

Electrolux Gl30nbec, Gl30caec, Gl30lbec, Gl30lkec, Gl30nkec Owner's Manual

=====1
tructions ....... 2
GrH_ Assembly
BuiLt=In instructions ............. 5=8
Gas Requirements
Leak Testing ................... 9=11
Lighting the Grill .................. 12
Using the Grill
Rotisserie/Side Burner Usage ........... 1 3=15
Visit the Frigidaire Web Site at:
http:flwww.frigidaire.com
READ AND SAVE THESE INSTRUCTIONS
Care & Maintenance .............. 16
Troubleshooting Your Grill ..... 17-18
Warranty ......................... 19
Congratulations on your purchase of a new grill! We at
Electrolux Home Products are very proud of our product
and we are completely committed to providing you with
the best service possible. Your satisfaction is our #1 pri-
ority.
Please read this Use & Care Manual very carefully. It
contains valuable information on how to properly
maintain your new grill.
We know you'll enjoy your new grill and thank you for
choosing our product. We hope you consider us for
future purchases.
PLEASE READ AND SAVE THESE INSTRUCTIONS
This Use & Care Manual provides specific operating
instructions for your model. Use your grill only as
instructed in this manual. These instructions are not
meant to cover every possible condition and situation
that may occur. Common sense and caution must be
practiced when installing, operating and maintaining any
appliance.
Please record your model and serial numbers below for
future reference. This information is found on the serial
plate located on the back of the built-in grill or on the
inside of the cart door (complete grill & cart model).
Questions?
1-800-320-0859
Register Your Product
The PRODUCT REGISTRATION CARD
should be filled in completely signed
and returned to Electrolux Home
Products North America.
NOTE: Use only soap and water to clean serial plate.
Model Number:
Serial Number:
Purchase Date:
Gas Type:
Please complete and mail in the Product
Registration Card included with your grill.
Please retain this manual for future reference
© 2004 Electrolux Home Products, Inc All rights reserved
Please attach sales receipt here for
future reference.
]

IMPORTANT SAFETY INFORMATION
- Read this manual carefully before using your grill to reduce the risk of fire, burn
hazard or other injury.
- Extreme care should be used because of the high temperatures produced by this
appliance. CHILDREN SHOULD NOT BE LEFT UNATTENDED IN AN AREA
WHERE THE GRILL IS BEING OPERATED.
- This appliance must be kept clear from combustible materials, gasoline or other flammable vapors and liquids. Do not
allow flammable materials to come in contact with grate, burner or hot surfaces.
- Use only outdoors and provide good ventilation to avoid carbon monoxide build-up which could result in injury or death.
- Do not repair or replace any part of this appliance unless it is specifically recommended in this manual. A qualified
service technician should conduct all other service.
- Follow the installation and servicing instructions provided with this product. Have your grill installed by a qualified service
technician.
- Locate the main gas supply valve so that you know how to shut the gas off to your grill.
- If you smell gas, make sure all gas connections are tight before operation. If you continue to smell gas call a qualified
technician.
- When lighting a burner, always pay close attention to what you are doing and be certain you are pushing the igniter
that lights the burner you intend on using.
- Always keep your face and body as far away as from the grill as possible when lighting to reduce the risk of burn.
- Extinguish all flames and do not smoke while engaging gas and igniting the grill.
9
12
13
10
5
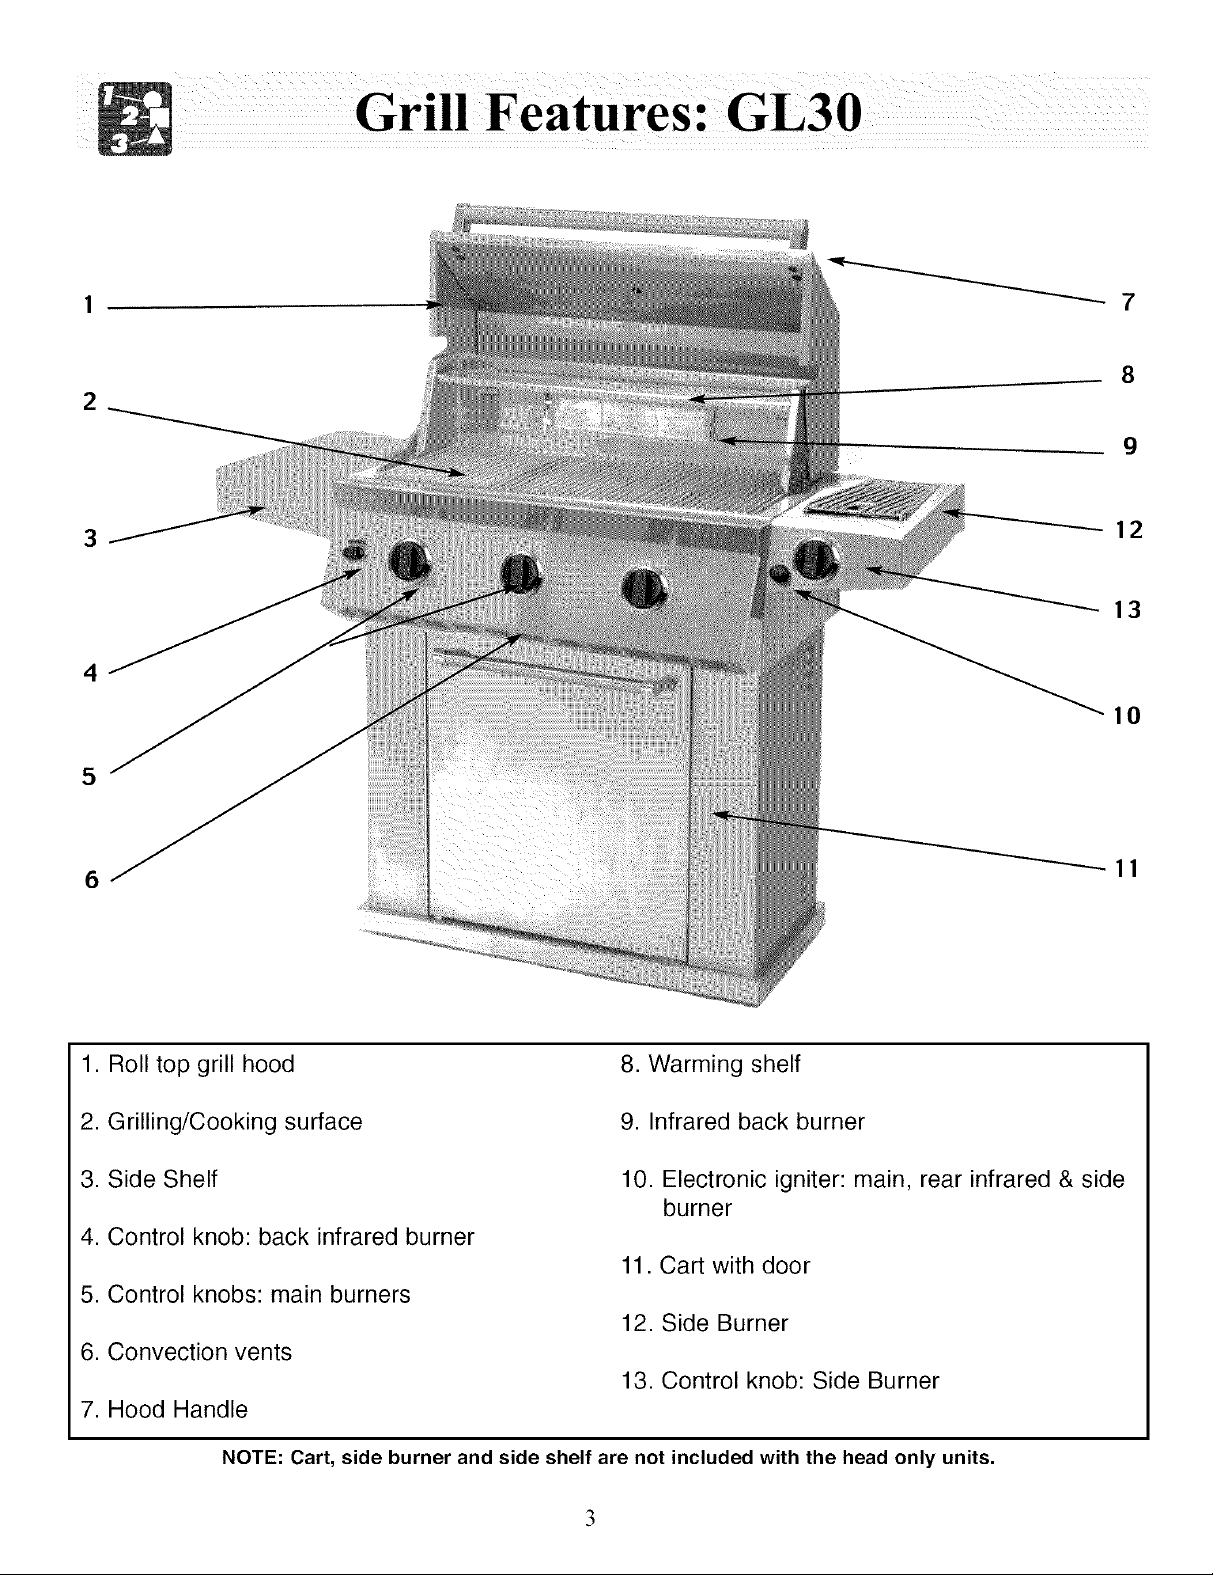
1. Roll top grill hood 8. Warming shelf
2. Grilling/Cooking surface
3. Side Shelf
9. Infrared back burner
10. Electronic igniter: main, rear infrared & side
burner
4. Control knob: back infrared burner
11. Cart with door
5. Control knobs: main burners
12. Side Burner
6. Convection vents
13. Control knob: Side Burner
7. Hood Handle
NOTE: Cart, side burner and side shelf are not included with the head only units.

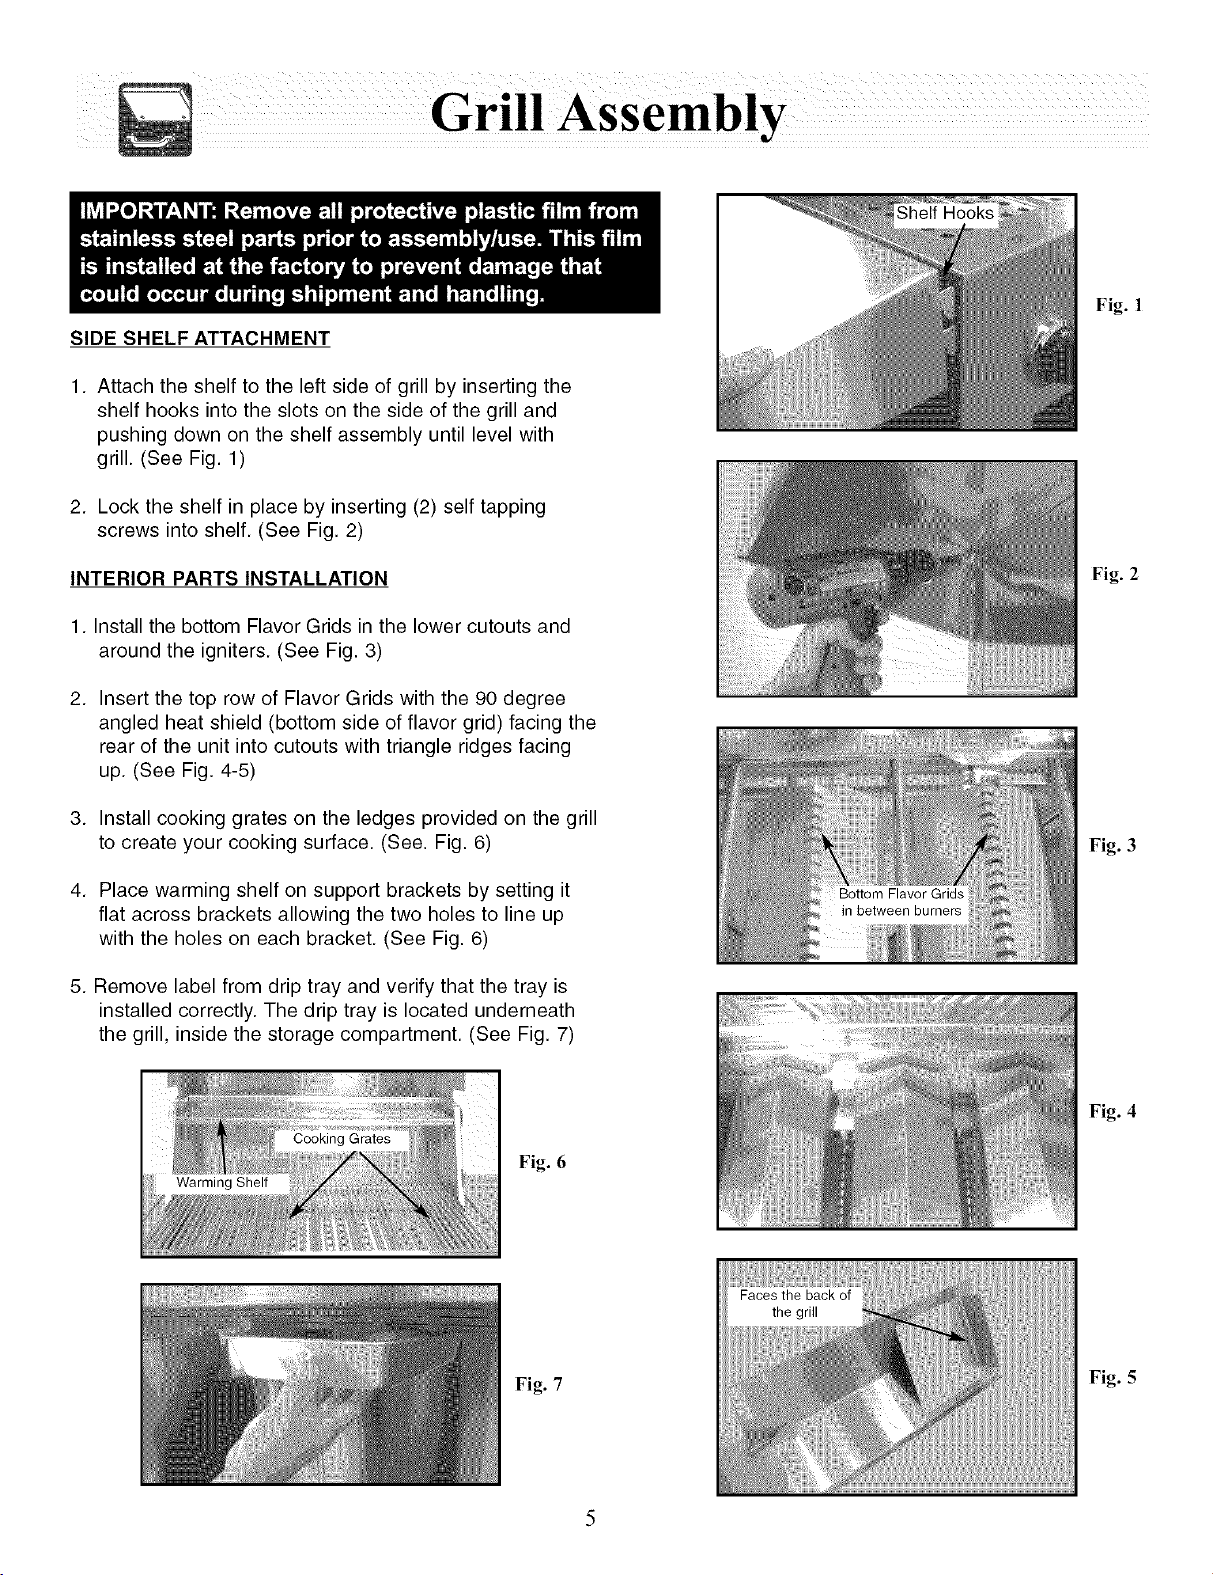
SIDE SHELF ATTACHMENT
1. Attach the shelf to the left side of grill by inserting the
shelf hooks into the slots on the side of the grill and
pushing down on the shelf assembly until level with
grill. (See Fig. 1)
2. Lock the shelf in place by inserting (2) self tapping
screws into shelf. (See Fig. 2)
Fig. 1
INTERIOR PARTS INSTALLATION
1. Install the bottom Flavor Grids in the lower cutouts and
around the igniters. (See Fig. 3)
2. Insert the top row of Flavor Grids with the 90 degree
angled heat shield (bottom side of flavor grid) facing the
rear of the unit into cutouts with triangle ridges facing
up. (See Fig. 4-5)
3. install cooking grates on the ledges provided on the grill
to create your cooking surface. (See. Fig. 6)
4. Place warming shelf on support brackets by setting it
flat across brackets allowing the two holes to line up
with the holes on each bracket. (See Fig. 6)
5. Remove label from drip tray and verify that the tray is
installed correctly. The drip tray is located underneath
the grill, inside the storage compartment. (See Fig. 7)
Fig. 2
Fig. 3
Fig. 4
Fig. 6
Fig. 7
Fig. 5
 Loading...