

Page 1
ESL5206LO
EN Dishwasher User Manual 2
TR Bulaşık Makinesi Kullanma Kılavuzu 20
Page 2

www.electrolux.com2
CONTENTS
1. SAFETY INFORMATION....................................................................................2
2. SAFETY INSTRUCTIONS..................................................................................4
3. PRODUCT DESCRIPTION................................................................................ 5
4. CONTROL PANEL............................................................................................. 6
5. PROGRAMMES................................................................................................. 6
6. SETTINGS..........................................................................................................7
7. BEFORE FIRST USE......................................................................................... 9
8. DAILY USE....................................................................................................... 11
9. HINTS AND TIPS............................................................................................. 12
10. CARE AND CLEANING..................................................................................14
11. TROUBLESHOOTING....................................................................................15
12. TECHNICAL INFORMATION......................................................................... 18
WE’RE THINKING OF YOU
Thank you for purchasing an Electrolux appliance. You’ve chosen a product that
brings with it decades of professional experience and innovation. Ingenious and
stylish, it has been designed with you in mind. So whenever you use it, you can
be safe in the knowledge that you’ll get great results every time.
Welcome to Electrolux.
Visit our website for:
Get usage advice, brochures, trouble shooter, service information:
www.electrolux.com/webselfservice
Register your product for better service:
www.registerelectrolux.com
Buy Accessories, Consumables and Original spare parts for your appliance:
www.electrolux.com/shop
CUSTOMER CARE AND SERVICE
Always use original spare parts.
When contacting our Authorised Service Centre, ensure that you have the
following data available: Model, PNC, Serial Number.
The information can be found on the rating plate.
Warning / Caution-Safety information
General information and tips
Environmental information
Subject to change without notice.
1. SAFETY INFORMATION
Before the installation and use of the appliance, carefully
read the supplied instructions. The manufacturer is not
Page 3

ENGLISH 3
responsible for any injuries or damages that are the
result of incorrect installation or usage. Always keep the
instructions in a safe and accessible location for future
reference.
1.1 Children and vulnerable people safety
• This appliance can be used by children aged from 8
years and above and persons with reduced physical,
sensory or mental capabilities or lack of experience
and knowledge if they have been given supervision or
instruction concerning the use of the appliance in a
safe way and understand the hazards involved.
• Do not let children play with the appliance.
• Keep detergents away from children.
• Keep children and pets away from the appliance when
the door is open.
• Children shall not carry out cleaning and user
maintenance of the appliance without supervision.
1.2 General Safety
• This appliance is intended to be used in household
and similar applications such as:
– farm houses; staff kitchen areas in shops, offices
and other working environments;
– by clients in hotels, motels, bed & breakfast and
other residential type environments.
• Do not change the specification of this appliance.
• The operating water pressure (minimum and
maximum) must be between 0.5 (0.05) / 8 (0.8) bar
(MPa)
• Obey the maximum number of 13 place settings.
• If the supply cord is damaged, it must be replaced by
the manufacturer, its Authorised Service Centre or
similarly qualified persons in order to avoid a hazard.
• Put the cutlery in the cutlery basket with the sharp
ends pointing down or put them in the cutlery drawer
in a horizontal position with the sharp edges down.
Page 4

www.electrolux.com4
• Do not leave the appliance with the open door
unattended to avoid stepping accidentally onto it.
• Before any maintenance operation, deactivate the
appliance and disconnect the mains plug from the
socket.
• Do not use high pressure water sprays and/or steam
to clean the appliance.
• If the appliance has ventilation openings in the base,
they must not be covered e.g. by a carpet.
• The appliance is to be connected to the water mains
using the new supplied hose-sets. Old hose sets must
not be reused.
2. SAFETY INSTRUCTIONS
2.1 Installation
WARNING!
Only a qualified person must
install this appliance.
• Remove all the packaging.
• Do not install or use a damaged
appliance.
• Do not install or use the appliance
where the temperature is less than 0
°C.
• Follow the installation instruction
supplied with the appliance.
• Always take care when moving the
appliance as it is heavy. Always use
safety gloves and enclosed footwear.
• Make sure that the appliance is
installed below and adjacent to safe
structures.
2.2 Electrical connection
WARNING!
Risk of fire and electrical
shock.
• The appliance must be earthed.
• Make sure that the parameters on the
rating plate are compatible with the
electrical ratings of the mains power
supply.
• Always use a correctly installed
shockproof socket.
• Do not use multi-plug adapters and
extension cables.
• Make sure not to cause damage to
the mains plug and to the mains
cable. Should the mains cable need to
be replaced, this must be carried out
by our Authorised Service Centre.
• Connect the mains plug to the mains
socket only at the end of the
installation. Make sure that there is
access to the mains plug after the
installation.
• Do not pull the mains cable to
disconnect the appliance. Always pull
the mains plug.
• This appliance complies with the
E.E.C. Directives.
• UK and Ireland only. This appliance is
fitted with a 13 A mains plug. If it is
necessary to change the mains plug
fuse, use only a 13 A ASTA (BS
1362) fuse.
2.3 Water connection
• Do not cause damage to the water
hoses.
• Before connection to new pipes, pipes
not used for a long time, where repair
work has been carried out or new
devices fitted (water meters, etc.), let
the water flow until it is clean and
clear.
Page 5
• Ensure that there are no visible water
4
3
7
9
8
10
56
11
1
2
leaks during and after the first use of
the appliance.
• If the water inlet hose is damaged,
immediately close the water tap and
disconnect the mains plug from the
mains socket. Contact the Authorised
Service Centre to replace the water
inlet hose.
2.4 Use
• Do not sit or stand on the open door.
• Dishwasher detergents are
dangerous. Obey the safety
instructions on the detergent
packaging.
• Do not drink and play with the water in
the appliance.
• Do not remove the dishes from the
appliance until the programme is
3. PRODUCT DESCRIPTION
ENGLISH 5
complete. Some detergent may
remain on the dishes.
• The appliance can release hot steam
if you open the door while a
programme operates.
• Do not put flammable products or
items that are wet with flammable
products in, near or on the appliance.
2.5 Disposal
WARNING!
Risk of injury or suffocation.
• Disconnect the appliance from the
mains supply.
• Cut off the mains cable and discard it.
• Remove the door catch to prevent
children and pets to get closed in the
appliance.
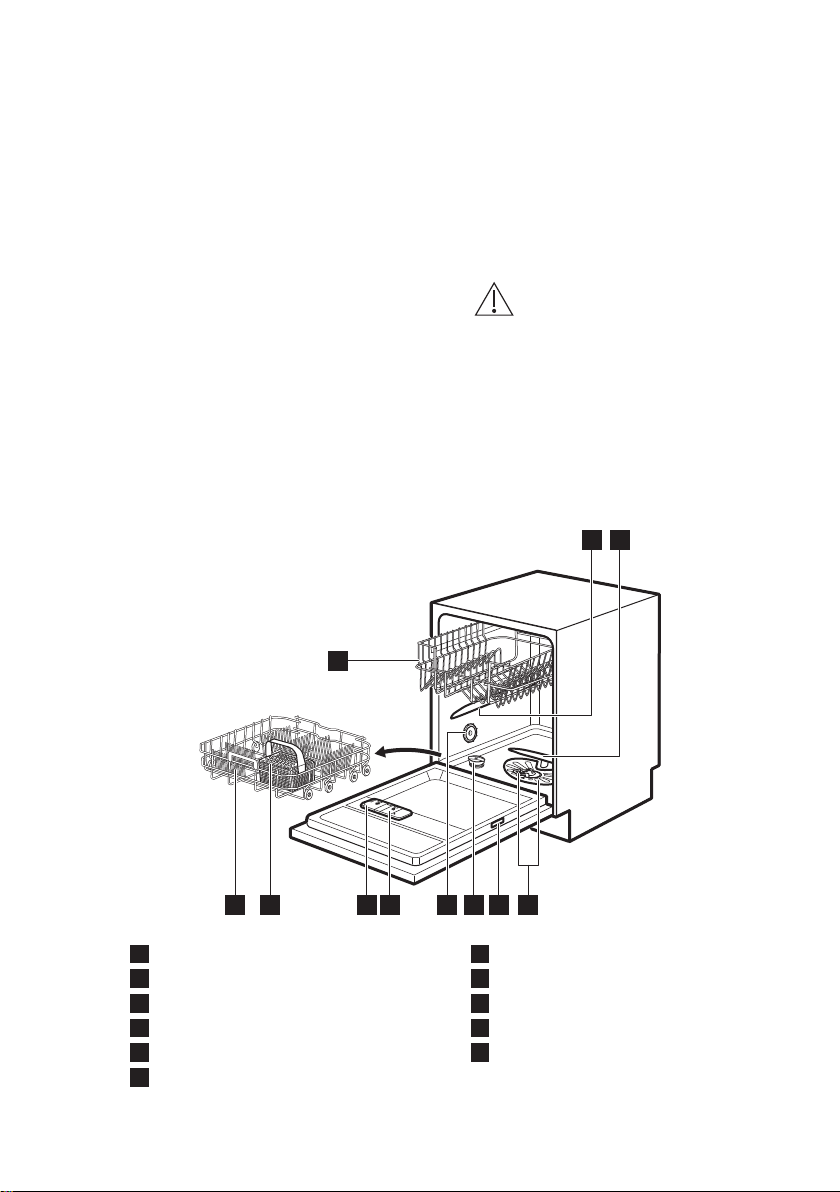
Upper spray arm
1
Lower spray arm
2
Filters
3
Rating plate
4
Salt container
5
Air vent
6
Rinse aid dispenser
7
Detergent dispenser
8
Cutlery basket
9
Lower basket
10
Upper basket
11
Page 6
21
3
45
www.electrolux.com6
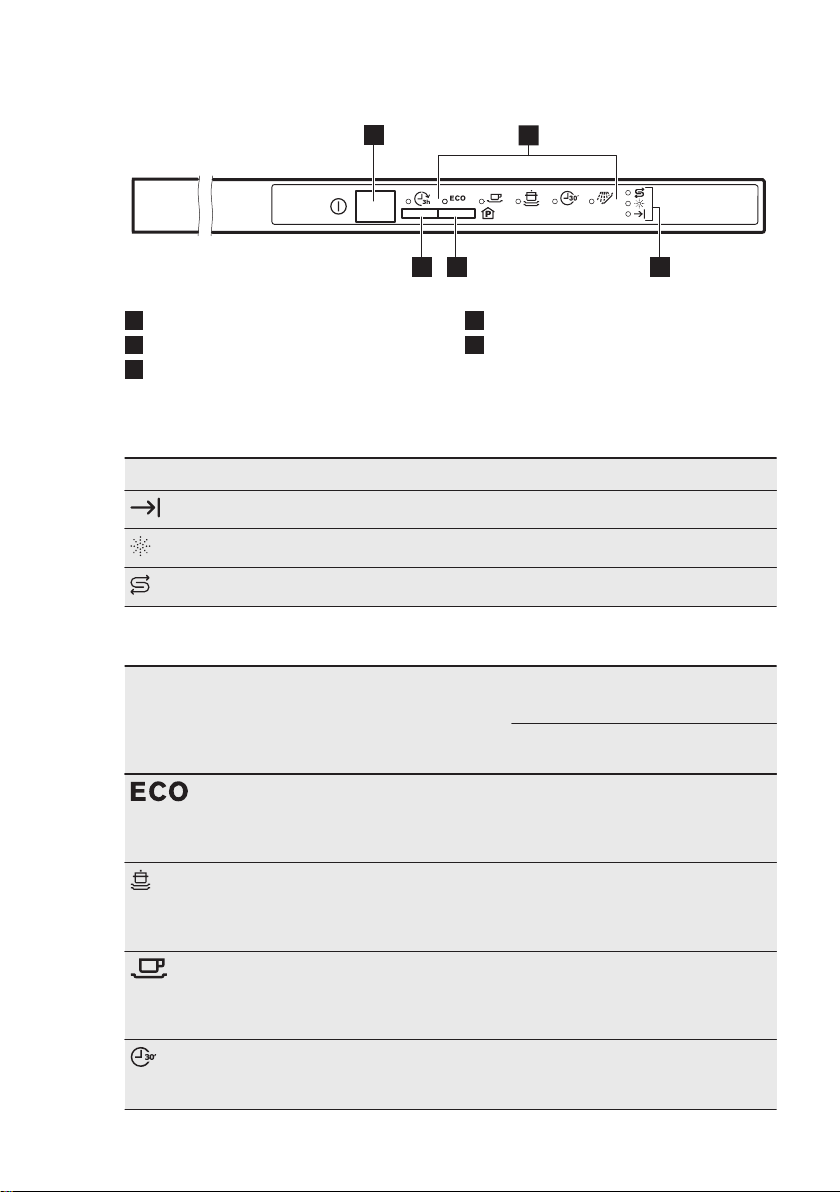
4. CONTROL PANEL
On/off button
1
Programme indicators
2
Indicators
3
4.1 Indicators
Indicator Description
End indicator.
Rinse aid indicator. It is always off while the programme operates.
Salt indicator. It is always off while the programme operates.
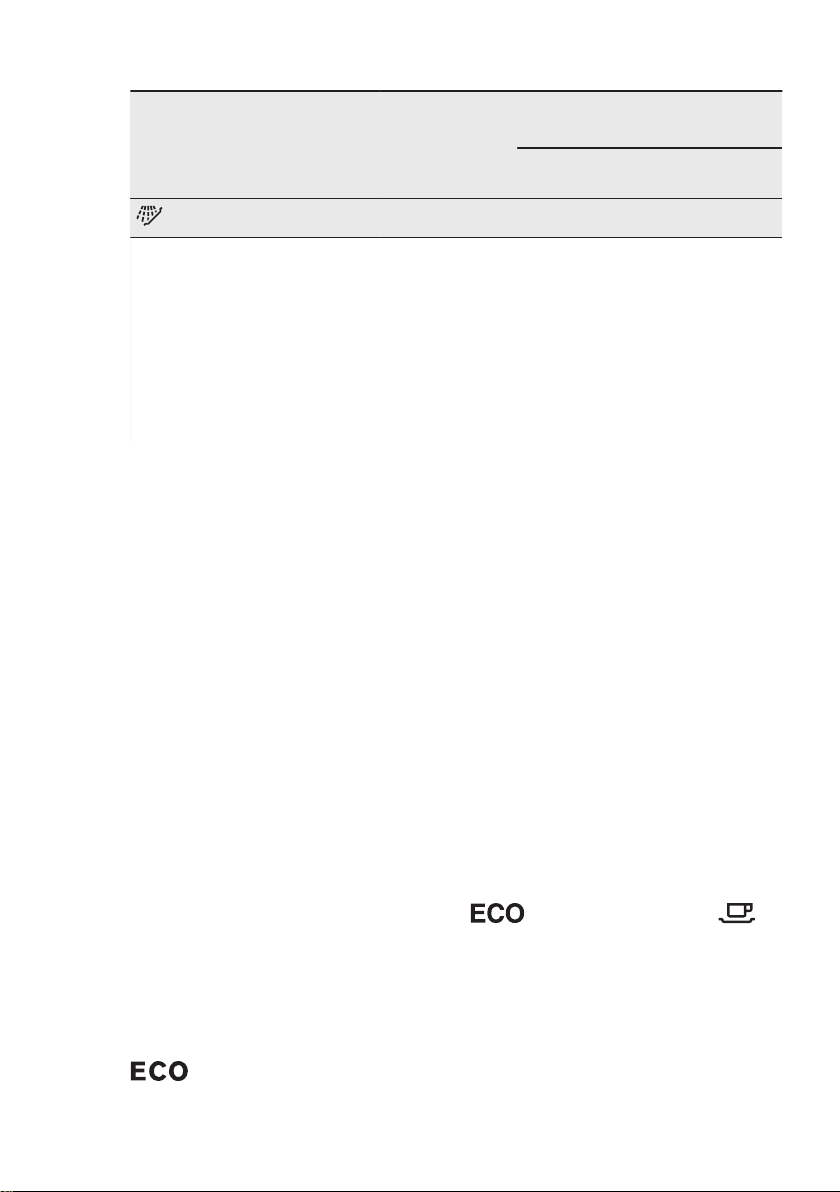
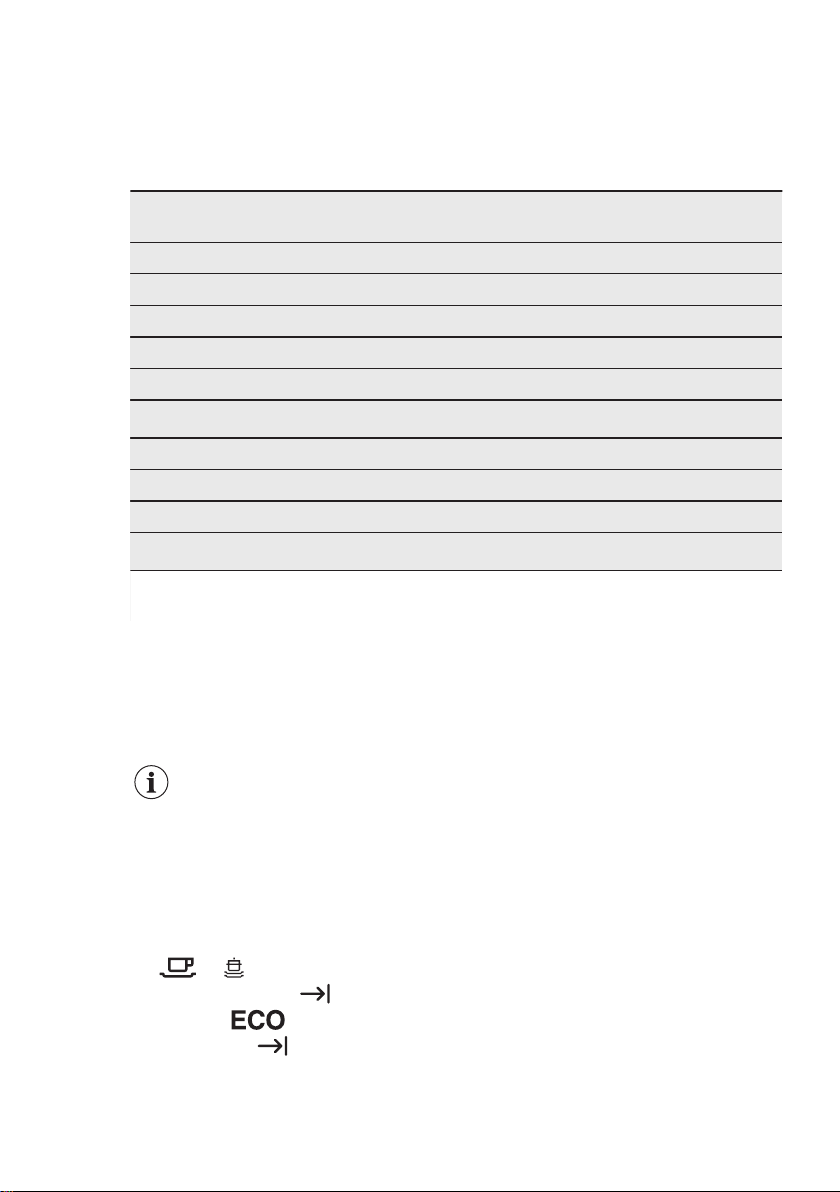
5. PROGRAMMES
Programme Degree of soil
2)
3)
Type of load
Normal soil
Crockery and
cutlery
Heavy soil
Crockery, cut‐
lery, pots and
pans
Normal soil
Crockery and
cutlery
Fresh soil
Crockery and
cutlery
4
5
Programme
phases
• Pre-wash
• Wash 50 °C
• Rinses
• Dry
• Pre-wash
• Wash 70 °C
• Rinses
• Dry
• Pre-wash
• Wash 65 °C
• Rinses
• Dry
• Wash 60 °C
or 65 °C
• Rinses
Programme button
Delay button
Consumption values
1)
Duration
(min)
227 1.039 11
155 - 170 1.5 - 1.7 14-15
130 - 140 1.4 - 1.6 15-17
30 0.8 10
Energy
(kWh)
Water
(l)
Page 7
ENGLISH 7
Programme Degree of soil
4)
1)
The pressure and the temperature of the water, the variations of the mains supply, the
options and the quantity of dishes can change the values.
2)
With this programme you have the most efficient use of water and energy consumption
for crockery and cutlery with normal soil. (Also, it is a standard programme for test insti‐
tutes).
3)
With this programme you can wash a load with fresh soil. It gives good washing results in
a short period of time.
4)
Use this programme to quickly rinse the dishes and to prevent the food remains from dry‐
ing out on the dishes and to reduce bad odour coming out from the appliance. Do not use
detergent with this programme.
5.1 Information for test institutes
For all the necessary information for test
performance, send an email to:
6. SETTINGS
6.1 Programme selection mode
and user mode
When the appliance is in programme
selection mode it is possible to set a
programme and to enter the user mode.
Settings available in the user mode:
• The level of water softener according
to the water hardness.
• Activation or deactivation of the
acoustic signal for the end of a
programme.
• Activation or deactivation of AirDry.
As the appliance stores the saved
settings, there is no need to configure
it before every cycle.
Type of load
All • Pre-wash 14 0.1 5
Programme
phases
Consumption values
1)
Duration
(min)
info.test@dishwasher-production.com
Write down the product number (PNC)
that is on the rating plate.
After activation, the appliance is in
programme selection mode by default. If
not, set the programme selection mode
the following way:
Press and hold the programme button
until the appliance is in programme
selection mode.
Energy
(kWh)
How to enter user mode
Make sure the appliance is in
programme selection mode.
To enter the user mode, press and hold
the programme button until the indicator
flashes and the indicator is
on.
Water
(l)
How to set the programme selection mode
The appliance is in programme selection
mode when the programme indicator
flashes.
6.2 The water softener
The water softener removes minerals
from the water supply, which would have
a detrimental effect on the washing
results and on the appliance.
Page 8

www.electrolux.com8
The higher the content of these minerals,
the harder your water is. Water hardness
is measured in equivalent scales.
The water softener should be adjusted
according to the hardness of the water in
Water hardness
German de‐
grees (°dH)
47 - 50 84 - 90 8.4 - 9.0 58 - 63 10
43 - 46 76 - 83 7.6 - 8.3 53 - 57 9
37 - 42 65 - 75 6.5 - 7.5 46 - 52 8
29 - 36 51 - 64 5.1 - 6.4 36 - 45 7
23 - 28 40 - 50 4.0 - 5.0 28 - 35 6
19 - 22 33 - 39 3.3 - 3.9 23 - 27
15 - 18 26 - 32 2.6 - 3.2 18 - 22 4
11 - 14 19 - 25 1.9 - 2.5 13 - 17 3
4 - 10 7 - 18 0.7 - 1.8 5 - 12 2
<4 <7 <0.7 < 5
1)
Factory setting.
2)
Do not use salt at this level.
French de‐
grees (°fH)
your area. Your local water authority can
advise you on the hardness of the water
in your area. It is important to set the
right level of the water softener to assure
good washing results.
mmol/l Clarke de‐
grees
Water softener
level
1)
5
2)
1
Whether you use a standard detergent
or multi-tabs (with or without salt), set
the proper water hardness level to
keep the salt refill indicator active.
Multi-tabs containing salt are
not effective enough to
soften hard water.
How to set the water softener level
Make sure the appliance is in user mode.
1. Wait until the indicators
are off and the indicator flashes.
The indicator still flashes.
The intermittent flashing of the
indicator shows the current
setting.
• e.g. 5 flashes + pause + 5 flashes
= level 5.
and
2. Press the programme button
repeatedly to change the setting.
Each pressing of the programme
button increases the level number.
After reaching level 10, the count
starts again from level 1.
3. Press on/off to confirm the setting.
6.3 Acoustic signals
Acoustic signals sound when a
malfunction of the appliance occurs. It is
not possible to deactivate these acoustic
signals.
There is also an acoustic signal that
sounds when the programme is
completed. By default this acoustic signal
is deactivated but it is possible to
activate it.
Page 9
ENGLISH 9
How to activate the acoustic signal for the end of programme
Make sure the appliance is in user mode.
1. Press the programme button
immediately.
• The indicator and are
on.
• The indicator flashes.
2. Wait until the indicator
are off. The indicator still
flashes.
• The indicator shows the
current setting: indicator off =
Acoustic signal off.
3. Press the programme button to
change the setting.
• indicator on = Acoustic signal
on.
4. Press on/off confirm the setting.
and
6.4 AirDry
AirDry improves the drying results with
less energy consumption.
During the drying phase, the
door opens automatically
and remains ajar.
CAUTION!
Do not try to close the
appliance door within 2
minutes after automatic
opening. This can cause
damage to the appliance.
AirDry is automatically activated with all
programmes excluding .
CAUTION!
If children have access to
the appliance, it is advised to
deactivate AirDry as opening
the door may pose a danger.
How to deactivate AirDry
Make sure the appliance is in user mode.
1. Press the programme button twice.
• The indicators and
are on.
• The indicator flashes.
2. Wait until the indicators
are off. The indicator still
flashes.
• The indicator shows the
current setting: off = AirDry is
deactivated.
3. Press the programme button to
change the setting.
• on = AirDry is activated.
4. Press on/off to confirm the setting.
and
7. BEFORE FIRST USE
1. Make sure that the current level of
the water softener agrees with the
hardness of the water supply. If
not, adjust the level of the water
softener.
2. Fill the salt container.
3. Fill the rinse aid dispenser.
4. Open the water tap.
5. Start a programme to remove any
processing residuals that can still be
inside the appliance. Do not use
detergent and do not load the
baskets.
After starting a programme, it may take
up to 5 minutes for the appliance to
recharge the resin in the water softener.
Page 10
A
B
D
C
M
A
X
1
2
3
4
+
-
A
B
D
C
www.electrolux.com10
It seems that the appliance is not
working. The washing phase starts only
after this procedure is completed. The
procedure is repeated periodically.
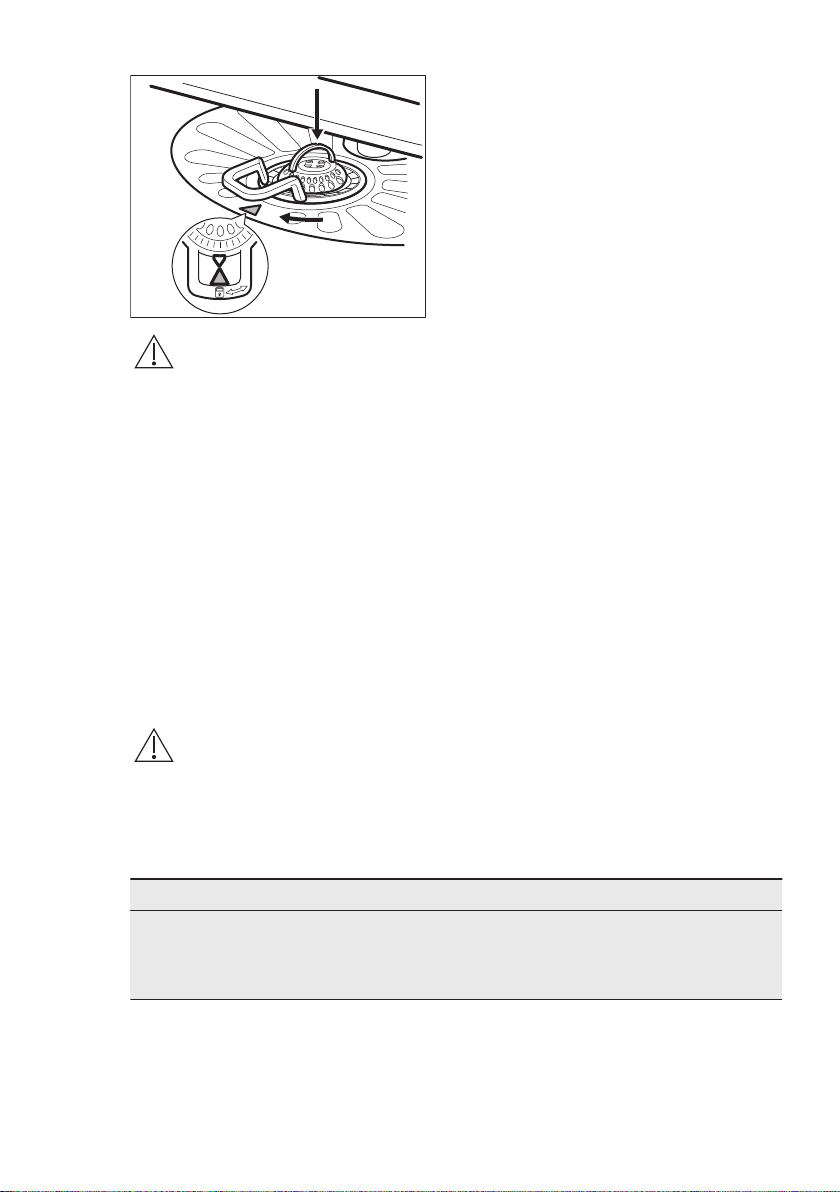
7.1 The salt container
CAUTION!
Use rough salt designed for
dishwashers only. Fine salt
increases the risk of
corrosion.
The salt is used to recharge the resin in
the water softener and to assure good
washing results in daily use.
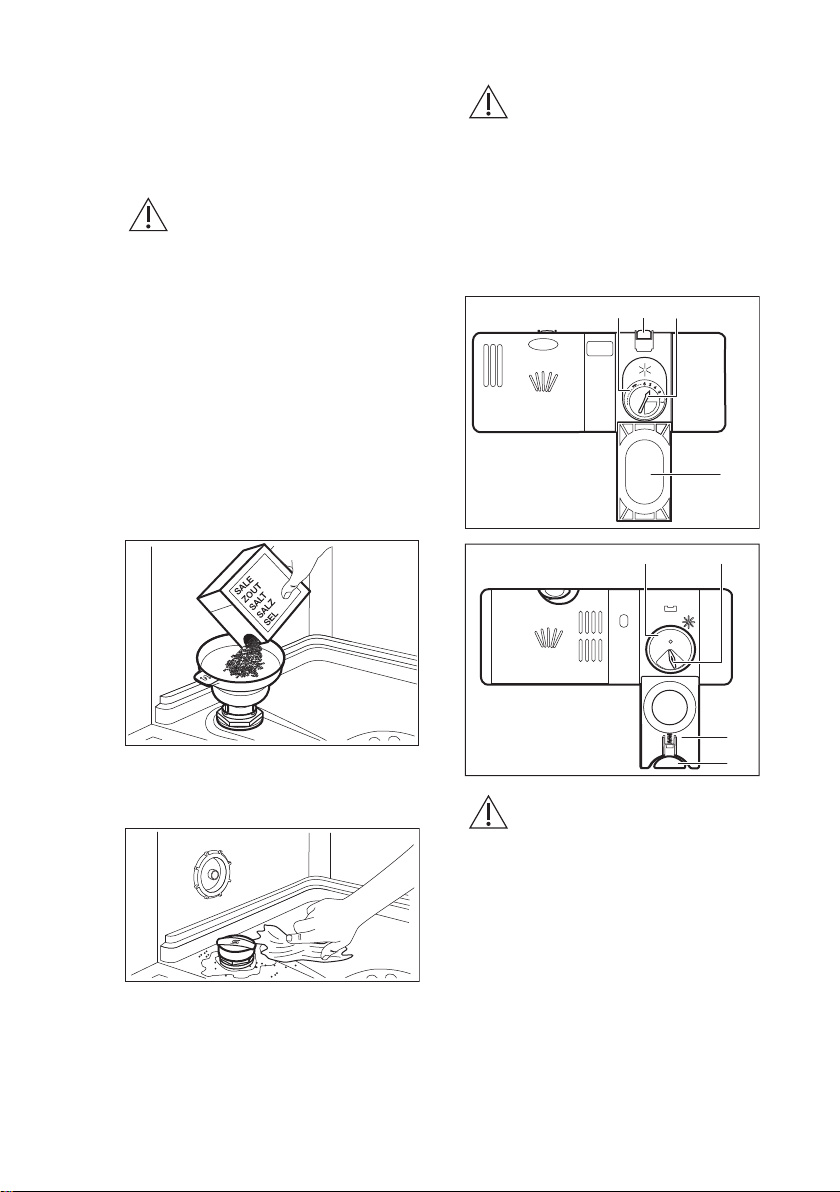
How to fill the salt container
1. Turn the cap of the salt container
counterclockwise and remove it.
2. Put 1 litre of water in the salt
container (only for the first time).
3. Fill the salt container with 1 kg of salt
(until it is full).
CAUTION!
Water and salt can come out
of the salt container when
you fill it. After you fill the
salt container, immediately
start a programme to
prevent corrosion.
7.2 How to fill the rinse aid dispenser
4. Carefully shake the funnel by its
handle to get the last granules inside.
5. Remove the salt around the opening
of the salt container.
6. Turn the cap of the salt container
clockwise to close the salt container.
CAUTION!
Only use rinse aid
specifically designed for
dishwashers.
1. Press the release button (D) to open
the lid (C).
2. Pour the rinse aid in the dispenser
(A) until the liquid reaches the fill
level 'max'.
3. Remove the spilled rinse aid with an
absorbent cloth to prevent too much
foam.
4. Close the lid. Make sure that the
release button locks into position.
Page 11
You can turn the selector of
30
20
A BD
C
20
30
B
A D
C
the released quantity (B)
between position 1 (lowest
quantity) and position 4 or 6
(highest quantity).
8. DAILY USE
ENGLISH 11
1. Open the water tap.
2. Press the on/off button to activate the
appliance.
Make sure that the appliance is in
programme selection mode.
• If the salt indicator is on, fill the
salt container.
• If the rinse aid indicator is on, fill
the rinse aid dispenser.
3. Load the baskets.
4. Add the detergent.
5. Set and start the correct programme
for the type of load and the degree of
soil.
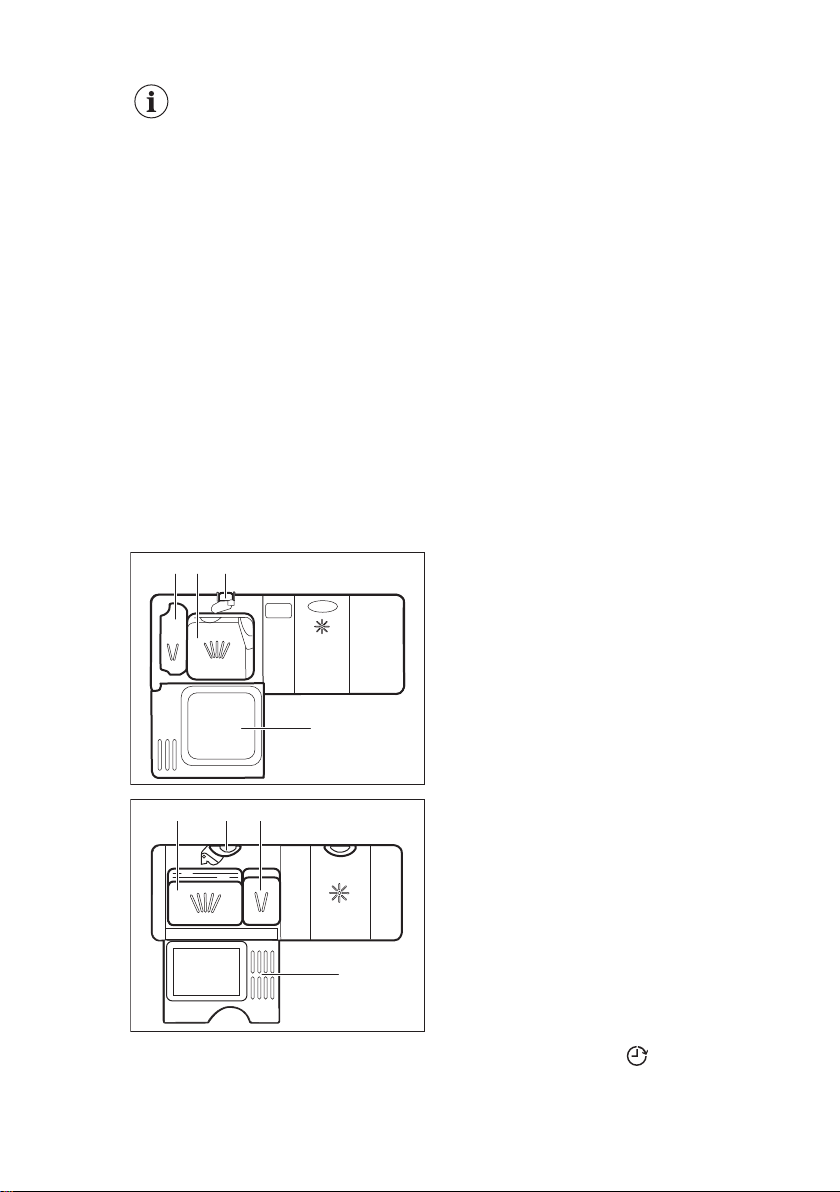
8.1 Using the detergent
2. Put the detergent, in powder or
tablets, in the compartment (A).
3. If the programme has a prewash
phase, put a small quantity of
detergent in the compartment (D).
4. Close the lid. Make sure that the
release button locks into position.
8.2 Using the multi-tablets
When you use tablets, that contain salt
and rinse aid, do not fill the salt container
and the rinse aid dispenser.
1. Adjust the water softener to the
lowest level.
2. Set the rinse aid dispenser to the
lowest position.
8.3 Setting and starting a
programme
Starting a programme
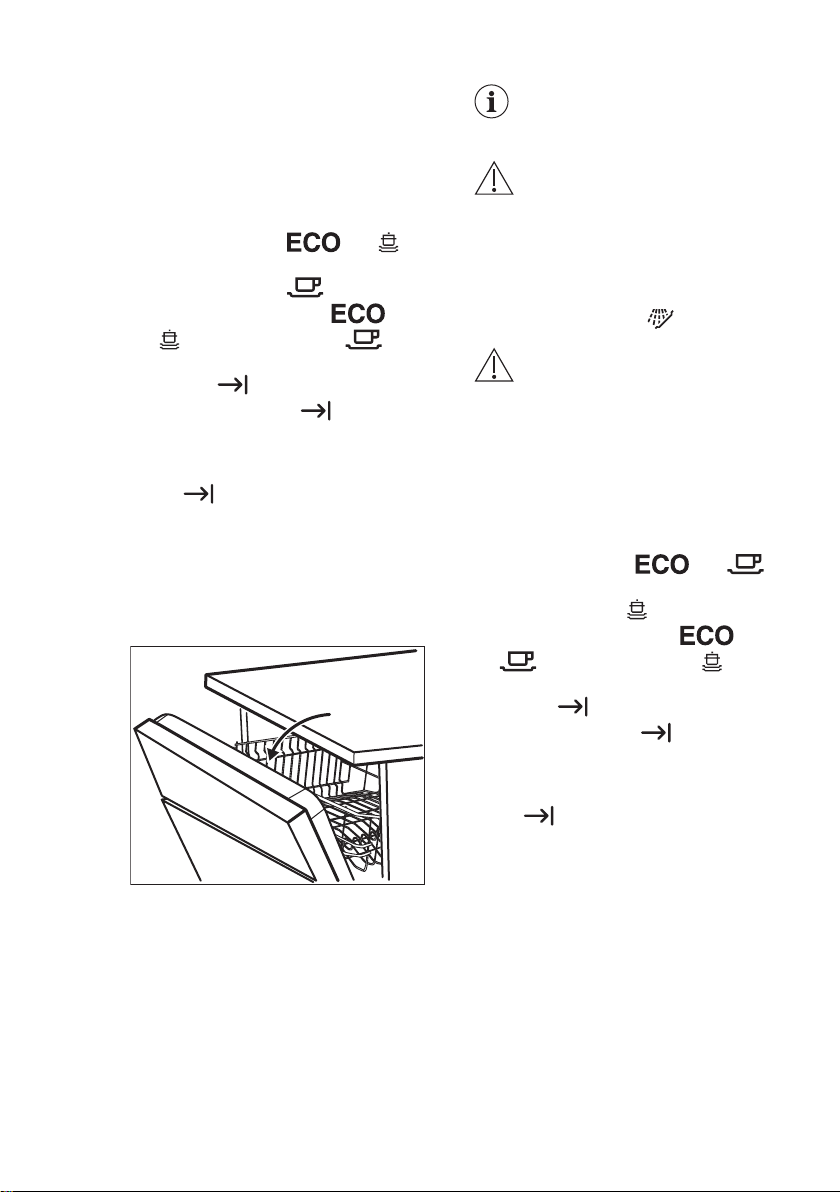
1. Keep the appliance door ajar.
2. Press the on/off button to activate the
appliance. Make sure that the
appliance is in programme selection
mode.
3. Press the programme button
repeatedly until the indicator of the
programme you want to select starts
flashing.
4. Close the appliance door to start the
programme.
1. Press the release button (B) to open
the lid (C).
Starting a programme with delay start
1. Set a programme.
2. Press Delay to delay the start of the
programme of 3 hours.
• The indicator comes on.
Page 12
www.electrolux.com12
3. Close the appliance door to start the
countdown.
When the countdown is completed, the
programme starts.
Opening the door while the appliance operates
Opening the door while a programme is
running stops the appliance. It may affect
the energy consumption and the
programme duration. After closing the
door, the appliance continues from the
point of interruption.
If the door is opened for
more than 30 seconds
during the drying phase, the
running programme ends. It
does not happen if the door
is opened by AirDry function.
Do not try to close the
appliance door within 2
minutes after AirDry
automatically opens it, as
this may cause damage to
the appliance.
If, afterwards, the door is
closed for another 3
minutes, the running
programme ends.
Cancelling the delay start
Press and hold the programme button
until the appliance is in programme
selection mode.
When you cancel the delay start, you
have to set the programme again.
Cancelling the programme
Press and hold the programme button
until the appliance is in programme
selection mode.
Make sure that there is detergent in the
detergent dispenser before you start a
new programme.
End of the programme
When the programme is completed the
indicator
1. Press the on/off button or wait for the
appliance to switch to standby mode.
If you open the door before the
activation of standby mode, the
appliance is automatically
deactivated.
2. Close the water tap.
is on.
9. HINTS AND TIPS
9.1 General
The following hints will ensure optimal
cleaning and drying results in daily use
and also help to protect the environment.
• Remove larger residues of food from
the dishes into the waste bin.
• Do not pre-rinse dishes by hand.
When needed, use the prewash
programme (if available) or select a
programme with a prewash phase.
• Always use the whole space of the
baskets.
• When loading the appliance, make
sure that the dishes can be
completely reached and washed by
the water released from the spray arm
nozzles. Make sure that items do not
touch or cover each other.
• You can use dishwasher detergent,
rinse aid and salt separately or you
can use the multi-tablets (e.g. ''3in1'',
''4in1'', ''All in 1''). Follow the
instructions written on the packaging.
• Select the programme according to
the type of load and degree of soil.
With the ECO programme you have
the most efficient use of water and
energy consumption for crockery and
cutlery with normal soil.
9.2 Using salt, rinse aid and
detergent
• Only use salt, rinse aid and detergent
for dishwasher. Other products can
cause damage to the appliance.
• In areas with hard and very hard
water we recommend to use plain
Page 13

dishwasher detergent (powder, gel,
tablets containing no additional
agents), rinse aid and salt separately
for optimal cleaning and drying
results.
• At least once a month run the
appliance with the use of appliance
cleaner which is particularly suitable
for this purpose.
• Detergent tablets do not fully dissolve
with short programmes. To prevent
detergent residues on the tableware,
we recommend that you use the
tablets with long programmes.
• Do not use more than the correct
quantity of detergent. Refer to the
instructions on the detergent
packaging.
9.3 What to do if you want to
stop using multi-tablets
Before you start to use separately
detergent, salt and rinse aid do the
following procedure.
1. Set the highest level of the water
softener.
2. Make sure that the salt and rinse aid
containers are full.
3. Start the shortest programme with a
rinsing phase. Do not add detergent
and do not load the baskets.
4. When the programme is completed,
adjust the water softener according
to the water hardness in your area.
5. Adjust the released quantity of rinse
aid.
9.4 Loading the baskets
• Only use the appliance to wash items
that are dishwasher-safe.
• Do not put in the appliance items
made of wood, horn, aluminium,
pewter and copper.
• Do not put in the appliance items that
can absorb water (sponges,
household cloths).
ENGLISH 13
• Remove larger residues of food from
the dishes into the waste bin.
• Make soft the remaining burned food
on the items.
• Put hollow items (cups, glasses and
pans) with the opening down.
• Make sure that glasses do not touch
other glasses.
• Put cutlery and small items in the
cutlery basket.
• Put light items in the upper basket.
Make sure that the items do not
move.
• Make sure that the spray arms can
move freely before you start a
programme.
9.5 Before starting a
programme
Make sure that:
• The filters are clean and correctly
installed.
• The cap of the salt container is tight.
• The spray arms are not clogged.
• There is dishwasher salt and rinse aid
(unless you use multi- tablets).
• The position of the items in the
baskets is correct.
• The programme is applicable for the
type of load and for the degree of soil.
• The correct quantity of detergent is
used.
9.6 Unloading the baskets
1. Let the tableware cool down before
you remove it from the appliance. Hot
items can be easily damaged.
2. First remove items from the lower
basket, then from the upper basket.
At the end of the program
water can still remain on the
sides and on the door of the
appliance.
Page 14

C
B
A
www.electrolux.com14
10. CARE AND CLEANING
WARNING!
Before maintenance,
deactivate the appliance and
disconnect the mains plug
from the main socket.
Dirty filters and clogged
spray arms decrease the
washing results. Make a
check regularly and, if
necessary, clean them.
10.1 Cleaning the filters
The filter system is made of 3 parts.
1. Turn the filter (B) counterclockwise
and remove it.
3. Remove the flat filter (A).
4. Wash the filters.
5. Make sure that there are no residues
of food or soil in or around the edge
of the sump.
6. Put back in place the flat filter (A).
Make sure that it is correctly
positioned under the 2 guides.
7. Reassemble the filters (B) and (C).
8. Put back the filter (B) in the flat filter
(A). Turn it clockwise until it locks.
2. Remove the filter (C) out of filter (B).
Page 15
CAUTION!
An incorrect position of the
filters can cause bad
washing results and damage
to the appliance.
10.2 Cleaning the spray arms
Do not remove the spray arms. If the
holes in the spray arms are clogged,
remove remaining parts of soil with a thin
pointed object.
11. TROUBLESHOOTING
ENGLISH 15
10.3 External cleaning
• Clean the appliance with a moist soft
cloth.
• Only use neutral detergents.
• Do not use abrasive products,
abrasive cleaning pads or solvents.
10.4 Internal cleaning
• Carefully clean the appliance,
including the rubber gasket of the
door, with a soft damp cloth.
• If you regularly use short duration
programmes, these can leave
deposits of grease and limescale
inside the appliance. To prevent this,
we recommend to run long duration
programmes at least 2 times per
month.
• To maintain the performance of your
appliance at its best, we recommend
to use monthly a specific cleaning
product for dishwashers. Follow
carefully the instructions on the
packaging of the product.
If the appliance does not start or it stops
during operation, before you contact an
Authorised Service Centre, check if you
can solve the problem by yourself with
the help of the information in the table.
WARNING!
Repairs not properly done
may result in serious risk to
the safety of the user. Any
repairs must be performed
by qualified personnel.
Problem and alarm code Possible cause and solution
You cannot activate the appliance. • Make sure that the mains plug is connected
With some problems the end indicator
flashes intermittently indicating a
malfunction.
The majority of problems that can
occur can be solved without the need
to contact an Authorised Service
Centre.
to the mains socket.
• Make sure that there is no damaged fuse in
the fuse box.
Page 16

www.electrolux.com16
Problem and alarm code Possible cause and solution
The programme does not start. • Make sure that the appliance door is closed.
• If the delay start is set, cancel the setting or
wait for the end of the countdown.
• The appliance has started the procedure to
recharge the resin inside the water softener.
The duration of the procedure is approxi‐
mately 5 minutes.
The appliance does not fill with wa‐
ter.
• The end indicator flashes 1 time
intermittently.
• Acoustic signal sounds 1 time in‐
termittently.
• Make sure that the water tap is open.
• Make sure that the pressure of the water
supply is not too low. For this information,
contact your local water authority.
• Make sure that the water tap is not clogged.
• Make sure that the filter in the inlet hose is
not clogged.
• Make sure that the inlet hose has no kinks
or bends.
The appliance does not drain the
water.
• The end indicator flashes 2 times
intermittently.
• Make sure that the sink spigot is not clog‐
ged.
• Make sure that the drain hose has no kinks
or bends.
• Acoustic signal sounds 2 times
intermittently.
The anti-flood device is on.
• The end indicator flashes 3 times
• Close the water tap and contact an Author‐
ised Service Centre.
intermittently.
• Acoustic signal sounds 3 times
intermittently.
The appliance stops and starts
more times during operation.
• It is normal. It provides optimal cleaning re‐
sults and energy savings.
The program lasts too long. • If the delayed start option is set, cancel the
delay setting or wait for the end of the
countdown.
Small leak from the appliance door. • The appliance is not levelled. Loosen or
tighten the adjustable feet (if applicable).
• The appliance door is not centred on the
tub. Adjust the rear foot (if applicable).
The appliance door is difficult to
close.
• The appliance is not levelled. Loosen or
tighten the adjustable feet (if applicable).
• Parts of the tableware are protruding from
the baskets.
Rattling/knocking sounds from in‐
side the appliance.
• The tableware is not properly arranged in
the baskets. Refer to basket loading leaflet.
• Make sure that the spray arms can rotate
freely.
Page 17

Problem and alarm code Possible cause and solution
The appliance trips the circuit-beak‐
er.
• The amperage is insufficient to supply si‐
multaneously all the appliances in use.
Check the socket amperage and the capaci‐
ty of the meter or turn off one of the applian‐
ces in use.
• Internal electrical fault of the appliance.
Contact an Authorised Service Centre.
ENGLISH 17
Refer to "Before first use",
"Daily use", or "Hints and
tips" for other possible
causes.
Once you have checked the appliance,
deactivate and activate the appliance. If
the problem occurs again, contact an
Authorised Service Centre.
For alarm codes not described in the
table, contact an Authorised Service
Centre.
11.1 The washing and drying results are not satisfactory
Problem Possible cause and solution
Poor washing results. • Refer to "Daily use", "Hints and tips" and basket
Poor drying results. • Tableware has been left for too long inside a
There are whitish streaks or
bluish layers on glasses and
dishes.
There are stains and dry wa‐
ter drops on glasses and
dishes.
The dishes are wet. • The programme does not have a drying phase or
loading leaflet.
• Use more intensive washing programmes.
• Clean spray arm jets and filter. Refer to "Care and
Cleaning".
closed appliance.
• There is no rinse aid or the dosage of rinse aid is
not enough. Set the rinse aid dispenser to a higher
level.
• Plastic items may need to be towel dried.
• We recommend to always use rinse aid, even in
combination with multi-tablets.
• The release quantity of rinse aid is too much. Ad‐
just the rinse aid level to a lower level.
• The quantity of detergent is too much.
• The released quantity of rinse aid is not sufficient.
Adjust the rinse aid level to a higher level.
• The quality of the rinse aid can be the cause.
has a drying phase with low temperature.
• The rinse aid dispenser is empty.
• The quality of the rinse aid can be the cause.
• The quality of the multi-tablets can be the cause.
Try a different brand or activate the rinse aid dis‐
penser and use rinse aid and multi-tablets together.
Page 18

www.electrolux.com18
Problem Possible cause and solution
The interior of the appliance
is wet.
Unusual foam during wash‐
ing.
Traces of rust on cutlery. • There is too much salt in the water used for wash‐
There are residues of deter‐
gent in the dispenser at the
end of the programme.
Odours inside the appliance. • Refer to "Internal cleaning".
Limescale deposits on the
tableware, on the tub and on
the inside of the door.
Dull, discoloured or chipped
tableware.
• This is not a defect of the appliance. it is caused by
the humidity in the air that condenses on the walls.
• Use the detergent for dishwashers only.
• There is a leak in the rinse aid dispenser. Contact
an Authorised Service Centre.
ing. Refer to "The water softener".
• Silver and stainless steel cutlery were placed to‐
gether. Avoid to put silver and stainless steel items
close together.
• The detergent tablet got stuck in the dispenser and
therefore was not completely washed away by wa‐
ter.
• Water cannot wash away the detergent from the
dispenser. Make sure that the spray arm is not
blocked or clogged.
• Make sure that items in the baskets do not impede
the lid of the detergent dispenser from opening.
• The level of salt is low, check the refill indicator.
• The cap of the salt container is loose.
• Your tap water is hard. Refer to "The water soft‐
ener".
• Even using multi-functional tabs use salt and set
regeneration of the water softener. Refer to "The
water softener".
• If lime scale deposits still remain, clean the appli‐
ance with appliance cleaners which are particularly
suitable for this purpose.
• Try different detergent.
• Contact the detergent manufacturer.
• Make sure that only dishwasher-safe items are
washed in the appliance.
• Load and unload the basket carefully. Refer to bas‐
ket loading leaflet.
• Place delicate items in the upper basket.
Refer to "Before first use",
"Daily use" or "Hints and
tips" for other possible
causes.
12. TECHNICAL INFORMATION
Dimensions Width / height / depth
(mm)
596 / 818 - 898 / 550
Page 19

ENGLISH 19
Electrical connection
Water supply pressure Min. / max. bar (MPa) 0.5 (0.05) / 8 (0.8)
Water supply
Capacity Place settings 13
Power consumption Left-on mode (W) 5.0
Power consumption Off-mode (W) 0.50
1)
Refer to the rating plate for other values.
2)
If the hot water comes from alternative source of energy, (e.g. solar panels, aeolian ener‐
gy), use the hot water supply to decrease energy consumption.
1)
Voltage (V) 220 - 240
Frequency (Hz) 50
Cold water or hot water
13. ENVIRONMENTAL CONCERNS
Recycle materials with the symbol .
Put the packaging in relevant containers
to recycle it. Help protect the
environment and human health by
recycling waste of electrical and
electronic appliances. Do not dispose of
appliances marked with the symbol
with the household waste. Return the
product to your local recycling facility or
contact your municipal office.
max 60 °C
2)
Page 20

www.electrolux.com20
İÇİNDEKİLER
1. GÜVENLIK BILGILERI..................................................................................... 21
2. GÜVENLIK TALIMATLARI............................................................................... 22
3. ÜRÜN TANIMI.................................................................................................. 24
4. KONTROL PANELI...........................................................................................24
5. PROGRAMLAR................................................................................................ 25
6. AYARLAR......................................................................................................... 26
7. İLK KULLANIMDAN ÖNCE.............................................................................. 28
8. GÜNLÜK KULLANIM........................................................................................30
9. İPUÇLARI VE YARARLI BILGILER..................................................................31
10. BAKIM VE TEMIZLIK......................................................................................33
11. ARIZALAR VE ÇÖZÜMLERI.......................................................................... 34
12. TEKNIK BILGILER..........................................................................................38
13. TÜKETICININ SEÇIMLIK HAKLARI............................................................... 38
BİZİM İÇİN ÖNEMLİSİNİZ
Bir Electrolux cihazı aldığınız için teşekkürler. Size onlarca yıllık profesyonel
deneyim ve yenilik sunan bir ürün tercih ettiniz. Sizi düşünerek tasarlanan yaratıcı
ve şık bir ürün. Bu ürünü her kullandığınızda, daima en iyi sonuçları
alacağınızdan emin olabilirsiniz.
Electrolux'e hoş geldiniz.
Aşağıdakiler için web sitemizi ziyaret edin:
Kullanım önerileri, broşürler, sorun giderme bilgileri, servis bilgileri edinmek
için:
www.electrolux.com/webselfservice
Ürününüzü daha iyi servis için kaydedin:
www.registerelectrolux.com
Cihazınız için Aksesuarlar, Sarf Malzemeleri ve Orijinal yedek parçalar satın
alın:
www.electrolux.com/shop
MÜŞTERİ HİZMETLERİ VE SERVİS
Orijinal yedek parça kullanılmasını tavsiye ederiz.
Yetkili Servis Merkezimizle iletişim sırasında, aşağıdaki verilerin bulunduğunu
kontrol edin: Model, PNC, Seri Numarası.
Bilgiler, bilgi etiketinde yazılıdır.
Uyarı / Dikkat-Güvenlik bilgileri
Genel bilgiler ve tavsiyeler
Çevre ile ilgili bilgiler
Önceden haber verilmeksizin değişiklik yapma hakkı saklıdır.
Page 21

1. GÜVENLIK BILGILERI
Cihazın montaj ve kullanımından önce, verilen talimatları
dikkatlice okuyun. Üretici, yalnız kurulum veya
kullanımdan kaynaklanan yaralanma ya da hasarlardan
sorumlu değildir. Talimatları, ileride kullanabilmeniz için
her zaman güvenli ve kolay ulaşılabilir bir yerde tutun.
1.1 Çocukların ve tehlikeye açık kişilerin güvenliği
• Bu cihaz, güvenli şekilde kullanımı ve oluşabilecek
tehlikeler hakkında talimat, gözetim veya bilgi
verilmesi halinde 8 yaş ve üzeri çocuklar ve fiziksel,
duyumsal veya zihinsel kapasitesi düşük veya bilgi ve
deneyimi olmayan kişiler tarafından kullanılabilir.
• Bu cihaz, çocukların oynayabileceği bir oyuncak
değildir.
• Deterjanları çocuklardan uzak tutun.
• Kapak açıkken, çocukları ve evcil hayvanları
makineden uzak tutun.
• Temizlik ve kullanıcı bakımı çocuklar tarafından,
denetim altında olmadıkları sürece yapılmamalıdır.
TÜRKÇE 21
1.2 Genel Güvenlik
• Bu cihaz aşağıdaki gibi evle ilgili ve benzeri
uygulamalarda kullanılmak üzere tasarlanmıştır:
– çiftlik evleri; mağaza, ofis ve diğer çalışma
ortamlarındaki çalışanlar için yapılmış mutfak
bölümleri;
– otel, motel ve diğer konaklama tarzı yerlerdeki
müşteriler tarafından.
• Cihazın teknik özelliklerini kesinlikle değiştirmeyin.
• Çalıştırma su basıncı (minimum ve maksimum) 0.5
(0.05) / 8 (0.8) bar (MPa) arasında olmalıdır
• Maksimum 13 kişilik yer sunar.
• Elektrik kablosunun zarar görmesi durumunda, bir
kazanın meydana gelmesine engel olmak için,
kablonun değişimi, üretici, Yetkili Servis veya benzer
nitelikteki kalifiye bir kişi tarafından yapılmalıdır.
Page 22

www.electrolux.com22
• Çatal bıçak takımını keskin uçları aşağı bakacak
şekilde çatal-bıçak sepetine koyun veya keskin
kenarları aşağıda yatay konumda çatal bıçak
çekmcesine koyun.
• Kazara basmayı önlemek için cihazın kapısını açık
şekilde gözetimsiz bırakmayın.
• Bakım işleminden önce, cihazı devre dışı bırakın ve
elektrik fişinin bağlantısını kesin.
• Cihazı temizlemek için yüksek basınçlı su spreyi ve/
veya buhar kullanmayın.
• Cihazın tabanında havalandırma açıklıkları varsa,
örneğin bir halıyla örtülü olmamalıdır.
• Cihaz su şebekesine verilen yeni hortum seti ile
bağlanmak durumundadır. Eski hortum setleri tekrar
kullanılmamalıdır.
2. GÜVENLIK TALIMATLARI
2.1 Kurulum
UYARI!
Cihazın montajı yalnızca
kalifiye bir kişi tarafından
yapılmalıdır.
• Tüm ambalajları çıkartın.
• Hasarlı bir cihazı monte etmeyin ya
da kullanmayın.
• Cihazı, sıcaklığın 0°C'den daha az
olduğu yerlere monte etmeyin ya da
buralarda kullanmayın.
• Cihazla birlikte verilen montaj
talimatını takip edin.
• Cihazı hareket ettirdiğinizde dikkatli
olun, ağırdır. Her zaman koruyucu
eldiven ve koruyuculu ayakkabı
kullanın.
• Cihazı güvenli yapıların altına ve
yanına monte edin.
2.2 Elektrik bağlantısı
UYARI!
Yangın ve elektrik çarpması
riski.
• Cihaz topraklanmalıdır.
• Anma değeri plakasındaki
parametrelerinin ana güç kaynağının
elektrik gücüne uygun olduğunda
emin olun.
• Her zaman doğru monte edilmiş,
darbeye dayanıklı bir priz kullanın.
• Priz çoğaltıcılarını ve uzatma
kablolarını kullanmayın.
• Elektrik fişine ve kablosuna zarar
vermemeye özen gösterin. Cihazın
ana kablosunun değiştirilmesi
gerekirse, bu işlem Yetkili Servis
tarafından yapılmalıdır.
• Fişi prize sadece kurulum
tamamlandıktan sonra takın.
Kurulumdan sonra elektrik fişine
erişilebildiğinden emin olun.
• Cihazın fişini prizden çıkarmak için
elektrik kablosunu çekmeyiniz. Her
zaman fişten tutarak çekin.
• Bu cihaz, E.E.C. Direktifleri ile
uyumludur.
• Yalnızca Birleşik Krallık ve İrlanda. Bu
cihaz 13 A fiş içermektedir. Gerektiği
takdirde, prizin bağlı olduğu sigortanın
bir 13 A ASTA (BS 1362) sigorta ile
değiştirilmesi gerekir.
2.3 Su bağlantısı
• Su hortumlarına zarar vermeyin.
Page 23

• Yeni borulara veya uzun süre
kullanılmamış olan borulara
bağlamadan önce, herhangi bir tamir
işlemi gerçekleştirirken veya yeni
cihazlar takarken (su metreleri vb.)
temiz su gelene dek suyu akıtın.
• Cihaz ilk kez kullanıldığında veya ilk
kez kullanıldıktan sonra görülebilir su
kaçağı olmadığından emin olun.
• Eğer su giriş hortumu hasar görürse,
derhal su musluğunu kapatın ve
cihazın fişini prizden çekin. Su giriş
hortumunu değiştirmek için Yetkili
Servis Merkezine başvurun.
2.4 Kullanım
• Açık kapak üzerine oturmayın veya
basmayın.
• Bulaşık makinesi deterjanları
tehlikelidir. Deterjan ambalajının
üzerindeki güvenlik talimatlarına uyun.
• Cihazdaki suyu içmeyin ya da bu
suyla oynamayın.
• Program tamamlanana kadar
cihazdan bulaşıkları çıkarmayın.
Bulaşıkların üzerinde biraz deterjan
kalabilir.
• Bir program çalışırken kapağı
açarsanız cihazdan sıcak buhar çıkışı
olabilir.
• Cihazın içine, üzerine veya yakınına
yanıcı ürünler ya da yanıcı ürünlerle
ıslanmış eşyalar koymayın.
2.5 Elden çıkarma
TÜRKÇE 23
• Cihazın fişini prizden çekin.
• Elektrik kablosunu kesin ve atın.
• Çocukların ve hayvanların cihazda
kapalı kalmasını önlemek için kapak
kilit dilini çıkarın.
Üretici / İhracatçı :
ELECTROLUX APPLIANCES AB
BUSINESS SECTOR EMA-EMEA (SEE)
ST GÖRANSGATAN 143
SE-105 45 STOCKHOLM
SWEDEN
TEL: +46 (8) 738 60 00
FAX: +46 (8) 738 63 35
www.electrolux.com
İthalatcı: Electrolux A.Ş
Tarlabaşı Cad. No:35 34435-Taksim-
Beyoğlu_Istanbul
Electrolux tüketici danışma merkezi: 0
850 250 35 89
www.electrolux.com.tr
Kullanım Ömrü Bilgisi :
Kullanım ömrü küçük ev aletlerinde 7 yıl,
diğer beyaz eşya ürünlerinde ise 10
yıldır. Kullanım ömrü, üretici ve/veya
ithalatçı firmanın cihazınızla ilgili yedek
parça temini ve bakım süresini ifade
eder.
UYARI!
Yaralanma ya da boğulma
riski.
Page 24

4
3
7
9
8
10
56
11
1
2
21
3
45
www.electrolux.com24
3. ÜRÜN TANIMI
Üst püskürtme kolu
1
Alt püskürtme kolu
2
Filtreler
3
Bilgi etiketi
4
Tuz haznesi
5
Hava menfezi
6
4. KONTROL PANELI
Açma/kapama tuşu
1
Program göstergeleri
2
Göstergeler
3
Parlatıcı gözü
7
Deterjan gözü
8
Çatal-bıçak sepeti
9
Alt sepet
10
Üst sepet
11
Program tuşu
4
Delay tuşu
5
Page 25

4.1 Göstergeler
Gösterge Açıklama
Bitiş göstergesi.
Parlatıcı uyarı göstergesi. Program çalışırken bu gösterge daima ka‐
palıdır.
Tuz uyarı göstergesi. Program çalışırken bu gösterge daima kapalıdır.
5. PROGRAMLAR
TÜRKÇE 25
Program Kirlilik dere‐
2)
3)
cesi
Bulaşıkların
türü
Normal kirli
Tabaklar, bar‐
daklar, kaplar
ve çatal-bıçak‐
lar
Ağır kirli
Tabaklar, bar‐
daklar, kaplar,
çatal-bıçaklar,
tencereler ve
tavalar
Normal kirli
Tabaklar, bar‐
daklar, kaplar
ve çatal-bıçak‐
lar
Yeni kirlenmiş,
kiri henüz ku‐
rumamış
Tabaklar, bar‐
daklar, kaplar
ve çatal-bıçak‐
lar
Program aşa‐
maları
• Ön yıkama
• 50 °C'de yı‐
kama
• Durulama
• Kurutma
• Ön yıkama
• 70 °C'de yı‐
kama
• Durulama
• Kurutma
• Ön yıkama
• 65 °C'de yı‐
kama
• Durulama
• Kurutma
• 60 °C ya da
65 °C'de yı‐
kama
• Durulama
Tüketim değerleri
1)
Süre
(dakika)
227 1.039 11
155 - 170 1.5 - 1.7 14-15
130 - 140 1.4 - 1.6 15-17
30 0.8 10
Tüketim
(kWsaat)Su(l)
Page 26

www.electrolux.com26
Program Kirlilik dere‐
4)
1)
Su basıncı ve sıcaklığı, elektrik beslemesindeki dalgalanmalar, seçenekler ve bulaşıkların
miktarı, değerlerde değişikliğe neden olabilir.
2)
Bu programla, normal kirli bulaşıklar için suyu ve enerjiyi en verimli şekilde kullanırsınız.
(Ayrıca test enstitüleri tarafından standart program olarak adlandırılır).
3)
Bu programla, üzerindeki kiri henüz kurumamış bulaşıkları yıkayabilirsiniz. Kısa sürede iyi
yıkama sonuçları sağlar.
4)
Bu programı bulaşıkları hızlı bir şekilde durulamak ve bulaşıklar üzerinde yemek kalıntısı
kalmasını engellemek için kullanabilir böylece cihazdan gelen kötü kokular da azaltılabilir.
Bu programda deterjan kullanmayın.
5.1 Test enstitüleri için bilgiler
Test performansı hakkında tüm gerekli
bilgiler için şu adrese e-posta gönderin:
info.test@dishwasher-production.com
6. AYARLAR
6.1 Program seçme modu ve
kullanıcı modu
Cihaz, program seçme modundayken bir
program ayarlanabilir ve kullanıcı
moduna geçilebilir.
Kullanıcı modunda mevcut ayarlar:
• Su sertliğine göre su yumuşatıcının
seviyesi.
• Program sonu için sesli ikazın
devreye sokulması veya devre dışı
bırakılması.
• AirDry aktive edilmesi / devre dışı
bırakılması.
Cihaz kaydedilen ayarları
sakladığından, her döngüden önce
yapılandırmanız gerekmez.
Program seçim modunun ayarlanması
Program göstergesi yanık halde
ise, cihaz program seçme modundadır.
cesi
Bulaşıkların
türü
Tümü • Ön yıkama 14 0.1 5
Program aşa‐
maları
Tüketim değerleri
1)
Süre
(dakika)
Bilgi etiketinde bulunan ürün numarasını
(PNC) not edin.
Etkinleştirme sonrası cihaz varsayılan
olarak program seçme modundadır. Aksi
takdirde program seçme modunu
aşağıdaki şekilde ayarlayın:
Cihaz program seçme moduna
geçinceye kadar program tuşunu basılı
tutun.
Tüketim
(kWsaat)Su(l)
Kullanıcı modu nasıl geçilir
Cihazın program seçme modunda
olduğundan emin olun.
Kullanıcı moduna girmek için gösterge
yanıp sönene ve gösterge
açık duruma gelene kadar program
tuşuna basılı tutun.
6.2 Su yumuşatma düzeneği
Su yumuşatma düzeneği, su
kaynağındaki mineralleri yok eder; bu
minerallerin yıkama sonuçları ve cihazın
çalışması üzerinde olumsuz etkisi vardır.
Bu minerallerin içeriği ne kadar yüksek
olursa, su da o kadar sert demektir. Su
sertliği, eşdeğer skalalarda ölçülür.
Page 27
Su yumuşatma düzeneği, bölgenizdeki
suyun sertliğine göre ayarlanmalıdır.
Yerel su idareniz, bölgenizdeki suyun
sertliği hakkında size bilgi verebilir.
Su sertliği
Alman derece‐
si (°dH)
47 - 50 84 - 90 8.4 - 9.0 58 - 63 10
43 - 46 76 - 83 7.6 - 8.3 53 - 57 9
37 - 42 65 - 75 6.5 - 7.5 46 - 52 8
29 - 36 51 - 64 5.1 - 6.4 36 - 45 7
23 - 28 40 - 50 4.0 - 5.0 28 - 35 6
19 - 22 33 - 39 3.3 - 3.9 23 - 27
15 - 18 26 - 32 2.6 - 3.2 18 - 22 4
11 - 14 19 - 25 1.9 - 2.5 13 - 17 3
4 - 10 7 - 18 0.7 - 1.8 5 - 12 2
<4 <7 <0.7 < 5
1)
Fabrika ayarı.
2)
Bu seviye seçildiğinde tuz kullanmayınız.
Fransız dere‐
cesi (°fH)
Yıkamadan memnun edici sonuçlar
almak için, su yumuşatma düzeneğinin
doğru seviyede ayarlanması önemlidir.
mmol / l Clarke de‐
recesi
TÜRKÇE 27
Su yumuşatma
düzeneği seviyesi
1)
5
2)
1
Standart deterjan veya tablet
kullanıyorsanız (tuz etkisi içeren veya
içermeyen) tuz doldurma uyarı
göstergesinin doğru çalışması için su
sertlik seviyesinin doğru oranda
ayarlamanız gerekmektedir.
Tuz içeren multi tabletler
suyu yumuşatmak için yeteri
kadar etkili değildir.
Su yumuşatıcı (tuz) seviyesinin ayarlanması
Cihazın kullanıcı modunda olduğundan
emin olun.
1.
ve göstergeleri sönene
kadar ve gösterge yanana kadar
bekleyin. göstergesi hala
yanıp söner. göstergesinin
aralıklı yanıp sönmesi, geçerli ayarı
gösterir.
• ör. 5 defa yanıp sönme +
duraklama + 5 defa yanıp sönme
= seviye 5.
2. Ayarı değiştirmek için program
tuşuna birkaç kez basın. Program
tuşuna her bastığınızda seviye
numarası artar. Seviye 10'dan sonra
tekrar sayım seviye 1'den başlar.
3. Ayarı onaylamak için açma/kapama
tuşuna basın.
6.3 Sesli ikazlar
Cihazda bir arıza oluştuğunda sesli
sinyaller duyulur. Bu sesli sinyalleri devre
dışı bırakmak mümkün değildir.
Program tamamlandığında da sesli bir
sinyal duyulur. Varsayılan olarak, bu
sesli ikaz devre dışıdır fakat
etkinleştirilebilir.
Page 28

www.electrolux.com28
Program sonu sesli sinyalinin etkinleştirilmesi
Cihazın kullanıcı modunda olduğundan
emin olun.
1. Hemen program tuşuna basın.
• ve göstergesi açıktır.
• göstergesi yanıp söner.
2.
3. Ayarı değiştirmek için program
4. Ayarı onaylamak için açma/kapama
ve göstergeleri sönene
kadar bekleyin. göstergesi hala
yanıp söner.
• göstergesi geçerli ayarı
gösterir: göstergesi kapalı =
Sesli ikaz kapalı.
tuşuna basın.
• göstergesi açık = Sesli ikaz
açık.
tuşuna basın.
6.4 AirDry
AirDry daha az enerji tüketimiyle kurutma
sonuçlarını geliştirir.
DİKKAT!
Otomatik olarak açıldıktan
sonra cihazın kapağını 2
dakika kapatmayın. Aksi
halde cihazınız zarar
görebilir.
AirDry, hariç tüm programları
otomatik olarak aktive eder.
DİKKAT!
Eğer çocuklar cihaza
ulaşabiliyorsa, kapının
açılması tehlike
yaratabileceğinden AirDry
fonksiyonunun devre dışı
bırakılması önerilir.
AirDry özelliğinin devre dışı bırakılması
Cihazın kullanıcı modunda olduğundan
emin olun.
1. Program tuşuna iki kez basın.
• ve göstergesi açıktır.
• göstergesi yanıp söner.
2.
3. Ayarı değiştirmek için program
4. Ayarı onaylamak için açma/kapama
ve göstergeleri sönene
kadar bekleyin. göstergesi hala
yanıp söner.
• göstergesi geçerli ayarı
gösterir: kapalı = AirDry
devre dışı.
tuşuna basın.
açık = AirDry etkin.
•
tuşuna basın.
Kurutma aşamasında kapak
otomatik olarak açılır ve yarı
açık kalır.
7. İLK KULLANIMDAN ÖNCE
1. Geçerli su yumuşatıcı seviyesinin,
su kaynağının sertliği ile uyumlu
olup olmadığını kontrol edin.
Uyumlu değilse, su yumuşatıcının
seviyesini ayarlayın.
2. Tuz haznesini doldurun.
3. Parlatıcı gözünü doldurun.
4. Musluğu açın.
5. Hala cihazın içinde olabilecek işlem
kalıntılarını çıkarmak için programı
başlatın. Deterjan kullanmayın ve
sepetlere bir şey yerleştirmeyin.
Page 29

Bir programı başlattıktan sonra, cihaz su
A
B
D
C
M
A
X
1
2
3
4
+
-
A
B
D
C
yumuşatıcıdaki reçineyi yeniden
doldurması için 5 dakika zaman
harcayabilir. Cihaz çalışmıyor görünüyor.
Yıkama aşaması ancak bu işlem bittikten
sonra başlatılır. Prosedür periyodik
olarak tekrarlanır.
7.1 Tuz haznesi
DİKKAT!
Sadece bulaşık makinelerine
uygun kaba tuz kullanın.
İnce tuz korozyon riskini
artırır.
Su yumuşatıcı içine reçineyi yeniden
doldurmak ve günlük kullanımda
yıkamadan memnun edici sonuçların
alınmasını sağlamak için tuz kullanılır.
Tuz haznesinin doldurulması
1. Tuz haznesinin kapağını saatin tersi
yönde çevirip, çıkarın.
2. Tuz haznesine 1 litre su koyun
(sadece ilk çalıştırmada).
3. Tuz haznesine 1 kg tuz koyun
(tamamen dolana kadar).
TÜRKÇE 29
6. Tuz haznesini, haznenin kapağını
saat yönünde çevirerek kapatın.
DİKKAT!
Tuz doldururken, hazneden
tuz ve su taşabilir. Tuz
haznesini doldurduktan
sonra, dökülen tuzların çelik
tabana zarar vermemesi için
derhal durula& beklet
programını çalıştırın.
7.2 Parlatıcı gözünün doldurulması
4. İçindeki son granüllerin de
dökülmesini sağlamak için huniyi
dikkatlice sallayın.
5. Tuz haznesi deliğinin etrafındaki
tuzları temizleyin.
DİKKAT!
Sadece bulaşık makineleri
için hazırlanmış parlatıcıları
kullanın.
1. Kapağı (C) açmak için, kilit açma
tuşuna (D) basın.
2. Parlatıcı gözünü (A) sıvı "maks."
seviyeye ulaşana kadar doldurun.
3. Dökülen parlatıcıyı, aşırı köpük
oluşmasını önlemek için emici bir
bezle silin.
Page 30

30
20
A BD
C
20
30
B
A D
C
www.electrolux.com30
4. Kapağı kapatın. Açma tuş kilidinin
yerine oturduğundan emin olun.
8. GÜNLÜK KULLANIM
Bırakılan miktar seçicisini
(B), konum 1 (en düşük
miktar) ile konum 4 veya 6
(en yüksek miktar) arasında
ayarlayabilirsiniz.
1. Musluğu açın.
2. Cihazı çalıştırmak için açma/kapama
tuşuna basın.
Cihazın program seçme modunda
olduğundan emin olun.
• Tuz göstergesi yanıyorsa, tuz
haznesini doldurun.
• Parlatıcı göstergesi yanıyorsa,
parlatıcı gözünü doldurun.
3. Bulaşıkları sepetlere yerleştirin.
4. Deterjanı ekleyin.
5. Bulaşığın tipine ve kirlilik derecesine
göre doğru yıkama programını
ayarlayın ve başlatın.
8.1 Deterjan kullanımı
2. Toz veya tablet deterjanı, bölmeye
(A) koyun.
3. Programın ön yıkama aşaması varsa,
bölmeye (D) az miktarda deterjan
koyun.
4. Kapağı kapatın. Açma tuş kilidinin
yerine oturduğundan emin olun.
8.2 Multi tablet deterjanların
kullanımı
Tuz ve parlatıcı içeren tabletler
kullanırken, tuz haznesini ve parlatıcı
gözünü doldurmayın.
1. Su yumuşatıcıyı en düşük seviyeye
ayarlayın.
2. Parlatıcı gözünü en düşük seviyeye
ayarlayın.
8.3 Bir programın ayarlanması
ve başlatılması
Programın başlatılması
1. Cihazın kapağını aralık bırakın.
2. Cihazı çalıştırmak için açma/kapama
tuşuna basın. Cihazın program seçim
modunda olduğundan emin olun.
3. Ayarlamak istediğiniz programın
göstergesi yanıncaya kadar ardı
ardına program tuşuna basın.
4. Cihazın kapağını kapatın ve
programı başlatın.
1. Kapağı (B) açmak için, kilit açma
tuşuna (C) basın.
Gecikmeli başlatma ile bir programın başlatılması
1. Bir program ayarlayın.
2. Programı 3 saate kadar gecikmeli
olarak başlatmak için Delay tuşuna
basın.
• Gösterge yanar.
Page 31

3. Geri sayımı başlatmak için cihazın
kapağını kapatın.
Geri sayım sona erdiğinde, program
başlar.
Cihaz çalışırken kapağın açılması
Cihazın kapağını bir programın çalışması
sırasında açarsanız, cihaz durur. Bu,
enerji tüketimini ve program süresini
etkileyebilir. Kapağı kapattığınızda, cihaz
duraklatıldığı yerden devam eder.
Kurutma aşaması sırasında
kapak 30 saniyeden daha
uzun bir süre açık kalırsa,
çalışan program sonlanır.
Ancak kapak AirDry
fonksiyonu tarafından
açılırsa bu durum
gerçekleşmez.
Cihaza zarar
verebileceğinden AirDry
fonksiyonu cihazın kapağını
otomatik olarak açtıktan
sonra kapağı 2 dakika
kapatmayın.
Kapak 3 dakika daha
kapatılmazsa çalışan
program sonlanır.
TÜRKÇE 31
Gecikmeli başlatmanın iptal edilmesi
Cihaz program seçme moduna
geçinceye kadar program tuşunu basılı
tutun.
Gecikmeli başlatmayı iptal ettiğinizde,
programı tekrar başlatmanız gerekir.
Programın iptal edilmesi
Cihaz program seçme moduna
geçinceye kadar program tuşunu basılı
tutun.
Yeni bir program başlatmadan önce
deterjan gözünde deterjan
bulunduğundan emin olun.
Program sonu
Program tamamlandığında gösterge
yanar.
1. Açma/kapama tuşuna basın ya da
cihazın bekleme moduna geçmesini
bekleyin. Cihazın kapağını bekleme
modu etkinleşmeden açarsanız,
cihaz otomatik olarak devre dışı kalır.
2. Su musluğunu kapatın.
9. İPUÇLARI VE YARARLI BILGILER
9.1 Genel
Aşağıdaki ipuçları, günlük kullanımda en
iyi temizleme ve kurutma sonuçlarını elde
etmenizi sağlarken çevreyi korumanıza
da yardımcı olur.
• Bulaşıklardaki büyük yemek
kalıntılarını çöp kutusuna atın.
• Elle ön durulama yapmayın.
Gerekirse ön yıkama programını
kullanın (varsa) veya ön yıkama
aşamalı bir program seçin.
• Daima bulaşık sepetindeki tüm alanı
kullanın.
• Bulaşıkları makineye yerleştirirken,
püskürtme kolundaki deliklerden
püskürtülen suyun tüm bulaşıklara
ulaşabilir ve bulaşıkların yıkanabilir
olmasına dikkat edin. Bulaşıkların
birbirine temas etmemesi ya da
birbirlerinin üzerini kapatmamasına
dikkat edin.
• Bulaşık makinesi deterjanı, parlatıcı
ve tuzunu ayrı ayrı kullanabilir veya
multi-tablet kullanabilirsiniz (örn; "3'ü
1 arada", "4'ü 1 arada", "Hepsi 1
arada"). Ambalaj üzerindeki talimatları
uygulayın.
• Bulaşığın türüne ve kirlilik derecesine
göre program seçin. ECO
programıyla, normal kirli tabaklar ve
çatal-bıçaklar için suyu ve enerjiyi en
verimli şekilde kullanırsınız.
9.2 Tuz, parlatıcı ve deterjan
kullanımı
• Sadece bulaşık makinesi tuzu,
parlatıcısı ve deterjanı kullanın. Diğer
ürünler cihazınıza zarar verebilir.
Page 32

www.electrolux.com32
• Suyu sert ve çok sert olan bölgelerde
optimum seviyede temizleme ve
kurutma sonuçları elde etmek için,
deterjan (katkı maddesi içermeyen
toz, jel veya tabletler), parlatıcı ve
tuzu ayrı ayrı kullanmanızı öneririz.
• Ayda en az bir kere, cihazı özellikle
bunun için uygun olan cihaz
temizleyicisiyle çalıştırın.
• Deterjan tabletleri kısa programlarda
tamamen çözünmezler. Yemek
takımlarının üzerinde deterjan
artıklarının kalmaması için, tabletleri
uzun programlarla kullanmanızı
öneririz.
• Gereğinden fazla deterjan
kullanmayın. Deterjan ambalajındaki
talimatlara bakın.
9.3 Multi-tablet (tuz ve/veya
parlatıcı etkisi içeren) tablet
kullanmayı bıraktığınızda
yapmanız gerekenler
Deterjan, tuz ve parlatıcıyı ayrı olarak
kullanmaya başlamadan önce, aşağıdaki
prosedürü yerine getirin.
1. Su yumuşatıcıyı (tuz seviye ayarını)
en yüksek seviyeye getirin.
2. Tuz ve parlatıcı haznelerinin dolu
olduğundan emin olun.
3. Durulama aşaması içeren en kısa
programı başlatın. Deterjan
eklemeyin ve sepetlere bir şey
yerleştirmeyin.
4. Program tamamlandığında, su
yumuşatıcıyı (tuz seviye ayarını)
bölgenizdeki su sertliğine göre
ayarlayın.
5. Parlatıcı miktarı seviyesini ayarlayın.
9.4 Bulaşıkların sepetlere
yerleştirilmesi
• Bu cihazı, sadece bulaşık
makinesinde güvenli şekilde
yıkanabilir olan bulaşıkları yıkamak
için kullanın.
• Ahşap, boynuz, alüminyum, kalaylı ve
bakırdan yapılmış cisimleri cihaza
koymayın.
• Suyu emebilen nesneleri (süngerler,
toz bezleri) cihazın içine koymayın.
• Bulaşıklardaki büyük yemek
kalıntılarını çöp kutusuna atın.
• Bulaşıklarda kalan yanmış yiyecekleri
yumuşatın.
• İçi boş bulaşıkları (fincanlar, bardaklar
ve tavalar) ağızları aşağı gelecek
şekilde yerleştirin.
• Bardakların diğer bardaklara temas
etmediğinden emin olun.
• Çatal-bıçak ve küçük bulaşıkları çatalbıçak sepetine koyun.
• Hafif bulaşıkları üst sepete koyun.
Bulaşıkların sabitlendiğinden ve
hareket etmediğinden emin olun.
• Bir programı başlatmadan önce,
püskürtme kollarının rahatça hareket
edebildiğinden emin olun.
9.5 Bir programa başlamadan
önce
Şunlardan emin olun:
• Filtreler temiz olmalıdır ve doğru
şekilde yerleştirilmelidir.
• Tuz haznesinin kapağı sıkı olmalıdır.
• Püskürtme kolları tıkanmamış
olmalıdır.
• Bulaşık makinesi tuzu ve parlatıcısı
(multi tablet kullanmadığınız takdirde)
kullanılmalıdır.
• Bulaşıklar sepete doğru
yerleştirilmelidir.
• Program, bulaşık tipine ve kirlilik
derecesine uygun olmalıdır.
• Doğru miktarda deterjan
kullanılmalıdır.
9.6 Bulaşıkların sepetlerden
boşaltılması
1. Yemek takımının cihazdan
çıkartmadan önce soğumalarını
bekleyin. Sıcak şeyler kolayca zarar
görebilir.
2. Öncelikle alt sepeti sonra da üst
sepeti boşaltın.
Program sona erdiğinde,
cihazın yan kısımlarında ve
kapağında su kalabilir.
Page 33

10. BAKIM VE TEMIZLIK
C
B
A
TÜRKÇE 33
UYARI!
Bakım işleminden önce,
cihazı devre dışı bırakın ve
elektrik fişini prizden çekin.
Kirli filtreler ve tıkalı
püskürtme kolları yıkamadan
alınacak sonucu kötüleştirir.
Düzenli olarak kontrol yapın
ve gerekirse bunları
temizleyin.
10.1 Filtrelerin temizlenmesi
Filtre sistemi 3 parçadan oluşur.
1. Filtreyi (B) saatin tersi yönde çevirip
çıkarın.
3. Yassı filtreyi (A) çıkarın.
4. Filtreleri yıkayın.
5. Haznenin içinde veya kenarlarında
yiyecek veya kir kalıntısı
olmadığından emin olun.
6. Yassı filtreyi (A) yerine takın. Filtrenin
2 kılavuzun altına düzgün şekilde
yerleştirildiğinden emin olun.
7. (B) ve (C) filtrelerini yerine takın.
8. Filtreyi (B) yassı filtrenin (A) içine
geri takın. Kilitlenene kadar saat
yönünde çevirin.
2. (C) filtresini (B) filtresinden çıkarın.
Page 34

www.electrolux.com34
DİKKAT!
Filtrelerin yanlış
konumlanması, tatmin edici
olmayan yıkama sonuçlarına
ve cihazın zarar görmesine
neden olabilir.
10.2 Püskürtme kollarının temizlenmesi
Püskürtme kollarını çıkartmayın.
Püskürtme kollarındaki delikler tıkanırsa,
11. ARIZALAR VE ÇÖZÜMLERI
kalan kir parçalarını ince uçlu bir cisim ile
çıkarın.
10.3 Dış temizlik
• Cihazı yumuşak, nemli bir bezle
temizleyin.
• Sadece nötr deterjanlar kullanın.
• Aşındırıcı ürünleri, aşındırıcı
temizleme bezlerini veya çözücüleri
kullanmayın.
10.4 İç temizlik
• Cihazı, kapının lastik contası dahil,
nemli yumuşak bir bez kullanarak
özenle temizleyin.
• Düzenli olarak kısa süreli programlar
kullanıyorsanız, cihazınızın içerisinde
yağ ve kireç birikebilir. Bunu önlemek
için, ayda en az 2 kez uzun süreli
programlar çalıştırmanızı öneririz.
• Cihazın en iyi şekilde çalışması için,
bulaşık makineleri için ayda bir özel
bir temizlik ürünü kullanmanızı
öneririz. Ürünlerin ambalajının
üzerindeki talimatlara aynen uyun.
Cihaz başlamaz ya da çalışma sırasında
durursa, Yetkili Servisi aramadan önce,
tablodaki bilgiler yardımıyla sorunu kendi
kendinize çözüp çözemeyeceğinizi
kontrol edin.
UYARI!
Tamir işlemlerinin doğru
şekilde yapılmaması,
kullanıcının güvenliği
açısından ciddi tehlikelere
yol açabilir. Her tür tamir
işlemi kalifiye personel
tarafından yapılmalıdır.
Sorun ve alarm kodu Olası sebep ve çözümü
Cihaz çalışmıyor. • Elektrik fişinin prize takılı olduğundan emin
Bazı problemler oluştuğunda bitiş
göstergesi, aralıklı olarak yanıp sönerek
bir arıza olduğunu gösterir.
Oluşan sorunların büyük bir kısmı,
Yetkili Servis Merkezi ile iletişime
geçmeye gerek kalmadan çözülebilir.
olun.
• Sigorta kutusunda bulunan sigortaların
doğru çalıştığına emin olun.
Page 35

TÜRKÇE 35
Sorun ve alarm kodu Olası sebep ve çözümü
Program çalışmaya başlamıyor. • Cihazın kapağının kapalı olduğundan emin
olun.
• Gecikmeli başlatma ayarlanmış ise, ayarı
iptal edin ya da geri sayımın bitmesini bek‐
leyin.
• Cihaz su yumuşatma düzeneğindeki reçine‐
yi temizleme işlemini başlattı. Bu işlemin sü‐
resi yaklaşık 5 dakikadır.
Makine su almıyorsa.
• Bitiş göstergesi aralıklı olarak 1
kez yanıp sönüyor.
• Sesli sinyal aralıklı olarak 1 kez
duyulur.
• Su musluğunun açık olduğundan emin olun.
• Su besleme basıncının çok düşük olma‐
dığından emin olun. Bu bilgi için, yerel su
idarenizi arayın.
• Su musluğunun tıkalı olmadığından emin
olun.
• Giriş hortumundaki filtrenin tıkanmadığın‐
dan emin olun.
• Giriş hortumunun bükülmediğinden emin
olun.
Cihaz suyu boşaltmıyor.
• Bitiş göstergesi aralıklı olarak 2
kez yanıp sönüyor.
• Giderin tıkalı olmadığından emin olun.
• Tahliye hortumunun bükülmediğinden emin
olun.
• Sesli sinyal aralıklı olarak 2 kez
duyulur.
Su taşma tespit aygıtı çalışıyor.
• Bitiş göstergesi aralıklı olarak 3
• Su musluğunu kapatın ve Yetkili Servis
Merkezini arayın.
kez yanıp sönüyor.
• Sesli sinyal aralıklı olarak 3 kez
duyulur.
Cihaz çalışma esnasında bir çok
kez durur ve çalışır.
• Bu normal bir durumdur. Bu çalışma sistemi
daha yüksek yıkama performansı ve enerji
tasarrufu sağlar.
Program çok uzun sürüyor. • Gecikmeli başlatma ayarlanmış ise, gecik‐
me ayarını iptal edin ya da geri sayımın bit‐
mesini bekleyin.
Cihaz kapağında küçük sızıntı var. • Cihaz dengelenerek kurulmamıştır. Ayarla‐
nabilir ayakları (varsa) gevşetin veya sıkın.
• Cihazın kapağı kasadaki yuvasına tam otur‐
madan kapanıyordur. Arka ayağı (varsa)
ayarlayın.
Cihazın kapağı zor kapanıyor. • Cihaz dengelenerek kurulmamıştır. Ayarla‐
nabilir ayakları (varsa) gevşetin veya sıkın.
• Bulaşıklar sepetten taşıyor olabilir.
Page 36

www.electrolux.com36
Sorun ve alarm kodu Olası sebep ve çözümü
Cihazdan şıngırdama ve çarpma
sesleri geliyor.
Cihaz sigortayı attırıyor. • Evinizde tek bir sigortaya bağlı olan cihazla‐
• Bulaşıklar sepetlere düzgün şekilde yerleşti‐
rilmemiştir. Sepet doldurma broşürüne ba‐
kın.
• Püskürtme kollarının bir yere çarpmadan
tam tur döndüğünden emin olun.
rın hepsine aynı anda yeterli amper tedarik
edilemiyordur. Priz amperini ve metre kapa‐
sitesini kontrol edin ya da aynı anda çalıştı‐
rılmış cihazlardan birini veya birkaçını kapa‐
tın.
• Cihazda elektriksel bir arıza vardır. Yetkili
Servis Merkezini arayın.
Olası diğer sebepler için "İlk
Kullanımdan Önce",
"Günlük kullanım" veya
"İpuçları ve yararlı bilgiler"
bölümlerine bakın.
Cihazı kontrol ettikten sonra kapatıp
açın. Sorun tekrarlanırsa Yetkili Servis
Merkezi ile temasa geçin.
Tabloda belirtilmeyen alarm kodları için
Yetkili Servis Merkezi ile temasa geçin.
11.1 Yıkama ve kurutma sonuçları tatmin edici değil
Problem Olası sebep ve çözümü
Kötü yıkama sonuçları. • "Günlük kullanım", "İpuçları ve yararlı bilgiler"
Kötü kurutma sonuçları. • Bulaşıklar yıkandıktan sonra çok uzun bir süre ka‐
Bardak ve tabaklarda beya‐
zımsı çizikler ve lekeler ya
da mavimsi katmanlar var.
Bardak ve tabakların üzerin‐
de lekeler ve kurumuş su
damlacıkları var.
bölümlerine ve sepet yerleştirme broşürüne bakın.
• Daha yoğun yıkama programlarını kullanın.
• Püskürtme kollarındaki delikleri ve filtreyi temizle‐
yin. "Bakım ve Temizlik" bölümüne bakın.
pağı kapalı cihazın içinde kaldı.
• Parlatıcı yok veya parlatıcı miktarı yeterli değil. Par‐
latıcı seviye ayarını daha yüksek bir konuma geti‐
rin.
• Plastik parçaların havlu ile ilaveten kurulanması ge‐
rekebilir.
• Parlatıcı etkisi içeren multi-tablet kullanıyor olsanız
dahi, her zaman ilaveten parlatıcı kullanmanız tav‐
siye edilir.
• Parlatıcı ayarı seviyesi çok yüksektir. Parlatıcı sevi‐
ye ayarını daha düşük konuma getirin.
• Çok fazla deterjan kullanılmıştır.
• Parlatıcı ayar seviyesi çok düşüktür. Parlatıcı mik‐
tarı seviyesini daha yüksek bir konuma ayarlayın.
• Sebebi parlatıcı kalitesi olabilir.
Page 37

TÜRKÇE 37
Problem Olası sebep ve çözümü
Bulaşıklar ıslak. • Programda kurutma aşaması yoktur veya kurutma
aşaması düşük sıcaklıktadır.
• Parlatıcı gözü boştur.
• Sebebi parlatıcı kalitesi olabilir.
• Bunun nedeni multi tabletlerin kalitesi olabilir. Farklı
bir marka kullanın veya parlatıcı gözünü aktive edin
ve kombi multi tabletler ile parlatıcıyı birlikte kulla‐
nın.
Cihazın iç kısmı ıslak. • Bu bir kusur değildir. Kurutma esnasında duvarlar‐
da yoğunlaşan nemden kaynaklanmaktadır.
Yıkama esnasında anormal
köpük.
• Sadece bulaşık makinelerine özel üretilmiş deter‐
janları kullanın.
• Parlatıcı gözünde sızıntı var. Yetkili Servis Merkezi‐
ni arayın.
Çatal-bıçaklar üzerinde pas
izleri.
• Seçilmiş olan tuz seviyesi ayarı çok yüksek. "Su
yumuşatıcısı" bölümüne bakın.
• Gümüş ve paslanmaz çelik çatal-bıçaklar birlikte
yerleştirilmiştir. Gümüş ve paslanmaz çelik parçala‐
rı birbirlerine yakın yerleştirmeyin.
Program sonunda deterjan
gözünde deterjan kalıntıları
var.
• Deterjan tableti bölmeye sıkışmış ise yıkama suyu
deterjanı bulunduğu yerden çıkaramamış olabilir.
• Su, bölmeye yapışmış ve sıkışmış olan deterjanı
çıkaramayabilir. Püskürtme kolunun tıkalı veya
önünün kapalı olmadığından emin olun.
• Sepetin içinde bulunan parçaların deterjan gözü
kapağının açılmasını engellemediğinden emin olun.
Cihazın içinde koku mevcut. • "İç temizlik" bölümüne bakın.
Bulaşıklar, iç hazne ve ka‐
pağın içinde kireç kalıntıları
var.
• Tuz seviye ayarı düşük, tuz doldurma uyarı göster‐
gesini kontrol edin.
• Tuz haznesinin kapağı gevşek bırakılmıştır.
• Musluk suyunuz çok sert. "Su yumuşatıcısı" bölü‐
müne bakın.
• Musluk suyu çok sert ise, tuz etkisi içeren multi-tab‐
let kullansanız dahi sertlik oranına uygun olarak tuz
seviyesi ayarını yapmanızı ve tuz kullanmanızı
öneririz. "Su yumuşatıcısı" bölümüne bakın.
• Cihaz içerisinde halen kireç kalıntıları görüyorsanız
uygun bir makine temizleyicisi kullanarak cihazı
boş olarak çalıştırın.
• Başka bir deterjan deneyin.
• Deterjan üreticisiyle iletişime geçin.
Mat, soluk veya çizikli hale
gelen bulaşıklar.
• Sadece bulaşık makinesine uygun bulaşıkların yı‐
kandığından emin olun.
• Sepeti dikkatli bir şekilde doldurun ve boşaltın. Se‐
pet doldurma broşürüne bakın.
• Hassas bulaşıkları üst sepete koyun.
Page 38

www.electrolux.com38
Olası diğer sebepler için "İlk
Kullanımdan Önce",
"Günlük kullanım" veya
"İpuçları ve yararlı bilgiler"
bölümlerine bakın.
12. TEKNIK BILGILER
Boyutlar Genişlik / yükseklik / de‐
Elektrik bağlantısı
Su besleme basıncı Min. / maks. bar (MPa) 0.5 (0.05) / 8 (0.8)
Su beslemesi
Kapasite Kişilik yemek takımı 13
Enerji tüketimi Açık bırakma modu (W) 5.0
Enerji tüketimi Kapalı mod (W) 0.50
1)
Diğer değerler için bilgi etiketine bakın.
2)
Sıcak su alternatif enerji kaynaklarından (ör. güneş panelleri, rüzgar) geliyorsa, enerji tü‐
ketimini azaltmak için sıcak su kaynağını kullanın.
1)
rinlik (mm)
Voltaj (V) 220 - 240
Frekans (Hz) 50
Soğuk su veya sıcak su
13. TÜKETICININ SEÇIMLIK HAKLARI
1. Malın ayıplı olduğunun anlaşılması
durumunda tüketici;
a. Satılanı geri vermeye hazır
olduğunu bildirerek sözleşmeden
dönme,
b. Satılanı alıkoyup ayıp oranında
satış bedelinden indirim isteme,
c. Aşırı bir masraf gerektirmediği
takdirde, bütün masrafları
satıcıya ait olmak üzere satılanın
ücretsiz onarılmasını isteme,
d. İmkân varsa, satılanın ayıpsız bir
misli ile değiştirilmesini isteme,
seçimlik haklarından birini
kullanabilir. Satıcı, tüketicinin
tercih ettiği bu talebi yerine
getirmekle yükümlüdür.
2. Ücretsiz onarım veya malın ayıpsız
misli ile değiştirilmesi hakları üretici
veya ithalatçıya karşı da kullanılabilir.
Bu fıkradaki hakların yerine
getirilmesi konusunda satıcı, üretici
ve ithalatçı müteselsilen sorumludur.
Üretici veya ithalatçı, malın kendisi
tarafından piyasaya sürülmesinden
sonra ayıbın doğduğunu ispat ettiği
takdirde sorumlu tutulmaz.
3. Ücretsiz onarım veya malın ayıpsız
misli ile değiştirilmesinin satıcı için
orantısız güçlükleri beraberinde
getirecek olması hâlinde tüketici,
sözleşmeden dönme veya ayıp
oranında bedelden indirim
haklarından birini kullanabilir.
Orantısızlığın tayininde malın ayıpsız
değeri, ayıbın önemi ve diğer
seçimlik haklara başvurmanın tüketici
açısından sorun teşkil edip
etmeyeceği gibi hususlar dikkate
alınır.
4. Ücretsiz onarım veya malın ayıpsız
misli ile değiştirilmesi haklarından
birinin seçilmesi durumunda bu
talebin satıcıya, üreticiye veya
ithalatçıya yöneltilmesinden itibaren
azami otuz iş günü, konut ve tatil
amaçlı taşınmazlarda ise altmış iş
günü içinde yerine getirilmesi
zorunludur. Ancak, bu Kanunun 58
inci maddesi uyarınca çıkarılan
596 / 818 - 898 / 550
maks. 60°C
2)
Page 39

yönetmelik eki listede yer alan
mallara ilişkin, tüketicinin ücretsiz
onarım talebi, yönetmelikte belirlenen
azami tamir süresi içinde yerine
getirilir. Aksi hâlde tüketici diğer
seçimlik haklarını kullanmakta
serbesttir.
5. Tüketicinin sözleşmeden dönme
veya ayıp oranında bedelden indirim
hakkını seçtiği durumlarda, ödemiş
olduğu bedelin tümü veya bedelden
yapılan indirim tutarı derhâl tüketiciye
iade edilir.
6. Seçimlik hakların kullanılması
nedeniyle ortaya çıkan tüm
masraflar, tüketicinin seçtiği hakkı
yerine getiren tarafça karşılanır.
Tüketici bu seçimlik haklarından biri
ile birlikte 11/1/2011 tarihli ve 6098
sayılı Türk Borçlar Kanunu hükümleri
uyarınca tazminat da talep edebilir.
14. ÇEVREYLE İLGİLİ BİLGİLER
TÜRKÇE 39
Tüketici, garantiden doğan haklarının
kullanılması ile ilgili olarak çıkabilecek
uyuşmazlıklarda yerleşim yerinin
bulunduğu veya tüketici işleminin
yapıldığı yerdeki Tüketici Hakem
Heyetine veya Tüketici Mahkemesine
başvurabilir.
Şu sembole sahip malzemeler geri
dönüştürülebilir . Ambalajı geri
dönüşüm için uygun konteynerlere
koyun. Elektrikli ve elektronik cihaz
atıklarının geri dönüşümüne ve çevre ve
insan sağlığının korunmasına yardımcı
olun. Ev atığı sembolü bulunan
cihazları atmayın. Ürünü yerel geri
dönüşüm tesislerinize gönderin ya da
belediye ile irtibata geçin.
AEEE Yönetmeliğine Uygundur.
*
Page 40

www.electrolux.com/shop
156918760-A-292017
 Loading...