

Electrolux ERM3701WE Installation Manual

installation manual
built-in
refrigeration
2 installation manual electrolux built-in refrigeration
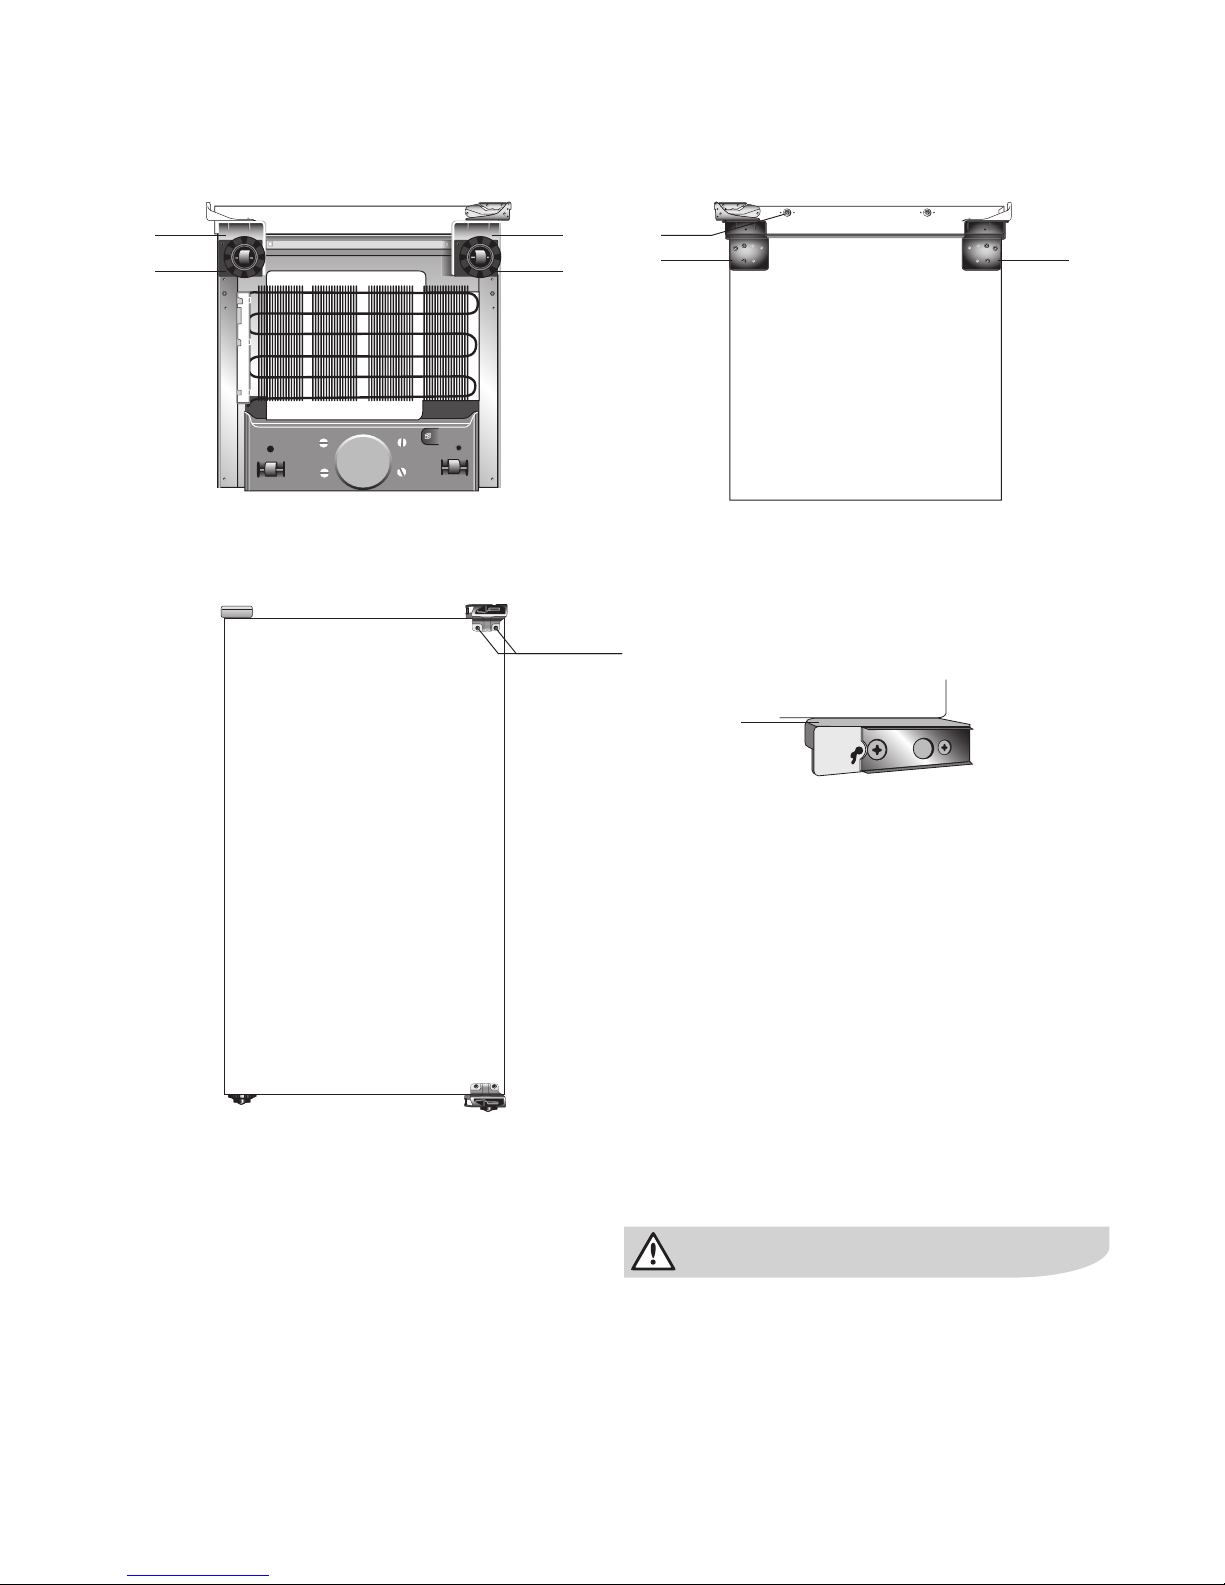
Fully assembled fridge bottom
1 Kit bottom hinge bracket assembly (non-hinge side)
2 Bottom front roller assembly
3 Sheet metal spacer
4 Kit bottom hinge mounting bracket assembly
5 Kit top hinge mounting bracket assembly (hinge side)
6 Kit top hinge mounting bracket assembly (non-hinge side)
Hinge side Non-hinge sideNon-hinge side Hinge side
1 14
2
5
2
6
Fully assembled fridge top
Fridge front
M5x10 screws
Thin metal spacer installed between
refrigerator cabinet and mounting
brackets on both sides.
3
NOTE:
We strongly recommend that a professional builder/
cabinetmaker builds this unit into required cabinetry
prior to fi nished installation in customer’s kitchen.
Electrolux can not take responsibility for any
installation issues when customer retrofi ts this
product into existing cabinetry.
warning
R600a refrigerant warning
This appliance contains a small quantity of environmentally
friendly, but fl ammable, non-synthetic R600a refrigerant:
• Ensure that the tubing of the refrigerant circuit is not
damaged during transportation and installation.
• Leaking refrigerant may cause eye injuries or ignite.
• The room for installing appliance must be at least 1m3
per 8g of refrigerant. The amount of refrigerant in the
appliance can be found on the rating plate inside the
appliance.

To reverse the door swing from a right hand swing to
a left hand swing.
Unscrew two M5 screws from Kit bottom mounting (hinge
side) and remove the hinge. Unscrew the two M5 screws
from Kit top mounting (non-hinge side) and remove the
plastic cover and the L-bracket. Swap the hinge and the
plastic cover and the L-bracket and re mount them on the
steel main brackets. Refi t the screws and ensure they are
fully tightened. Unscrew two M5 screws from Kit Top hinge
mounting (hinge side) and remove the hinge. Unscrew the
two M5 screws from kit bottom hinge mounting (non-hinge
side) and remove the plastic cover and the L-bracket.
Swap the hinge and the plastic cover with the L-bracket
and re-mount them on the steel main brackets. Refi t the
screws and ensure they are fully tightened. Do the opposite
of above if left hand swing is to be reversed with right hand
swing. In either case, follow the steps 1 to 27 of the general
installation pages.
tips and information
min. 438cm² airflow space
min. 152 cm²
airflow space
min. 625mm
max. 628mm
min. 690mm
min. 50mm
1772mm
1702mm
1780mm
1665mm
604mm
595mm
628mm
300mm
223mm
200mm
■
External dimensions depend on thickness of cabinet materials used.
■
Cabinet door widths should not exceed total cabinet width to allow proper door opening.
NOTE: kitchen cabinetry is not included with the appliance
min 690mm
639mm
max. external
cabinet width
min. 625mm
max. 628mm
approx. 240mm
depending on
external door width
max. 113°
min. 438cm² airflow space
Installation guide
electrolux built-in refrigeration installation manual 3
Keep ventilation openings in the appliance enclosure
or the built-in structure clear of obstruction.
warning
We strongly recommend that these
units are built into new cabinetry prior
to installation in the kitchen, by a
professional builder / cabinet maker.
Electrolux can not take responsibility
for any installation issues when
customer retrofi ts these products into
existing cabinetry.
 Loading...