

Electrolux EPWD15RR, EPWD15MB Installation Guide
KIT COMPONENTS:
Adjustable wrench
Llave ajustable
Clé à molette
Carpenter’s level
Nivel de carpintero
Niveau de charpentier
Universal wrench
supplied with washer
Llave universal propor-
cionada con la lavadora
Clé iniverselle fournie
avec la laveuse
Phillips screwdriver
Destornillador Phillips
Tournevis Phillips
OR
O
OU
OR
O
OU
AND
Y
ET
AND
Y
ET
9/16” or 14 mm box wrench
Llave de cubo de
9/16 po o 14 mm
Clé polygonale de
9/16 po ou de 14 mm
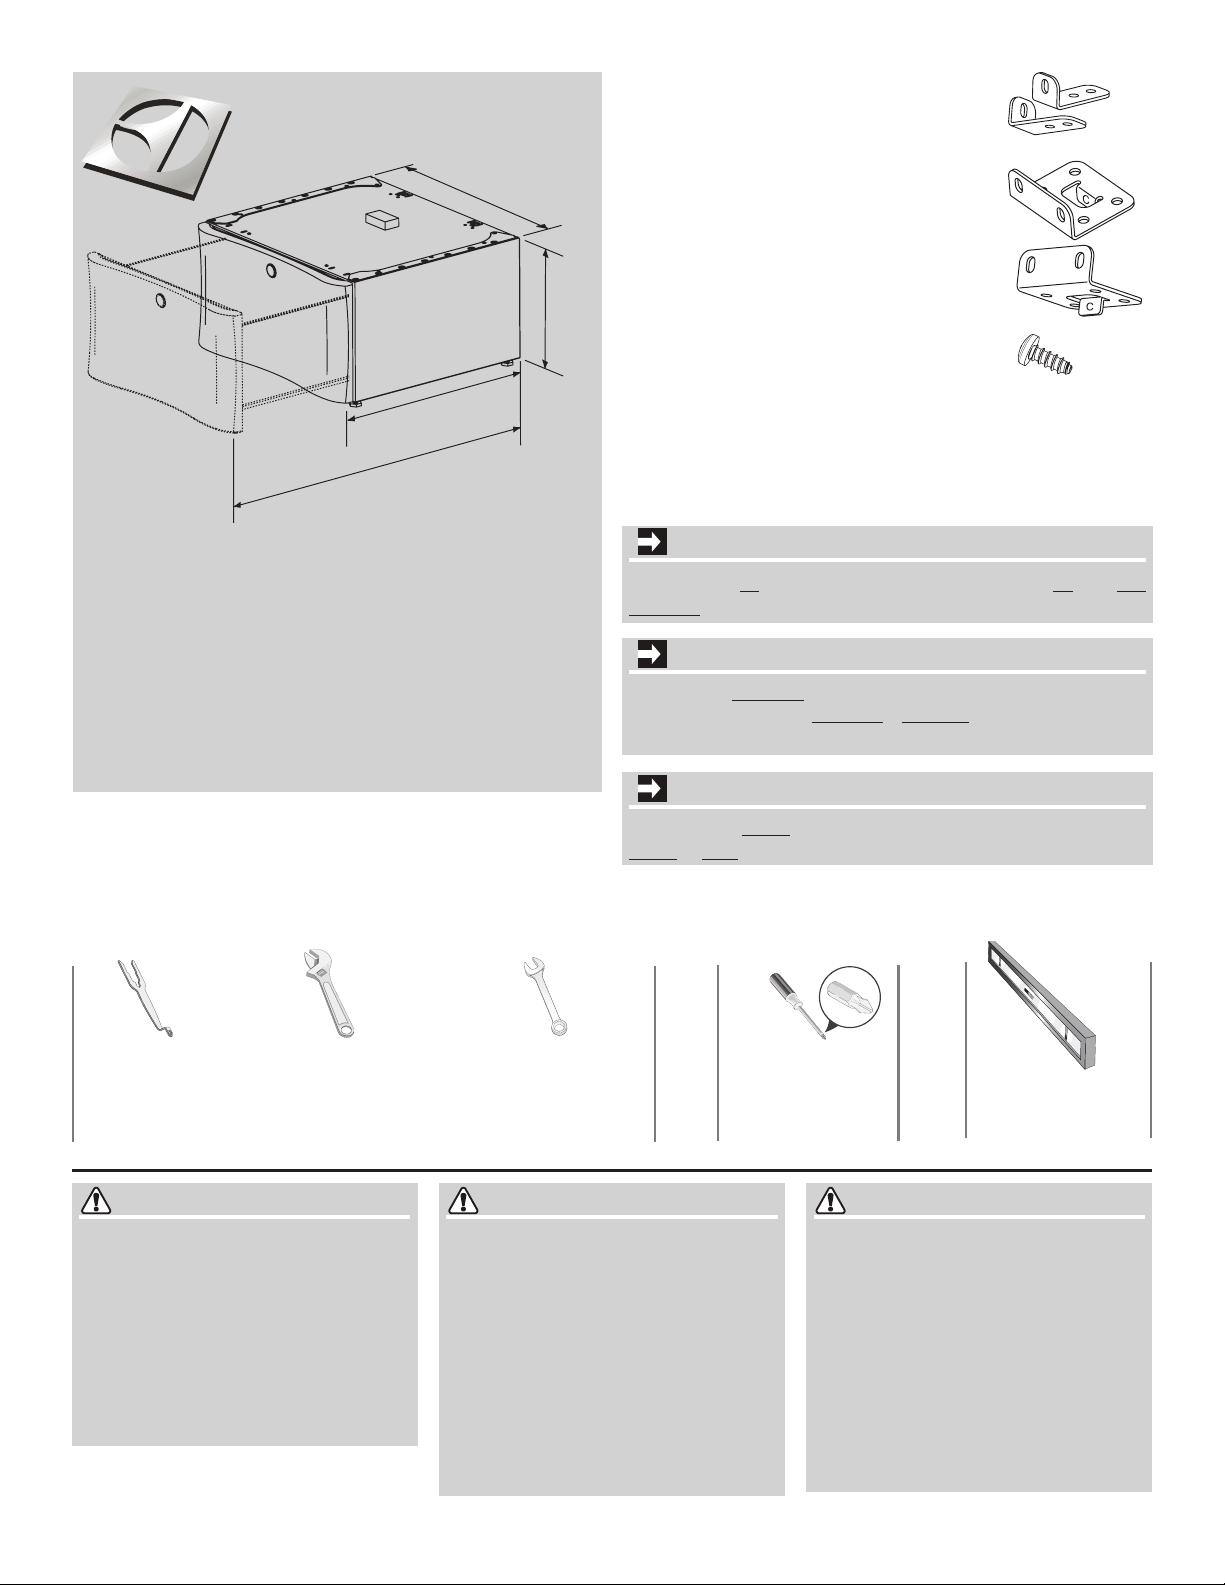
26.5”
(67 cm)
42.5”
(108 cm)
1 5 ”
( 3 8 c m )
2 7 ”
( 6 8 . 5 c m )
1 Pedestal Installation Instructions.•
2 Front brackets.A
2 Rear brackets.B
14 #10 (16 x .500) screws.C
A
B
Installation Instructions
Electrolux 15” Pedestal
Instrucciones de Instalación
Pedestal Electrolux de 15" (38,1 cm)
Instructions d’installation
Socle de 38 cm (15 po) Electrolux
Tools needed:
Herramientas necesarias:
Outils nécessaires:
134863100 A (0807)
COMPONENTES DEL KIT
1 libro de instrucciones de instalación•
2 soportes delanteros.A
2 soportes traserosB
14 C tornillos n.º 10 (16 x .500).
.
COMPOSANTS DU
NÉCESSAIRE
1 instructions d’installation•
2 supports avant.A
2 supports arrièreB
14 vis n° 10 (16 x .500).C
:
.
:
C
IMPORTANT
Total weight IN closed drawer or combination of IN and ON
TOP OF open drawer should not exceed 65 lb. (29.5 kg).
IMPORTANTE
El peso total DENTRO del cajón cerrado o el peso combinado de
los artículos que estén DENTRO y ENCIMA del cajón abierto no
debe exceder las 65 lb (29,5 kg)
.
IMPORTANT
Le poids total DANS un tiroir fermé ou une combinaison du poids
DANS et SUR le tiroir ouvert ne doit pas excéder 29,5 kg (65 lb)
.
WARNING
Failure to disconnect from power •
source before stacking could result in
personal injury or even death.
Improper installation of dryer venting •
could result in personal injury or
damage to property.
To avoid back or other injury, have •
more than one person move or lift the
washer or dryer.
ADVERTENCIA
El no desconectar el suministro eléctrico •
antes de la instalación apilada puede
ocasionar lesiones personales o incluso
la muerte.
La instalación inadecuada de la •
ventilación de la secadora puede
ocasionar lesiones personales o daños a
la propiedad.
Para evitar lesiones en la espalda u •
otro tipo de lesiones, procure levantar
o mover la lavadora o secadora con la
ayuda de más de una persona
1
.
AVERTISSEMENT
Ne pas débrancher l’appareil de sa •
source d’alimentation en électricité
avant de le superposer peut causer des
blessures, voire la mort.
Une installation inappropriée du système •
de ventilation de la sécheuse peut
causer des blessures ou des dommages
matériels.
Pour éviter les blessures au dos ou •
d’autres types de blessure, demandez
l’aide d’autres personnes pour déplacer
ou soulever la laveuse ou la sécheuse
.
ENGLISH
NOTE
Due to higher center of gravity of appliance on pedestals,
some side-to-side rocking is normal during operation. Vibration
can be minimized by assuring appliance is installed properly,
including being level and solid on all four (4) legs by following
these directions.
A) Preparing washer or dryer for mount-
ing on pedestal
If washer or dryer is new and has not been installed yet, skip 1.
to step 4.
If dryer is already installed, disconnect dryer from electrical 2.
and gas connections and exhaust venting. On models with
Steam Option, turn off cold water supply and disconnect water supply hose to dryer.
If washer is already installed, disconnect washer from electri-3.
cal connection. Turn off hot and cold water supply and disconnect hot and cold water supply hoses from water supply
outlets. Disconnect drain hose from drain pipe.
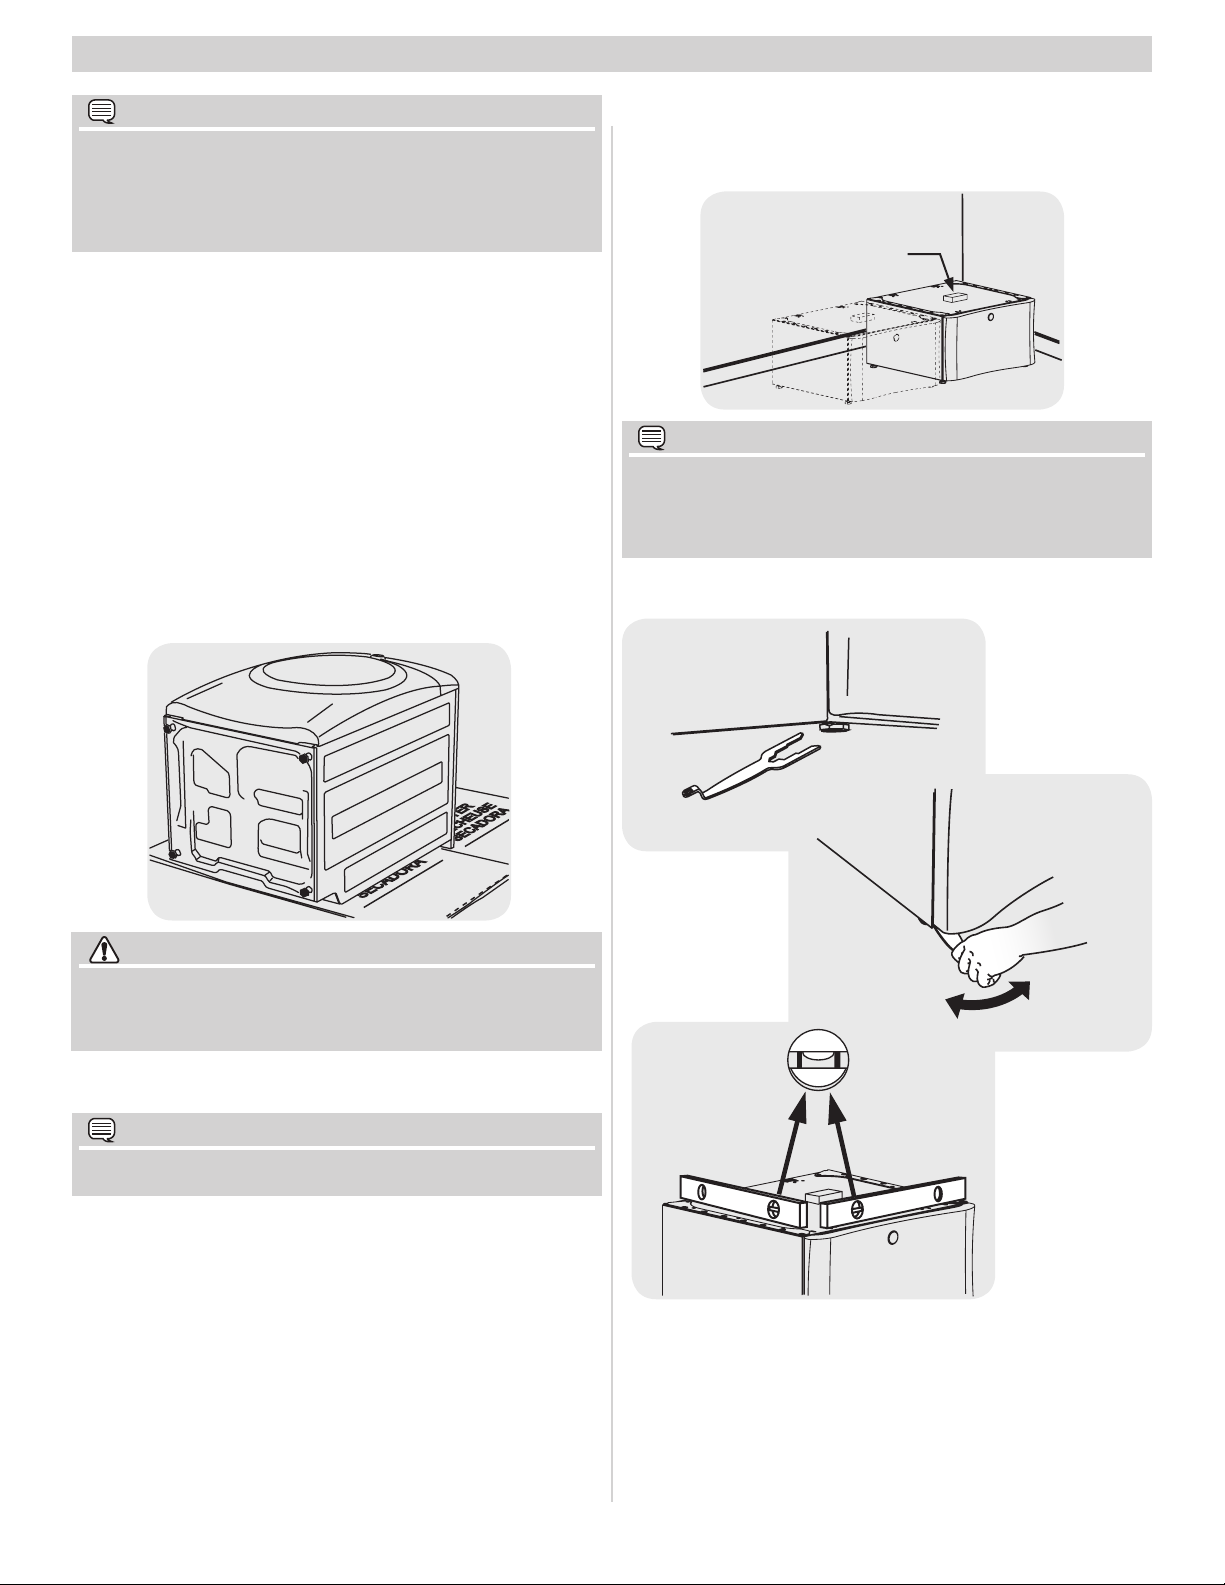
Protect floor with cardboard or other covering. Using two or 4.
more persons, carefully tip the washer or dryer onto its back.
Take care not to damage hoses and/or electrical cords as you
lay the unit back.
B) Preparing pedestal before mounting
washer or dryer
Locate pedestal to within a few inches of its final location.1.
DO NOT remove foam!
NOTE
Allow for approximately 5 in. (12.5 cm) behind the pedestal
for clearance of back of washer or dryer to the wall. Allow an
additional 3/4 in. (2 cm) for water inlet on Steam Model Dryers
and additional space if venting dryer upward or downward.
Level the pedestal front-to-back and side-to-side by adjusting 2.
each leveling leg. Keep leg extension to a minimum.
CAUTION
EXCESSIVE WEIGHT HAZARD
To avoid back or other injury, have more than one person move
or lift the washer or dryer.
Remove all four (4) adjustable leveling legs from the appliance 5.
base and save for future use.
NOTE
If leveling legs are not removed, mounting holes in appliance
will not align to mounting holes in brackets.
Carefully return appliance to upright position.6.
raise
lower
2

Rock the pedestal from corner-to-corner to check for stability. 3.
Repeat leveling and rocking until all four (4) feet are sturdy on
the floor and pedestal is level.
Without turning the rubber foot, lock each pedestal leg in 4.
place by tightening its lock nut tight against the pedestal base.
lock nut
Install 2 screws through each rear bracket into aligning pedes-3.
tal holes.
C3a (WASHER)
C3b (DRYER)
D) Mounting washer or dryer
CAUTION
EXCESSIVE WEIGHT HAZARD
To avoid back or other injury, have more than one person move
or lift the washer or dryer.
Using two or more persons, slightly tip the washer or dryer 1.
back and lift it onto the pedestal. Still tipped, slide the appliance back against the rear brackets and gently set down the
front so the appliance is between the front and rear brackets.
C) Attaching mounting hardware
Attach each front clip to outer-most set of holes with 2 screws.1.
Insert “C” tab of each rear bracket into the widest slots on rear 2.
of pedestal. Orient bracket outward for washer mounting (image
C2a). Orient bracket inward for dryer mounting (image C2b).
C2a (WASHER)
tab
slot
outward
SLIDE BACK
TIP DOWN
Adjust the appliance side-to-side to align its mounting holes 2.
with the pedestal’s bracket holes.
Install 2 screws through each rear bracket into the base of the 3.
washer (image D3a) or dryer (image D3b).
D3a (WASHER)
With the pedestal drawer open for better access, install a screw 4.
through each front bracket into the base of the washer or dryer.
D3b (DRYER)
C2b (DRYER)
tab
slot
inward
E) Installing or re-installing washer or dryer
Slide appliance/pedestal into place.1.
Check for levelness and rock all four (4) legs again. Repeat 2.
until level and solid.
Refer to Washer or Dryer Installation Instructions for complete de-3.
tails on installing water, drain, electrical, gas, or exhaust venting.
3
 Loading...