

ELECTROCOMPANIET ECM 1 Owner's Manual
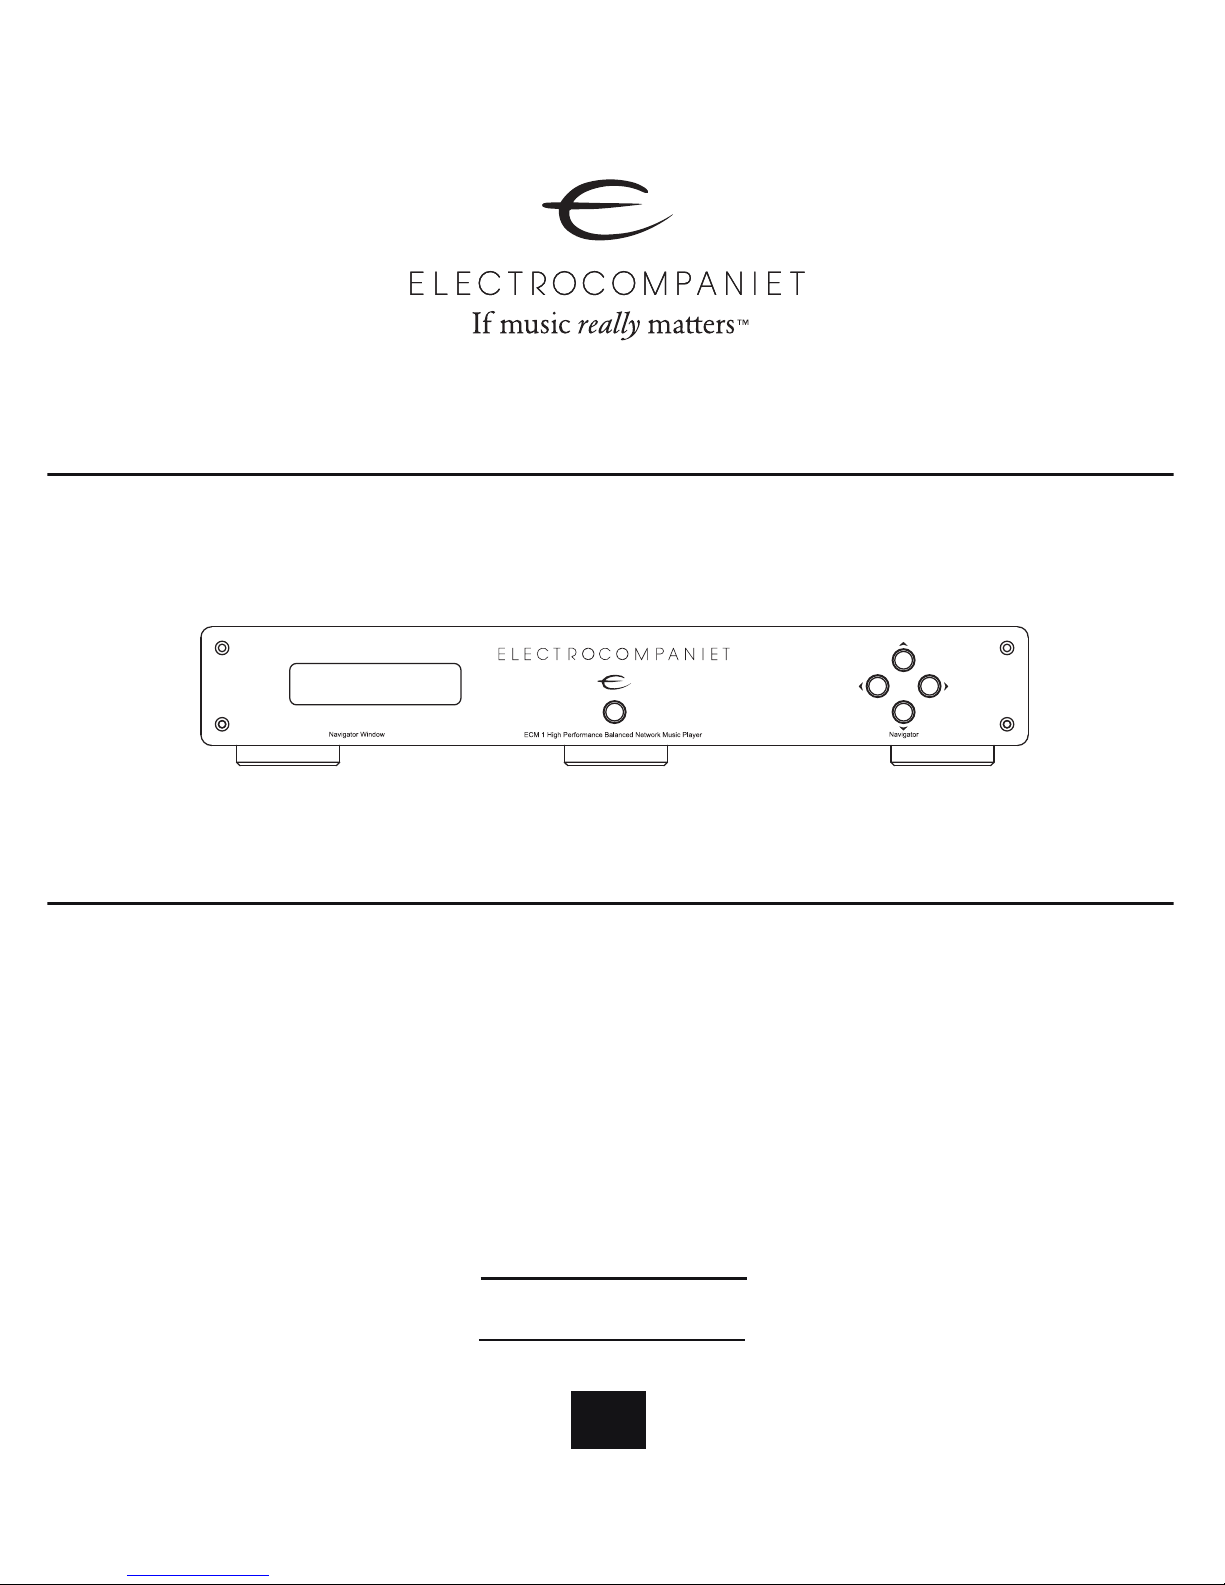
ECM 1
Balanced Network Music Player
with
built-in DAC
Owner's Manual
ENGLISH
EN

2
ENG
Welcome to the world of Electrocompaniet!
We thank you for choosing an Electrocompaniet high-end product.
At Electrocompaniet we are relentlessly focused on developing
audio equipment that is capable of bringing the fabulous experience of the concert hall into the very heart of your home.
Our aim when developing and testing new products is to ensure
that the wonderful richness of tone and every nuance of feeling
and emotion of a piece of music is delivered to you just as the artist
intended.
We continually strive to give you the very best musical listening
experience available whatever your preferred musical genre.
Sincerely yours
Mikal Dreggevik
CEO

3
ENG
Unpacking the ECM 1
Immediately upon receipt of the ECM 1, inspect the carton for possible damage
during shipment. The carton and packaging have been designed to provide the
safest possible protection for transport of your network music player. Unpack the
unit carefully. Save all packaging materials for future shipment.
The contents of the carton
• 1 pc. Electrocompaniet ECM 1 Network Music Player.
• 1 pc. AC main cord.
• 1 pc. Inspection card.
• 1 pc. Owner's manual.
• 1 pc. IR Remote control.
Set up procedure
Before connecting the ECM 1 to the AC Power outlet, check that the main voltage
selector indicated on the rear panel corresponds to the line voltage in the country
were you intend to use the unit.
How to avoid damages
Do not under any circumstances connect or disconnect equipment when power is
turned on. The design of the RCA plug generates a huge transient when inserted.
Connecting or disconnecting equipment with the power on can result in severe
damage to both speakers and amplifier.
How to avoid noise problems
The ECM 1 contains delicate circuits that are sensitive to magnetic stray fields. The
unit should not be placed near power voltage transformers, TV sets etc. Care should
also be taken regarding placement of the interconnect cables. Do not run interconnect
cables in parallel with main cords or speaker cables. Keep interconnect cables as
short as possible.
How to avoid possible antenna problems
In some set-ups hum may occur when you connect the radio, VCR or TV to your
system. The problem is caused by DC voltage coming from your antenna. Please
contact your cable network operator.
4
ENG
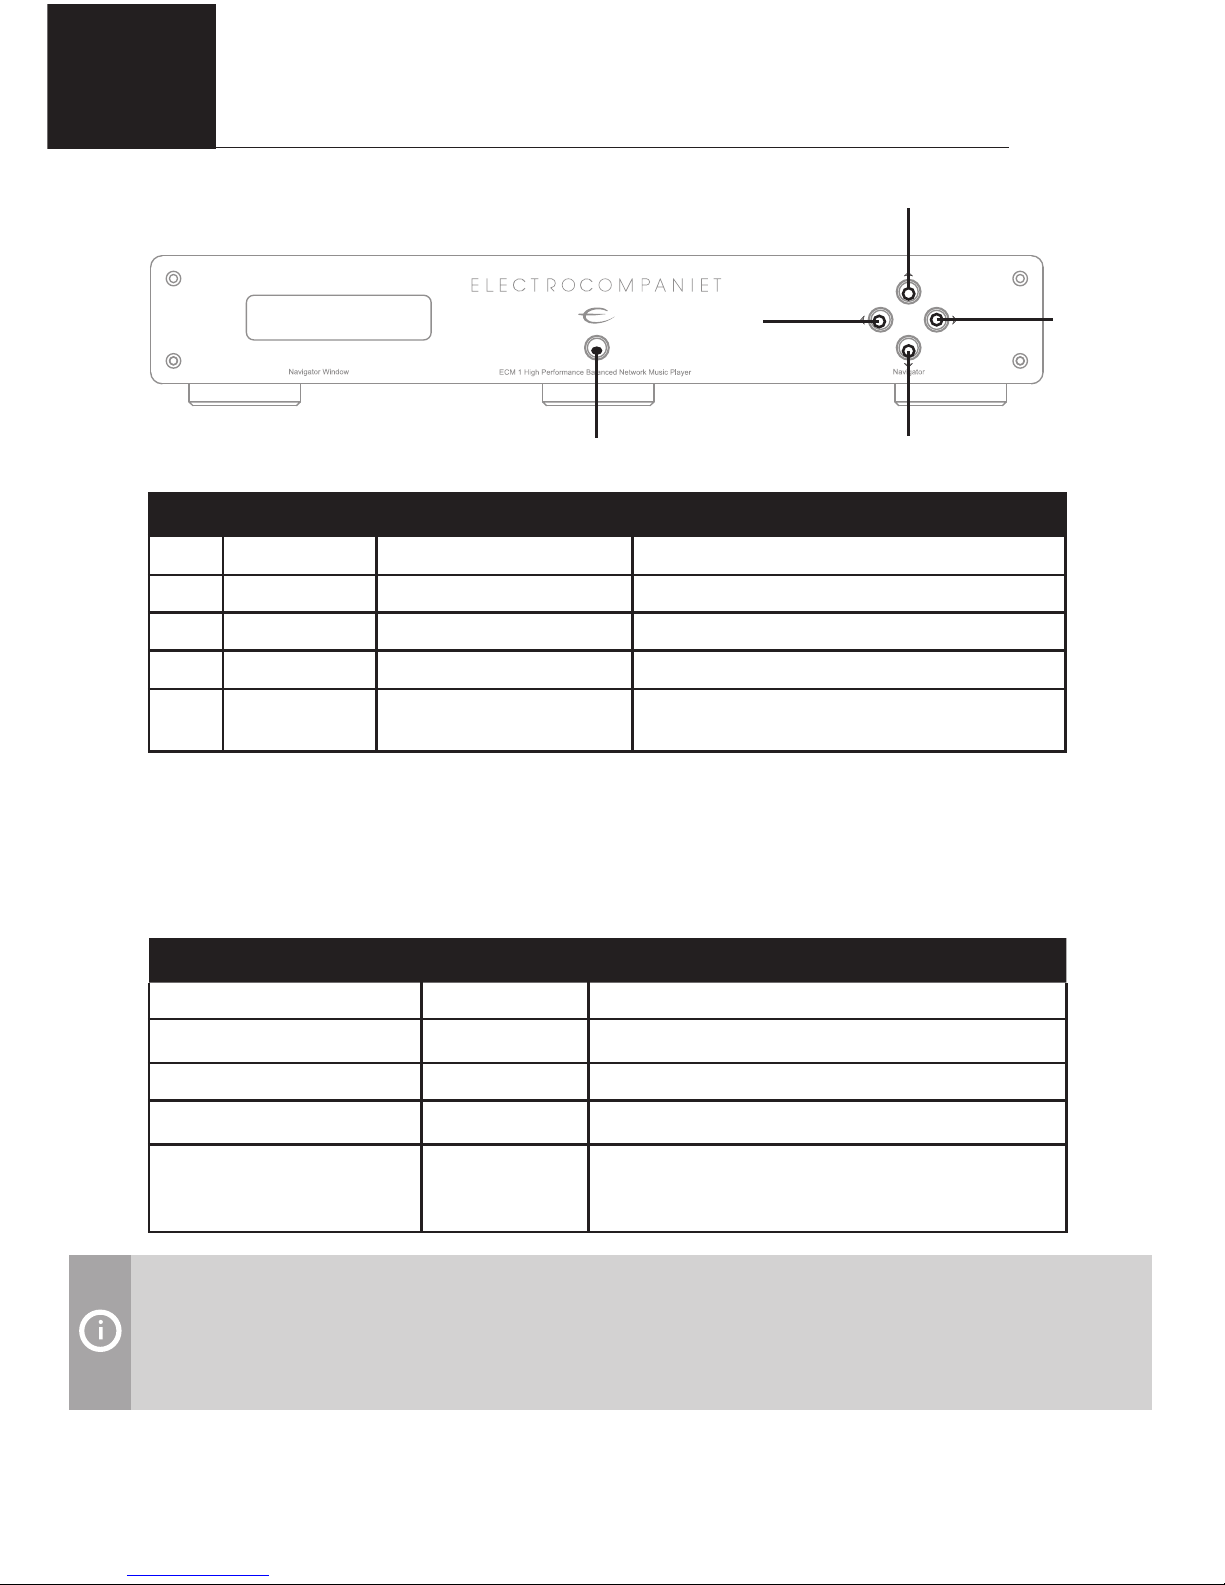
Front panel overview
Nr. Button Function Description
1 UP Volume Up Increases the volume level.
2 DOWN Volume Down Decreases the volume level.
3 LEFT Select source left Selects the next source to the left.
4 RIGHT Select source right Selects the next source to the right.
5 STANDBY Standby mode
In daily operation, switch off the ECM 1
by using the STANDBY
Navigator window
The display is showing the active input, the sample rate/bit depth and the volume
setting. The display have two display modes: Input and Status.
Input display mode
Audio Source Display Text Description
COAX 1 COAX1 Coaxial S/PDIF input up to 192 kHz/24 bit
COAX 2 COAX2 Coaxial S/PDIF input up to 192 kHz/24 bit
TosLink 1 TOSLNK1 Optical S/PDIF input up to 192 kHz/24 bit
TosLink 2 TOSLNK2 Optical S/PDIF input up to 192 kHz/24 bit
LAN/Wi-Fi Streaming
service name
If audio source is LAN/WiFi, the display text
shows the current source (e.g. Music, Tidal,
Spotify, etc.)
When the ECM 1 is not in use for a long period of time, use the main switch
(located on the back panel) to turn the unit off. Then disconnect the AC main cord
for maximum safety.
2
3
5
4
1
5
ENG
Status display mode
The display mode shows the volume setting and sample rate for the selected input. The
display enters into “status” mode when the volume control is operated and when new
input is activated, input or the sample rate is changed. After 5 seconds the display will
revert back to the INPUT mode. In “status” mode the following information is displayed:
The first part shows the current sample rate of the input
and the last number shows the volume level. Sampling
rate is only shown for external/DAC inputs. For streaming
services, the status mode does not show the sampling rate.
The volume has ranges from 0 to 100.
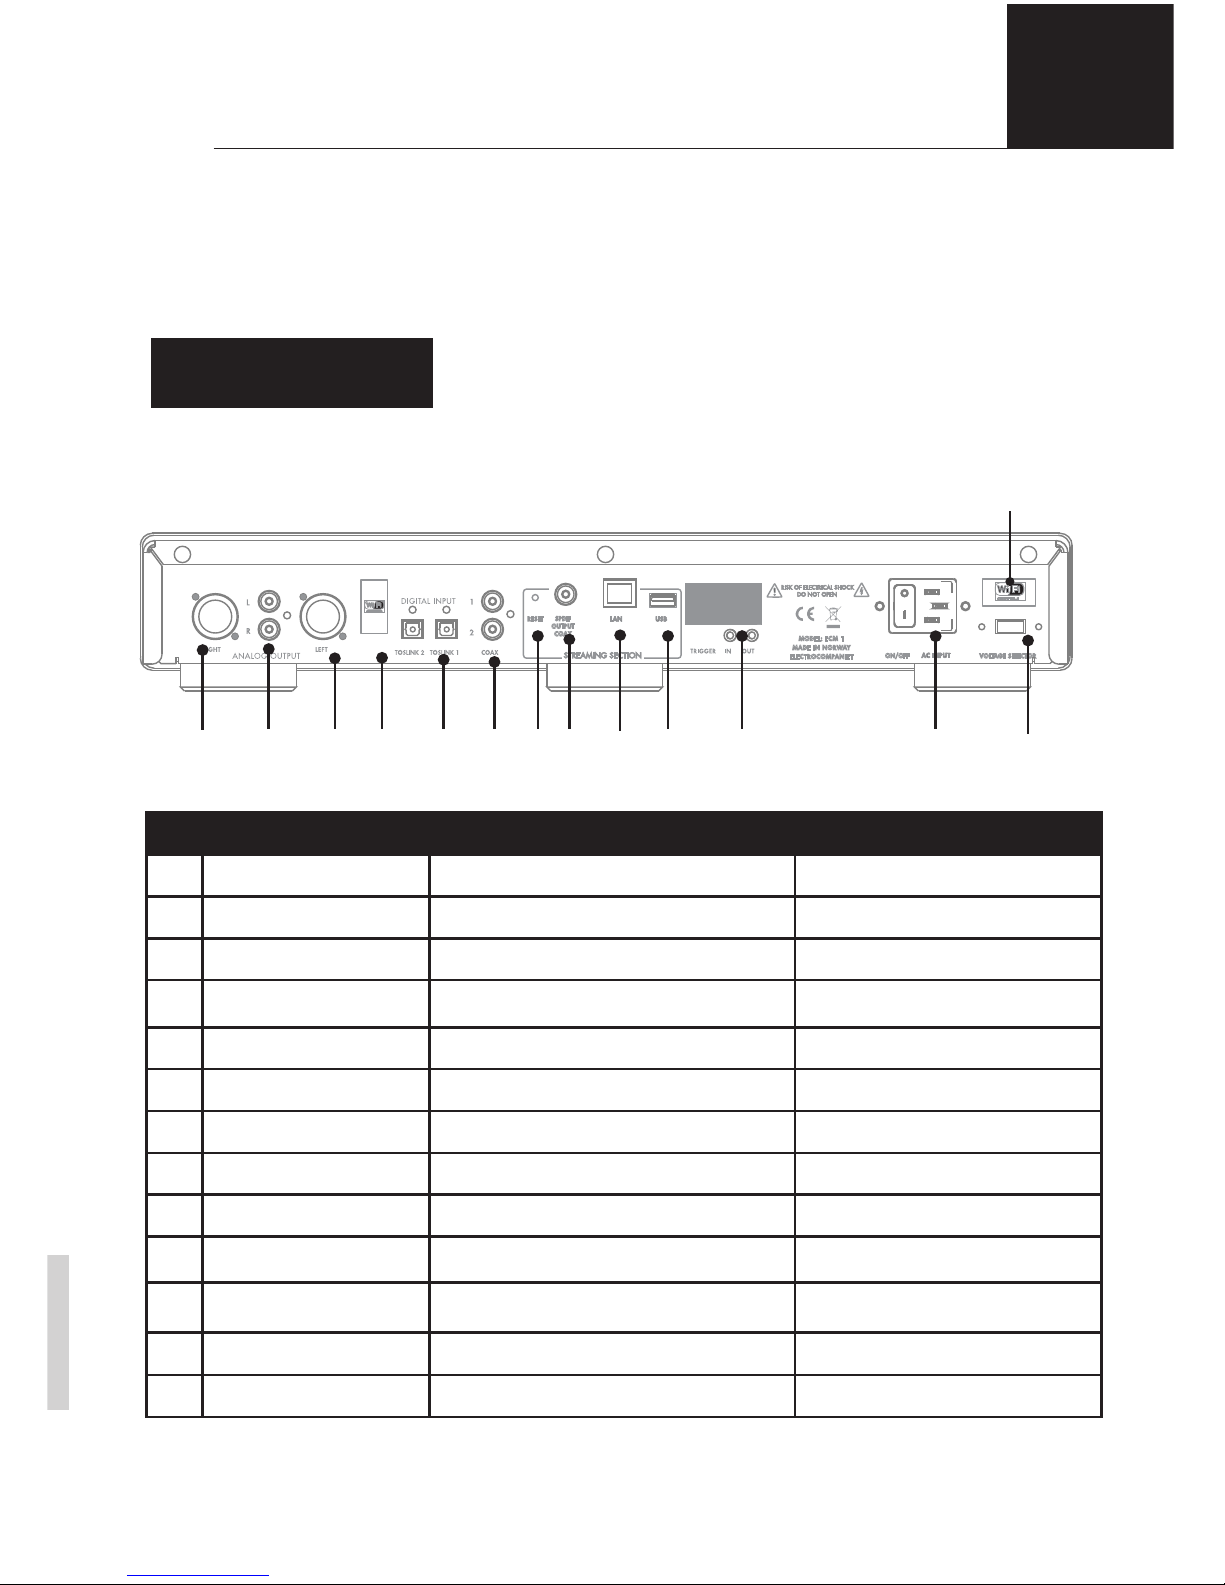
Rear panel overview
Nr.
Name Used for Connection type/Cable
1 Voltage Selecting input voltage 110/240V N/A
2 Power / AC Input Power ON/OFF button. Input power Supplied power cable
3 Trigger in/out 12V trigger control in-/output 3,5mm mono mini jack
4 USB input External usb storages USB
5 LAN Network conection RJ 45/ Cat 5 or higher
6 SPDIF Coaxial digital audio output (SPDIF) Coaxial digital cable
7 Reset Reset of the unit to factory settings N/A
8 Coax input 1/2 Coaxial digital input Coaxial digital cable
9 Toslink inputs 1/2 Optical digital audio input TOSLINK / optical cable
10 Wireless antenna Wireless connection N/A
11 XLR output left Balanced audio connection XLR / balanced audio cable
12 RCA output Left/ Right Analog unbalanced audio connection RCA / unbalanced audio cable
13 XLR output right Balanced audio connection XLR / balanced audio cable
SPDIF
OUTPUT
COAX
VOLTAGE SELECTOR
RESET
MODEL: ECM 1
MADE IN NORWAY
ELECTROCOMPANIET
ON/OFF
127 6
5
4 38912 11 1013
192kHz 100
10
6
ENG
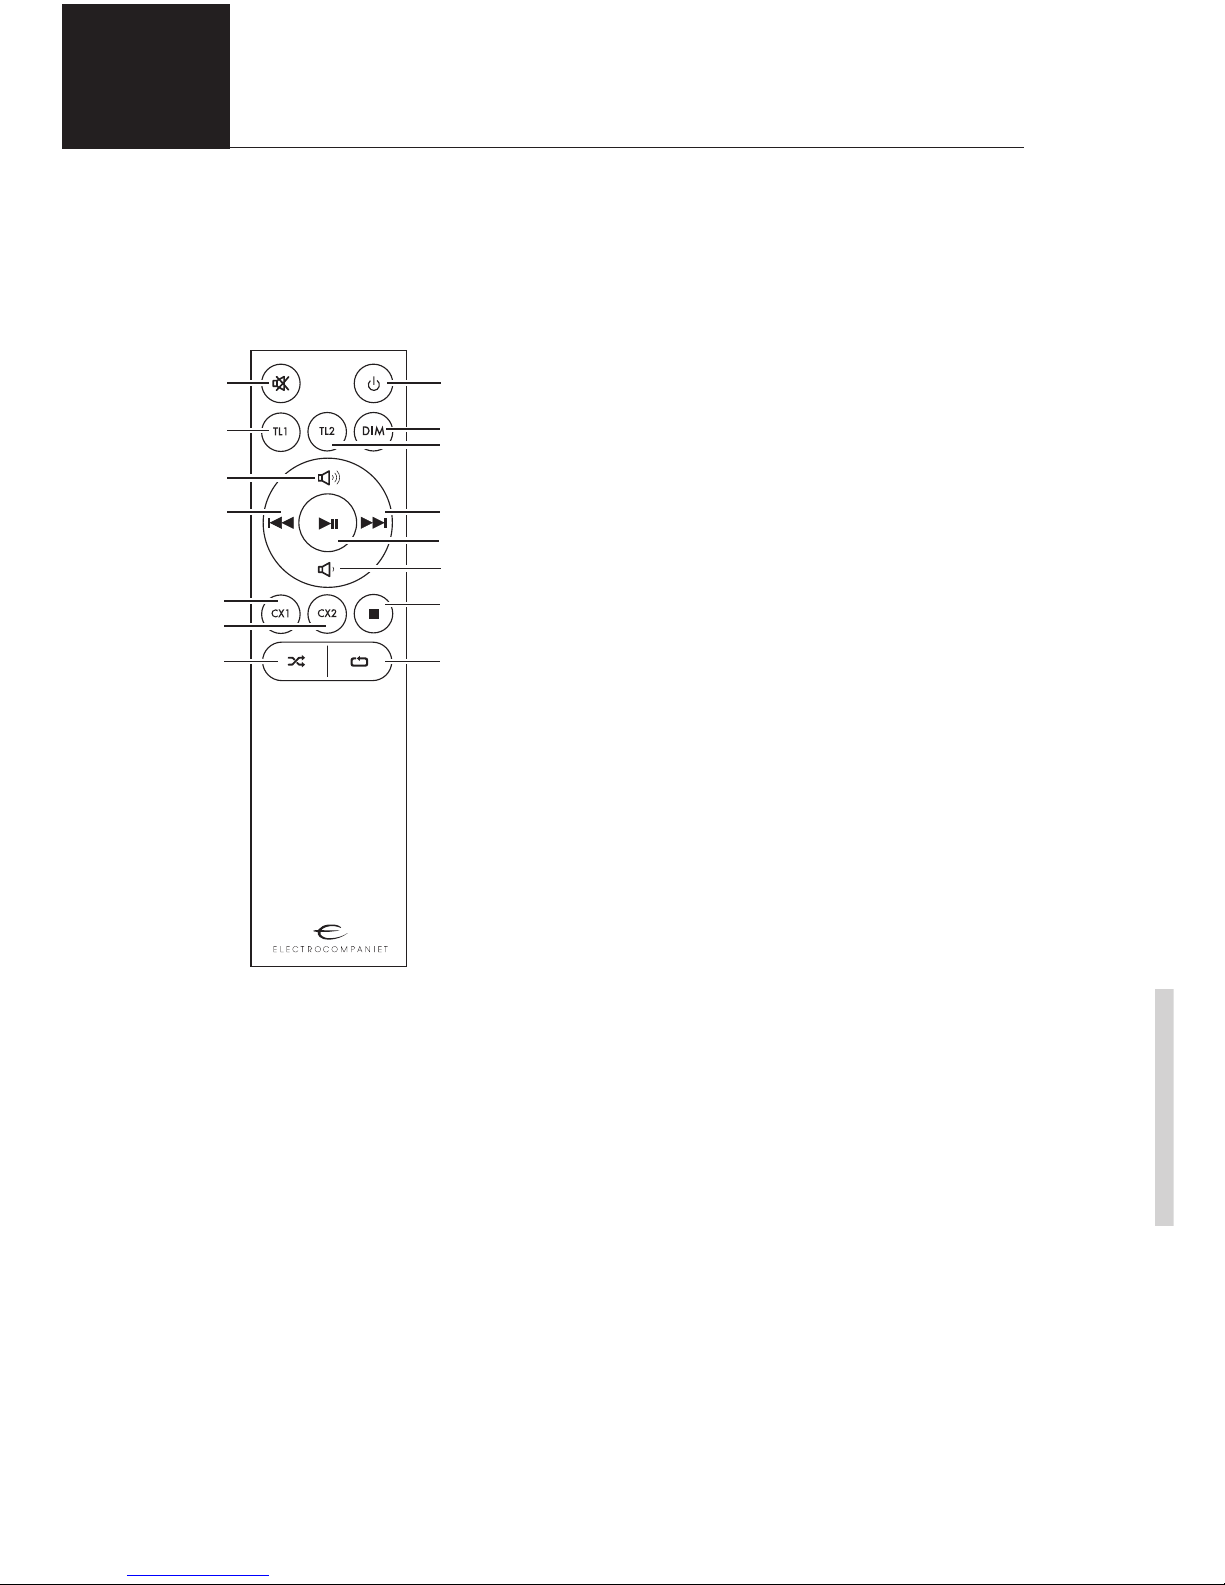
Using the remote
When using the remote control, the front end of the remote control should be pointed to
the front panel of your ECM 1. A free line of sight is required between the remote and the
infrared sensor on the front panel.
REMOTE CONTROL
1. Mute - on/off.
2. Standby button.
3. DAC input selector: TOSLINK 1.
4. DAC input selector: TOSLINK 2.
5. DAC input selector: COAX 1.
6. DAC input selector: COAX 2.
7. DIM - dimming the display.
* Keep in mind that the display can be
dimmed to zero brightness.
8. Volume UP.
9. Volume DOWN.
10. Previous track.
11. Next track.
12. Shuffle.
13. Repeat.
14. Play/Pause
15. Stop.
Replacing batteries
Use 1pc CR2032 batteries. Observe correct
polarization when inserting batteries. Please
remove batteries when the remote is not used
for a prolonged period of time.
IR Remote control codes ( page 18)
4
8
2
14
11
5
6
15
13
12
10
9
7
3
1
 Loading...