

EKWB EK-Quantum Momentum VRM Bridge ROG Maximus XII Formula D-RGB - Plexi Service Manual
EKQuantum
Momentum VRM Bridge ROG Maximus XII Formula D-RGB - Plexi
USER GUIDE

This product is intended for installation only by expert users.
Please consult with a qualified technician for installation. Improper
installation may result in damage to your equipment. EK Water
Blocks assumes no liabilit y whatsoever, expressed or implied,
for the use of these products, nor their installation. The following
instructions are subject to change without notice. Please visit our
web site at www.ekwb.com for updates. Before installation of this
product please read important notice, disclosure and warranty
conditions printed on the back of the box.
Before you start using this product please follow these basic guidelines:
Please carefully read the manual thoroughly before beginning
with the installation process!
Please remove your motherboard from the computer to assure
safest mounting process in order to prevent any possible
damages to your CPU and/or motherboard’s circuit board (PCB).
The EK- Fittings require only a small amount of force to screw
them firmly in place since the liquid seal is ensured by the
rubber o-ring gaskets.
The use of quality, market proved corrosion inhibiting coolants
is always strongly recommended for any liquid cooling system.
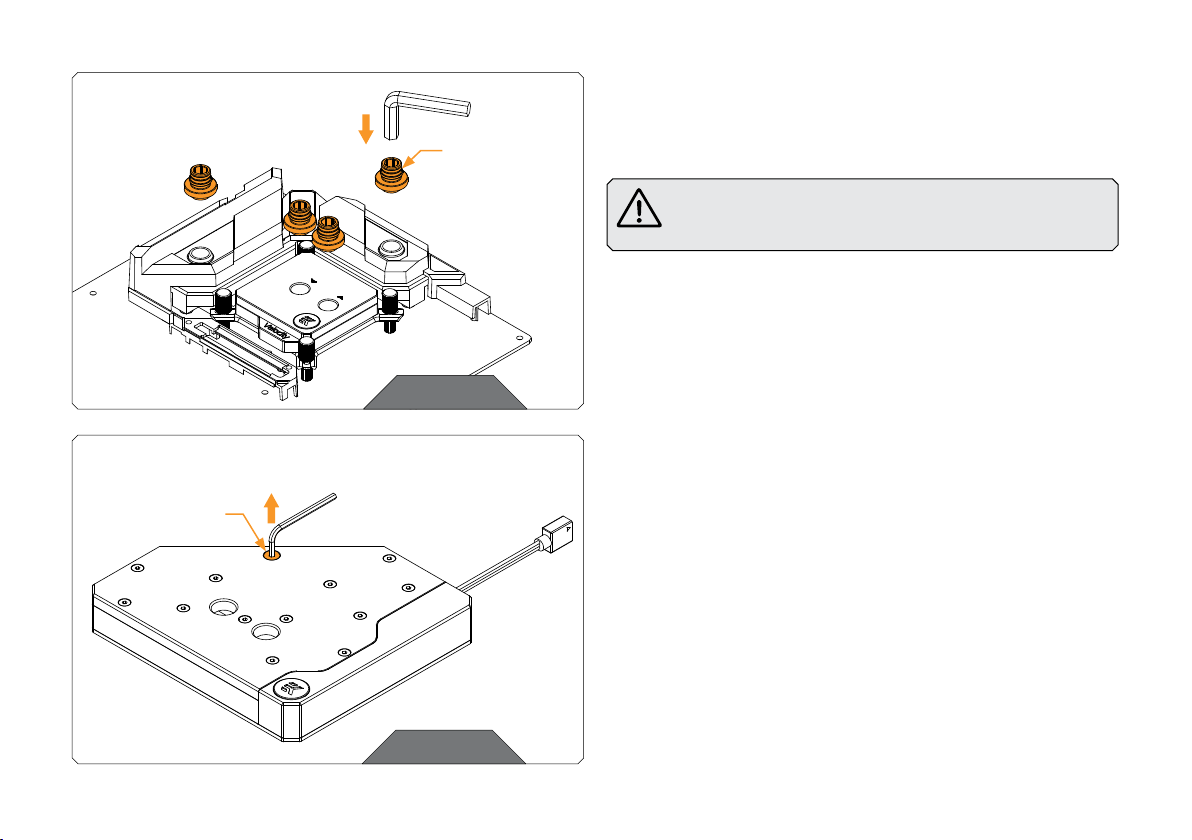
M4 x 22 Screw
Fixation Fitting
STEP 1
STEP 1
Install your EK-Quantum Velocity or Velocity Strike CPU water block in
the illustrated orientation and place the motherboard on a secure flat
surface. Using the enclosed 8mm Allen key, install all four (4) fixation
fittings to the pre-installed VRM block and CPU block.
Always consult the latest available manual for CPU block
installation. Do not use excessive force when tightening
the fittings.
STEP 2
Unscrew the M4 x 22 screw using the enclosed 2.5mm Allen key and
remove it from the block.
STEP 2
- 3 -
 Loading...