

Page 1

®
BAS 18-2/1H
Art.-Nr.: 45.128.70
Operating Instructions
Battery-powered Drill/Screwdriver
with Adjustable Torque
Istruzioni d’usoTrapano-avvitatore
elettronico ad accumula tore con
regolazione coppia di rotazione
Käyttöohje
Elektroninen akkuporakone/ruuvin
väännin vääntömomentin säädöllä
BAS 18-2/1H_GB, I, FIN 14.05.2001 14:21 Uhr Seite 1
Page 2
2
Important: Read and note the opera
ting instructions and safety regulations
before using!
Attenzione: prima della messa in fun
zione leggere ed osservare le istruzioni
d’uso e le avvertenze sulla sicurezza.
Huomio: Ennen käyttöönottoa on luett
ava käyttöohje ja turvallisumääräykset
huolella ja noudatettava niitä!
Please pull out pages 2-5
Aprire le pagine dalle 2 alla 5
Käännä sivut 2-5 auki
Page 6 - 9
Pagina 10 - 13
Sivu 14 - 17
BAS 18-2/1H_GB, I, FIN 14.05.2001 14:21 Uhr Seite 2
Page 3
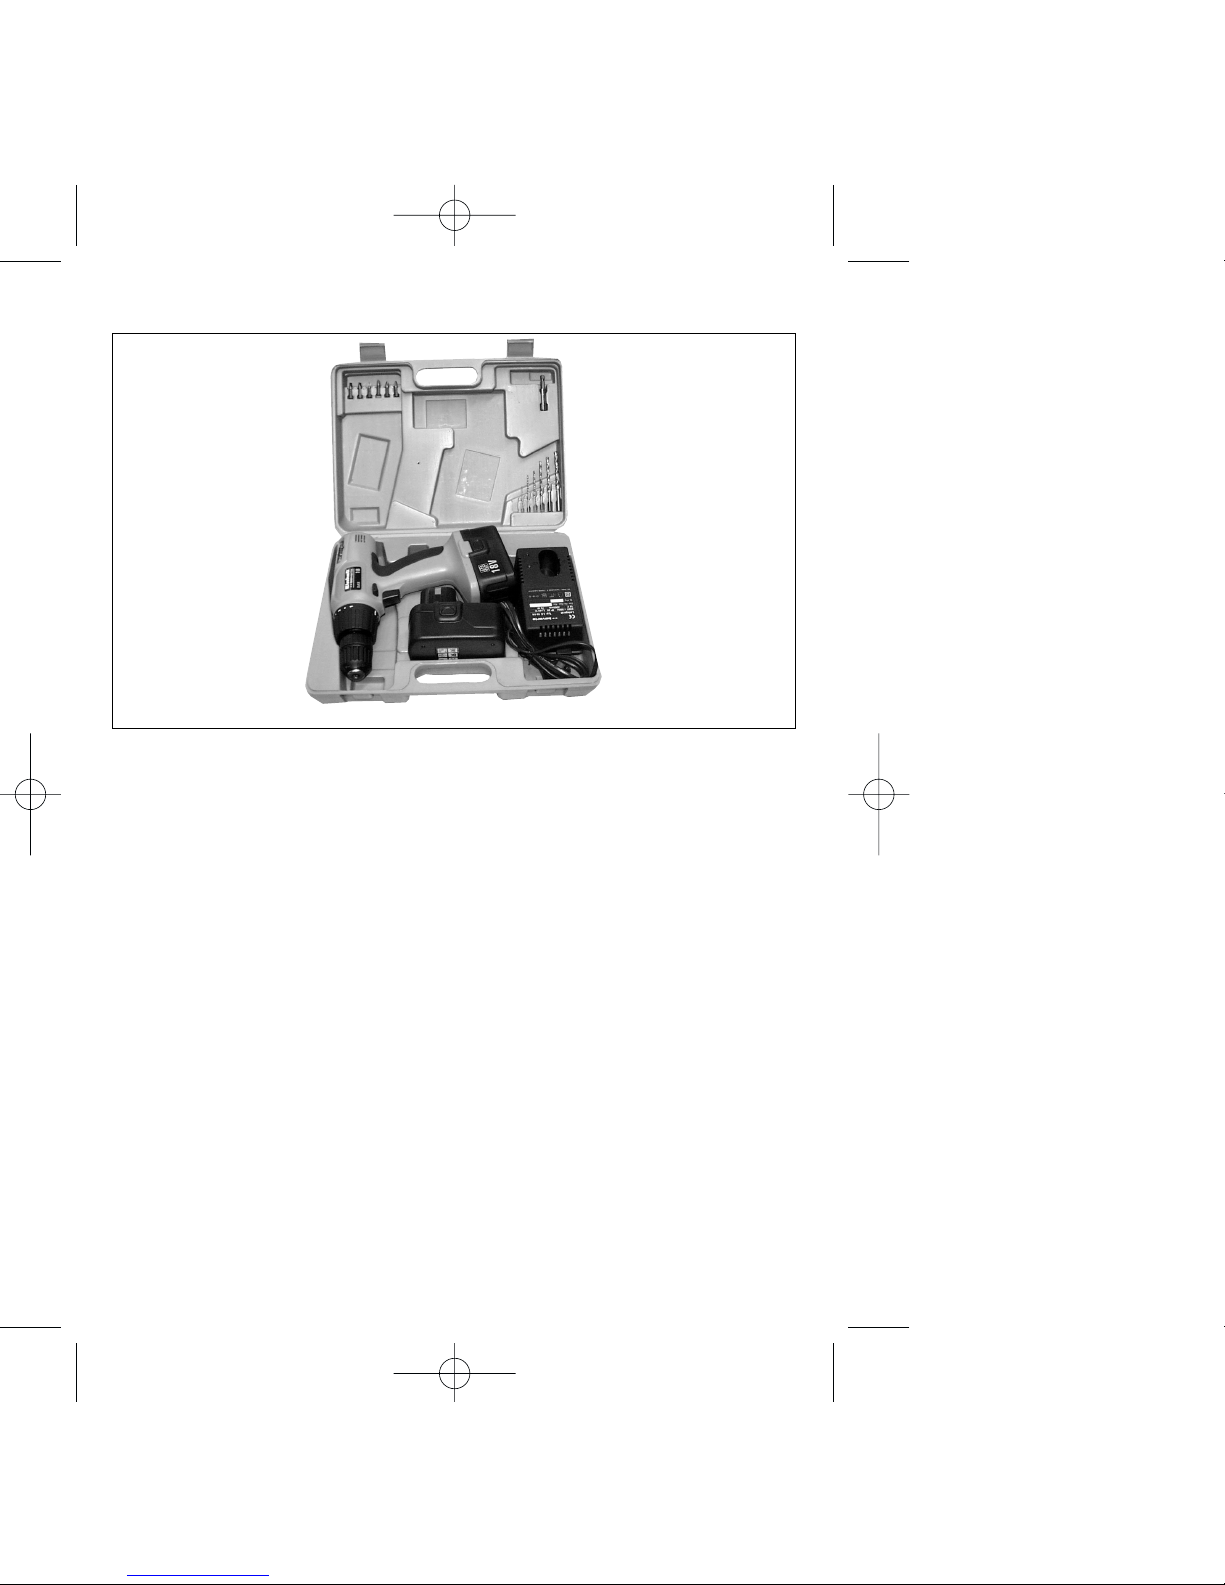
Items supplied:
1 cordless drill/scr-
ewdriver
2 removable batte-
ries
1 battery charger
1 storage case
6 HSS bits
6 bit inserts
1 bit holder
Elementi forniti
1 trapano avvitatore
a batteria
2 batterie di ricam-
bio
1 caricabatteria
1 contenitore a vali-
getta
6 trapani di acciaio
superrapido
6 inserti giravite
1 portainserti
Toimitukseen
kuuluu:
1 akkukäyttöinen
pora-ruuviväännin
2 kpl vaihtoakkua
1 laturi
1 säilytyslaukku
6 HSS-poranterää
6 kärkipalaa
1 palanpidike
FIN
BAS 18-2/1H_GB, I, FIN 14.05.2001 14:21 Uhr Seite 3
Page 4

BAS 18-2/1H_GB, I, FIN 14.05.2001 14:21 Uhr Seite 4
Page 5

BAS 18-2/1H_GB, I, FIN 14.05.2001 14:21 Uhr Seite 5
Page 6

6
Tool illustration:
Figure 1: Torque adjustment
facility
Figure 2: Bit holder
Figure 3: Forward / Reverse
selector switch
Figure 4: On/Off switch
Figure 5: Removable battery
pack; press both
clips to take out the
battery pack
Important notes:
It is imperative to read these notes
before putting your battery-powered drill/screwdriver into operation:
1. The removable Ni-Cd battery
pack supplied with your battery-powered drill/screwdriver
has to be charged before you
use the tool for the first time.
2. Use the supplied battery char-
ger to charge the battery pack.
It takes a maximum of 1 hour
to charge an empty battery. Do
not use the supplied battery
charger to charge any other
tools or appliances.
3. The battery pack reaches its
maximum capacity after
approx. five discharge/charge
cycles.
4. Ni-Cd batteries will also
discharge when they are not in
use. It is recommended, therefore, to charge the batteries
regularly.
5. Please note the data quoted on
the rating plate of the battery
charger. Operate the charger
only from the same mains
voltage as that quoted on the
rating plate.
6. In periods of heavy duty the
battery pack will grow warm.
Allow the battery pack to cool
to room temperature before
starting to charge it.
Safety regulations:
1. Protect your battery-powered
drill/screwdriverand charger
from the damp and rain.
2. Keep the charger and batterypowered drill/screwdriver safe
from children.
3. Use only sharp drill bits and
undamaged, properly fitting
screwdriver bits.
4. Wear suitable working clothes
and safety goggles.
5. Never use the battery-powered
drill/screwdriver and charger in
the vicinity of vapours and
combustible liquids.
6. Look for concealed electric
cables, gas pipes and water
pipes before drilling and screwdriving in walls.
7. Never throw old batteries into
an open fire. Risk of explosion!
8. Avoid contact with leaky batteries. Should contact arise
nevertheless, wash the affec-
GB
BAS 18-2/1H_GB, I, FIN 14.05.2001 14:21 Uhr Seite 6
Page 7

ted area of skin immediately
with soap and water. If battery acid gets in your eye, rinse
the eye with clear water for at
least 10 minutes and consult
a doctor immediately.
9. Protect the charger and its
cable from damage and sharp
edges. Damaged cables are to
be replaced immediately by an
electrician.
10. Examine your tool for any
signs of damage. Have repairs
carried out only by an electrician.
11. Make sure that the contacts of
the Ni-Cd battery pack do not
touch other metallic objects,
e.g. nails and screws. Risk of
short-circuiting!
Putting into operation:
Loading the Ni-Cd battery
pack
1. Check that your mains voltage
is the same as that quoted on
the rating plate. Insert the
charger in a socket-outlet.
2. Pull the battery pack out of the
handle (Figure 5) by depressing the clips on the side.
3. nsert the battery pack in the
charger. The red light comes
as a sign that the battery pack
is being charged. The green
LED comes on to signal that
the charging is completed. It
takes 1 hour to charge an
empty battery. The temperature
of the battery may rise slightly
during the charging operation.
This is normal.
If the battery pack fails to become
charged, please check
whether there is voltage at the
socket-outlet
whether there is proper contac-
tat the charging contacts on
the charger.
If the battery still fails to become
charged, please return
the charger
the battery pack
to our Customer Service
Department.
Timely recharging of the Ni-Cd battery pack is recommended in the
interest of long battery life.
Recharging is always necessary
when you notice that the power of
the battery-powered drill/screwdriver is decreasing.
Never allow the battery pack to
discharge completely. This will
result in damage to the Ni-Cd battery pack!
Adjusting the torque
(Figure 1)
The Einhell battery-powered
drill/screwdriver is equipped with a
17-step mechanical torque adjustment facility. The torque for a spe-
7
GB
BAS 18-2/1H_GB, I, FIN 14.05.2001 14:21 Uhr Seite 7
Page 8

cific size of screw is selected with
the set-collar (Figure 1). The correct torque depends on several
factors:
on the type and hardness of
material in question
on the type and length screws
used
on the requirements needing to
be met by the screwed joint.
The clutch disengages with a grating sound to indicate when the set
torque is reached.
Drilling
For drilling purposes, move the setcollar to the last step „Drill“ (Figure
1). In this setting the slip clutch is
inactive. The maximum torque is
available in drilling mode.
Forward/Reverse switch
(Figure 3)
With the slide switch above the
On/Off switch you can select the
direction of rotation of the batterypowered drill/screwdriver and secure it against being switched on
accidentally. You can choose between clockwise and anticlockwise
rotation. To avoid causing damage
to the gearing it is advisable to
change the direction of rotation
only when the tool is at a standstill.
The On/Off switch is blocked when
the slide switch is in centre position.
On/Off switch (Figure 4)
Infinitely variable speed control is
possible with the On/Off switch.
The further you press the switch,
the higher the speed of the batterypowered drill/screwdriver.
Screwdriving
We recommend using self-centering screws (e.g. Torx screws,
recessed head screws) designed
for reliable working. Be sure to use
a bit that matches the screw in
shape and size. Set the torque, as
described elsewhere in these operating instructions, to suit the size
of screw.
8
GB
BAS 18-2/1H_GB, I, FIN 14.05.2001 14:21 Uhr Seite 8
Page 9
Technical data
Voltage supply 18 V =
Speed 0-900 rpm
Torque 17 levels
Forward and
reverse rotation yes
Chuck clamping
width 1.5 - 10 mm
Battery charging
voltage 18 V =
Battery charging
current 2 A
Mains voltage for
charger 230 V ~ 50 Hz
Sound pressure level
LPA: 72 dB(A)
Sound power level
LWA: 82 dB(A)
Vibration a
–
w
< 2,5 m/s
2
Weigth 1,8 kg
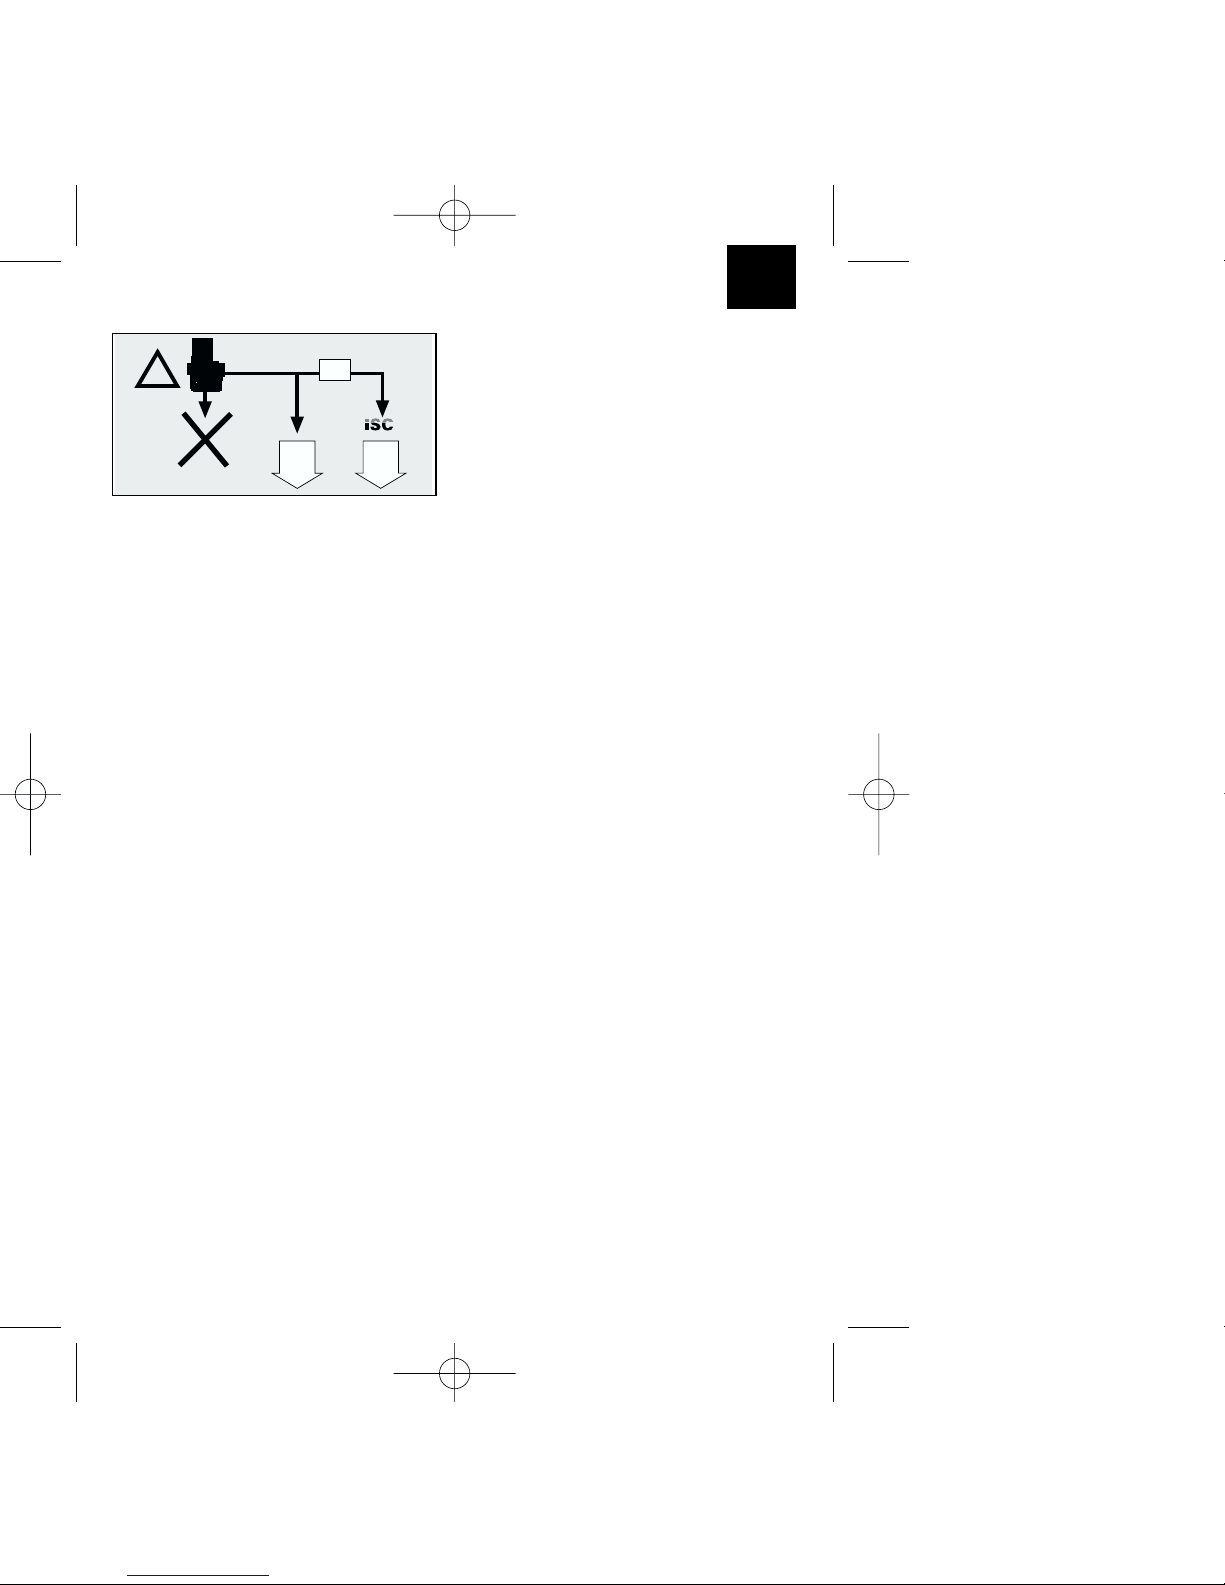
Old and defective batteries do not
belong in the refuse bin. Think of
the environment! Cadmium is toxic.
For correct disposal, return old and
defective batteries postage-paid to
ISC or take them to your local old
battery depot. Ask at your town hall
for details of the old battery depots
in your area.
9
!
iNTERNATiONALES SERViCE CENTER GmbH
GB
BAS 18-2/1H_GB, I, FIN 14.05.2001 14:21 Uhr Seite 9
Page 10

10
Illustrazione integrale:
Figura 1: Regolazione momento
di rotazione
Figura 2: Reggibussola
Figura 3: Commutazione rotazio
ne senso sinistro/dest
ro
Figura 4: Interruttore
acceso/spento
Figura 5: Accumulatore di ricam
bio, per prelevare il
pacchetto di accumula
tori premere ambedue i
pulsanti a scatto
Avvertenze importanti
Prima di adoperare l’Avvitatore ad
accumulatore leggere attentamente
le presenti istruzioni:
1. All’acquisto il pacchetto di
accumulatori di ricambio al NC
del presente avvitatore è scarico. Lo si dovrà quindi caricare
avanti di adoperarlo per la
prima volta.
2. Caricate la batteria con il caricabatteria fornito. Una batteria
scarica viene ricaricata entro
un’ora al massimo. Non usate
il caricabatteria fornito per ricaricare altri apparecchi.
3. Il pacchetto di accumulatori
raggiungerà la sua carica massima dopo ca. cinque cicli di
carica/ scarica.
4. Gli accumulatori al NC si scaricano anche non usandoli. Per
cui caricare regolarmente gli
accumulatori.
5. Rispettare i dati riportati sulla
targhetta di fabbricazione del
caricaaccumulatori. Collegare il
caricaaccumulatori solo alla
tensione di rete indicata sulla
targhetta di fabbricazione dello
stesso.
6. Se sottoposto a forte utilizzo, il
pacchetto di accumulatori si
riscalda. Prima di ricaricare il
pacchetto di accumulatori lasciate che si raffreddi e raggiunga la temperatura ambiente.
Avvertenze sulla sicurezza:
1. Proteggete dall’umidità e dalla
pioggia il Vostro Avvitatore ad
accumulatore .
2. Tenere lontano dai bambini il
caricaaccumulatori ed
l’Avvitatore ad accumulatore.
3. Utilizzare soltanto punte taglienti e punte a cacciavite adatte
ed in perfetto stato tecnico.
4. Portate indumenti da lavoro
adatti ed occhiali di protezione.
5. Non usare l’Avvitatore ad accumulatore vicino a fonti di vapore e liquidi infiammabili.
6. Volendo trapanare o avvitare
viti su pareti e muri, verificare
che non vi siano nascosti delle
condutture elettriche, dell’acqua o del gas.
7. Non gettare nel fuoco gli accumulatori inutilizzabili. Pericolo
d’esplosione!
8. Evitare il contatto con accumulatori imbrattati di elettrolito
fuoriuscito. Se però ciò fosse
già accaduto, lavare immedia-
I
BAS 18-2/1H_GB, I, FIN 14.05.2001 14:21 Uhr Seite 10
Page 11

tamente con acqua e sapone
la pelle colpita. Se l’acido
dell’accumulatore dovesse
penetrare in un occhio,
sciacquare l’occhio con acqua
pulita per almeno 10 minuti e
consultare immediatamente il
medico.
10. Proteggere da eventuali danni
e da spigoli taglienti il caricaaccumulatori ed il cordone. Fare
immediatamente sostituire da
uno specialista elettricista i
cavi elettrici danneggiati.
11. Verificate che il Vostro attrezzo
non presenti danni. Fare effettuare da uno specialista elettricista i danni eventualmente
constatati.
12. Fare attenzione che i contatti
elettrici del pacchetto di accumulatori al NC non vengano a
contatto con altri oggetti metallici, ad es. chiodi o viti. In tal
caso sussiste pericolo di cortocircuitaggio!
Messa in funzione:
Come caricare l’accumu-
latore
1. Verificare che la tensione indicata sulla targhetta del modello
corrisponda alla tensione di
rete disponibile. Inserire il caricaaccumulatori nella presa di
corrente ed inserite la spina del
cordone di carica nel rispettivo
adattatore.
2. Tirare fuori dal manico il
pacchetto di accumulatori (figu-
ra 5), agendo sui tasti d’arresto
scattanti laterali.
3. Inserite la batteria nel caricabatteria. Il diodo luminoso
rosso segnala che la batteria
viene ricaricata. Il diodo luminoso verde segnala che la procedura di ricarica è terminata.
Il tempo necessario per la ricarica è di 1 ora in caso di batteria scarica. Mentre viene ricaricata la batteria si può riscaldare un po’, ma ciò è del tutto
normale.
Se non fosse possibile caricare il
pacchetto di accumulatori, verificate che
la presa di corrente disponga
della tensione di rete richiesta
i contatti del caricaaccumulatori
abbiano un contatto elettrico
perfetto.
Se malgrado tutto non fosse ancor
possibile caricare gli accumulatori,
Vi preghiamo di fare pervenire al
nostro Servizio clientela quanto
segue
caricaaccumulatori
pacchetto di accumulatori.
Allo scopo di prolungare la longevità del pacchetto di accumulatori,
dovreste provvedere a tempestivamente ricaricare il pacchetto di
accumulatori al NC, fatto comunque necessario dopo aver constatato che la potenza dell’Avvitatore
ad accumulatore diminuisce.
11
I
BAS 18-2/1H_GB, I, FIN 14.05.2001 14:21 Uhr Seite 11
Page 12

Non scaricare completamente il
pacchetto di accumulatori. Ciò
comporterebbe un guasto a codesto pacchetto di accumulatori al
NC.
Regolazione del momento
di rotazione(figura 1)
Il momento di rotazione
dell’Avvitatore ad accumulatore
Einhell è meccanicamente regolabile tramite un dispositivo a 17
stadi. Il momento di rotazione relativo ad una determinata misura di
vite, scelto sull’anello di regolazione (figura 1). Il momento di rotazione dipende da più fattori:
da tipo e durezza del materiale
da sottoporre a lavorazione
da tipo e lunghezza delle viti
da utilizzare
dai requisiti richiesti al collega-
mento a vite da effettuare.
Il raggiungimento del momento di
rotazione è segnalato mediante
disinnesto cricchettante dell’innesto
stesso.
Trapanatura
Per eseguire una trapanatura portate l’anello di regolazione momento di rotazione sull’ultima posizione
“Bohren”, trapanatura, (figura 1). In
tale posizione l’innesto slittante è
disattivato.
Commutadirezione di
rotazione (figura 3)
Azionando il selettore scorrevole
sopra all’interruttore acceso/spento
potete regolare il senso di rotazione dell’Avvitatore ad accumulatore,
proteggendo allo stesso tempo
l’Avvitatore ad accumulatore contro
un avviamento involontario. Per
evitare di danneggiare la trasmissione, il senso di rotazione dovrebbe essere regolato con attrezzo
fermo. Se il selettore scorrevole si
trovasse in posizione centrale, in
tal caso l’interruttore acceso/spento
è bloccato.
Interruttore acceso/spento
(figura 4)
Con l’interruttore acceso/spento si
può progressivamente comandare
il numero dei giri. Più che si preme
l’interruttore e più aumenterà il
numero di giri dell’Avvitatore ad
accumulatore.
Avvitamento
Usate preferibilmente viti autocentranti (ad es. con intaglio a croce),
che garantiscono un lavoro sicuro.
Fate attenzione che le punte a cacciavite utilizzate corrispondano a
forma e dimensioni delle rispettive
viti. Effettuate la regolazione del
momento di rotazione come
descritto nelle istruzioni, corrispondentemente alle dimensioni della
vite da usare.
12
I
BAS 18-2/1H_GB, I, FIN 14.05.2001 14:21 Uhr Seite 12
Page 13
Dati tecnici
Tensione alimentazione
motore 18 V =
Numero giri 0-900 min
-1
Momento di rotazione a 17 stadi
Rotazione sinistra/destra si
Apertura bocca mandrino portapunta 1,5 - 10 mm
Tensione di carica
accumulatore 18 V =
Corrente di carica
accumulatore 2 A
Tensione di rete per
caricaaccumulatori 230 V ~ 50 Hz
Livello di pressione
acustica LPA: 72 dB (A)
Livello di potenza
sonora LWA: 82 (A)
Vibrazione a
–
w
< 2,5 m/s
2
Peso: 1,8 kg
Gli accumulatori inutilizzabili o guasti non vanno gettati nella pattumiera Contribuite a tutelare l’ambiente. Il cadmio è velenoso. Fate
pervenire alla Ditta ISC o ad un
adeguato Centro di raccolta gli
accumulatori inutilizzabili o guasti.
Se non sapete dove si trova questo Centro di raccolta, rivolgeteVi
all’Amministrazione comunale.
13
!
iNTERNATiONALES SERViCE CENTER GmbH
I
BAS 18-2/1H_GB, I, FIN 14.05.2001 14:21 Uhr Seite 13
Page 14

14
FIN
Laitteen kuva:
Kuva 1: Vääntömomentin säätö
Kuva 2: kärki
Kuva 3: Kytkentä vasen-oikeapy
örintä
Kuva 4: Päälle-/pois-kytkin
Kuva 5: Vaihtoakku, painakaa
akkua irroitettaessa
molempia lukitusnäppäi
miä
Tärkeät ohjeet:
Lukekaa nämä ohjeet ehdottomasti
ennen akkuruuvinvääntimen käyttöönottoa:
1. Akkuruuvinvääntimen NCvaihtoakkua ei ole ladattu
ennen toimitusta. Akku on siksi
ladattava ennen ensikäyttöä.
2. Lataa akkusarja mukanatoimitetulla laturilla. Tyhjä akku on
ladattu täyteen kork. 1 tunnin
kuluttua. Älä käytä mukanatoimitettua laturia muiden laitteiden lataamiseen.
3. Akku on saavuttanut suurimman tehonsa n. viiden
lataus- ja tyhjennysjakson jälkeen.
4. NC-akut tyhjenevät silloinkin,
kun niitä ei käytetä.Ladatkaa
siksi akku säännöllisin väliajoin.
5. Huomioikaa latauslaitteen tyyppikilvessä annetut tiedot.
Liittäkää latauslaite vain tyyppikilvessä annettuun jännitteeseen.
6. Akku kuumenee kovassa rasituksessa. Antakaa sen jäähtyä
huoneenlämpöiseksi ennen
lataamista.
Turvallisuusmääräykset
1. Suojatkaa akkuruuvinvääntimenne ja latauslaitteenne
kosteudelta ja sateelta.
2. Pitäkää latauslaite ja akkuruuvinväännin poissa lasten ulottuvilta.
3. Käyttäkää vain teräviä poranteriä sekä ehjiä, sopivia talttapaloja.
4. Käyttäkää tarkoituksenmukaista suojapukua sekä suojalaseja.
5. Akkuruuvinväännintä ja latauslaitetta ei saa käyttää höyryjen
tai helposti syttyvien nesteiden
lähellä.
6. Poratessa ja ruuvatessa seiniä
ja muureja on tarkistettava
ensin, onko niissä piilossa olevia sähkö-, kaasu- ja vesijohtoja.
7. Loppuunkäytettyä akkua ei saa
heittää tuleen - räjähdysvaara!
8. Välttäkää koskettamasta vuotanutta akkua. Jos näin kuitenkin
käy, peskää likaantunut iho heti
vedellä ja saippualla. Jos akun
happoa joutuu silmiin, on niitä
huuhdeltava vähintäin 10 minuuttia puhtaalla vedellä ja
hakeuduttava sitten heti
lääkärinhoitoon.
BAS 18-2/1H_GB, I, FIN 14.05.2001 14:21 Uhr Seite 14
Page 15

9. Suojatkaa latauslaite ja sen
johto vaurioilta ja teräviltä kulmilta. Vahingoittuneet johdot on
annettava heti sähköammattilaisen vaihdettavaksi.
10. Tarkistakaa laitteenne usein
vaurioitten varalta. Korjaukset
saa suorittaa vain alan ammattilainen.
11. Huolehtikaa siitä, että NC-akun
kontaktit eivät ole yhteydessä
metalliesineisiin, kuten esim.
nauloihin, ruuveihin jne. Tästä
voi seurata oikosulku!
Käyttöönotto:
NC-akun lataaminen
1. Tarkistakaa, että tyyppikilvessä
annettu jännite on sama kuin
verkkojännite. Painakaa latauslaite pistorasiaan ja yhdistäkää latausjohto lataussovitteeseen.
2. Akku vedetään pois kahvasta
(kuva 5), samalla painetaan
sivullaolevia lukitusnäppäimiä.
3. Työnnä akkusarja laturiin.
Punainen valodiodi ilmoittaa,
että akkusarja latautuu. Vihreä
valodiodi ilmoittaa latauksen
päättyneen. Tyhjän akun lataaminen kestää 1 tunnin.
Lataamisen aikana akkusarja
voi kuumeta, mutta tämä kuuluu asiaan.
Jos akun lataaminen ei onnistu,
tarkistakaa,
onko pistorasiassa jännitettä
onko kontakti latauslaitteen
latauspisteisiin hyvä.
Jos akun lataaminen ei vieläkään
onnistu, pyydämme Teitä lähettämään
latauslaitteen
akun
asiakaspalveluumme.
Jotta NC-akkunne kestäisi kauan,
on Teidän ladattava se riittävän
ajoissa. Tämä on joka tapauksessa
tarpeen, kun akkuruuvivääntimen
teho heikkenee.
Älkää antako akun tyhjentyä täysin.
Tämä johtaa NC-akun vaurioitumiseen!
Vääntömomentin säätö
(kuva 1)
Einhell-akkuruuvinväännin on varustettu
17-asteisella mekaanisella vääntömomentin säädöllä. Tietyn ruuvinkoon vääntömomentti säädetään
säätörenkaasta (kuva 1).
Vääntömomentti on riippuvainen
useammista tekijöistä:
työstettävän materiaalin laadu-
sta ja kovuudesta,
käytettyjen ruuvien lajista ja
pitu udesta,
ruuviliitokselle asetetuista vati-
muksista.
15
FIN
BAS 18-2/1H_GB, I, FIN 14.05.2001 14:21 Uhr Seite 15
Page 16
Vääntömomentin saavuttamisesta
ilmoittaa kytkimen rasahtava irroitus.
Poraaminen
Porausta varten on säätörengas
asennettava viimeiseen asteeseen
„Poraaminen“ (kuva 1).
Porausasennossa on luistokytkin
toimentamaton. Poratessa käytössä on suurin vääntömomentti.
Pyörimissuunnan vaihtokytkin (kuva 3)
Päällä-/pois-kytkimen yläpuolella
olevalla työntökytkimellä voidaan
vaihtaa akkuruuvinvääntimen pyörimissuuntaa sekä varmistaa akkuruuvinväännin tahatonta käynnistämistä vastaan. Voitte valita
vasemman- ja oikeansuuntaisen
pyörimisen välillä. Pyörimissuuntaa
tulee muuttaa vain ruuvivääntimen
seistessä, ettei vaihteisto vahingoitu. Kun työntökytkin on keskiasennossa, on päälle-/pois-kytkin
lukittu.
Päälle-/pois-kytkin
(kuva 4)
Päälle-/pois-kytkimellä voitte
säätää kierosluvun portaattomasti.
Mitä pidemmälle kytkintä painetaan, sen suurempi on ruuvinvääntimen kierrosluku.
Ruuvinvääntö:
Käyttäkää vain itsekeskittyviä ruuveja (esim. ristiuraruuveja), jolloin
työskentely on turvallisempaa.
Huolehtikaa siitä, että käytetty talttapala sopii ruuvin kokoon ja muotoon. Säätäkää vääntömomentti
ruuvin koon mukaan, kuten liitteessä selitetään.
Tekniset tiedot:
Moottorin virranotto 18 V =
Kierrosluku 0-900 min
-1
Vääntömomentti 17-asteinen
Oikea/vasen-suuntaus kyllä
Poranistukan läpimitta 1,5 - 10 mm
Akun latausjännite 18 V =
Akun latausvirta4 2 A
Latauslaitteen
verkkojännite 230 V - 50 Hz
Äänen painetaso LPA: 72 dB (A)
Äänitehotaso LWA: 82 dB (A)
Tärinä a
–
w
< 2,5 m/s
Paino: 1,8 kg
16
FIN
BAS 18-2/1H_GB, I, FIN 14.05.2001 14:21 Uhr Seite 16
Page 17
Loppuunkäytetyt tai vahingoittuneet
akut eivät kuulu tavalliseen jätehuoltoon. Muistakaa ympäristönsuojelu! Kadmium on myrkyllistä.
Loppuunkäytetyt ja vahingoittuneet
akut voi lähettää firmalle ISC
käytöstäpoistoa varten tai toimittaa
erikoisjätteitten keräyspisteeseen.
Jollette tiedä, missä tällainen
keräyspiste on, tiedustelkaa asiaa
asuinkuntanne hallinnosta.
17
FIN
!
iNTERNATiONALES SERViCE CENTER GmbH
BAS 18-2/1H_GB, I, FIN 14.05.2001 14:21 Uhr Seite 17
Page 18

18
EG Konformitätserklärung
Der Unterzeichnende erklärt im
Namen der
Firma
BAS 18 /BAS 18-2/1
– Seriennummer auf
dem Produkt –
der
EG Niederspannungs-
richtlinie 73/23 EWG
EG Richtlinie Elektro-
magnetische Verträglichkeit
89/336 EWG mit
Änderungen entspricht.
Landau/Isar, den
06.08.1999
Pflaum
Produkt-Management
Typ
Marke
daß die
Maschine/Produkt
EC Declaration of Conformity
The Undersigned declares, on
behalf of
– Serial number specified on
the product -
is in accordance with the
EC Directive regarding
low-voltage equipment
73/23 EEC;
EC Directive regarding
electromagnetic compatibility
89/336 EEC, as amended.
Landau/Isar, (date)
06.08.1999
Pflaum
Produkt-Management
Landau/Isar, (date)
06.08.1999
Pflaum
Produkt-Management
Landau/Isar, datum
06.08.1999
Pflaum
Produkt-Management
Landau/Isar
06.08.1999
Pflaum
Produkt-Management
Landau/Isar
06.08.1999
Pflaum
Produkt-Management
Type
produced by:
that the
Machine / Product
Déclaration de Conformité CE
Le soussigné déclare, au nom
de
– no. série indiqué sur le
produit -
correspond(ent) à la
Directive CE relative aux
basses tensions 73/23 CEE;
Directive CE relative à la
compatibilité électro-
magnétique 89/336 CEE
avec les modifications y
apportées.
– serienummer op het produkt-
conform de volgende
richtlijnen is:
EG laagspanningsrichtlijn
73/23 EWG
EG richtlijn Elektro-
magnetische compatibiliteit
89/336 EWG met wijzigingen
Type
du fabricant
que
la machine / le produit
EC Conformiteitsverklaring
De ondertekenaar verklaart in
naam van de
firma
type
merk
dat de
machine/produkt
Declaracion CE de
Conformidad
Por la presente, el abajo
firmante declara en nombre de
la empresa
– No. de serie en el producto:
satisface las disposiciones
pertinentes siguientes:
Disposición de baja tensión
de la CE 73/23 CEE
Disposición de la
compatibilidad electro-
magnética de la CE 89/336
CEE con modificaciones.
tipo
marca
que el/la
máquina/producto
Declaração de conformidade
CE
O abaixo assinado declara em
nome da
empresa
– cujo número de série
encontra-se no produto -
corresponde à
Directiva da CE de baixa
tensão 73/23 CEE
Directiva da CE de
compatibilidade electro-
magnética 89/336 CEE, com
alterações
tipo
marca
que
a máquina/o produto
ISC GmbH · Eschenstraße 6 · D-94405 Landau/Isar
Akku-Bohrschrauber
Electronic battery-
powered screw drill
Foreuse à visser
électronique à accumulateur
Electronische
accu-boorschroover
Taladro
altornillador electrónico
Furadeira aparafusadora
electrónica de acumulador
EN 60335-1; DIN VDE 0700-207; prEN 50260-1; prEN 50260-2-1; prEN 50260-2-2; EN 55014-1; EN 55014-2; EN 61000-3-2; EN 61000-3-3
Achivierung / For archives: BAS-0646-26-4147145-E
BAS 18-2/1H_GB, I, FIN 14.05.2001 14:21 Uhr Seite 18
Page 19

19
EG Konformitätserklärung
Der Unterzeichnende erklärt im
Namen der
Firma
BAS 18 /BAS 18-2/1
– Seriennummer auf
dem Produkt –
der
EG Niederspannungs-
richtlinie 73/23 EWG
EG Richtlinie Elektro-
magnetische Verträglichkeit
89/336 EWG mit
Änderungen entspricht.
Landau/Isar, den
06.08.1999
Pflaum
Produkt-Management
Typ
Marke
daß die
Maschine/Produkt
EC Declaration of Conformity
The Undersigned declares, on
behalf of
– Serial number specified on
the product -
is in accordance with the
EC Directive regarding
low-voltage equipment
73/23 EEC;
EC Directive regarding
electromagnetic compatibility
89/336 EEC, as amended.
Landau/Isar, (date)
06.08.1999
Pflaum
Produkt-Management
Landau/Isar, (date)
06.08.1999
Pflaum
Produkt-Management
Landau/Isar, datum
06.08.1999
Pflaum
Produkt-Management
Landau/Isar
06.08.1999
Pflaum
Produkt-Management
Landau/Isar
06.08.1999
Pflaum
Produkt-Management
Type
produced by:
that the
Machine / Product
Déclaration de Conformité CE
Le soussigné déclare, au nom
de
– no. série indiqué sur le
produit -
correspond(ent) à la
Directive CE relative aux
basses tensions 73/23 CEE;
Directive CE relative à la
compatibilité électro-
magnétique 89/336 CEE
avec les modifications y
apportées.
– serienummer op het produkt-
conform de volgende
richtlijnen is:
EG laagspanningsrichtlijn
73/23 EWG
EG richtlijn Elektro-
magnetische compatibiliteit
89/336 EWG met wijzigingen
Type
du fabricant
que
la machine / le produit
EC Conformiteitsverklaring
De ondertekenaar verklaart in
naam van de
firma
type
merk
dat de
machine/produkt
Declaracion CE de
Conformidad
Por la presente, el abajo
firmante declara en nombre de
la empresa
– No. de serie en el producto:
satisface las disposiciones
pertinentes siguientes:
Disposición de baja tensión
de la CE 73/23 CEE
Disposición de la
compatibilidad electro-
magnética de la CE 89/336
CEE con modificaciones.
tipo
marca
que el/la
máquina/producto
Declaração de conformidade
CE
O abaixo assinado declara em
nome da
empresa
– cujo número de série
encontra-se no produto -
corresponde à
Directiva da CE de baixa
tensão 73/23 CEE
Directiva da CE de
compatibilidade electro-
magnética 89/336 CEE, com
alterações
tipo
marca
que
a máquina/o produto
ISC GmbH · Eschenstraße 6 · D-94405 Landau/Isar
Akku-Bohrschrauber
Electronic battery-
powered screw drill
Foreuse à visser
électronique à accumulateur
Electronische
accu-boorschroover
Taladro
altornillador electrónico
Furadeira aparafusadora
electrónica de acumulador
EN 60335-1; DIN VDE 0700-207; prEN 50260-1; prEN 50260-2-1; prEN 50260-2-2; EN 55014-1; EN 55014-2; EN 61000-3-2; EN 61000-3-3
Achivierung / For archives: BAS-0646-26-4147145-E
BAS 18-2/1H_GB, I, FIN 14.05.2001 14:21 Uhr Seite 19
Page 20

20
GARANTIEURKUNDE
Wir gewähren Ihnen zwei Jahre Garantie gemäß nachstehenden
Bedingungen. Die Garantiezeit beginnt jeweils mit dem Tag der
Lieferung, der durch Kaufbeleg, wie Rechnung, Lieferschein oder
deren Kopie, nachzuweisen ist. Innerhalb der Garantiezeit beseitigen wir alle Funktionsfehler am Gerät, die nachweisbar auf
mangelhafte Ausführung oder Materialfehler zurückzuführen
sind. Die dazu benötigten Ersatzteile und die anfallende Arbeitszeit werden nicht berechnet.
Ausschluß: Die Garantiezeit bezieht sich nicht auf natürliche Ab-
nutzung oder Transportschäden, ferner nicht auf Schäden, die infolge Nichtbeachtung der Montageanleitung und nicht normgemäßer Installation entstanden. Der Hersteller haftet nicht für
indirekte Folge- und Vermögensschäden.
Durch die Instandsetzung wird die Garantiezeit nicht erneuert
oder verlängert. Bei Garantieanspruch, Störungen oder Ersatzteilbedarf wenden Sie sich bitte an.
ISC GmbH · International Service Center
Eschenstraße 6 · D-94405 Landau/Isar (Germany)
Ersatzteil-u. Reparatur-Abt.: Telefon (0 99 51) 942 357 • Telefax (0 99 51) 26 10 und 52 50
Technische Kundenberatung: Telefon (0 99 51) 942 358
BAS 18-2/1H_GB, I, FIN 14.05.2001 14:21 Uhr Seite 20
Page 21

21
EINHELL-WARRANTY CERTIFICATE
The guarantee period begins on the sales date and is
valid for 2 years.
Responsibility is assumed for faulty construction or
material or funcitional defects.
Any necessary replacement parts an necessary repair
work are free of charge.
We do not assume responsibility for consequential
damage.
Your customer service partner
CERTIFICATO DI GARANZIA EINHELL
I periodo di garanzia inizia nel glomo dell´acquisto e
dura 2 anni. La garanzia vale nel caso di confezione
difettosa oppure di difetti del materiale e del funzionamento. Le componenti da sostituire e il lavoro necessario per la riparazione non vengono calcolati. Non c´è
alcuna garanzia nel caso di danni successivi.
Il vostro centro di assistenza
EINHELL-TAKUUTODISTUS
Takkuuaika alkaa ostopäivänä ja sen pituus on
2 vuotta.
Takuu korvaa valmistusviat tai materiaali- ja toimintoviat. Tähän tarvittavia varaosia ja työaikaa ei laskuteta.
Välillisiä vahinkoja ei korvata.
Teidän asiakaspalveluyhdyshenkilönne
BAS 18-2/1H_GB, I, FIN 14.05.2001 14:21 Uhr Seite 21
Page 22

22
BAS 18-2/1H_GB, I, FIN 14.05.2001 14:21 Uhr Seite 22
Page 23

ISC GmbH
Eschenstraße 6
D-94405 Landau/Isar
Tel
.
(099
51)
94235
7,
Fax
(099
51)
2610
u
.
5250
Hans Einhell Österreich
Gesellschaft m.b.H.
Mühlgasse 1
A-2353 Guntramsdorf
Tel
.
(02236)
535
16,
Fax
(02236)
5236 9
Einhell UK Ltd
Brook House, Brookway
North Chesire Trading Estate
Prenton, Wirral, Chesire
CH 43 3DS
Tel. 0151 6084802, Fax 0151 6086339
V.B.P. Distribution Service Après Vente
5, allée Joseph Cugnot, Z.I. du Phare
F-33700 Merignac
Tel. 05 56479483, Fax 05 56479525
Einhell Benelux
Weberstraat 3
NL-7903 BD Hoogeveen
Tel. 0528 232977, Fax 0528 232978
Einhell Benelux
Abtsdreef 10
B-2940 Stadbroek
Tel/Fax 03 5699539
Comercial Einhell S.A.
Antonio Cabezon, 83
E-28034 Madrid
Tel. 91 7294888, Fax 91 3581500
Einhell Iberica
Rua da Aldeia , 225 Apartado 2100
P-4405-017 Arcozelo VNG
Tel. 02 75336100, Fax 02 7536109
Antzoulatos E. E.
Paralia Patron-Panayitsa
GR-26517 Patras
Tel. 061 525448, Fax 061 525491
Einhell Italia s.r.l.
BAS 18-2/1H_GB, I, FIN 14.05.2001 14:21 Uhr Seite 23
Page 24

Technische Änderungen vorbehalten
Technical changes subject to change
Sous réserve de modifications
Technische wijzigingen voorbehouden
Salvo modificaciones técnicas
Salvaguardem-se alterações técnicas
Förbehåll för tekniska förändringar
Oikeus teknisiin muutoksiin pidätetään
Der tages forbehold för tekniske ændringer
Ο κατασκεναστς διατηρε το δικαωµα
τεχνικν αλλαγν
Con riserva di apportare modifiche tecniche
Tekniske endringer forbeholdes
Technické změny vyhrazeny
Technikai változások jogát fenntartva
Tehnične spremembe pridržane.
Zastrzega się wprowadzanie zmian technicznych
Se rezervå dreptul la modificåri tehnice.
Teknik de©iµiklikler olabilir
wegm. 03/2001
Einhell Hungaria Ltd.
Vajda Peter u. 12
H 1089 Budapest
Tel. 01 3039401, Fax 01 2101179
Star AS
Yesilkibris sk. 6A, Emniyet Evleri
TR 80650 Istanbul
Tel. 0212 3253536, Fax 0212 3253537
Novatech S.R.L.
Bd.Lasar Catargiu 24-26
S.C. AAp. 9 Sector 1
RO 75 121 Bucharest
Tel. 01 4104800, Fax 01 4103568
DAT spol s.r.o
Hrubeho 3
CZ 61200 Brno
Tel. 05 49211107, Fax 05 41214831
Slav GmbH
Podvis Str. Wbl. 30 E.G. ap. 52
9000 Varna
Tel. 052 242854, Fax 052 242854
CZ
BAS 18-2/1H_GB, I, FIN 14.05.2001 14:21 Uhr Seite 24
 Loading...