

Instructions
for
951SXe
LONER®
Temperature Controlled Soldering Station
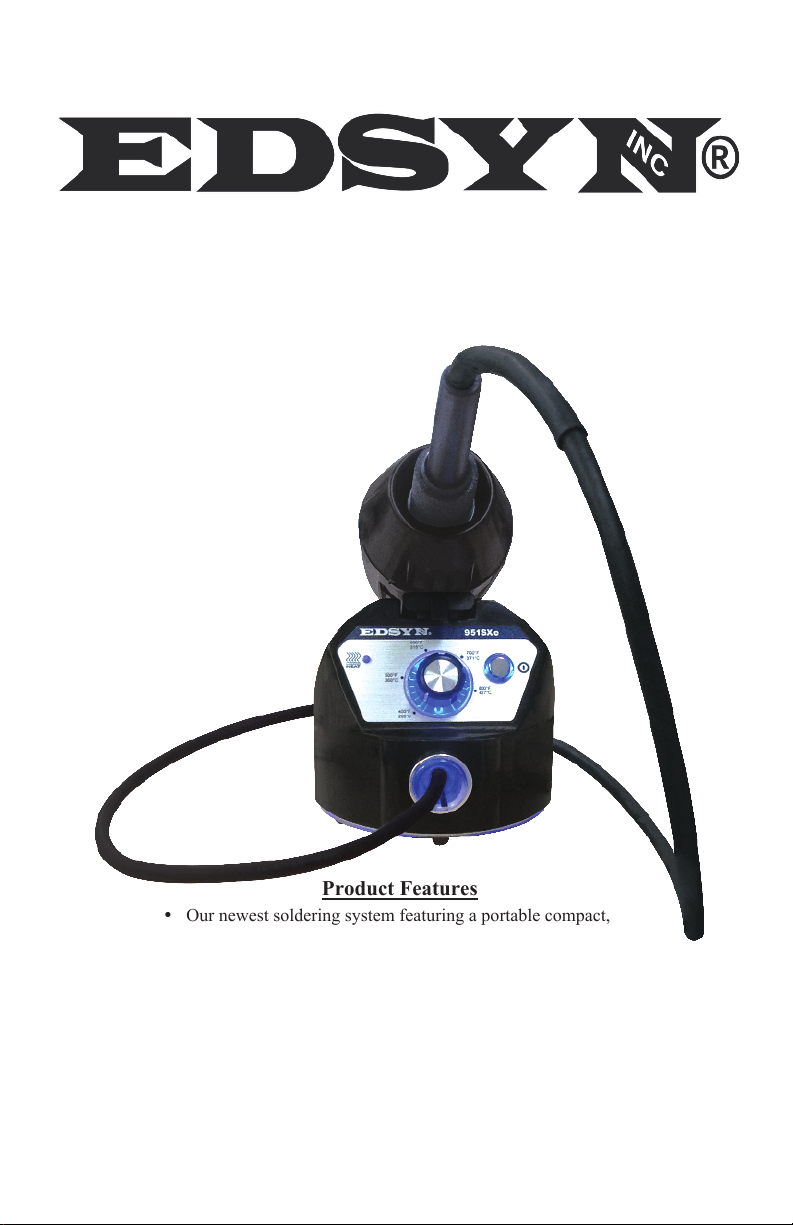
Product Features
Ÿ Our newest soldering system featuring a portable compact,
lightweight design with analog display
Ÿ Accurate linear temperature control dial
Ÿ New and modern illuminated design for better visibility and
to better indicate power on/off
Ÿ F/C display
Ÿ Easy to maintain and calibrate with external calibration features
Ÿ Modular sponge tray
Ÿ Wide variety of soldering and SMT CROWN® tips available
Ÿ RoHS compliant
Ÿ ESD safe
Ÿ 18 month warranty
Temp.
Regulation
Indicator
Illuminated
Graduations
Package Contents
951SXe Temperature Controlled Soldering
Station includes LT375 Tip
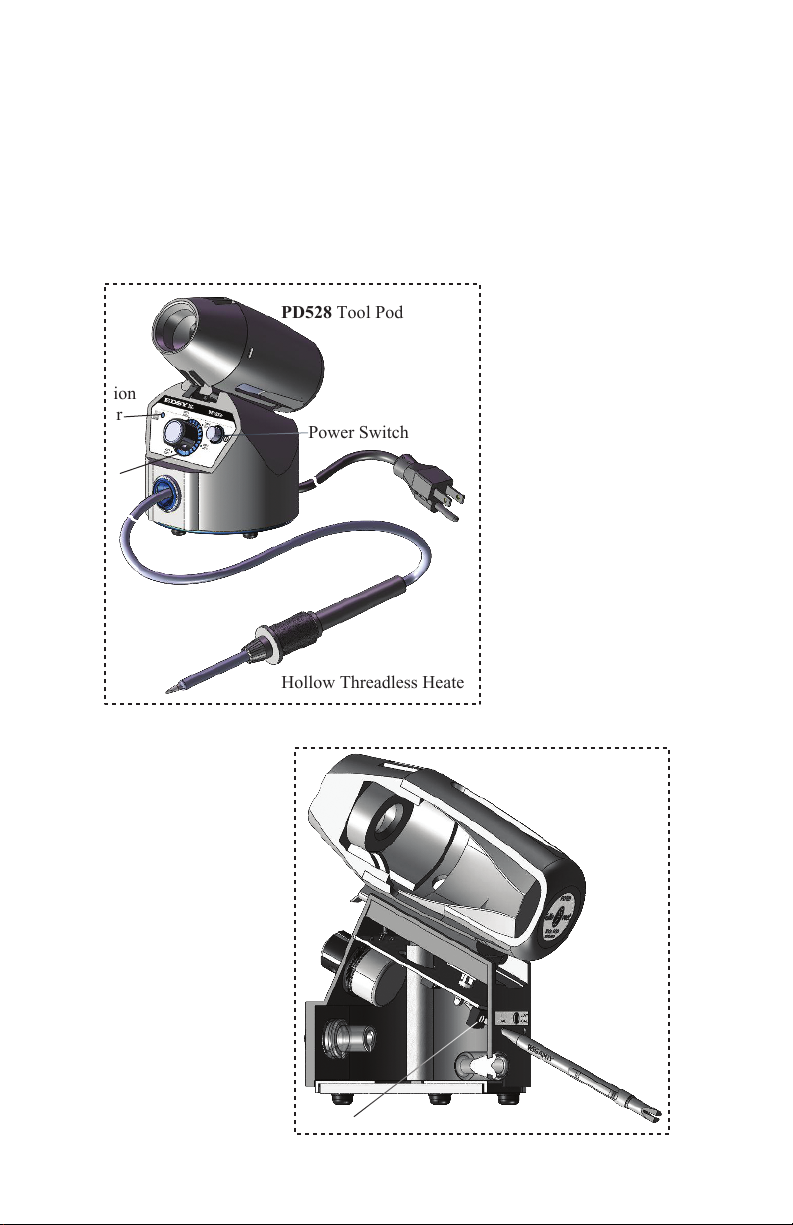
PD528 Tool Pod
SH235 Modular Sponge Tray with RS200
Round Cleaning Sponge
WP556 WIGAPRY® Mini Screwdriver
and Calibration Aid Tool
PD528 Tool Pod
Power Switch
Hollow Threadless Heater
Front Right Side View
SR1227 Tool Pod Label
SR1228 Rear Calibration Label
WP556 Calibration Aid Tool
Calibration Pots for
HI & LO Temp.
Rear Side Section View
Warning: Do not hit or tap the soldering tool. The ceramic heater element may break

Tip Cleaning
To maintain proper Tip to Ground resistance
1. Remove Tip from Heater Assembly.
2. Using a ST707 Solder Tool Maintenance Brush, clean Tip and Heater Barrel.
3. Install the tip and tighten RS372* Retaining Sleeve. Take note of the gap to ensure
proper fitting.
clean
Tip Care
ST707
gap
1. Set desired temperature. Blinking Neon Lamp means Tool is ready.
2. TIN the Tip. (apply solder)
3. Do not rub, bend or reshape the Tip.
4. Always clean the Tip by wiping it against the moist RS200 Sponge or EA439 Dry Tip
Cleaner and always RE-TIN with the LT-1 Tip Tinner and Cleaner.
Temperature Calibration
1. Turn on power and set Temperature Control Knob to 400°F (205°C).
2. Using a clean and well tinned Tip, apply a small amount of solder on the Tip, just
enough to form a bead on top of the Tip.
3. Place the center of the thermocouple wire of the SDS100 on top of the bead.
4. Again, apply a small amount of solder on the center of the thermo-couple wire, just
enough to embed the center.
5. Adjust LO-Temp Calibration Pot so the Meter will read 400°F (205°C).
6. Set Temperature Control Knob to 800°F (427°C).
7. Adjust Hi-Temp Calibration Pot so the Meter will read 800°F (427°C).
MS412
Digital Temperature
Measurement System
For a quicker calibration for more than one
station try using the TP475 Temperature Probe
LT-1
FX635
* To avoid transferring debris back to your clean tip make sure you clean the RS372 retaining sleeve with the
ST707 solder tool maintenance brush and replaces the RS200 sponge frequently.
TI680
SDS100
 Loading...