

Page 1
1718 W. Fullerton Ave
Chicago, IL 60614
Tel: 773-770-1195
Fax: 773-935-5613
www.edgelighting.com
© 2009 Edge Lighting. All Rights Reserved.
info@edgelighting.com
Installation Instructions for Little Solid Back Shade MR16
IMPORTANT INFORMATION
- This product is ETL listed for indoor dry locations.
SAVE THESE INSTRUCTIONS!
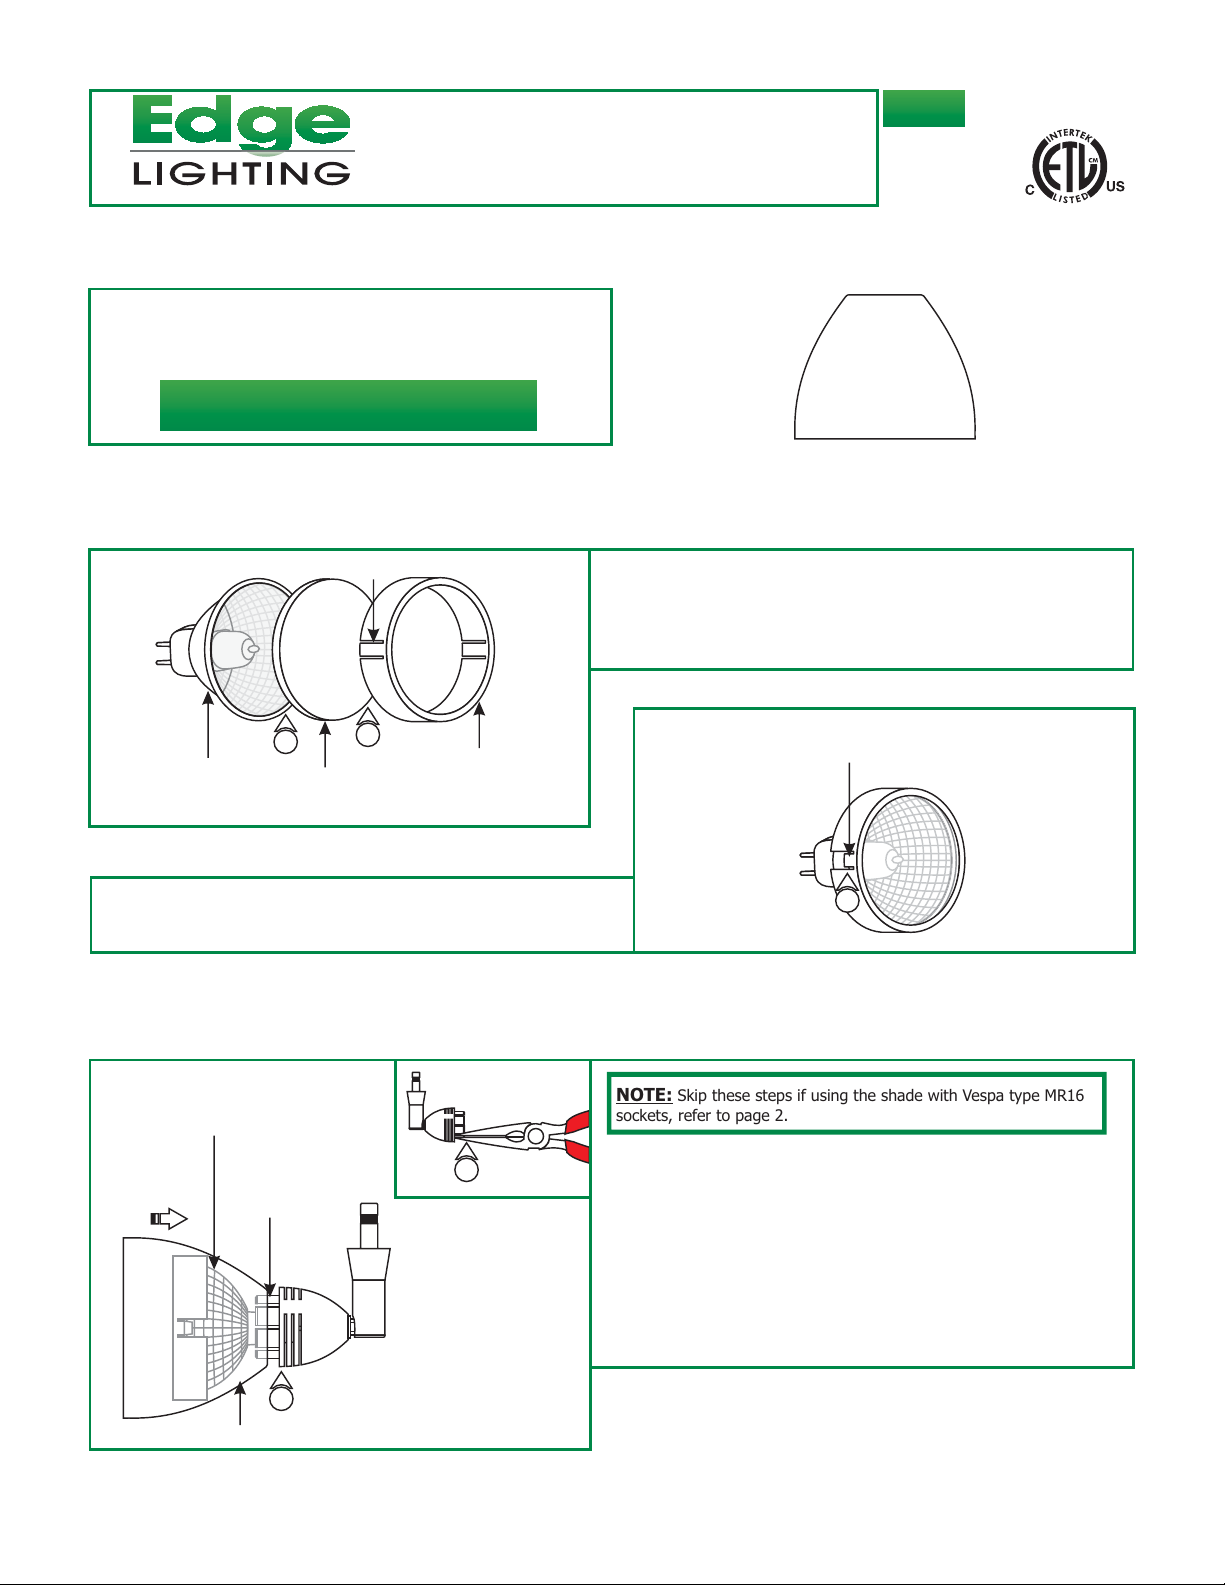
Install the Louver Lens Holder (Optional)
S1-_
904-S1-03
A
2
MR16 LAMP
3: Press the tabs on sides of the snap lens holder against the
MR16 lamp to keep it in the position.
HEXCELL LOUVER
AND/OR GLASS LENS
TAB
1
LOUVER LENS
HOLDER
1: Place the Hexcell louver (Optional) or glass lens (Optional)
or a combination of a hexcell and glass lens into the louver
lens holder.
2: Place the MR16 lamp into the louver lens holder.
B
TAB
3
Install the Accessory Shade in Low Rider type Fixtures
C
MR16 LAMP
3
SLOTTED
SHADE HOLDER
NOTE: Skip these steps if using the shade with Vespa type MR16
sockets, refer to page 2.
1: Place the MR16 lamp into the accessory shade and line up
the MR16 lamp pins with the socket holes.
2: Push the lamp pins completely into the socket holes and
simultaneously push the accessory shade onto the slotted
shade holder.
2
ACCESSORY SHADE
3: The accessory shade must fit snugly onto the slotted shade
holder. If adjustment is necessary, carefully bend the slotted
shade holder tabs slightly in or out with needle-nose pliers.
1
Page 2
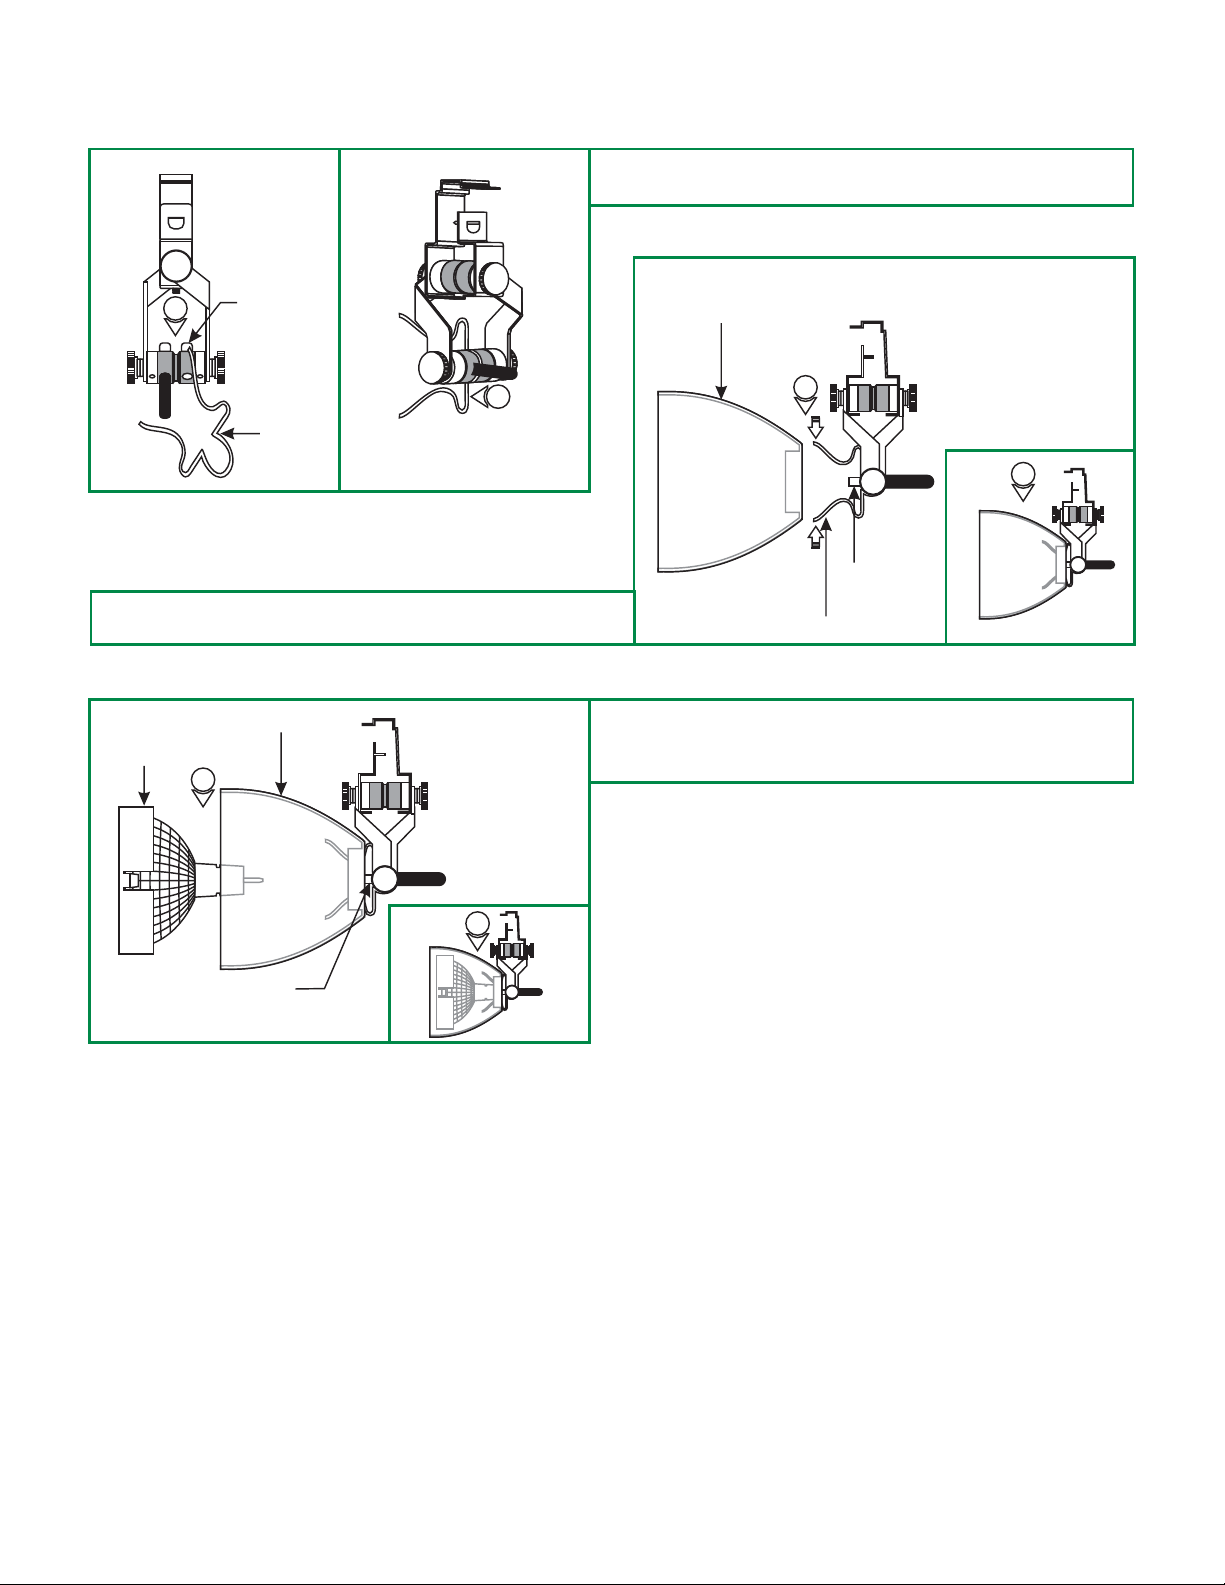
Install the Accessory shade in Vespa type MR16 Sockets
D
1
8: Squeeze the spring clip ends while inserting it into the
shade.
F
MR16 LAMP
SOCKET
1
SPRING
CLIP HEAD
ACCESSORY SHADE
3
1: Push the spring clip completely onto the center of the socket
groove until it snaps into place.
E
SHADE
2
2
SOCKET
SPRING CLIP
3: Place the MR16 lamp into the accessory shade and line up
the MR16 lamp pins with the socket holes. Push the lamp
pins completely into the socket holes.
SOCKET
3
2
 Loading...