

Page 1
1718 W. Fullerton Ave
Chicago, IL 60614
Tel: 773-770-1195
Fax: 773-935-5613
www.edgelighting.com
© 2010 Edge Lighting. All Rights Reserved.
Installation Instructions for Mint 5Square
IMPORTANT SAFETY INSTRUCTIONS
To reduce the risk of fire, electrical shock, exposure to
excessive UV radiation, or injury to persons:
- Use this fixture indoors only.
- Do not look directly at the lamp while the fixture is on.
- RISK OF FIRE: Use only the type of lamp and maximum
wattage indicated in this instruction manual.
- Never cover the halogen lamp with anything other than a
lamp shade provided by Edge Lighting and never place
flammable material close to the fixture.
- Never turn the fixture on and off by connecting and
disconnecting the halogen lamp.
- Do not touch the fixture head, shade or lamp shield while
the fixture is on. These surfaces may be VERY HOT.
- Do not touch lamp at anytime. Use a soft cloth instead as oil
from skin may damage lamp.
- It is normal for a new halogen lamp to produce minor
smoke when first turned on.
- Turn power off and allow to cool before replacing lamp.
- This product is ETL listed for indoor dry locations.
- This product is ceiling mounted only.
- This product can mount to either a 4" square electrical box
with round plaster ring or an octagon electrical box.
- This product can be dimmed with a standard incandescent
dimmer.
MINT-5-C-SQ-FR-_
904-MINT-5-SQ-01
IMPORTANT INFORMATION
SAVE THESE INSTRUCTIONS!
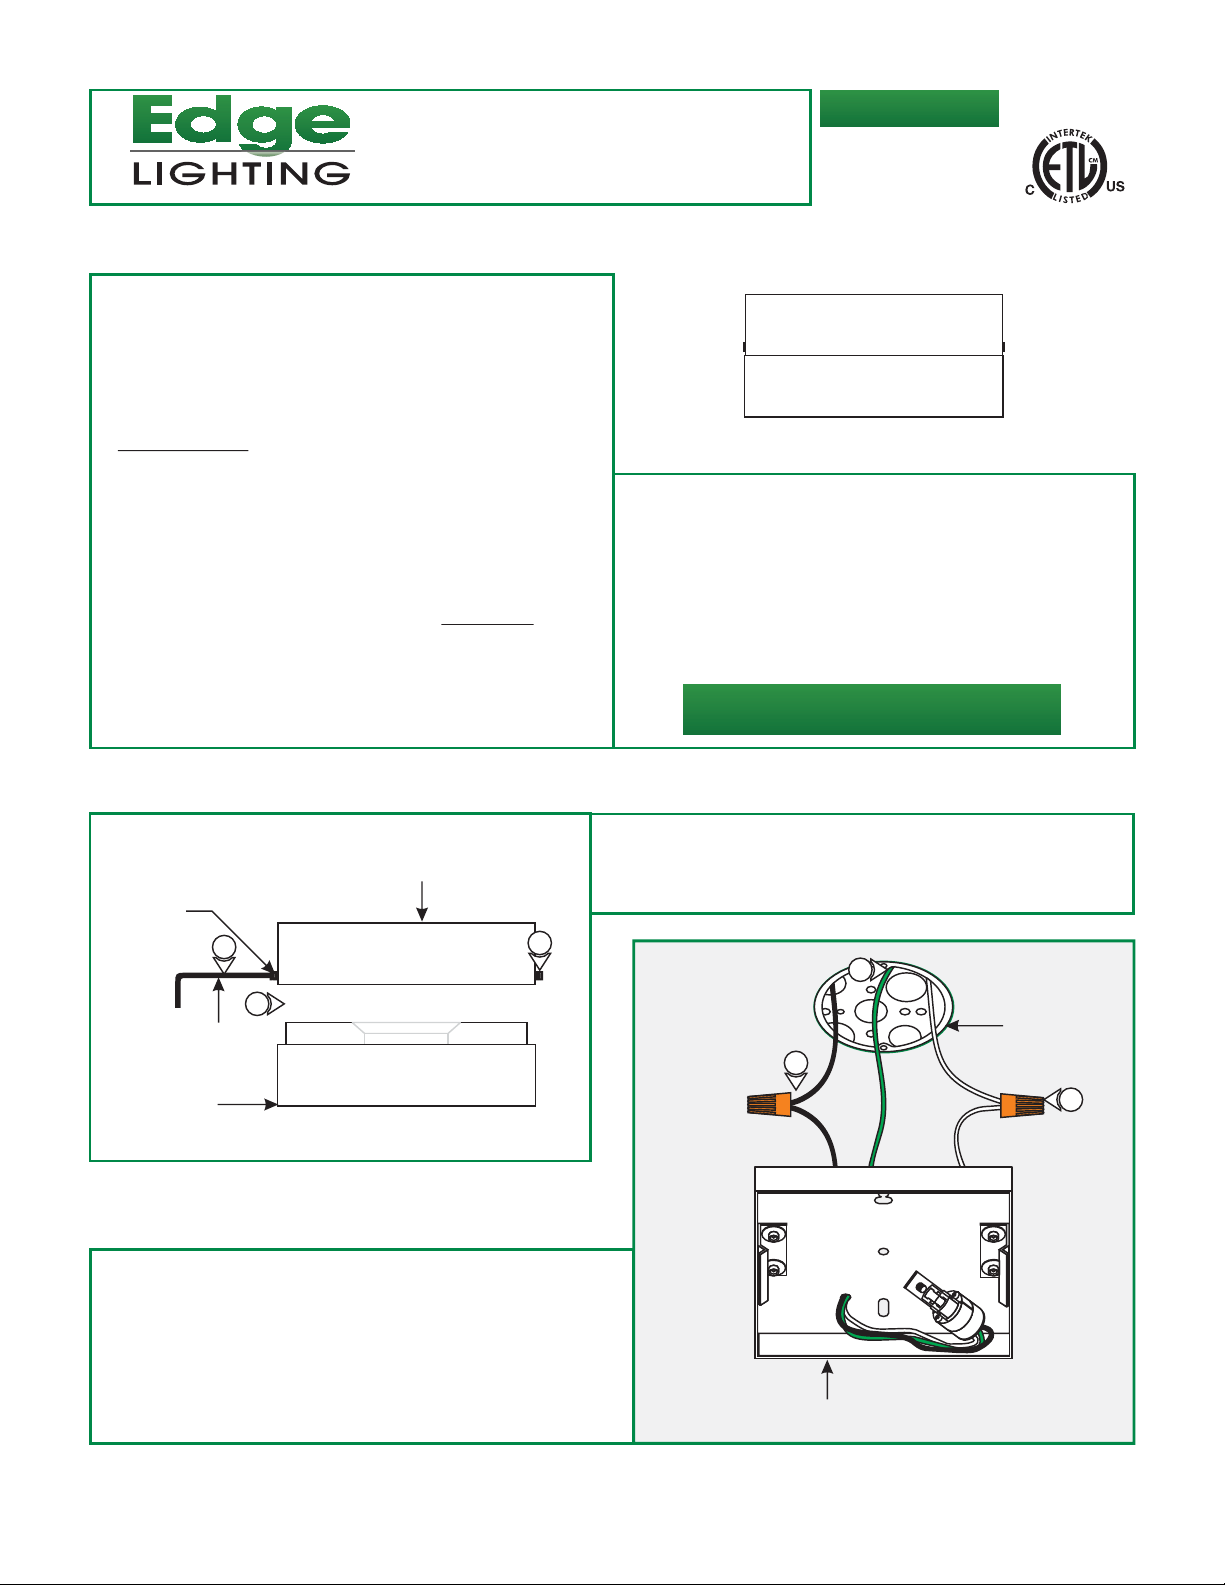
Install the Fixture
A
BACKPLATE
M4 SET
SCREW
1
2
2MM ALLEN
WRENCH
GLASS SHADE
3: Make sure that the fixture is grounded in accordance with
local electrical codes.
4: Connect the white fixture wire to the neutral power wire
with a wire nut.
1
1: Loosen the two M4 set screws on the
backplate with the 2mm Allen wrench provided.
2: Carefully pull the glass shade out.
B
5
(DO NOT REMOVE)
3
ELECTRICAL
BOX
4
5: Connect the black fixture wire to the hot power wire with a
wire nut.
BACKPLATE
1
Page 2
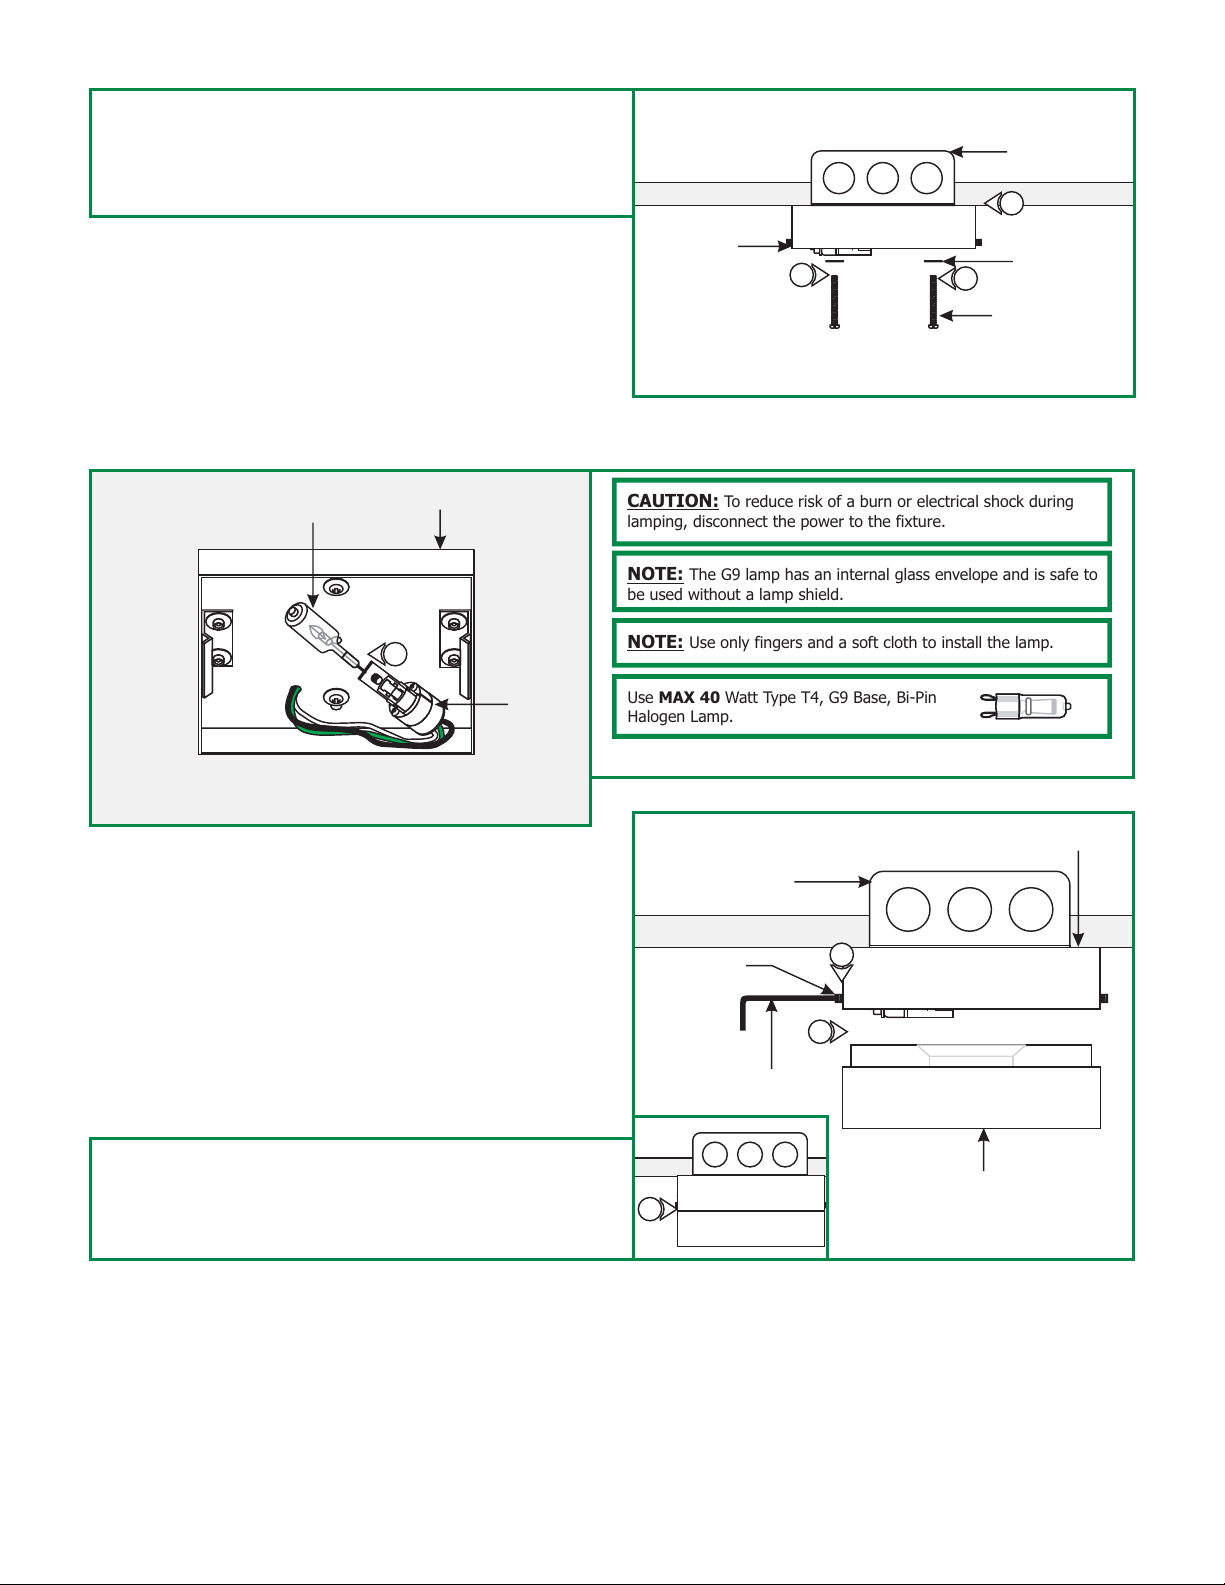
6: Place all wires and wire nut connections inside the electrical
box.
7: Mount the backplate to the electrical box holes with the two
#8-32 screws and washers provided.
C
ELECTRICAL
BOX
6
Install the Lamp & Glass Shade
D
LAMP
BACKPLATE
1
SOCKET
BACKPLATE
7
CAUTION: To reduce risk of a burn or electrical shock during
lamping, disconnect the power to the fixture.
NOTE: The G9 lamp has an internal glass envelope and is safe to
be used without a lamp shield.
NOTE: Use only fingers and a soft cloth to install the lamp.
Use MAX 40 Watt Type T4, G9 Base, Bi-Pin
Halogen Lamp.
1: Push the lamp completely into the socket.
WASHER
7
#8-32 SCREW
2: Push the glass shade completely into the mounting base until
it snaps properly into the springs.
3: Tighten the two M4 set screws on sides of the backplate with
the 2mm Allen wrench.
E
ELECTRICAL BOX
M4 SET
SCREW
3
BACKPLATE
3
2
2MM ALLEN
WRENCH
GLASS SHADE
2
 Loading...