

Page 1
© 2011 Edge Lighting. All Rights Reserved.
1718 W. Fullerton Ave
Chicago, IL 60614
Tel: 773-770-1195
Fax: 773-935-5613
www.edgelighting.com
info@edgelighting.com
NIGHT3-_-P
Installation Instructions for Night Owl 3 (Plug-In Version)
IMPORTANT INFORMATION
- This product is ETL listed for indoor locations.
- This product is for wall mount application.
- This instruction shows a typical installation.
SAVE THESE INSTRUCTIONS!
Install the Fixture
904-NIGHT3-P-01
A
COVER
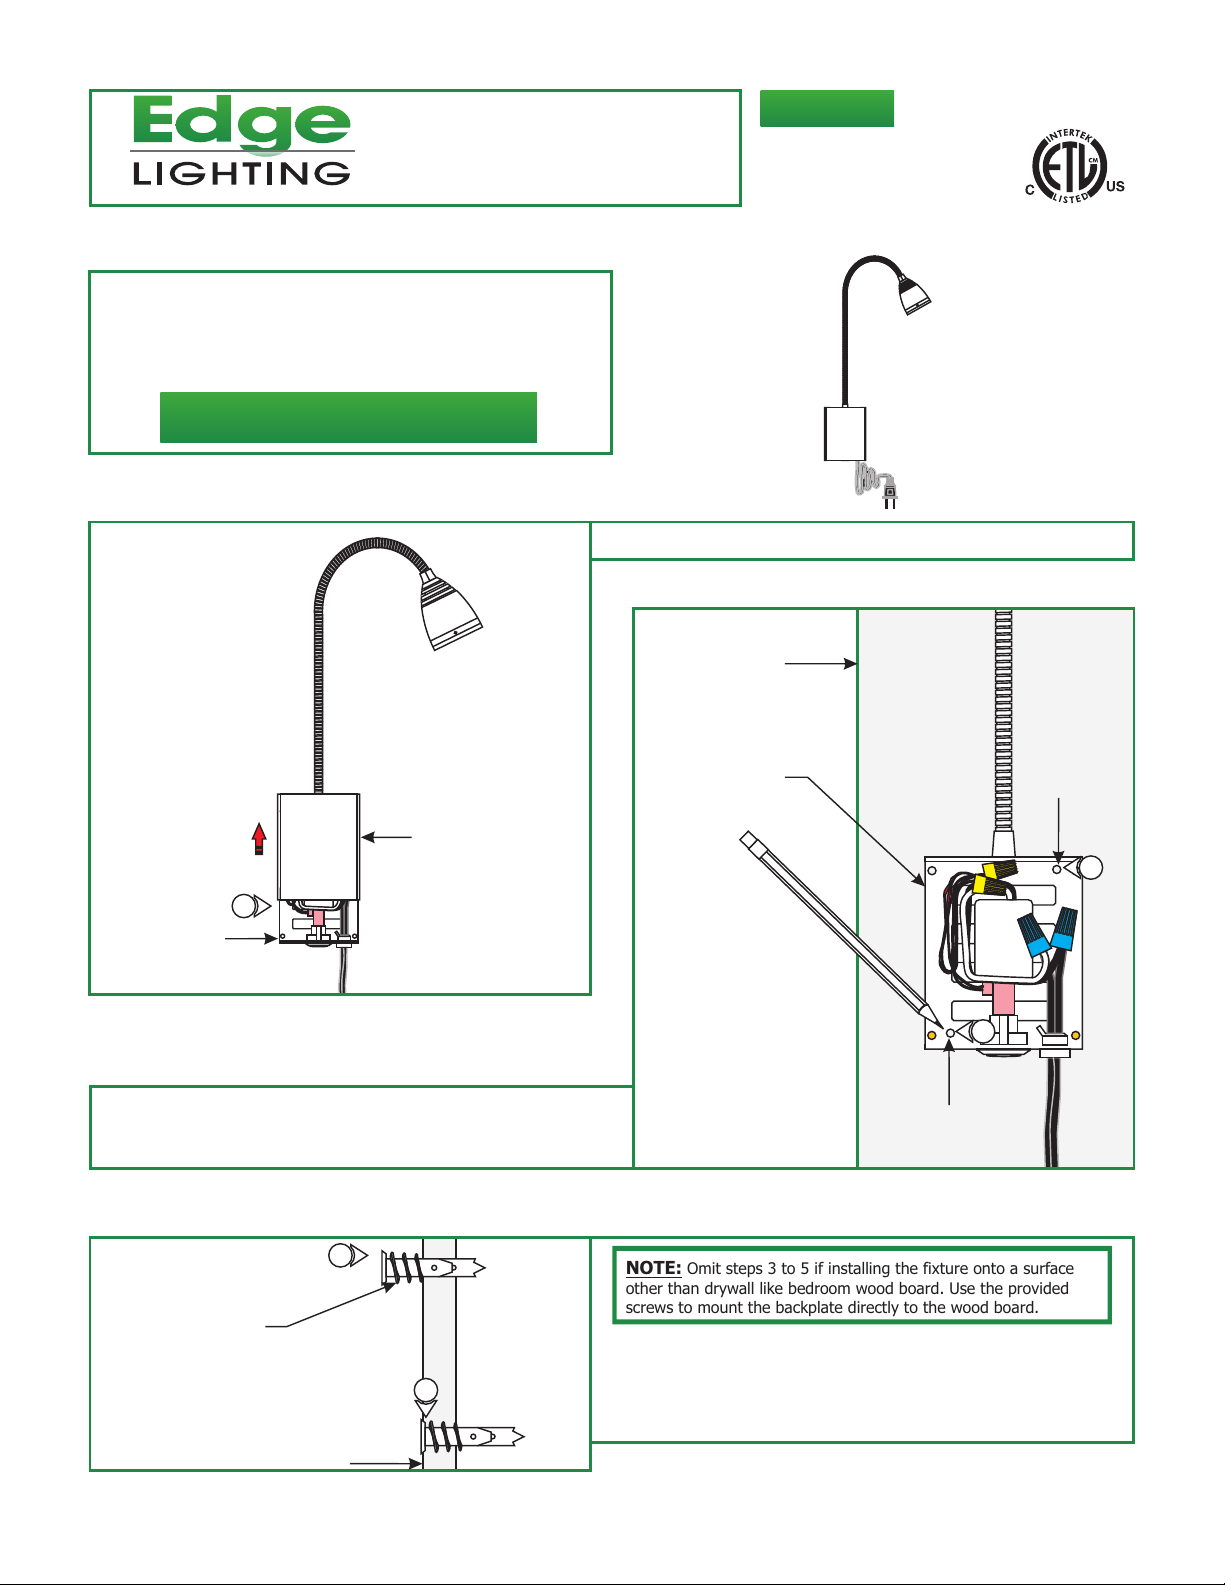
1
BACKPLATE
2: Hold the backplate against the surface where the fixture is
going to be mounted. Level the backplate vertically and mark
the two mounting holes on the surface.
1: Remove the cover by sliding it up and then off the backplate.
B
WALL
BACKPLATE
MOUNTING
HOLE
MOUNTING
HOLE
2
2
C
ANCHOR
WALL
3
4
NOTE: Omit steps 3 to 5 if installing the fixture onto a surface
other than drywall like bedroom wood board. Use the provided
screws to mount the backplate directly to the wood board.
3: Tap the anchors onto the marked points into the wall up to
the threaded portion with a hammer.
4: Screw the threaded portion of the anchors in with the a
Phillips screwdriver.
Page 2
D
WALL
MOUNTING
HOLE
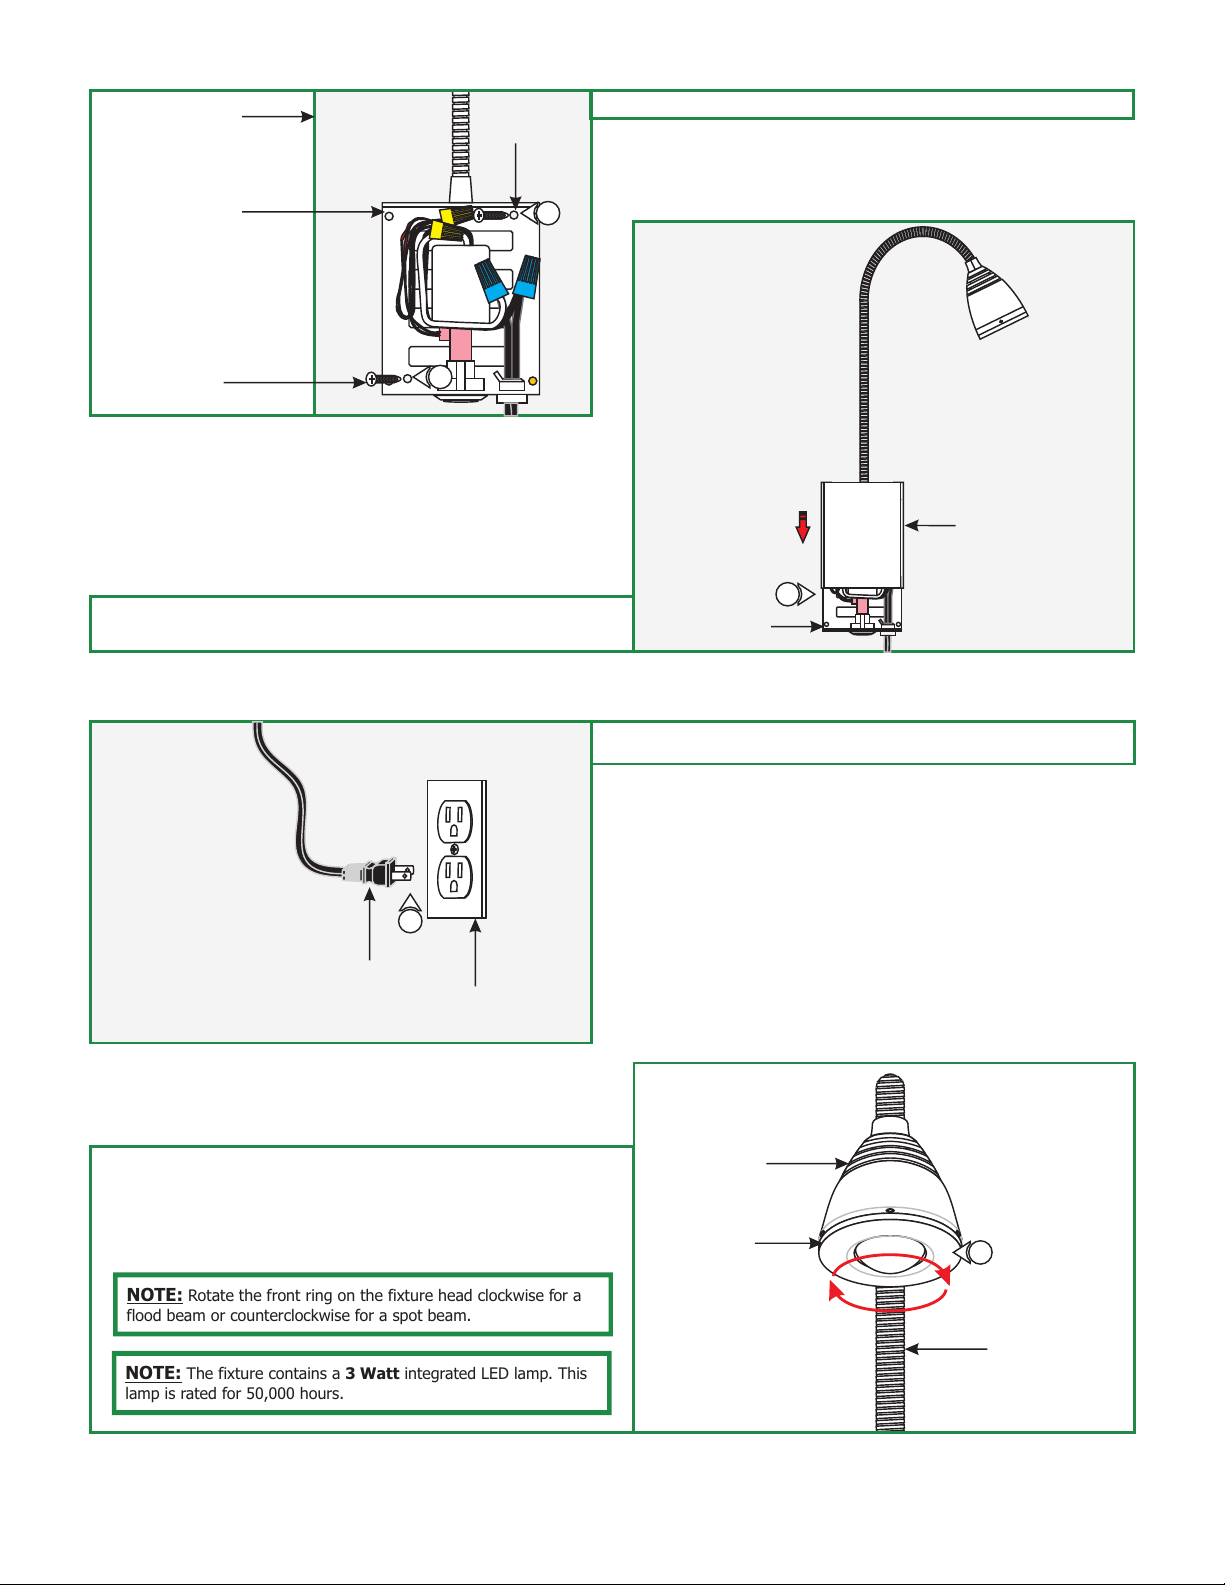
5: Mount the backplate to the anchors with the two #8 screws.
BACKPLATE
#8 SCREW
6: Replace and slide the cover down completely onto the
backplate.
5
F
5
E
COVER
6
BACKPLATE
7: Plug the power supply into the 120 volt power outlet.
7
PLUG-IN
120 VOLT
POWER OUTLET
8: Use the rocker switch on the bottom of the backplate to
control intensity of the light.
9: Rotate the front ring on the fixture head to adjust the beam
spread to either a spot or flood.
NOTE: Rotate the front ring on the fixture head clockwise for a
flood beam or counterclockwise for a spot beam.
NOTE: The fixture contains a 3 Watt integrated LED lamp. This
lamp is rated for 50,000 hours.
G
FIXTURE HEAD
FRONT RING
9
ADJUSTABLE ARM
2
 Loading...