

Page 1
© 2011 Edge Lighting. All Rights Reserved.
1718 W. Fullerton Ave
Chicago, IL 60614
Tel: 773-770-1195
Fax: 773-935-5613
www.edgelighting.com
info@edgelighting.com
MAR-RD-22-_-CH
MAR-SQ-24-_-CH
Installation Instructions for Marilyn Round & Square
IMPORTANT INFORMATION
- This product is wall mounted only.
- This instruction shows a typical installation
- This Fluorescent lamps are not dimmable.
SAVE THESE INSTRUCTIONS!
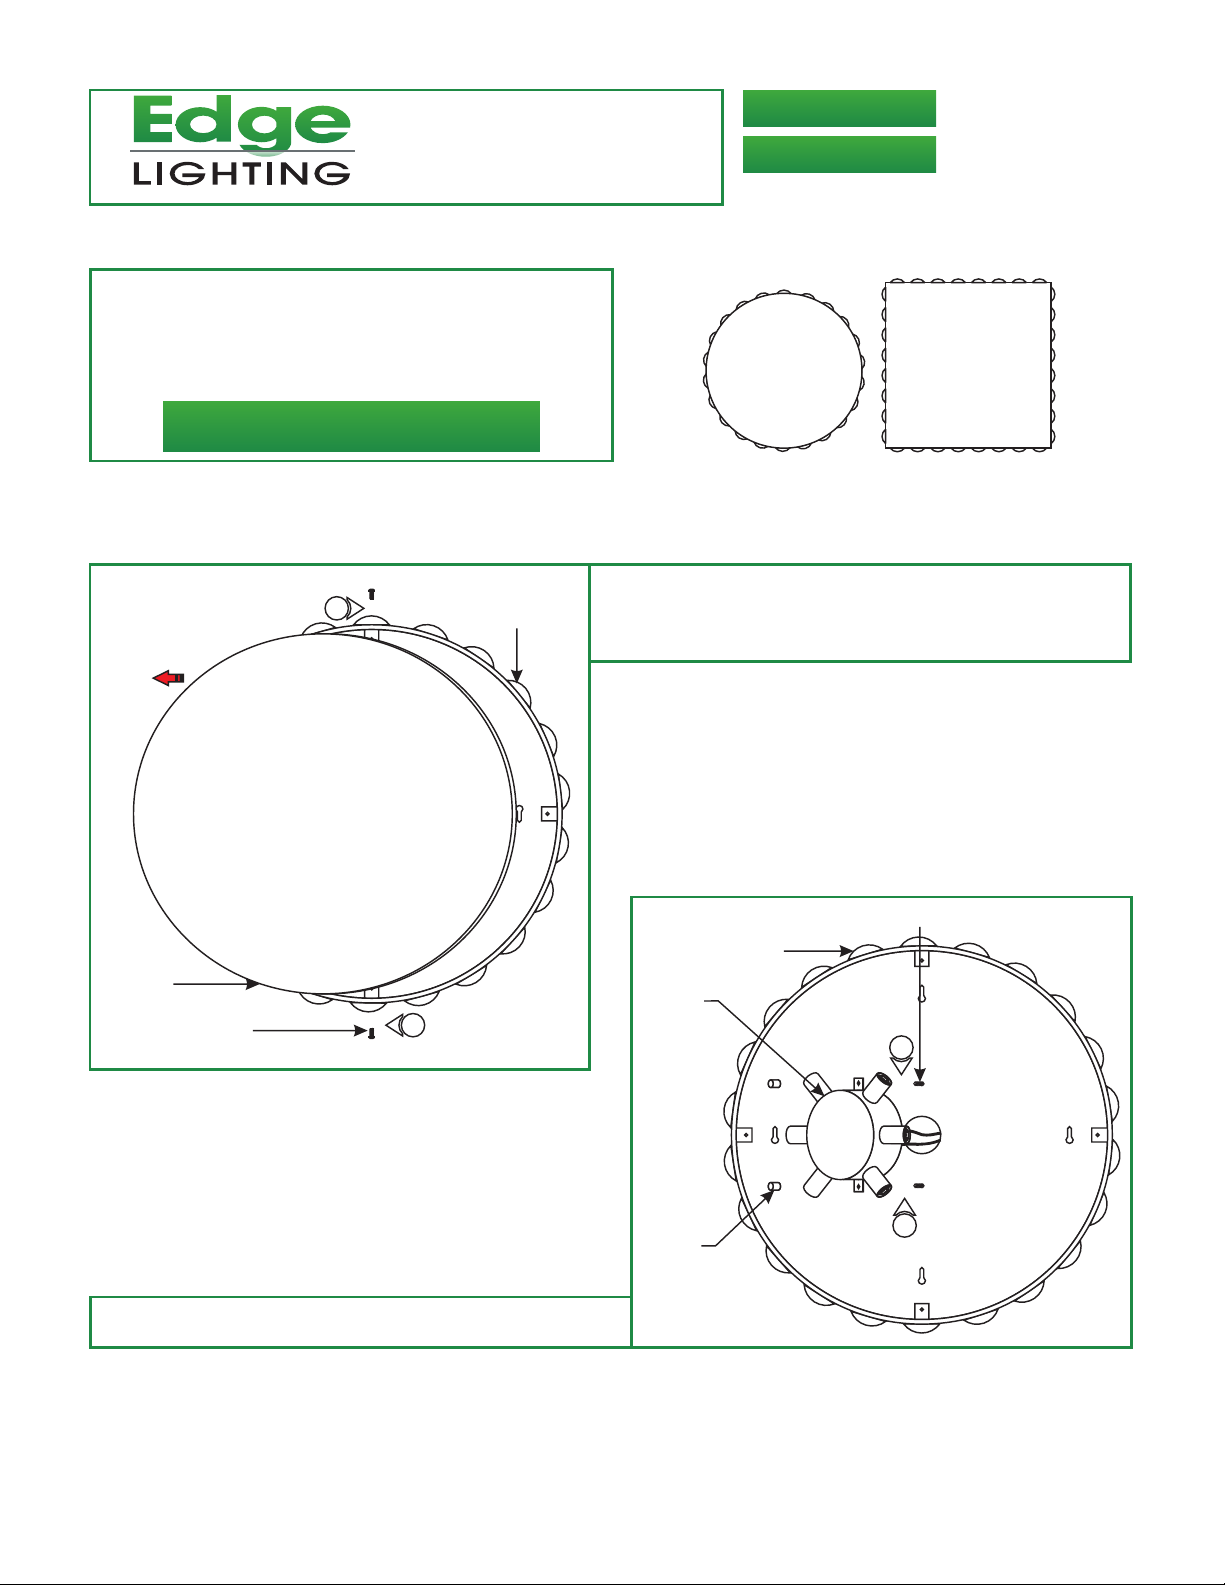
Install the Backplate
904-MARILYN-01
A
MIRROR
PHILLIPS SCREW
1: Remove the two Phillips screws from the sides of the
1
1
BACKPLATE
backplate.
2: Carefully remove the mirror.
B
BACKPLATE
SOCKET
ASSEMBLY
THREADED STUD
3
3: Remove the thumb nuts, and carefully remove the socket
assembly.
THUMB
NUT
3
1
Page 2
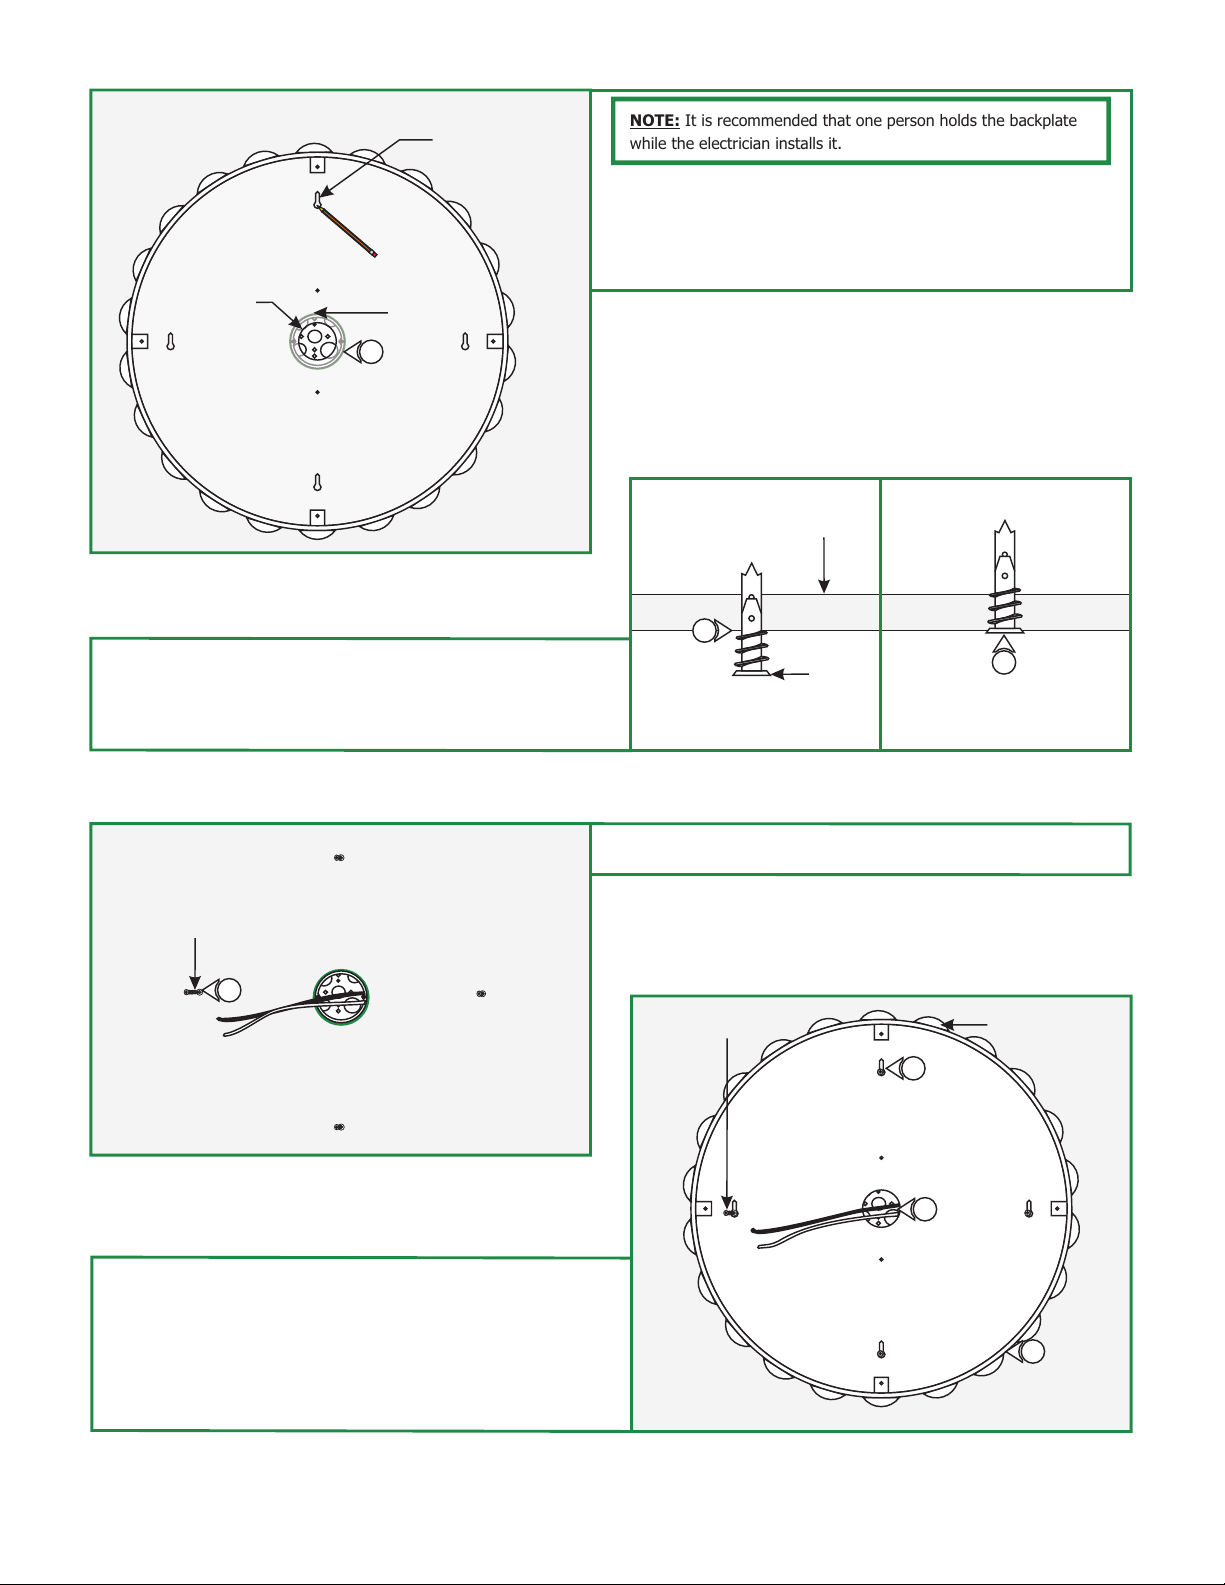
C
BACKPLATE
NOTE: It is recommended that one person holds the backplate
while the electrician installs it.
4: Align the backplate center hole with the electrical box. Level
the backplate horizontally and mark the four key holes onto
the wall.
MOUNTING PLATE
CENTER HOLE
6: Tap the anchors onto the marked points up to the threaded
portion with a hammer.
7: Screw in the threaded portion of the anchors with a Phillips
screwdriver.
ELECTRICAL
BOX
4
E
5: Remove the backplate.
D
WALL
6
ANCHOR
8: Tighten (not completely) the four #8 screws into the anchors
leaving the head unscrewed for 1/8".
7
PHILLIPS SCREW
8
9: Feed the power wires coming from the electrical box
through the backplate center hole.
10: Hang the backplate keyholes onto the exposed screws.
11: Tighten the four #8 screws completely to the secure the
backplate in place.
PHILLIPS SCREW
F
BACKPLATE
11
9
10
2
Page 3

G
12: Make sure that the backplate is grounded in accordance
with local electrical codes.
13: Connect the white socket assembly wire to neutral power
wire a wire nut.
14
13
12
15: Place all wires inside the electrical box and socket
assembly.
16: Mount the socket assembly to the backplate threaded studs
with the thumb nuts.
Install the Lamp & Mirror
I
BACKPLATE
14: Connect the black socket assembly wire to the hot power
wire with a wire nut.
H
BACKPLATE
THUMB
NUT
SOCKET
ASSEMBLY
THREADED
STUD
CAUTION: To reduce risk of a burn or electrical shock during
lamping, disconnect the power to the fixture.
16
15
16
1
SOCKET
ASSEMBLY
2: Align the mirror brackets to the backplate brackets. Place the
mirror into the backplate and tighten the Phillips screws to
secure the mirror in place.
Use MAX 20 Watt Type E12 Candelabra base
Krypton/Xenon For Each Socket.
Use MAX 18 Watt Type E12 Candelabra base
Self Ballast Compact Fluorescent Spiral Lamp For
Each Socket.
1: Screw the lamps completely into the sockets.
J
MIRROR
PHILLIPS SCREW
2
BACKPLATE
2
3
 Loading...