

904-SS-HR-LFX-01
© 2011 Edge Lighting. All Rights Reserved.
1718 W. Fullerton Ave
Chicago, IL 60614
Tel: 773-770-1195
Fax: 773-935-5613
www.edgelighting.com
info@edgelighting.com
SS-HR-LFX-_
Installation Instructions for Flexible L Shaped Heat Sink Reflector
IMPORTANT INFORMATION
- This product can be mounted as floor reflector or ceiling
reflector.
- This installation shows a typical floor installation.
SAVE THESE INSTRUCTIONS!
Install the Reflector
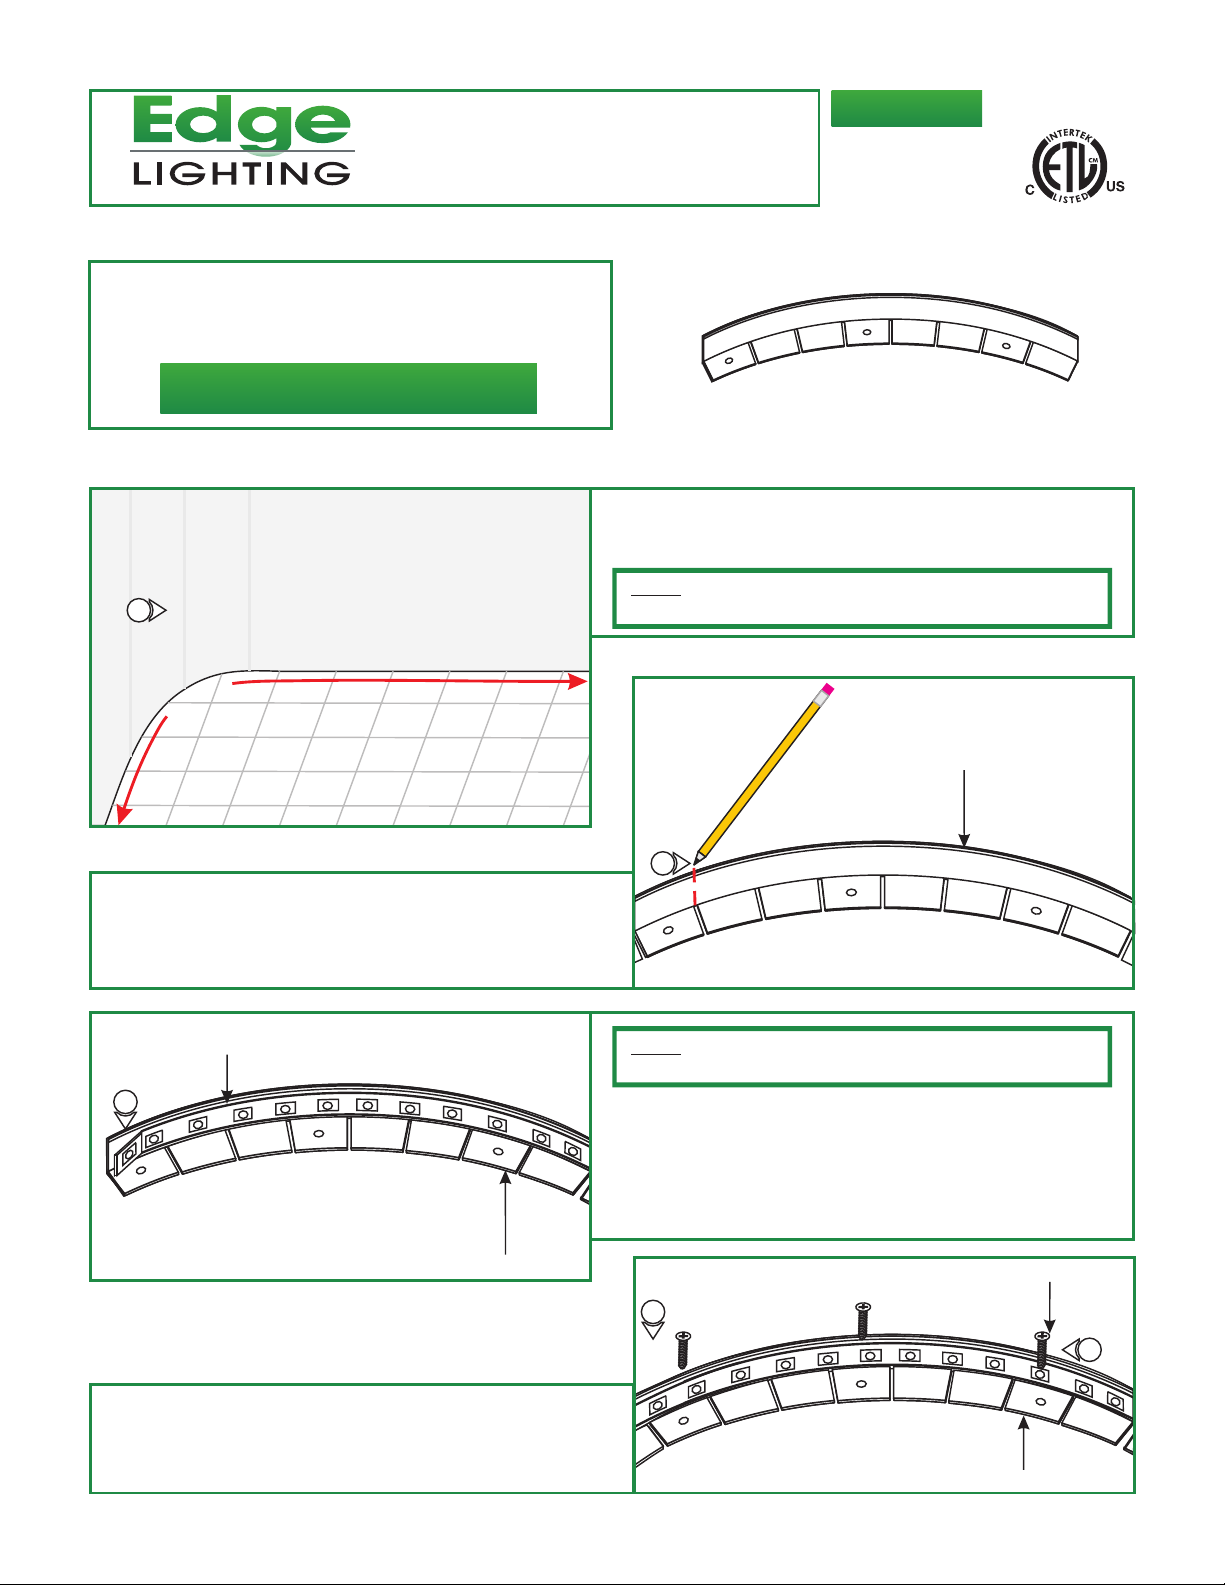
A
1
CURVED REFLECTOR
INSTALLATION
3: If necessary, mark the size of the reflector.
4: Cut the excess reflector.
5: Clean the burrs around the the cut sections.
C
SOFT STRIP LED
7
CURVED WALL
1: Determine the location where the reflector will be installed.
2: Using a tape measure determine the reflector size (A).
NOTE: For sections longer than 3ft use multiple flexible heat
sinks.
B
REFLECTOR
FLOOR
3
NOTE: Avoid bending the soft strip in sharp horizontal angles
which may damage the LEDs. Use the proper power connectors.
6: Clean the area thoroughly on the reflector where the soft
strip LED will be installed.
REFLECTOR
8: Secure the reflector to the surface using the provided #6
screws.
9: Refer to the power supply instructions to power the LED soft
strip.
7: Remove the backing from the soft strip LED and firmly press
down making sure there are no air bubbles that can cause
surface irregularities.
D
8
#6 SCREW
8
REFLECTOR
1
 Loading...