


904-FJP-26RE-2-01
© 2009 Edge Lighting. All Rights Reserved.
1718 W. Fullerton Ave
Chicago, IL 60614
Tel: 773-770-1195
Fax: 773-935-5613
www.edgelighting.com
info@edgelighting.com
FJP-26RE-2-_
Installation Instructions for 26" Rectangle 2 Port Fast Jack Canopy
IMPORTANT INFORMATION
- This product is ETL listed for indoor dry locations.
- This product is dimmable with a standard incandescent
dimmer.
- This product can be installed to a 4" electrical box with
round plaster ring, or to an octagon electrical box.
SAVE THESE INSTRUCTIONS!
Install the Canopy
A
PHILLIPS SCREW
1
CANOPY
2 Align the mounting plate holes with the electrical box holes
:
and mark a point through the mounting plate holes onto the
ceiling. These points are used for the anchors.
MOUNTING PLATE
1
1
C
3
ANCHOR
4
1: Loosen and remove the six Phillips screws from the canopy
to remove the mounting plate.
B
3: Tap the anchors onto the marked points up to the threaded
portion with a hammer.
4: Screw in the threaded portion of the anchors with a Phillips
screwdriver.
D
ELECTRICAL BOX HOLE
2 2
MOUNTING PLATE
CROSSBAR ASSEMBLY
Feed the power wires through the crossbar assembly
5:
center hole.
6: Mount the crossbar assembly to the electrical box holes with
the provided #8-32 screws.
#8-32 SCREW
5
6
6
1
E
MOUNTING PLATE
ELECTRICAL BOX
COVER
7:
Slide the cover and mounting plate center hole onto the
crossbar threaded nipple and secure it with the nut provided.
6
Secure the mounting plate to the anchors with the provided
8:
#8 screws.
G
ELECTRICAL BOX
9
CANOPY
POWER WIRE
NUT
1011
F
8
#8 SCREW
Make sure the mounting plate is grounded in accordance
9:
with local electrical codes.
10: Connect the white fixture wire to the neutral power wire
with a wire nut.
11: Connect the black fixture wire to the hot power wire with a
wire nut.
8
H
12: Place all the wires and wire nut connections inside the
canopy.
13: Align and secure the canopy to the mounting plate by
tightening the six #8-32 screws.
I
14
FAST JACK
FIXTURE
CONNECTOR
14
FAST JACK
CANOPY
PORT
13
12
#8-32 SCREW
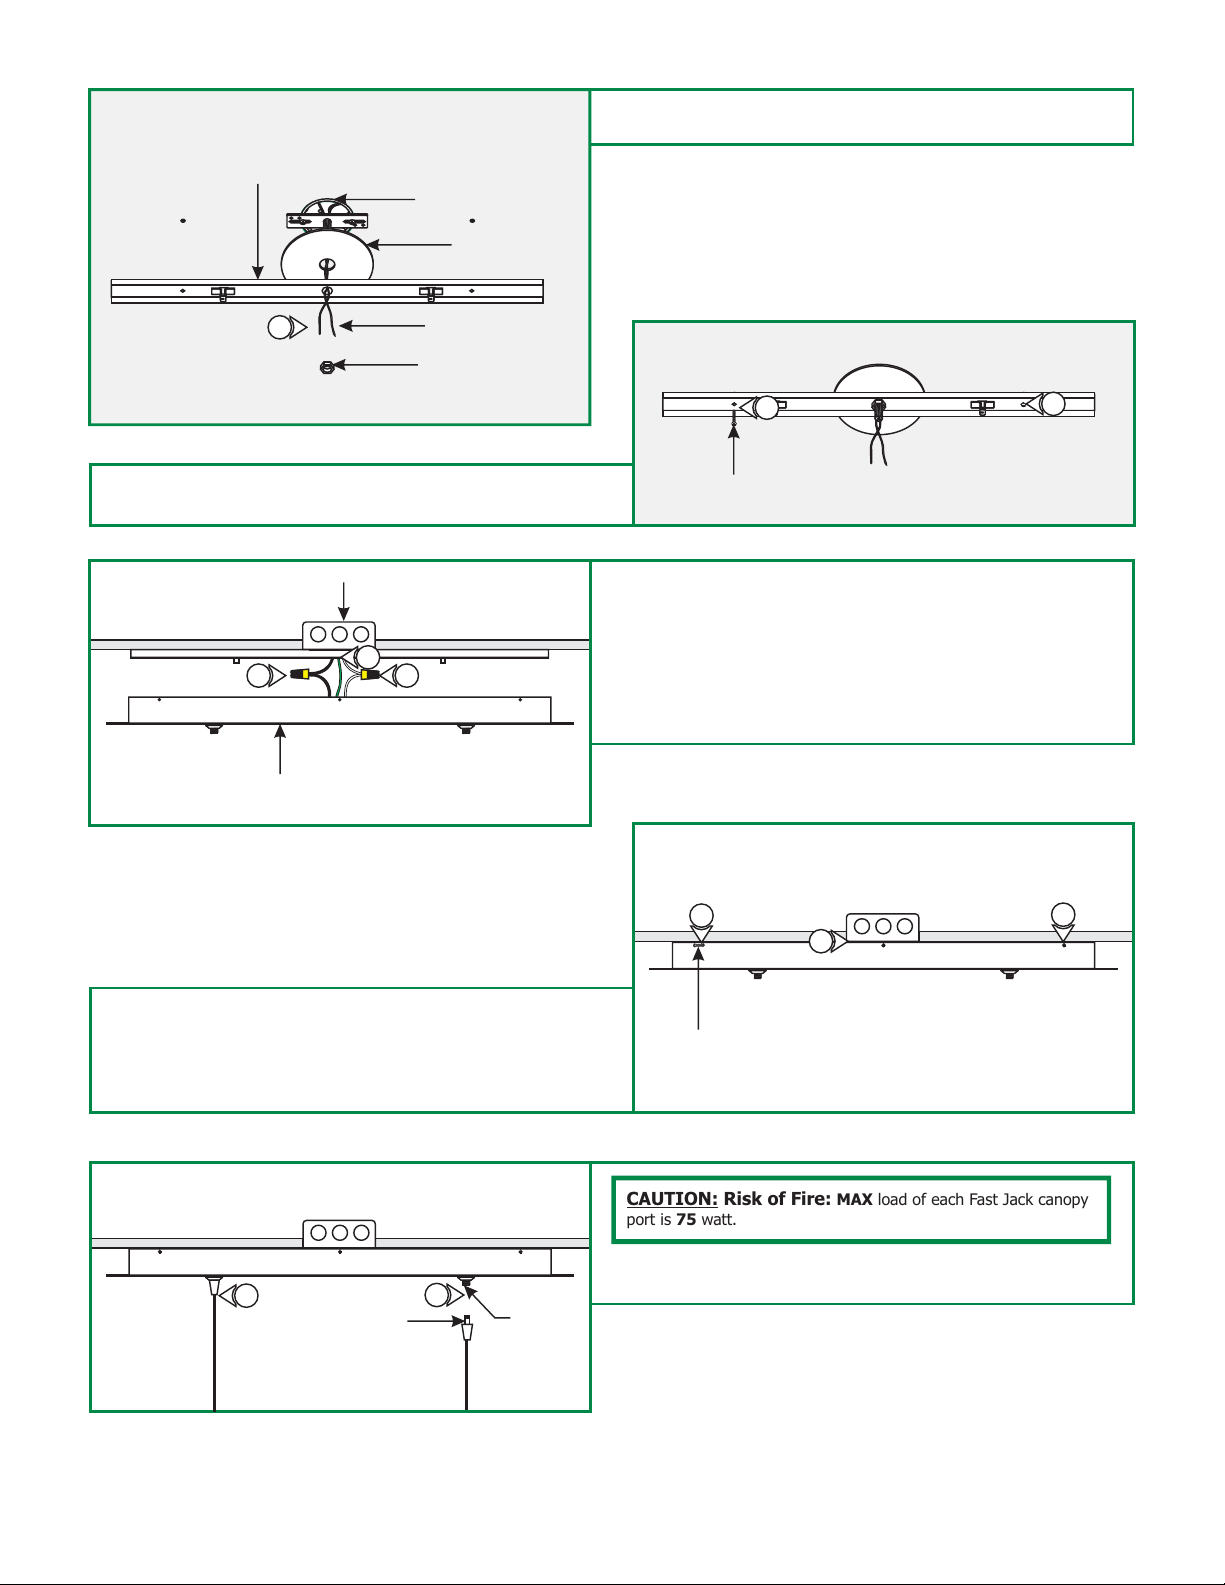
CAUTION: Risk of Fire:
port is 75 watt.
14:
Use fingers to tighten each Fast Jack fixture connector into
one Fast Jack canopy port.
MAX load of each Fast Jack canopy
13
2
 Loading...