

Page 1
© 2010 Edge Lighting. All Rights Reserved.
1718 W. Fullerton Ave
Chicago, IL 60614
Tel: 773-770-1195
Fax: 773-935-5613
www.edgelighting.com
info@edgelighting.com
904-FJC-2RD-2SQ-REMOTE_01
FJC-2SQFJC-2RD-
Installation Instructions for 2
" Round & Square Fast Jack For Remote
Transformer
IMPORTANT INFORMATION
- This product is ETL listed for indoor dry locations.
- This product mounts to a 4" standard electrical box or
octagon electrical box using the 2" plaster ring provided.
- A remote transformer should be installed prior to
beginning this installation.
SAVE THESE INSTRUCTIONS!
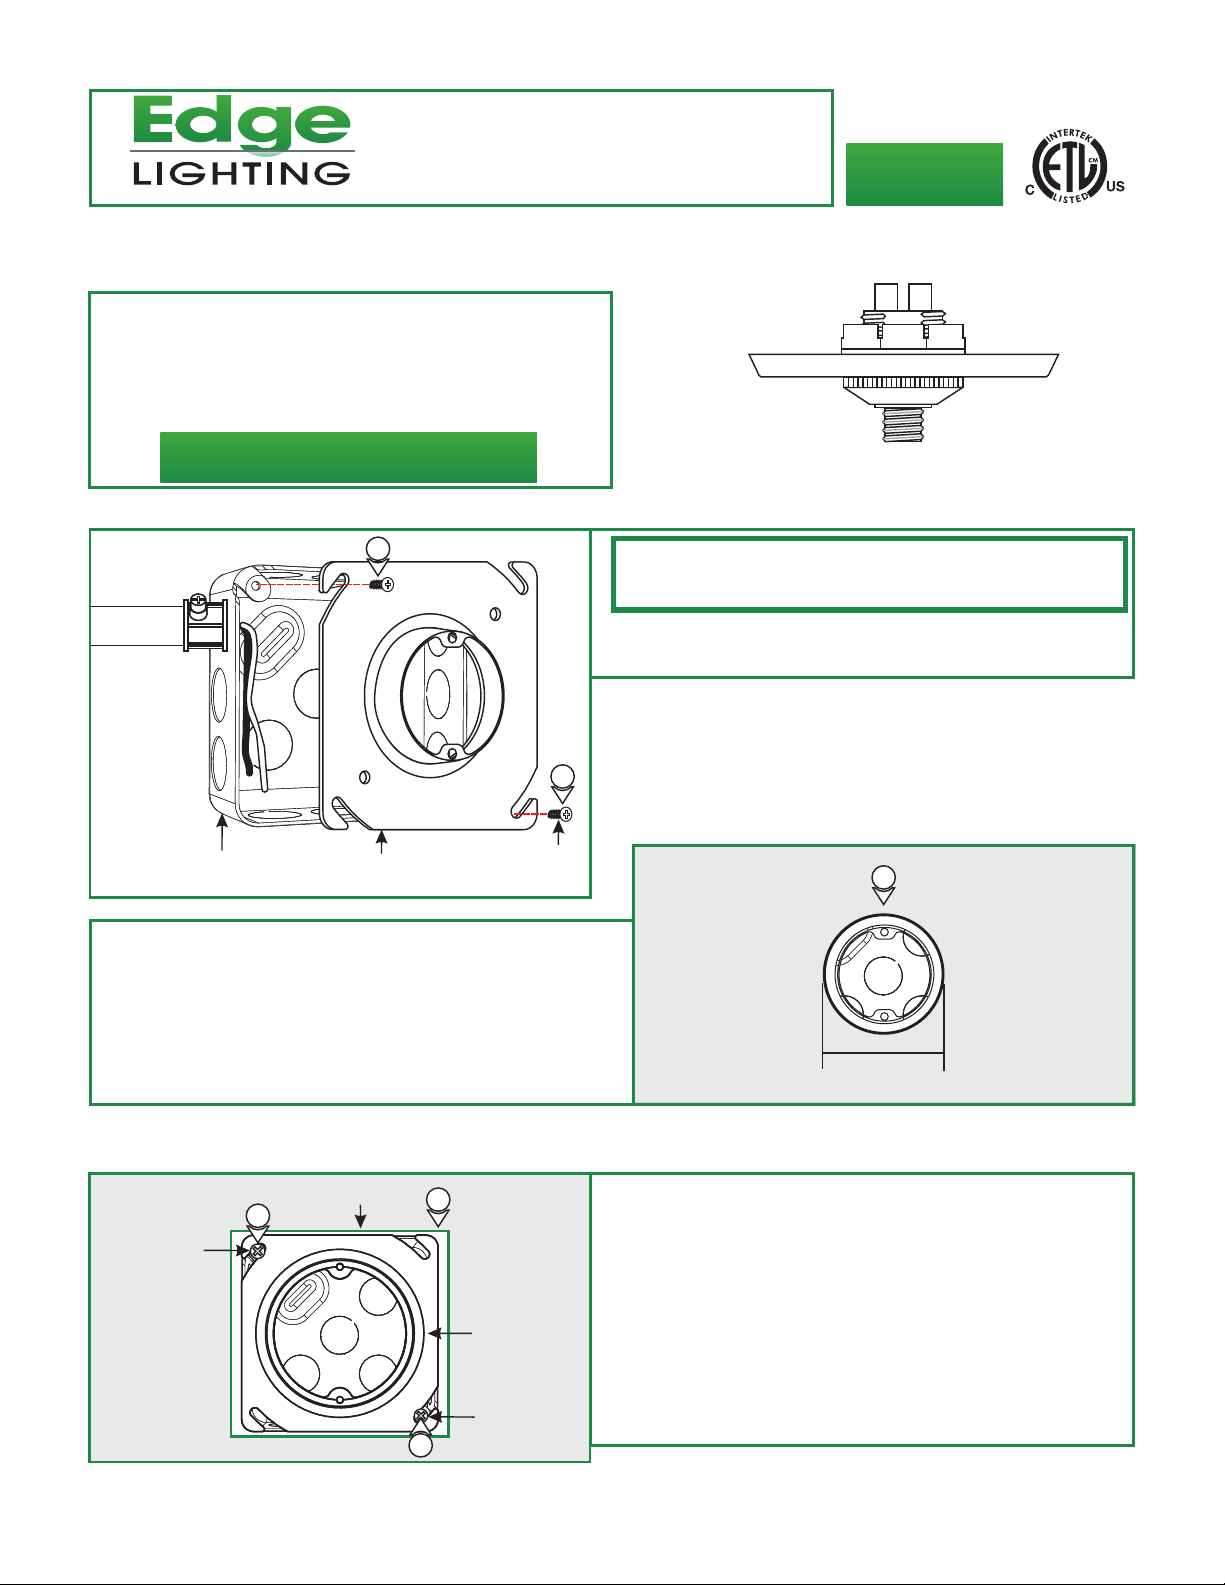
Install 2" Plaster Ring Adapter (New Construction)
A
1
1
NOTE: Junction box must be mounted to allow clearance of
½" between the face of the junction box and the drywall
surface.
1: Install the 2" Plaster Ring Adapter to the junction box using
two #8-32 screws.
JUNCTION BOX
2: Use a circular saw to cut out the drywall section where the
junction box opening is.
3: Install the drywall. If necessary, plaster and finish the
drywall.
4: Complete installation per “Install Fast Jack Port” section on
Page 2.
2" PLASTER RING
ADAPTER
#8-32
SCREW
B
Install 2" Plaster Ring Adapter (Remodel)
CEILING
C
#8-32
SCREW
CUT DRYWALL
2
1
2
CEILING
STANDARD
PLASTER
PLATE
#8-32
SCREW
1: Cut away the drywall where the junction box is located.
2: Remove the plaster ring by removing the #8-32 screws.
3: Install the 2" Plaster Ring to the junction box using two
#8-32 screws.
4: Plaster and finish around the junction box opening.
5: Complete installation by following steps in “Install Fast Jack
Port” section on Page 2.
3
2 1/4"
CEILING
1
Page 2

Install Fast Jack Port
D
TRANSFORMER
WIRES
2: Place all wire and wire nut connections properly inside the
junction box. Mount the Fast Jack port to the 2" Plaster Ring
using two #8-32 screws provided.
1 1
FAST JACK FIXTURE
CEILING
F
NOTE: Ensure that power supply wires from remote
transformer are present in junction box before continuing.
1: Connect each remote transformer wire to one Fast Jack
fixture wire with a wire nut.
E
CEILING
2
#8-32 SCREW
FAST JACK FIXTURE
3: Place the canopy onto the Fast Jack port against drywall and
secure it in place by tightening the knurled cap to the Fast
Jack port. Make sure the knurled cap is not cross
threaded.
CEILING
FAST JACK PORT
3
KNURLED CAP
4:
Use fingers to tighten the Fast Jack fixture connector into
the Fast Jack port.
3
CANOPY
G
FAST JACK FIXTURE
CONNECTOR
FAST JACK
PORT
4
CEILING
2
 Loading...