

Page 1
© 2012 Edge Lighting. All Rights Reserved.
1718 W. Fullerton Ave
Chicago, IL 60614
Tel: 773-770-1195
Fax: 773-935-5613
www.edgelighting.com
info@edgelighting.com
FJC-24SQ-_
Installation Instructions for 24" Square 20 & 26 Port Fast Jack
Canopy Only
IMPORTANT INFORMATION
- This product is ETL listed for indoor dry locations.
SAVE THESE INSTRUCTIONS!
Running the Power from a Remote Transformer to the
Fast Jack Canopy
904-FJC-24SQ-01
A
ELECTRICAL BOX
1
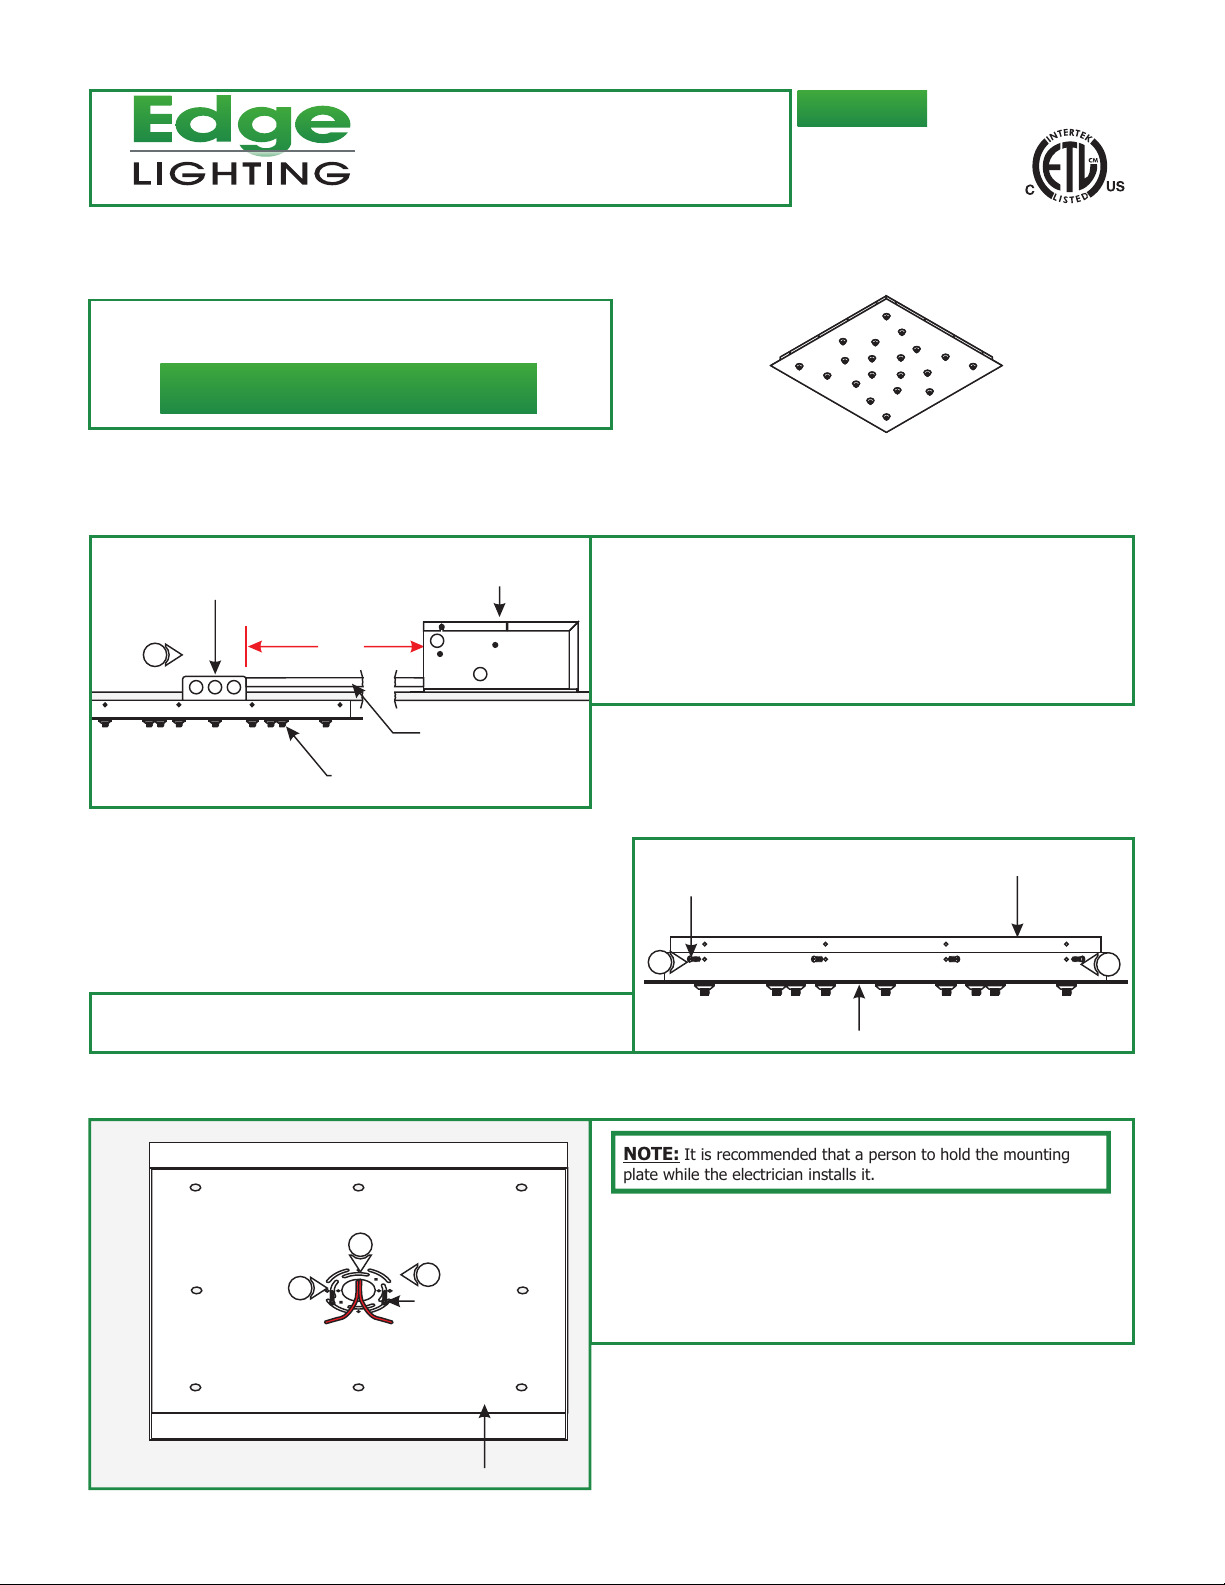
1: Remove the sixteen #8-32 screws around the canopy to
remove the mounting plate.
MAX
20FT
FAST JACK
CANOPY
REMOTE
TRANSFORMER
CONDUIT
1: Run the low voltage wires from a remote transformer to
electrical box where Fast Jack canopy is going to be
installed. It is recommended to install the remote
transformer near the electrical box to avoid voltage drop.
Refer to the instructions provided with remote transformer
for low voltage wire size chart. Refer to the low voltage wire
size chart provided with the remote transformer.
Install the Canopy
B
#8-32 SCREW
1
CANOPY
MOUNTING PLATE
1
C
NOTE: It is recommended that a person to hold the mounting
plate while the electrician installs it.
2: Feed the low voltage coming from the remote transformer
2
3
3
#8-32 SCREW
MOUNTING PLATE
through mounting plate center hole.
3: Align the mounting plate slots with the electrical box holes
and secure it to the electrical box holes with the provided
two #8-32 screws.
1
Page 2
D
ANCHOR
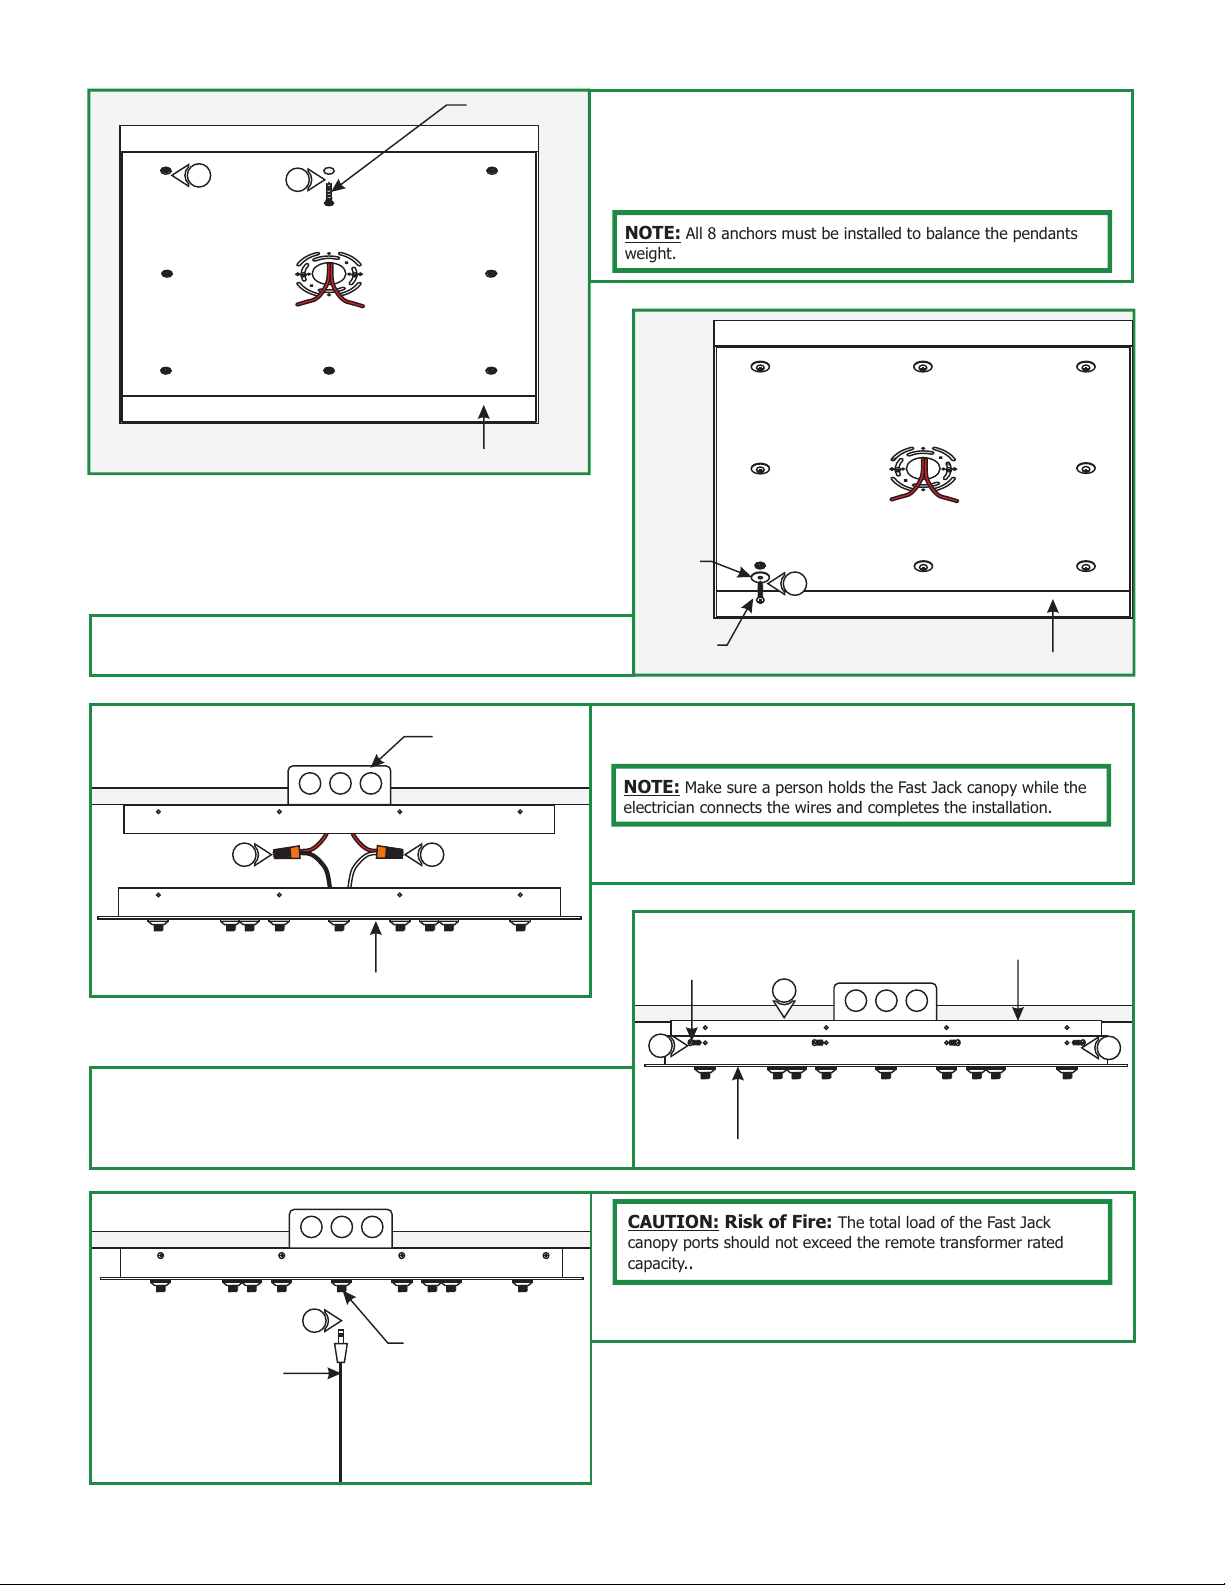
4: Tap the anchors through the mounting plate holes onto the
marked point up to the threaded portion with a hammer.
5
6: Secure the mounting plate to the anchors with the provided
#8 screws and washers.
F
4
MOUNTING PLATE
ELECTRICAL BOX
5: Screw in the threaded portion of the anchors with a Phillips
screwdriver.
NOTE: All 8 anchors must be installed to balance the pendants
weight.
E
WASHER
6
#8 SCREW
MOUNTING PLATE
7: Make sure that the mounting plate is grounded in
accordance with local electrical codes.
8
FAST JACK CANOPY
9: Place all wires and wire nut connections inside the canopy.
10: Place the canopy onto the mounting plate and tighten the
sixteen #8-32 screws.
8
H
11
FAST JACK
FIXTURE
CONNECTOR
FAST JACK
CANOPY
PORT
NOTE: Make sure a person holds the Fast Jack canopy while the
electrician connects the wires and completes the installation.
8: Connect each canopy wire to one low voltage transformer
wire with a wire nut.
G
#8-32 SCREW
9
10
FAST JACK CANOPY
CAUTION: Risk of Fire: The total load of the Fast Jack
canopy ports should not exceed the remote transformer rated
capacity..
11:
Use fingers to tighten each Fast Jack fixture connector into
one Fast Jack canopy port.
MOUNTING PLATE
10
2
 Loading...