

Page 1
EcoBoulder
Waterproof Outdoor Speaker
+
User Guide
1
Page 2
IMPORTANT SAFETY INFORMATION
WARNING: TO REDUCE THE RISK OF ELECTRIC SHOCK, DO NOT REMOVE COVER (OR BACK)
AS THERE ARE NO USER-SERVICEABLE PARTS INSIDE. REFER SERVICING TO QUALIFIED
SERVICE PERSONNEL.
AVIS
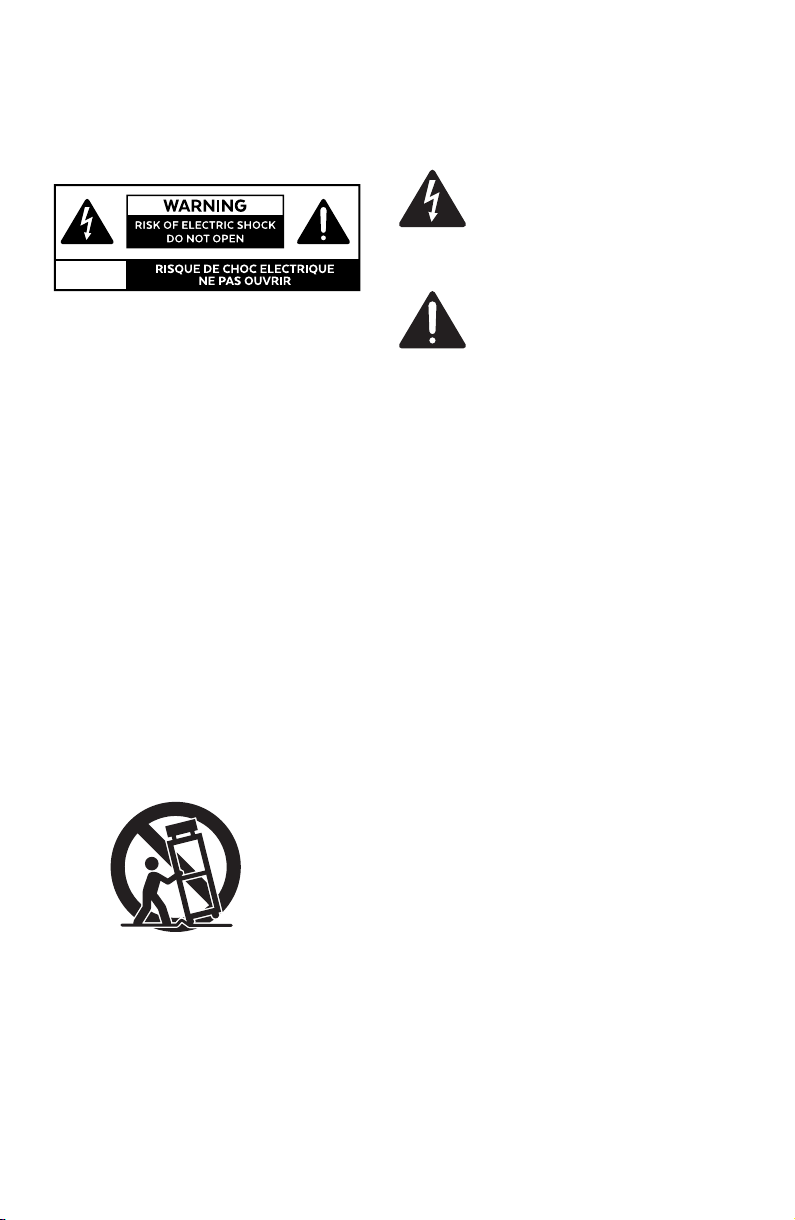
The lightning flash with arrowhead symbol,
within an equalateral triangle, is intended to
alert the user to the presence of non-insulated
"dangerous voltage" within the product's
enclosure that may be of sufficient magnitude
to constitute a risk of electric shock.
The exclamation point within an equilateral
triangle is intended to alert the user to
the presence of important operating and
maintenance instructions in the literature
accompanying the appliance.
IMPORTANT SAFETY INSTRUCTIONS
1. Read these instructions – All the safety and operating instructions should be read before this
product is operated.
2. Keep these instructions – The safety and operating instructions should be retained for
future reference.
3. Heed all warnings – All warnings on the appliance and in the operating instructions should be
adhered to.
4. Follow all instructions – All operating and use instructions should be followed.
5. This apparatus can be used in outdoor conditions after disconnected the AC Mains supply and
closing the waterproof cap for the AC inlet. It must not be used in outdoor conditions when
charging. Do not use this apparatus near water – The appliance should not be used near water
or moisture – for example, in a wet basement or near a swimming pool, and the like'
6. Clean only with dry cloth.
7. Do not block any ventilation openings. Install in accordance with the manufacture’s instructions.
8. Do not install near any heat sources such as radiators, heat registers, stoves, or other apparatus
(including amplifiers) that produce heat.
9. Only use attachments/accessories specified by the manufacturer.
10. Use only with the cart, stand, tripod, bracket, or table
specified by the manufacturer, or sold with the apparatus.
When a cart or rack is used, use caution when moving the
cart/apparatus combination to avoid injury from tip-over.
11. Do not install this equipment in a confined or building-in space such as a book case or similar
unit, and remain a well ventilation conditions. The ventilation should not be impeded by
covering the ventilation openings with items such as newspaper, table-cloths, curtains etc.
12. Protect the power cord from being walked on or pinched particularly at plugs, convenience
receptacles, and the point where they exit from the apparatus.
13. Unplug this apparatus during lightning storms or when unused for long periods of time.
14. CAUTION: Danger of explosion if battery is incorrectly replaced. Replace only with the same or
equivalent type.
15. The battery (battery or batteries of battery pack) shall not be exposed to excessive heat such
as sunshine, fire or the like.
2
Page 3
16. Refer all servicing to qualified service personnel. Servicing is required when the apparatus has
been damaged in any way, such as power-supply cord or plug is damaged, liquid has been
spilled or objects have fallen into the apparatus, the apparatus has been exposed to rain or
moisture, does not operate normally, or has been dropped.
17. Keep a minimum distance of 5cm around all edges of the display for sufficient ventilation.
18. The ventilation should not be impeded by covering the ventilation openings with items, such
as newspapers, table-cloths, curtains, etc.
19. No naked flame sources, such as lighted candles, should be placed on the apparatus.
20. Operating Environment: temperature: 5 degree-35 degree, Humidity: 10% to 90%
non-condensing, altitude: 0-2000m. Safety way to remove the battery or the battery from
the equipment: Remove the old battery or battery pack, follow the steps in reverse order than
the assembly. To prevent contamination of the environment and bring on possible threat to
human and animal health, the old battery or the battery put it in the appropriate container
at designated collection points. Do not dispose of batteries or battery together with other
waste. It is recommended that you use local, free reimbursement systems batteries and
accumulators. The battery shall not be exposed to excessive heat such as sunshine, fire or the
like. Do not remove battery incorporated with product for your safety. If you need to replace the
battery, take it to the nearest authorized EcoBoulder+ service point or dealer for assistance.
Safety way to remove the battery or the battery from the equipment: Remove the old battery
or battery pack, follow the steps in reverse order than the assembly. To prevent contamination of
the environment and bring on possible threat to human and animal health, the old battery or the
battery put it in the appropriate container at designated collection points. Do not dispose
of batteries or battery together with other waste. It is recommended that you use local, free
reimbursement systems batteries and accumulators. The battery shall not be exposed to excessive
heat such as sunshine, fire or the like. Do not remove battery incorporated with product for your
safety. If you need to replace the battery, take it to the nearest authorized EcoBoulder+ service
point or dealer for assistance.
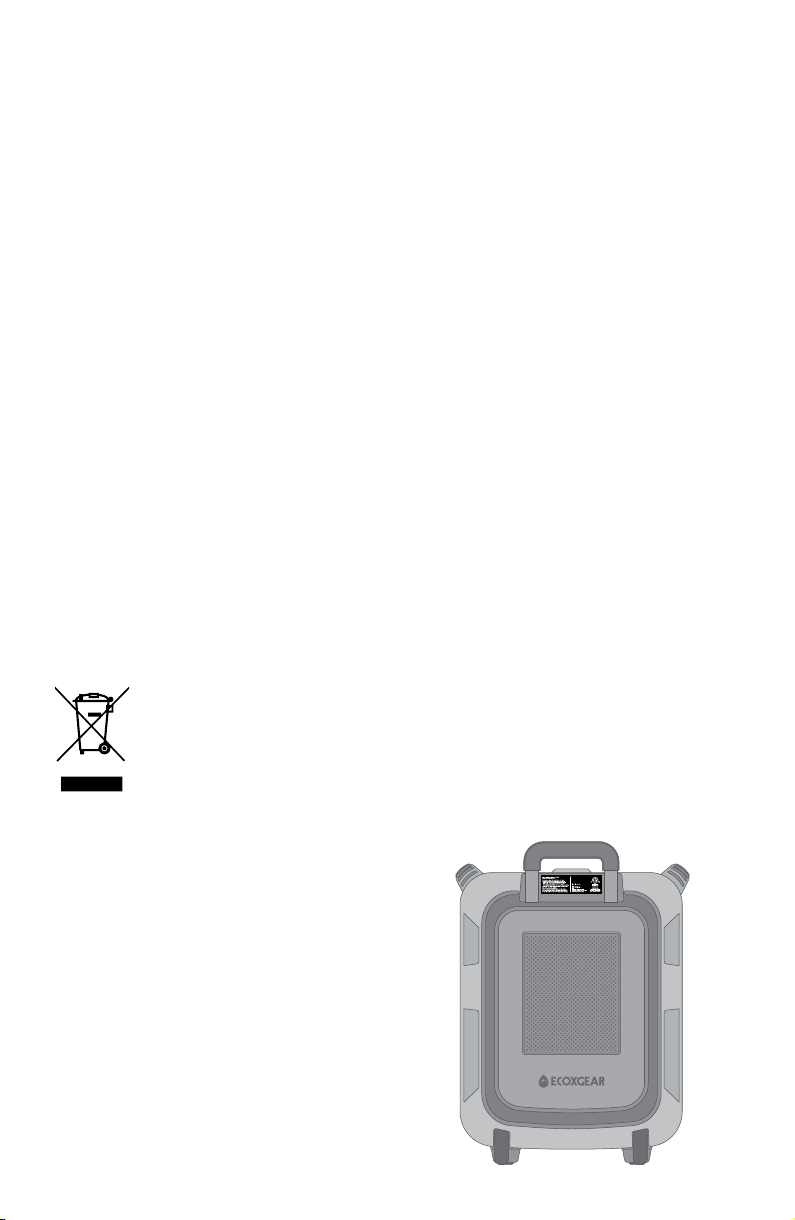
Correct Disposal of this product. This marking indicates that this product should not
be disposed with other household wastes throughout the EU. To prevent possible
harm to the environment or human health from uncontrolled waste disposal, recycle
it responsibly to promote the sustainable reuse of material resources. To return your
used device, please use the return and collection systems or contact the retailer
where the product was purchased. They can take this product for environmental safe
recycling. WEEE directive
Rating Label
The product rating label is located
behind the retractable handle.
3
Page 4

EcoBoulder
Control PanelConnect Port
+
Layout
Rugged Carrying
Handles
Charge Port
4
FRONT
Page 5
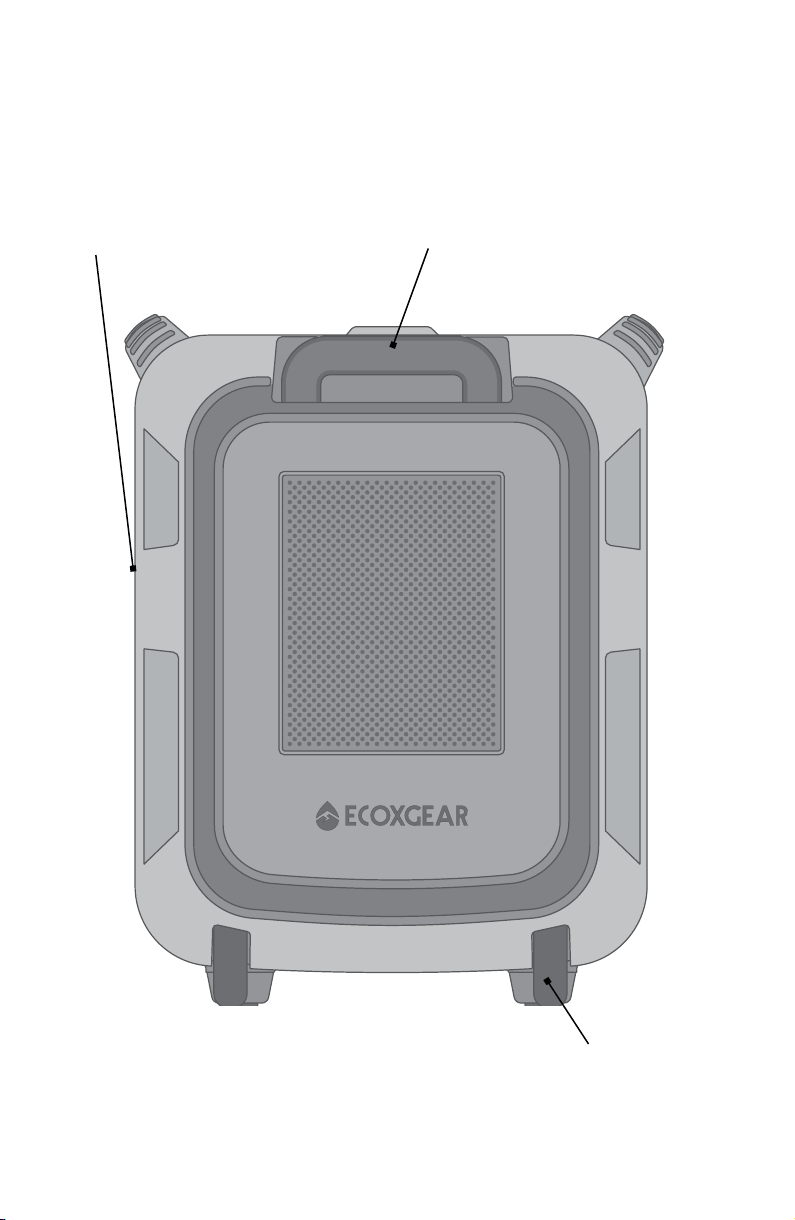
Models: GDI-EXBLD800...820
Storage Pocket Retractable Handle
BACK
Rugged Wheels
5
Page 6

Connect + Power
In/Out Connections
Do NOT use these connections if they are wet.
Microphone Input: You can input a microphone, guitar, or other musical
instrument. Port is ¼" (6.35 mm).
Auxiliary Input: This input can be used to connect a CD player,
MP3 player, etc.
USB Charging Port: Connect your device’s charge cable here to charge it.
USB charging only functions when the EcoBoulder’s power is turned on.
USB port rating is 5V, 2.1A.
Power
Do NOT plug unit into wall power outlet if power cable jack is wet.
Use Caution: 120V AC Power Input. Contact may cause electric shock and
injury if wet.
Insert the included power cable to charge the EcoBoulder+.
Note: The EcoBoulder+ can be played while battery charges.
The icon will be on when plugged into AC power. When the power
cable is connected, blinking of the battery segments shows the battery
is charging. When fully charged, all battery segments will be lit without
blinking. It can take 4 to 8 hours to fully recharge the battery from empty.
Notes:
· Fully charge prior to first use (4-8 hours).
· Fully charge prior to extended storage (4-8 hours).
· Contact Grace Digital at www.gracesupport.com prior to attempting
to replace battery.
6
Page 7

USB Jack
Microphone Jack
AUX Jack
LEFT SIDE
Power Cable Jack
7
Page 8

Important: Maintaining Waterproofness
If the caps on the left side panel are not properly closed, the unit is
NOT watertight.
Waterproof Caps
To close properly, turn the cap clockwise
so the cap’s arrow point lines up with the
locked symbol .
To access the connections, turn the cap
counterclockwise so the cap’s arrow point
lines up with the unlocked symbol ,
then pull the tab on the cap to open.
Notes:
· The storage pocket on the right side
panel is NOT waterproof.
· The storage pocket is attached to your
EcoBoulder+ with velcro, so you can
remove it and take it with you.
Lock
Unlock
8
Page 9

Bottle Opener
Storage Pocket
RIGHT SIDE
9
Page 10

Display + Controls
12 13 123
4
5
7891011 6
Cup Holders Secure Cradle
for Devices
TOP
1. Power Button: Turns EcoBoulder+ on or off.
2. Bluetooth Button: When in Bluetooth mode, if the Bluetooth icon is not
flashing on the LED screen, press this button to enter pairing mode. If your device
is paired (solid icon on LED screen), press button to disconnect. Press and hold this
button for 5 seconds to clear all pairing records.
3. Source Button: Press this button to cycle through the following modes:
Bluetooth, FM, AM, and AUX.
4. Play/Pause: Press to play or pause a track from a paired Bluetooth device.
5. Track Buttons: Press these buttons to go to the previous/next track on a paired
Bluetooth device.
6. Microphone Volume Control: Press to adjust the microphone volume. Press
and hold to adjust the volume continually (volume levels are 0 to 30).
10
Page 11

7. EcoConnect Button:
ECOXGEAR speaker bearing the EcoConnect symbol), press and release this button
on both speakers to link them together and play in stereo.
If you have purchased a second EcoBoulder+ (or one other
8. Master Volume Control: Press to adjust the speaker’s main mix volume. Press
and hold to adjust the volume continually (volume levels are 0 to 30).
9. Backlight Button: Press to turn button backlights on / off.
10. Tune Buttons: Press these buttons to tune in a radio station. To “seek” (jump
to the next available station), press and hold either button down for a few seconds
until it starts to seek a station.
11. EcoTalk: This button activates your Voice Assistant (Siri and OK Google).
12. AM/FM Presets and Equalization: Store up to 5 of your favorite AM/FM
radio stations and quickly tune to a preset radio station. Press the EQ button to
activate the Bass and Treble controls. PRESS AND HOLD the EQ button for 3
seconds to activate the Preset EQ modes.
13. LED Screen Icons:
Indicates the battery level of
the EcoBoulder+.
When the battery level is
less than 20%, the first bar
will blink.
Indicates that the battery
level is very low.
The EcoBoulder+ is in the
Bluetooth mode.
The EcoBoulder+ is in
FM mode.
The EcoBoulder+ is in
AM mode.
Indicates the EcoBoulder+
is charging.
Two speakers are paired
via EcoConnect.
In pairing mode, the icon will
flash. If the connection is
successful, the icon will be solid.
Indicates the speaker volume
level of EcoBoulder+. (0 to 30)
Indicates the microphone vol.
level of EcoBoulder+. (0 to 30)
Indicates the current FM
station of the EcoBoulder+.
The EcoBoulder+ is in
AUX mode.
Indicates the current AM
station of the EcoBoulder+.
11
Page 12

Operations
Power On/Off
Power On: PRESS AND HOLD for 3 seconds to power on the
EcoBoulder+. “Power On, Ready to Connect” voice prompt will be heard.
Power Off: PRESS AND HOLD for 3 seconds to power off
the EcoBoulder+.
Pairing a Bluetooth Device
1. Turn on your Bluetooth device.
2. Power on EcoBoulder+. “Power on, ready to connect” voice prompt
will be heard. If already powered on and not in Bluetooth mode, press
SOURCE until it is in Bluetooth mode. (If Bluetooth icon on LED screen
is not flashing, briefly press to start pairing your device.)
3. Navigate to your Bluetooth device’s setup screen, find ECOXGEAR
and connect. If the connection is successful, the Bluetooth icon will be
lit solid and your EcoBoulder+ will announce “Connection successful.”
12
Page 13

Notes:
· If the pairing is not complete within 5 minutes, the speaker will exit the
pairing mode. You need to repeat the pairing steps again.
· After the connection is successful, if you turn the speaker off and turn it
on again, it will reconnect to the last connected device automatically.
Also, a voice prompt “Power on, ready to connect” followed by
“Connection successful” will be heard.
· Press and hold for 5 seconds to clear all pairing records.
Adjust the Master Volume
1. Press briefly to adjust the speaker volume.
2. Press and hold to adjust the speaker volume
continuously (volume levels are 0 to 30).
a. Press briefly to increase one volume level. Press and hold to
keep increasing the volume until maximum volume level is reached.
b. Press briefly to decrease one volume level. Press and hold to
keep decreasing the volume until minimum volume level is reached.
Adjust the Microphone Volume
1. Press briefly to adjust the microphone volume.
2. Press and hold to adjust the microphone volume
continuously (volume levels are 0 to 30).
a. Press briefly to increase one volume level. Press and hold to
keep increasing the volume until maximum volume level is reached.
b. Press briefly to decrease one volume level. Press and hold to
keep decreasing the volume until minimum volume level is reached.
Source Button
Press SOURCE briefly to cycle through the following modes:
BT (Bluetooth), FM, AM, AUX 1.
13
Page 14

Play Music (Bluetooth Mode)
After the EcoBoulder+ is connected to your Bluetooth device, press
briefly on the EcoBoulder+ to play, press again to pause.
Press briefly to play previous song. Press briefly to get the
next song.
Press to adjust the volume.
Notes:
· Pair and connect your Bluetooth device with EcoBoulder+ before using
this feature.
· If a call is received when you are listening to music, the music will
pause automatically.
· You can also control Volume and Play / Pause music operations from
your Bluetooth enabled device.
Listening (AM/FM Mode)
Press SOURCE briefly to switch to FM or AM. Press to tune in a
radio station. To “seek” (jump to the next available station), press and
hold either button down for a few seconds until it starts to seek a station.
Press to adjust the volume.
EcoTalk
Press the EcoTalk button to activate the voice assistant on your device
(Siri, OK Google, etc.). Once activated, the speakerphone mic on your
EcoBoulder+ will hear your voice commands and transfer them to the
voice assistant on your device.
Notes:
· Before using the EcoTalk function, your device must be connected to
the EcoBoulder+ via Bluetooth.
· Not all devices have voice assistant functionality; refer to your device
for details.
14
Page 15

AM/FM Presets and Equalization
Store a favorite radio station to quickly
tune to a preset radio station. There are
5 positions for AM station and 5 positions
for FM stations. While listening to a station
you want to store, press and hold a preset
button (P1~P5) to assign the current station to that preset number. The
LED screen will flash 2 times to indicate it has been set.
If you want to listen to a stored preset, press a preset button (P1~P5) to
go to the stored radio station.
You can use the Equalization button to adjust the Bass and
Treble to your liking. Press the EQ button once to activate the Bass
controls and once more to activate the Treble controls. Use the Tune
buttons to decrease/increase the Bass and Treble. Both the Bass
and Treble levels range from -4 to 4.
PRESS AND HOLD the EQ button for 3 seconds to activate the Preset
EQ modes. Use the Tune buttons to cycle through the five modes:
Normal, Jazz, Rock, Classical, and Pop.
After six seconds of inactivity, the EcoBoulder+ will automatically exit the
EQ Input screen; the EQ button must be pressed again to change modes.
Notes:
· The EcoBoulder+ will automatically save your EQ settings. Your settings
will load after powering the EcoBoulder+ off and back on again.
· To clear all of the saved settings, press and hold both and
for 5 seconds.
LED Screen EQ Icons:
Minimum Treble
adjustment of -4.
Maximum Treble
adjustment of 4.
Preset EQ mode: Normal
Preset EQ mode: Rock
Preset EQ mode: Pop
Minimum Bass
adjustment of -4.
Maximum Bass
adjustment of 4.
Preset EQ mode: Jazz
Preset EQ mode: Classical
15
Page 16

EcoConnect - Wireless Stereo
Connection of Two Speakers
When you have two EcoBoulder+ speakers and
want to wirelessly pair them for stereo sound,
first follow the Pairing a Bluetooth Device
instructions to connect one EcoBoulder+ speaker
to your Bluetooth device. Leave this EcoBoulder+
speaker powered on and connected to your device.
Next, turn on your second EcoBoulder+ speaker. Once the second speaker
is powered on (the Bluetooth light will be flashing), press the EcoConnect
Button on both of your EcoBoulder+ speakers. Wait a few seconds
for the speakers to wirelessly connect. Both speakers will announce
“Connection Successful,” and the EcoConnect icon on the LED screen on
both units will light up once the connection is completed.
Once the two EcoBoulder+ speakers are connected via EcoConnect, start
playing music from your device. Both connected EcoBoulder+ units will
play the music from you device.
The EcoConnect default has your speakers playing in stereo mode. If you
would like to change which speaker is left or right or if you want to set
each speaker to play in mono mode you can press and hold . Each
press and hold of will change the speaker from RIGHT / LEFT to
LEFT / RIGHT to MONO. When changing modes, the left and right speakers
will announce, "Stereo mode, left speaker," "Right speaker," respectively.
When in mono mode, both speakers will annouce, "Mono mode."
The EcoConnect connection between the two EcoBoulder+ speakers will
NOT automatically re-connect after the speakers are turned off. To
re-establish EcoConnect between the speakers, after power off, please
follow the above steps.
Notes:
· You can also pair the EcoBoulder+ with any other ECOXGEAR speaker
bearing the EcoConnect symbol .
· The EcoConnect functionality is only available while using Bluetooth as
your audio source at a maximum range of 30 feet between both of the
paired speakers.
16
Page 17

Troubleshooting
The sound is distorted
Try lowering the volume control of your connected device or musical
instrument. Also, try to reduce the overall volume of the EcoBoulder+.
Cannot Pair With Bluetooth Device
Make sure that your device is compatible with Bluetooth. Turn off your
EcoBoulder+ and Bluetooth device, then power on and reconnect. Make sure
that Bluetooth mode is selected on your EcoBoulder+.
There is a high-pitched whistling noise when using microphone
This is probably feedback. Point the microphone away from the speaker.
If there is poor AM/FM reception
To adjust AM/FM reception, move entire product.
If you can’t hear the microphone over the music volume
EcoBoulder+ Master Volume must be turned up to increase the Microphone
Volume. Turn up the Master Volume on the EcoBoulder+ and turn down the
music volume directly from your Bluetooth device.
Can NOT play music from a flash drive
The USB ports are only for charging USB devices.
Water draining from bottom of unit
Holes in the base of the EcoBoulder+ speaker are designed to allow excess
water run-off to drain away from the speaker. Water draining from this area is
normal and safe.
Volume level is too low
Increase the volume on the EcoBoulder+ and / or increase the volume on
your Bluetooth device.
Battery not properly charging
Twenty minutes after plugging into an AC power outlet, EcoBoulder+ will
check if the battery is rechargeable. If not, the individual bars on the battery
level indicator on the LED screen will flash from top to bottom. (Normally,
the battery segments will flash from bottom to top.) Please do NOT attempt
to fix your EcoBoulder+ unit. Please contact our Customer Support at
support@gracedigital.com or call us at 866.446.0961.
17
Page 18

Specifications
Dimensions
19.8 in / 504 mm
15.5 in / 393 mm
Bluetooth Compliance
Bluetooth V 4.1
Bluetooth Frequency Band
2.402~2.480GHz ISM Spectrum
Modulation
GFSK, π/4-DQPSK, 8DPSK
Bluetooth Range
Up to 100 ft / 30m
Tweeter
3'' (76.2mm) tweeter
Passive Woofer
8'' (203.2mm) woofer
Woofer
8'' (203.2mm) full range woofer
Output Power
100 W (peak)
Power Source
12V, 7.0Ah SLA Battery
Power Supply
Input voltage:
110-230V~50/60Hz
Charging Time
Approximately 8 hours
18
11.3 in / 287 mm
EcoConnect
TrueWireless Stereo (TWS)
EcoConnect Range
30 ft / 9.1 m between
left and right speaker
Compatibility
Mobile phone/device supporting
Bluetooth V1.1 (and above)
Radio Frequency Range
US: AM 520 - 1710 kHz,
FM 87.5 - 107.9 mHz
Fuse
Glass tube (slow-blow)
Ø 5.2x20mm; 250V, 1A
Storage Temperature
-40°F to 122°F / -40°C to 50°C
Operating Temperature
23°F to 95°F / -5°C to 35°C
Waterproof / Dust Rating
IP67
Play Time
Up to 100hrs in standby, 50hrs play
time, 10hrs play time at max. volume
Page 19

FCC STATEMENT:
This device complies with Part 15 of the FCC Rules. Operation is subject to the following two conditions:
1.) This device may not cause harmful interference, and
2.) This device must accept any interference received, including interference that may cause undesired operation.
WARNING: Changes or modifications not expressly approved by the party responsible for compliance could void the user’s
authority to operate the equipment.
NOTE: To maintain compliance with FCC's RF Exposure guidelines, this equipment should be installed and operated with
minimum distance between 20cm the radiator to your body: Use only the supplied antenna. FCC ID: 2AAUI-GDIEXBLD801.
This equipment has been tested and found to comply with the limits for a Class B digital device, pursuant to Part 15 of the
FCC Rules. These limits are designed to provide reasonable protection against harmful interference in a residential installation.
This equipment generates, uses, and can radiate radio frequency energy and, if not installed and used in accordance with the
instructions, may cause harmful interference to radio communications. However, there is no guarantee that interference will
not occur in a particular installation. If this equipment does cause harmful interference to radio or television reception, which
can be determined by turning the equipment off and on, the user is encouraged to try to correct the interference by one or
more of the following measures: reorient or relocate the receiving antenna, increase the separation between the equipment
and receiver, connect the equipment into an outlet on a circuit different from that to which the receiver is connected, consult
the dealer or an experienced radio/TV technician for help.
RF WARNING STATEMENT:
The device has been evaluated to meet general RF exposure requirement. The device can be used in portable exposure
condition without restriction.
IC STATEMENT:
This device complies with Industry Canada licence-exempt RSS standard(s). Operation is subject to the following two conditions:
1.) This device may not cause interference, and
2.) This device must accept any interference, including interference that may cause undesired operation of the device.
PRODUCT USE AND PROTECTION:
Read and follow all instructions. Use only as intended.
The ECOXGEAR Bluetooth speaker is intended to be used indoors or outdoors and in land or water environments. The speaker
has been tested to IP67 waterproofing standards, which means the speaker can be submerged in up to 3 feet of water for 30
minutes without any damage. However, the speaker is NOT intended for constant underwater use.
Always make sure the cap(s) / cover(s) are clean, free from sand or debris, and correctly fitted. The speaker will only meet IP67
ratings if all rubber seals, gasket(s) and cover(s) / cap(s) are in place. If you notice a muffling of audio after submersion, gently
shake the unit to clear excess water. If your speaker is exposed to salt water, clean it thoroughly after use with fresh water.
The power cable and the unit with an improperly fitted cap are NOT waterproof.
To prevent fire or shock, do NOT attempt to charge this unit if it is wet or you suspect water has entered the unit. In this
situation, please return the unit to Grace Digital for a free assessment. If we have found that the unit has carried water, we will
repair or replace the unit free of charge.
SAFETY ADVISORY & WARNING:
Read and follow all instructions. Use only as intended.
CAUTION: Do NOT open to repair. A qualified technician must carry out repair work.
ATTENTION: Do NOT charge while the unit is wet. Towel dry the unit AND make sure all connections are dry
WARNING: This product may contain chemicals listed in Proposition 65
WARNING: Danger of explosion if battery is incorrectly replaced.
CAUTION: The unit can be used with the main power cord disconnected, the unit is readily operable with the main power
cord disconnected.
ATTENTION: Do NOT dispose of in a landfill. Contact Grace Digital at www.gracesupport.com or a certified recycling agent to
BEFORE plugging in the charging connector. Failure to do so may result in electrical damage to the unit and
may void the warranty.
( www.oehha.ca.gov/prop65/prop65_list/Newlist.html )
dispose of the unit.
SAFETY:
This product has a limited life span of use and should be replaced when it shows obvious signs of wear.
Do not modify or remove any original component parts of the speaker. Doing so could cause damage to the unit, allowing
water to ingress. A unit with water ingress should not be charged due to potential risk of fire or shock.
Please exercise care and good judgment when using your ECOXGEAR speaker. Audio levels should be appropriate to your
environment, comply with all local regulations, and always ensure that you can hear and be aware of any potential hazards
around you.
19
Page 20

You should always
1.) Use the ECOXGEAR speaker in accordance with any music or noise rules and regulations.
2.) Properly seal the ECOXGEAR prior and after each use when in humid or water environments to avoid water damage to the
internal components. Salt water / air is particularly corrosive. Always make sure that the gaskets are sealed when in a salt
water environment and that the unit is properly rinsed off after use.
3.) Properly clean the ECOXGEAR and ensure the gaskets have no sand, dirt, or water on them prior to storage.
4.) Store your unit with all caps properly sealed to avoid long term internal moisture damage inside your unit.
5.) Completely dry and clean your ECOXGEAR prior to attempting to charge the unit.
6.) Return the ECOXGEAR to Grace Digital if you suspect water ingress into the unit or if the unit has experienced a severe
impact that may have affected the integrity of the unit to take on water.
You should never
1.) Never charge your ECOXGEAR if you suspect water has entered the device. Charging a device with water inside could be
potentially hazardous and cause fire or a spark.
2.) Never use your ECOXGEAR if you have dropped it or thrown it against a hard surface which may have destroyed the
integrity of the speaker, housing, or gaskets. In the event of a severe impact to your unit, please return the unit to Grace
Digital to review for potential damage.
3.) Never open the auxiliary doors in a water environment. This could cause water to ingress into the unit which could
potentially be hazardous and cause a fire or a spark.
4.) Never connect a device to the auxiliary input jacks when in a water environment. The auxiliary jacks should only be used in
a dry environment.
5.) Never attempt to fix, repair your ECOXGEAR unit. Please send it back to Grace Digital for any assessments and repairs.
CARE, MAINTENANCE & PRECAUTIONS:
1.) The unit is waterproof only when the caps and door are properly closed.
2.) Close the caps and door properly before use. If the unit is placed in water without the caps or door properly closed, water
may enter into the unit and void your warranty.
3.) Dry unit completely before opening the caps or door. Do NOT open the caps or door if wet or in a wet environment.
4.) Do NOT apply excessive force to any surfaces of the unit when wet or in a wet environment.
5.) Do NOT use or store the unit in places with high temperature.
6.) AVOID prolonged exposure to ultraviolet radiation (UV sunlight) and strong magnetic fields.
7.) Periodically check the rubber seal on the caps and door for premature wear.
8.) Periodically clean the rubber with a soft moist cloth and ensure no objects such as dirt, hair, sand are on the rubber seal
ring. Do NOT use any oily solvent or chemicals for cleaning.
9.) Rinse off the unit with tap water after use in salt water or swimming pool.
10.) Power and / or charge the built-in rechargeable battery for portable use by connecting the AC cord to an AC outlet.
11.) Noise and audio distortion may occur when the batteries are nearing end of charge.
12.) Do NOT remove the built-in battery. Do NOT remove the grill covers.
LIMITED MANUFACTURER’S WARRANTY:
EcoBoulder+ is covered by a 3 year limited warranty that covers defects in workmanship and / or materials for a period of 3
years from original purchase date. This warranty does not apply to any products which have been abused, neglected, modified
or used for a purpose other than the one for which they were manufactured. Please refer to the above care and maintenance
instructions for suggested care details. The warranty is valid only for the original owner who purchases the unit from an
authorized dealer. Transfers do not qualify for warranty protection. Grace Digital reserves the right to replace any out-of-stock
or discontinued product with a comparable product. Discontinued products may not be available for warranty replacement.
Any contents are NOT covered by the limited manufacturer’s warranty. Warranty terms may be revised without notification at
the discretion of the manufacturer. Please visit www.ecoxgear.com for additional product & warranty information.
20
EcoBoulder+ by ECOXGEAR, a division of Grace Digital Inc., San Diego, California.
Designed in California. Made in China.
Patents Pending.
 Loading...