

Page 1

SRM/GT/PAS/SB/PE SAFETY MANUAL
DANGER!
Misuse may result in serious or fatal injuries. You must read, understand, and follow these safety instructions, and the instructions in the
Operator’s Manual, before operating a Model GT Grass Trimmer, SRM
Trimmer-Brushcutter, PAS Pro-Attachment Series Powerhead, SB SplitBoom Trimmer-Brushcutter, or PE Power Edger.
If you operate a model SB Split-Boom or PAS Pro Attachment Series
multi-attachment unit, you must also read, understand, and follow the
instructions in your PAS Attachment Operator’s Manual.
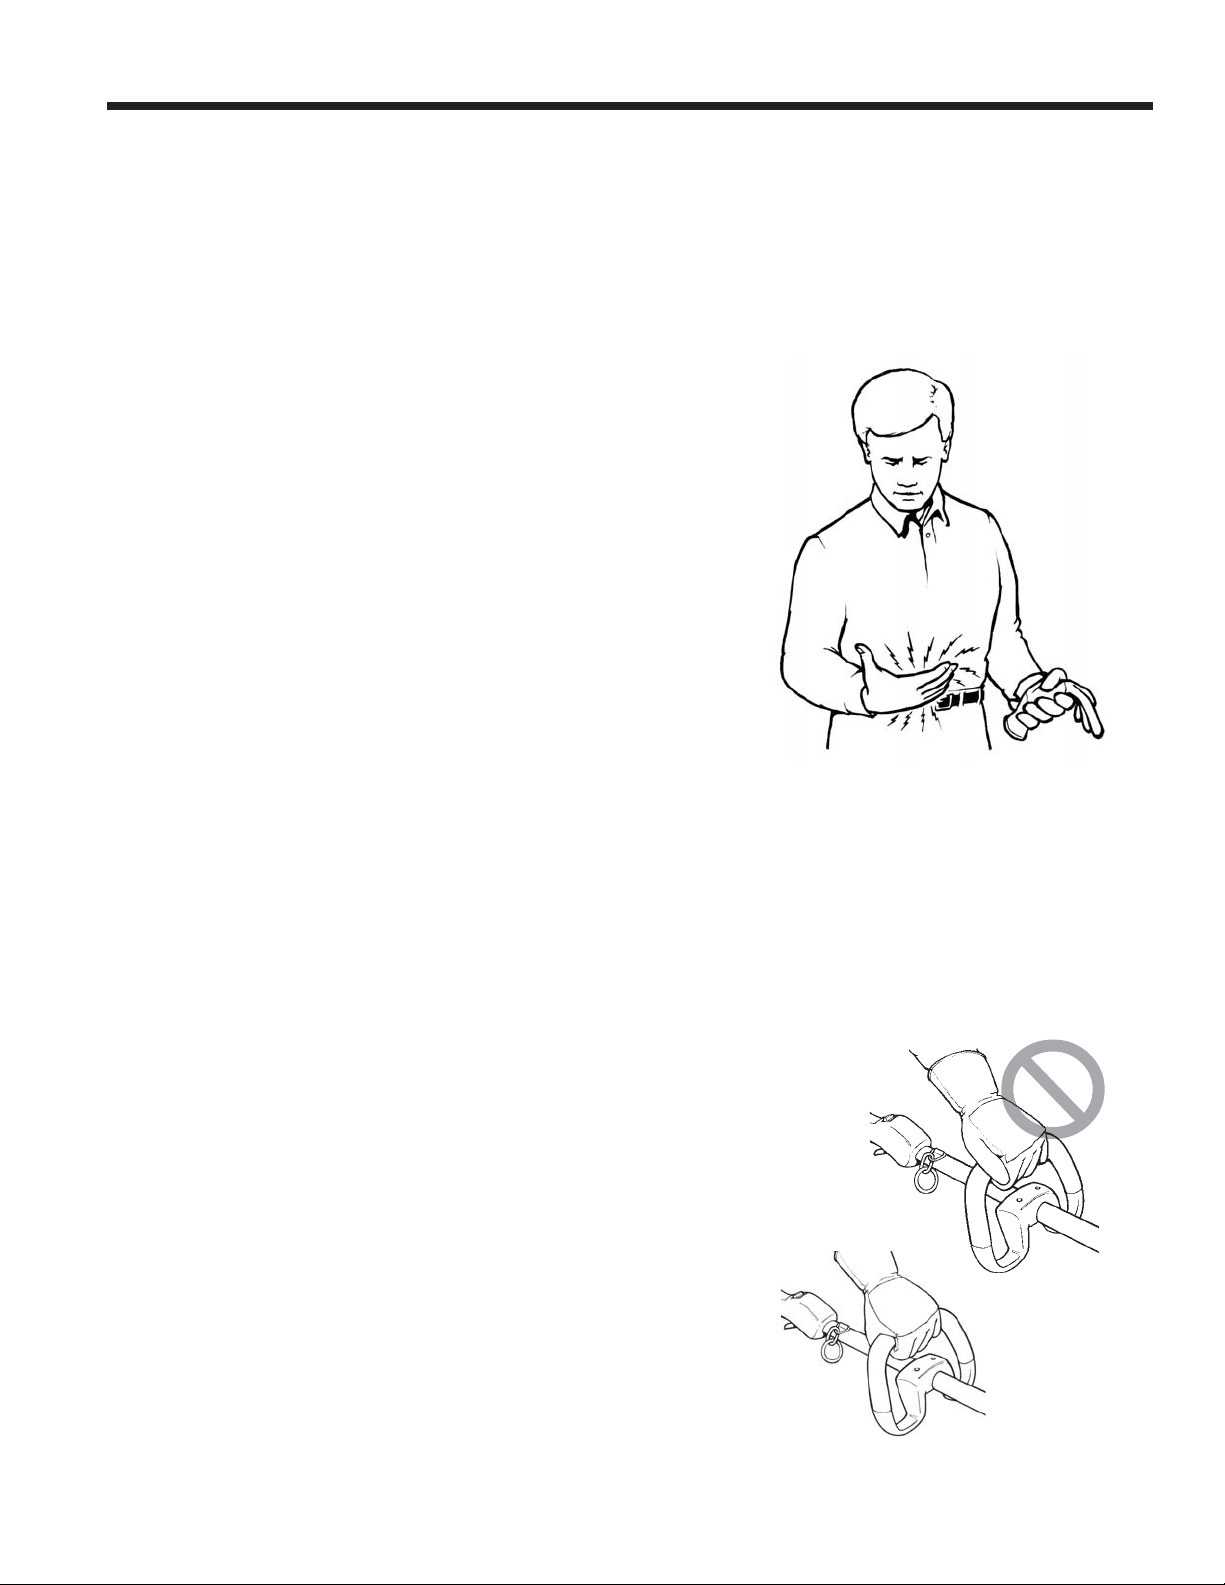
DANGER!
Metal blades are very sharp and can cause severe injuries, even if engine
is off and blades are not moving. Avoid contact with blades. Wear gloves
to protect hands.
To locate your nearest Echo dealer, visit our website at www.echo-usa.com, or call 1-800432-ECHO (3246). Ask how to obtain a FREE Safety Video. Echo’s supplemental Safety
Video provides helpful safety and operating information.
X752000041
X7522270601
09/07
Page 2

INTRODUCTION
W ARNING
This manual describes how to protect yourself and others from hazards related to operation of
a Model GT Grass Trimmer, Model SRM Trimmer-Brushcutter, Model PAS Pro-Attachment
Series unit with attachment, Model SB Split-Boom unit with attachment, and Model PE Power
Edger.
Before assembling, fueling, operating, or servicing your unit, you must read and understand
this Safety Manual, your unit’s Operator’s Manual, and the Operator’s Manual or Installation
Instructions for any attachment or accessory you may be using.
You must understand all safety symbols and warning labels, and obey the safety precautions
provided by these important safety reminders.
You must also be alert at all times, and be physically capable of handling and controlling a
grass trimmer, trimmer-brushcutter, PAS attachment, or Power Edger in a variety of applications. If you are unable to handle the equipment safely, or if you feel that the task you wish to
perform could put you, your property, or others at risk, please call a professional landscape
maintenance company to handle the job.
Echo highly recommends that you obtain and review the supplemental Echo TrimmerBrushcutter Safety Video before using your unit. Contact your Echo dealer for a copy, or for
more information, or call Echo at 1-800-432-ECHO. You may also visit Echo’s website at
www.Echo-USA.com.
TABLE OF CONTENTS
TABLE OF CONTENTS ............................................................................................ 2
SAFETY SYMBOLS AND WARNINGS .....................................................................3
OPERATOR SAFETY................................................................................................7
ASSEMBLY .............................................................................................................12
FUELING .................................................................................................................20
STARTING...............................................................................................................23
STOPPING...............................................................................................................25
OPERATION ............................................................................................................26
MAINTENANCE.......................................................................................................45
STORAGE................................................................................................................47
DEFINITIONS ..........................................................................................................48
2
Page 3
SAFETY SYMBOLS AND WARNINGS
These important safety symbols and warnings are used throughout this manual, and may also
appear in your Operator’s, Attachment, or Installation Instruction Manual. These symbols and
warnings are provided to help make you aware of potential hazards, and the precautions you
must take to protect yourself from injury. You must read and understand this information, and
obey the instructions. These symbols may also appear on safety labels as a visual reminder to
follow these important precautions whenever you are transporting, fueling, operating, servicing,
handling, or storing your unit.
Circle/Slash Prohibition Symbol
This symbol means that the specific action shown is
prohibited. Ignoring these prohibitions can result in
serious or fatal injury.
Safety Alert Symbol
The Safety Alert symbol is used to alert you to potential
personal injury hazards. To avoid serious or fatal
injuries, obey all safety messages that follow this symbol.
Safety Alert Symbol/DANGER Signal Word
The safety alert symbol appearing with the word “Danger!” calls attention to a hazard which will result in death
or serious injury if not avoided.
Safety Alert Symbol/WARNING Signal Word
The safety alert symbol appearing with the word “Warning!” calls attention to a hazard which could result in
death or serious injury if not avoided.
Safety Alert Symbol/CAUTION Signal Word
The safety alert symbol appearing with the word “Caution!” calls attention to a hazard which could result in
minor or moderate injury if not avoided.
NOTICE signal word only. (No safety alert symbol)
The word "NOTICE” calls attention to a situation which
may result in property or equipment damage if the
information that is provided is not followed .
DANGER
WARNING
CAUTION
NOTICE
3
Page 4
SAFETY SYMBOLS AND WARNINGS
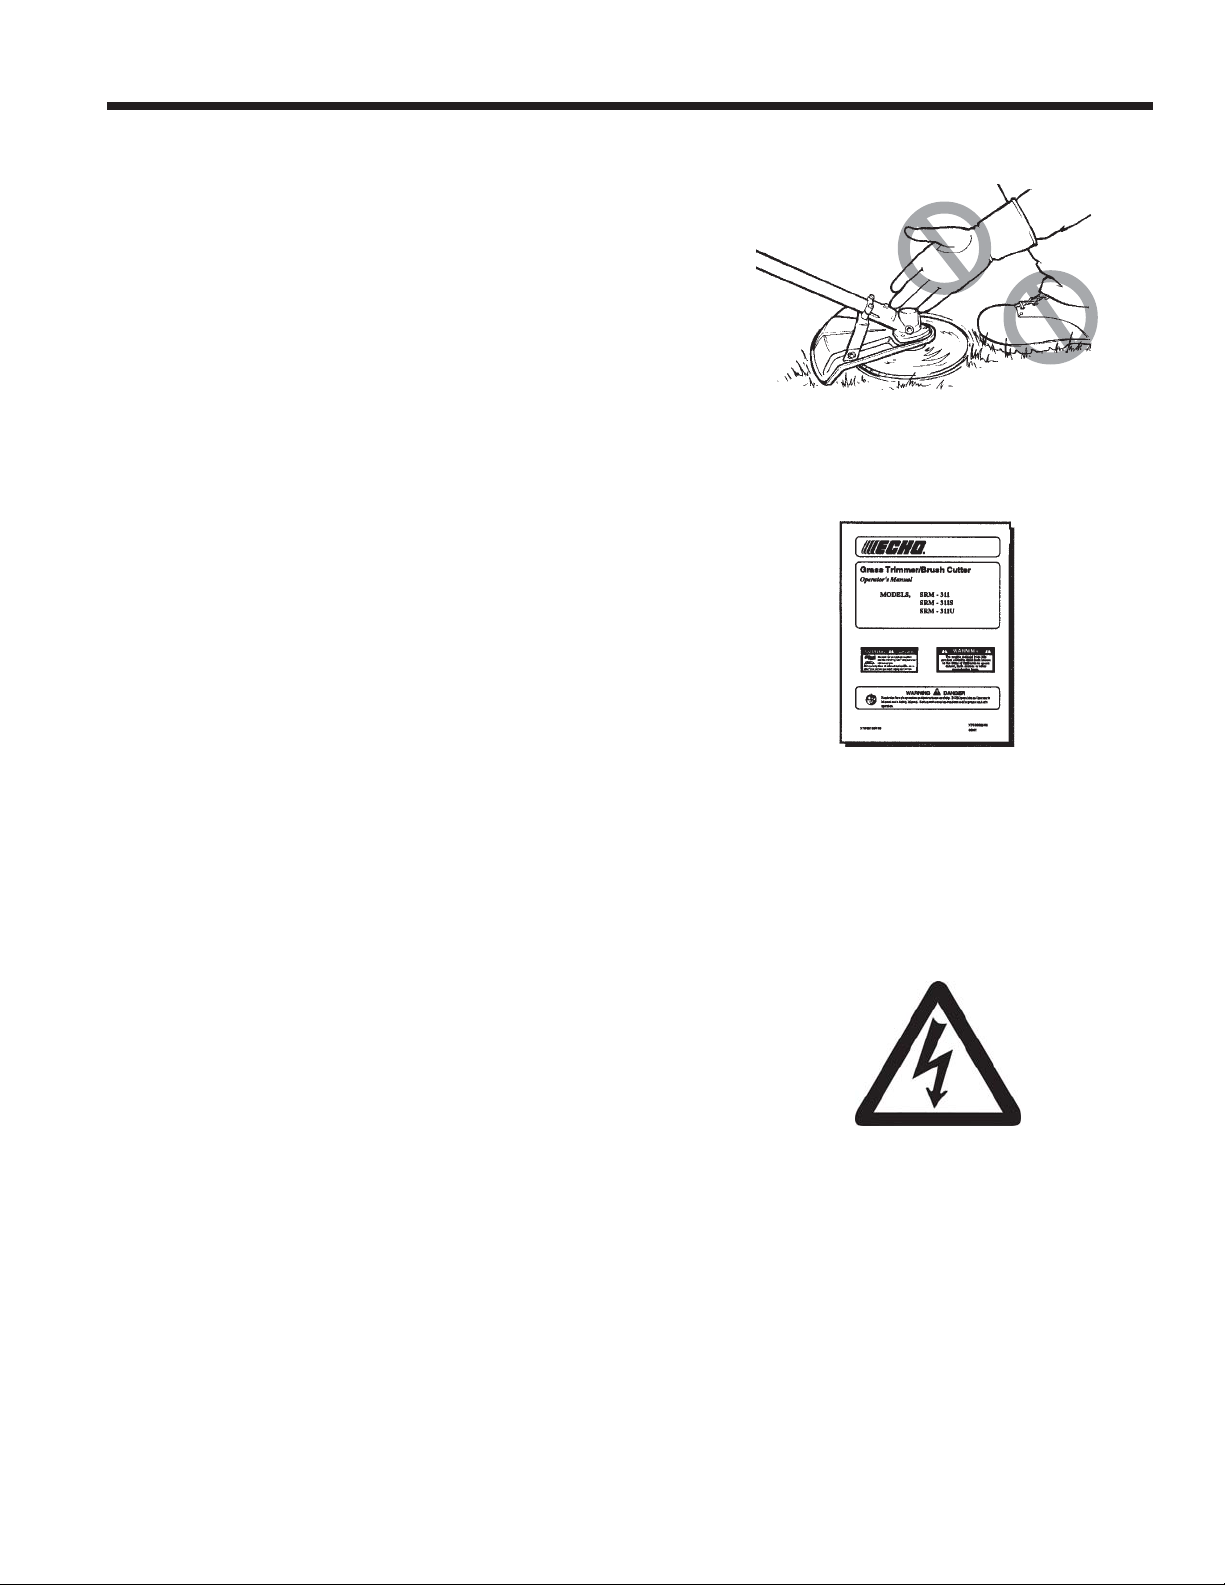
Read Operator's and Safety Manuals
Read manuals carefully, and follow rules for safe operation. Failure to do so could result in serious or fatal injury.
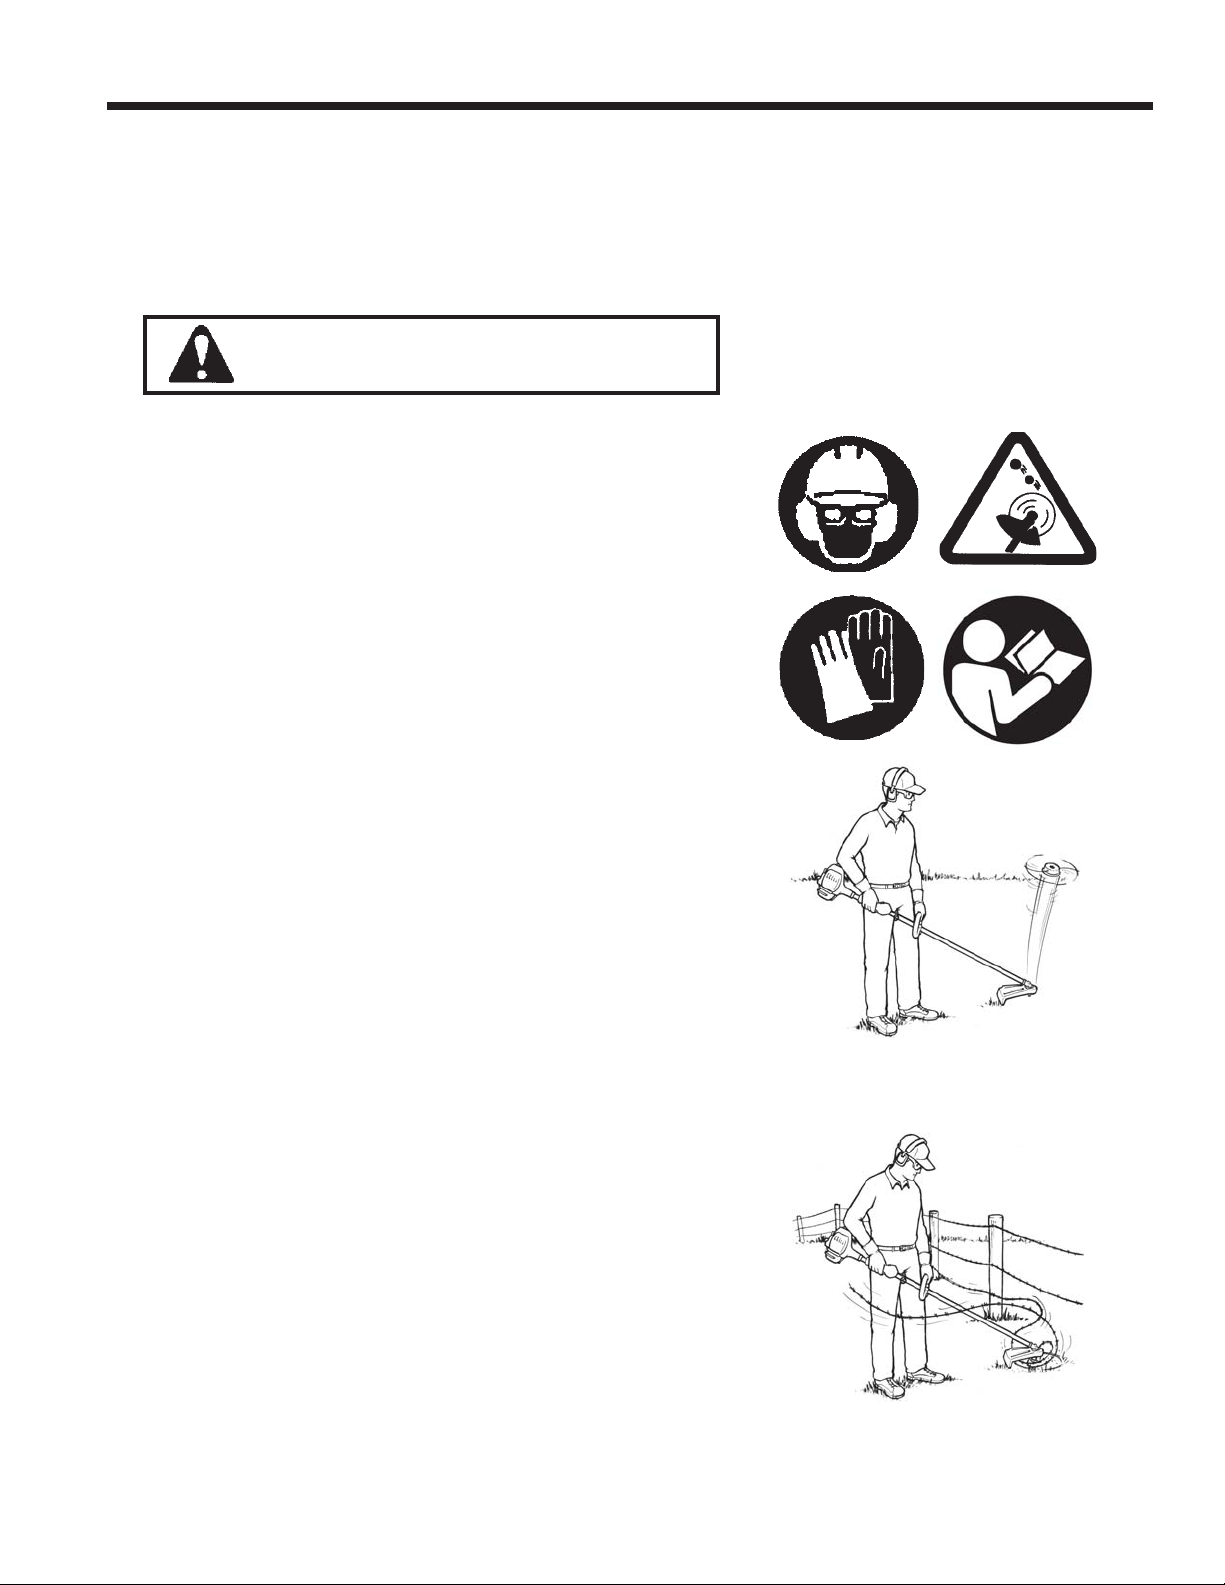
Wear Head, Eye, and Hearing Protection
Wear head, hearing, and eye protection that meet ANSI
requirements.
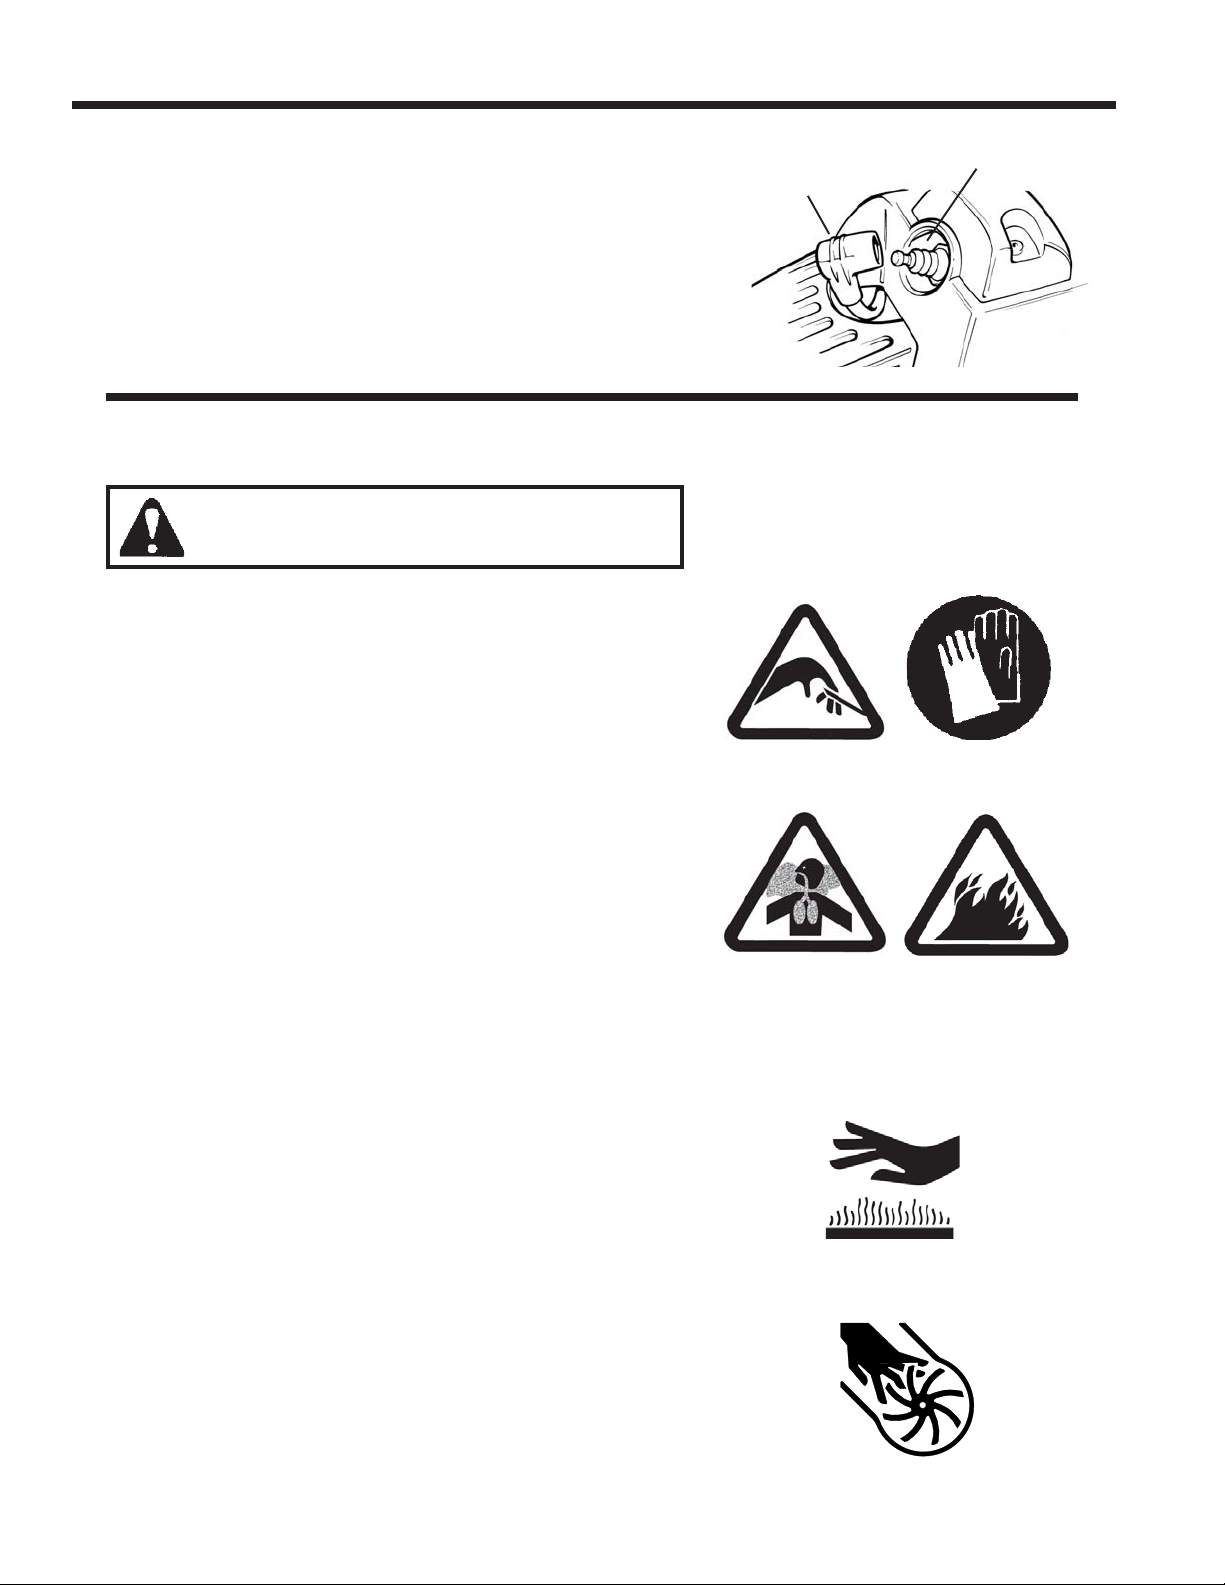
Wear Hand Protection
Wear heavy duty work gloves to protect hands
Sharp Blades Alert
Contact with blades can result in serious cuts and amputation
Carbon Monoxide Hazard Alert
Do not operate indoors. Breathing carbon monoxide can
cause serious or fatal injuries.
Explosion Hazard Alert
Gasoline vapor can explode if exposed to sparks or open
flame.
Burn Hazard Alert
Contact with hot surfaces can cause serious burns.
Fire Hazard Alert
Risk of fire from gasoline spills or leaks. Wipe up spills
immediately and dispose of wipes in an approved firesafe container.
Shock Hazard Alert
Unit not insulated against electrical current. Avoid power
lines.
4
Page 5
SAFETY SYMBOLS AND WARNINGS
Slip Hazard Alert
Wear slip-resistant footwear to reduce risk of falls.
Operate Only With Debris Shield In Place
Do not operate without correct debris shield.
Stop Symbol
Indicates the “Stop” position for the engine ignition
switch (Stop Switch).
Keep Bystanders 15 m (50 feet) Feet Away
Keep bystanders at least 15 m (50 feet) away when
operating unit.
15 m
15 M
(50 feet)
Do Not Operate Near Electrical Lines
Do not operate closer than 15 m (50 ft.) to electrical
lines.
Flame Prohibition
Do not allow flames or sparks near fuel or fuel vapors.
No Smoking Prohibition
Do not smoke near fuel.
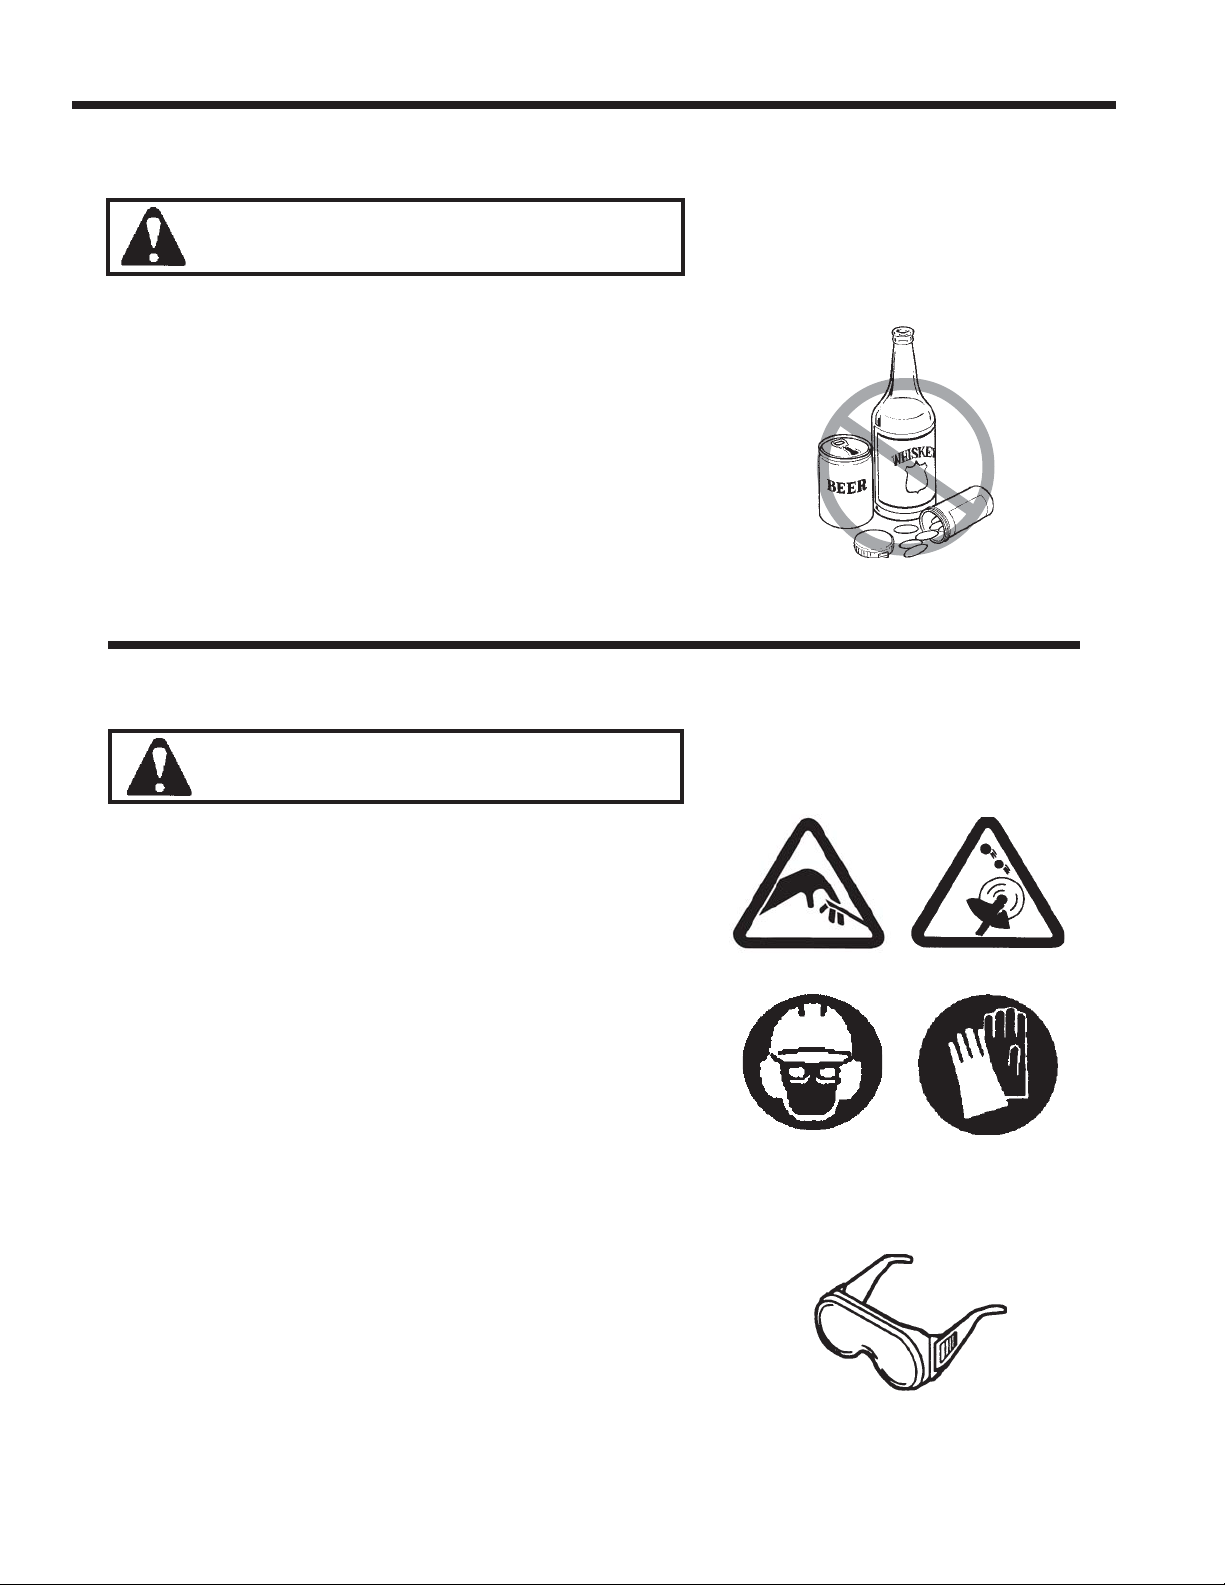
Do Not Operate Equipment While Impaired
Do not operate equipment while under the influence of
alcohol, medication, or any other substance that can
impair judgment, reflexes, vision, or coordination.
Operating a unit while impaired can result in serious
injury to operator and bystanders, or cause damage to
property or equipment.
15 M
5
Page 6
SAFETY SYMBOLS AND WARNINGS
Flying Debris Hazard
Work attachments can throw debris. Flying debris can
cause serious injury.
Danger Zone Alert
Maintain 15 m (50 feet) radius danger zone around
trimmer - brushcutter.
Metal Blade Prohibition (Use Nylon Line Head
Only)
Metal blades cannot be used on unit. Use nylon line
head only.
Edger Debris Alert
Edger debris can affect stable footing. Use extreme
care when walking in edging area.
Edger Blade Alert
Edger Blade is partially exposed during operation.
Keep clear of blade.
Prohibited Clothing
Wear protective clothing and shoes. Loose clothing,
dangling accessories, or open footwear increases risk
of serious injury.
Finger Sever Hazard
Moving parts can amputate fingers or cause severe
injuries. Keep hands, clothing and loose objects away
from all openings.
6
Page 7
OPERATOR SAFETY
DANGER
Echo GT Grass trimmers and SRM trimmer-brush
cutters are powerful, professional-grade tools designed
for applications such as trimming grass and light
weeds, and when properly configured (SRM/PAS/SB /
straight shaft only), cutting brush, woody growth, and
small saplings and trees.
PAS Pro Attachment Series and SB units can be
equipped with a wide variety of lawn and landscaping
attachments for tasks ranging from edging to pruning,
allowing operators to perform an entire range of applications with just one powerhead.
OPERATOR SAFETY
PE Power Edgers provide precise edging action for
maintaining lawn borders in residential and commercial
landscaping. Edgers can also be equipped with an
attachment that quickly cleans out cracks and joints in
sidewalks, driveways, paved areas, and other hard
surfaces.
When used properly, these tools save time, reduce effort, and make difficult landscaping tasks
easy. If handled carelessly or used improperly, they can cause severe injury or death.
Before using this equipment, you must:
• Read and understand this Safety Manual
• Read and understand the Operator’s Manual provided with your unit.
• Read and understand the Manual provided with any blade, attachment, or accessory that
will be used.
• Wear appropriate personal protective equipment and clothing
• Make sure all others who use the equipment have read and understand the manuals before
fueling or operating the tool.
• Clear the work area of bystanders and pets.
• Clear the work area of debris and other work hazards
• Make sure you have safe, unobstructed footing
• Make sure the area to be cut is free of obstacles and hidden hazards
• Safely prepare the fuel/oil mix
• Fuel your unit safely
• Store the fuel and 2-stroke oil containers safely.
7
Page 8
OPERATOR SAFETY
PHYSICAL CONDITION
WARNING
Operating this unit while you are impaired can result in
serious personal injury or death to yourself and others.
Never operate the unit if you are fatigued, or are under
the influence of alcohol, medication, or any other substances that can affect your judgment, reflexes, vision,
or coordination. You must be mentally alert and physically able to operate a trimmer, brushcutter, edger, or
PAS attachment safely. If you are impaired in any way,
or are physically unable to safely operate and control
the unit, do not fuel, start, or attempt to use the unit.
PERSONAL PROTECTIVE EQUIPMENT
WARNING
Operating a trimmer, brushcutter, or other powered
cutting or work attachment may expose you to sharp
blades, powerful cutting action, spinning nylon cutting
line, flying debris, and other work area hazards. These
hazards can cause serious injury to you and others if
you do not take the precautions necessary for safe
operation.
To help protect against risk of injury caused by these
hazards, you must wear appropriate personal protective
equipment:
Eye and Face Protection
Wear eye protection that meets current ANSI Z87.1
requirements. For additional safety, a full-face shield
may be worn over safety glasses or goggles to provide
protection from sharp branches or flying debris.
8
Page 9
OPERATOR SAFETY
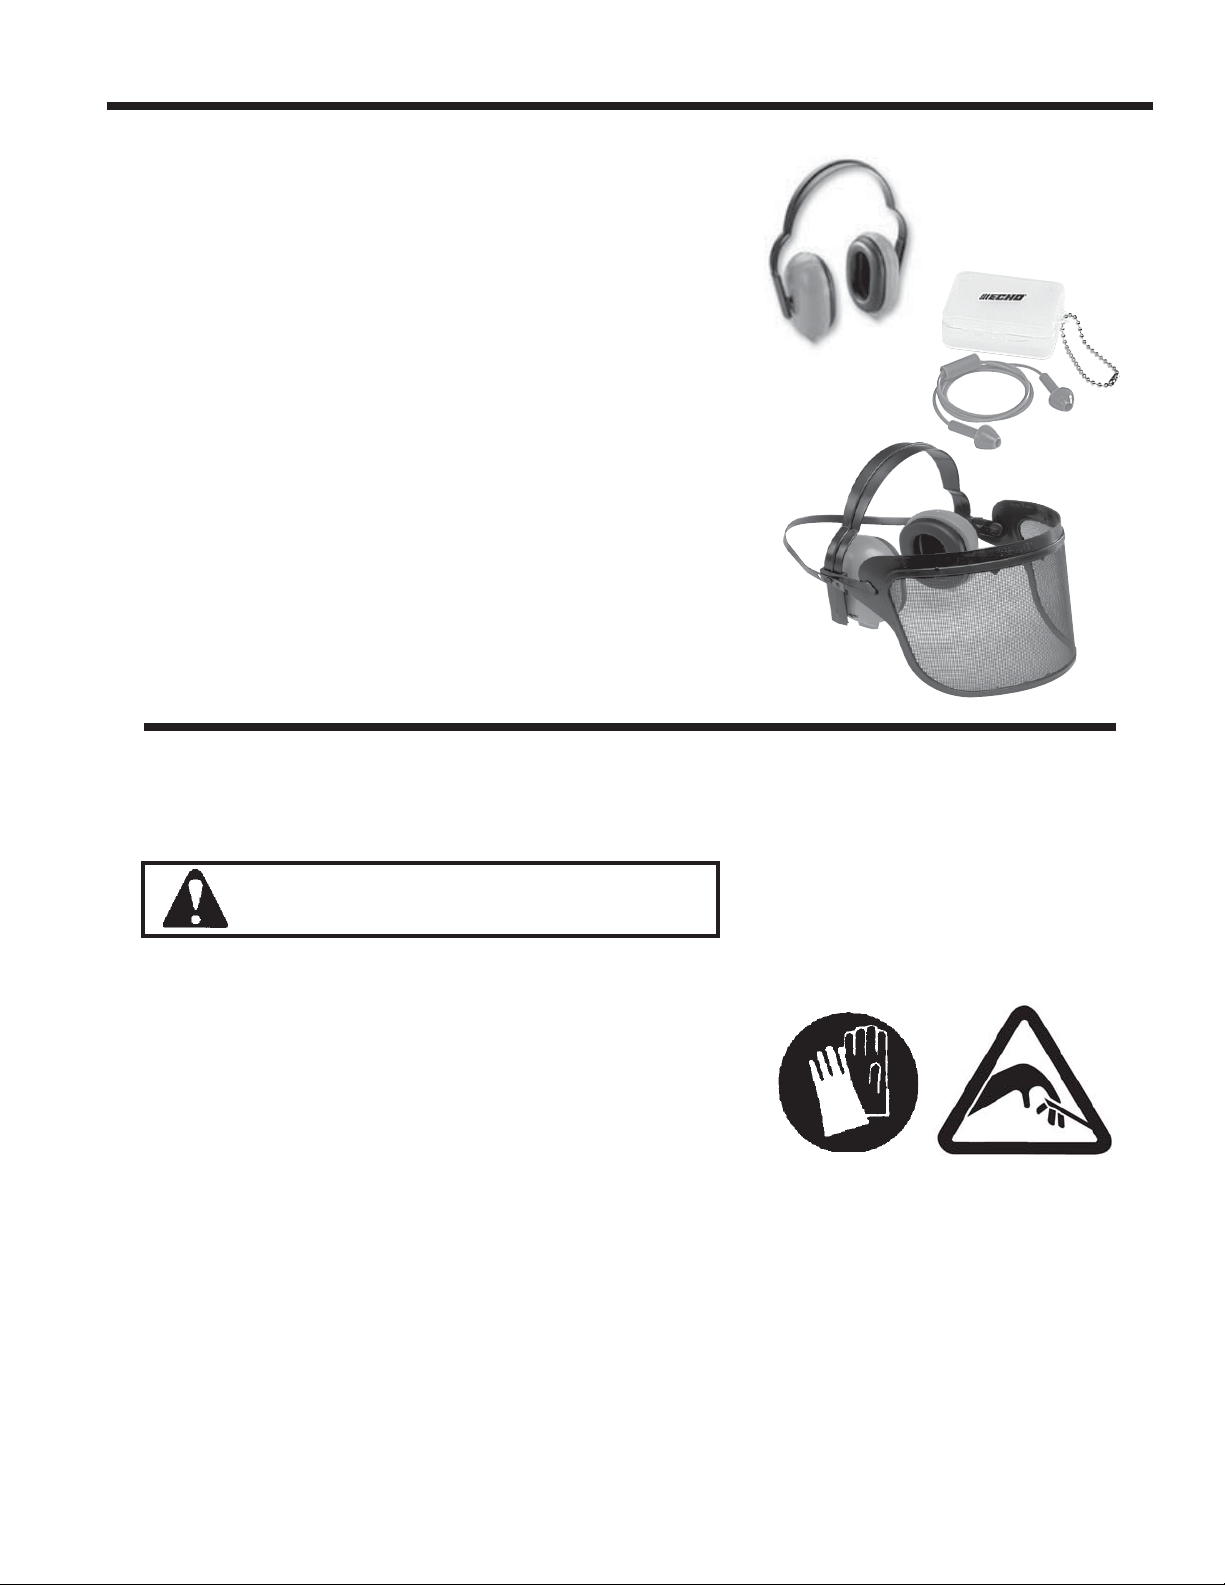
Hearing/Ear Protection
Echo highly recommends wearing ANSI recognized
hearing protection whenever you are operating the unit.
Hearing protection prevents hearing loss caused by
frequent or prolonged exposure to engine noise. Echo
recommends ear plugs, or for constant heavy-duty use,
wear earmuff-style hearing protection.
Combination Face/Hearing Protection
For complete face/hearing protection, the use of combination ear muffs/face shield provides face and hearing
protection all in one unit.
ALWAYS wear safety glasses or goggles under the
face shield, and wear head protection when cutting
overhead using a PAS or SB unit with Power Pruner or
Hedge Clipper Attachments.
PROTECTIVE CLOTHING
Gloves
WARNING
Sharp Blades/Powerful Cutting Action. Contact with
sharp edges of moving blades and attachments will
cause severe injury or amputation. Keep hands, fingers, and all other body parts away. Work gloves and
other heavy work clothing do not protect against serious
injury if contact is made with moving blades or attachments.
Wear sturdy work gloves to provide protection against
cuts and scratches, and to help reduce the effects of
vibration.
9
Page 10
OPERATOR SAFETY
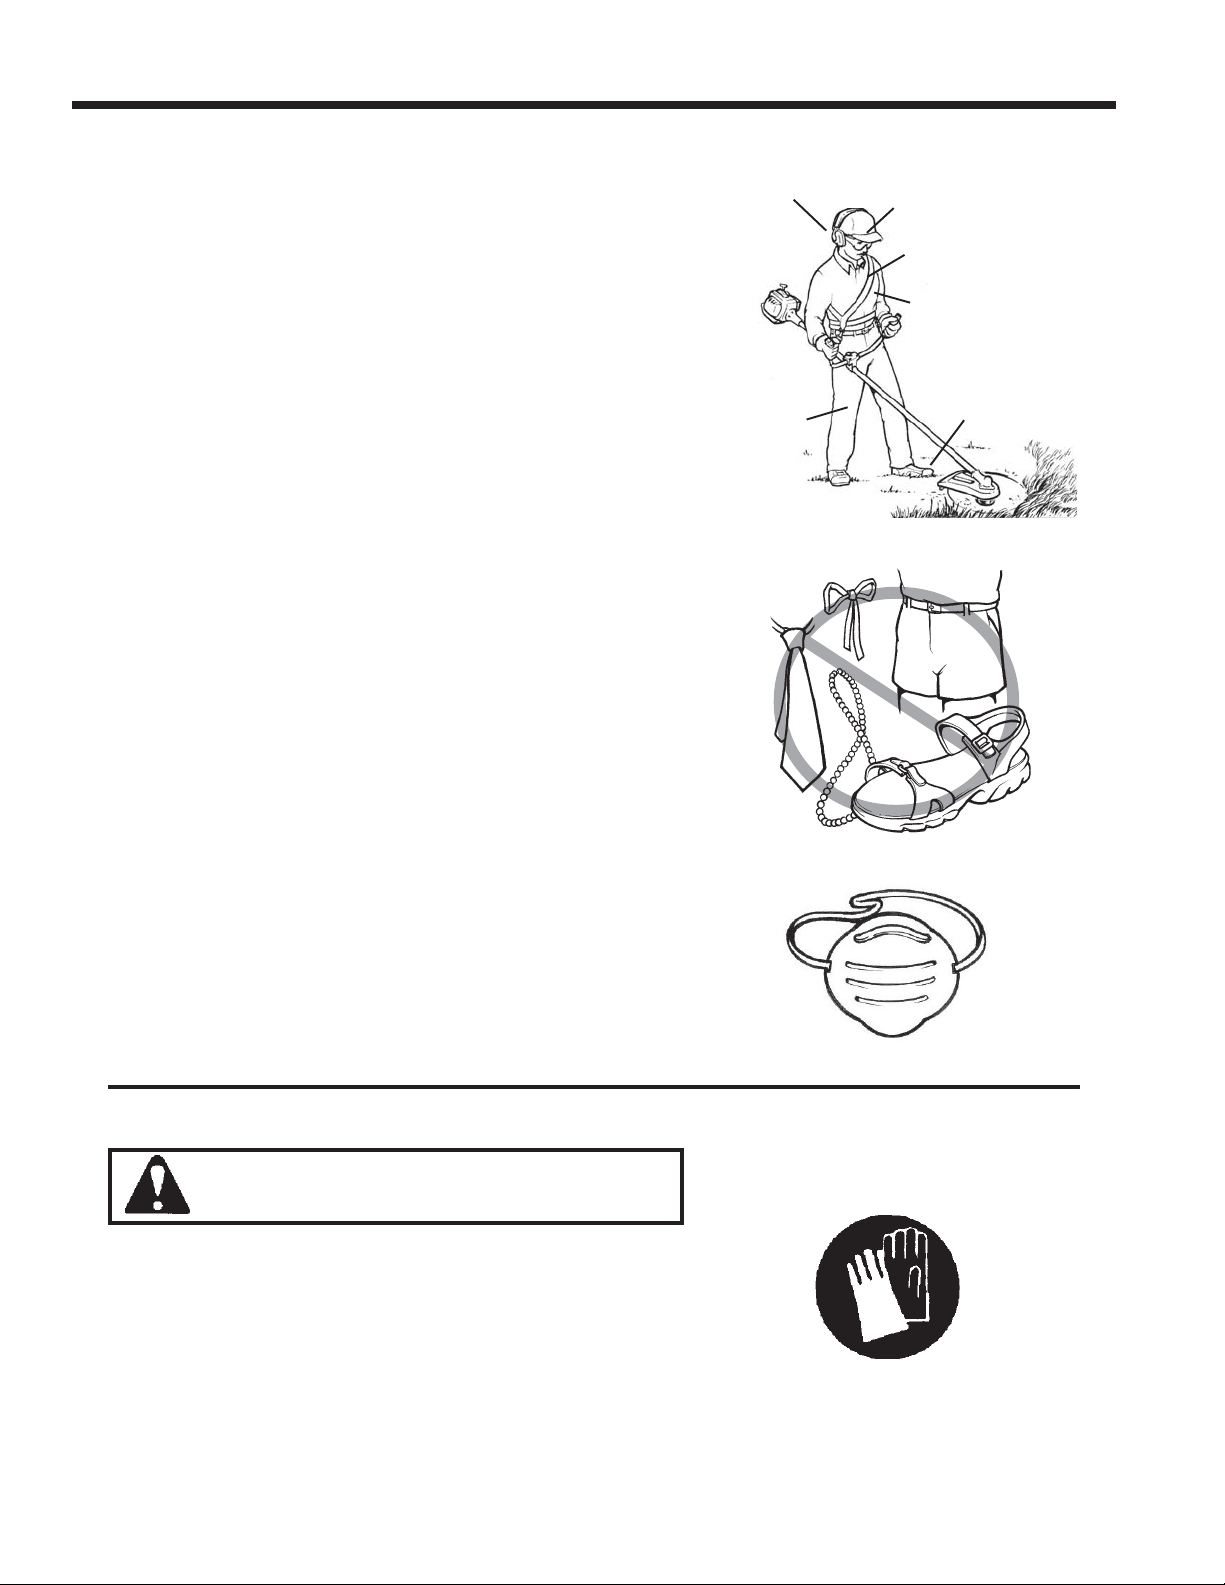
Leg Protection
Wear long pants to protect legs from cuts and scratches
caused by flying debris.
Foot Protection
Wear sturdy shoes or work boots to provide foot protection. Steel-toe shoes or boots provide extra protection
against dropped or falling objects. Make sure soles are
non-slip for secure footing.
General Clothing Safety
Never wear ties, loose clothing, or clothing with strings,
frills, or dangling straps. Keep clothing buttoned or
zipped, and keep shirt tails tucked in. Never wear
dangling or hanging jewelry such as earrings or necklaces, or any other items that could become entangled
with branches or equipment, and be drawn into the
moving parts of the engine.
HEARING
PROTECTORS
LONG
PANTS
SAFETY
GLASSES
SHOULDER
HARNESS
TRIM-FITTING
CLOTHES
STURDY
SHOES OR
BOOTS
Dust Protection
Operators who are sensitive to wood dust or other
common airborne allergens may need to wear a dust
mask to prevent inhaling these materials while operating unit. Dust masks can provide protection against
sawdust, plant debris, and other plant matter such as
pollen. Make sure the mask does not impair your
vision, and replace the mask as needed to prevent air
restrictions.
PROTECTION AGAINST COLD OR VIBRATION
CAUTION
Prolonged exposure to cold and/or vibration may result
in injury. Read and follow all safety and operation
instructions to minimize risk of injury. Failure to follow
instructions may result in painful wrist/hand/arm injuries.
Wear sturdy work gloves to help reduce the effects of
cold and vibration, and to help improve your grip.
10
Page 11
OPERATOR SAFETY
Raynaud's Syndrome
A condition known as Raynaud’s Syndrome can occur from exposure to cold and/or vibration.
This condition affects the hands and arms, causing tingling, burning, numbness, and loss of
color in the fingers. The amount of exposure needed to trigger this is unknown, and varies by
individual.
To protect yourself from this condition, take the following precautions:
• Keep your body warm - pay particular attention to
head and neck, hands and wrists, and feet and
ankles.
• Avoid awkward grips on the unit that may cause
stress. Maintain control, but do not hold the unit with
an excessively tight grip.
• Take regular rest breaks.
• Exercise and stretch to strengthen muscles, and to
maintain circulation. Keep exposure to vibration at
a minimum.
• If you experience discomfort, redness, and/or swelling of the fingers, followed by whitening or loss of
feeling, stop using the unit, and contact a doctor.
Repetitive Stress Injuries (RSI)
Overuse of the muscles and tendons of the fingers hands, arms, and shoulders may cause
soreness, swelling, numbness, weakness, and pain in these areas. Repetitive hand/wrist
movement can put you at high risk for developing a Repetitive Stress Injury (RSI), such as
Carpel Tunnel Syndrome (CTS). Carpal Tunnel Syndrome occurs when swelling in the wrist
puts pressure on a nerve, resulting in severe pain.
To protect yourself from these conditions, take the following precautions:
• Avoid using your wrist in a bent or twisted position.
Try to maintain a straight wrist position.
• Avoid using your thumb and index finger to grip
things - use your whole hand.
• Take regular rest breaks.
• Exercise and stretch to strengthen muscles and
maintain circulation.
• Keep exposure to vibration at a minimum.
• Reduce the speed and force of repetitive move-
ments.
• If you experience tingling, numbness, or pain in the
fingers, hands, wrists, or arms, stop using the unit
immediately, and contact a doctor. Early diagnosis
of RSI can help prevent permanent nerve and
muscle damage.
11
Page 12
ASSEMBLY
ASSEMBLY
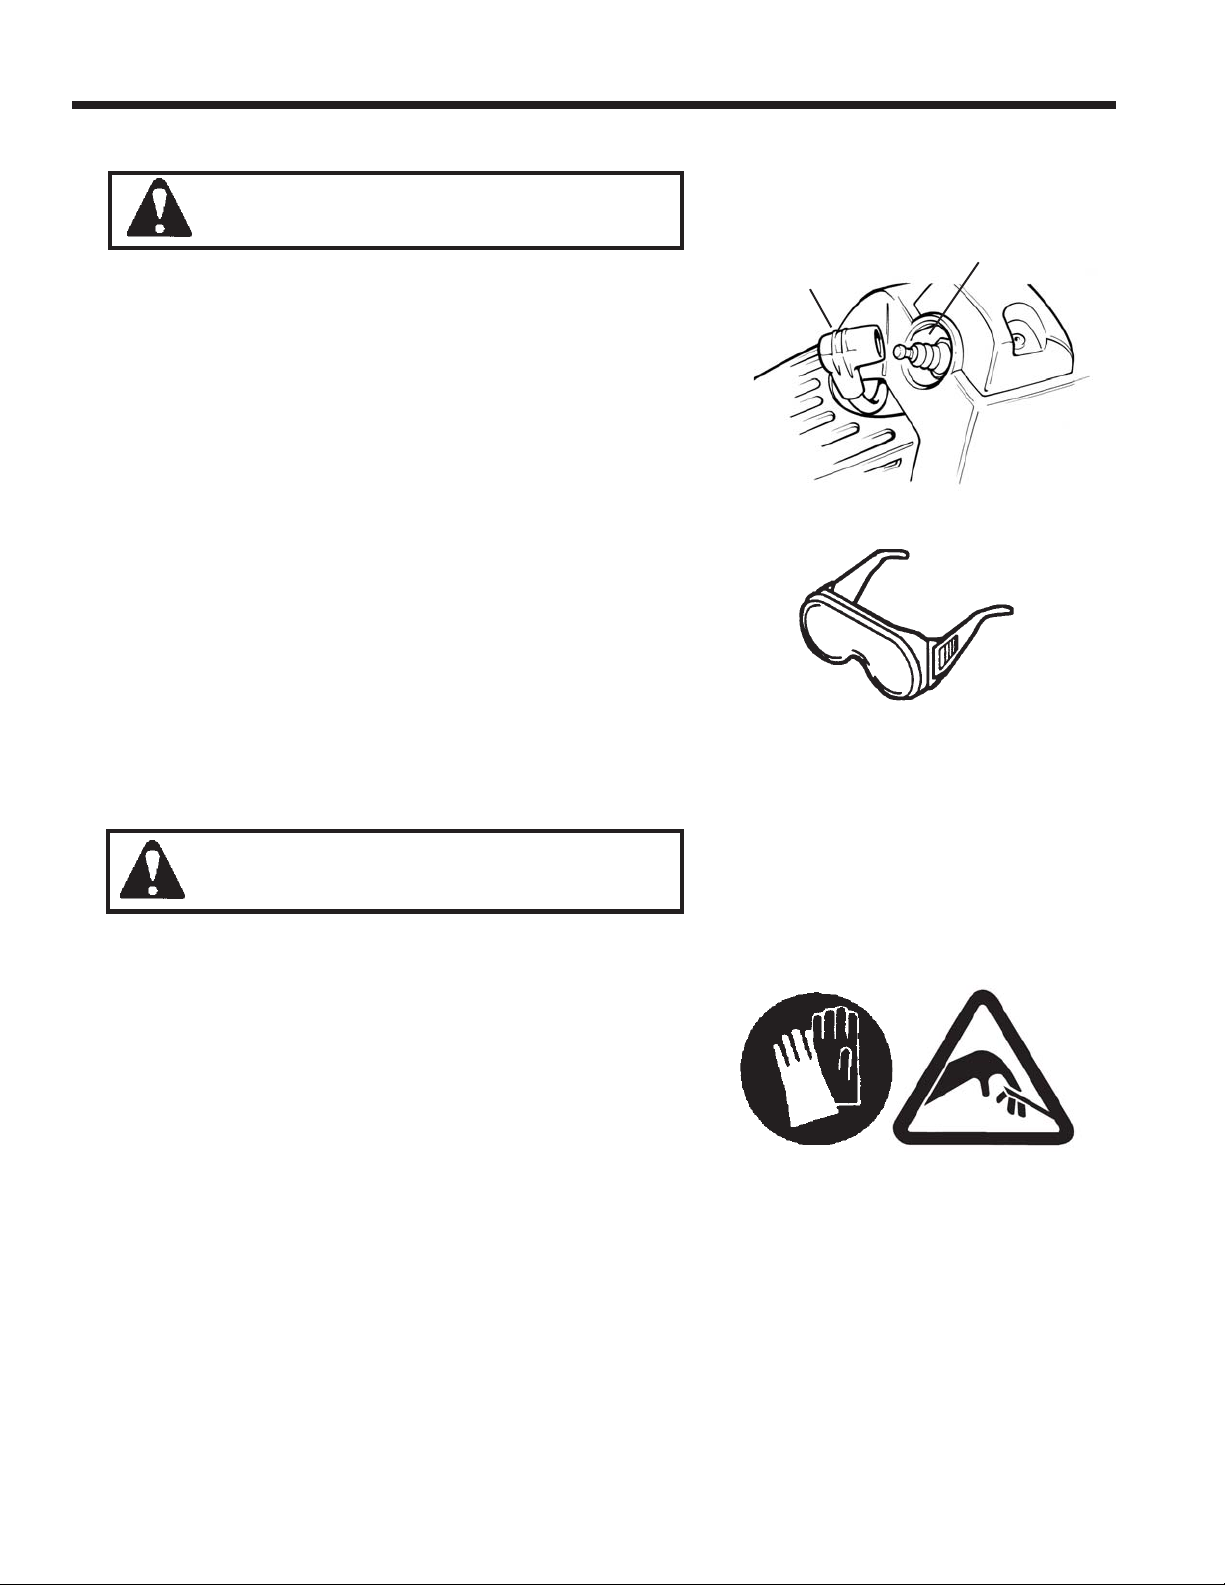
WARNING
Move STOP switch to STOP position and disconnect
spark plug lead at spark plug before assembling unit.
Do not connect spark plug lead to spark plug until unit is
properly assembled, checked, and ready for use.
ALWAYS wear eye protection that meets current
ANSI Z87.1 requirements. Operators that wear prescription glasses must wear appropriate protective
eyewear over glasses. For additional safety, a full-face
shield may be worn over the safety eyewear to provide
complete face protection.
If parts are missing, or if you have a problem installing
parts, contact your Echo Dealer for assistance or call
Echo Consumer Product Support at 1-800-673-1558.
For the Dealer nearest you ask your retailer or call
1-800-432-3246, or visit our website at www.echousa.com
Spark
Plug
Wire
Spark
Plug
DANGER
Metal grass, weed, brush, and clearing blade edges are
extremely sharp. Accidental hand or body contact with
blade edges can result in severe cuts, even if the engine is off and blades are not moving. Always wear
sturdy work gloves when handling blades. Do not allow
blades to contact any part of your body. Work gloves
do not provide protection from contact with moving
blades. Always keeps hands and body away from
moving blades.
NEVER fuel, start, or operate your unit unless it is fully
assembled, all shields and required guards are in
place, and the throttle lock-out lever and trigger are
working properly.
12
Page 13
NEVER install any other type of blade, line head, cutting
attachment, part, or accessory on your trimmer/
brushcutter unless it is approved by Echo for use on
your specific model. Parts and accessories that appear to fit properly may create a safety hazard when the
unit is operated, and could result in serious injury to
operator and bystanders.
ASSEMBLY
ALWAYS use the correct tools for assembly. Using
incorrect or improperly sized tools can result in a sudden slip and serious injuries.
ALWAYS follow the assembly instructions in order, as
shown in the Operator’s Manual. Improper assembly
can result in sudden part failure, and serious injuries.
NEVER use parts that appear to be worn, damaged,
improperly sized, or otherwise incompatible with mating
parts. Contact your dealer or Echo Consumer Support
for assistance if parts do not fit properly.
NEVER modify parts or use parts from other pieces of
equipment to assemble your unit. Use only parts that
are designed to fit your model. Modifying a part to fit
may weaken it, and cause premature failure. Parts from
other models may not work properly, and can create
unsafe operating conditions.
Wiring
Keep feet and
hands away
Position wiring safely to prevent snagging, separation
of connectors, or breakage during operation. Gather
excess wire, and secure with wiring clamp if provided
on unit, or tuck behind the air filter area. Do not place
wiring directly against hot engine components.
Check wiring and connectors for nicks, cuts, exposed
wire, or other damage, and repair or replace as
needed. Exposed wire or connectors can cause
shocks, sparks, and risk of fire or explosion, resulting in
serious injury.
Check wire terminals for secure connections. Loose
connections can cause erratic engine operation, or
prevent Stop switch from stopping engine.
13
Page 14
ASSEMBLY
Debris Shield
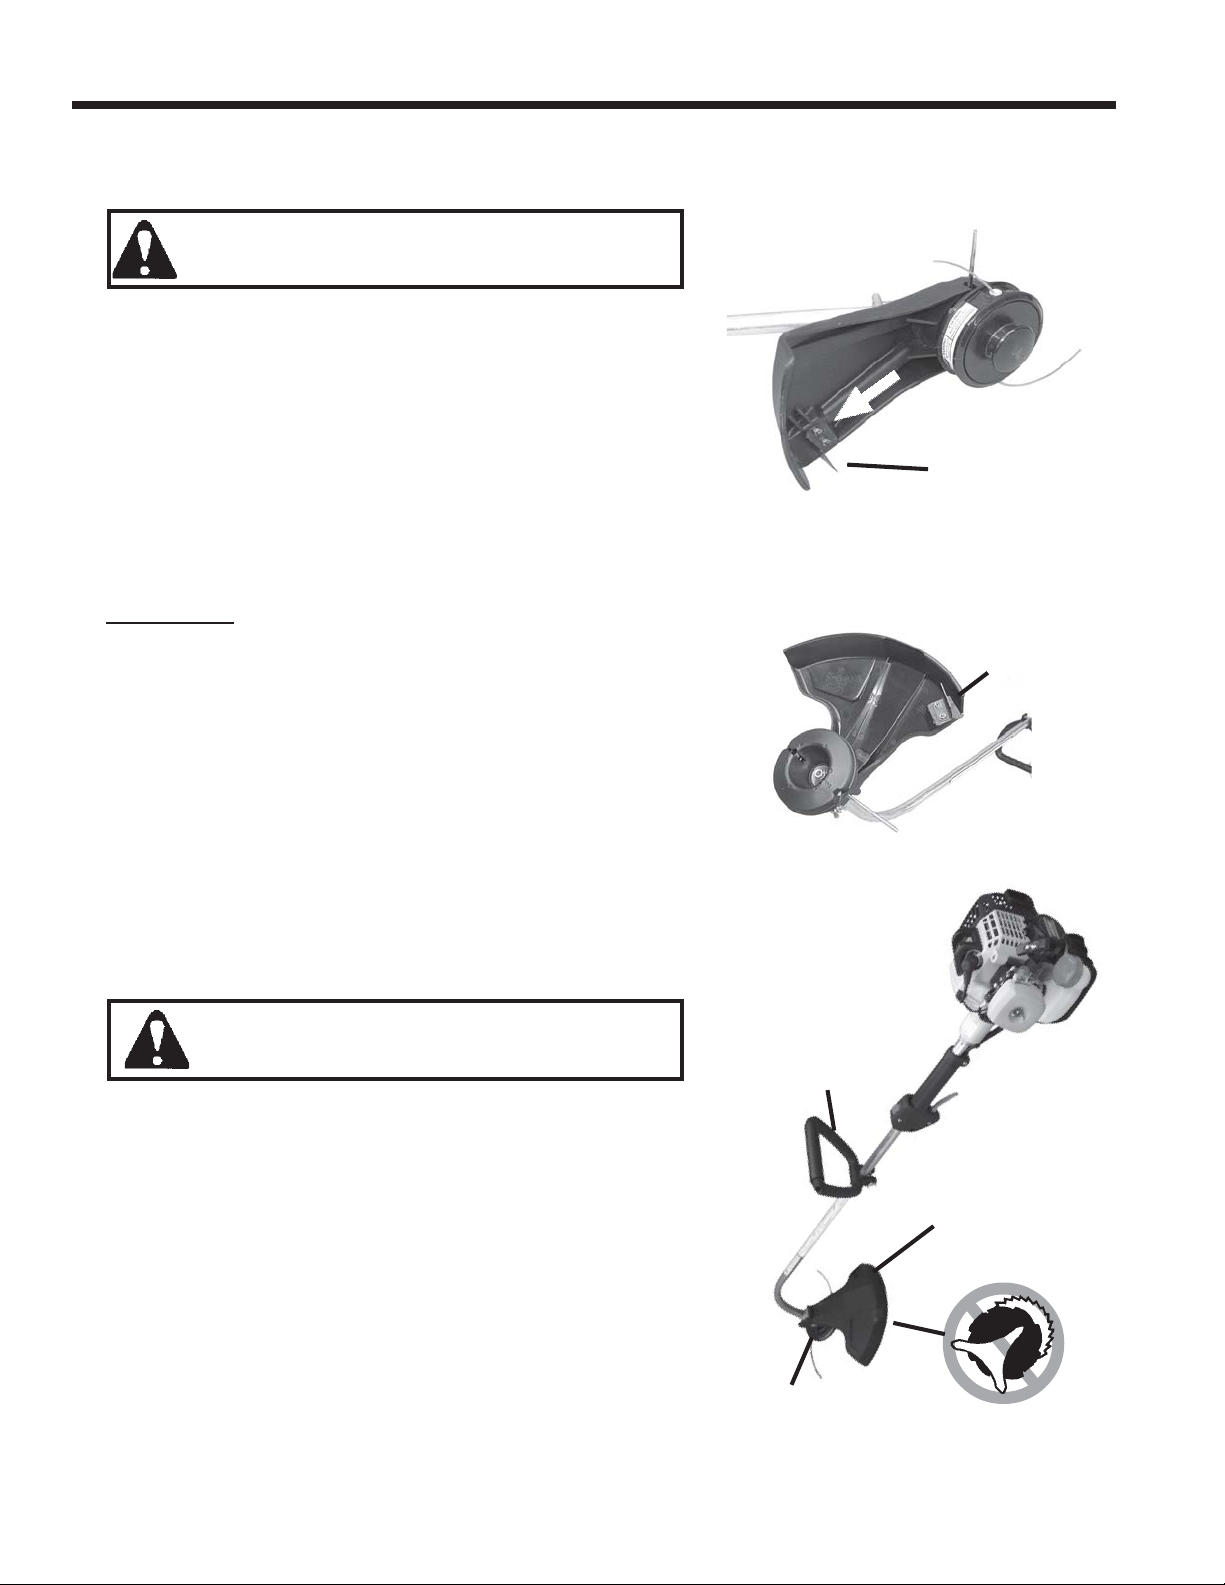
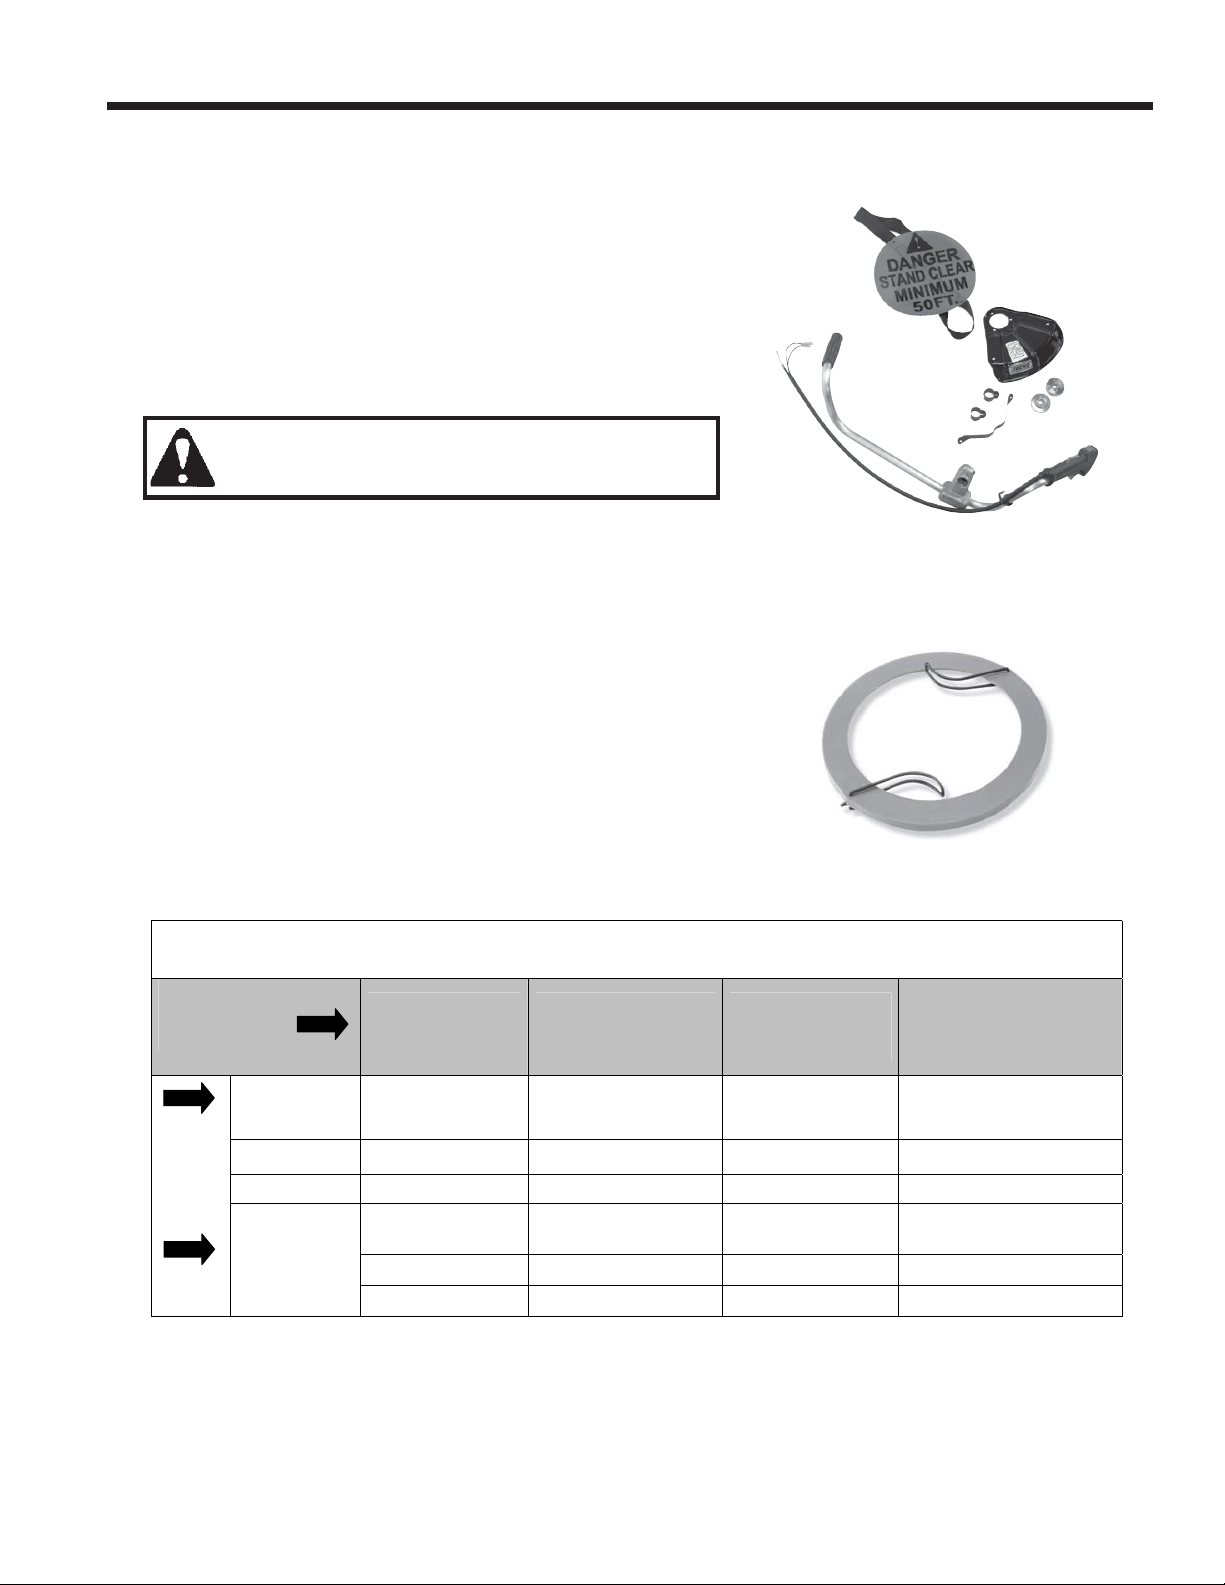
WARNING
Plastic Debris Shields are equipped with a sharp cut-off
knife for cutting nylon trimmer line to length during operation. Use extreme care when assembling nylon line
head to gear case to avoid accidental contact with cutoff knife. Wear work gloves when assembling nylon line
head to gear case, and avoid contact with sharp cut-off
knife edges.
Unit Configuration
SRM Debris Shield
Cut-Off Knife
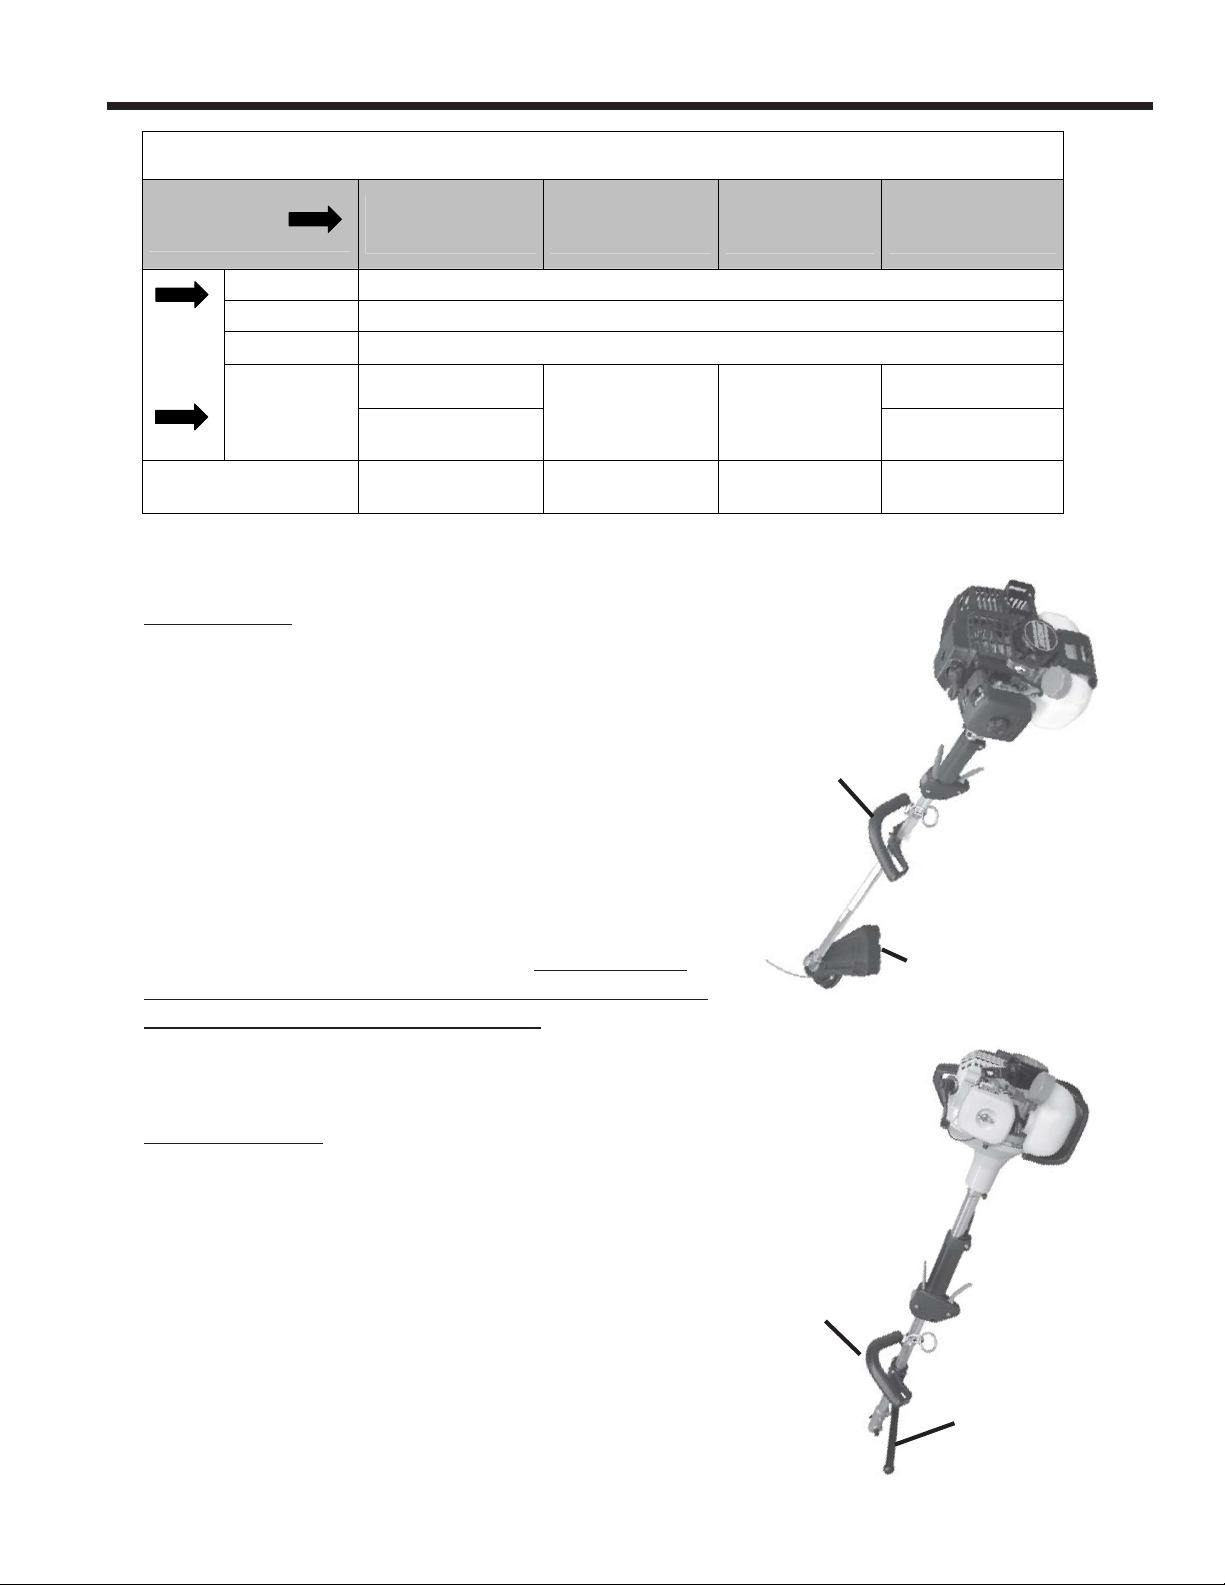
GT Models: If your Model GT curved shaft trimmer is
not fully assembled, you must assemble the unit as
instructed in the Operator’s Manual provided with the
unit. Before using the unit, make sure the plastic debris
shield, trimmer head, and handle are properly attached,
and are securely fastened.
If your GT curved shaft trimmer has been pre-assembled, you must make sure the plastic debris shield,
handle, and trimmer head are properly installed and
securely attached, as shown in the Operator’s Manual
provided with the unit.
DANGER
NEVER install a metal blade on a model GT curved
shaft trimmer. Use of any metal blade on a GT curved
shaft trimmer can result in serious injury to operator and
bystanders. Use only nylon line heads or GT series
Maxi-Cut plastic weed trimmers approved for use on GT
models by Echo. (See Set-up Guide page 15)
GT Debris Shield
Cut-Off
Knife
GT MODEL
Front Handle
GT Debris
Shield
14
Trimmer Head
NO Metal
Blades
Page 15
ASSEMBLY
GT MAXI-CUT BLADE/NYLON LINE HEAD SET-UP GUIDE
TO USE THESE
CUTTING
ATTACHMENTS*
You
must
use
these
parts!
Standard Cutting Line
* All required installation hardware provided with cutting attachment.
GT Series
Maxi-Cut Grass/Weed
Plastic Cutters
Front Handle Loop Handle (STD)
Debris Shield Plastic Shield (STD)
Harness Not Required
Mounting
Hardware*
Diameter
Flat Washer Flat Washer
3/8-24 R.H. Thread
Hex Locknut
N/A .080 Diameter .080 Diameter .095 Diameter
GT Dual Line
ECHOmatic
Line Head
Extra Hardware
Not Required
SRM Models: If your trimmer-brushcutter requires
assembly before it can be used, you must make sure
the unit is properly configured for the type of cutting
attachment you will be using. Follow the instructions in
the Operator’s Manual provided with the unit. You must
install the required cutting attachment, debris shield,
handle, and any other protective devices needed, such
as a harness loop and safety harness. See SRM/PAS/
SB Set-Up Guide Page 17)
GT Single Line
ECHOmatic
Line Head
Extra Hardware
Not Required
SRM MODEL
Front
Handle
2 Line GT
Rapid Loader
Line Head
3/8-24 R.H. Thread
Hex Locknut
If your trimmer-brushcutter has been preassembled, you
must make sure the unit is properly configured for the
type of cutting you will be performing. If the unit is not
properly configured, you must first remove the incorrect
parts, and then install the correct parts, following the
instructions in the Operator’s Manual before using the
trimmer-brushcutter,
PAS/SB Models
Echo Pro Attachment Series (PAS) and Split-Boom
(SB) models are for use only with Echo PAS series
attachments, and must not be used with any other type
or brand of attachment. Select the desired PAS attachment, and assemble the attachment to the powerhead
driveshaft using the coupler. Follow the safety and
operating instructions in the Operator’s Manual provided with the attachment, and General Safety Instructions in this Safety Manual.
Debris Shield
PAS MODEL
Front
Handle
Barrier Bar
15
Page 16

ASSEMBLY
The Echo Pro Attachment Series and Split-Boom models allow the use of a wide range of
attachments to perform various lawn, garden, and landscaping tasks. These attachments
have individual safety and operating rules which must be obeyed for safe operation. You must
read and understand the safety and operating instructions for each attachment before using
the unit. You must also review the general safety instructions for PAS Attachments.
If you change PAS attachments, you must also make sure your front handle is properly configured for the new attachment.
PAS/SB Front Handle Configuration
The required front handle configuration of your PAS/SB
unit may change, depending on the type of PAS attachment being used:
• Use the barrier bar provided with the PAS power
head when instructed in the PAS Attachment
Operator’s Manual.
• Remove the barrier bar when using an attachment
that does not require a barrier. See the PAS/SB
Attachments Barrier Bar Use table for barrier bar
usage information.
BARRIER BAR USE - PAS/SB ATTACHMENTS
PAS ATTACHMENT
Shaft Hedge Clipper X
Tiller-Cultivator X
Power Pruner X
Standard Line Trimmer X
Pro Sweep X
Pro Thatch X
Articulating Hedge Clipper X
Brushcutter1 X
Rapid Loader Line Trimmer X
Pro Paddle X
1 - See SRM/PAS/SB Blade Set-up Guide on Page 17 for blade use requirements
2 - Use J-Handle provided with Pro-Thatch attachment as a barrier
3 - Brushcutter requires U-Handle & Harness
RECOMMENDED OPTIONAL
NOT
RECOMMENDED
2
3
16
Page 17
SRM/PAS/SB Blade Configuration
If you change the cutting attachment on your SRM, PAS,
or SB unit from nylon line head to a blade, you must also
install all of the parts required for blade operation.
These parts vary by type of blade being used, and may
include replacing the front handle with a U-Handle (See
the SRM/PAS/SB Set-Up Guide, Page 17)
ASSEMBLY
DANGER
A trimmer-brushcutter unit equipped with a metal blade
can cause serious injuries if handled improperly.
ALWAYS use extreme care when carrying or handling
the unit to avoid contact with the cutting edges of the
blade. Echo recommends using the optional plastic
blade cover to protect yourself and others from accidental blade contact.
SRM/PAS/SB Blade Set-Up Guide
Use this configuration table as a guide for setting up
your unit with a blade. See the assembly instructions in
your Operator’s Manual or Blade Conversion Kit for
specific information.
SRM/PAS/SB BLADE SET-UP GUIDE*
TO USE
THESE BLADES
Pro Maxi-Cut
Grass/Weed
Plastic Cutters
Rigid Plastic
Tri-Cut
Grass/Weed Blade
U-handle/Blade Kit
Circular Blade Cover
Metal
Tri-Cut/8 Tooth
Grass/Weed Blade
Metal 80T Brush Blade
Metal 22T Clearing Saw Blade
You
must
install
these
parts!
* WARNING! DO NOT INSTALL BLADES ON GT (CURVED SHAFT) MODEL TRIMMERS
** Arbor diameter of Upper Blade Plate must match arbor diameter of metal blades.
*** New cotter pin required each time blade is installed.
**** Brushcutters over 16.5 lbs (7.5 kg) dry weight (weight w/o fuel) require a double shoulder harness
Handle
Debris Shield Metal Shield Metal Shield Metal Shield Metal Shield
Harness Shoulder Harness Shoulder Harness Shoulder Harness Shoulder Harness****
Blade
Mounting
Hardware
Loop Handle, w/or
w/o Barrier Bar
Upper Plate &
Flat Washer
Hex Nut Hex Nut Hex Nut Hex Nut
New Cotter Pin*** New Cotter Pin*** New Cotter Pin*** New Cotter Pin***
Loop Handle
w/Barrier Bar,
or U-Handle
Upper Plate
& Glide Cup
Loop Handle
w/Barrier Bar,
or U-Handle
Upper/Lower
Blade Plates**
U-Handle
Upper/Lower
Blade Plates**
17
Page 18

ASSEMBLY
PE Models
DANGER
Modification, improper assembly, or use of unapproved
blades or attachments, can result in serious injury,
engine failure, and voiding of warranty. Use only Echo
blades and attachments approved for use on PE Series
power edger models.
Assemble unit only as instructed in Operator’s
Manual, using parts provided with unit.
• NEVER modify edger or install blades or attachments not approved by Echo for use on Echo model
PE power edgers.
• NEVER remove debris shield or deflector flap.
• NEVER install grass, weed, clearing, brushcutter, or
any other type of circular metal saw blades or cutting
attachment on an edger.
• ALWAYS use a new split pin each time blade is
installed or replaced.
• ALWAYS remember to remove locking bar, Twrench, and any other tools used to assemble unit or
tighten hardware.
• ALWAYS store assembly tools safely away from the
work area.
Keep Hands/Feet Away
From Edger Blade
PE POWER EDGER
DANGER
Improper use of any trimmer, brushcutter, or PAS/SB
unit and attachment or Power Edger, can cause serious
or fatal injury. Moving edger blades and attachments
can cut through work gloves, protective clothing, and
footwear, and cause serious injuries. Keep hands, feet,
and all other body parts away from spinning blades or
attachments.
You must read, understand, and obey all safety and
operating instructions in this Safety Manual, your unit’s
Operator’s Manual, and in the Operator’s Manual or
Installation Instructions provided with any attachment,
accessory, or parts kit that will be used.
18
PE Debris Shield
Deflector Flap
Page 19
All Front Loop Handle Models
ASSEMBLY
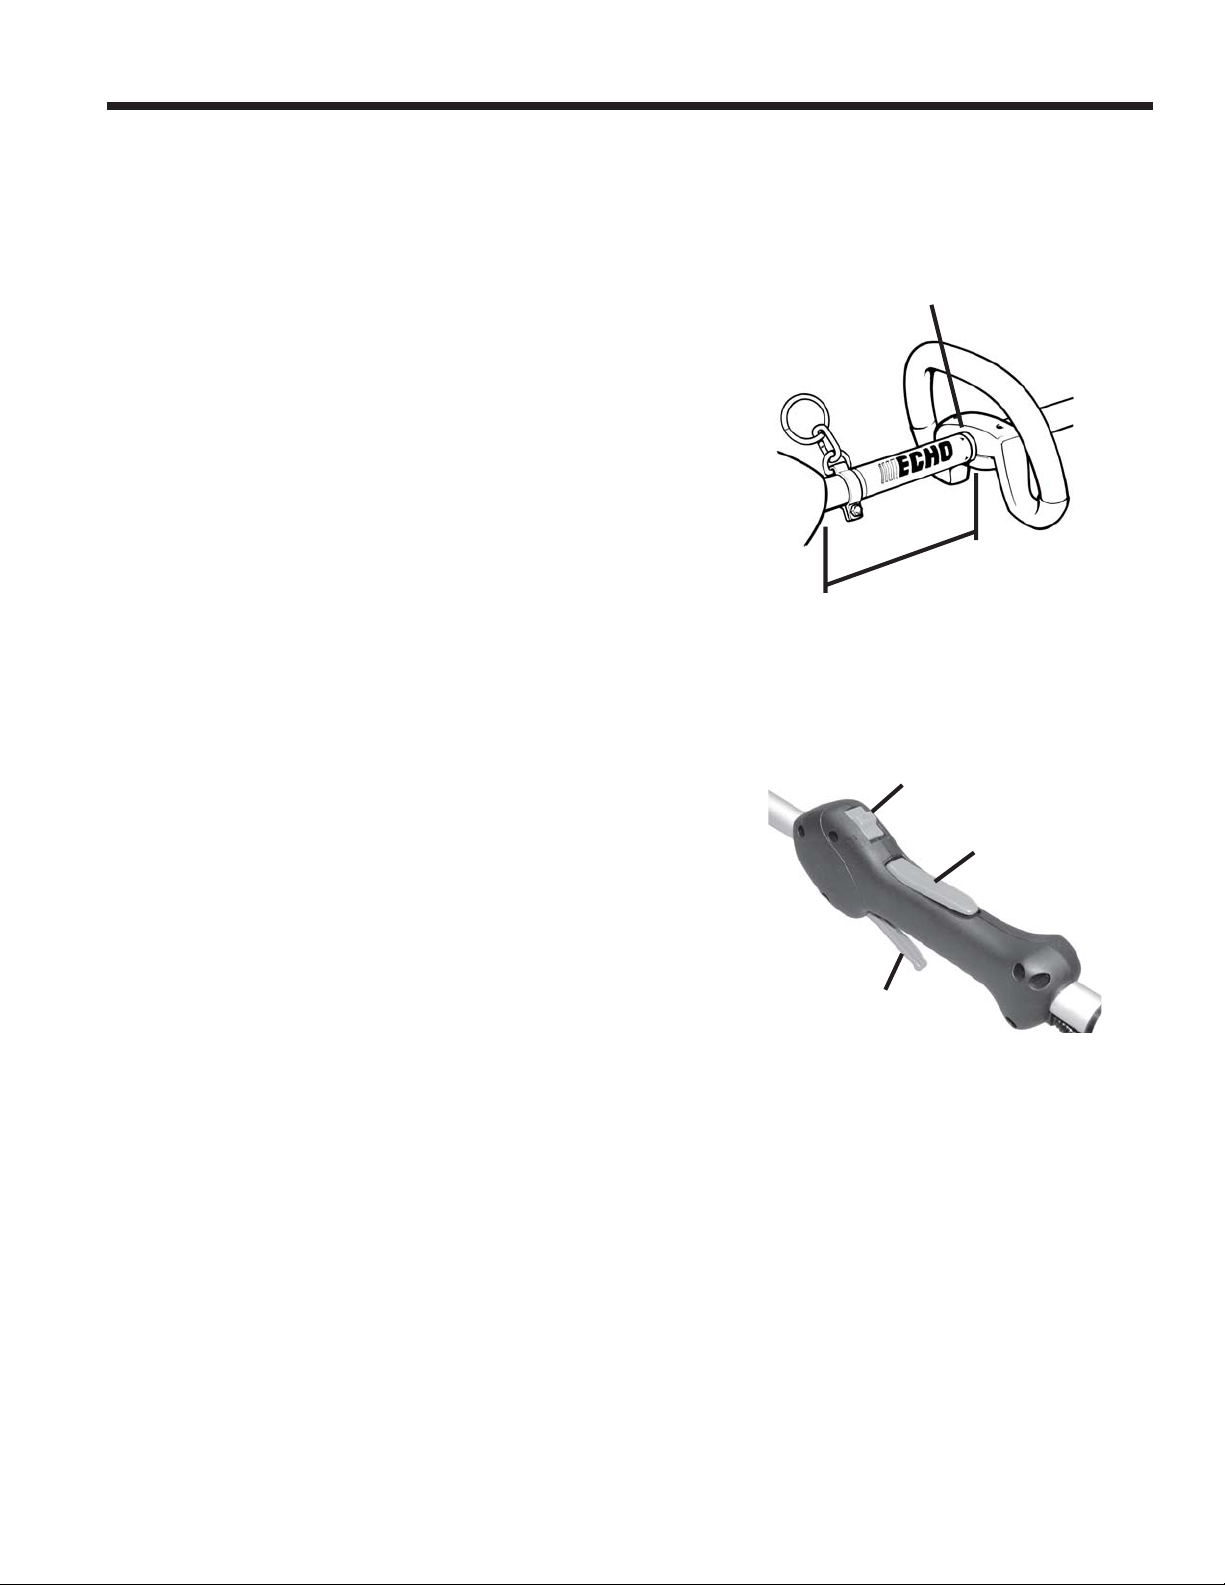
Make sure the front loop handle is positioned beyond
the minimum handle spacing line, as shown on the
handle spacing decal on the drive shaft housing. The
minimum handle spacing line indicates the minimum
distance between the rear handle and front handle, and
helps ensure the operator’s hands are far enough apart
to maintain good control of the unit.
Final Assembly Check List
After assembly, check your unit to make sure guards,
shields, protective devices, and all other parts are
properly and securely assembled and working correctly. See the Operator’s Manual for assembly details
and part locations for your unit.
• Make sure all required hardware has been used
and is properly tightened.
• Make sure throttle lock-out lever resets when re-
leased.
• Make sure throttle trigger does not operate unless
throttle lockout lever is depressed.
• Make sure throttle trigger returns to normal position
when released.
• Make sure stop switch operates properly, moving
feely between STOP and run positions.
• Move STOP switch to stop position.
• Connect spark plug lead.
Minimum Handle
Spacing Line
Minimum
Handle
Spacing
Stop Switch
Throttle Lock-out
Lever
Throttle Trigger
NEVER fuel, start, or operate your unit unless it is fully
assembled, all shields and required guards are in
place, and the throttle lock-out lever and trigger are
working properly.
If parts are damaged, missing, or do not operate properly, or if you have a problem assembling your unit,
contact your Echo Dealer for assistance or call Echo
Consumer Product Support at 1-800-673-1558.
19
Page 20

FUELING
FUELING
DANGER
Explosion/Fire/Burn Hazard. Gasoline is extremely
flammable. Vapors are explosive. Keep at least 50
feet (15 m) away from heat, sparks, open flame, smoking materials, static electricity, and all other sources of
ignition when fueling unit.
Gasoline vapor is heavier than air, and can travel along
the ground to nearby sources of ignition such as electrical motors, pilot lights, and hot or running engines.
Vapors ignited by an ignition source can flash back to
the fuel container, resulting in an explosion, fire, serious
or fatal injuries, and extensive property damage.
Follow these important safety precautions to minimize
risk of explosion or fire:
• ALWAYS use an approved, "no-spill" type fuel
container with tight-fitting caps.
• ALWAYS follow posted safety instructions for filling
fuel containers at filling stations.
• ALWAYS place container to be filled with gasoline
on the ground to prevent static build-up during
filling.
• ALWAYS keep the metal filling pump nozzle in
contact with the fuel container while dispensing fuel
to prevent buildup and discharge of static electricity.
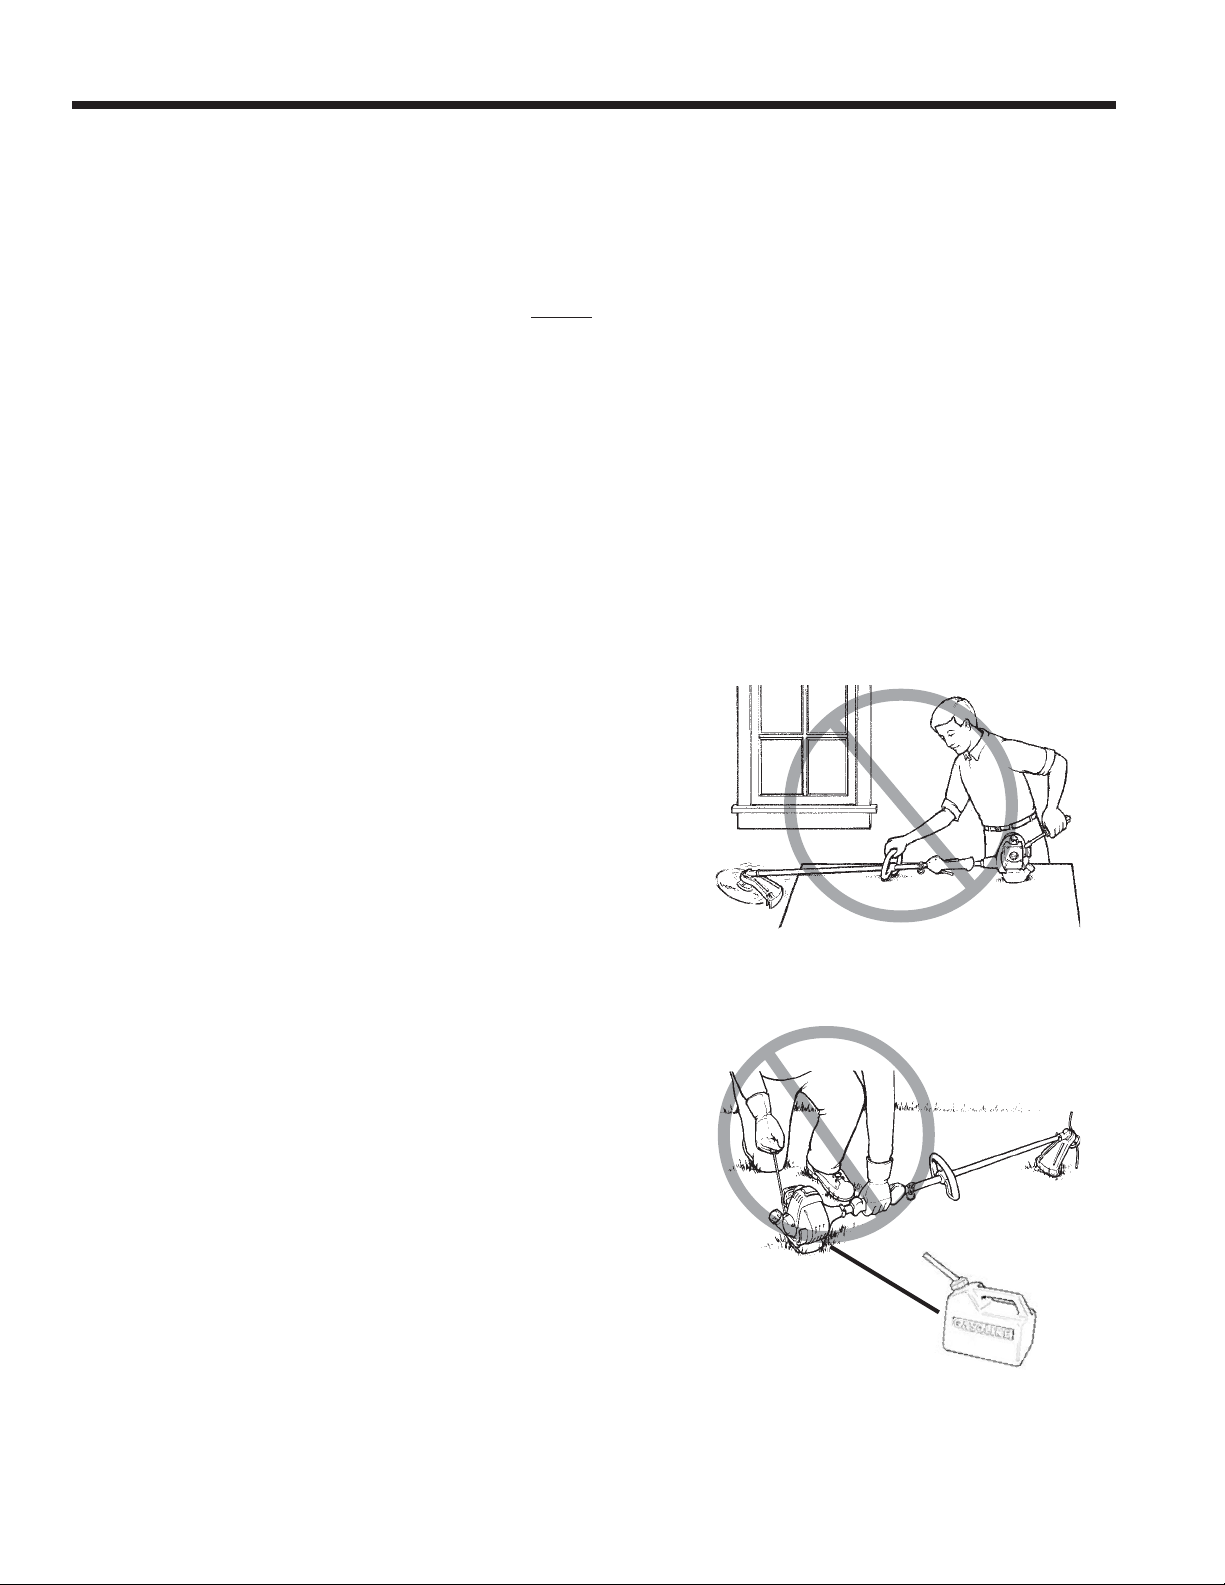
• NEVER fill fuel container on SUV/truck bed or in
trunk of car.
• NEVER smoke near fuel.
• NEVER allow flames or sparks near fuel.
• ALWAYS loosen fuel caps slowly to allow pressure
in tanks and containers to escape
• ALWAYS use extreme care when mixing, storing,
or handling fuel.
Fill Fuel Outdoors
• NEVER remove tank cap or refuel a unit while the
engine is hot or running
20
Open Fuel Cap Slowly
Page 21

• NEVER fill fuel tanks indoors - ALWAYS fill fuel
tanks outdoors over open ground.
• DO NOT overfill fuel tank - ALWAYS allow room in
tank for expansion. Fill tank no more than 95 percent full, or to “Safe Fill Line” if marked on container.
• ALWAYS wipe up spills immediately, and dispose
of fuel soaked wipes safely. Use a fireproof container designed for safe disposal.
• IMMEDIATELY change clothes if fuel spills on
clothing. Wet clothes down with water first to minimize fire risk.
• ALWAYS tighten fuel tank cap securely - check cap
for tightness.
• ALWAYS close fuel container immediately after
refueling.
FUELING
Tighten cap securely
• ALWAYS check fuel system for leaks before using
unit - NEVER start or operate a unit with leaks.
• ALWAYS move at least 3 m (10 ft.) away from
refueling location before starting engine.
• STOP USING UNIT IMMEDIATELY and shut
engine ignition off if you smell the strong odor of
gasoline. Set unit down in a safe location, and allow
to cool before checking for leaks.
• ALWAYS store fuel containers in a well ventilated,
unoccupied building, away from heat, sparks, open
flames, and other sources of ignition.
Fuel Mix
2-Stroke engine oil contains petroleum distillates and
other additives that may be harmful if swallowed.
Heated oil can release vapors that can cause flash fire,
or ignite with explosive force. Read and follow the oil
manufacturer’s instructions, and observe all safety
warnings and precautions for handling flammable
liquids. For more detailed safety and first aid information, visit www.echo-usa.com for a copy of the Material
Safety Data Sheet.
WARNING
3 m
(10 ft.)
Start at least 3 m (10 ft.)
from fueling area.
ECHO Power Blend X
2-Stroke Universal Oil
TM
21
Page 22

FUELING
• KEEP OUT OF REACH OF CHILDREN.
• If swallowed, do not induce vomiting. CALL PHYSI-
CIAN OR A POISON CONTROL CENTER IMMEDIATELY.
• WEAR SAFETY GLASSES when mixing or han-
dling.
• AVOID repeated or prolonged skin contact.
• AVOID inhaling oil mists or vapors.
• ALWAYS wipe up spills promptly - spills may create
a slip hazard if not attended to
••
• NEVER store oil in open or unmarked containers.
••
Also, follow these important safe-handling precautions
to minimize risk of explosion or fire when preparing fuel/
oil mix:
••
• ALWAYS prepare fuel/oil mix in an approved fuel
••
container
••
• ALWAYS follow mixing instructions in Operator’s
••
Manuals.
••
• ALWAYS make sure fuel container caps are tightly
••
secured before shaking container to mix fuel and oil.
••
• ALWAYS store fuel containers in a safe location,
••
with caps and vents sealed tightly.
Wear Safety Glasses when
mixing or handling fuel
Tighten cap before shaking
container
DANGER
Alternative fuels, such as E-20 (20% ethanol), E-85
(85% ethanol) or any fuels not meeting ECHO requirements are NOT approved for use in ECHO 2-stroke
gasoline engines. Use of alternative fuels may cause
performance problems, loss of power, overheating, fuel
vapor lock, and unintended machine operation, including, but not limited to, improper clutch engagement.
Alternative fuels may also cause premature deterioration of fuel lines, gaskets, carburetors and other engine
components.
22
E-20
E-85
Page 23
NEVER use raw (unmixed) fuel, or any high-ethanol fuel
(ethanol content greater than 10%) such as E20 -E85,
in a two-stroke engine.
Fuel containers filled with 2-stroke engine fuel/oil mix
should be identified as containing fuel/oil mix, and
should be stored separately to prevent using raw or high
ethanol gasoline in a two-stroke engine.
STARTING
STARTING
DANGER
The Operator’s Manual for your unit has specific starting
instructions for your model and type of engine. For your
safety and ease of starting, always follow these starting
instructions, and obey the safety rules provided.
The cutting head/work attachment on units that require
starting at wide-open (full) throttle (throttle trigger fully
depressed) will start moving immediately when the
engine starts.
To avoid loss of control and serious injury:
••
• Stabilize unit on ground before pulling starter handle.
••
••
• Stay clear of the cutting head/work attachment.
••
••
• Keep the cutting head/work attachment off the
••
ground and clear of objects that could be struck or
become entangled.
••
• Release the throttle trigger immediately when en-
••
gine starts.
Before starting the unit, make sure you know the location of the unit’s “STOP” switch, and know how to perform an emergency stop in case of a switch malfunction.
(See “Stopping” on page 25.)
Stabilize unit on ground
23
Page 24
STARTING
The cutting head/work attachment (nylon line head,
blade, or PAS/SB attachment) must not move at idle,
otherwise serious personal injury may result. Periodic
carburetor adjustment may be necessary to assure the
cutting head/PAS attachment does not move at idle. If
the cutting head/work attachment moves at idle, readjust carburetor according to “Carburetor Adjustment”
instructions and idle speed specifications provided in
your Operator’s Manual. See your Echo dealer or
contact Echo Consumer Support at 1-800-432-ECHO.
for help if you have any questions.
Follow these important safety rules when starting your
unit:
• DO NOT use unit if cutting head/work attachment
moves while engine is idling (throttle trigger not
depressed). Adjust idle speed as instructed in your
unit’s Operator’s Manual before using unit.
• NEVER start or run your unit indoors or anywhere
else where there is poor air circulation. Indoor
operation produces dangerous levels of Carbon
Monoxide, a colorless and odorless poisonous gas.
Carbon Monoxide (CO) causes nausea and other
flu-like symptoms if breathed. Prolonged exposure
to CO may cause loss of consciousness, brain
damage, or death.
• NEVER start a unit near a gasoline container or
spilled gasoline.
• ALWAYS move at least 3 m (10 ft.) away from
refueling location before starting engine.
• If a protective blade cover is used, ALWAYS re-
move blade cover before starting unit. Keep blade
cover nearby, and place cover back on blade when
unit is off and blade has stopped.
• NEVER start a PAS/HCA (extended shaft, articulat-
ing blade) unit while blade is in folded/locked position. Make cutting angle adjustment first.
Do not operate indoors
3 m
(10 ft.)
Do not start within 3 m (10 ft.) of
fueling location
24
Page 25

• ALWAYS start the unit with power head on the
ground, with cutting head/work attachment off the
ground and clear of debris and all obstructions.
• NEVER “drop start” the unit or attempt to start the
unit while it is resting on blade tips.
• ALWAYS grip the unit firmly when starting to prevent
loss of control when pulling starter handle.
STOPPING
• ALWAYS hold the unit securely on the right side of
your body with both hands. Use left hand on the front
handle and right hand on the rear handle, or use left
and right handgrips on units equipped with UHandle for metal blade use.
• MAINTAIN a secure, two-handed grip at all times
while unit is in use.
• ALWAYS shut unit off immediately if it shakes or
vibrates excessively when started. Tag unit, and
have it checked by an authorized service center
before placing back in use.
STOPPING
The “STOP” switch stops the unit by grounding the
ignition and preventing the spark plug from discharging
a spark. If the STOP switch malfunctions and does not
stop the unit when required, use the choke to stall the
engine to a stop, and have your Echo dealer repair the
switch before using the unit again.
Never drop start unit
Never use one-handed
Use this “Emergency" Stopping sequence only if the
STOP switch malfunctions:
• Release trigger and allow engine to return to idle,
and wait for cutting head/work attachment to stop.
• After the engine has returned to idle and cutting
attachment has stopped, place the unit on a safe,
flat surface, clear of obstructions.
• Keep one hand on the throttle control handle assem-
bly to maintain control of the unit, and move the
choke control lever to the closed, “COLD START”
( ) position to stall the engine.
CHOKE CLOSED
(COLD START POSITION)
25
Page 26
OPERATION
• Hold the unit with a secure, two-handed grip, and
wait for the engine to stall to a complete stop.
• After the engine stops, disconnect the spark plug
lead, and tag the unit to identify it as having a broken
STOP switch.
• Do not restart the unit. Have the unit repaired before
using it again.
OPERATION - GENERAL SAFETY
DANGER
Blade Hazard
Metal blades are extremely sharp, and have powerful
cutting action. Contact with moving blades or cutting
attachments will cause serious injury. Keep hands, feet,
and all other body parts away from moving blades and
cutting attachments at all times. Wear work gloves,
safety glasses, hearing protection, and protective
clothing.
Spark
Plug
Wire
Spark
Plug
Carbon Monoxide Hazard
Engine exhaust contains carbon monoxide, a poisonous gas. Breathing carbon monoxide can cause loss of
consciousness, serious injury, or death. Start and
operate outdoors only.
Spark Hazard
All Echo equipment features spark-arresting mufflers as standard equipment. Spark arrestors
prevent hot, glowing particles of carbon from being discharged from the muffler. Operation
with a damaged, loose, or missing spark arrestor can result in fire.
Hot Exhaust/Burn Hazard
The exhaust produced by gasoline-powered equipment
is hot, and can cause burns or ignite nearby flammable
materials. Never blow engine exhaust against your
body or toward flammable materials. The muffler and
surrounding area become extremely hot during use, and
can cause serious burns if touched.
Finger Sever Hazard
Moving parts can amputate fingers or cause severe
injuries. Keep hands, clothing and loose objects away
from all openings. Always stop engine, disconnect
spark plug, and make sure all moving parts have come
to a complete stop before removing obstructions,
clearing debris, or servicing unit.
26
Page 27
OPERATION
DANGER ZONE
Careless operation, misuse, improper configuration or assembly, or use of unapproved cutting
heads and work attachments can result in serious or fatal injuries to operator and bystanders.
Flying debris can cause serious eye injury, loss of sight, or property damage. You must read,
understand, and follow all safety and operating instructions in this safety manual, in your unit’s
Operator’s Manual, the Attachment Operator’s Manual, and in the Installation Instructions for
any kit or accessory being installed before using this equipment.
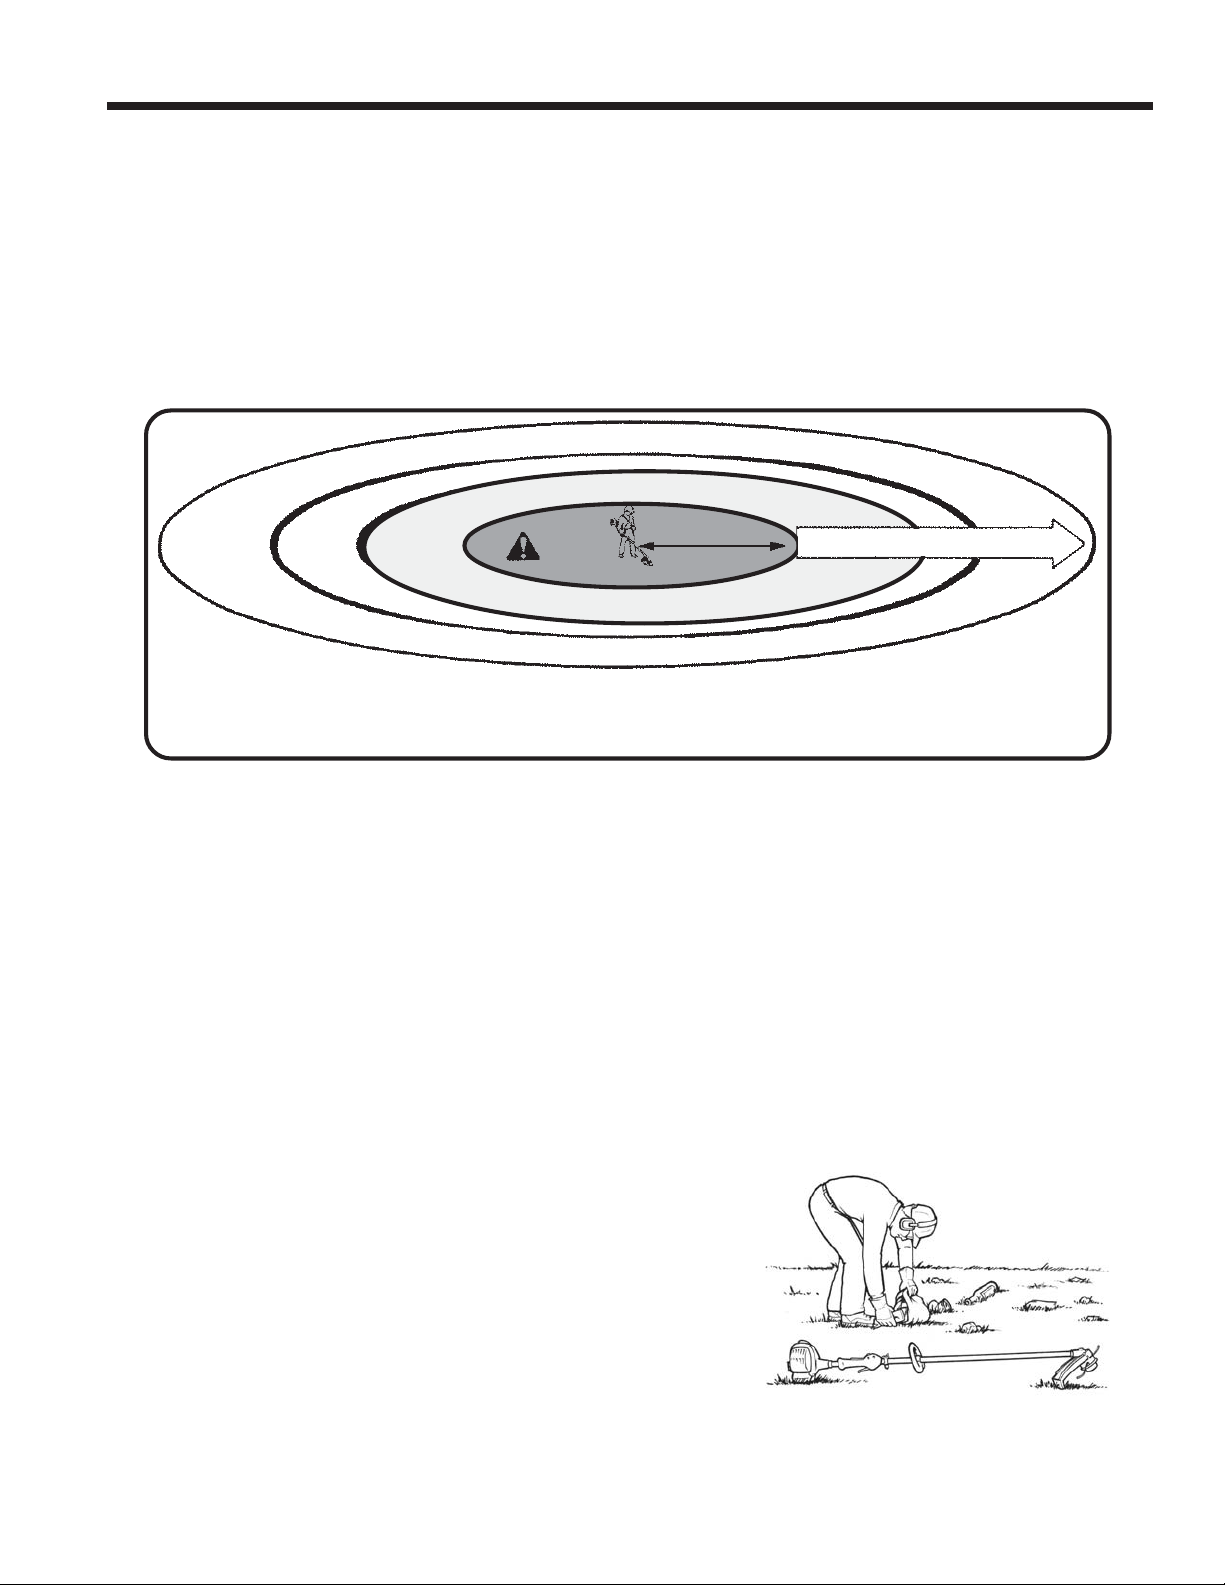
DANGER ZONE
30 METERS
15 METERS
DANGER ZONE
50 FEET
RISK ZONE
100 FEET
NO PERSON EXCEPT OPERATOR IS ALLOWED IN 15 METER RADIUS* DANGER ZONE. EYE,
EAR, FACE, FOOT, LEG AND BODY PROTECTION MUST BE WORN BY OPERATOR. PERSONS
IN ZONE OF RISK BEYOND DANGER ZONE MUST WEAR EYE PROTECTION.
• ALWAYS maintain a minimum safety zone of 50 feet (15 meters) from where you are
working. Don’t allow others to enter the safety zone unless you have shut the unit off and
the cutting/work attachment has completely stopped moving.
• ALWAYS wear appropriate personal protective equipment to protect eyes, face, hearing,
and hands.
• ALWAYS wear protective clothing to minimize risk of cuts, scrapes, and burns, and wear
sturdy shoes or work boots with non-slip soles.
• ALWAYS safety-check equipment carefully before use.
• NEVER operate with missing, broken, or loose parts.
• NEVER operate a unit with a fuel leak of any kind.
• ALWAYS clear the intended cutting/work area of debris such as wire, stones, wood, cans,
broken glass, and other objects which could be thrown, become entangled, or damage the
cutting head/work attachment.
• ALWAYS check for hidden hazards such as sprinkler
heads, metal stakes, or other similar objects that
could break the cutting line or damage the cutting/
work attachment. Stay clear of these hazards when
operating your unit to minimize risk of injury from
flying debris and loss of control, and to prevent
equipment damage.
• ALWAYS check the ground for surface obstacles
and other trip hazards, and be prepared for the
terrain when moving around the work area.
Always clear debris before
using unit
27
Page 28

OPERATION
• ALWAYS use extra care to maintain footing around
sloping, hilly, or slippery ground, and around uneven
surfaces like steps, raised walkways, edging, and
curbs.
• ALWAYS hold the unit firmly with two hands, with
thumbs wrapped around the handles for a secure,
comfortable grip. Left/front handle in left hand and
right/rear handle in right hand.
• ALWAYS cut using a stable stance, with both feet
on the ground.
• NEVER stand on a ladder or other temporary
platform. You can fall or slip, and injure yourself or
others.
• NEVER allow others near the cutting/work area, or
to hold material you are cutting.
• ALWAYS keep both hands on the unit to maintain
control.
• ALWAYS keep the muffler exhaust directed away
from your body.
• NEVER touch the muffler, muffler cover, or surround-
ing area. Allow the unit to cool down before performing any maintenance in the muffler area.
• NEVER allow flammable debris such as dried
leaves and sticks to build up in the exhaust area.
Heat from operation can ignite these materials, and
cause fire.
• ALWAYS keep fingers, hands, and all other body
parts away from the cutting/work attachment and
cutting/work area.
•
NEVER allow anyone to reach into the cutting/work
area for any reason while the unit is running.
• ALWAYS maintain a direct line of sight to the cut-
ting/work attachment and the area where cutting/
work is being performed. Be aware of what lies in
the path of the cutting/work attachment at all times.
• NEVER work in the dark or when visibility of the
work area is poor.
• ALWAYS be alert for changes in operation that
could signal a problem - sudden vibration, unusual
noise, the strong smell of fuel, or poor engine performance, all require immediate attention. Stop the
unit and correct any problems before resuming
cutting.
• NEVER carry unit around the work site while the
blade or attachment is rotating. ALWAYS shut the
engine off and let the blade or attachment stop
before lifting the unit and moving to a new position.
Always use 2 hands to
hold unit
Stop unit immediately if
sudden vibration occurs
28
Page 29
GT GRASS TRIMMER & SRM TRIMMER/
BRUSHCUTTER OPERATION
GT/SRM/PAS Units - Using Nylon Line Heads
OPERATION
Flying Debris
Line heads rotate at high speed - rotating nylon line can
throw debris with sufficient force to cause injury. Keep
bystanders and pets out of the “Danger Zone,” a 50 foot
(15 meter) radius around the unit being operated.
• ALWAYS check area for hidden hazards before
• Make sure line head is securely attached to gear
• Make sure cut-off knife is properly assembled to the
• Make sure debris shield is aligned with drive shaft,
• Keep debris flow directed away from operator to
• Contact with spinning nylon line will cause serious
• Keep cutting line away from wire fences to avoid
W ARNING
starting. Trimmer head or nylon line contact with
hidden hazards (sprinkler heads, metal stakes, etc.)
can result in loss of control of unit, nylon line breakage, and flying pieces of line or other ground debris.
case drive shaft, and, if used to install line head,
locking bar has been removed.
debris shield, and nylon line head is secured.
and is properly secured to the gear case housing.
minimize risk of being struck and injured by flying
debris. Debris flows in direction of line head rotation at point of cutting contact. Change line head
position as needed to change debris flow.
injury. Keep hands, feet, and all other body parts
away from line head.
entanglement with loose or broken wires. Entangled
fence wire can spin around with cutting head at high
speed, and cause serious injuries.
Make sure line head is
securely fastened
Keep cutting head away from
wire fences
29
Page 30
OPERATION
• NEVER operate trimmer with cutting head above
knee height - operation with the cutting head well
above ground level produces a higher debris flow, and
can cause debris to strike you in the face.
• ALWAYS follow instructions provided in Operator’s
Manual or with line head for loading or advancing nylon
line.
• ALWAYS wear gloves when handling or reloading a
line head that has been in use - the gear case and
driveshaft get very hot and can cause burns if touched.
Applications
Nylon line heads may be used for trimming, scything,
edging, and scalping of grass and light weeds.
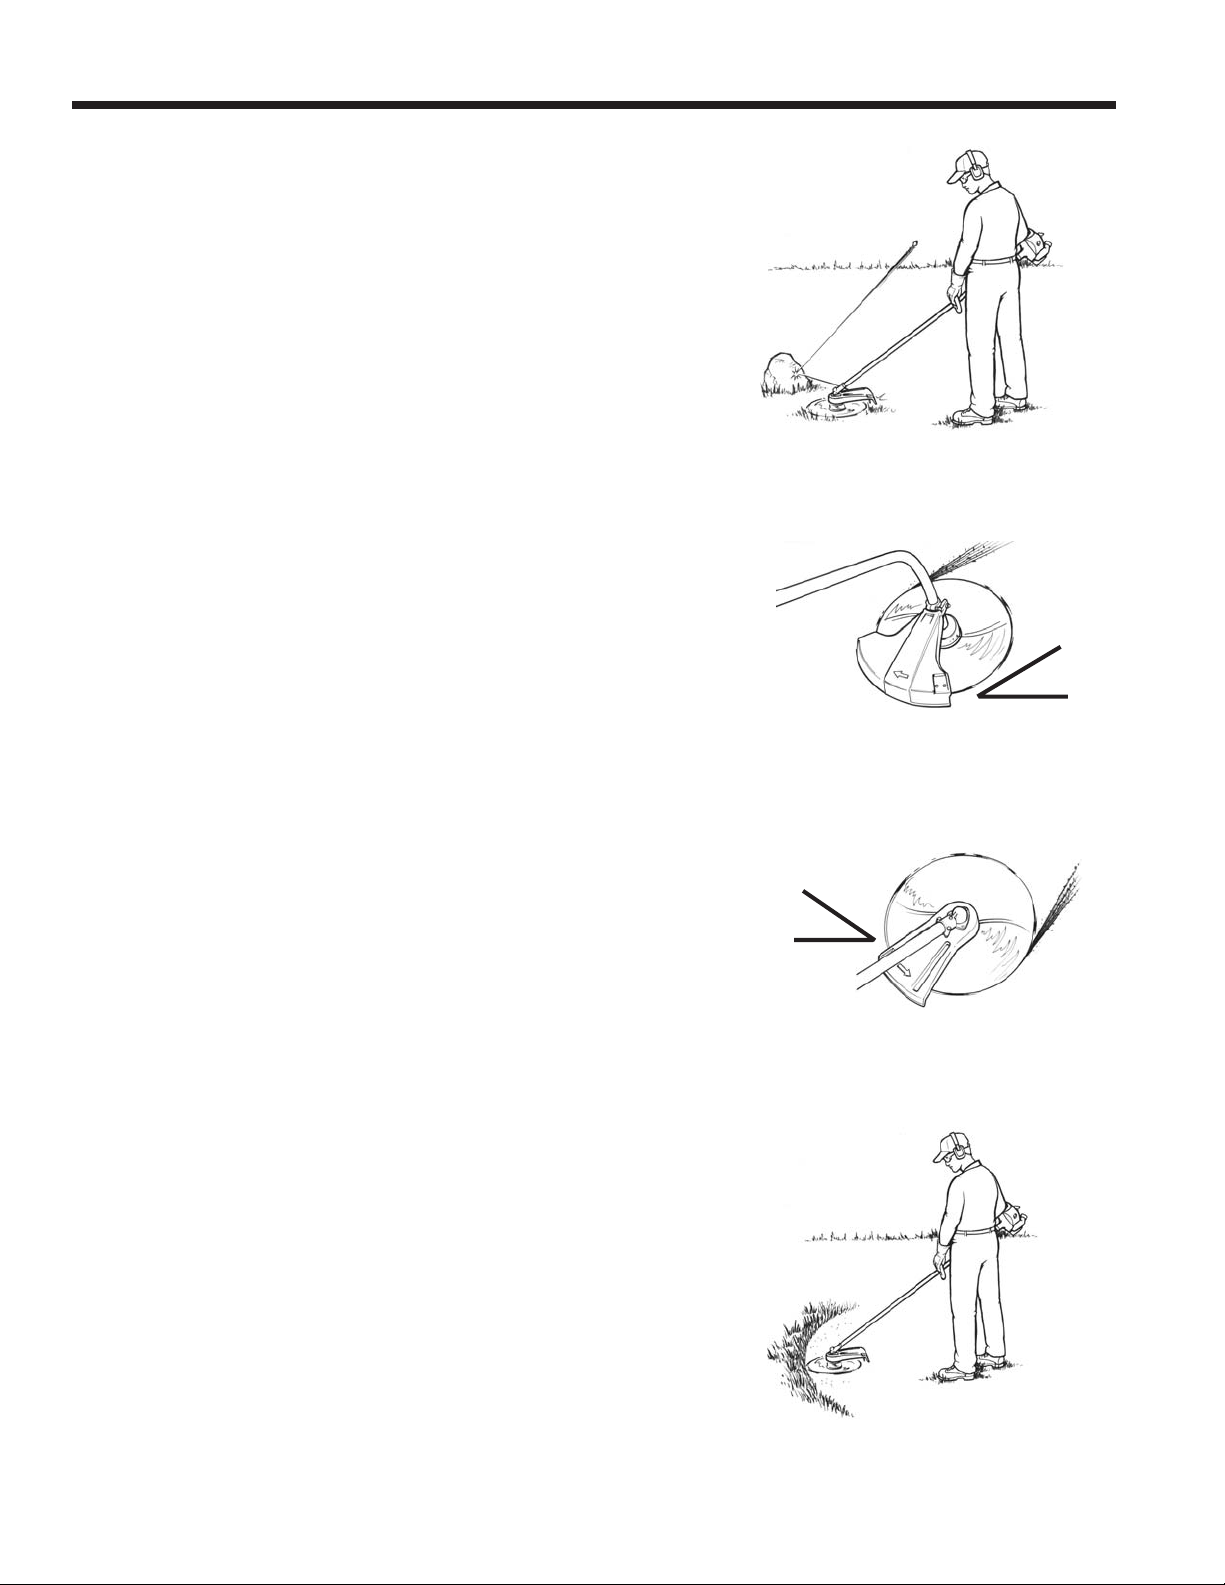
Trimming - Feed the spinning line into the material to be
cut. Tilt the line head to one side to direct cutting debris
away from you:
GT Trimming
Rotation
• Model GT (Curved shaft, clockwise line head rotation)
- Tilt the cutting head down on the left side (air filter
side) while cutting to direct cutting debris away from
operator. Feed the line gradually into the material you
wish to cut, avoiding contact with fences or other
barriers.
• Model SRM/PAS/SB (Straight shaft, counter-clock-
wise line head rotation) - Tilt the cutting head down on
the right side (muffler side) while cutting to direct
cutting debris away from operator. Feed the line
gradually into the material you wish to cut, avoiding
contact with fences or other barriers.
Scything - Swing the cutting head in a level arc, gradually
feeding the line into the material being cut. Move forward
with each arc to cut a swath. Width of cutting swath
depends on arc. Use a larger arc for a wider swath, or a
smaller arc for a narrow swath. Keep line head tilted to
direct cutting debris forward or away from you.
Tilted to the
left
SRM Trimming
Tilted to
the right
Rotation
30
Scything
Page 31
SRM/PAS Brushcutter Operation - Using Metal
Grass/Weed, Brush, & Clearing Blades
DANGER
Sharp Blades/Powerful Cutting Action
Contact with moving blades can cause serious or fatal
injury. Keep hands, feet, and all other body parts away
from blades. Wear all required personal protective
equipment. Misuse, improper assembly or care of
equipment, or failure to follow all safety and operating
instructions, can result in serious injuries to operator
and bystanders.
• Read blade selection, assembly, and sharpening
instructions in operator’s manual before using
trimmer/brushcutter with metal blade.
• Read, understand, and obey all warnings and in-
structions in this safety manual before using trimmer/
brushcutter with metal blade.
• Read, understand, and obey warnings and instruc-
tions on blade and blade packaging.
• Wear sturdy work gloves when handling, installing,
or removing metal blades.
• Keep blades in protective packaging until ready to
install. Store blades safely after removal to prevent
injury from accidental contact.
• Use Blade Protectors to prevent injury and protect
blade teeth during unit transport.
OPERATION
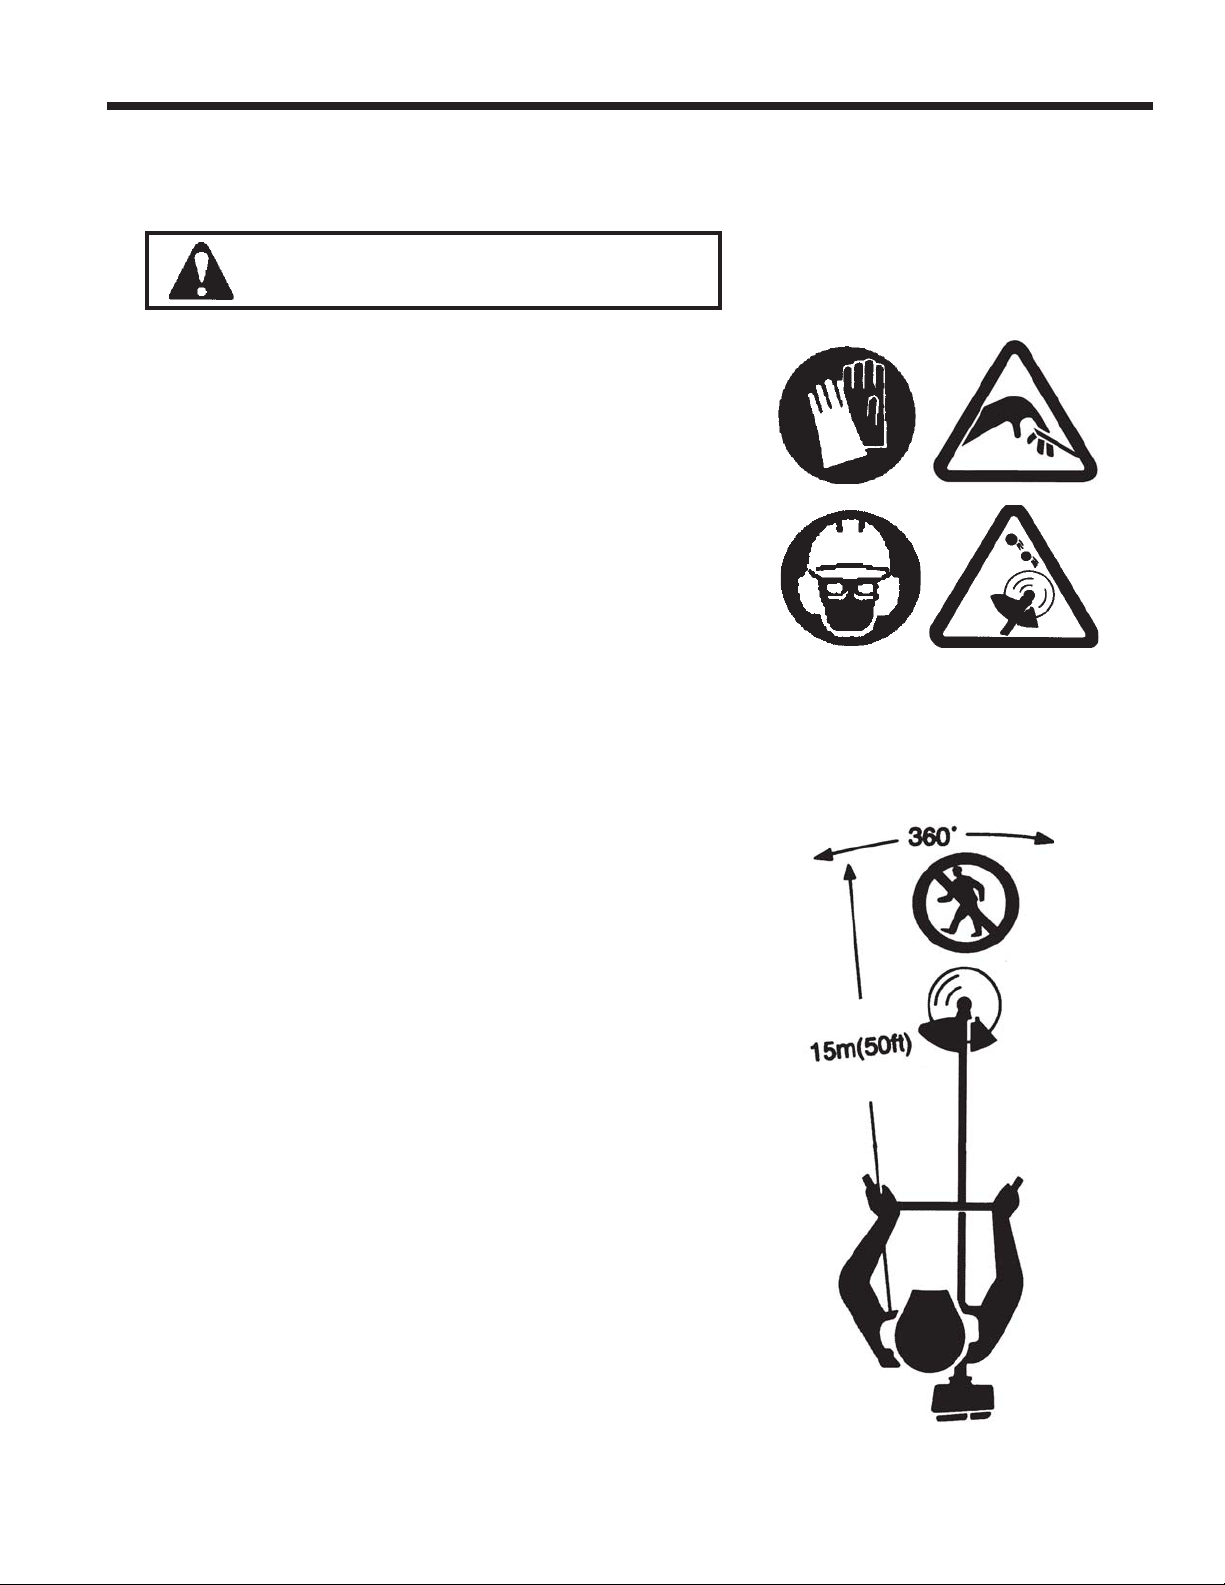
Observe 50’ (15 m) Danger Zone
Spinning blades can throw cutting and ground debris
with sufficient force to cause serious injury. Keep
bystanders and pets out of the “Safety Zone,” a 50 foot
(15 meter) radius around the unit being operated.
• Be alert for bystanders, children, and pets entering
Danger Zone during cutting. Stop unit and clear
work area completely before resuming cutting.
• Moving about while cutting changes Danger Zone
boundaries. Make sure all Danger Zone restrictions
are followed at all times.
31
Page 32

OPERATION
• Make sure the warning sign on the back of the
shoulder harness is properly positioned for easy
viewing by others.
• Wearing hearing protection and engine noise may
prevent you from hearing others about to enter the
Safety Zone. Perform regular visual safety checks
of the area while cutting to help ensure a safe work
area.
Hidden Hazards
Blade contact with exposed or hidden hazards (rocks,
metal posts, metal stakes, sprinkler heads, etc.) can
result in sudden loss of control, and injury from blade
contact or flying debris. Blade damage can result in
breakage, and serious injury caused by flying blade
fragments. Cutting with a dull or damaged blade increases risk of kick out and loss of control.
Standard Harness
• ALWAYS check area for hidden hazards before
starting. Remove hazard, or mark location of hazard
to prevent striking it while using brushcutter.
• ALWAYS use extreme care when cutting near
ground hazards and other obstacles.
• ALWAYS stop unit immediately and check for blade
damage if an object is struck. Do not use blade if
cracked, bent, chipped, or dulled by impact. Replace blade before resuming cutting.
• STOP engine immediately if sudden vibration
occurs, and check blade for damage before using.
Unit Configuration - Blade Use
Blade use requires specific unit configuration. Blade
must be matched to application requirements. See
Blade Configuration Chart (Page 15).
• NEVER use a metal blade with a plastic debris
shield.
• NEVER use a metal blade on a Model GT (Curved
Shaft) Grass Trimmer
• NEVER use an edging blade, circular saw blade, or
any other type of saw blade on an SRM/PAS/SB
unit. Only use brushcutter blades approved for use
by Echo on your model brushcutter.
• NEVER use a dull or damaged blade.
Heavy-Duty Harness
32
Page 33

• ALWAYS use blade only for application for which it
was intended
• ALWAYS use the correct front handle for the type of
blade being used. Echo recommends using a UHandle for all blade use.
REACTION FORCES - Push/Pull - Kickback/
Kickout
During normal use, operating a brushcutter with a
circular metal blade can produce sudden strong reaction forces that are difficult to control. Strong reaction
forces can cause a loss of balance or loss of control of
the unit, resulting in serious injury to operator and bystanders.
Understanding what causes these reactive forces may
help you to avoid them, and can help you to maintain
control of the unit if you experience a sudden reaction
during cutting. Reactive forces occur when the force
being applied by the cutting teeth of a blade meet
resistance, and some of the cutting force is directed
back toward the unit. The greater the cutting force or
the amount of resistance, the greater the reactive force.
OPERATION
PULL
Contact
Point
Push and Pull Forces
Push and pull forces are reactive forces that push the
unit directly toward the operator, or that pull the unit
directly away from the operator. These forces are the
result of cutting on the sides of the blade. The direction
of the force depends on the side of the blade being
used, and the direction of blade rotation at the point of
contact. The reactive force is in the opposite direction
of blade rotation at the contact point, regardless of
where the contact is being made. These types of
reactive forces are also called “Blade Thrust.”
As shown in the illustration, a blade turning counterclockwise will cause the unit to pull away from the
operator if the point of cutting resistance is on the left
side of the blade. If the point of cutting resistance is on
the right side of the blade, the unit will push back toward
the operator. In both examples, the reactive force is in
the opposite direction of blade rotation at the contact
point where resistance occurs.
Contact
Point
PUSH
33
Page 34

OPERATION
Kickout
Kickout is also a reactive force caused by resistance to
cutting, but the direction of blade thrust is lateral (to the
left or right of the blade), instead of forward or back
toward the operator. In most cases, Push, Pull, and
Kickout can be reduced or eliminated by:
• Using the correct blade for the cutting job
• Using properly sharpened blades
• Applying consistent, even force to the blade during
the cut
• Avoiding obstacles and ground hazards
• Using extra care when cutting harder materials such
as extremely dry brush, saplings, and small trees
• Cutting from a stable, secure position
Blade Assembly
Follow the instructions in the Operator’s Manual to
install a blade on your unit.
Kickout
Blade Assembly
Blade Rotation
• ALWAYS wear gloves when handling and assem-
bling blade to unit.
• ALWAYS use correct assembly hardware when
installing blade and debris shield.
• ALWAYS use correct blade arbor size.
• ALWAYS install blade with teeth pointed in direction
of rotation.
• ALWAYS tighten blade hardware securely using
properly sized tools
• ALWAYS use a new cotter pin when installing or
replacing blades.
• ALWAYS check to make sure head locking tool and
hex wrench have been removed from cutting head
after assembly.
Blade Cutting Capacities
Do not exceed recommended blade cutting capacity.
Use a chain saw for larger trees. Exceeding cutting
capacity can cause blade binding in cut, blade damage,
and risk of injury from blade breakage during cutting.
Cutting capacity depends on blade diameter - see
operator’s manual or Echo catalog for more information.
Cotter Pin
Blade
Upper
Blade Plate
Lower Blade
Plate
Lower Blade
Plate
Hex Nut
Cotter
Pin
Metal Debris
Shield
34
Page 35

Blade Applications
Use blades only in recommended applications.
••
• Grass/Weed Blade - Use Grass/Weed blades for
••
cutting thick grasses, weeds, light to medium vegetation, and thick-stalked growth such as reeds and
palm grass.
••
• Brush Blades - Use Brush blades for cutting dried
••
brush, small saplings, and large weeds with thick
stalks.
••
• Clearing Blades - Use Clearing Blades to cut
••
saplings, small trees, and thick, heavy brush.
Blade Cutting Problems
Binding - Blades may bind in the cut if dull or forced.
Binding can damage blade, and result in blade breakage or injury from fragments and flying debris. If a blade
binds in a cut, don’t try to get it out by applying “up and
down” force to pry the cut open. Applying prying force
to the blade can bend the blade, and result in blade
failure and injury.
OPERATION
Grass/Weed
Blade
Brush Blade
Clearing Blade
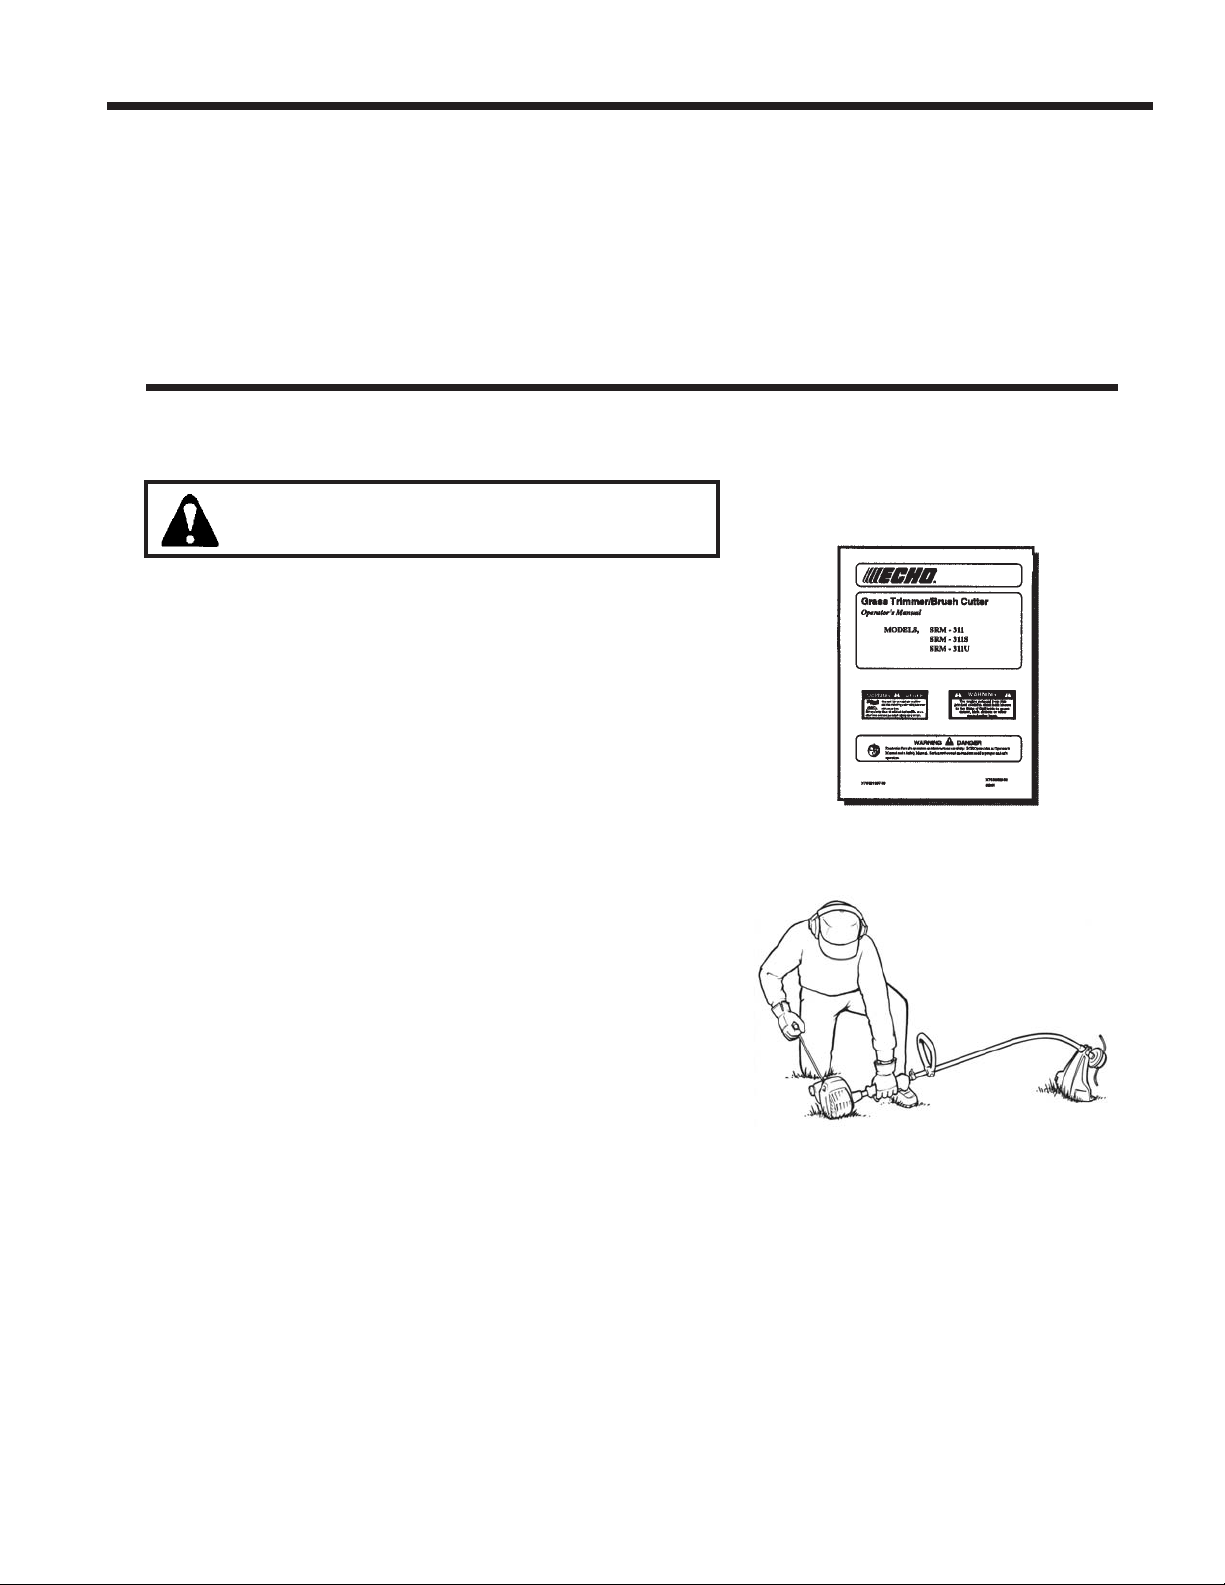
To free a blade that is bound in the cut, stop the engine, and support the trimmer/brushcutter to keep
stress off the blade. Push the tree away from the entry
point of the cut to open the cut, and pull the blade directly away from the cut in a straight-line motion. Use
caution when releasing the tree to avoid being struck by
spring-back or falling.
Inspect the blade for damage before proceeding.
Sharpen teeth if dull, or replace blade if cracked, bent,
missing teeth, or otherwise damaged. (See "Blade
Sharpening," on next page for important sharpening
information
To prevent binding:
• Keep blades sharp
• Avoid excessive pressure during cuts
• Don’t exceed cutting capacity of blade
• Don’t use blades with damaged or missing cutting
teeth
• Don’t rock blades in cut
Turn
engine off!
Jammed
Open cut to free blade with
engine off
Inspect jammed blade for
damage
35
Page 36

OPERATION
Blade Sharpening
All blades must be kept sharp for best cutting performance. 8 Tooth Grass/Weed blades can be sharpened
using the instructions in the Operator’s Manual. Brush
and Clearing blades require professional sharpening.
Improper sharpening can cause blade failure and result
in severe injury.
PLASTIC/METAL TRI-CUT BLADES
Use blade set-up guide for configuring trimmerbrushcutter to use plastic or metal tri-cut blades.
• Use Plastic tri-cut blades to cut grass and weeds
• Use Metal Tri-cut blades to cut reeds, large weeds,
and light brush
• Read, understand, and obey all trimmer-brushcutter
safety rules before using tri-cut blades.
• NEVER use tri-cut blades to cut heavy brush, sap-
lings, or small trees.
SHARPENING
8-TOOTH
WEED/GRASS
BLADE
30° ANGLE
LEAVE 2MM
RADIUS
UNFILED
SHARP CORNER
GULLET MAY
CRACK
Plastic Tri-Cut Blade SRM Pro Maxi-Cut
GT Maxi-Cut
PE Models
DANGER
Striking concrete or other hard materials with spinning edger blade can cause severe blade
damage or breakage, and serious or fatal injuries from flying fragments. Stop unit immediately
and check blade if an object is struck. Replace blade if broken, cracked, bent, chipped or
otherwise damaged, or if unit began shaking or vibrating after striking the object.
Small stones and other hard debris can be thrown from blade guard, and strike bystanders
and nearby buildings. Keep bystanders a minimum of 50 feet (15 m) away when operating
edger. Always keep flow of edging debris directed away from windows, parked vehicles,
buildings, and bystanders. Always operate edger with unit to right side of body only. Wear
eye protection, work gloves, and protective clothing. Use full face shield when edging in rocky
or debris-filled soil.
36
Page 37

WARNING
Edger operation may scatter ground debris that
can cause unstable or slippery footing, and increase the risk of slips and falls. Always maintain
proper footing and balance while operating edger.
Stop unit if necessary, and remove excessive
debris from work path before continuing.
• ALWAYS maintain control using a secure, wrap-
around, two-handed grip when operating the power
edger. If the edger strikes a buried object, it may
kick up and out of the edging cut forcefully, causing
serious injury.
• NEVER operate with unit on left side of operator.
Use only on right side of body to keep operator out
of edger debris flow.
• ALWAYS maintain a stable, balanced stance, and
use extra care when walking on uneven, slippery, or
sloping surfaces.
• ALWAYS use extreme care when walking on wet
surfaces. Wet surfaces reduce traction, and increase the risk of slips and falls.
• ALWAYS be aware of ground and walkway condi-
tions in the work area, and be prepared to maintain
balance and footing when conditions change.
• ALWAYS check edging area for all potential haz-
ards before edging, and remove objects that can be
thrown or cause kick-out.
• NEVER edge where the cut line passes directly
over buried hazards such as sprinkler pipes, electric
wiring, gas lines, or other similar hazards.
• NEVER operate edger in any area where electric
extension cords are on the ground.
• NEVER use edger in gravel, rocky soil, or in areas
with hard ground cover such as decorative rocks.
• NEVER attempt to clear debris build-up from debris
shield by tapping shield against the ground.
ALWAYS shut engine off, wait for blade to stop, and
disconnect spark plug wire. Remove debris with a
small non-scratching scraper. Wear gloves to
protect hands from contact with sharp edges and hot
surfaces.
OPERATION
Edger Operator in Operating
Position
Prohibition - Edger Operation
w/Electric Cord on Ground
ENGINE
OFF
Debris Removal with Scraper
37
Page 38

OPERATION
• ALWAYS use only Echo-approved attachments and
edger blades.
• NEVER operate edger with damaged or missing
debris shield.
• NEVER adjust edger blade height with engine
running. Stop engine, disconnect spark plug lead,
and make adjustments.
• NEVER carry edger around the work site while the
blade or attachment is rotating. ALWAYS shut the
engine off and let the blade or attachment stop
before lifting the edger and moving to a new position.
• ALWAYS avoid contact with engine, muffler area,
and gear case during and immediately after operation. These areas get extremely hot, and touching
them can cause serious burns.
• ALWAYS wear work gloves to protect hands from
sharp edges or hot surfaces.
• NEVER allow edger blade to strike concrete or
other hard surfaces. Blade contact with hard surfaces can dislodge pieces of sidewalk, curb, paved
surfaces, or other hard materials, and cause serious
injury from flying debris.
• NEVER set depth of blade cut deeper than 1/2”
below guide surface. Cutting too deep increases
risk of edger kickout from cut and possible loss of
control of unit.
• ALWAYS keep edger blade vertical during edging -
NEVER operate with blade tilted at an angle.
• ALWAYS operate edger only when conditions
provide good visibility and clear line of sight to
edging cut line.
• ALWAYS release trigger and allow blade to come
to a stop before lifting unit out of the cut.
• ALWAYS release trigger and stop engine if some-
one enters the 50 foot radius danger zone. Wait for
visitor to leave the danger zone area before restarting engine.
• NEVER leave a power edger running while ground
or guide surface debris is being removed. Shut the
engine off, and place the unit in a safe place where it
will not be a trip hazard.
Prohibition - Edger Blade
Spinning Above Knee Level
38
Page 39

PAS ATTACHMENTS
DANGER
Misuse, improper assembly, or use of unapproved
attachments, can result in serious injury, engine failure,
and voiding of warranty. Use only Echo attachments
approved for use on Pro Attachment Series models.
Contact with moving cutting or work attachments can
cause serious injury. Keep clear of moving cutting/work
attachment.
Follow assembly instructions in attachment Operator’s
Manual and PAS power head manual.
OPERATION
• Drive shaft housing and gear case gets hot during
use. ALWAYS wear gloves when handling a unit
that has been in use.
PAS HEDGE CLIPPER ATTACHMENT
DANGER
Hedge clipper blades are very sharp and can
cause severe injuries, even if engine is off and
blades are not moving. Avoid contact with blades.
Wear gloves to protect hands.
••
• ALWAYS grip unit with both hands when operating
••
unit. Left/front handle in left hand and right/rear
handle in right.
••
• ALWAYS wear work gloves to protect hands from
••
sharp edges on blades.
••
• NEVER touch a moving blade or allow it to contact
••
any part of your body.
••
• NEVER feed blades toward your body when cutting
••
- keep blades directed away from yourself at all
times.
39
Page 40

OPERATION
••
• NEVER use unit within 15 meters (50 feet) of any
••
power lines or wires that may be conducting electricity. Contact with wires carrying electrical current can
result in shock or electrocution.
••
• NEVER exceed the cutting capacity of the hedge
••
clippers - forcing the blades to cut materials thicker
than the hedge clipper is designed to handle will
result in jams, blade damage, and poor overall
performance.
••
• ALWAYS use a suitable tool such as a power
••
pruner or chain saw to cut branches larger than the
hedge clipper will allow.
••
• NEVER attempt to cut more than 6 inches from a
••
hedge or shrub in one cutting pass. Use multiple
passes for cleaner, safer cuts, and better control.
••
• ALWAYS stop engine and disconnect spark plug
••
lead before removing a blade obstruction.
••
• NEVER use dull, loose, or damaged blades. Keep
••
blades properly adjusted and lubricated at all times.
••
• NEVER adjust blades when engine is running. Shut
••
engine off, and disconnect spark plug lead from
spark plug.
••
• ALWAYS use correct tools to perform blade adjust-
••
ments. Use long wrenches to keep hands away
from sharp blade edges.
••
• ALWAYS place blade cover on blades when trans-
••
porting or storing unit.
15 M
15 meters
(50 feet)
Blade Cover
PAS HCA ARTICULATING HEDGE CLIPPER
ATTACHMENT
DANGER
Metal blades are very sharp and can cause severe
injuries, even if engine is off and blades are not
moving. Avoid contact with blades. Wear gloves
to protect hands.
••
• ALWAYS read, understand, and obey all hedge
••
clipper warnings, safety rules, and operating instructions before using unit.
••
• ALWAYS shut unit off and make all cutting angle
••
adjustments on the ground.
40
Page 41

••
• ALWAYS use adjustment handle to hold blade
••
assembly when making adjustments.
••
• ALWAYS lock blades securely in position before
••
lifting unit off ground.
••
• ALWAYS check cutting area for hidden wires, fence
••
posts, and other obstacles before starting.
••
• ALWAYS maintain a line of sight to the cutting area.
••
••
• ALWAYS use extreme care when cutting overhead.
••
PAS POWER PRUNER ATTACHMENT
DANGER
OPERATION
Open blades on ground only
with engine stopped.
Saw chain teeth are very sharp and can cause
severe injuries, even if engine is off and chain is
not moving. Avoid contact with saw chain. Wear
gloves to protect hands.
KICKBACK HAZARDS
Contact between the tip of the guide bar nose and
objects such as tree limbs and branches can
cause Kickback. Kickback is a sudden, forceful
reaction that throws the guide bar and saw chain
up and away from the point of contact, and in an
arc back toward the operator.
Kickback can also occur when the moving saw
chain gets pinched in the cut, pushing the unit
straight back toward the operator with a sudden,
forceful reaction.
Kickback can result in loss of balance, loss of unit
control, and serious injury from contact with moving saw chain, or contact between the unit and
surrounding hazards.
Kickback
ROTATIONAL KICKBACK
••
• NEVER operate a Power Pruner Attachment while
••
on a ladder, in a tree, or on slippery or unstable
surfaces.
CHAIN MOVING DOWNWARD AT IMPACT
41
Page 42

OPERATION
••
• ALWAYS make sure that the pruned tree branch or
••
limb can fall safely to the ground after cutting.
••
• NEVER stand under a tree limb or branch during
••
cutting
••
• ALWAYS keep guide bar cover on guide bar until
••
unit is ready to be used.
••
• ALWAYS keep chain properly tensioned
••
••
• NEVER make guide bar/saw chain adjustments
••
while unit is running. Stop engine and disconnect
spark plug lead before tensioning chain.
••
• ALWAYS keep saw chain sharp. Dull chain will
••
cause increased vibration and premature guide bar
and chain failure.
••
• ALWAYS use only to cut wood. Cutting any other
••
type of material can cause increased risk of kickback and damage to saw chain and guide bar.
••
• ALWAYS stop engine immediately and check chain
••
and guide bar for damage if the cutting attachment
strikes an obstacle during cutting.
••
• NEVER use a saw chain with missing or damaged
••
teeth. Excessive vibration and erratic operation can
cause chain failure and serious injury.
Keep chain properly tensioned
PAS PROPADDLE/PROSWEEP ATTACHMENT
Misuse, improper assembly, or use of unapproved
attachments, can result in serious injury, engine failure,
and voiding of warranty. Use only Echo attachments
approved for use on Pro Attachment Series models.
Contact with moving work attachments can cause
entanglement and serious injury. Keep clear of moving
work attachment.
• ALWAYS keep hands and feet away from moving
work attachment.
• ALWAYS allow attachment to come to a complete
stop before handling.
• ALWAYS keep attachment far enough away from
your body to prevent entanglement with rotating
parts.
42
Page 43

PAS PRO-THATCH ATTACHMENT
Misuse, improper assembly, or use of unapproved
attachments, can result in serious injury, engine failure,
and voiding of warranty. Use only Echo attachments
approved for use on Pro Attachment Series models.
Contact with moving work attachments can cause
entanglement and serious injury. Keep clear of moving
work attachment.
• ALWAYS check Pro-Thatch tines for damage and
secure attachment before using unit. Replace tines
if damaged or missing.
• NEVER use ProThatch without dethatcher guard in
place. Operation without a guard exposes operator
to flying debris and rotating steel tines.
• ALWAYS install J-Handle before using unit, and
adjust position as needed to accommodate operator. J-Handle provides best control and comfort
when operating unit.
• NEVER replace tines with engine running. Stop
engine and disconnect spark plug lead. Wear work
gloves when replacing or handling tines.
OPERATION
Pro-Thatch Attachment
PAS POWER EDGER ATTACHMENT
Misuse, improper assembly, or use of unapproved
attachments, can result in serious injury, engine failure,
and voiding of warranty. Use only Echo attachments
approved for use on Pro Attachment Series models.
Contact with moving cutting or work attachments can
cause entanglement and serious injury. Keep clear of
moving work attachment.
• ALWAYS check edging area for hidden objects,
and remove all dangerous debris.
• ALWAYS stay clear of spinning edger blade.
• NEVER operate with unit on left side of operator.
Use only on right side of body to keep operator out
of edger debris path.
• NEVER use edger in gravel, rocky soil, or in land-
scape beds with decorative rock ground cover.
• ALWAYS use only Echo-approved edger blades.
• NEVER use edger blades on any trimmer or brush
cutter.
Position Edger on right side of
operator only
43
Page 44

OPERATION
• NEVER operate edger attachment unless all edger
blade hardware has been properly installed.
• ALWAYS use a new split pin each time blade is
installed or replaced.
• NEVER operate edger with damaged or missing
debris shield.
• NEVER adjust edger blade height with engine
running. Stop engine, disconnect spark plug lead,
and make adjustments. Wear work gloves to protect hands from hot surfaces if unit has been in
operation.
• NEVER allow edger blade to strike concrete or
other hard surfaces. Blade contact with concrete
and hard surfaces will dislodge pieces of material
and cause injury from flying debris.
PAS TILLER/CULTIVATOR ATTACHMENT
Misuse, improper assembly, or use of unapproved
attachments, can result in serious injury, engine failure,
and voiding of warranty. Use only Echo attachments
approved for use on Pro Attachment Series models.
Contact with moving cutting or work attachments can
cause entanglement and serious injury. Keep clear of
moving work attachment.
• NEVER use cultivator if parts are missing or dam-
aged.
• NEVER use cultivator if shield is not securely in
place.
• NEVER clean or reposition cultivator tines with
engine running. Stop engine and remove spark plug
lead.
• ALWAYS check ground for hidden obstacles before
use, and remove or mark location to prevent striking
with tines.
• NEVER use cultivator where there may be buried
electrical wire, sprinkler tubing, or underground
pipes.
44
Page 45

Clearing Jams
DANGER
If the cutting head/work attachment gets jammed by an
obstruction and can’t move, the clutch allows the engine
to keep running. As soon as the obstruction is removed, the cutting head/work attachment will start
moving again. To protect yourself from serious injury
when clearing jams, follow these important safety rules:
• ALWAYS switch the unit off and disconnect the
spark plug before clearing a jam.
• NEVER reach for or try to remove jammed material
while the engine is running.
• ALWAYS inspect the cutting head/work attachment
after clearing a jam to make sure all jammed material has been cleared.
• ALWAYS make sure cutting head/work attachment
has not been damaged.
MAINTENANCE
MAINTENANCE
Operating a poorly maintained unit can result in serious injuries to operator and others. Maintain unit as instructed in Operator’s Manual. Keep blades sharp and properly adjusted, and
replace broken parts immediately.
Moving parts can amputate fingers or cause severe injuries. Keep hands, clothing and loose
objects away from all openings. Always stop engine, disconnect spark plug, and make sure
all moving parts have come to a complete stop before removing obstructions, clearing debris,
or servicing unit.
Your unit requires regular maintenance for safe operation and reliable performance. Using a
poorly-maintained unit can result in an injury caused by a part failure or other malfunction.
Follow these important safety instructions to reduce the risk of injury caused by poor maintenance.
• NEVER test for ignition spark by grounding spark plug near cylinder plug hole. A spark
WARNING
could ignite fuel vapor, causing serious injury from explosion or fire.
45
Page 46

MAINTENANCE
• NEVER use a unit with broken, damaged, missing,
or worn parts. Contact your dealer for repairs if
problems are found.
• NEVER use substitute parts, parts from other
models or brands, or used parts, when performing
maintenance or repairs. Use only new parts that are
manufactured for your specific serial number and
model trimmer.
• NEVER make temporary repairs on a unit - taking
shortcuts or using questionable parts and performing repairs that are not approved by Echo may
create a safety hazard that can cause serious injury.
Improper repair may also cause premature part
failures, and void your product warranty.
• ALWAYS keep blades sharp. Cutting with dull
blades increases the chances of jams and binding,
reduces cutting efficiency, and increases operator
fatigue.
• ALWAYS keep hedge clipper blades properly
adjusted. Improperly adjusted blades may result in
poor cutting performance, increased risk of jams,
and premature blade wear or failure.
• ALWAYS keep blades and gear case properly
lubricated. Poor lubrication can cause result in part
failures and cause overheating.
• ALWAYS keep fasteners tightened securely, and
use the correct tools for the job. Operation with
loose fasteners can result in hazardous operation.
• ALWAYS do a safety check after performing any
service or maintenance on the unit. Make sure all
parts have been properly installed, all hardware is
properly tightened, and all guards and shields are in
place.
• NEVER reach into any opening while the engine is
running. Moving parts may not be visible through
openings.
46
Page 47

• ALWAYS stop unit immediately and correct any
problem if unit does not run properly after performing
service or maintenance. Operating a unit that has
been improperly repaired may result in serious
injury.
• ALWAYS have major service performed by a
qualified service technician. See your dealer for
authorized service support.
STORAGE
STORAGE
Improper storage can result in fire and damage to
equipment and property. Follow storage instructions in
Operator’s Manual. Obey all rules for safe fuel handling.
Your Operator’s Manual contains detailed instructions
for preparing your unit for storage. Follow the instructions in your manual carefully, and make sure you observe these important safety precautions:
• NEVER store a unit with fuel mix in the fuel tank.
• ALWAYS keep muffler exhaust area clear of flam-
DANGER
Leakage can result in fire.
mable debris when storing or transporting unit.
Allow unit to cool down before placing in a confined
area such as a trunk, covered pickup truck bed, or
fully enclosed trailer.
• NEVER store unit in an enclosure where fuel fumes
can accumulate or reach an open flame or spark.
• ALWAYS stay away from heat, sparks, and open
flame when draining fuel tank for prolonged storage.
Wipe up spills immediately, and dispose of rags
and drained fuel safely.
• ALWAYS disconnect spark plug lead and install
blade cover when storing unit, and keep unit out of
the reach of children.
47
Page 48

GLOSSAR Y
Grass Trimmer-Brushcutter Terms
TERM DEFINITION
Air Filter Filters air used by the engine for combustion. Keeps dirt and
dust out of the engine to help extend engine life.
Alternative Stop Procedure Procedure used to stall engine if Stop switch malfunctions and
unit does not stop when switch is moved to stop position.
Move choke lever to Cold Start (Choke) position to stall engine.
ANSI Z87.1 American National Standards Institute safety standard for
safety glasses. Safety glasses and goggles that meet the
requirements of this standard are marked with this number.
Anti-vibration System A design that minimizes the vibration created during operation.
Reduced vibration helps reduce operator fatigue and risk of
injury.
Barrier Bar A protective device that restrains rearward movement of a unit.
Binding Slowing or stopping of cutting attachment caused by a restric-
tion, or by resistance to the cutting action
Blade Cover Optional protective plastic cover used to prevent accidental
contact with blades. Used when carrying, transporting, or
storing unit.
Blade Thrust A forceful push created by a blade when sudden cutting resis-
tance occurs.
Blades Devices that are used to cut or trim shrubs, bushes, and other
vegetation.
Brush Blade A circular metal blade designed to cut light woody growth such
as brush.
Brushcutter SRM (Straight Shaft) unit using a rotating blade to cut weeds,
brush, small trees, and small vegetation.
Carburetor Mixes fuel and air together so combustion can tank place in
engine.
Catalytic Muffler Reduces noise and emissions.
Choke Control Lever Controls choke open/closed settings. Used for starting/running
engine. Also used for emergency stops.
Clearing Blade A circular metal blade designed to cut small trees and sap-
lings.
Clutch Centrifugal device that transmits rotary motion of crankshaft to
the gear case assembly.
Clutch Engagement Speed The engine speed or R.P.M. at which the clutch engages and
transmits power to a drive shaft or sprocket.
48
Page 49

GLOSSAR Y
Cotter Pin A fastening device used to retain hex nuts on threaded shafts.
Also called a split pin.
Cultivator Attachment A rotating work attachment used on Power Attachment Series
units. Rotating tines cultivate and break up soil for weeding,
planting seeds, and working mulch into the soil.
Cut-Off Knife A cutting device attached to a plastic debris shield that cuts
nylon trimming line to the correct length.
Cutting Head A device that is designed to cut material by means of a nylon
line head, metal or nylon blades, or rotating saw chain.
Danger Zone An area around the operator where there is a high risk of injury
from contact with flying debris or sharp cutting head/work
attachments.
Debris Shield A plastic or metal barrier that helps protect an operator from
being struck by debris when using outdoor power equipment.
Edger A device with rotating blade that cuts a clean, straight edge.
Normally used along the edge of hard surfaces, such as between the lawn and a sidewalk.
Face Mask Protective device worn over mouth and nose. Protects against
breathing sawdust or other small particles.
Face Shield Protective device worn over safety glasses or safety goggles
to provide face protection from flying debris.
Foot Protection Heavy-duty footwear that helps protect feet from injury.
Front Handle Provides secure support of unit for proper balance and control.
Helps reduce operator fatigue.
Fuel Filter Filter element located on end of fuel line. Filters fuel mix
before it enters carburetor.
Fuel Tank Contains fuel mix used for engine operation.
Gear Case Provides rotating or reciprocating motion to a cutting head or
work attachment.
Goggles, Safety Protective eyewear that fits over glasses and provides com-
plete, wrap-around protectionl
Grass Trimmer A unit designed to cut only grass and light weeds.
Grass/Weed Blade A blade used to cut soft, light vegetation, such as grass and
weeds. Not for use in clearing brush, saplings, or small trees.
G T Grass Trimmer (Curved Shaft). GT models cannot use a metal
blade.
Harness An adjustable shoulder strap used to support a trimmer or
brushcutter. Helps operator control unit by providing a stable
support and reducing fatigue. Required for all Brushcutter
applications.
49
Page 50

GLOSSAR Y
Head Protection Helmet-like device that protects the head from falling materials.
Hearing Protection Devices Protective devices such as ear plugs or ear muffs that protect
hearing by reducing exposure to harmful noises.
Hedge Clipper A cutting device with reciprocating blades. Used to cut
hedges, shrubs, and ornamental vegetation.
Idle Speed The normal running speed of the engine when the throttle
trigger is not depressed.
Kickout The sudden and forceful action that occurs when a blade
propels itself out of a cut due to binding or pinching of the
blade.
Manual Line Head A line head that requires manual indexing of cutting line.
Maxi-Cut Blade A cutting head with 3 straight blades that can be used in place
of a nylon line head. When the blade rotates, centrifugal force
causes the blades to fully extend, creating a wide cutting
swath.
Maximum Diameter Cut The largest diameter material that can be cut by the cutting
attachment.
Muffler Housing Provides protective barrier around muffler. Helps prevent
accidental contact with muffler when unit is hot.
PAS Power Attachment Series - System consisting of an engine
power source, drive shaft, and a variety of optional work at-
tachments that can be changed as needed.
Power Head Engine assembly - includes engine, clutch, fuel system, ignition
system, air filter, and recoil starter.
Protective Clothing Clothing that provides protection from work place hazards that
can cause cuts, scratches, or contact injuries.
Pruner A cutting device used to cut small limbs and branches from
trees, bushes, and shrubs.
Purge Bulb Draws fuel mix from gas tank to carburetor. Helps engine to
start by removing air from fuel line.
Push and Pull Reactive forces that push the unit toward the operator, or that
pull the unit away from the operator.
Quick Release Latch A latch design that allows a quick separation of the unit from
the support harness when there is an emergency.
Rapid Loader Line Head A line head that allows rapid nylon line reloading using short,
pre-cut pieces of line.
Rear Handle Houses Stop Switch, Throttle Trigger, and Throttle Trigger
lockout lever. Gripped by operator to help support unit, control
engine speed, and shut unit off.
50
Page 51

GLOSSAR Y
Recoil Starter Starts engine by turning crankshaft and moving piston up and
down.
Recoil Starter Handle Molded rubber handle attached to starter cord. Used to start
engine.
Ricochet When a thrown object bounces off another surface.
Safety Glasses Eye protection devices that are worn like glasses.
Safety Goggles Eye protection devices that fit flush against the face and cover
the complete eye and socket.
SB Split Boom model (similar to PAS )
Scalping Cutting grass or other vegetation down to ground level. Used
for clearing grass and other growth.
Scything Using an arcing cutting motion to trim weeds and grass.
Semi-Automatic Line Head Nylon line head that feeds line out when tapped on the ground
during normal operation.
Spark Arrestor Muffler Muffler with spark arrestor screen that prevents hot, glowing
particles of carbon from leaving the muffler.
Spark Plug Provides spark to ignite fuel/air mixture in engine.
SRM Shoulder Rotary Mower, also known as a trimmer-brushcutter.
SRM (Straight Shaft) models can be adapted to use metal
blades (Brushcutter Application).
Stalling Engine Using choke lever to provide an overly rich fuel/air mixture that
stops engine from running.
Stop Switch Electrical switch used to start/stop engine. Grounds ignition
circuit in Stop position to prevent firing of spark plug.
Throttle Trigger Controls engine speed.
Throttle Trigger Lockout Lever Prevents the throttle trigger from operating unless lockout lever
is depressed.
Tri-Cut Blade A blade with 3 cutting edges.
U-Handle A bicycle-style handlebar that provides two handgrips spaced
apart for maximum cutting control.
Wide Open Throttle The highest engine speed attainable when the throttle trigger is
held fully depressed.
51
Page 52

NOTES
52
Page 53

NOTES
53
Page 54

NOTES
54
Page 55

NOTES
55
Page 56

ECHO INCORPORATED
400 OAKWOOD ROAD
LAKE ZURICH, IL 60047
PHONE: (847) 540-8400
www.echo-usa.com
Printed in USA
 Loading...