

Page 1
Instructions
SUBJECT: FENDERS AND TAIL
LIGHTS KIT # 77510-00
FITS MODELS: LS21, LS22 & LS27
WARNING
Before inspecting or servicing any part of this machine,
shut off power source, remove key, disconnect the
battery cables and make sure all moving parts have
come to a complete stop.
NEVER exceed 45 mph while towing this log
splitter
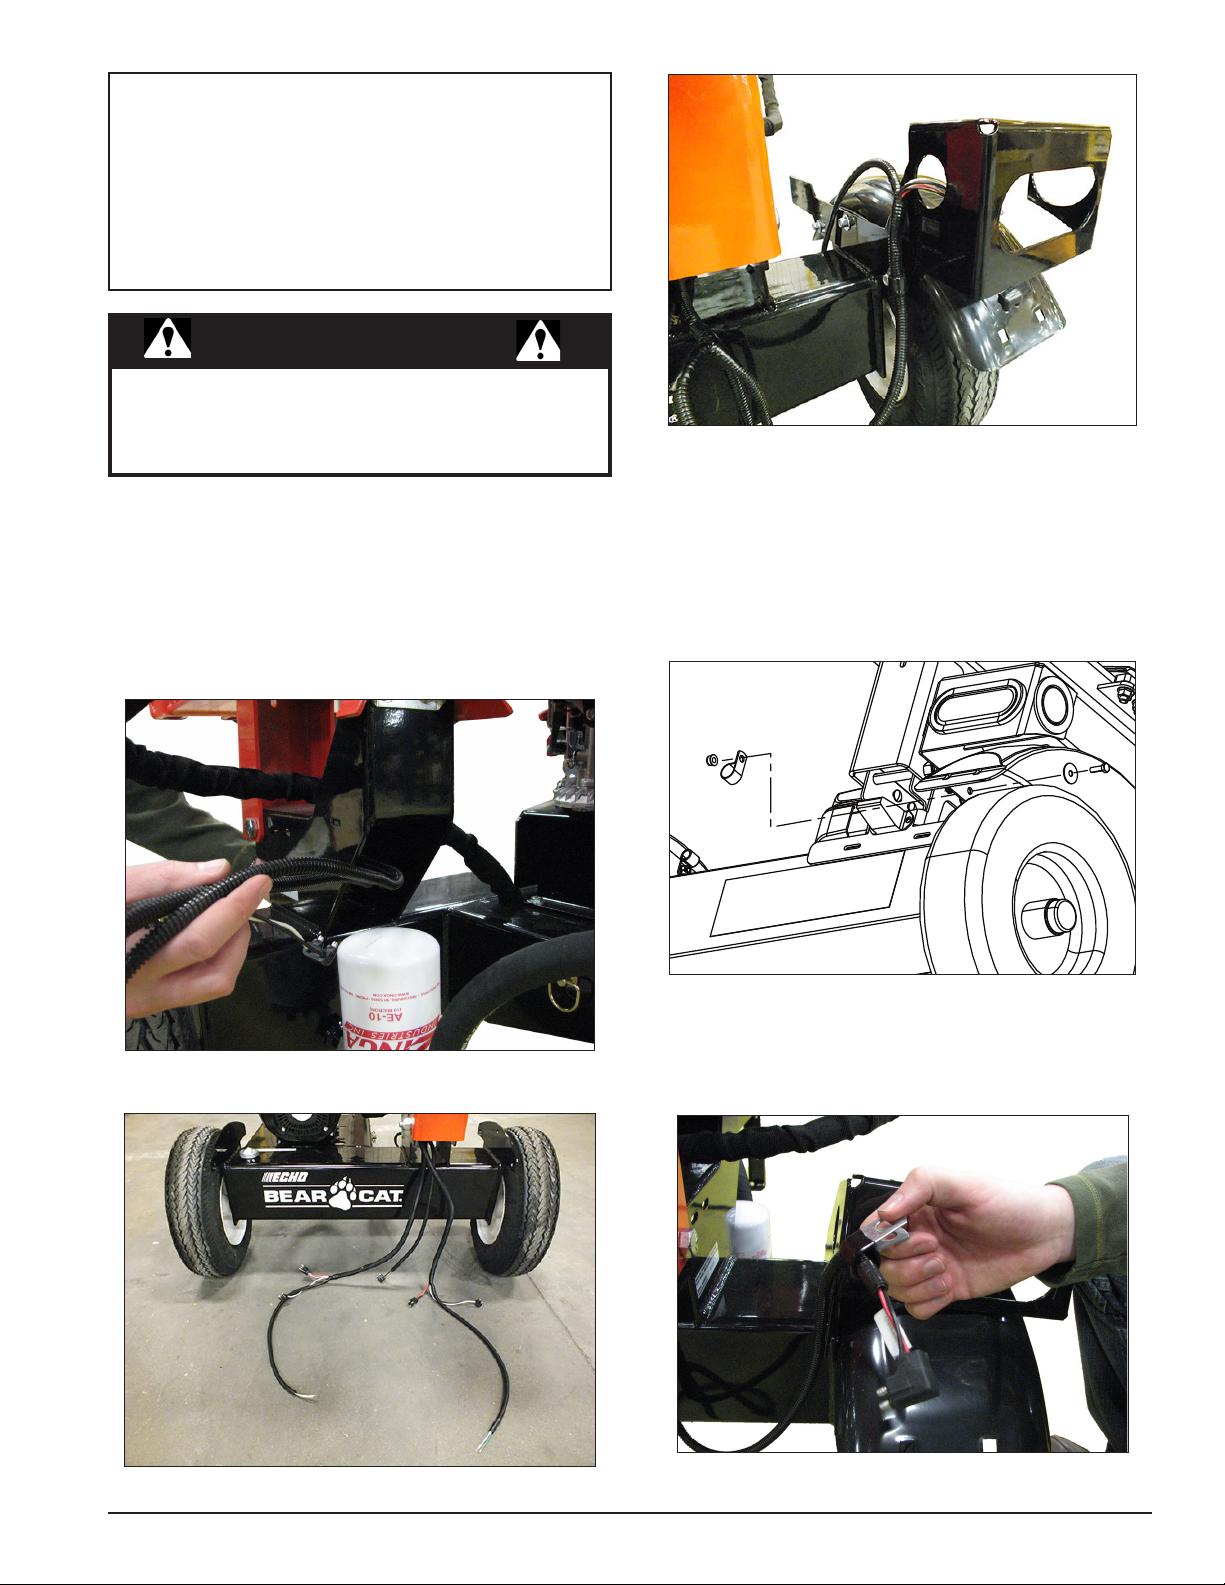
INSTALL FENDERS AND LIGHTS
1. Route the tail light connector end of the harness to the
back of the machine by putting it through the frame at
location shown in Figure 1.
Figure 3
2. Attach the fenders and light bracket to the machine
with three 5/16 x 1" hex head bolts, three 5/16" fender
washers on the inside of the fender, three 5/16" nylock
flange nuts on the outside of the fender. See Figure 4
for details. There will also need to be coated clamps
mounted at the rear hole locations of each fender for
wire harness routing purposes.
Figure 1
Figure 2
3. It is important to route the harness through the
Instruction Sheet
Figure 4
clamps before securing them in place at the rear hole
location.
Figure 5
PN 77199-00
Rev. 100114
Page 2
4. The tail light connector labeled with a tag that has
the word "GREEN" on it needs to be routed to the (as
you look at the machine from the rear) right tail light
assembly, The tail light connector labeled with a tag
that has the word "YELLOW" on it needs to be routed
to the left tail light assembly.
Figure 6
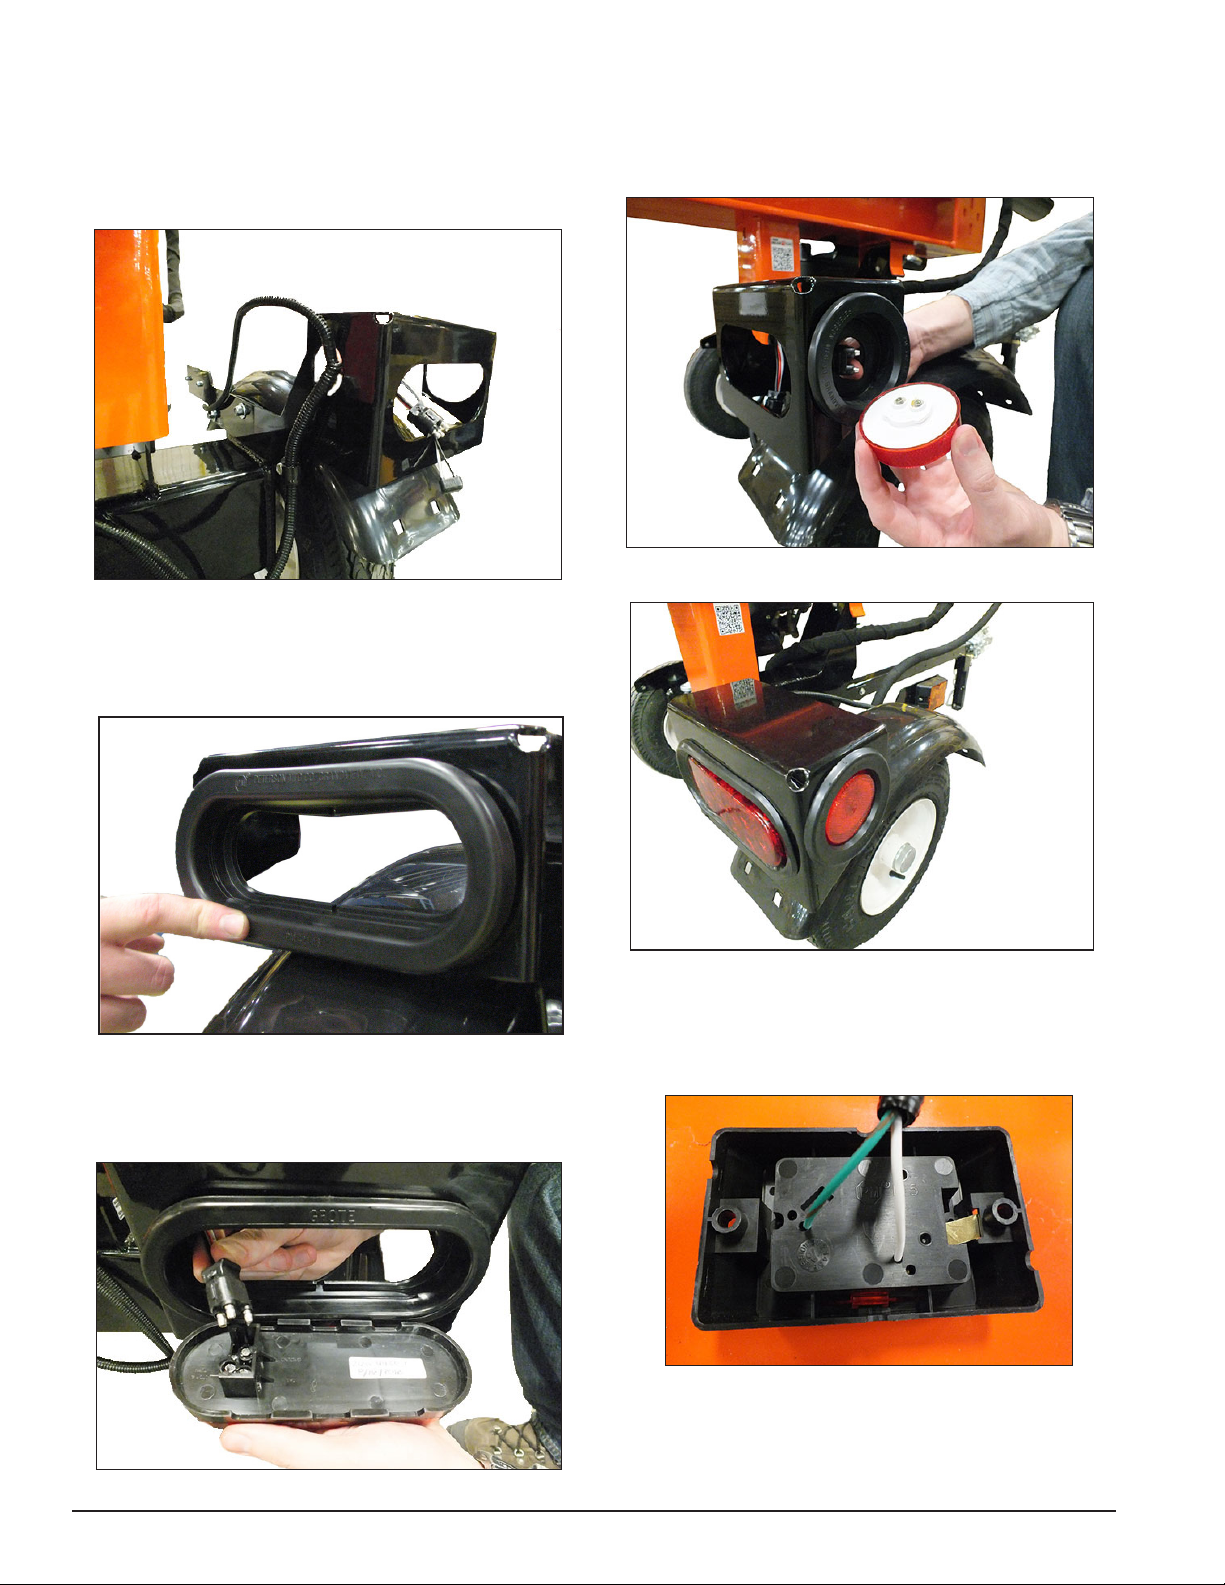
5. With the harness ends now in position, place the oval
shaped rubber tail light grommets in to place on the
light brackets.
7. Now press the light into the rubber grommet and press
the light and grommet assembly into the oval hole in
the bracket.
8. Repeat steps 6 & 7 for the round marker light
Figure 9
Figure 7
6. Route the harness connector ends through the
grommet and connect it to the tail light by plugging the
three-pronged connector into the back of the light.
Figure 8
Instruction Sheet
Figure 10
9. Next, plug green and white harness wires into back of
amber marker light as shown in Figure 11 and attach
light to bracket.
Figure 11, green and white wires route to right side amber light
and yellow and white wires route to left side amber light
Page 3

Figure 12
10. Now, locate the license place mounting bracket. Route
the remaining harness connector end through the hole
in the bracket and attach it to the license plate light.
The wires of the harness, once they're connected,
should be orientated to go downward from the back
of the light.
13. To complete the routing of the wire harness to the front
of the machine, it will be necessary to mount three
additional coated clamps along the hitch pole.
14. Before mounting, locate the remaining three coated
clamps in the kit and route the harness through the
clamps.
15. First, you will need to remove the existing 3/8 x 3" bolt
at the hitch pole pivot location shown in Figure 15. To
do this, it is necessary to put the hydraulic cylinder
in the vertical position. This will take weight off of the
hitch pole and allow removal of the bolt. It is replaced
with a 3/8 x 3-1/4" bolt and added coated clamp
with harness routed through it. Secure in its original
position with new 3/8" flange nylock nut from kit.
16. Place two 5/16 x 3" bolts and washers through the
holes of the manual container and secure to the
hitch pole by adding last two coated clamps (with the
harness routed through them), 5/16 nylock flange
nuts. See Figure 16 for completed example.
Figure 13
11. Now connect the license plate light to the bracket
using two #10-24 x 3/4" screws and nylock nuts.
12. Mount the completed light and bracket assembly to
the machine at the location detailed in Figure 14 using
four 5/16 x 1" carriage bolts and nylock flange nuts.
Figure 14
Figure 15
Figure 16
HOOKUP AND TEST
1. Hook up the trailer light harness to the towing
vehicle.
2. Check to make sure that tail lights on the log splitter
work properly.
3. Towing laws may vary in different states. It is
recommended that you contact the local motor vehicle
department for any special regulations that pertain
to towing and know the laws of any state you travel
through.
Instruction Sheet
Page 4

12
20
12
23
16
14
7
9
1
1
8
6
14
13
5
22
1
15
10
14
14
4
21
3
12
11
2
24
18
17
KIT, LS FENDERS AND TAIL LIGHTS (77510-00)
ITEM
1 14048-00 CLAMP, 9/16 COATED 5
2 14361-00 LIGHT, RED CLEARANCE 2
3 14366-00
4 14368-00 LIGHT, LICENSE PLATE 1
5 15031
6 15040
7 15103
8 15219
9 15250 WASHER, 5/16" FLAT ZP 2
10 15301
11 15397
12 15460
PART
NUMBER
DESCRIPTION QTY
GROMMET, CLEARANCE
LIGHT
WASHER, 3/8" FLAT ZP
(67PCS/LB)
WASHER, 5/16" FENDER
ZP-32PCS/LB
BOLT 5/16*3 GR5 HEX CAP
ZP
BOLT 5/16 * 1" GR5 HHCS
NC ZP
BOLT, 5/16" X 1" GR5 CRG
ZP
NUT, 10/24 NYLOCK TYPE
NM, ZP
MCH SCW#10-24*3/4"PAN
HD PH ZP
13 15501
14 15904-00
15 15905-00
2
1
6
2
6
4
6
6
Phone: 701.282.5520 • Toll Free: 888.625.4520 • Fax: 701.282.9522
E-mail: service@bearcatproducts.com • sales@bearcatproducts.com
16 18008-00 CONTAINER, MANUAL 1
17 31736-00 TAIL LIGHT, OVAL LED 2
18 31737-00
19 32346-00
20 32347-00 LIGHT, AMBER MARKER 2
21 70853-12
22 76624-00
23 77485-12
24 77486-12
237 NW 12th Street, West Fargo, ND 58078-0849
BOLT, 3/8X3-1/4 HXHD GR5
ZP
NUT, 5/16-18 NYLOCKFLANGE
NUT, 3/8-16 NYLOCK
FLANGE
GROMMET, OVAL TAIL
LIGHT
HARNESS, 3" CS TRAILER
(NOT SHOWN)
BRACKET, LS LICENSE
PLATE
FENDER, BLACK PLASTIC
DRILLED
BRACKET, RIGHT TAIL
LIGHT
BRACKET, LEFT TAIL
LIGHT
ECHO BEAR CAT
www.bearcatproducts.com
1
12
1
2
1
1
2
1
1
 Loading...