

Page 1
Instructions
SUBJECT: ONE-SPEED BLOWER
(PN 70251)
FITS MODELS: ALL 3" CHIPPER/
SHREDDERS (EXCEPT MODEL
SC3206)
WARNING
Before inspecting or servicing any part of this machine,
shut off power source, remove key, disconnect the
battery cables and make sure all moving parts have
come to a complete stop.
This kit adds a one-speed blower with a two-blade radial
fan to a 3" chipper/shredder. The discharge tube can be
rotated 360° so that the flow of chips can be directed into
a pickup box or trailer.
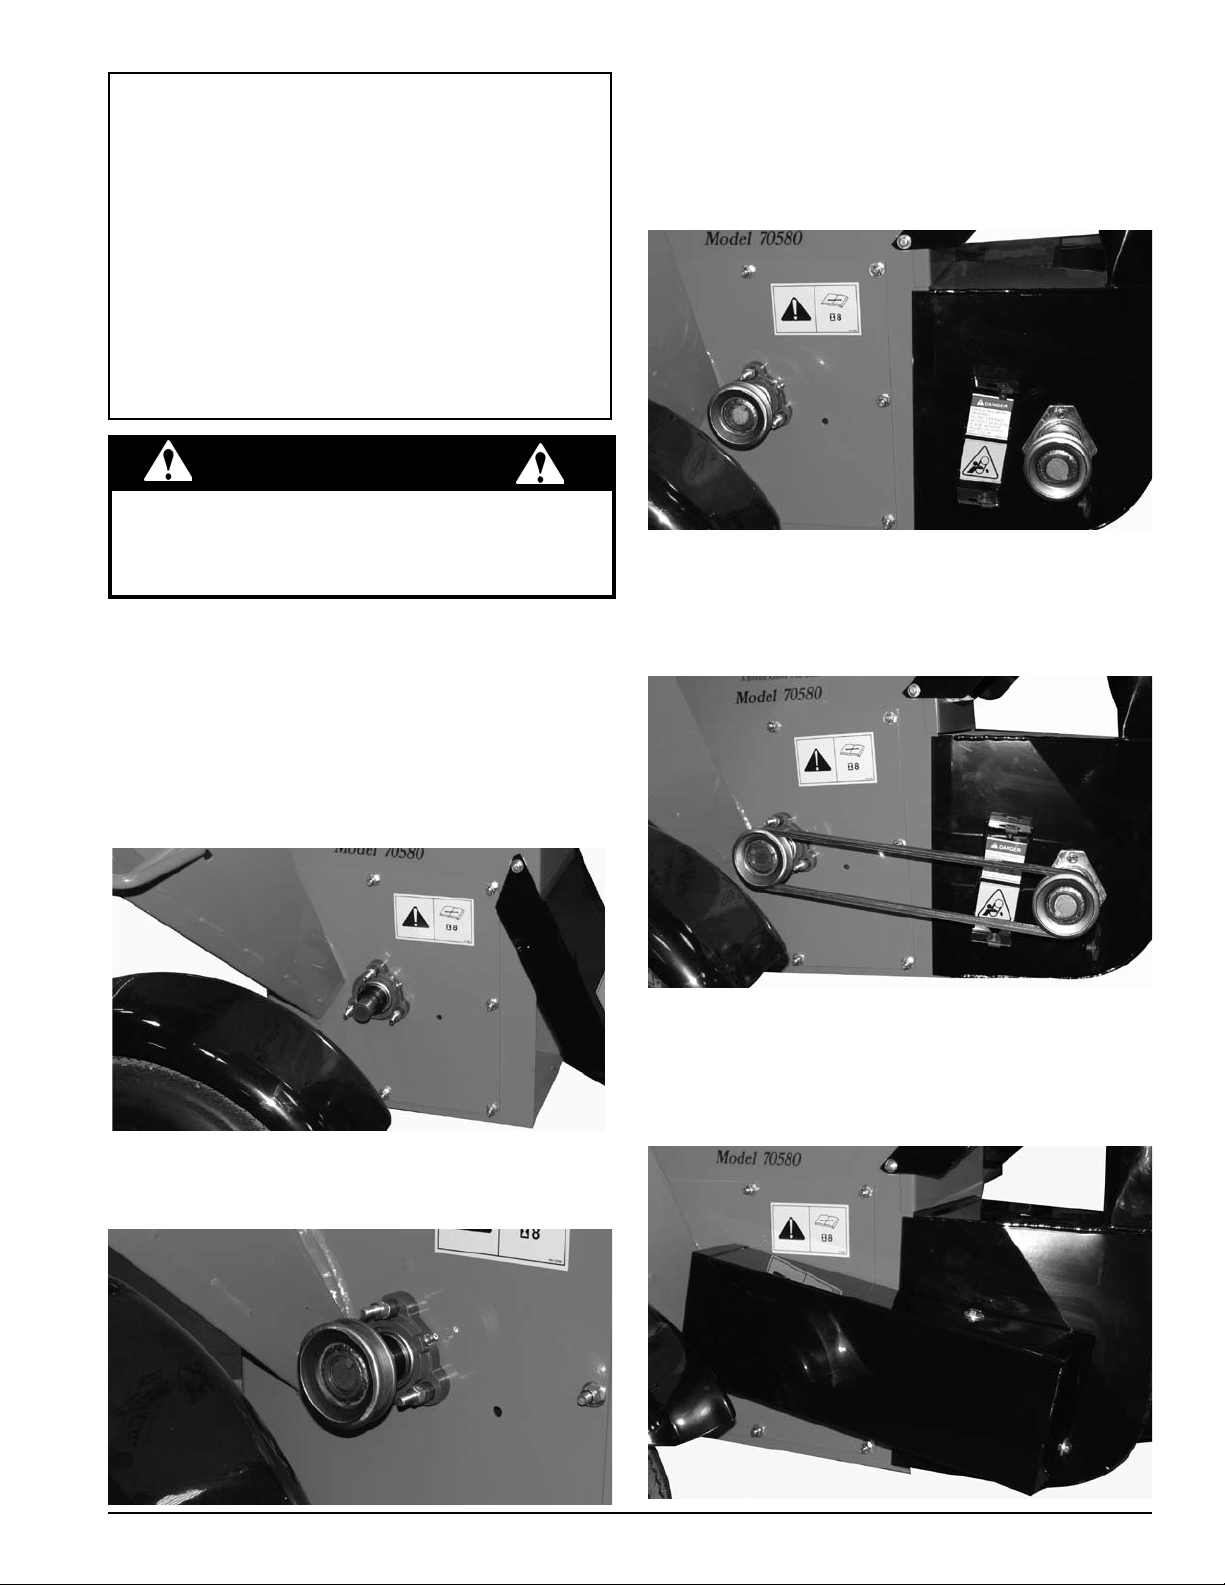
Install the blower attachment on the chipper/shredder. 3.
Lift the discharge door and slide the blower assembly
onto the frame using the slots provided. Slide the
pegs on the bottom of the blower into the holes in the
chipper/shredder frame.
Install the drive belt. Align the rotor shaft pulley and 4.
blower pulley. Tighten all pulley set screws after
alignment is completed.
INSTALLATION
Remove rotor shaft end cap from the chipper/ 1.
shredder.
Install the 1/4" x 1-1/2" key on rotor shaft and then 2.
install the 3" pulley on the rotor shaft. Do not tighten
pulley set screws now.
Install the belt guard on top of the pulleys with three 5.
5/16" x 3/4" bolts and three 5/16" flat washers.
Instruction Sheet
PN 17956
Rev. 010208
Page 2
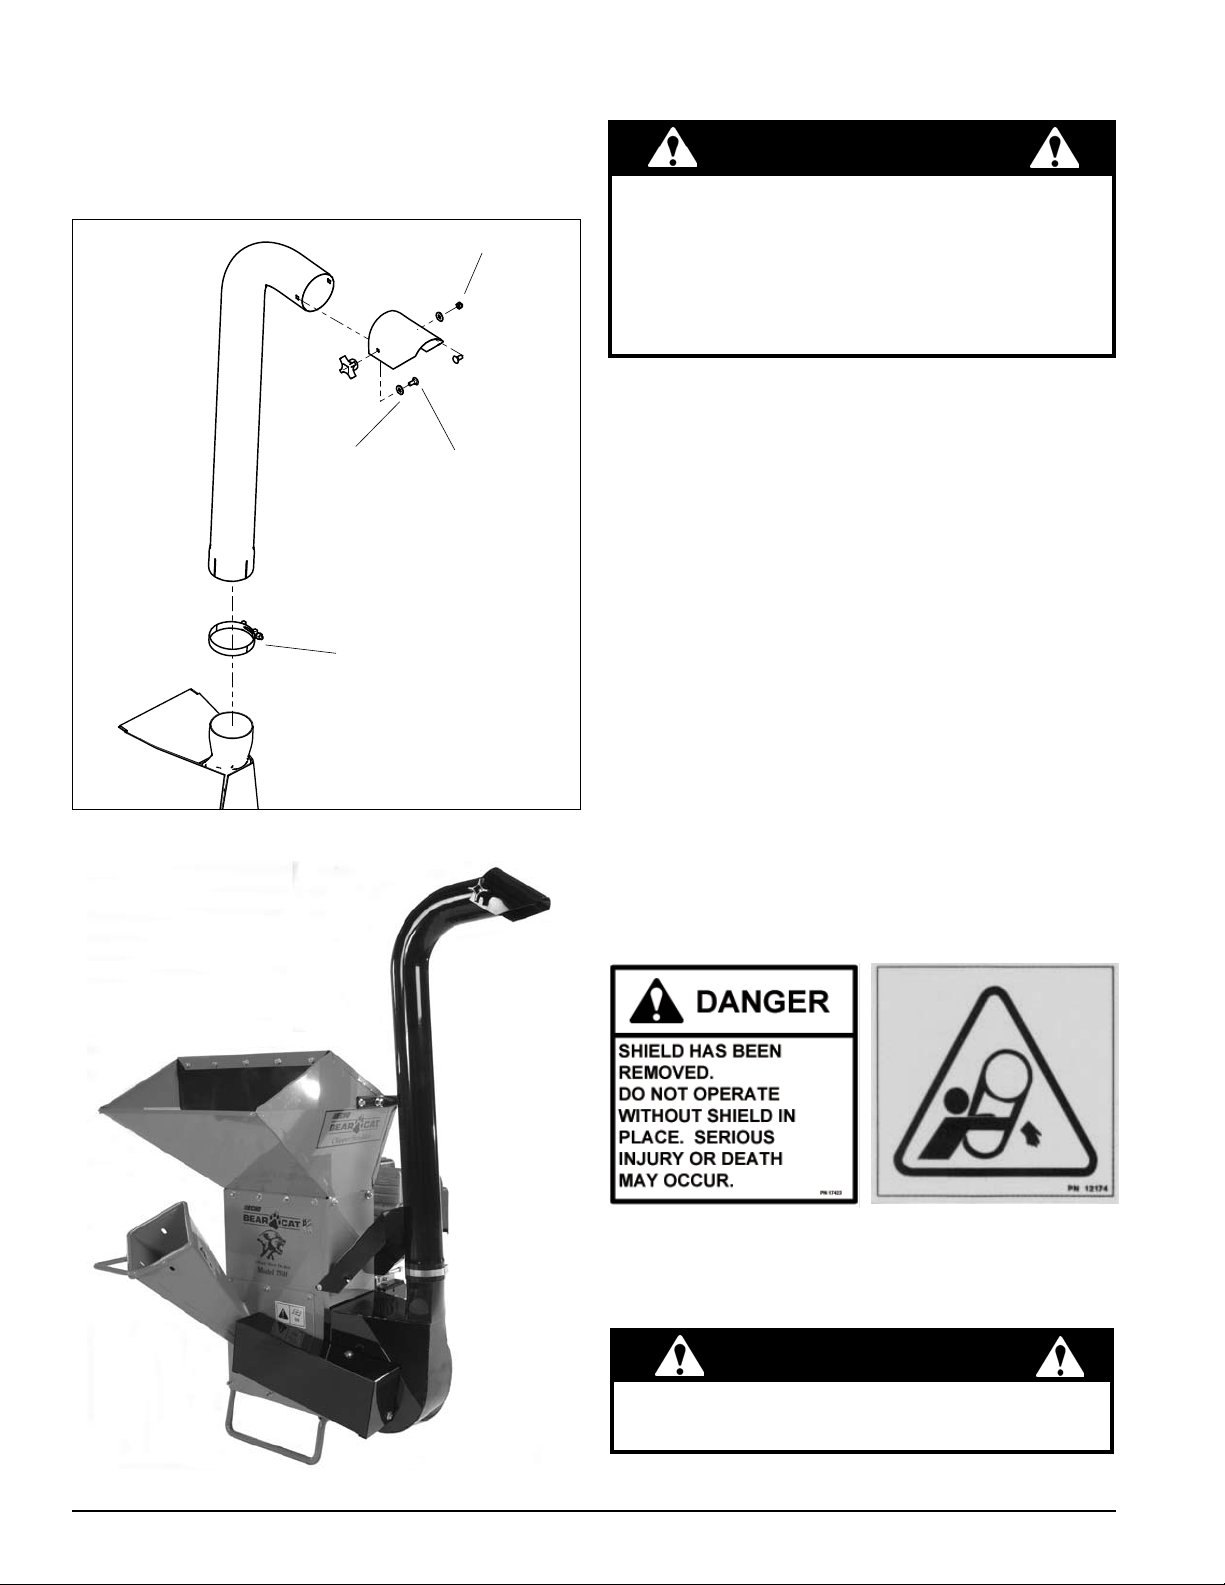
Install the blower deflector on the blower tube using 6.
5/16” NYLOCK
NUT
3/4” CARRIAGE
BOLT
5/16”
WASHER
T-BOLT CLAMP
two 5/16" x 3/4" carriage bolts, two 5/16" flat washers,
one knob, and one nylock nut.
Install the blower tube onto the blower. Fasten with 7.
the T-bolt clamp.
OPERATION
WARNING
Read and follow all safety instructions in your machine
owner's manual. Failure to operate the machine in
accordance with the safety instructions MAY RESULT
IN PERSONAL INJURY!
Before inspecting or servicing any part of this machine,
shut off power source and make sure all moving parts
have come to a complete stop.
Test run the machine after installing the blower and 1.
check the belt guard to make sure the belts do not
rub, adjust if needed. Check bolt torque after a few
hours of use.
Feed materials slowly into the chipper and shredder 2.
chutes to get used to the rate of discharge. The
machine may discharge materials slightly slower with
the blower and discharge tube installed.
To rotate the blower discharge tube, loosen the clamp 3.
around the base of the tube, reposition the tube, and
tighten the clamp.
SAFETY DECALS
The blower comes with the safety decals pictured below.
Familiarize yourself with all of the safety and operating
decals on the machine and the associated hazards.
Make certain that all safety and operational decals on this
machine are kept clean and in good condition. Decals
that need replacement must be applied to their original
locations.
PART NO. 17423 PART NO. 12174
The blower installed on a non-towable chipper/shredder
IMPORTANT
Keep these instructions with the Owner's manual from
your chipper/shredder as a reference.
Instruction Sheet
Page 3

1
2
3
4
5
6
7
8
9
10
11
12
13
14
15
16
17
18
19
20
20
20
21
18
1
70251, BLOWER ATTACHMENT
ITEM PART NO. DESCRIPTION QTY
1 15367
2 70218 SHAFT, BLOWER IMPELLER 1
3 70217
4 70213
5 17488
6 17423
7 15402
8 15140 BOLT, 5/16 X 2” GR5 HCS ZP 1
9 12174
BOLT, 5/16 X 3/4” GR5 NC
ZP CRG
BLOWER IMPELLER
WELDMENT
BLOWER ATTACHMENT
WELDMENT
FLANGETTE, 52MM 3 BOLT
TRIANGLE
DECAL, SHIELD DANGER
ANSI
NUT, 5/16” -18 TINNERMAN
U-TYPE
DECAL, SHIELD DANGER
ISO
8
1
1
4
1
3
1
10
11 70253 SPOUT, BLOWER TUBE 1
12 70249 BLOWER TUBE 1
13 17960 CLAMP, T-BOLT 4-1/4” ID ZP 1
14 17923
15 17558 4L390 BELT 1
16 15418
17 15321 KNOB, SPOUT 5/16-18 1
18 15250 WASHER, 5/16” FLAT ZP 5
19 15003
20 15356 NUT, 5/16” NE NYLOCK ZP 8
21 70236
02020020-00
BEARING, 1 X 52MM SPH
NIR W/COL
PULLEY, 3” OD A GROVE 1”
BORE
KEY, 1/4 SQ X 1-1/2” LG
PLAIN
BOLT, 5/16 X 3/4” GR5 HEX
HD ZP
BLOWER BELT GUARD
WELDMENT
2
2
2
3
1
Instruction Sheet
Page 4

ECHO BEAR CAT
www.bearcatproducts.com
237 NW 12th Street, West Fargo, ND 58078-0849
Phone: 701.282.5520 • Toll Free: 800.247.7335 • Fax: 701.282.9522
E-mail: service@bearcatproducts.com • sales@bearcatproducts.com
 Loading...