

Dynex DX-SH115 User Manual

Mini Audio Shelf System w/
Bluetooth
DX-SH115
Before using your new product, please read these instructions to prevent any damage.
USER GUIDE
2
DX-SH115
Mini Audio Shelf System w/Bluetooth
Contents
Safety information . . . . . . . . . . . . . . . . . . . . . . . . . . . . . . . . . . . . . . . . . . . . . . 2
Features . . . . . . . . . . . . . . . . . . . . . . . . . . . . . . . . . . . . . . . . . . . . . . . . . . . . . . . . 4
Setting up your mini audio shelf system. . . . . . . . . . . . . . . . . . . . . . . . . . 9
Using your mini audio shelf system . . . . . . . . . . . . . . . . . . . . . . . . . . . . . 10
Troubleshooting . . . . . . . . . . . . . . . . . . . . . . . . . . . . . . . . . . . . . . . . . . . . . . . 20
Maintaining . . . . . . . . . . . . . . . . . . . . . . . . . . . . . . . . . . . . . . . . . . . . . . . . . . . . 21
Specifications . . . . . . . . . . . . . . . . . . . . . . . . . . . . . . . . . . . . . . . . . . . . . . . . . . 21
Legal notices . . . . . . . . . . . . . . . . . . . . . . . . . . . . . . . . . . . . . . . . . . . . . . . . . . . 22
One-year limited warranty - Dynex . . . . . . . . . . . . . . . . . . . . . . . . . . . . . . 23
Safety information
DX-SH115
CAUTION
RISK OF ELECTRIC SHOCK
DO NOT OPEN
This symbol indicates that dangerous
voltage constituting a risk of electric
shock is present within your mini audio
shelf system. This label is located on
the back of your mini audio shelf
system.
This symbol indicates that there are
important operating and maintenance
instructions in the literature
accompanying your mini audio shelf
system.

Mini Audio Shelf System w/Bluetooth
Your mini audio shelf system utilizes a Class 1
laser to read Compact Discs. Your mini audio
shelf system is equipped with safety switches
to avoid exposure when the CD tray is open and
the safety interlocks are defeated. Invisible
laser radiation is present when the CD tray is
open and the system's interlock has failed or
been defeated. You should avoid direct
exposure to the laser beam at a ll times. Do not
attempt to defeat or bypass the safety
switches. Do not stare into the beam.
Important safety instructions
1 Read these instructions.
2 Keep these instructions.
3 Heed all warnings.
4 Follow all instructions.
5 Do not use this apparatus near water.
6 Clean only with a dry cloth.
7 Do not block any ventilation openings. Install in accordance with the
manufacturer's instructions.
8 Do not install near any heat sources such as radiators, heat registers,
stoves, or other apparatus (including amplifiers) that produce heat.
9 Do not defeat the safety purpose of the polarized or grounding-type
plug. A polarized plug has two blades with one wider than the other. A
grounding type plug has two blades and a third grounding prong. The
wide blade or the third prong are provided for your safety. If the provided
plug does not fit into your outlet, consult an electrician for replacement
of the obsolete outlet.
10 Protect the power cord from being walked on or pinched particularly at
plugs, convenience receptacles, and the point where they exit from the
apparatus.
11 Only use attachments/accessories specified by the manufacturer.
12 Unplug this apparatus during lightning storms or when unused for long
periods of time.
13 Refer all servicing to qualified service personnel. Servicing is required
when the apparatus has been damaged in any way, such as
power-supply cord or plug is damaged, liquid has been spilled or objects
have fallen into the apparatus, the apparatus has been exposed to rain or
moisture, does not operate normally, or has been dropped.
3

4
14 To reduce the risk of fire or electric shock, do not expose this device to
rain, moisture, dripping, or splashing, and no objects filled with liquids,
such as vases, shall be placed on it.
15 The wall plug is the disconnecting device. The plug must remain readily
operable.
16 Batteries should not be exposed to excessive heat such as sunshine, fire,
or the like.
Features
Package contents
• Bluetooth/CD mini audio shelf system, including:
•Speakers (2)
•Subwoofer
• Remote control and batteries (2)
•FM antenna
•Audio cable
•Quick Setup Guide
•User Guide
DX-SH115

Mini Audio Shelf System w/Bluetooth
EQ
S
OUR
C
E
Front view
CE
5
EQ
18
19
# Component Description
1 Display Displays source, frequency, and playback information.
2 Standby indicator Red indicates Standby mode
3 (standby) button Press to turn on your mini audio shelf system. Press again to go to
4 (play/pause) button Press to start playback. Press again to pause playback.
5 SOURCE button Press repeatedly to select a source: CD, FM, USB, BT (Bluetooth), or AUX.
6 SEARCH button Press to search FM stations. The searched stations are saved
7 (fast reverse) button Press to fast rewind a CD or USB track.
8 (previous) button Press to go to the previous track or song.
9 L/R AUX IN jacks Connect an external sound source, such as an MP3 player, to these jacks.
10 Remote control sensor Point the remote control at this sensor.
11 (eject) Press to open the CD tray or eject the currently playing CD.
12 VOLUME knob Turn to adjust the volume.
standby.
automatically as presets.
6
R(4Ω) L(4Ω) SW(8Ω)
SPEAKERS
120V~60Hz
AUDIO OUTPUT
FM ANT 75Ω
FCCID:
IC:
Max150W
Dynex
LEFT
RIGHT
1
2
5
3
6
4
DX-SH115
# Component Description
13 (stop) button Press to stop playback.
14 TO NE button Press to adjust the bass and treble.
15 EQ button Press to select a specific sound field (equalization). Selections include
Jazz, Rock, Classic, Pop, Live, Dance, and Off.
16 (fast forward) button Press to fast forward a CD or USB track.
17 (next) Press to go to the next track or song.
18 CD tray Place the CD in this tray, label side up, to begin playback.
19 USB port Connect a USB flash drive to this port to play files on the device.
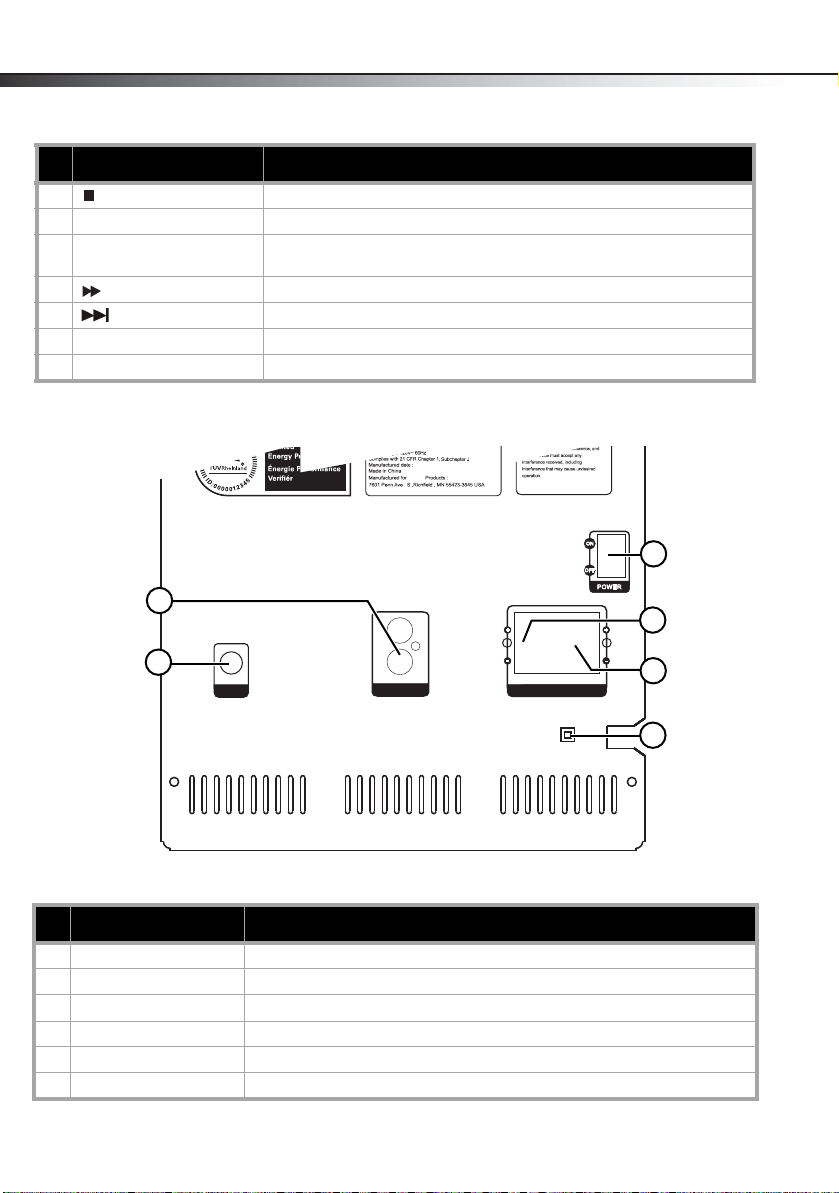
Back
# Component Description
1 L/R Audio output Connect to the audio input of an audio amplifier.
2 FM antenna jack Connect the FM antenna to this jack.
3 Power switch Turn power on and off.
4 L/R speaker connections Connect the left and right speakers to these jacks.
5 Subwoofer connection Connect the subwoofer to this jack.
6 Power cord Plug into a standard 120V~60Hz wall outlet.
Mini Audio Shelf System w/Bluetooth
INFOINFO
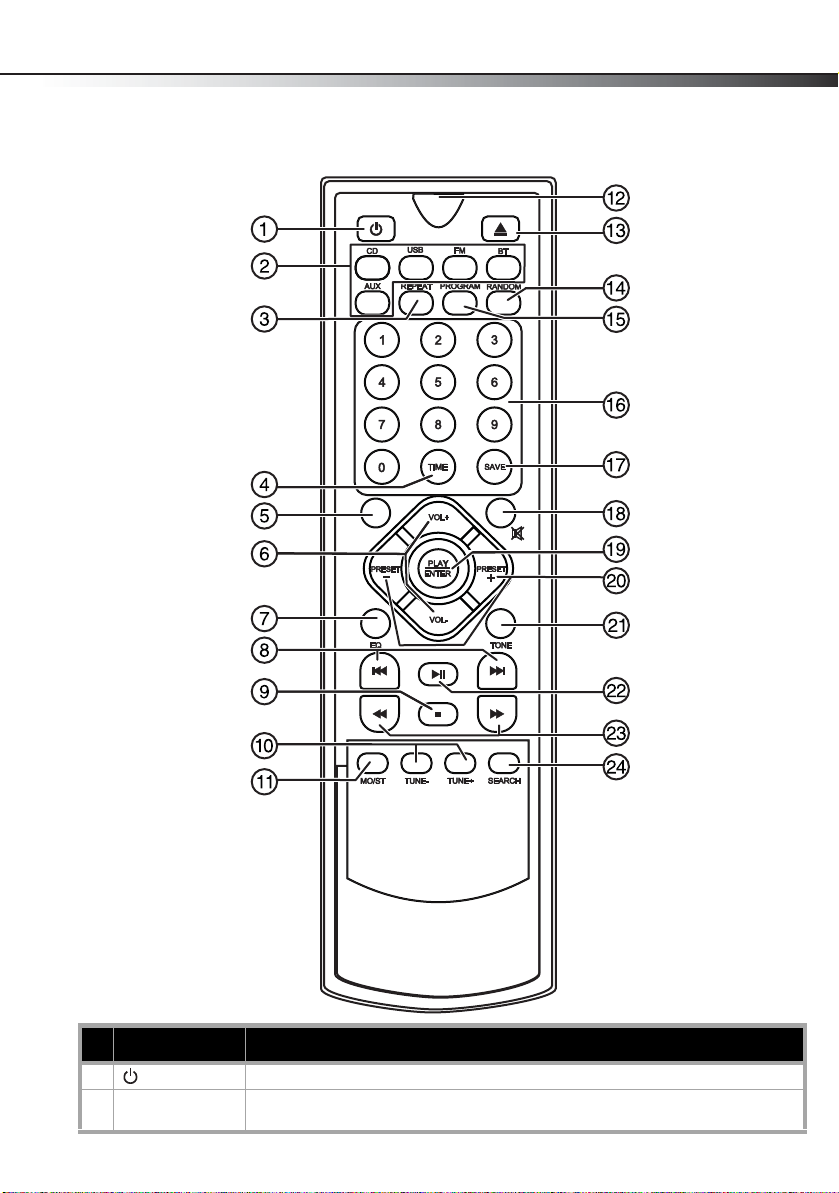
Remote control
7
# Button Description
1 (standby) Press to turn on your mini audio shelf system. Press again to go to standby.
2 Source buttons Press to switch to CD mode, USB mode, FM mode, BT (Bluetooth) mode, or AUX
mode.
8
DX-SH115
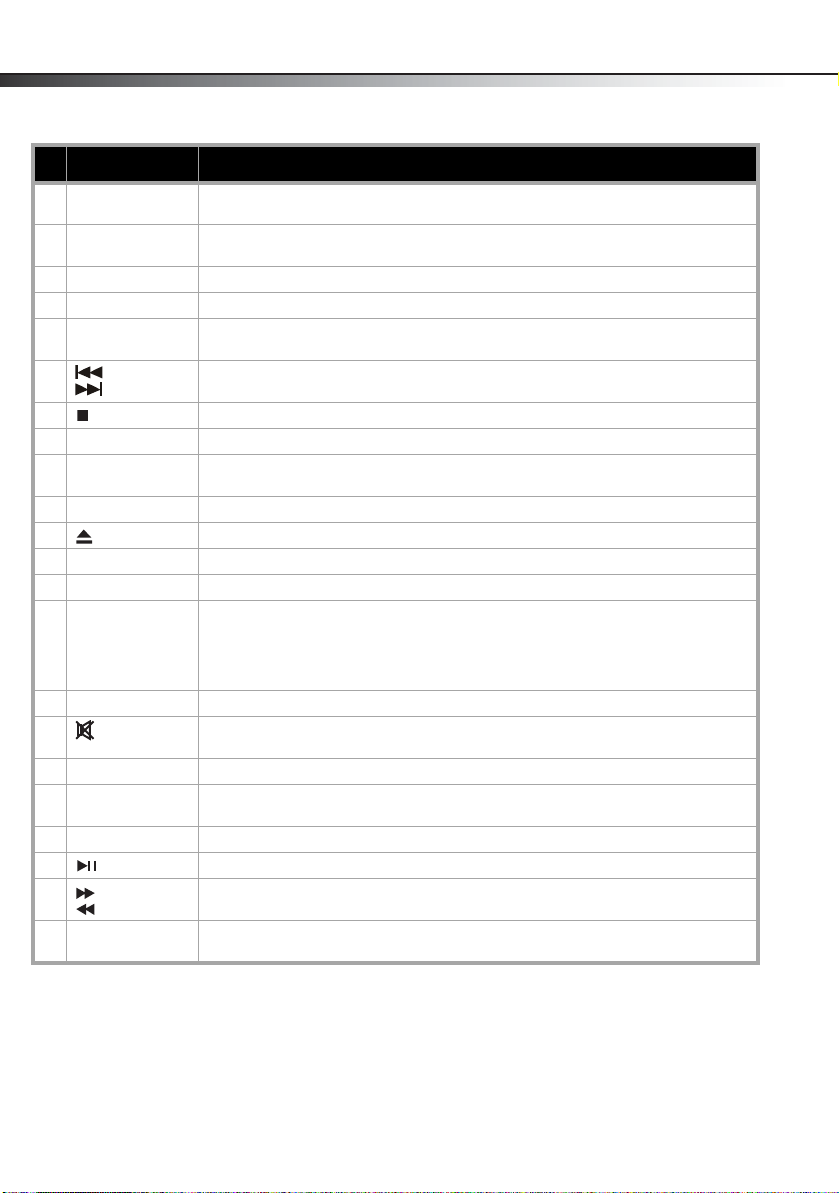
# Button Description
3 REPEAT In CD or USB mode, press once to repeat the current song, press twice to repeat all
4 TIME Press to play a CD from a specific time point. In USB mode, press to set the playback
5 INFO While playing MP3 tracks, press to display information about the current track.
6 VOL+/VOL- Press to raise and lower the volume.
7 EQ Press to select a specific sound field (equalization). Selections include Jazz, Rock,
8 (previous)
9 (stop) Press to stop playback.
10 TUNE+/TUNE– Press to tune the FM radio to a higher or lower frequency.
11 MO/ST In Tuner mode, press to switch from Stereo mode to Mono mode. Press again to
12 IR transmitter Transmits the IR signal to the mini audio shelf system.
13 (eject) Press to open the CD tray or eject the currently playing CD.
14 RANDOM Press to switch playback to random mode. Press again to cancel.
15 PROGRAM Press to program CD playback.
16 Number buttons In CD mode, press to enter the track number you want to play.
17 SAVE In FM mode, press to save a preset station.
18 (mute) Press to mute the sound. Press again to cancel. When you switch to other modes,
19 PLAY/ENTER Press to enable the item you have selected.
20 PRESET–/
21 TONE Press to adjust the bass and treble.
22 (play/pause) Press to start and pause playback.
23 (fast forward)
24 SEARCH Press to search FM stations. The searched stations are saved automatically as
(next)
PRESET +
(fast reverse)
tracks, or press a third time to cancel Repeat mode.
time of the current track.
Classic, Pop, Live, Dance, and Off.
Press to go to the previous or next track or song.
switch back to Stereo mode.
In FM mode, press to select a specific frequency.
In Program mode, press to enter the numbers of the songs you want to play in the
order you want them played.
In Time mode, press to enter the time.
the default is mute off.
Press to tune the FM radio to the previous or next preset station. When setting
presets, press to select a lower or higher preset number.
Press to fast forward or fast reverse a CD or USB track.
presets.
 Loading...