


Wireless Laser Mouse
Souris laser sans fil
Ratón láser inalámbrico
DX-LM100
USER GUIDE • GUIDE DE L’UTILISATEUR • GUÍA DEL USUARIO
2
Contents
Dynex Wireless Laser Mouse
DX-LM100
Contents
Introduction..................................................................................... 2
Important safety instructions........................................................... 2
Wireless mouse components............................................................ 2
Setting up the wireless mouse ......................................................... 2
Using the wireless mouse................................................................. 4
Troubleshooting............................................................................... 4
Legal notices ................................................................................... 4
Warranty .......................................................................................... 4
Français ....................................................... 5
Español ........................................................ 8
Introduction
Thank you for choosing the Dynex DX-LM100 advanced wireless laser
mouse. This User Guide provides a general description of the laser mouse
features, setup instructions, and troubleshooting information.
Important safety instructions
• Always read the safety instructions in the User Guide carefully.
Keep the User Guide for future reference.
• When using some operating systems, the driver software must be
installed before operation.
• Do not drop or allow forceful impacts to the produc t, or install it in
locations exposed to heavy vibrations.
• Do not disassemble or modify the product in any way. Disassembly
or modification may not only void warranty, but also could cause
damage or lead to fires or electric shock.
• Do not use or store the product in damp locations. Liquid entering
the product may cause damage or lead to fires or electric shock.
• If this equipment does cause harmful interference to radio or
television reception, which can be determined by turning the
equipment off and on, you are encouraged to try to correct the
interference by one or more of the following measures:
• Reorient or relocate the receiving antenna.
• Increase the separation between the equipment and receiver.
• Connect the equipment into an outlet on a circuit different
from that to which the receiver is connected.
• Consult the dealer or an experienced radio/TV technician for
help.
Caution: Any changes of modifications not expressly approved by
the grantee of this device could void the user’s authority to operate
the equipment.
• This device complies with Part 15 of the FCC Rules. Operation is
subject to the following two conditions: (1) this device may not
cause harmful interference, and (2) this device must accept any
interference received, including interference that may cause
undesired operation.
Caution: Avoid direct or indirect (such as reflection) eye exposure
to laser light! Keep out of the reach of children!
Wireless mouse components
Package contents
Make sure that the package contains the following items:
•Wireless laser mouse
• Cradle receiver
• AC/DC adapter
• 2 Ni-MH rechargeable AA batteries
• User Guide
• Drivers on CD
If any components are missing, contact Dynex immediately.
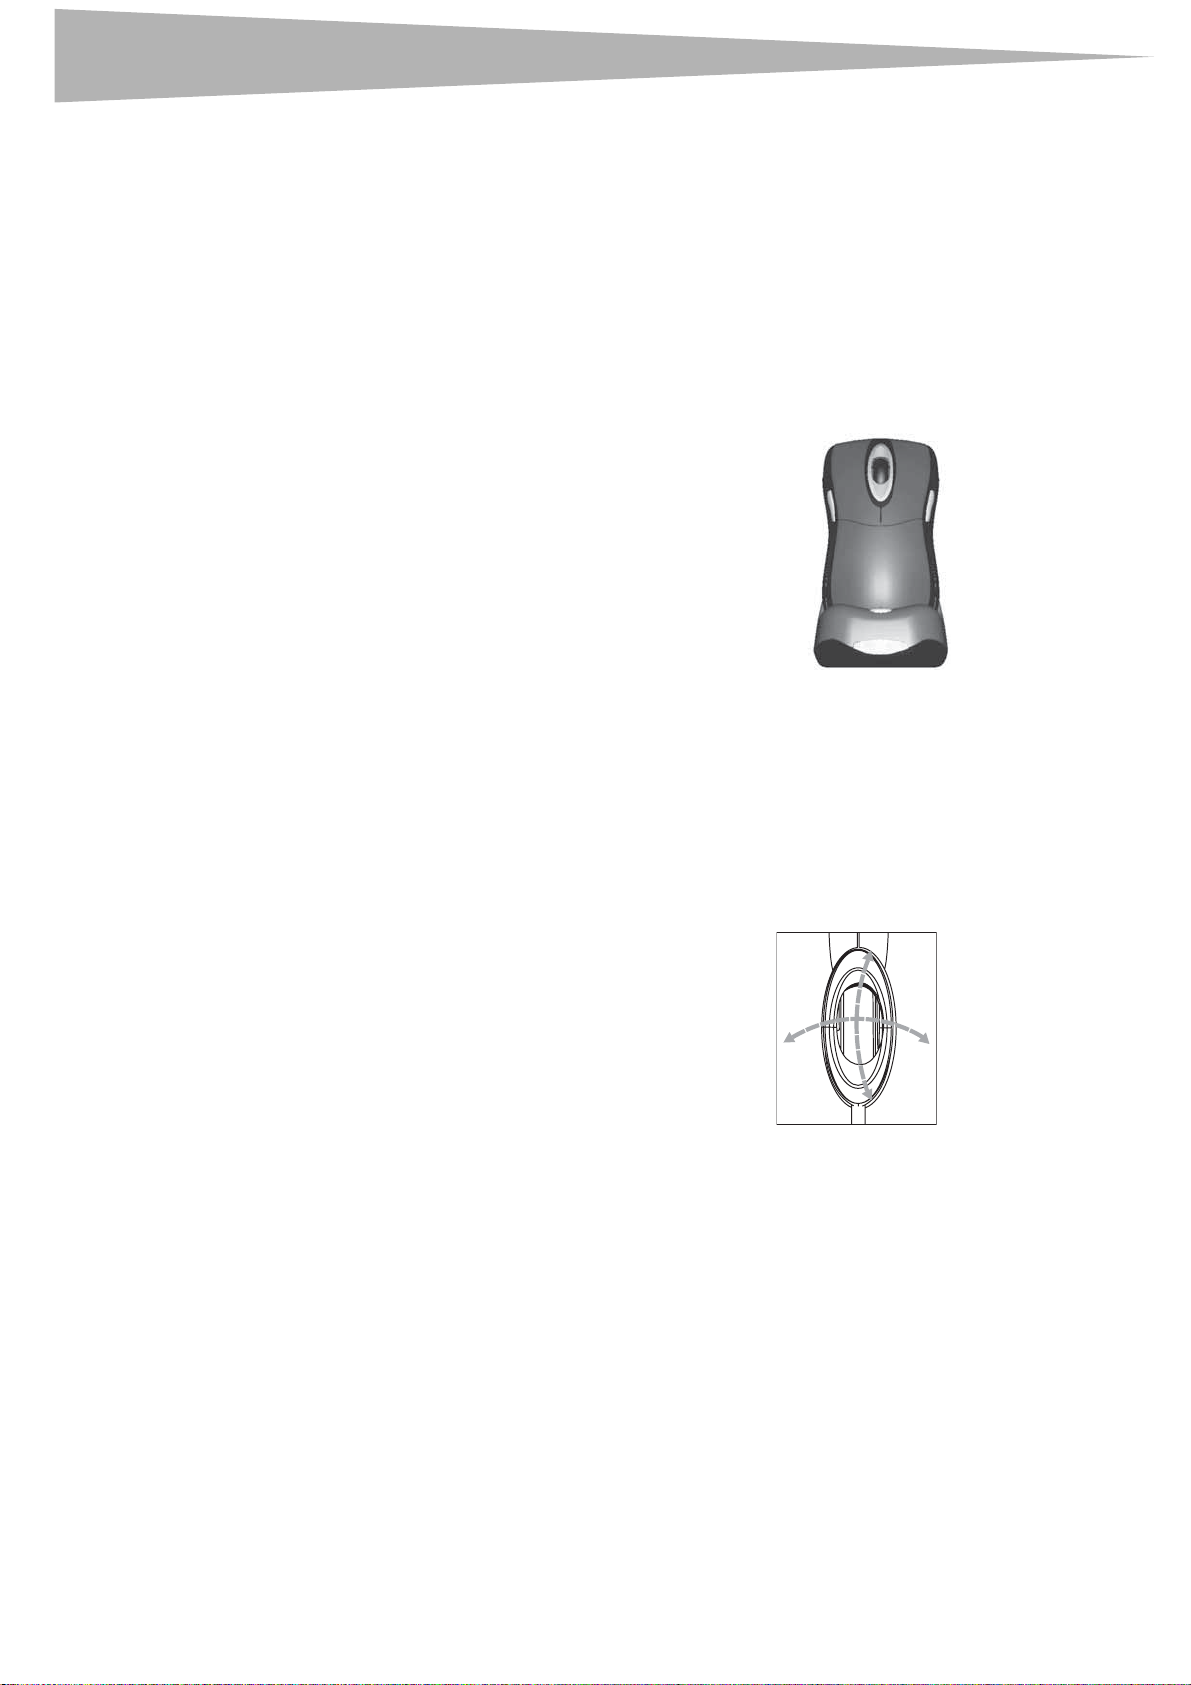
Features
The Dynex DX-LM100 advanced wireless laser mouse is designed with
three unique features:
• Smart Link eliminates the need to re-link the cradle to the mouse
after completing the initial linkage procedure, even if you change
batteries or restart the computer.
• The Universal Scroll Wheel is designed with the 4–way navigating
function so that you can easily view whole documents using the
up, down, left, and right controls on the scroll wheel.
• The two-channel, 27 MHz wireless laser mouse has 256
changeable IDs.
Setting up the wireless mouse
Installing the receiver
To connect the receiver:
1 Turn on the computer.
2 Plug the USB connector of the receiver into the USB port on the
computer.
3 Select the mouse channel.
To select the mouse channel:
1 Install the 2 Ni-MH AA batteries in the mouse.
Note: You must use rechargeable batteries in the chargeable mouse. Before
using the mouse for the first time, charge the batteries for 10 to 12
hours.
Setting up the wireless mouse
3
2 Adjust the two-cha nnel switch inside the batter y compartment to either
channel 1 or 2 to select the mouse channel.
Channel switch
Linking the mouse with the receiver
Note: Link the mouse within the effective distance of 39 inches (1 meter).
To link the mouse with the receiver:
1 Turn on your computer.
2 Press the ID link button on the receiver. There will be a 15-second
delay while the receiver links to the mouse.
Within that 15-second delay, press the ID link button on the
mouse to complete the linking process. The LED indicator on the
receivers changes from flashing to green.
The mouse is designed with Smart Link. After the linkage
procedure is complete, you don’t have to re-link the mouse, even if
you change batteries or restart the computer.
3 If the mouse does not link with the receiver, repeat the ID linking
process in Step 2.
4 If there is interference when using the mouse with the selected
channel, change the mouse channel and repeat Step 2. There are
256 changeable IDs for a single channel.
To uninstall the mouse driver:
1 Click the Add/Remove Programs icon in the Control Panel or
click the Uninstall icon in the mouse folder under Programs on
Start on the Windows desktop to remove the mouse software
from your computer.
2 Select the mouse software installed and click the Remove button.
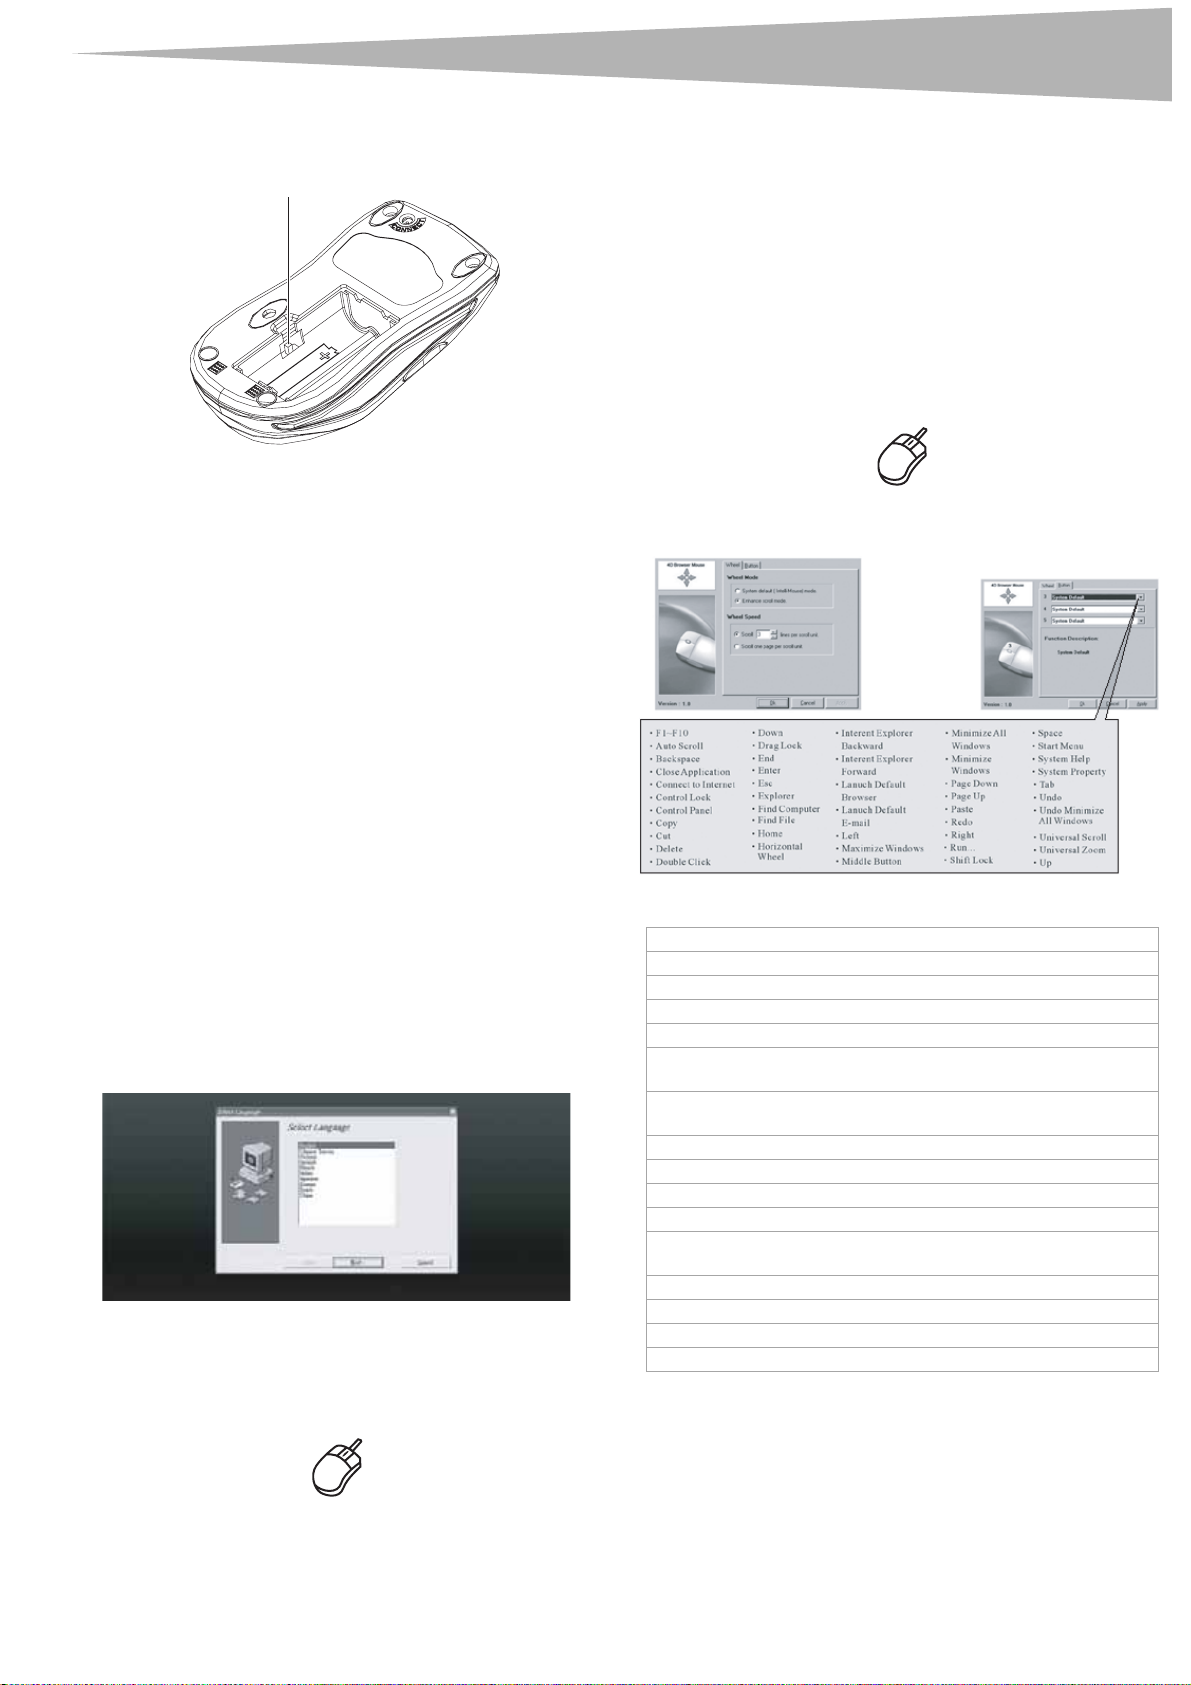
Programming the mouse
A programmable key on the mouse allows you to set a number of mouse
properties.
To program the mouse:
1 Double-click the Mouse icon on the Windows task bar. A mouse
programming screen displays.
2 Follow the instructions in the dialog boxes to set the mouse
properties.
Installing the software
Note:
The driver supports Windows 2000/ ME/XP.
To install the mouse driver:
1 Remove any existing mouse drivers completely.
2 Insert the driver CD in your computer, then select the mouse driver
to be installed.
3 Select a language for installation.
The operating system automatically installs the driver through
auto-install.
4 Restart the computer.
A Mouse icon will appear on the Windows task bar after you
successfully finish the installation.
The following mouse properties can be set:
F1-F10 Explorer Paste
Auto Scroll Find Computer Redo
Backspace Find File Right
Close Applications Home Run...
Connect to Internet Horizontal Wheel Shift Lock
Control Lock Internet Explorer
Backward
Control Panel Internet Explorer
For ward
Copy Launch Default Browser System Help
Cut Launch Default E-mail System Property
Delete Left Tab
Double-click Maximize Windows Undo
Down Middle Button Undo Minimize All
Drag Lock Minimize All Windows Universal Scroll
End Minimize Windows Universal Zoom
Enter Page Down Up
Escape Page Up
Space
Start Menu
Windows

4
Using the wireless mouse
Using the wireless mouse
Controlling the mouse
This laser mouse has a high resolution of 1600 dpi, which provides the
most reliable and accurate movement.
• Avoid using the mouse on any reflective, transparent, metallic, or
complex-pattern surfaces such as glass or a mirror.
• Avoid using the mouse under the following conditions:
• Direct sunlight
• Extreme hot, cold, dusty, or magnetic environment
• Near a fax machine, television, radio, mobile phone or any
wireless device
• Press any button to wake up the keyboard or the mouse while the
mouse is in sleeping mode.
• Scroll the wheel to wake up the mouse while the mouse is in the
sleeping mode.
Using power-saving
The optical sensor can be turned off to save power.
To use powe r-sav ing:
1 Press and hold middle of the scroll wheel, then press the
Connect/Link button on the bottom of the mouse. The optical
sensor turns off.
2 To turn the sensor back on again, perform the same actions.
Using mouse power management
Legal notices
Radio and TV Interference Statement
This equipment has been tested and found to comply within the limits
for a Class B digital device, pursuant to Part 15 of the FCC rules. These
limits are designed to provide reasonable protection against harmful
interference in a residential installation. This equipment generates, uses
and can radiate radio frequency energy and if not installed and used in
accordance with the instructions, may cause harmful interference to
radio communications. However, there is no guarantee that interference
will not occur in a particular installation.
This Class B digital apparatus complies with Canadian ICES-003.
Copyright
© 2006 Dynex. DYNEX and the DYNEX logo are trademarks of Best Buy
Enterprise Services, Inc. Other brands and product names are trademarks
or registered trademarks of their respective holders. Specifications and
features are subject to change without notice or obligation.
To use mouse power management
1 Right-click the mouse icon in the windows taskbar, then click
Active Mouse Properties.
2 Click the Hardware tab, then double-click USB Browser Mouse
Device.
3 Click the Power Management tab, then check the box for Allow
this device to bring the computer out of standby.
4 Click OK.
Charging the mouse
The mouse scroll wheel will light when the mouse batteries are low.
Change or recharge the batteries immediately. Do not use the mouse
during while it is charging.
To charg e the mouse :
1 Connect the cord of the receiver cradle to the AC/DC adapter, then
connect the AC/DC adapter to the power outlet.
2 Place the mouse in the cradle and allow the mouse to charge.
A solid red LED means that the mouse is charging, and a blinking
red LED means that the mouse is fully charged.
Troubleshooting
If the mouse is malfunctioning, do one of the following:
• Change or recharge the batteries.
• Move the receiver away from the computer and the monitor and
repeat the set-up procedure on page 2.
• Make sure the USB port on the computer is working.
• Make sure that the receiver connector or cable is not broken or
tangled.

Introduction
5
Souris laser sans fil Dynex
DX-LM100
Introduction
Merci d’avoir choisi la souris laser sans fil de technologie avancée Dynex
DX-LM100. Ce Guide de l’utilisateur donne une description générale des
caractéristiques de la souris laser sans fil, des instructions de
configuration et des informations relatives à la solution de problèmes.
Instructions de sécurité importantes
• Lire les instructions de sécurité dans le Guide de l’utilisateur avec
attention. Conserver ce Guide de l’utilisateur pour toute référence
ultérieure.
• Avec certains systèmes d’exploitation, le pilote doit être installé
avant la mise en service.
• Éviter de faire tomber le produit, de l’exposer à un choc violent ou
de l’installer dans des endroits soumis à de fortes vibrations.
• Ne pas démonter ou modifier le produit. Le démontage ou la
modification du produit peut non seulement annuler la garantie,
mais aussi causer des dommages ou provoquer des incendies ou
chocs électriques.
• Ne pas utiliser ou entreposer le produit dans des endroits humides.
Le déversement d’un liquide sur le produit peut l’endommager ou
provoquer des incendies ou chocs électriques.
• Si cet équipement cause des interférences négatives à la réception
radio ou télévision, ce qui peut être déterminé en activant et en
désactivant l’équipement, il est conseillé que l’utilisateur tente de
corriger l’interférence en prenant l’une ou plusieurs des mesures
suivantes :
• Réorienter ou déplacer l’antenne réceptrice.
• Augmenter la distance entre l’équipement et le récepteur.
• Brancher l’équipement sur la prise électrique d’un circuit
différent de celui auquel le récepteur est relié.
• Contacter le revendeur ou un technicien radio/télévision
qualifié.
Attention : Tout changement ou modification non expressément
approuvé dans le cadre de la garantie de ce périphérique pourrait
annuler l’autorisation pour l’utilisateur d’utiliser cet équipement.
• Cet appareil est conforme à l’article 15 du règlement de la FCC. Son
fonctionnement est soumis aux deux conditions suivantes : (1) Cet
appareil ne doit pas provoquer d’interférence dangereuses et (2) il
doit accepter toute interférence reçue, y compris celles risquant
d’engendrer un fonctionnement indésirable.
Attention : Éviter toute exposition directe ou indirecte (par
réfléchissement) des yeux au rayonnement laser ! Tenir hors de la
portée des enfants !
Fonctionnalités
La souris laser avancée DX-LM100 comporte trois fonctionnalités
exclusives :
• Smart Link élimine le besoin de reconnecter le support à la souris
après la connexion initiale, même en cas de remplacement des
piles ou de relance de l'ordinateur.
• La mollette de défilement universelle est conçue avec la fonction
de navigation dans 4 directions, ce qui permet de lire des
documents entiers à l'aide des commandes haut, bas gauche et
droite de la molette de défilement.
• Cette souris laser sans fil 2 canaux, 27 Mhz, est dotée de 256 ID
modifiables.
Installation de la souris sans fil
Installation du récepteur
Pour installer le récepteur :
1 Mettre l'ordinateur sous tension.
2 Brancher le connecteur USB du récepteur sur le port USB de
l’ordinateur.
3 Sélectionner le canal de la souris.
Pour sélectionner le canal de la souris :
1 Insérer les deux piles AA Ni-MH dans la souris.
Remarque : Utiliser impérativement des piles rechargeables dans la souris
rechargeable. Charger les piles de 10 à 12 heures avant d’utiliser la
souris pour la première fois.
2 Régler le sélecteur à deux canaux à l’intérieur du compartiment piles sur
soit le canal
1 soit sur 2 afin de sélectionner le canal de la souris.
Composants de la souris sans fil
Contenu de l’emballage
Vérifier que l’emballage contient les articles suivants :
• Souris laser sans fil
•Support récepteur
• Adaptateur CA/CC
• 2 piles rechargeables AA Ni-MH
• Guide de l’utilisateur
•Pilotes sur CD
Si l’un des éléments manque, contacter Dynex immédiatement.
Sélecteur de canal

6
Connexion de la souris au récepteur
Remarqu e : Connecter la souris e n deçà de la portée effi cace maximal e de la
souris de 39 pouces (1 mètre).
Pour connecter la souris au récepteur :
1 Mettre l'ordinateur sous tension.
2 Appuyer sur le bouton de connexion ID du récepteur. Le récepteur
se connecte à la souris après un délai de 15 secondes.
Au cours de ce délai de 15 secondes, appuyer sur le bouton de
connexion ID de la souris pour achever la procédure de connexion.
Le témoin DEL sur les récepteurs passe du clignotant au vert.
La conception de la souris intègre la fonctionnalité Smart Link.
Une fois la procédure de connexion achevée, il n’est plus
nécessaire de reconnecter la souris, même en cas de
remplacement des piles ou de redémarrage de l’ordinateur.
3 Si la souris ne se connecte pas avec le récepteur, répéter la
procédure de connexion ID à l’étape 2.
4 En cas d’interférence avec le canal sélectionné lors de l’utilisation
de la souris, modifier le canal de la souris et recommencer l'étape
2 ci-dessus. 256 ID modifiables sont disponibles par canal.
Installation de la souris sans fil
2 Suivre les instructions dans les boîtes de dialogue pour définir les
propriétés de la souris.
Installation du logiciel
Remarque :
Le pilote prend en charge Windows 2000/ME et XP.
Pour installer le pilote de la souris :
1 Désinstaller complètement tous les pilotes de souris existants.
2 Insérer le CD de pilotes dans l’ordinateur puis sélectionner le pilote
de souris à installer.
3 Sélectionner une langue pour l’installation.
Le système d’exploitation installe automatiquement le pilote au
moyen de la fonction auto-install (installation automatique).
4 Redémarrer l’ordinateur.
Une icône de Souris s’affiche dans la barre des tâches, dès que
l’installation a été effectuée avec succès.
Pour désinstaller le pilote de la souris :
1 Cliquer sur l’icône Add/Remove Programs (Ajout/Suppression
de programmes) du panneau de configuration ou cliquer sur
l’icône Uninstall (Désinstaller) dans le dossier de la souris sous
Programs (Programmes) ou sur Start (Démarrer) sur le Bureau
de Windows pour retirer le logiciel de la souris de l'ordinateur.
2 Sélectionner le logiciel de la souris installé et cliquer sur le bouton
Remove (Supprimer)
Programmation de la souris
Une touche programmable sur la souris permet à l'utilisateur de définir
un certain nombre de propriétés de la souris.
Pour programmer la souris :
1 Double-cliquer sur l’icône de la souris dans la barre des tâches. Un
écran de programmation de la souris s’affiche.
Il est possible de définir les propriétés suivantes de la souris :
F1 à F10 Explorer (Explorateur) Paste (Coller)
Auto Scroll (Défilement
automatique)
Backspace (Retour
arrière)
Close Applications
(Fermer des
applications)
Connect to Internet
(Connexion à
l’Internet)
Control Lock
(Verrouillage du
contrôle)
Control Panel (Panneau
de configuration)
Copy (Copier) Launch Default Browser
Cut (Couper) Launch Default E-mail
Delete (Supprimer) Left (Gauche) Tab (Tabulation)
Double-click
(Double-cliquer)
Down (Bas) Middle Button (Bouton
Drag Lock (Verrouiller
la fonction faire
glisser)
End (Fin) Minimize Windows
Enter (Entrée) Page Down (Page
Escape (Échappement) Page Up (Page
Find Computer
(Rechercher un
ordinateur)
Find File (Rechercher un
fichier)
Home (Page d’accueil) Run... (Exécuter)
Horizontal Wheel
(Mollette de défilement
horizontal)
Internet Explorer
Backward (Page Web
précédente)
Internet Explorer
Forward (Page Web
suivante)
(Lancer le navigateur
Web par défaut)
(Lancer l’application de
courriel par défaut)
Maximize Windows
(Agrandir la fenêtre)
central)
Minimize All Windows
(Minimiser toutes les
fenêtres)
(Réduire la fenêtre)
suivante)
précédente)
Redo (Rétablir)
Right (Droite)
Shift Lock (Verrouillage
maj)
Space (Espace)
Start Menu (Menu
Démarrer)
System Help (Aide
système)
System Property
(Propriété système)
Undo (Annuler)
Undo Minimize All
Windows (Annuler la
commande Minimiser
toutes les fenêtres)
Universal Scroll
(Défilement universel)
Universal Zoom (Zoom
universel)
Up (Haut)

Utilisation de la souris sans fil
7
Utilisation de la souris sans fil
Contrôle de la souris
Cette souris laser est dotée d’une résolution élevée de 1 600 ppp, ce qui
lui assure un mouvement fiable et précis.
• Éviter d’utiliser la souris sur des surfaces réfléchissantes,
transparentes, métalliques ou à motif complexe telles que du
verre ou un miroir.
• Éviter d’utiliser la souris dans les conditions suivantes :
• Lumière directe du soleil
• Environnement extrême chaud, froid, poussiéreux ou
magnétique
• Près d’une machine à photocopier, un téléviseur, une radio, un
téléphone cellulaire ou tout autre périphérique sans fil
• Appuyer sur n’importe quel bouton pour activer le clavier ou la
souris quand celle-ci est en mode veille.
• Faire défiler la molette pour activer la souris quand elle est en
mode veille.
Utilisation de la fonction d’économie d’énergie
Le capteur optique peut être désactivé pour économiser de l’énergie.
Pour utiliser la fonction d’économie d’énergie :
1 Maintenir appuyé le milieu de la molette de défilement, puis
appuyer sur la touche Connect/Link (Connecter/Liaison) en
dessous de la souris. Le capteur optique est désactivé.
2 Pour activer de nouveau le capteur optique, effectuer la même
opération.
• Éloigner le récepteur de l’ordinateur et du moniteur et
recommencer la procédure d’installation de la page 2.
• Vérifier que le port USB de l’ordinateur fonctionne correctement.
• Vérifier que le connecteur du récepteur ou le câble n’est pas cassé
ou entortillé.
Avis juridiques
Déclaration sur les interférences radio
et TV
Cet équipement a été mis à l’essai et déclaré conforme aux limites
prévues pour un appareil numérique de classe B, conformément à la
partie 15 du règlement de la FCC. Ces limites ont été é tablies pour fournir
une protection raisonnable contre les interférences nocives lors d’une
installation résidentielle. Cet appareil génère, utilise et peut émettre de
l'énergie sur les fréquences radios et s'il n'est pas installé et utilisé
conformément aux instructions, il peut causer des interférences nuisibles
aux communications radio. Cependant, il n’est pas possible de garantir
qu’aucune interférence ne se produira dans une installation particulière.
Cet appareil numérique de la classe B est conforme à la norme NMB-003
du Canada.
Droits d’auteurs
©2006 Dynex. DYNEX et le logo de DYNEX sont des marques de
commerce de Best Buy Enterprise Services, Inc. Les autres noms de
marques et de produits mentionnés sont des marques de commerce ou
des marques déposées de leurs propriétaires respectifs. Les spécifications
et caractéristiques sont susceptibles d’être modifiées sans préavis.
Utilisation de la gestion de l'alimentation de la souris
Pour utiliser la gestion de l'alimentation de la souris
1 Cliquer à l'aide du bouton droit sur l'icône de la souris dans la barre
des tâches, puis cliquer sur Active Mouse Properties (Activer les
propriétés de la souris).
2 Cliquer sur l'onglet Hardware (Matériel), puis double-cliquer sur
USB Browser Mouse Device (Périphérique souris USB de
navigation).
3 Cliquer sur l'onglet Power Management (Gestion de
l'alimentation), puis cocher l'élément Allow this device to
bring the computer out of standby (Autoriser ce périphérique
à sortir cet ordinateur de la mise en veille).
4 Cliquer sur OK.
Charge de la souris
La mollette de défilement de a souris s’allume quand les piles sont
faibles. Remplacer ou recharger les piles immédiatement. Ne pas utiliser
la souris en cours de charge.
Pour charger la souris :
1 Brancher le cordon du support récepteur de la souris sur
l'adaptateur CA/CC, puis brancher l'adaptateur CA/CC sur la prise
secteur.
2 Pla cer la souri s dans so n suppor t et l a laisse r se ch arger. U n témo in
DEL rouge fixe signifie que la souris se recharge et un témoin
rouge clignotant indique que la souris est complètement
rechargée.
Problèmes et solutions
Si le fonctionnement de la souris est défectueux, essayer ce qui suit :
• Remplacer ou recharger les piles.

8
Introducción
Ratón láser inalámbrico
modelo DX-LM100 de Dynex
Introducción
Gracias por elegir el ratón láser inalámbrico modelo DX-LM100 de
tecnología avanzada de Dynex. Esta Guía del Usuario provee una
descripción general de las características del ratón láser, las instrucciones
de instalación e información para solución de problemas.
Instrucciones importantes de seguridad
• Siempre lea cuidadosamente las instrucciones de seguridad
descritas en la Guía del Usuario. Guarde la Guía del usuario como
referencia.
• Al usar algunos sistemas operativos, el software del controlador
debe instalarse antes del funcionamiento.
• No deje caer ni el producto, no lo exponga a golpes fuertes, ni lo
instale en lugares expuestos a vibración excesiva.
• No desensamble ni modifique el producto de ninguna manera.
Desensamblar o modificar el producto puede anular la garantía,
además de causar daño, incendio o choque eléctrico.
• No use ni almacene el producto en lugares húmedos. El ingreso de
líquido en el producto puede causar daño, incendio o choque
eléctrico.
• Si el equipo causa interferencias perjudiciales en la recepción de la
señal de radio o televisión, lo cual puede comprobarse
encendiéndolo y apagándolo alternativamente, se recomienda
corregir la interferencia mediante uno de los siguientes
procedimientos:
• Cambie la orientación o la ubicación de la antena receptora.
• Aumente la distancia entre el equipo y el receptor.
• Conecte el equipo a un tomacorriente de un circuito distinto de
aquel al que esta conectado el receptor.
• Solicite consejo al distribuidor o a un técnico experto en radio/TV
para obtener ayuda.
Precaución: Cualquier cambio o modificación no aprobada
expresamente por la garantía de este dispositivo puede anular la
autoridad del usuario para operar el equipo.
• Este dispositivo satisface la parte 15 del reglamento FCC. Su
operación está sujeta a las dos condiciones siguientes: (1) Este
dispositivo no puede causar interferencia dañina, y (2) este
dispositivo debe aceptar cualquier interferencia recibida
incluyendo interferencias que puedan causar una operación no
deseada.
Precaución: ¡Evite la exposición directa o indirecta (por ejemplo
reflejo) de los ojos a la luz láser! ¡Mantenga el producto fuera del
alcance de los niños!
Componentes del ratón
Si falta algún componente, comuníquese con Dynex inmediatamente.
Características
El ratón láser inalámbrico modelo DX-LM100 de tecnología avanzada de
Dynex está diseñado con tres exclusivas funciones:
• La función de enlace inteligente SmartLink elimina la necesidad
de volver a enlazar la unidad base al ratón tras completar el
procedimiento de enlace inicial, ni siquiera si se cambian las pilas
o se reinicia la computadora.
• La rueda de desplazamiento universal está diseñada con una
función de navegación de 4 direcciones para que pueda ver
fácilmente documentos enteros con ayuda de los controles arriba,
abajo, a izquierda y a derecha en la rueda de desplazamiento.
• El ratón láser inalámbrico de dos canales, de 27 MHz, tiene 256
identificadores cambiables.
Configuración del ratón inalámbrico
Instalación del receptor
Para conectar el receptor:
1 Encienda la computadora.
2 Enchufe el conector USB del receptor en el puerto USB de la
computadora.
3 Seleccione el canal del ratón.
Para seleccionar el canal del ratón:
1 Instale en el ratón las 2 baterías AA Ni-MH.
Nota: Debe utilizar baterías recargables en el ratón recargable. Antes de
usa r el rató n por pr imera ve z, cargue las ba terías durante 10 a 12 horas.
inalámbrico
Contenido de la caja
Asegúrese de que el paquete contiene los siguientes artículos:
• Ratón láser inalámbrico
• Estación base/receptor
• Adaptador de CA/CC
• 2 baterías recargables Ni-MH
• Guía del usuario
• Controladores en el CD

Configuración del ratón inalámbrico
2 Ponga el conmutador de dos canales que se encuentra dentro del
compartimiento de pilas d el ratón en
canal del ratón.
Conmutador de canales
el canal 1 o 2 para seleccionar el
Enlace del ratón con el receptor
Nota: Enlace el ratón a una distancia dentro del radio de acción de
39 pulgadas (1
Para enlazar el ratón con el receptor:
1 Encienda la computadora.
2 Presione el botón ID link (enlace de identificadores) del receptor.
Transcurrirá un lapso de 15 segundos mientras el receptor enlaza
con el ratón.
Dentro de ese lapso de 15 segundos de retardo, presione el botón
ID link en el ratón para completar el proceso de enlace. El indicador
LED de los receptores cambia de parpadeante a verde fijo.
El ratón está diseñado con enlace inteligente (Smart Link). Una vez
completado el proceso de enlace, no es necesario volver a enlazar
el ratón, ni siquiera si se cambian las pilas o se reinicia la
computadora.
3 Si el ratón no enlaza con el receptor, repita el proceso de enlace de
identificadores descrito en el paso 2.
4 Si existe interferencia al usar el ratón con el canal seleccionado,
cambie el canal del ratón y repita el paso 2. Hay 256
identificadores cambiables para un solo canal.
metro).
9
Para desinstalar el controlador del ratón:
1 Haga clic en el icono Add/Remove Programs (Añadir/quitar
programas) en el Panel de control, y haga clic en el icono
Uninstall (Desinstalar) en la carpeta del ratón bajo Programs
(Programas) en Start (Inicio) en el escritorio de Windows para
retirar el software del ratón de su computadora.
2 Seleccione el software de ratón instalado y haga clic en el botón
Remove (Retirar).
Programación del ratón
Una tecla programable en el ratón le permite establecer una serie de
propiedades del ratón.
Para programar el ratón:
1 Haga doble clic en el icono de Ratón en la barra de tareas de
Windows. Aparece la pantalla de programación del ratón.
2 Siga las instrucciones de los cuadros de diálogo para establecer las
propiedades del ratón.
Instalación del software
Nota:
El controlador es compatible con Windows 2000/ ME/XP.
Para instalar el controlador del ratón:
1 Desinstale completamente cualquier controlador de ratón
instalado.
2 Inserte el CD de controladores en su computadora, luego
seleccione el controlador de ratón que desea instalar.
3 Seleccione un idioma para la instalación.
El sistema operativo instala automáticamente el controlador
mediante la función de instalación automática.
4 Reinicie la computadora.
Cuando haya concluido correctamente la instalación, aparecerá el
icono de Ratón en la barra de tareas de Windows.

10
Uso del ratón inalámbrico
Puede establecer las siguientes propiedades del ratón:
F1-F10 Explorer (Explorador) Paste (Pegar)
Auto Scroll
(Desplazamiento
automático)
Backspace (Retroceso) Find File (Encontrar
Close Applications
(Cerrar aplicaciones)
Connect to Internet
(Conectar a la Internet)
Control Lock (Bloqueo
de control)
Control Panel (Panel de
Control)
Copy (Copiar) Launch Default Browser
Cut (Cortar) Launch Default E-mail
Delete (Borrar) Left (Izquierda) Tab
Double-click (Doble
clic)
Down (Abajo) Middle Button (Botón
Drag Lock (Bloqueo de
arrastre)
End (Final) Minimize Windows
Enter (Entrar) Page Down (Página abajo) Up (Arriba)
Escape (Esc) Page Up (Página arriba)
Find Computer (Encontrar
computadora)
archivo)
Home (Página principal) Run… (Ejecutar...)
Horizontal Wheel (Rueda
horizontal)
Internet Explorer
Backward (Internet
Explorer Atrás)
Internet Explorer Forward
(Internet Explorer
Adelante)
(Iniciar el Navegador
predeterminado)
(Iniciar correo electrónico
predeterminado)
Maximize Windows
(Maximizar ventanas)
medio)
Minimize All Windows
(Minimizar todas las
ventanas)
(Minimizar Windows)
Redo (Rehacer)
Right (Derecha)
Shift Lock (Bloqueo de
Mayúsculas)
Space (Espacio)
Start Menu (Menú de
Inicio)
System Help (Ayuda de
Sistema)
System Property
(Propiedades del
Sistema)
Undo (Deshacer)
Undo Minimize All
Windows (Deshacer
Minimizar todas las
ventanas)
Universal Scroll
(Desplazamiento
universal)
Universal Zoom (Zoom
universal)
Uso del ratón inalámbrico
Uso de la administración de energía del ratón
Para usar la administración de energía del ratón
1 Haga clic con el botón derecho en el icono del ratón en la barra de
tareas de Windows, luego haga clic en Active Mouse Properties
(Propiedades del Ratón Activo).
2 Haga clic en la ficha Hardware (Equipo), luego haga doble clic en
USB Browser Mouse Device (Dispositivo de Ratón de
Exploración USB).
3 Haga clic en la ficha Power Management (Administración de
Energía) y seleccione la caja de Allow this device to bring the
computer out of standby (Permitir a este dispositivo reactivar
el equipo).
4 Haga clic en OK (Aceptar).
Carga del ratón
La rueda de desplazamiento del ratón se encenderá cuando las baterías
del ratón estén bajas. Cambie o recargue las baterías inmediatamente.
No use el ratón mientras se está cargando.
Para cargar el ratón:
1 Conecte el cable de la base receptora al adaptador de CA/CC, luego
conecte el adaptador de CA/CC al tomacorriente.
2 Coloque el ratón en la base y deje que se cargue. Un LED de color
rojo permanentemente iluminado significa que el ratón se está
cargando y un LED color rojo parpadeando significa que el ratón
está completamente cargado.
Solución de problemas
Si el ratón no funciona correctamente, realice uno de los pasos
siguientes:
•Cambie o recargue las baterías.
• Aleje el receptor de la computadora y del monitor y repita el
procedimiento de configuración descrito en la página 2.
• Asegúrese de que funcione el puerto USB de la computadora.
• Asegúrese de que el conector del receptor o el cable no esté roto o
enredado.
Control del ratón
Este ratón láser tiene una alta resolución de 1600 dpi, que proporciona el
movimiento más confiable y preciso.
• Evite usar el ratón en superficies reflectivas, transparentes,
metálicas o de patrón complejo tales como vidrio o un espejo.
• Evite usar el ratón en las siguientes condiciones:
• Luz del sol directa
• Ambientes extremadamente calientes, fríos, polvorosos o
magnéticos
• Cerca de una máquina de fax, televisor, radio, teléfono móvil o
de cualquier clase de dispositivo inalámbrico
• Presione cualquier botón para activar el teclado o el ratón
mientras el ratón se encuentra en el modo de suspensión.
• Desplace la rueda para activar el ratón mientras este se encuentra
en el modo de suspensión.
Cómo ahorrar energía
El sensor óptico puede apagarse para ahorrar energía.
Para ahorrar energía:
1 Presione y sostenga la parte media de la rueda de desplazamiento,
luego presione el botón Connect/Link (Conectar/Enlazar) en la
parte inferior del ratón. El sensor óptico se apagará.
2 Para encender el sensor de nuevo, realice las mismas acciones.
Avisos legales
Declaración sobre interferencias de radio y televisión
Este equipo ha sido sometido a pruebas y se ha determinado que
satisface los límites establecidos para clasificarlo como dispositivo digital
de Clase B de acuerdo con la Parte 15 del reglamento FCC. Estos límites se
han establecido para proporcionar una protección razonable contra
interferencias perjudiciales en una instalación residencial. Este equipo
genera, utiliza y puede irradiar energía de radiofrecuencia y, si no es
instalado y utilizado de acuerdo a las instrucciones, puede causar
interferencias perjudiciales en las comunicaciones de radio. Sin embargo,
no se garantiza que no ocurrirá interferencia en una instalación
particular.
Este aparato de Clase B cumple con el ICES-003 canadiense.
Derechos de reproducción
© 2006 Dynex. DYNEX y el logotipo de DYNEX son marcas de comercio de
Best Buy Enterprise Services, Inc. Otras marcas y nombres de productos
son marcas de comercio o marcas registradas de sus respectivos dueños.
Las especificaciones y características están sujetas a cambio sin aviso
previo u obligación.

Avisos legales
11

www.dynexproducts.com (800) 305-2204
Distributed by Best Buy Purchasing, LLC
7601 Penn Ave. South, Richfield, MN 55423 U.S.A.
Distribué par Best Buy Purchasing, LLC
7601 Penn Ave. South, Richfield, MN 55423 É.-U.
Distribuido por Best Buy Purchasing, LLC
7601 Penn Ave. South, Richfield, MN 55423 U.S.A.
R1
 Loading...