

Page 1
USER’S GUIDE
Thank you for purchasing our Dynex Portable DVD Travel Kit. Our product includes
a DVD car seat console and mounting straps that allow rear-seat passengers
to watch movies on your portable DVD player while traveling in your car.
Using the car seat console, you can mount your portable DVD player:
• On the back of one front seat
• On the center console
• Suspended between two front seats
In addition to this user’s guide, the Dynex Portable DVD Travel Kit contains:
• DVD Travel Case
• Car seat console
• Six mounting straps
• 90 watt inverter
• Two behind-the-neck headphones
• “Y” jack
• Shoulder strap
DYNEX • WWW.DYNEXPRODUCTS.COM
Page 2
FEATURES
With the DVD kit, you can safely carry your portable DVD player and
DVDs. The DVD kit has storage pockets for your remote control, cables
and other items. In addition, its seat console enables rear-seat
passengers to view DVD movies in the back of your car.
The following is a list of our specific features:
• Both the DVD player case and the seat console are made of rugged
outer materials
• Deluxe high density interior foam padding for superior protection
• Storage pockets for up to 16 DVDs
•Viewing case can accommodate up to 10 inch screen DVD Player
• Storage pockets for accessories, cables and remote
•2 inch expansion zipper increases the outer bag's capacity
• Storage for car seat console bag
• 6 straps for mounting the seat console bag
DIRECTIONS FOR USING YOUR PORTABLE DVD TRAVEL KIT
This section describes how to insert your DVD player in the car seat
console, how to mount the DVD player in your car and how to store your
DVD player in the DVD travel kit.
Inserting your DVD Player in the Viewing Case
The car seat console case
can accommodate a portable
DVD player with a screen
size of up to 10 inches.
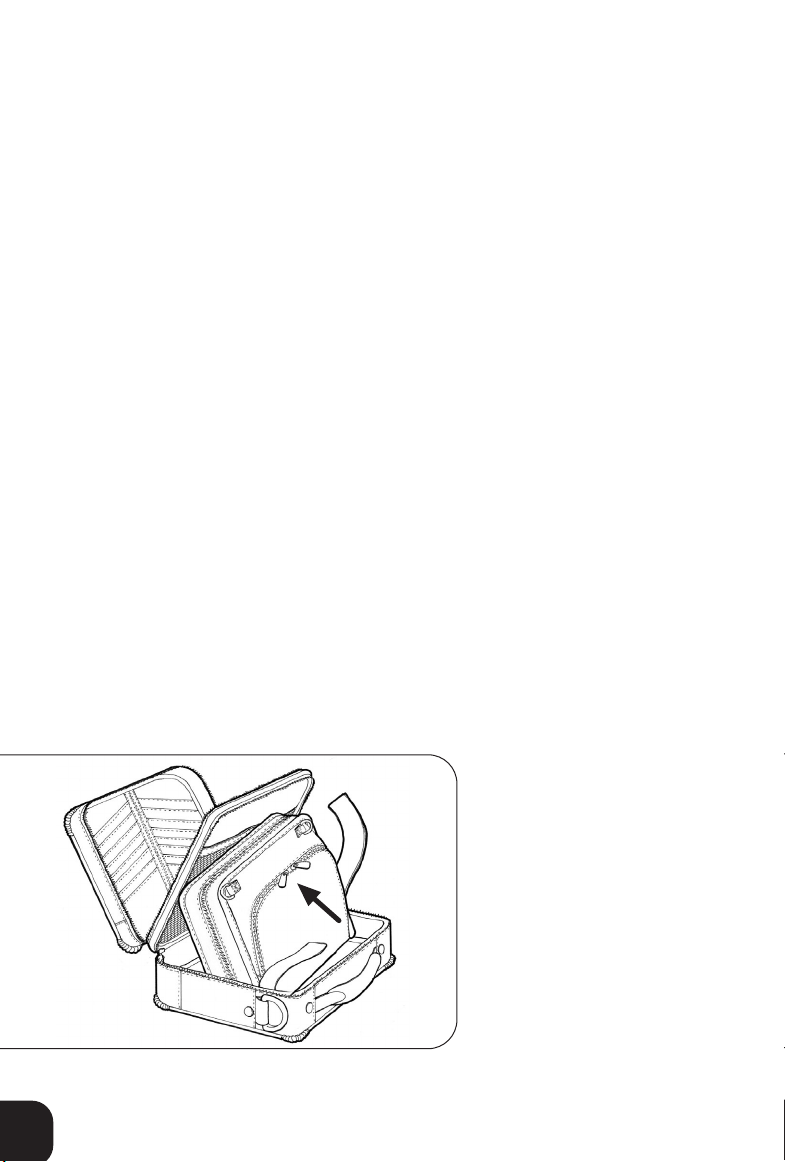
Removing the viewing
case
1. Remove the car seat
console case from the
main DVD player case.
2
Page 3
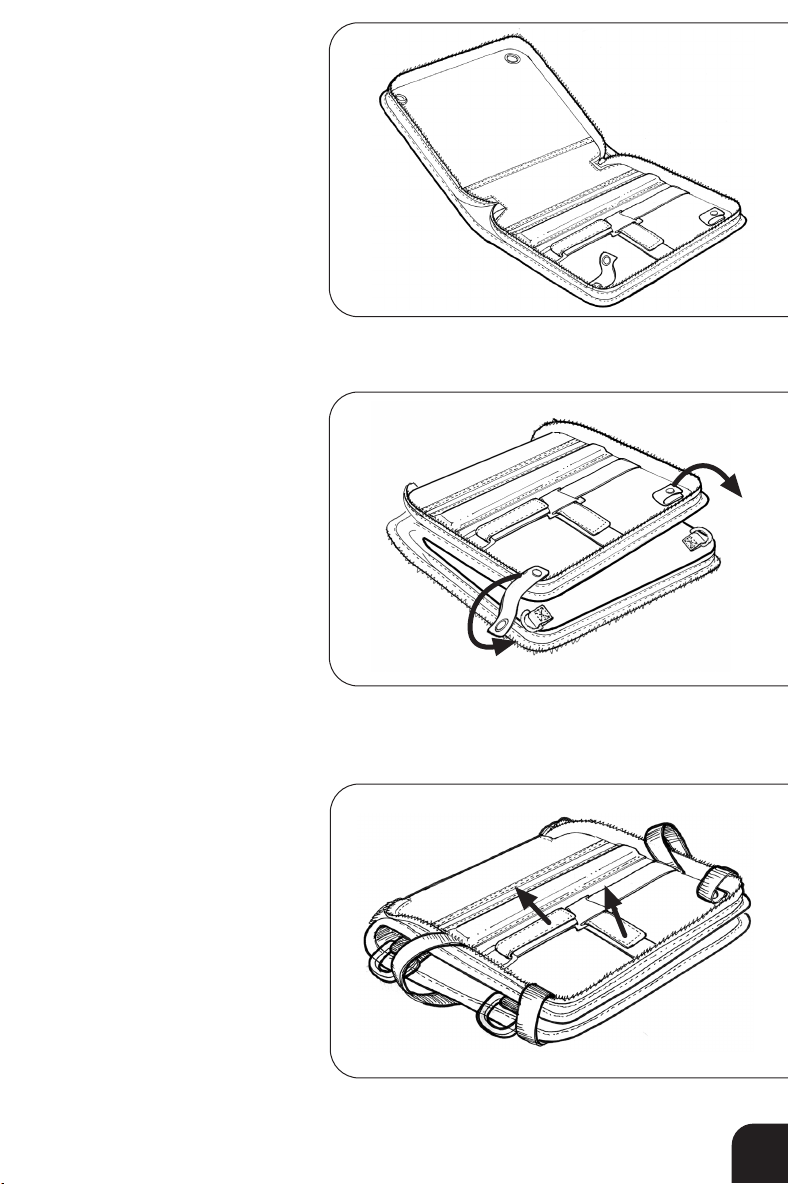
2. Unzip and unfold (open)
the car seat console
case.
3. Turn the car seat console
case over and unfasten
the two elastic snaps.
4.
Fold the car seat console
case in half so you can
snap the two elastic snaps
to the fasteners.
5. Turn the car seat console
case back over and loosen
the hook and loop straps.
3
Page 4

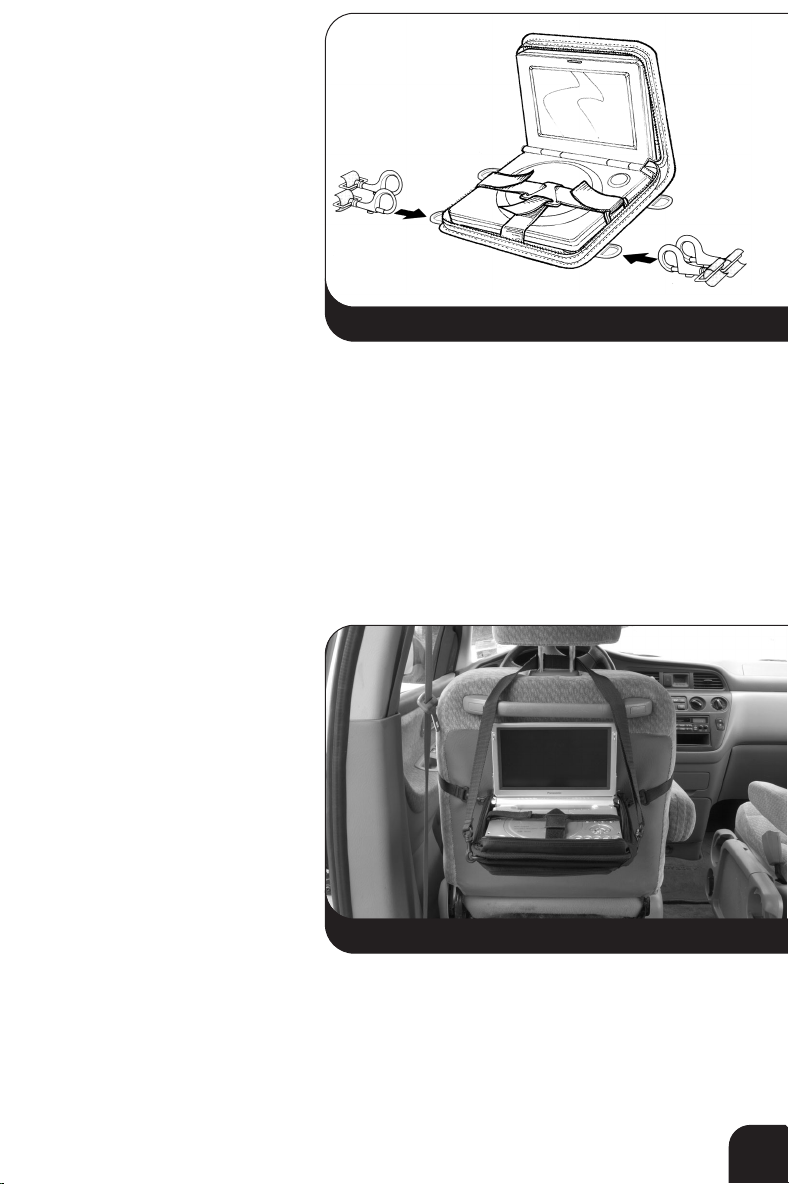
6. Place your portable DVD
player in the car seat
console case so that your
DVD player is under the hook
and loop straps.
7. Fasten the strap to hold the
DVD player in place.
You are now ready to mount
the player in your car.
Mounting Your Portable DVD Player
You can mount the car seat console case in the following configurations in
your car:
• On the center console
• On the back of one seat
• Suspended between both front seats
CAUTION: Make sure you position your portable DVD player facing
rearward so that the driver cannot see the screen. Viewing DVD movies
while driving is unlawful in some states.
ATTENTION: Each vehicle design varies greatly. These mounting directions
are for reference only and may not work in every vehicle. Always mount
your DVD Player with safety in mind.
Adjust the seats before mounting the car seat console to avoid possible
damage to the car seat console, mounting straps or seats.
Mounting on the Center Console
Mounting the car seat console
case with your DVD player on
your car’s center console
requires two of the mounting
straps. These straps secure
the car seat console case to
both front seats.
1. Place the car seat console
case on your car’s center
console with the DVD
player facing rearward.
2. Sitting in a rear passenger seat, put one of the mounting straps around
the back of one of the front seats.
4
Page 5
3. Position the strap’s swivel
clasps near the car seat
console.
4. Put a second mounting
strap around the back of
the other seat.
5. Move both straps down
towards the base of the
seats
6. Attach each mounting
strap’s two swivel clasps
to the front D-rings closest
to the viewer.
7. Tighten each mounting
strap until the car seat
console is secure on the
console and cannot move
forward or backward.
Connecting mounting straps to the front D-rings
Mounting on the Back of a Seat
Mounting the car seat console with your DVD player on the back of one
seat requires two of the mounting straps. The upper strap attaches to
the car seat console case’s front D-rings. The lower strap attaches to the
rear D-rings.
Placing the first strap
1. Sitting in the rear
passenger seat, put one
of the mounting straps
around the front seat.
2. Position the strap’s
swivel clasps so they are
toward you
3. Move the strap down to
where the middle of your
back would rest against
the seat.
4. Hold the car seat console case against the back of the seat with the
DVD player facing toward you.
5. Attach the mounting strap to the rear D-rings (one swivel clasp to each
D-ring).
6. Tighten the strap to hold the car seat console in place.
Car Seat Console mounted on the back of one seat
5
Page 6

Placing the second strap
1. Put a second mounting strap around the headrest mounts of the same
front seat.
2. Position the strap’s swivel clasps so they are toward you.
3. Position the strap toward the top of the seat where your head or neck
would rest against the seat back.
4. Attach the mounting strap to the front D-rings (one swivel clasp to each
D-ring).
5. Hold the car seat console
case perpendicular to the
back of the seat.
6. Tighten each strap so the
DVD player is at the
desired viewing angle and
the car seat console case
is secure against the seat.
Mounted Between Two Seats:
Mounting the car seat console case holding your DVD player suspended
between the front seats requires all four mounting straps.
Placing the straps on the seats
1. Sitting in a rear passenger
seat, put one of the
mounting straps around
the back of one of the front
seats.
2. Move the strap down to
where the middle of your
back would rest against
the seat.
3. Put another mounting strap
around the headrest
mounts of the same front
seat.
4. Position each straps’ set of swivel clasps toward the center of your car
to where the car seat console case will be mounted.
5. Repeat steps 1-5 to fit the other two mounting straps on the other front
seat.
6
Page 7

Mounting the car seat console bag
1. Hold the car seat console between the seats so that the DVD player
is facing rearward.
2. Attach the two lower mounting straps’ swivel clasps to the car seat
console case’s front and rear D-rings closets to the clasps.
You should have attached four swivel clasps, one to each D-ring.
3. Attach the two upper
mounting straps’ swivel
clasps to the car seat
console’s front and rear
D-rings closest to the
clasps.
You should have attached
four more swivel clasps,
one to each D-ring, for a
total of eight.
4. Adjust and tighten each
strap so that the DVD
player is at the desired
viewing angle and car
seat console case is
secure.
Connecting mounting straps to D-rings
Storing Your DVD Player in the Main DVD Player Case
Once inserted in the car seat console case, you can store your DVD
player in the main DVD Player case when not in use.
1. Close your DVD player.
2. Unfasten the two elastic snaps.
3. Close and zip the car seat console.
4. Fasten the two elastic snaps to the bottom of the car seat console.
5. Insert the car seat console case in the larger pocket of the DVD
player case and zip the pocket.
7
Page 8

Limited Warranty
This warranty applies only to the Dynex Portable DVD Travel Kit sold to original purchasers of
the product in the United States. If you purchased your Dynex product outside of the United
States, please contact your local distributor for warranty information.
WHAT IS COVERED?
Dynex warrants to the original purchaser that the Dynex Portable DVD Travel Kit is free from
defects in materials and workmanship in manufacturing for one (1) year from the date of
purchase.
WHAT WE WILL DO TO CORRECT THE PROBLEMS
Dynex will repair or replace, at Dynex’s option, the products covered under this warranty that
prove to be defective in materials or workmanship, without charge to you (except you must
pay for your own shipping and transportation costs to a Best Buy store). If the product is no
longer available, Dynex reserves the right to substitute a comparable product.
In order to be eligible for service under this warranty, the defective Dynex product must be
returned to a Best Buy store within the applicable Warranty Period described above. You must
provide the original receipt as proof of purchase.
WHAT IS NOT COVERED
This warranty does not cover damage from normal wear and tear, misuse, abuse, neglect,
alteration and accidental causes, including bodily, personal or property damage resulting from
vehicular accidents or other sudden forces or “Acts of God”. Dynex will not provide any warranty
service if this product shows evidence of such damage. Dynex will not repair defects relating
to repair or servicing not performed by Dynex.
In no event shall Dynex be held liable for incidental, special or consequential damages. Some
states do not allow the exclusion or limitation of incidental, special or consequential damages,
so the above limitation or exclusion may not apply to you.
ASSUMPTION OF RISK
Any person who uses the Dynex Portable DVD Travel Kit assumes the risks, including bodily
injury, caused by the presence of the Dynex Portable DVD Travel Kit in the vehicle during an
accident involving the vehicle. This product has not been used in any crash tests and its
presence in a vehicle may become a dangerous projectile during an accident or other sudden
force upon the vehicle.
YOUR RIGHTS UNDER IMPLIED WARRANTIES AND STATE LAW
This limited warranty is exclusive and in lieu of all other warranties, obligations or liabilities.
If any implied warranties apply as a matter of law, Dynex limits the duration of such warranty,
including but not limited to the implied warranties or merchantability and fitness for a particular
purpose, to the applicable Warranty Periods described above. Some states do not allow
limitations on how long an implied warranty lasts, so the above limitation may not apply to you.
This warranty gives you specific legal rights and you may also have other rights, which vary
from state to state.
Copyright 2004 Dynex.
Richfield, Minnesota www.dynexproducts.com
 Loading...