

Dynex DX-CMBOSLM - Slim USB 2.0 CDRW/DVD Combo Drive, DX-CMBOSLM User Manual
USER GUIDE • GUIDE DE L’UTILISATEUR • GUÍA DEL USUARIO
External Slim CD-RW/DVD Combo Drive
Lecteur combiné externe ultraplat de CD-RW/DVD
Unidad Combo Delgada de CD-RW/DVD Externa
DX-CMBOSLM
DX-CMBOSLM.fm Page 1 Wednesday, June 29, 2005 11:16 AM
2
Contents
External Slim CD-RW/DVD
Combo Drive DX-CMBOSLM
Contents
Introduction..................................................................................... 2
Installing your combo drive.............................................................. 3
Using your combo drive.................................................................... 4
Troubleshooting............................................................................... 5
Specifications................................................................................... 5
Legal Notices.................................................................................... 6
Français ....................................................... 7
Español ...................................................... 12
Introduction
Features
Thank you for purchasing the Dynex combo drive, a high-performance,
slim drive that connects through a USB 2.0 por t. You can connect this
drive to a notebook or desktop PC.
Because this is an external drive, it frees up precious bay space. This drive
reads CDs of all types at a m aximum speed of 24× and DVDs at a
maximum speed of 8×. This drive writes to CD-Rs at a maximum speed
of 24× and to CD-RWs at a maximu m speed of 24×.
With the bundled programs, you can enjoy the fun of creating
customized audio and data CDs and watching DVDs in high resolution.
Some important features of this combo drive include:
• Slim design for moving office use
• 8×, 16×, and 24× writing speeds on CD-R media
• 4×, 8×, 10×, 12×, and 24× writing speeds on CD-RW media
• Uses “MTKSuperLink” to prevent b uffer underrun
• Supports wri ting modes of TAO, DAO, SAO, and packet writing
• Large 2 MB internal buffer
• Supports Multi Read function
• Ser ves as RPC-2 DVD drive
• Smooth DVD playback
• USB 2.0 interface for easy connection to a USB 2.0 por t
About USB
A USB (Universal Serial Bus) por t is a standardized, intelligent serial
connection that lets you connect a wide variety of devices to your PC,
from simple items like mi ce and keyboards to more complicated devices
like printers, MP3 players, and storage devices.
A USB device supports plug and play, which means that when you plug
in a USB device, your PC automatically detec ts the device and installs the
driver for the device. You can connect and disconnec t USB devices while
your PC is turned on.
USB comes in two types:
• USB 2.0 supports data transfer at up to 480 Mbps for high-speed
devices. USB 2.0 is backward compatible with USB 1.1
• USB 1.1 supporting data transfer at as much as 12 Mbps.
This drive is designed for USB 2.0. If your PC doesn't have a built-in
USB 2.0 port, you need to install a USB 2.0 PCI host card in your PC for the
combo drive to run at USB 2.O speed. Otherwise, this combo drive will
run at standard USB 1.1 speed.
System Requirements
For IBM compatible PCs, the recommended sy stem requirements are:
• Pentium II or Celeron 400 MHz processor or above with at least
64 MB of memory
• Sufficient hard drive space (minimum 200 MB for installation,
1 GB or more is recommended.)
• Microsoft Windows XP, Windows 2000, Windows ME, or
Windows 98SE operating system
• Available USB port. If you don’t have a built-in USB 2.0 port, you
may want to install a USB 2.0 PCI host card in your PC. We
recommend that you use system boards with built-in USB 2.0
ports. If you use a USB 2.0 host card, the reading speed of DVDs
might be affected.
Package contents
• USB 2.0 external Slim Combo Drive, IDE 2408SU
• Power adapter
• USB 2.0 cable
• Program disc (2)
• Installation CD
•This guide
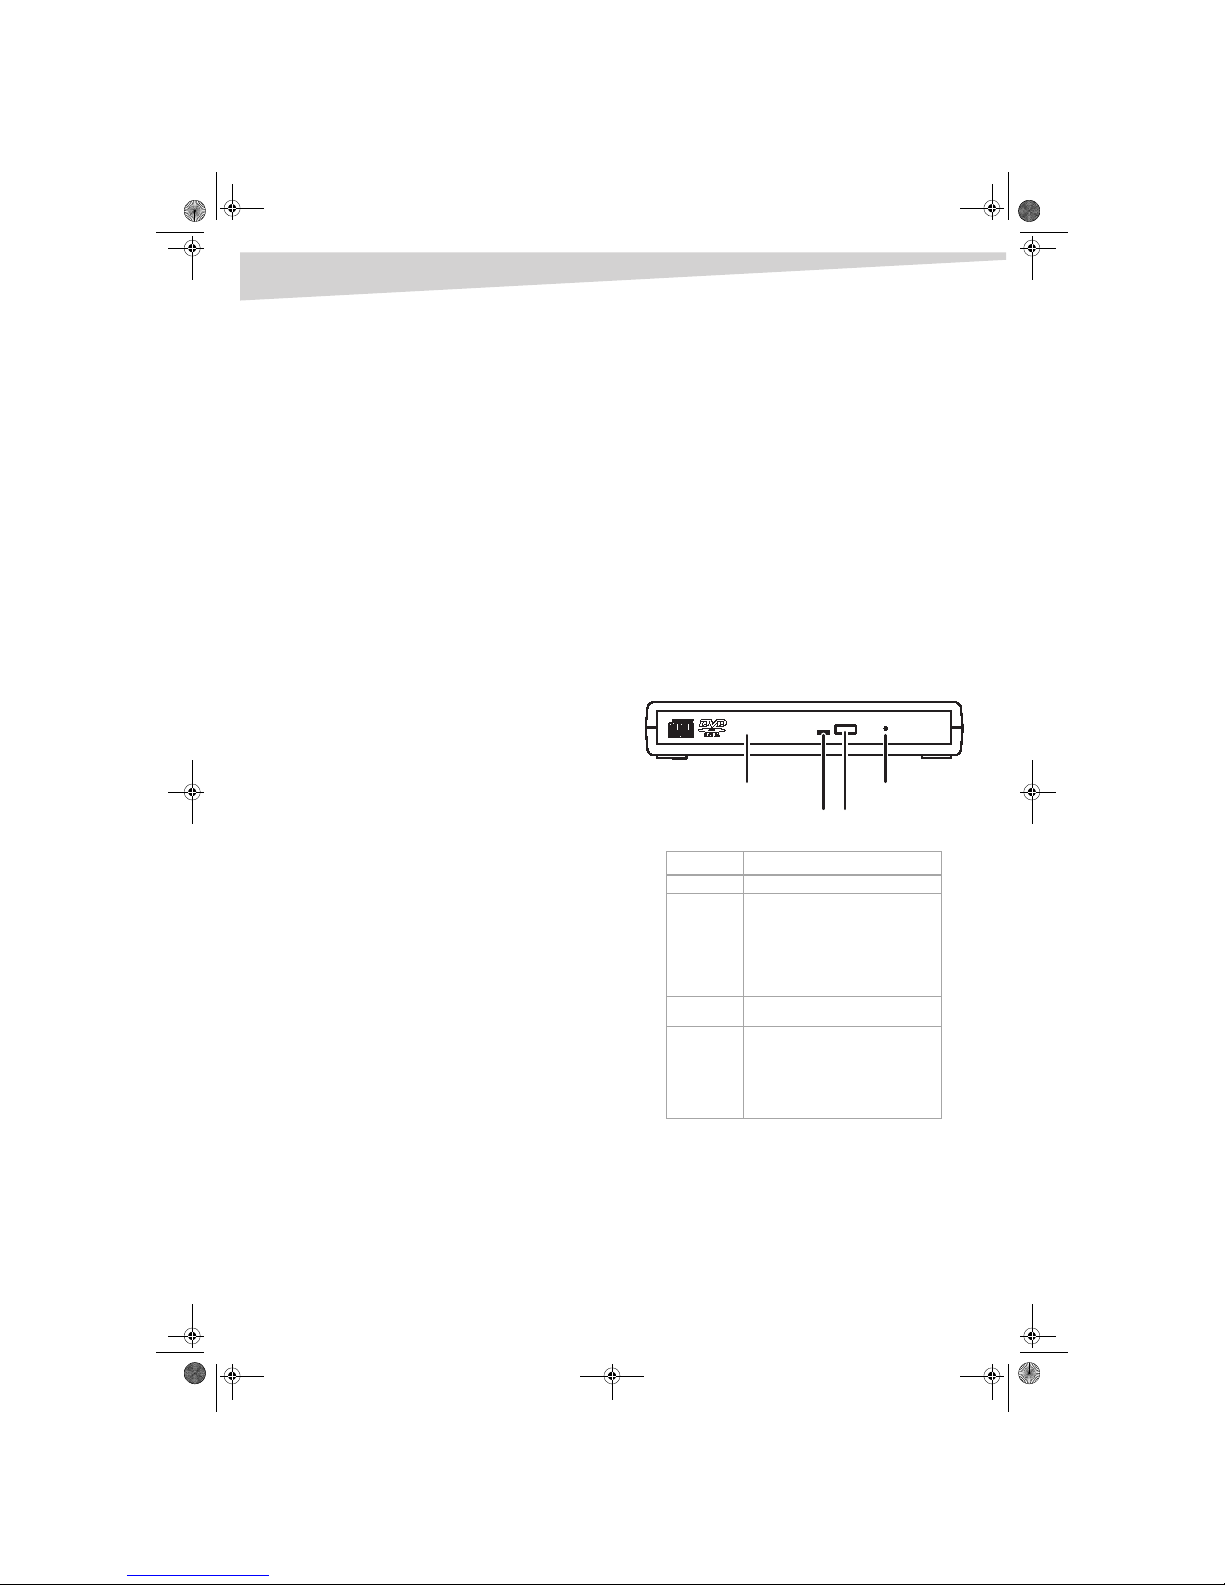
Front panel
Note: The front panel on your combo drive may vary from the one shown
here.
Feature Description
Disc tray Place the disc, label side up, in this tray.
LED indicator When the disc tray opens and closes,
this LED flashes gree n.
When a disc is in the comb o drive, this
LED lights soli d green.
When the combo drive is readin g or
writing to a disc, this LED flashes green.
When the combo drive is emp ty, this
LED is off.
Close/Eject
button
Press this button to open and close the
disc tray.
Manual eject
hole
If the Close/Eject button doesn’t open
the disc tray, you can insert a paper clip
or similar tool i nto this hole to
manually open the tray.
Caution: Make sure that your PC is
turned off before you inser t anything
into this hole.
Disc tray
LED indicator Close/Eject
button
Manual
eject hole
DX-CMBOSLM.fm Page 2 Wednesday, June 29, 2005 11:16 AM

Installing your combo drive
3
Back panel
Installing your combo drive
Connecting your combo drive
To install the CD-RW/DVD combo drive:
1 Connect the power adapter to the comb o drive.
2 Attach the USB 2.0 cabl e to the mini USB 2.0 port on the back of
the combo drive.
3 Attach the other end of the USB 2.0 cable to the USB port in your
PC. The combo drive is now ready to use.
Your PC must have a USB 2.0 port to reach th e drive’s top speed.
You may experience slower USB 2.0 drive performance if it is
connected to USB 1.1.
Note:
• Make sure that you use the USB 2.0 cable and the power adapter
that came with your comb o drive.
• Never plug in or unplug any other USB device while the combo
drive is transferring data. You may lose data.
• Don’t disconnect the combo drive or unplug the power to the drive
while a CD is inserted.
• Don’t connect more than two CD-RW drives to USB ports in a
single PC.
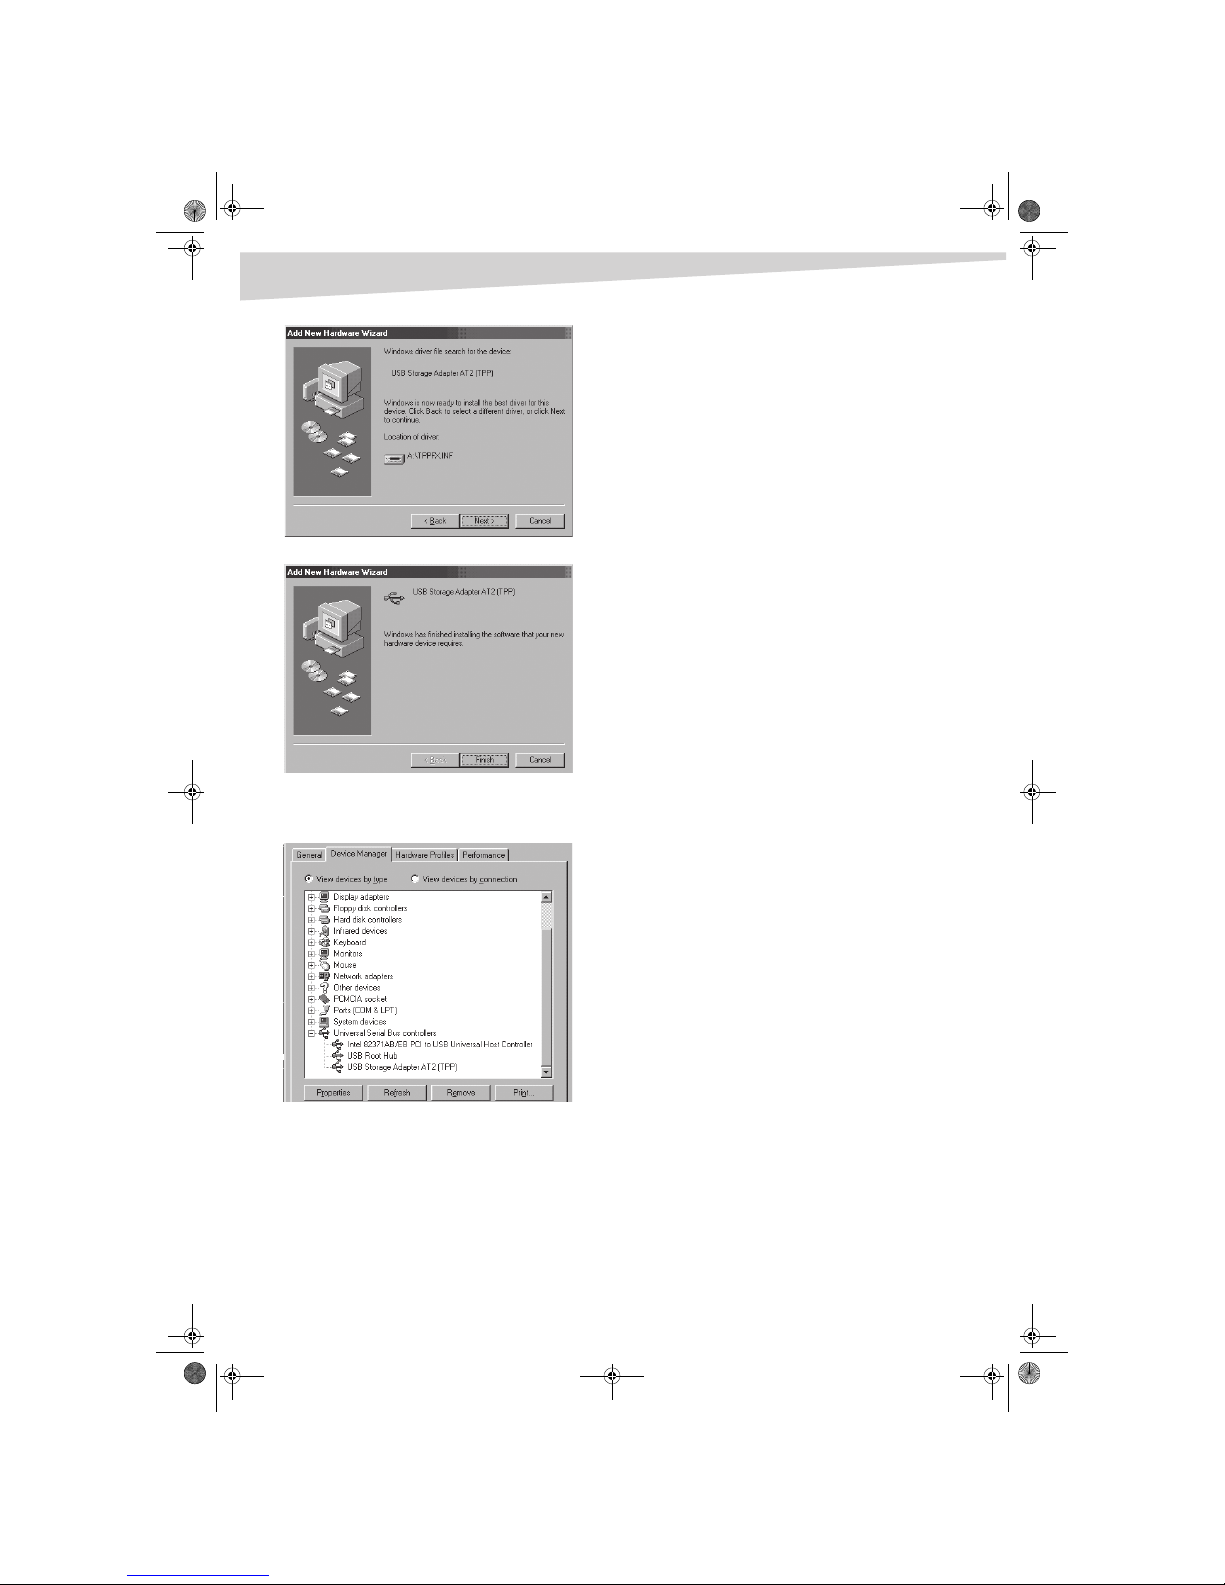
Installing the driver in Windows 98
Your combo drive is a PnP (Plug and Play) device. This means that
Windows XP, Windows 2000, and Windows ME will automatically detect
the drive and install the appropriate driver. If you are running
Windows 98SE, you need to install the driver from the CD that came with
your com bo drive.
To install the driver in Windows98SE:
1 After you connect your combo drive, turn on your PC.
Your PC automatically detects the drive, and the Add New
Hardware Wizard opens.
2 Click
Next.
3 Click
Search for the best driver for your device, then click Next.
Feature Description
DC jack Plug the supplied power cord into this
jack. Make sure that you use th e power
cord that came with your combo drive.
Mini USB 2.0
port
Plug one end of the USB 2.0 cable into
this port, then plug the other end of
the cable into a USB port on your PC.
DC jack Mini USB 2.0
port
DX-CMBOSLM.fm Page 3 Wednesday, June 29, 2005 11:16 AM
4
Using your combo drive
4 Insert the installation CD into the C D drive, then click Next.
5 Click
Next. Windows installs the driver.
6 Click
Finish. The installation is complete.
7 To make sure that the driver has been installed, click
Start, Control
Panel
, then click System. Click the Device M anager tab. USB
Storage Adapter AT2 TPP
appears in the list of devices.
Installing the CD and DVD programs in
Windows
To install the CD and DVD programs:
1 Insert the program CD in your combo drive. The installation
program runs automatically.
Or
Click
Start, then click Run. Type the drive letter for your combo
drive followed by \setup.exe in the Open box, then click OK.
2 Follow the on-screen instructions.
Using your combo drive
You can use your combo drive to read CDs and DVDs and to c reate (burn)
audio and data CDs.
Burning CDs
The CD burning program lets you the create (burn) audio and data CDs
right from your desktop. You can back up file s from your PC to a
recordable CD, and burn audio CDs that you can play in your home or car
CD player. CD-RWs let you write and erase data on the CD just like a
diskette. For more information, see the program’s online help.
Playing DVDs
The DVD playback program comes with leading video and audio
technologies to deliver the highest sound and visual effect possible on
your PC. The program has feature-rich navigation controls for an
interactive and tailored DVD movie viewing experience. You can enjoy
the wide range of educational and entertaining DVD titles with the ater
quality. For more information, see the program’s online help.
DVD region coding
REGION PLAYBACK CONTROL MANAGEMENT
All DVD video playback systems have “Region Playback Control” (RPC)
management which is required by the movie industry and defined by the
DVD Forum. You can only play DVDs with the same region code as your
combo drive.
The region code for a DVD is usually marked on the DVD package.
There are 6 regions worldwide:
• Region 1: Canada, US
• Region 2: Japan, Europe, South Africa, and Middle East (including
Egypt)
• Region 3: Southeast Asia and East Asia (including Hong Kong)
• Region 4: Australia, New Zealand, Pacific Islands, Central America,
Mexico, South America, and the Caribbean
• Region 5: Eastern Europe, Indian subcontinent, Africa, Nor th
Korea, and Mongolia
• Region 6: China
As required by the DVD Forum, your combo drive records how many
times you change the region code. The first region code selection is
determined by the first DVD you play. You can change th e region code
four more times for a total of five codes. The fifth code is locked in and
your combo drive can only play DVDs with the fifth region code.
DX-CMBOSLM.fm Page 4 Wednesday, June 29, 2005 11:16 AM
Troubleshooting
5
Troubleshooting
To help you get more familiar with your combo drive, the following FAQ
lists some common problems you might encounter.
T
HE DRIVE CAN’T BE RECOGNIZED.
• Make sure that the USB cable and power cord are plu gged in
tightly. If they are connected correctly, unplug the USB cable from
your PC and plug it in again.
• If you installed a PCI host card in your PC, make sure that the driver
for the PCI host ca rd has been installed correct ly.
• If your PC has a built-in USB 2.0 port, install the driver, check the
BIOS setting, or consult the system board manufacturer.
T
HE DRIVE CAN READ DATA AND AUDIO CDS, BUT IT CAN’T
READ DVDS.
Make sure that you’ve installed the DVD program.
T
HE DRIVE CAN’T READ FORMER SESSION(S) OF THE CD-R
THAT HAS BEEN WRITTEN TO TWO OR MORE TIMES.
Before writing data to a CD -R, make sure that you select
Import session
so the combo drive can read the former sess ions.
T
HE DRIVE MAKES NOISE WHILE READING.
If the disc is warped, dirty, or has a loose label, the combo drive may
make noise. Try another disc.
T
HE DRIVE DOESN’T HAVE POWER.
Make sure that the power co rd is connected securely.
T
HE TRAY CAN’T BE OPENED.
• Some CD and DVD programs requires you to use a program control
to open the tray. Use the program control to open the tray, then
close the program.
• The CD is inserted incorrectly a nd you need to manually open the
tray by inserting a paper clip or similar tool into the manual eject
hole.
T
HE DRIVE CAN’T READ SOME DISCS.
• If the disc is scratched, you may not be able to play it.
• If the disc is dirty, clean the disc.
T
HE DRIVE CAN’T WRITE.
Try th e fo ll owi ng:
• Use the burning program that c ame with this combo drive or
download the updated file from Internet.
• Most CD burning programs temporarily use space on your PC’s
hard drive to create the CD “image” before burning the image to
the CD. Make sure that you have enough room on the hard drive to
store the temporary image.
• Make sure that the disc is inser ted correctly.
• If you are using a packet writing program, you need to fully format
the blank CD before you can burn the CD image.
“B
UFFER UNDERRUN” ALWAYS OCCURS WHILE WRITING
DISCS.
Try th e fo ll owi ng:
• Close the screen saver and and any other open programs.
• Select good quality and high-speed supported blank CDs.
• Add more memory to your PC.
• Use a different CD burning program.
• Defragment your PC’s hard drive.
• Keep the source and destination discs clean. (no scratches,
fingerprints, or contamination.)
• Copy data as an image file to the hard drive to avoid buffer
underrun.
• Keep the hard drive clean. Do not install redundant dr ivers or
programs to reduce system loading or conflicts.
• Enable Buffer Underrun Protection mode if your program supports
it.
D
OES THIS DRIVE SUPPORT OVER-BURNING?
Yes, if you use a burning program that supports this function.
W
HAT BURNING PROGRAM SUPPORTS THIS COMB O DRIVE?
Programs such as:
• Adaptec EasyCD Creator
• Ahead Nero-Burning ROM
•NTICDMaker
D
OES THIS DRIVE SUPPORT THE CD-TEXT AND SAO
(SESSION AT ONCE) FUNCTION?
Yes, it does support the CD-Text and SAO function, and you can edit the
title or content on your music CD.
Specifications
PERFORMANCE
PHYSICAL SPECIFICATIONS
Tran sfer
rate
Read:
CD: 3600 kb/sec (up to 24×)
DVD: 10816 kb/sec (up to 8×)
Write :
CD-R: 3600 kb/sec (up to 24×)
CD-RW: 3600 kb/se c (up to 24×)
Data buffer 2MB
Writing
modes
TAO (Track at Once), DAO (Disc at
Once), SAO (Session at Once),
multi-session, i ncremental packet
writing
Writing
speed
CD-R: 8×/16×/24×
CD-RW: 4×/8×/10×/12×/24×
Interface USB 2.0
Disc
Loading
Tray (automatically eject/manual load)
Power Input: AC 100~240 V, 50/60 Hz
Output: 5 V 2.6A
Dimensions Height: 0.9 in. (23.0 mm)
Width: 5.6 in. (141.0 mm)
Depth: 6.1 in. (154.0 mm)
Weight: 12.4 oz (352 g)
DX-CMBOSLM.fm Page 5 Wednesday, June 29, 2005 11:16 AM
6
Legal Notices
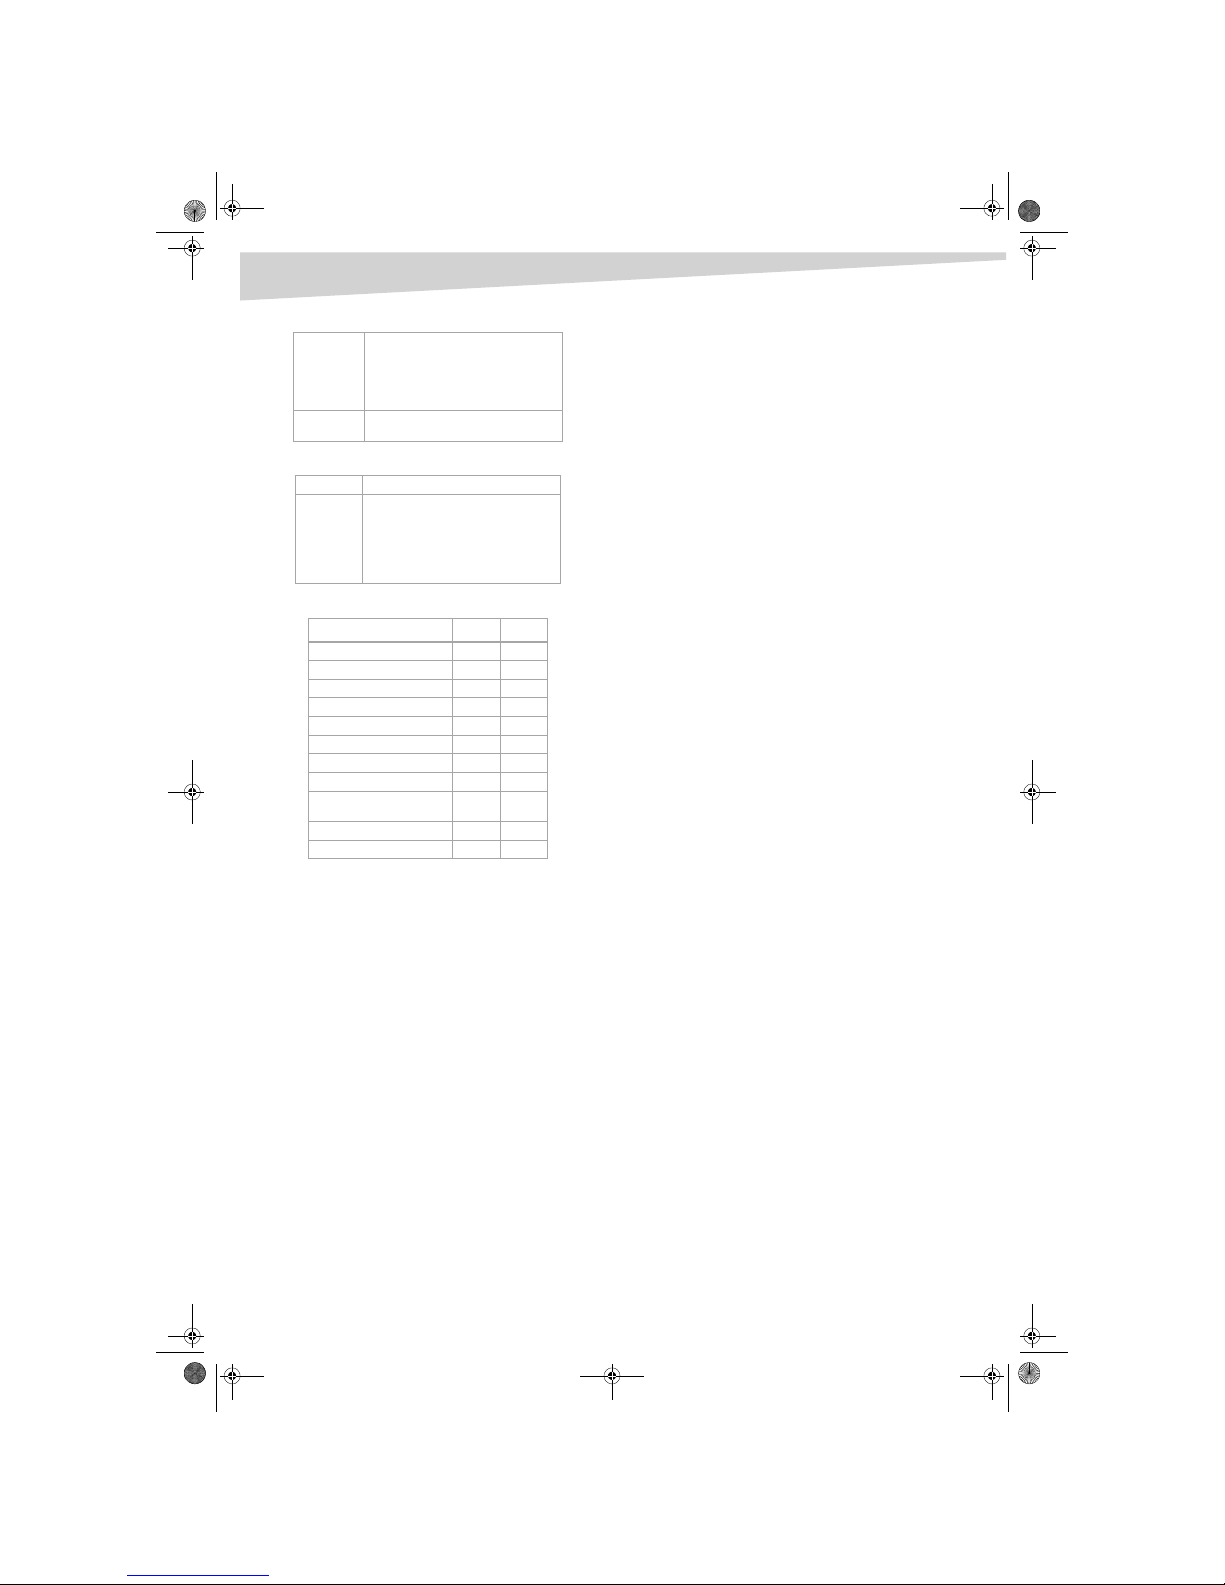
ENVIRONM ENT
DISC
DISC FORMAT S SUPPORTED
Legal Notices
CAUTION
Class 3B visible and invisible laser radition when open.
Avoid direct exposure to beam.
FCC compliance statement
This device complies with Part 15 of the FCC Rules. Operation is s ubject to
the following two conditions:
• This device may not cause harmful interference, and
• This device must accep t any interference received, including
interference that may cause undesired operation.
FCC warning statement
This equipment has been tested and found to comply with the limits for
a Class B digital device, pursuant to Part 15 of the FCC Rules. These limits
are designed to provide reasonable protection against harmful
interference in a residential installation. This equipment generates, uses
and can radiate radio frequency energy and, if not instal led and used in
accordance with the instructions, may cause harmful interference to
radio communications. However, there is no guarantee that inter ference
will not occur in a particular installation. If this equipment does cause
harmful interference to radio or television reception, which can be
determined by turning the equipment off and on, the user is en couraged
to correct the interference by one or more of the fol lowing measures:
• Reorient or relocate the receiving antenna
• Increase the separation between the equipment and the receiver
• Connect the equipment into an outlet on a ci rcuit different from
that to which the receiver is connected
• Consult the dealer or an experienced radio/TV technician for help.
C
AUTION
Any changes or modifications not expressly approved by the party
responsible for compliance could void the user's authority to operate the
equipment.
Copyright
© 2005 Dynex. DYNEX and the DYNEX logo a re trademarks of Best Buy
Enterprise Services, Inc. Other brands and product names are trademarks
or registered trademarks of their respective holders. Specifications and
features are subject to change without notice or obligation.
Support number: (800) 305-2204
URL: www.dynexproducts.com
Tem pe ra tu re Op er at in g:
41° F to 140° F
(5°C to 60°C)
Non-operating:
-4° F to 140° F
(-20° C to 60° C )
Humidity Operating: 10%~80% RH
Non-operating: 10%~ 90% RH
Disc Size 80 mm and 120 mm discs
Disc Data
Capacit y
DVD:
Single layer —4.7 GB
Double layer— 8.5 GB (one side)
CD:
74 min—650 MB (Mode 1)
80 min —700 MB (Mode 1)
Disc Type Write Read
CD-DA Yes Yes
CD-ROM Yes Yes
CD-ROM XA Yes Yes
CD-EXTRA Yes Yes
Video CD Yes Yes
Photo CD Yes Yes
CD-I Yes Yes
CD-TEXT Yes Yes
DVD-ROM (DVD-5, DVD-9,
DVD-10, DVD-18)
No Yes
DVD+R, DVD+RW No Yes
DVD-R, DVD-RW No Yes
DX-CMBOSLM.fm Page 6 Wednesday, June 29, 2005 11:16 AM
 Loading...