

Page 1

How to use the manual
1 - How to use the manual
This manual has been prepared for Ducati Authorized Service Centers and workshop personnel
involved in the maintenance and repair of Ducati motorcycles. It gives fundamental information on how
to work in perfect harmony with the concepts of “good technique” and “safety on work sites” for
servicing or replacing of original spare parts both for chassis and engine concerning this motorcycle.
All operations described in this manual must be carried out by senior skilled technicians, who are
requested to strictly follow the Manufacturer’s instructions.
Some information has been intentionally omitted, as, at our advice, a specialized technician must have
this technical background. Additional information on how to install the different components is provided
in the spare parts catalogue.
Caution
This manual also describes pre-delivery checks.
Ducati Motor Holding S.p.A. declines all responsibility for any technical errors or omissions in this
manual and reserves the right to make changes without prior notice.
The information given in this manual was correct at the time of going to print.
Caution
Reproduction and disclosure of all or part of the contents of this manual are strictly forbidden without
prior written authorization of Ducati Motor Holding S.p.A. All rights on this manual are reserved for
Ducati Motor Holding S.p.A. Applications for authorization must be submitted in writing and must
specify the reasons for reproduction or disclosure.
Ducati Motor Holding S.p.A.
Manual layout
This manual is divided in sections (1), each identified by a letter.
Each section (1) includes several chapters (2), which are numbered consecutively.
file:///C|/Documents%20and%20Settings/F4i/My%...0manual/wsm/usa/Mon695_MY07_A_1_3_00.3.1.html (1 of 2) [10/7/2008 8:41:32 PM]
Page 2

How to use the manual
Each chapter (2) may include several paragraphs (3).
The repair procedures described in this manual include the necessary disassembly and reassembly
instructions,
i.e. the full procedure is detailed starting with the motorcycle fully assembled until bringing it back to
the original condition.
Caution
Some of the sections of this manual are not present, being the relevant parts not installed on the
vehicle.
Caution
The manual structure has been designed to be applied to all the different models manufactured by
DUCATI MOTOR HOLDING.
To make reading easier, the sub-sections table of contents is kept unchanged for all models.
file:///C|/Documents%20and%20Settings/F4i/My%...0manual/wsm/usa/Mon695_MY07_A_1_3_00.3.1.html (2 of 2) [10/7/2008 8:41:32 PM]
Page 3

Symbols - abbreviations - references
2 - Symbols - abbreviations - references
For easy and rational reading, this manual uses graphic symbols for highlighting situations in which maximum
care is required, practical advice or simple information. Please pay maximum attention to these symbols as
they are meant to avoid repeating technical concepts or safety rules throughout the text. These symbols must
be considered as “hints” to important information. Please refer to this page whenever in doubt as to their
meaning.
Left-hand and right-hand in the descriptions refer to motorcycle direction of travel.
Warning
Failure to follow the instructions given in text marked with this symbol can lead to serious personal injury or
death.
Caution
Failure to follow the instructions in text marked with this symbol can lead to serious damage to the motorcycle
and its components.
Note
This symbol indicates additional useful information for the current operation.
Text references
(X)
The bold reference indicates a part that is not illustrated in the figures next to the text, but can be found in the
exploded view at the beginning of each section.
(X)
The non-bold reference indicates a part that is illustrated in the figures next to the text.
Product specifications
Symbols inside the diagram show the type of threadlocker, sealant or lubricant to be used at the points
indicated. The table below shows the symbols together with the product specifications.
Symbol Specifications Recommended product
Engine oil (for specifications, see sect. C 2,
Fuels and lubricants).
SHELL
Advance Ultra 4
DOT 4 special hydraulic brake fluid. SHELL
Advance Brake DOT 4
SAE 80-90 gear oil or special products for
chains with O-rings.
SHELL
Advance Chain or Advance Teflon Chain
file:///C|/Documents%20and%20Settings/F4i/My%...0manual/wsm/usa/Mon695_MY07_A_2_3_00.4.1.html (1 of 3) [10/7/2008 8:41:38 PM]
Page 4

Symbols - abbreviations - references
Anti-freeze (nitride, amine and phosphate
free) 30-40% water solution.
SHELL
Advance coolant or Glycoshell
GREASE A Multipurpose, medium fiber, lithium
grease.
SHELL Alvania R3
GREASE B Molybdenum disulphide grease, high
mechanical stress and high temperature
resistant.
SHELL
Retinax HDX2
GREASE C Bearing/joint grease for parts subject to
prolonged mechanical stress. Temperature
range: -10 to 110° C.
SHELL
Retinax LX2
GREASE D Protective grease. Corrosion protectant,
waterproof.
SHELL
Retinax HD2
GREASE E PANKL grease PLB 05.
GREASE F OPTIMOL - PASTE WHITE T. Grease
LOCK 1 Low-strength threadlocker. Loctite 222
LOCK 2 Medium-strength threadlocker, compatible
with oil.
Loctite 243
LOCK 3 High-strength sealant for threaded parts. Loctite 270
LOCK 4 Flange sealant. Resistant to high
mechanical stress, solvents and high
temperatures (up to 200°C). For pressures
up to 350 atm. Fills gaps up to 0.4 mm.
Loctite 510
LOCK 5 Permanent adhesive for smooth or
threaded cylindrical fasteners on
mechanical parts. High resistance to
mechanical stress and solvents.
Temperature range: -55 to 175°C.
Loctite 128455
LOCK 6 Pipe sealant for pipes and medium to large
fasteners. For water and gases (except
oxygen). Maximum filling capacity:
diameter gaps up to 0.40 mm.
Loctite 577
file:///C|/Documents%20and%20Settings/F4i/My%...0manual/wsm/usa/Mon695_MY07_A_2_3_00.4.1.html (2 of 3) [10/7/2008 8:41:38 PM]
Page 5

Symbols - abbreviations - references
LOCK 7 Speed bonder for rubber and plastics.
Elastomer loaded ethylic base.
Loctite 480
LOCK 8 High-strength retaining compound for
threaded parts, bearings, bushes, splines
and keys. Temperature range: -55 to 150 °
C.
Loctite 601
LOCK 9 Medium-strength threadlocker. Loctite 401
LOCK 10 Product for metal parts to seal and lock
freely sliding parallel or threaded
couplings. Resistant to high mechanical
stress and high temperature, solvent-proof
and chemical-proof.
Loctite 128443
LOCK 11 Instantaneous jelly sealant featuring
tensile / cut strength.
Loctite 454 gel
DUCATI liquid gasket 942470014
Exhaust pipe paste. Self-curing sealant,
hardens when heated. For temperatures
over 1,000°C.
Fire gum holts
Spray used in treating electrical systems
to eliminate moisture and condensation.
Provides high resistance to corrosion.
Waterproof.
SHELL
Advance Contact Cleaner
Dry lubricant that polymerizes in the air Molycote D321R
file:///C|/Documents%20and%20Settings/F4i/My%...0manual/wsm/usa/Mon695_MY07_A_2_3_00.4.1.html (3 of 3) [10/7/2008 8:41:38 PM]
Page 6

Dangerous products – warnings
3 - Dangerous products – warnings
General safety rules
Carbon oxide
When a maintenance operation must be performed with the engine running, position the motorcycle
out of doors or in a well-ventilated area. Never operate the engine in an enclosed place.
Warning
Exhaust emissions contain carbon oxide, which is a poisonous gas and may lead to loss of conscience
or even death.
Operate the engine out of doors or, if working indoors, use an exhaust emission extraction plant.
Fuel
Always make sure the area is well ventilated. Do not smoke near the motorcycle or the area where fuel
is stored and keep any sources of ignition, such as flames or sparks, well away from motorcycle and
fuel storage area.
Warning
The fuel used to operate engines is highly flammable and becomes explosive under particular
conditions. Keep away from children.
Hot component parts
Warning
The engine and exhaust component parts become hot when the engine is running and will stay hot for
some time after the engine has been stopped. Wear heat gloves before handling these components or
allow for the engine and exhaust system to cool down before proceeding.
Warning
The exhaust system will stay hot for some time after the engine has been stopped. Do not touch these
components with your body and do not park the vehicle near flammable materials (including wood,
leaves...).
Used engine oil
Warning
Prolonged or repeated contact with engine oil may cause skin cancer. If exposed to engine oil on a
daily basis, make it a rule to wash your hands thoroughly with soap right after handling engine oil.
Keep away from children.
Brake lining debris
file:///C|/Documents%20and%20Settings/F4i/My%...0manual/wsm/usa/Mon695_MY07_A_3_3_00.5.1.html (1 of 2) [10/7/2008 8:41:41 PM]
Page 7

Dangerous products – warnings
Never attempt to clean the brake assembly using compressed air or a dry brush.
Brake fluid
Warning
Avoid spilling brake fluid onto plastic, rubber or paint-finished parts or they will damage. Protect these
parts with a clean shop cloth before proceeding to service the motorcycle. Keep away from children.
Battery
Warning
The battery gives off explosive gases. Keep away from sources of ignition, such as sparks and flames.
Do not smoke near the battery. Make sure the area is well ventilated when charging a battery.
General maintenance indications
A word of advice
Ducati would like to suggest that you follow the instructions below so to ensure an efficient, fault-free
motorcycle operation.
-
When diagnosing breakdowns, primary consideration should always be given to what the customer
reports. Your questions to the customer should aim at clarifying the problem.
-
Diagnose the problem systematically and accurately before proceeding further. This manual provides
the theoretical background for troubleshooting that should be combined with personal experience and
attendance at Ducati training courses.
-
Repair work should be planned carefully in advance to prevent any unnecessary downtime, for
example picking-up of required spare parts or arrangement of required tools, etc.
-
Time and money can be saved by limiting the number of operations needed to reach the part to be
repaired. The disassembly procedure in this manual describes the most efficient way to reach a part
to be repaired.
General advice on repair work
-
Always use top quality tools. Lift the motorcycle only with devices in full compliance with relevant
European directives.
-
During repair work always keep the tools within reach, possibly in the right order. Never put them on
the vehicle or in hardly reachable places or somehow hidden.
- Work place must be neat and clean.
- During repair work always change gaskets, seals and split pins.
-
When loosening or tightening nuts and bolts, always start with the largest and always start from the
center. Tighten nuts and bolts working crossways; tighten to the specified torque.
- At disassembly, mark any parts and positions which might easily be confused at reassembly.
- Use Ducati original spare parts only. Use the recommended lubricants only.
- Use special service tools where specified.
-
Ducati Technical Bulletins often contain updated versions of the service procedures described in this
manual. Check the latest Bulletins for details.
file:///C|/Documents%20and%20Settings/F4i/My%...0manual/wsm/usa/Mon695_MY07_A_3_3_00.5.1.html (2 of 2) [10/7/2008 8:41:41 PM]
Page 8

Description
0Description
1 - How to use the manual 3
Manual layout 4
2 - Symbols - abbreviations - references 5
Product specifications 6
3 - Dangerous products – warnings 8
General safety rules 8
General maintenance indications 9
file:///C|/Documents%20and%20Settings/F4i/My%20D...i%20manual/wsm/usa/Mon695_MY07_A_IND_00.2.1.html [10/7/2008 8:41:43 PM]
Page 9

Identification data
1 - Identification data
Identification data for Monster 695 i.e.
Each Ducati motorcycle has two identification numbers - frame number and engine number, and an EC
nameplate (A) (not used in the USA version).
file:///C|/Documents%20and%20Settings/F4i/My%...0manual/wsm/usa/Mon695_MY07_B_1_1_00.7.1.html (1 of 4) [10/7/2008 8:41:45 PM]
Page 10

Identification data
Note
The frame and engine numbers identify the motorcycle model; please state these numbers when
ordering spare parts.
Data punched on frame
European version
1 Manufacturer’s name: Ducati Motor Holding
2 Type – same on all Monsters
3 Variant
4 Version
5 Year of manufacture (7=2007)
6 Plant of manufacture
7 Progressive serial No.
file:///C|/Documents%20and%20Settings/F4i/My%...0manual/wsm/usa/Mon695_MY07_B_1_1_00.7.1.html (2 of 4) [10/7/2008 8:41:45 PM]
Page 11

Identification data
Data punched on frame
USA version
1 Ducati
2 Type of motorcycle
3 Variant – Code number or Check digit (X)
4 Model year (7=2007)
5 Plant of manufacture
6 Progressive serial No.
Data punched on engine
European version
1 Manufacturer’s name: Ducati Motor Holding
2 Engine type
3 Progressive production No.
file:///C|/Documents%20and%20Settings/F4i/My%...0manual/wsm/usa/Mon695_MY07_B_1_1_00.7.1.html (3 of 4) [10/7/2008 8:41:45 PM]
Page 12

Identification data
Data punched on engine
USA version
1 Engine type
2 Model year
3 Progressive production No.
file:///C|/Documents%20and%20Settings/F4i/My%...0manual/wsm/usa/Mon695_MY07_B_1_1_00.7.1.html (4 of 4) [10/7/2008 8:41:45 PM]
Page 13

Model-specific information
0Model-specific information
1 - Identification data 3
Identification data for Monster 695 i.e. 3
file:///C|/Documents%20and%20Settings/F4i/My%20D...i%20manual/wsm/usa/Mon695_MY07_B_IND_00.6.1.html [10/7/2008 8:41:46 PM]
Page 14

Technical specifications
1.1 - Technical specifications
Description
Reference Technical specifications
Vehicle dimensions
Total length 2100 mm
Total width 794 mm
Total height 1058 mm
Wheelbase 1440 mm
Handlebar height - from grip to the
ground
980 mm.
Seat height 770 mm
Front footpeg height 360 mm
Rear footpeg height 490 mm
Min. ground clearance 120 mm
Dry weight in running order with no
fuel
168 kg
Weight in running order Not over 390 Kg
Frame
Type Chromium-molybdenum steel tube trellis
frame
Steering head angle 24°
Steering angle 27°
Trail 96 mm
Front rim Light alloy, three spokes
Front rim size MT 3.50x17"
Front tyre size 120/60 - ZR 17
Rear rim Light alloy, three spokes with cush drive
damper pads
Rear rim size MT 4.50x17"
Rear tyre size 160/60 - ZR 17
Type of tyre Radial tubeless tyre
Front brake Hydraulic with 2 calipers
Rear brake Hydraulic with 1 caliper
Engine
Type Twin-cylinder 4-stroke Otto-cycle engine
Bore 88 mm
Stroke 57.2 mm
Displacement 695 cu. cm
Compression ratio 10.5 ± 0.5:1
Max. power at crankshaft (95/1/EC)
derated
52 kW (70 HP) at 8500 rpm
22 kW at 8250 rpm
Max. power at crankshaft, measured
on test bench
53.7 kW (73 HP) at 8500 rpm
Max. crankshaft torque
derated
61 Nm (6.2 kgm) at 6750 rpm
46 kW at 3000 rpm
Max. torque at crankshaft, measured
on test bench
61 Kw (6.2 Kgm) at
6750 rpm
Max. engine speed 9200 rpm
file:///C|/Documents%20and%20Settings/F4i/My%...0manual/wsm/usa/Mon695_MY07_C_1A4_00.9.1.html (1 of 6) [10/7/2008 8:41:57 PM]
Page 15
Technical specifications
Timing system Toothed belt, overhead camshaft, 2 valves
per cylinder, 4 rocker arms
Lubrication system Forced lubrication by pump
Oil pump Gear pump with by-pass valves
Cooling system Air cooling
Air filter One filtering element in the airbox
Crankshaft type Enbloc
Cylinders "L" at 90°
Colors
Description Code
Ducati anniversary red, red frame
and black wheel rims
F_473.101 (PPG)
Shining black, black frame and
wheel rims
248.514 (PPG)
Matte black, black frame and
wheel rims
291.501 (PPG)
Transmission assembly
Reference Technical specifications
Clutch Multi-plate wet clutch
Clutch control Hydraulic
Gearbox Six gears
Primary drive 33/61
Transmission ratio 1.85
Final drive 15/48
Gearbox type Constant mesh spur gears, controlled by gear change
lever on vehicle left side
Gear ratios
1
st
2
nd
3
rd
4
th
5
th
6
th
13/32
18/30
21/28
23/26
22/22
26/24
Timing/valves
Reference Standard value Max. allowed value
Timing diagram
With 1 mm valve clearance
Intake Opening 19° B.T.D.C.
Closing 60° A.B.D.C.
Exhaust Opening 56° B.B.D.C.
Closing 24° A.T.D.C.
Intake valve diameter 43 mm
Exhaust valve diameter 38 mm
Valve lift
With 0 mm valve clearance Intake 10.80 mm
file:///C|/Documents%20and%20Settings/F4i/My%...0manual/wsm/usa/Mon695_MY07_C_1A4_00.9.1.html (2 of 6) [10/7/2008 8:41:57 PM]
Page 16
Technical specifications
Exhaust 10.30 mm
Opening rocker arm - intake 0.10-0.15 mm 0.05-0.15 mm
Opening rocker arm -
exhaust
0.10-0.15 mm 0.05-0.15 mm
Closing rocker arm - intake 0-0.05 mm 0-0.20 mm
Closing rocker arm -
exhaust
0-0.05 mm 0-0.20 mm
Adjusting timing
belt tension
DDS
Minimum value
145 Hz (horizontal)
160 Hz (vertical)
70 Hz
145 Hz (horizontal)
160 Hz (vertical)
70 Hz
Idle speed adjustment
1200 ± 50 rpm
Cylinder / piston
Reference Standard value Service limit
Cylinder
Max. oval 0.03 mm.
Max. taper with smaller
diameter up
0.03 mm.
Diameter
class A
class B
class C
88.000 mm
88.010 mm
88.020 mm
0- 0.010 mm
0-0.010 mm
0-0.010 mm
Piston
Diameter
class A
class B
class C
87.970 mm
87.980 mm
87.990 mm
± 0.005 mm
± 0.005 mm
± 0.005 mm
Gudgeon pin-piston clearance
0.004 - 0.012 mm 0.025 mm
Piston-cylinder coupling clearance
0.025-0.045 mm 0.12 mm
Gudgeon pin-connecting rod
clearance
0.006-0.028 mm 0.005 mm
Con-rod bearings-crankpin coupling
diameter clearance
0.015-0.058 mm
Cylinder compression
Standard
Minimum
Max. allowed difference
9 - 11 bar
8 bar (min.)
2 bar (max.)
Gearbox
Reference Standard value Service limit
Gearbox shafts
Axial play 0.05 – 0.20 mm
Gearbox drum
Axial play 0.10 - 0.40 mm
Gear selector fork
Fork sliding shoe thickness 3.90-4.00 mm
Fork – gear clearance 0.070- 0.285 mm 0.4 mm
Cooling system
Reference Technical specifications
Type
Air: heat is discharged through the
large fins of both cylinder-head
assemblies
file:///C|/Documents%20and%20Settings/F4i/My%...0manual/wsm/usa/Mon695_MY07_C_1A4_00.9.1.html (3 of 6) [10/7/2008 8:41:57 PM]
Page 17

Technical specifications
Front wheel
Reference Standard value Service limit
Tread min. thickness
In the most worn position 2 mm
Tyre pressure
Cold 2.1 bar - 2.3 bar
Wheel shaft eccentricity
On 100 mm 0.2 mm
Wheel rim eccentricity
Radial 0.8 mm 2 mm
Axial 0.5 mm 2 mm
Front suspension
Reference Technical specifications
Type
Upside-down hydraulic fork
ø 43
non adjustable
Travel along leg axis 130 mm
Clevis pin
Non adjustable
Oil quantity per leg 0.400 cu dm
Rear wheel
Reference Standard value Service limit
Tread min. thickness
In the most worn position 2 mm
Tyre pressure
Cold 2.2 bar - 2.4 bar
Swingarm shaft eccentricity
On 100 mm 0.2 mm
Wheel rim eccentricity
Radial 0.8 mm 2 mm
Axial 0.5 mm 2 mm
Chain
Make
Type
D.I.D.
520 V L 4
Dimensions 5/8" x 1/4"
No. of links 106
Rear suspension
Reference Technical specifications
Type
Progressive monoshock featuring
adjustable rebound and spring
preload
Shock absorber
Stroke 65 mm
Standard damping force setting.
Turn out the adjusters from
fully closed position (clockwise)
8 clicks
Spring standard length 157 mm
Wheel travel 148 mm
Hydraulic brakes
Reference Standard value Service limit
FRONT
Brake disc
Type Drilled twin disc
file:///C|/Documents%20and%20Settings/F4i/My%...0manual/wsm/usa/Mon695_MY07_C_1A4_00.9.1.html (4 of 6) [10/7/2008 8:41:57 PM]
Page 18

Technical specifications
Thickness 4 ± 0.1 mm 3.6 mm (min.)
Flange material Steel
Braking ring material Steel
Diameter 300 mm
Braking surface
44 cm
2
per disc
Brake caliper
Make Brembo
Type PF 2x28 - 2 pistons
Caliper cylinder diameter 30 mm - 34 mm
Pads friction material FERIT I/D 450-FF
Brake master cylinder
Type PS 15
Master cylinder diameter 15 mm
REAR
Brake disc
Type Drilled disc
Thickness 4 ± 0.1 mm 3.6 mm (min.)
Material Steel
Diameter 245 mm
Braking surface 25 sq cm
Brake caliper
Make Brembo
Type P 32 F - 2 pistons
Caliper cylinder diameter 32 mm
Pads friction material FERIT I/D 450 FF
Brake master cylinder
Type PS11
Master cylinder diameter 11 mm
Charging system / generator
Reference Technical specifications
Battery
Voltage 12V
Charge 16 Ah
Type Sealed, maintenance free
Generator
Capacity 12V - 520 W
Ignition system
Reference Technical specifications
Ignition
Type Electronic type with inductive
discharge system
Starting
Type Electric starter motor 12V - 520 W
Spark plugs
Make and type Champion RA 4 HC - NGK DCPR8E
Electrode gap 0.6 ÷ 0.7 mm
Fuel system
Make Type
Unleaded fuel 95 - 98 RON
THROTTLE BODY Ø 45 mm
Injectors per cylinder 1
file:///C|/Documents%20and%20Settings/F4i/My%...0manual/wsm/usa/Mon695_MY07_C_1A4_00.9.1.html (5 of 6) [10/7/2008 8:41:57 PM]
Page 19

Technical specifications
Firing points per injector 1
Injection system
Make Type
Control unit
Marelli CPU 5AM2
Lights / instrument panel
Reference Technical specifications
Bulbs
Front headlamp (low beam / high
beam)
12V - 55/60W
Number plate light 12V - 5W
Parking / stop light 12V - 5/21W
Turn indicator light 12V - 10W
Instrument panel light 12V - 2W
Turn indicator warning light 12V - 1.2W
High beam warning light 12V - 1.2W
Neutral light 12V - 1.2W
Oil pressure warning light 12V - 1.2W
Injection system warning light 12V - 1.2W
Fuses
Regulator 30 A
Instrument panel 5A
Injection 20A
Key sense 10 A
Ecu 5A
Loads 15 A
High and low beam, parking lights 15 A
Spare 20A
Spare 5A
file:///C|/Documents%20and%20Settings/F4i/My%...0manual/wsm/usa/Mon695_MY07_C_1A4_00.9.1.html (6 of 6) [10/7/2008 8:41:57 PM]
Page 20

Dimensions
1.2 - Dimensions
file:///C|/Documents%20and%20Settings/F4i/My%...manual/wsm/usa/Mon695_MY07_C_1B4_00.10.1.html (1 of 2) [10/7/2008 8:41:59 PM]
Page 21

Dimensions
file:///C|/Documents%20and%20Settings/F4i/My%...manual/wsm/usa/Mon695_MY07_C_1B4_00.10.1.html (2 of 2) [10/7/2008 8:41:59 PM]
Page 22

Fuels and lubricants
2 - Fuels and lubricants
Fuels Type cu. dm (liters)
Fuel tank, including a 3 cu. dm (litres)
reserve
Lead-free fuel with at least 95 - 98 RON
at origin
14
Engine sump and oil filter SHELL Advance Ultra 4 3.1
Clutch and front/rear brake circuits SHELL Advance Brake Dot 4
Protection for electrical contacts SHELL Advance Contact Cleaner
Front fork SHELL Advance Fork 7.5 or DONAX TA 0.400 (each leg)
Caution
Do not use fuel or lubricant additives.
Engine oil
A good engine oil has special properties. Use only a highly detergent engine oil with certified SE, SF or SG, or even
higher, service ratings.
Oil viscosity
SAE 10W-40
The other viscosity grades specified in the table can be used where the average ambient temperatures are within
the limits shown.
file:///C|/Documents%20and%20Settings/F4i/My%20D...%20manual/wsm/usa/Mon695_MY07_C_2_4_00.11.1.html [10/7/2008 8:42:01 PM]
Page 23

Torque settings
3 - Torque settings
Frame torque settings
Part Thread (mm) Nm tolerance ±10% Note
Chain, front sprocket
Front sprocket retaining screw M 5x0.8
6
*
LOCK 1
Front sprocket guard screw M 6x1 6
Light units
Headlight retaining screw M 8x1.25 12
Tail light nuts M 6x1 6
Screw securing headlight holder to
subframe on silent block
4
Number plate light nuts M 5x0.8 2.5
Cat's eye mounting nut M 4x0.7 2
Cable guide to headlight bracket screw M 6x1 9
Turn indicators retaining screw M 6x1 6
Headlight holder retaining screw M 6x1 10
Headlight reflector retaining screw M 4x0.7 2.3
Warning lights and indicators
Instrument panel silentblock fasteners 4
Screw retaining instrument panel to
silentblock
M 5x0.8 5
Temperature/air pressure sensor retaining screw
M 5x0.8 3
Front fork
Steering head retaining screw, center
position
M 8x1.25 23 * GREASE B
Steering head retaining screws M 8x1.25 24 * GREASE B
Bottom yoke screw M 8x1.25 20 * GREASE B -
sequence 1-2-1
Fork bottom end bolt M 8x1.25 20 * GREASE B -
sequence 1-2-1
Steering lock nut M 8x1.25 18 LOCK 2 (apply Loctite
to nut thread only)
Steering bearings ring nut M 35x1 30 * GREASE B
Front fork splashguard retaining screw M 5x0.8 5.5 LOCK 2
Electric system
Coil-to-frame retaining screw M 5x0.8 1.5
Coil-to-airbox nut M 5x0.8 3
LH and RH switch screw M 5x0.8 2.1
Key cover blind nut M 6x1 7
Key-operated switch bolt M 6x1 ** ** Shear bolt head
LOCK 2
Battery cable screw M 6x1 6
Starter motor nut M 6x1 5
Nut securing cable to contactor M 6x1 4
Speed sensor retaining screw M 6x1 10
file:///C|/Documents%20and%20Settings/F4i/My%...manual/wsm/usa/Mon695_MY07_C_3_4_00.12.1.html (1 of 7) [10/7/2008 8:42:18 PM]
Page 24

Torque settings
Screw retaining voltage regulator to oil
breather tank and frame
M 6x1 6
Screw retaining regulator to oil breather
tank
M 6x1 6
Screw retaining battery mount to
silentblocks
M 6x1 6
Nut retaining battery mount to cylinder
head
M 8x1.25 13
Control unit retaining screw M 6x1 10
Screw retaining ground cable to engine M 8x1.25 12
TPRT sensor retaining screws M 4x0.7 2
Horn mount screw M 8x1.25 15 LOCK 2
Warning horn retaining screw M 8x1.25 25 LOCK 2
Immobilizer antenna Assemble in production
line, apply Lock 11
between Antenna and
Switch cover
Nut securing temperature sensor support
to subframe
5
Relay mount retaining screw M 5x0.8 1
Front brake
Front brake caliper retaining screw M 10x1.25 43 * GREASE B
Front brake master cylinder retaining screw M 6x1 10 sequence 1 (UP) -2-1
Front/rear brake bleed coupling M 10x1 23
Brake lever pin M 8x1.25 24 LOCK 2
Rear brake
Rear brake caliper retaining screw M 8x1.25 24 * GREASE B
Brake bleeding fitting M 10x1 23
Rear brake master cylinder retaining screw M 6x1 10
Screw retaining rear brake hose clip to
swingarm
M 5x0.8 6
Rear brake fluid reservoir retaining screw M 6x1 2
Rear swingarm
Chain adjuster safety screw M 3x0.5 1.8
Chain adjuster screw M 8x1.25 8 GREASE B
Swingarm shaft screw M 10x1.5 43 * GREASE C
Aluminium swingarm shaft retaining screw M 8x1.25
18
*
GREASE C
Chain sliding shoe retaining screw M 6x1 6 LOCK 1
Rear brake caliper plate retaining pin M 8x1.25
25
*
LOCK 1
Handlebar
Handlebar clamp screw M 8x1.25 20 * GREASE B -
sequence 1-2-1
Clutch master cylinder retaining screw M 6x1 10 sequence 1 (UP) -2-1
Clutch hose fitting M 10x1 23
Clutch bleed nipple M 6x1 4
Clutch transmission unit screw M 6x1 10
Throttle control securing screw M 6x1 10
Throttle control cover securing screw M 4x0.7 1.8
file:///C|/Documents%20and%20Settings/F4i/My%...manual/wsm/usa/Mon695_MY07_C_3_4_00.12.1.html (2 of 7) [10/7/2008 8:42:18 PM]
Page 25

Torque settings
Counterweight retaining screw M 6x1 9
Rear shock absorber
Rear shock absorber upper screw M 10x1.25 42 * GREASE B
Rear shock absorber lower screw M 10x1.25 42 * GREASE B
Suspension linkage upper screw M 10x1.25 42 * GREASE B
Suspension rocker arm to frame fixing
screw
M 12x1.5 75 * GREASE B
Ball joints to actuating rod nut M 12x1.5 36
Front and rear mudguard
Front mudguard retaining screw M 6x1 3 LOCK 2
Rear mudguard retaining screw M 6x1 3 LOCK 2
Number plate holder protection screw M 6x1 5.5
Splashguard to underseat retaining screw M 6x1 1.8
Number plate holder to splashguard nut M 6x1 1.9
Footpegs and Levers
Lever and gearbox pin M 8x1.25 24 LOCK 2
Gear change lever fixing screw M 6x1 10 LOCK 1
Actuating rod ball joints screw on gear
change lever
M 6x1 10
Footpeg holders to engine retaining screws M 10x1.5 36
Footpeg holders to frame retaining screws M 8x1.25 24
Heat guard to footpeg holder retaining
screw
M 6x1 3
Front and Rear wheel
Front wheel nut M 25x1.25 63 * GREASE B
Rear wheel shaft nut M 25x1.25 83 * GREASE B
Brake disc mounting screw M 8x1.25 24 * DRILOC 218 as OE at
BREMBO, Lock 2 for
spare parts
Rear chain sprocket nut M 10x1.25 46 * LOCK 2
Fuel Tank
Retaining screw of plastic fuel tank flange M 6x1 10
Fuel hose clamp 1.5
Fuel filler plug fixing screw M 5x0.8 6
Fuel tank hinge bracket retaining screw M 6x1 10
Fuel tank pads retaining screw M 6x1 10
Exhaust
Nut securing exhaust pipe clamp to
silencers
M 10x1.25 42.4 Screwdriver max.
number of revolutions
400rpm
Special screw securing exhaust manifolds
to crankcase
M 12x1.5 25 LOCK 1
Exhaust pipe to casing retaining screw M 6x1 9
1/8” gas stainless steel plugs fastener for
exhaust pipes
M 10x1.25 25
Exhaust silencer to footpeg holder
retaining screw
M 6x1 10
Exhaust pipe to head nut M 8x1.25 24
Lambda sensor fastener M 18x1.5 45
file:///C|/Documents%20and%20Settings/F4i/My%...manual/wsm/usa/Mon695_MY07_C_3_4_00.12.1.html (3 of 7) [10/7/2008 8:42:18 PM]
Page 26

Torque settings
Seat
Seat lock ring nut M 22x1.5 1 LOCK 3
Seat lock holder retaining screw M 5x0.8 6
Seat cover holder retaining screw M 5x0.8 3
Seat pulley screw Self-tapping LOCK 2
Screw retaining seat cover and tool box
compartment cover to seat
M 6x1 2
Seat lock retaining screw M 5x0.8 6
Oil inlet/breather
Airbox hose clip 2
Airbox stud to airbox fixing M 6x1 6
Peg to airbox stud fixing M 6x1 4
Oil breather valve hose clip M 6x1 1.2
Oil breather tank hose clip 2
Oil breather tank to frame retaining screw M 6x1 6
Fuel system, Canister
Throttle body mounting clip 2
Pressure regulator to throttle body
retaining screw
M 6x1 5
Canister mount plate nut 8
Fairing
Side body panel retaining screw M 5x0.8 0.8
Headlight fairing to bracket retaining
screw
M 6x1 8
Side stand
Side stand plate retaining screw M 10x1.5 36 LOCK 5
Side stand sensor wire retainer screw M 6x1 10
Side stand pivot nut M 8x1.25 24
Side stand sensor retaining screw M 6x1 10
Frame
Engine to frame mounting bolt nut M 12x1.5 60 * GREASE B
Oil pipe fitting on casing M 9/16"UNF" 19
Fitting for oil delivery pipe to heads M 8x1.25 15
* critical point for dynamic safety. Tightening torque tolerance must be: ± 5% Nm.
Note
For product specifications and symbols, refer to "Product specifications" (A 2).
Engine torque settings
Part Thread (mm) Nm Min. Max. Note
Blow-by valve M 40x1.5 40 36 44
Mesh filter duct plug M 32x1.5 42 38 46
Oil temperature sensor ring nut M 30x1.5 38 34 42 LOCK 4
Wet clutch drum nut M 25x1.5 190 180 200 GREASE B
Generator rotor nut M 24x1 270 256 284 LOCK 5
Crankshaft gear fixing nut M 22x1 190 171 209 GREASE B
file:///C|/Documents%20and%20Settings/F4i/My%...manual/wsm/usa/Mon695_MY07_C_3_4_00.12.1.html (4 of 7) [10/7/2008 8:42:18 PM]
Page 27

Torque settings
Oil drain plug M 22x1.5 42 38 46
Oil mesh filter M 22x1.5 42 38 46
Oil filler plug M 22x1.5 5 5 6
Steel/alum. crankshaft blanking plug M 20x1 15 13.5 16.5 THREE BOND 1375B
Gearbox drum locating screw M 16x1.5 30 27 33
Oil filter nipple M 16x1.5 42 38 46 LOCK 2 or
THREE BOND 1324
Oil cartridge filter M 16x1.5 11 10 12 Engine oil on seal
Mesh filter duct plug M 15x1 20 18 22 LOCK 5 or
THREE BOND 1375B
By-pass pump plug M 15x1 25 22 28 LOCK 5 or
THREE BOND 1375B
Ring nut for belt rollers on lay shaft M 15x1 71 64 78 GREASE A
Ring nuts for belt rollers on heads M 15x1 71 64 78 GREASE A
Generator cover inspection plug M 15x1 20 18 22 THREE BOND 1215
Nut for timing lay shaft gear M 14x1 55 50 60 GREASE A
Radiator preset blanking plug M 14x1.5 27 24 30 LOCK 5 or
THREE BOND 1375B
Pick-up inspection screw M 12x1 15 13 17 LOCK 2 or
THREE BOND 1324
Earth screw M 12x1 15 13 17 LOCK 2 or
THREE BOND 1324
Oil temperature sensor M 12x1.5 18 16 19 LOCK 4
Spark plugs M 12x1.25 20 18 22
Head nuts:
1st snug torque
2nd snug torque
final torque
M 10x1.5
15
25
40
23
38
27
42
Smear GREASE C on
the underhead and
thread of the stud
bolt
Con-rod bolts:
1
st
tightening
Stop for 2 sec. and
loosen by 360°
1st snug torque
2
nd
snug torque
Tightening
Check angle: > 30°
M 10x1
35
20
35
70.5
66
73
Smear GREASE B on
thread
Oil pump duct plug M 10x1.5 Fully home with tool
15 13 17
LOCK 5 or
THREE BOND 1375B
Head stud bolts M 10x1.5 25 23 26 LOCK 2 or
THREE BOND 1324
Pressure switch M 10x1 19 17 21
Reduction bushing M 10x1 LOCK 5 or
THREE BOND 1375B
Spark plug M 10x1 15 13 17
Neutral light switch M 10x1.25 10 9 11
Clutch-side casing service plug M 10x1.5 15 13 17 LOCK 5 or
THREE BOND 1375B
Crankshaft dowels M 8x1.25 13 11 15 THREE BOND 1375B
Gearbox pawl screw M 8x1.25 25 22 28
Gear stopper screw M 8x1.25 18 16 20 LOCK 2 or
THREE BOND 1324
file:///C|/Documents%20and%20Settings/F4i/My%...manual/wsm/usa/Mon695_MY07_C_3_4_00.12.1.html (5 of 7) [10/7/2008 8:42:18 PM]
Page 28
Torque settings
Intake and exhaust flange stud bolts M 8x1.25 15 13 17 LOCK 2 or
THREE BOND 1324
Intake manifold nuts M 8x1.25 23 20 26
Oil pump screws M 8x1.25 26 23 29
Casing jointing screws:
1st snug torque
final torque
M 8x1.25
19
25
17
22
21
28
Casing drilled screw M 8x1.25 20 18 22
Fixed tensioner M 8x1 20 18 22 LOCK 2 or
THREE BOND 1324
Mobile tensioner M 8x1.25 26 23 29
Ground screw M 8x1.5 13 11 15
Clutch spring screw M 6x1 6 5 7
Stator cable guide screws M 6x1 10 9 11 LOCK 2 or
THREE BOND 1324
Starter motor screws M 6x1 10 9 11 LOCK 2 or
THREE BOND 1324
Starter idle gear pin screw M 6x1 10 9 11 LOCK 2 or
THREE BOND 1324
Generator stator retaining screws M 6x1 10 9 11 LOCK 2 or
THREE BOND 1324
Flywheel / rotor screws M 6x1 13 11 15 LOCK 2 or
THREE BOND 1324
Gearbox bearing stop plate screws M 6x1 10 9 11 LOCK 2 or
THREE BOND 1324
Head service screws (aluminium) M 6x1 3 2 3 LOCK 5 or
THREE BOND 1375B
Intake manifold fuel pump fitting M 6x1 2.5 2 3 LOCK 2 or
THREE BOND 1324
Bosch pick-up retaining screws M 6x1 10 9 11
Nut securing fluid recovery tank
bracket
M 6x1
9 8 10
Battery mount lower stud bolt M 6x1 10 9 11 LOCK 2 or
THREE BOND 1324
Gearbox pawl screw M 6x1 9 8.5 9.5 LOCK 2 or
THREE BOND 1324
Inspection cover screws M 6x1 4.5 4.5 6
Rocker arm shaft cover screws M 6x1 10 9 11
Intake / exhaust valve cover screws M 6x1 10 9 11
Casing jointing screws M 6x1 9 8.5 9.5
Clutch cover screws M 6x1 9 8.5 9.5
Generator cover screws M 6x1 10 9 11
Clutch spring screws M 5x0.8 5 5 7
Driven belt roller flange retaining
screws
M 5x0.8 5 5 7
Manifold nipple M 5x0.8 3 2 3 LOCK 2 or
THREE BOND 1324
Split belt roller flange retaining screws M 5x0.8 5 5 7
Head cover plug M 5x0.8 2.5 2.5 3
Screws M 10x1.5 45 40 50
Screws M 8x1.25 25 22 28
file:///C|/Documents%20and%20Settings/F4i/My%...manual/wsm/usa/Mon695_MY07_C_3_4_00.12.1.html (6 of 7) [10/7/2008 8:42:18 PM]
Page 29

Torque settings
Screws M 6x1 10 9 11
Screws M 5x1 5 5 7
Note
For product specifications and symbols, refer to "Product specifications" (A 2).
file:///C|/Documents%20and%20Settings/F4i/My%...manual/wsm/usa/Mon695_MY07_C_3_4_00.12.1.html (7 of 7) [10/7/2008 8:42:18 PM]
Page 30

Service Tools
4 - Service Tools
Spare parts catalogue
Workshop special tools
Engine special tools
Part No. Description
88700.5644 Tool to set belt roller ring nut for camshaft
88713.2107 Reaction tool to tighten timing belt rollers
88713.2676 Head nuts tightening tool
88713.2103 Support for head assembly
file:///C|/Documents%20and%20Settings/F4i/My%...manual/wsm/usa/Mon695_MY07_C_4_4_00.13.1.html (1 of 9) [10/7/2008 8:42:23 PM]
Page 31

Service Tools
98112.0002 Timing degree wheel
88713.0123 Timing check tool
97900.0215
DDS (Ducati Diagnosis System) + kit for measuring cylinder
vacuum
88713.0137 Crankshaft sprocket stop tool
88765.1058 Valve lift gauge
file:///C|/Documents%20and%20Settings/F4i/My%...manual/wsm/usa/Mon695_MY07_C_4_4_00.13.1.html (2 of 9) [10/7/2008 8:42:23 PM]
Page 32

Service Tools
88765.1000
88765.1005
88765.1006
0.1 mm fork feeler gauge
0.2 mm fork feeler gauge
0.3 mm fork feeler gauge
88713.2362 Tool to fit spring and closing rocker arm
88713.2009 Tool to lock belt rollers
88713.0262 Pin to fit the rocker arms
88713.0844 Drift to fit split rings
file:///C|/Documents%20and%20Settings/F4i/My%...manual/wsm/usa/Mon695_MY07_C_4_4_00.13.1.html (3 of 9) [10/7/2008 8:42:23 PM]
Page 33

Service Tools
88713.2011 Crankshaft locking tool
88700.5749 Cap for closing the crankcases
88713.1091 Plate for gear selector fork positioning
88713.1749 Puller for drive belt roller and cover
88765.1297 TDC check gauge
file:///C|/Documents%20and%20Settings/F4i/My%...manual/wsm/usa/Mon695_MY07_C_4_4_00.13.1.html (4 of 9) [10/7/2008 8:42:23 PM]
Page 34

Service Tools
88713.1994 Rocker arm shaft puller
88713.2556 ATPC system clutch housing locking tool
88713.2591 Clutch screw
88713.1010 Exhaust gas pick-up point
88713.1215 Timing belt tensioner
file:///C|/Documents%20and%20Settings/F4i/My%...manual/wsm/usa/Mon695_MY07_C_4_4_00.13.1.html (5 of 9) [10/7/2008 8:42:23 PM]
Page 35

Service Tools
88713.2036 Generator locking tool for nut tightening
88713.2092 Primary gears puller
88713.0879 Valve guide extraction tool
88713.0874 Exhaust valve guide drift
88713.0875 Intake valve guide drift
file:///C|/Documents%20and%20Settings/F4i/My%...manual/wsm/usa/Mon695_MY07_C_4_4_00.13.1.html (6 of 9) [10/7/2008 8:42:23 PM]
Page 36

Service Tools
88713.1078 Drift to install exhaust valve seat
88713.1079 Drift to install intake valve seat
88713.2422 Wrench for tightening the primary sprocket ring nut
Spare parts catalogue
Workshop special tools
Frame special tools
Part No. Description
677.4.003.1A Chain joint
88713.1072 Bottom yoke bearing drift
file:///C|/Documents%20and%20Settings/F4i/My%...manual/wsm/usa/Mon695_MY07_C_4_4_00.13.1.html (7 of 9) [10/7/2008 8:42:23 PM]
Page 37
Service Tools
88713.1344 Chain assembly tool
8000.70139 Front wheel shaft tool
88713.1096 Fork overhaul tool - for fitting the seal
88713.1515 Frame/engine support
88713.1058 Tool to fit steering tube top bolt
file:///C|/Documents%20and%20Settings/F4i/My%...manual/wsm/usa/Mon695_MY07_C_4_4_00.13.1.html (8 of 9) [10/7/2008 8:42:23 PM]
Page 38

Service Tools
88713.1062 Tool to fit steering tube bearings
file:///C|/Documents%20and%20Settings/F4i/My%...manual/wsm/usa/Mon695_MY07_C_4_4_00.13.1.html (9 of 9) [10/7/2008 8:42:23 PM]
Page 39

Specifications
0Specifications
1.1 - Technical specifications 3
Description 3
Colors 4
Transmission assembly 4
Timing/valves 4
Cylinder / piston 5
Gearbox 5
Cooling system 5
Front wheel 5
Front suspension 6
Rear wheel 6
Rear suspension 6
Hydraulic brakes 7
Charging system / generator 7
Ignition system 7
Fuel system 8
Injection system 8
Lights / instrument panel 8
1.2 - Dimensions 9
2 - Fuels and lubricants 10
3 - Torque settings 11
Frame torque settings 11
Engine torque settings 15
4 - Service Tools 18
Engine special tools 18
Frame special tools 23
file:///C|/Documents%20and%20Settings/F4i/My%20D...i%20manual/wsm/usa/Mon695_MY07_C_IND_00.8.1.html [10/7/2008 8:42:25 PM]
Page 40

Preliminary checks
1 - Preliminary checks
Running-in precautions
Max. rotation speed
Rpm limits to be observed during the running-in period and in normal operation:
1 Up to 1000 km;
2 From 1000 to 2500 km;
Max. rotation speed up to 1000 km
During the first 1000 km, keep an eye on the revolution meter. The indicator must not exceed 55006000 rpm. During the first hours of riding, it is advisable to run the engine at varying load and rpm,
though still within the recommended limit.
Twisty roads and gradients are ideal to break in engine, suspensions and brakes effectively. Apply the
brakes gently and avoid hard, prolonged braking until covering the first 100 km.This will allow the
brake pad lining to wear in properly rubbing on the brake discs. For all mechanical moving parts of the
motorcycle to adapt to one another and above all not to adversely affect the life of basic engine parts,
it is advisable to avoid harsh accelerations and not to run the engine at high rpm for too long,
especially uphill. Furthermore, the drive chain should be inspected frequently. Lubricate as required.
Max. rotation speed from 1000 to 2500 km
At this point, you can squeeze some more power out of your engine, being careful, however, to never
exceed 7000 rpm. Follow-ing these recommendations strictly will extend the life of your engine and
reduce the likelihood of overhauls or tune-ups.
Caution
During the whole running-in period, the maintenance and service rules recommended in the warranty
card should be observed carefully. Failure to comply with these rules will release Ducati Motor Holding
S.p.A. from any liability whatsoever for resulting engine damage or shorter engine life.
Pre-ride checks
file:///C|/Documents%20and%20Settings/F4i/My%...manual/wsm/usa/Mon695_MY07_D_1_5_00.15.1.html (1 of 2) [10/7/2008 8:42:26 PM]
Page 41

Preliminary checks
Warning
Failure to carry out these checks before riding, may lead to motorcycle damage and injury to rider.
Before riding, perform a thorough check-up on your bike as follows:
Fuel level in the tank
Check fuel level in the tank. Fill tank if needed (Sect. C 2,
Fuels and lubricants).
Engine oil level
Check oil level in the sump through the sight glass. Top up with recommended oil if needed (Sect. C 2,
Fuels and lubricants).
Brake and clutch fluid
Check fluid level in the relevant reservoirs.
Tyre condition
Check tyre pressure and condition (Sect. C 1.1,
Front wheel/Rear wheel).
Controls
Work the brake, clutch, throttle and gear change controls (levers, pedals and twistgrips) and check for
proper operation.
Lights and indicators
Make sure lights, indicators and horn work properly. Replace any burnt-out bulbs (Sect. C 1.1,
Lights /
instrument panel).
Key-operated locks
Check that fuel filler plug and seat catch locks are closed firmly.
Side stand
Check the side stand for operation (Sect. P 6,
Protection and safety devices) and correct position
(Sect. H 5,
Stands).
file:///C|/Documents%20and%20Settings/F4i/My%...manual/wsm/usa/Mon695_MY07_D_1_5_00.15.1.html (2 of 2) [10/7/2008 8:42:26 PM]
Page 42

Starting – engine warm-up
2 - Starting – engine warm-up
Starting the engine
Cold ambient temperature
(10 °C / 50 °F - 35 °C / 95 °F)
Turn the ignition switch to ON. Check that the green and red lights on the instrument panel are on
(Sect. P 7,
Instrument panel).
Move the choke lever to (B). Let the engine start without using the throttle.
Move the choke lever to vertical position (A).
Caution
The oil pressure light should go out a few seconds after the engine has started. If the light stays on,
stop the engine and check oil level (Sect. P 7, Instrument panel).
Never start the engine when oil pressure is too low.
file:///C|/Documents%20and%20Settings/F4i/My%...manual/wsm/usa/Mon695_MY07_D_2_5_00.16.1.html (1 of 3) [10/7/2008 8:42:28 PM]
Page 43

Starting – engine warm-up
Caution
If the engine fails to start, check that the stop switch (2) is positioned to (RUN), and then press the
starter button (3) within 15 seconds from KEY ON.
Note
This model is equipped with a servoignition system, and the engine is started by pressing the button
(3) and releasing it immediately. When the button (3) is pressed, the servoignition system
automatically cranks the engine for a maximum period of time that varies depending on engine
temperature.
Once the engine has started, the system prevents the starter motor from turning over. If the engine
fails to start, allow at least 2 seconds before pressing the button (3) again.
Caution
Do not rev up the engine when it is cold. Allow some time for oil to warm up and reach all points that
need lubricating.
Warning
The motorcycle can be started with the side stand down and the gearbox in neutral, or with a gear
engaged, the side stand up and the clutch lever pulled in.
Shift gradually the choke lever (1) to vertical position as the engine warms up.
The engine should run regularly at idling speed when the choke is fully closed.
High ambient temperature
(over 30 °C / 86 °F )
Follow the same procedure, however do not use the choke lever (1).
Note
Follow the procedure for “High ambient temperature” to start a warm engine.
file:///C|/Documents%20and%20Settings/F4i/My%...manual/wsm/usa/Mon695_MY07_D_2_5_00.16.1.html (2 of 3) [10/7/2008 8:42:28 PM]
Page 44

Starting – engine warm-up
file:///C|/Documents%20and%20Settings/F4i/My%...manual/wsm/usa/Mon695_MY07_D_2_5_00.16.1.html (3 of 3) [10/7/2008 8:42:28 PM]
Page 45
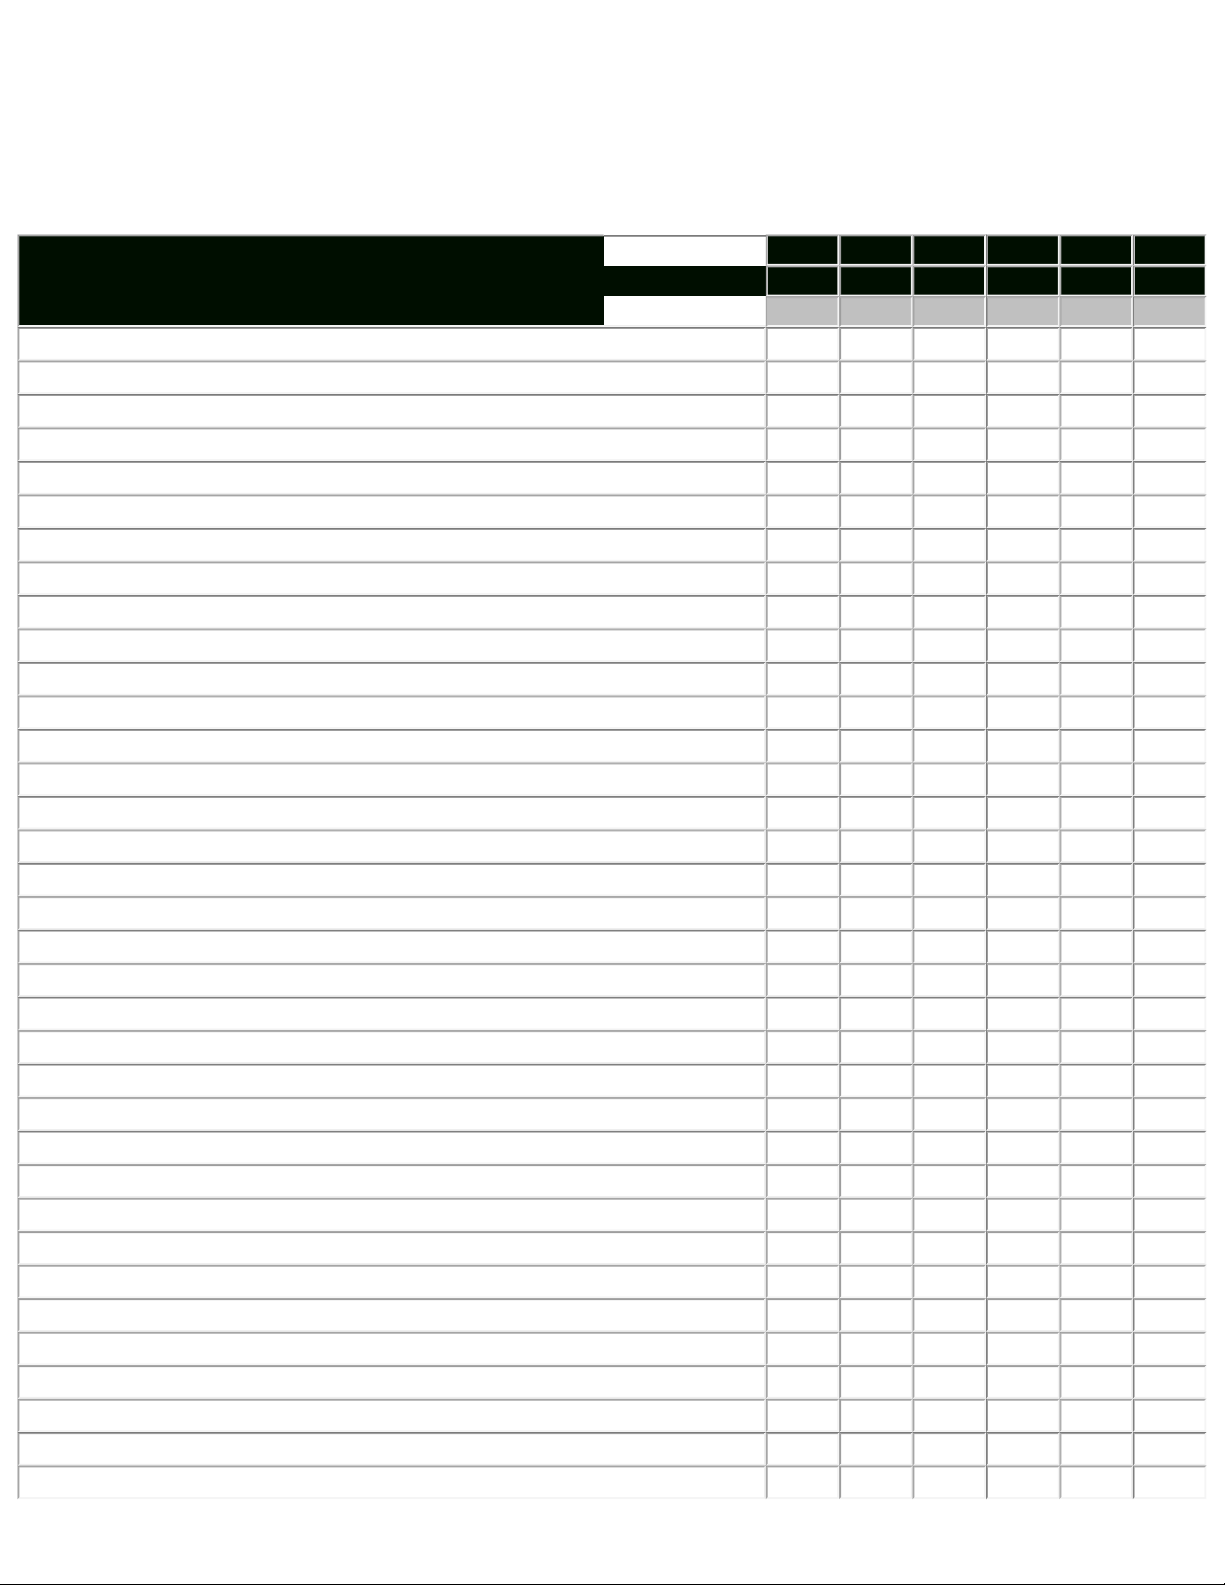
Routine maintenance table
3 - Routine maintenance table
Scheduled maintenance chart: operations to be performed by the dealer
List of operations and type of intervention
[set mileage (km/mi) or time interval *]
Km. x1000 1 12 24 36 48 60
mi. x1000
0.6 7.5 15 22.5 30 37.5
Months
6 12 24 36 48 60
Changing engine oil
• • • • • •
Changing engine oil filter
• • • • • •
Cleaning engine oil intake filter
•
Checking engine oil pressure
• •
Checking and/or adjusting valve clearance (1)
• • • • •
Checking timing belt tension (1)
• • •
Changing timing belts
• •
Checking and cleaning spark plugs. Change them, if necessary
• •
Checking and cleaning air filter (1)
• • •
Changing air filter
• •
Checking throttle body synchronization and idling (1)
• • • • •
Checking brake and clutch fluid level
• • • • • •
Changing clutch and brake fluid
•
Checking and adjusting brake and clutch controls
• • • • •
Checking/lubricating throttle/choke control
• • • • •
Checking tyres wear and pressure
• • • • • •
Checking brake pads. Change them, if necessary
• • • • • •
Checking steering bearings
• •
Checking chain tension, alignment and lubrication
• • • • • •
Checking clutch plates pack. Change, if necessary (1)
• • • • •
Checking rear wheel flexible coupling
• •
Checking wheel hub bearings
• •
Checking indicators and lighting devices
• • • • •
Checking engine-to-frame screw nuts tightening
• • • • •
Checking side stand
• • • • •
Checking front wheel nut tightening
• • • • •
Checking rear wheel nut tightening
• • • • •
Checking external fuel lines
• • • • •
Changing front fork fluid
•
Checking front fork and rear shock for leakage
• • • • •
Checking front sprocket fastening
• • • • •
General lubrication and greasing
• • • • •
Check and charge battery
• • • • •
Vehicle test ride
• • • • • •
Overall cleaning
• • • • •
file:///C|/Documents%20and%20Settings/F4i/My%...manual/wsm/usa/Mon695_MY07_D_3_5_00.17.1.html (1 of 2) [10/7/2008 8:42:35 PM]
Page 46
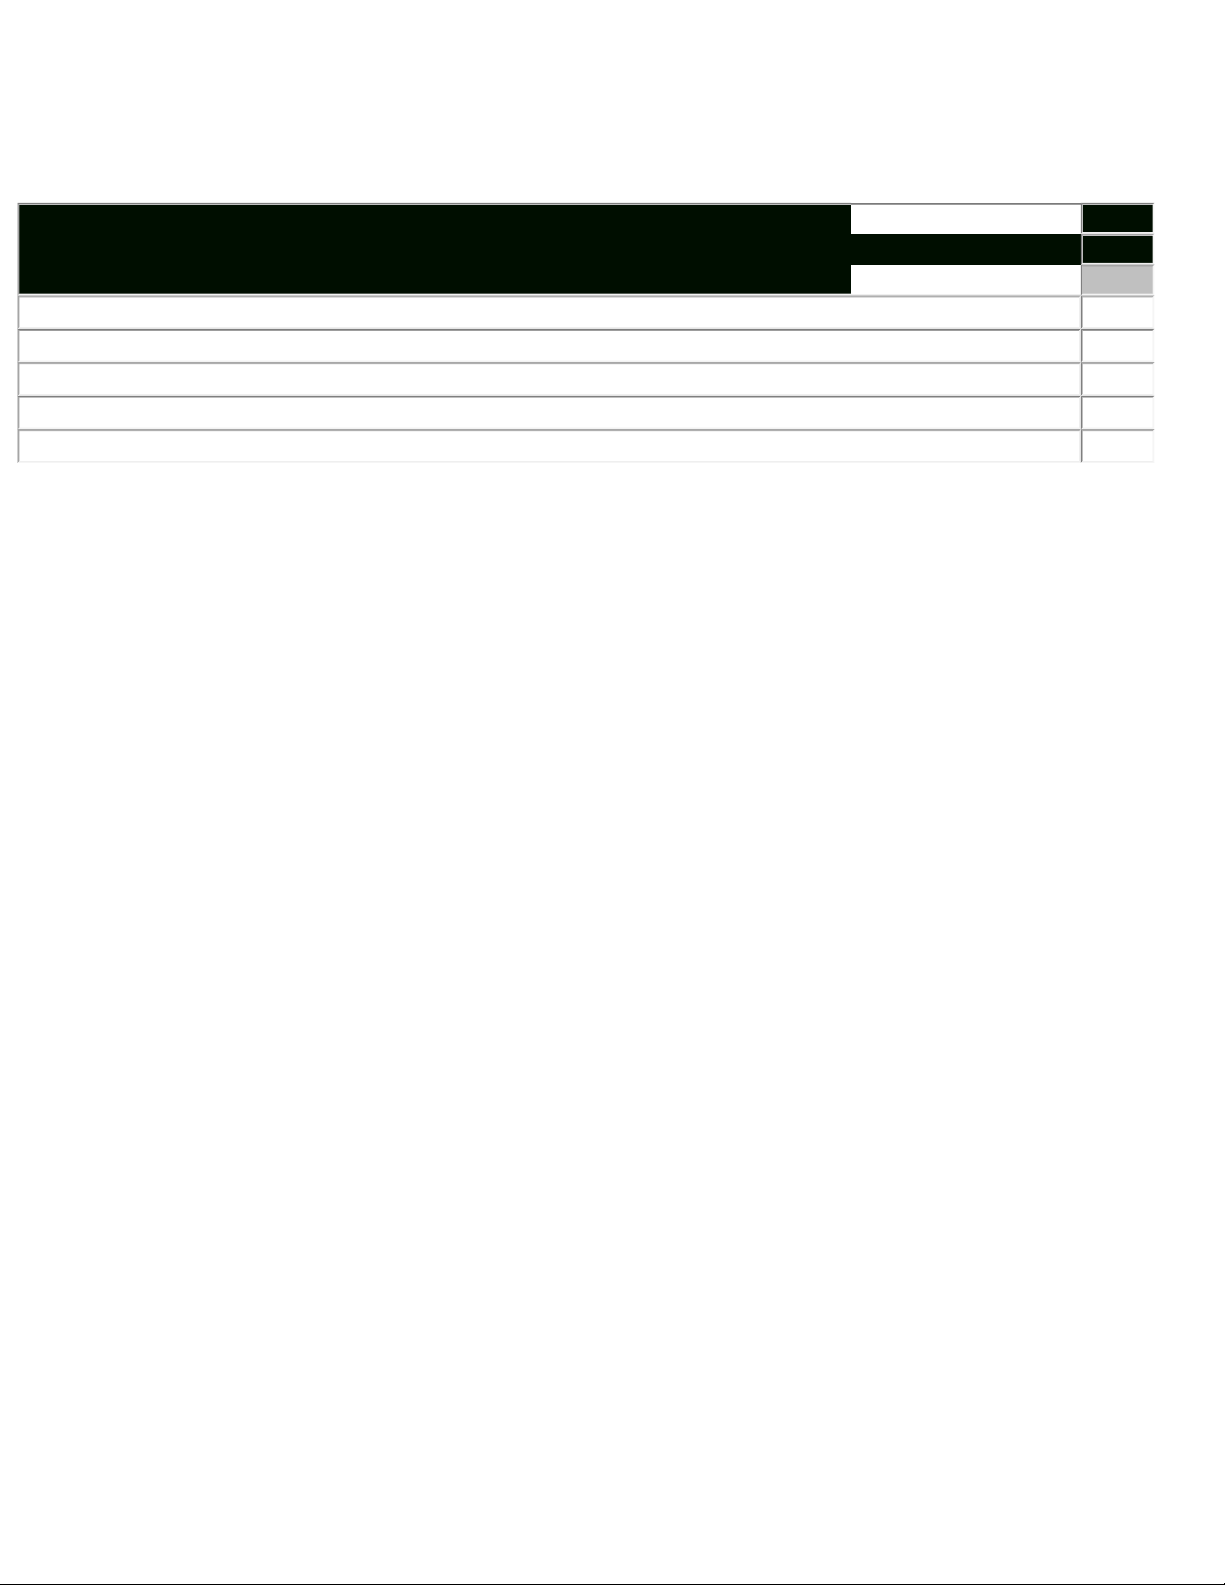
Routine maintenance table
* service on the set interval, whichever comes first (mileage or months)
(1) Operation to be performed only if set mileage is reached
Scheduled maintenance chart: operations to be performed by the customer
List of operations and type of intervention
[set mileage (km/mi) or time interval *]
Km. x1000 1
mi. x1000
0,6
Months
6
Checking the engine oil level
•
Checking brake and clutch fluid level
•
Checking tyres wear and pressure
•
Checking chain tension and lubrication
•
Checking brake pads. If necessary, have them replaced by a dealer
•
* service on the set interval, whichever comes first (mileage or months)
file:///C|/Documents%20and%20Settings/F4i/My%...manual/wsm/usa/Mon695_MY07_D_3_5_00.17.1.html (2 of 2) [10/7/2008 8:42:35 PM]
Page 47

Maintenance operations
4 - Maintenance operations
Checking the engine oil level
Check the engine oil level in the sight glass (1) on the RH side of the oil sump.
After switching off, allow several minutes for the oil to settle before checking the level. Check the level with the
motorcycle perfectly vertical and with the engine hot (but stopped).
The level should be between the MIN and MAX marks. Top up if low. Remove the filler plug (2) and top up with the
recommended oil.
Refit the filler plug.
Changing the engine oil and filter cartridge
Note
Change the oil when the engine is hot (but off). In these conditions the oil is more fluid and will drain more rapidly
and completely.
Remove the drain plug (3) on the oil sump and allow the oil to drain off.
Warning
Dispose of oil and/or filter cartridges in compliance with environmental protection regulations.
Remove any metallic deposits from the end of the magnetic drain plug. Refit the drain plug complete with seal (A) to
the sump.
Tighten it to the specified torque (Sect. C 3, Engine torque settings).
With a common filter wrench, remove the filter cartridge (4) from the oil sump.
file:///C|/Documents%20and%20Settings/F4i/My...anual/wsm/usa/Mon695_MY07_D_4_5_00.18.1.html (1 of 29) [10/7/2008 8:42:49 PM]
Page 48

Maintenance operations
Caution
Dispose of used cartridge. Do not reuse cartridges.
Grease the seal with engine oil and then fit the new cartridge (4).
Note
If you wish to skip this last check, fill the filter cartridge (2) with oil before installation and you will not need to top up
level later.
Screw it in its seat and tighten to the specified torque (Sect. C 3, Engine torque settings).
Clean the oil mesh filter every second oil change.
Unscrew the outer plug (5).
Release and withdraw the mesh filter (7).
Clean the mesh filter with gasoline and compressed air. Care must be taken not to break the filter mesh.
Refit the mesh filter (7) and its seal (6) on the plug (5) and tighten to the specified torque (Sect. C 3,
Engine torque
settings).
file:///C|/Documents%20and%20Settings/F4i/My...anual/wsm/usa/Mon695_MY07_D_4_5_00.18.1.html (2 of 29) [10/7/2008 8:42:49 PM]
Page 49

Maintenance operations
Remove the filler plug (2) and fill with the recommended oil (Sect. C 2, Fuels and lubricants). Fill until the oil reaches
the MAX mark on the sight glass.
Refit the filler plug (2). Run the engine at idling speed for several minutes.
Check for oil leaks. Check that the oil pressure light on the instrument panel switches off several seconds after the
engine has been started. If this is not the case, switch off and trace the fault.
Switch off the engine and allow several minutes for the oil to settle. Check the oil level and top up to MAX mark, if
necessary.
Refit any parts you have removed.
Checking valve clearances
Proceed as described under Section N 4.1, Checking and adjusting valve clearance.
With the valve in the rest position, slide a feeler gauge between opening rocker arm and shim to measure clearance.
Values must be as follows:
Opening rocker arm
Intake: (A)
Nominal 0.10-0.15 mm
In operation 0.05-0.15 mm
Exhaust: (A)
Nominal 0.10-0.15 mm
In operation 0.05-0.15 mm
file:///C|/Documents%20and%20Settings/F4i/My...anual/wsm/usa/Mon695_MY07_D_4_5_00.18.1.html (3 of 29) [10/7/2008 8:42:49 PM]
Page 50

Maintenance operations
With the valve in the rest position, slide a feeler gauge between closing rocker arm and shim to measure clearance.
Clearance must be within the specified limits:
Closing rocker arm
Intake: (A)
Nominal 0-0.05 mm
In operation 0-0.20 mm
Exhaust: (A)
Nominal 0-0.05 mm
In operation 0-0.20 mm
If the clearances measured are outside the specified limits, measure clearance and adjust as required (Sect. N 4.1,
Checking and adjusting valve clearance).
file:///C|/Documents%20and%20Settings/F4i/My...anual/wsm/usa/Mon695_MY07_D_4_5_00.18.1.html (4 of 29) [10/7/2008 8:42:49 PM]
Page 51

Maintenance operations
Adjusting valve clearances
Proceed as described under Section N 4.1, Checking and adjusting valve clearance.
Changing and cleaning the air filters
The air filter must be changed at the intervals indicated in the "Routine maintenance table" (Sect. D 3).
Raise the fuel tank (Sect. L 2,
Removing the fuel tank).
Release the cover clips (1) on either side of the airbox.
Remove the cover (2).
Remove the filter cartridge (3) and replace.
Blow the filter cartridge with compressed air or replace it if unserviceable.
file:///C|/Documents%20and%20Settings/F4i/My...anual/wsm/usa/Mon695_MY07_D_4_5_00.18.1.html (5 of 29) [10/7/2008 8:42:49 PM]
Page 52

Maintenance operations
Caution
A clogged air filter will reduce air intake and engine power leading to increased fuel consumption, and cause a build up
of deposits on the spark plugs. Do not run the engine without the air filter. Running the engine without a filter will
draw impurities into the engine and may damage the engine.
Fit the filter cartridge into the filter box and refit all components previously removed.
Caution
If the vehicle is used in very damp or dusty conditions, the air filter cartridge must be changed more frequently.
Changing the brake fluid
Warning
Brake fluid will damage painted surfaces if spilled on them. In addition, it will cause severe injury if spilled on the skin
or into your eyes. In the event of accidental contact with skin or eyes, wash the affected area with abundant running
water.
Filling the front brake circuit
Undo the screws (1) and remove the diaphragm cover from the front brake reservoir (A).
Connect a clear hose to the bleed valve (2); put one end of the hose into a container on the floor.
file:///C|/Documents%20and%20Settings/F4i/My...anual/wsm/usa/Mon695_MY07_D_4_5_00.18.1.html (6 of 29) [10/7/2008 8:42:49 PM]
Page 53

Maintenance operations
Suck the oil up from the reservoir (A).
Fill reservoir (A) with fresh oil up to MAX level.
Pump up two or three times with the lever to pressurize the circuit.
Keep the lever pulled toward the handgrip.
Loosen the bleed valve (2) so that oil flows off.
Warning
When filling up, keep oil level above MIN mark to avoid air bubbles into the circuit.
Let oil flow off from the bleed valve (2) until of different color.
Tighten the bleed valve to the specified torque (Sect. C 3,
Frame torque settings) and top up oil to correct level.
Note
Repeat the above procedure for both calipers.
file:///C|/Documents%20and%20Settings/F4i/My...anual/wsm/usa/Mon695_MY07_D_4_5_00.18.1.html (7 of 29) [10/7/2008 8:42:49 PM]
Page 54

Maintenance operations
Filling the rear brake circuit
Remove the cap (3) from the rear brake cylinder reservoir (B).
Connect a clear hose to the bleed valve (4); put one end of the hose into a container on the floor.
Suck the oil up from the reservoir (B).
Fill reservoir (B) with fresh oil up to MAX level.
Pump up two or three times with the pedal to pressurize the circuit.
Hold the pedal pressed.
file:///C|/Documents%20and%20Settings/F4i/My...anual/wsm/usa/Mon695_MY07_D_4_5_00.18.1.html (8 of 29) [10/7/2008 8:42:49 PM]
Page 55

Maintenance operations
Warning
When filling up, keep oil level above MIN mark to avoid air bubbles into the circuit.
Let oil flow off from the bleed valve (4) until of different color.
Tighten the bleed valve (4) to the specified torque (Sect. C 3,
Frame torque settings) and top up oil to correct level.
Draining the braking circuit
Warning
Brake fluid will damage painted surfaces if spilled on them. In addition, it will cause severe injury if spilled on the skin
or into your eyes. In the event of accidental contact with skin or eyes, wash the affected area with abundant running
water.
Remove the diaphragm cover (1) from the front brake reservoir (A) and cap (3) from rear brake reservoir (B).
file:///C|/Documents%20and%20Settings/F4i/My...anual/wsm/usa/Mon695_MY07_D_4_5_00.18.1.html (9 of 29) [10/7/2008 8:42:49 PM]
Page 56

Maintenance operations
Connect a common brake bleeder, easily available on the market, to the caliper bleed valve (2- front) or (4 -rear).
Note
If you are using a commercial bleeder, follow the manufacturer's instructions.
Unscrew the bleed valve and pump the bleeder until all the fluid has fully drained off the circuit.
If you do not have a brake bleeder available, attach a length of transparent plastic tubing to the caliper bleed valve (2
-front) or (4 -rear) and put the other end of the hose into a container holding spent brake fluid you will have placed
on the floor.
Unscrew the bleed valve by one fourth of a turn.
Operate the brake lever (or pedal) until all the fluid has fully drained off the circuit.
Repeat this operation for each brake caliper.
Filling the brake circuit
file:///C|/Documents%20and%20Settings/F4i/My...anual/wsm/usa/Mon695_MY07_D_4_5_00.18.1.html (10 of 29) [10/7/2008 8:42:49 PM]
Page 57

Maintenance operations
Warning
Brake fluid will damage painted surfaces if spilled on them. In addition, it will cause severe injury if spilled on the skin
or into your eyes. In the event of accidental contact with skin or eyes, wash the affected area with abundant running
water.
Fill the reservoirs (A) and (B) with specified brake fluid (Sect. C 2,
Fuels and lubricants) from a sealed container.
Caution
During the next operation, the fluid level must remain topped up at all times. The end of the transparent plastic
tubing must remain immersed in the discharged brake fluid at all times.
Operate the brake lever (or pedal) several times to let the fluid reach all points of the circuit and expel any air.
Connect the brake bleeder to the bleed valve (2) or (4).
Note
If you are using a commercial bleeder, follow the manufacturer's instructions.
Pump the brake bleeder and slacken the bleed valve (2) or (4). Make sure the level stays above the MIN level at all
times.
Repeat the bleeding operation until air bubbles no longer come out of the plastic tube.
Tighten the bleed valve (2) or (4) to the specified torque (Sect. C 3,
Frame torque settings).
file:///C|/Documents%20and%20Settings/F4i/My...anual/wsm/usa/Mon695_MY07_D_4_5_00.18.1.html (11 of 29) [10/7/2008 8:42:49 PM]
Page 58

Maintenance operations
If you do not have a brake bleeder available, connect a length of transparent plastic tubing to the bleed valve as
outlined in the draining procedure.
Open the bleed valve by one fourth of a turn and operate the brake lever (or pedal) several times until the fluid
starts coming out of the bleed valve.
Pull the lever or pedal fully in and slacken the bleed valve by at least one fourth one fourth of a turn.
Allow several seconds and then release the lever (or pedal) gradually and close the bleed valve (2) or (4).
Caution
Do not release the brake lever (or pedal) until the bleed valve has been fully tightened.
Repeat the bleeding operation until air bubbles no longer come out of the plastic tube.
Bleed all bleed valves on the calipers one at a time.
Tighten the bleed valve (2) or (4) to the specified torque (Sect. C 3,
Frame torque settings). Fit the protection cap.
file:///C|/Documents%20and%20Settings/F4i/My...anual/wsm/usa/Mon695_MY07_D_4_5_00.18.1.html (12 of 29) [10/7/2008 8:42:49 PM]
Page 59

Maintenance operations
Top up and fit the covers. Tighten the screws (1) onto the reservoir (A) and the cap (3) onto the reservoir (B).
Changing the clutch fluid
Warning
Clutch fluid will damage painted surfaces if spilled on them. In addition, it will cause severe injury if spilled on the skin
or into your eyes. In the event of accidental contact with skin or eyes, wash the affected area with abundant running
water.
Undo the screws (2) and remove the diaphragm cover (1) from the clutch reservoir (A).
file:///C|/Documents%20and%20Settings/F4i/My...anual/wsm/usa/Mon695_MY07_D_4_5_00.18.1.html (13 of 29) [10/7/2008 8:42:49 PM]
Page 60

Maintenance operations
Connect a clear hose to the bleed valve (3); put one end of the hose into a container on the floor.
Suck the oil up from the reservoir (A).
Fill reservoir (A) with fresh oil up to MAX level.
file:///C|/Documents%20and%20Settings/F4i/My...anual/wsm/usa/Mon695_MY07_D_4_5_00.18.1.html (14 of 29) [10/7/2008 8:42:49 PM]
Page 61

Maintenance operations
Pump up two or three times with the lever to pressurize the circuit.
Keep the lever pulled toward the handgrip.
Loosen the bleed valve (3) so that oil flows off.
Warning
When filling up, keep oil level above MIN mark to avoid air bubbles into the circuit.
Let oil flow off from the bleed valve (3) until of different color. Tighten the bleed valve (3) to the specified torque
(Sect. C 3,
Frame torque settings) and top up oil to correct level.
Draining the clutch circuit
Warning
Clutch fluid will damage painted surfaces if spilled on them. In addition, it will cause severe injury if spilled on the skin
file:///C|/Documents%20and%20Settings/F4i/My...anual/wsm/usa/Mon695_MY07_D_4_5_00.18.1.html (15 of 29) [10/7/2008 8:42:49 PM]
Page 62

Maintenance operations
or into your eyes. In the event of accidental contact with skin or eyes, wash the affected area with abundant running
water.
Slip off the protective cap to expose the bleed valve (3).
Connect a bleeder to the bleed valve (3) on the transmission unit.
Note
If you are using a commercial bleeder, follow the manufacturer's instructions.
Unscrew the bleed valve and pump the bleeder until all the fluid has fully drained off the circuit.
If you do not have a bleeder available, connect a piece of transparent plastic tubing to the bleed valve (3). Place the
other end in a container on the floor holding used clutch fluid.
Unscrew the bleed valve (one fourth of a turn). Remove the filler plug (1) with diaphragm from fluid reservoir (A),
loosening screws (2).
Operate the clutch lever until all the fluid has fully drained off the circuit.
file:///C|/Documents%20and%20Settings/F4i/My...anual/wsm/usa/Mon695_MY07_D_4_5_00.18.1.html (16 of 29) [10/7/2008 8:42:49 PM]
Page 63

Maintenance operations
To help drain the circuit fully, unscrew the three retaining screws (4) of the transmission unit and remove.
Withdraw the clutch transmission unit (5). Be careful of the O-ring (6) placed inside.
Push in the piston to expel all fluid inside the unit.
Refit transmission unit and tighten the retaining screws (4) to the specified torque (Sect. C 3,
Frame torque settings).
Tighten the bleed valve to the specified torque (Sect. C 3,
Frame torque settings).
Filling the clutch circuit
Warning
Clutch fluid will damage painted surfaces if spilled on them. In addition, it will cause severe injury if spilled on the skin
or into your eyes. In the event of accidental contact with skin or eyes, wash the affected area with abundant running
water.
Fill the reservoir (A) with specified fluid (Sect. C 2,
Fuels and lubricants) taken from a sealed container.
file:///C|/Documents%20and%20Settings/F4i/My...anual/wsm/usa/Mon695_MY07_D_4_5_00.18.1.html (17 of 29) [10/7/2008 8:42:49 PM]
Page 64

Maintenance operations
Caution
During the next operation, the fluid level must remain topped up at all times. The end of the transparent plastic
tubing must remain immersed in the discharged brake fluid at all times.
Operate the clutch lever several times to let the fluid reach all points of the circuit and expel any air.
Connect the bleeder to the bleed valve (3).
Note
If you are using a commercial bleeder, follow the manufacturer's instructions.
Pump with the bleeder and slacken the bleed valve (3). Ensure the fluid level never drops below the MIN level.
Repeat the bleeding operation until air bubbles no longer come out of the plastic tube connected to the bleed valve
(3).
If you do not have a bleeder available, connect a length of transparent plastic tubing to the bleed valve (3) as outlined
in the draining procedure.
file:///C|/Documents%20and%20Settings/F4i/My...anual/wsm/usa/Mon695_MY07_D_4_5_00.18.1.html (18 of 29) [10/7/2008 8:42:49 PM]
Page 65

Maintenance operations
Open the bleed valve (3) by one fourth of a turn and operate the clutch lever several times until the fluid starts
coming out of the bleed valve (3).
Pull the lever fully in and slacken the bleed valve by at least one fourth of a turn.
Allow several seconds and then release the lever gradually and close the bleed valve (3).
Caution
Do not release the clutch lever until the bleed valve has been fully tightened.
Repeat the bleeding operation until air bubbles no longer come out of the plastic tube.
Tighten the bleed valve (3) to the specified torque (Sect. C 3,
Frame torque settings). Fit the protection cap.
Top up the clutch fluid up to 3 mm above the MIN mark.
Refit the diaphragm and cap (1) to reservoir (A), tighten the screws (2).
Adjusting steering bearings play
file:///C|/Documents%20and%20Settings/F4i/My...anual/wsm/usa/Mon695_MY07_D_4_5_00.18.1.html (19 of 29) [10/7/2008 8:42:49 PM]
Page 66

Maintenance operations
Excessive handlebar play or shaking forks in the steering head indicate that the play in the steering head bearings
requires adjustment. Proceed as follows:
Loosen the four bolts (1), remove both clamps (2) and remove the handlebar.
Loosen the screws (3) on the steering head at the fork leg clamps.
Loosen the clamp screw (4) securing the steering tube to the steering head.
Tighten the ring nut (5) to the specified torque (Sect. C 3,
Frame torque settings) using the tool part no.
88713.1058.
file:///C|/Documents%20and%20Settings/F4i/My...anual/wsm/usa/Mon695_MY07_D_4_5_00.18.1.html (20 of 29) [10/7/2008 8:42:49 PM]
Page 67

Maintenance operations
Tighten all the previously loosened screws to the specified torque (Sect. C 3, Frame torque settings).
Reposition the handlebar, fit the two U-bolts (2) and tighten the four U-bolt screws (1) to the specified torque (Sect. C
3,
Frame torque settings).
Adjusting chain tension
Move the motorcycle slowly until finding the position at which the chain is tightest.
Place the motorcycle on the side stand.
Push the chain upwards with one finger at swingarm mid-length (see label).
The lower section of the chain should move by approx. 25 - 27 mm.
When required, adjust tension as follows:
Loosen nuts (1) at the wheel shaft ends.
Tighten (turn clockwise) the screws (2) equally on both sides of the swingarm to increase tension, or slacken to
decrease it. In the latter case, you will need to push the wheel forward.
file:///C|/Documents%20and%20Settings/F4i/My...anual/wsm/usa/Mon695_MY07_D_4_5_00.18.1.html (21 of 29) [10/7/2008 8:42:49 PM]
Page 68

Maintenance operations
Caution
A slack chain will lead to early wear of the transmission components.
Check that the reference marks on both sides of the swingarm are lined up. This indicates perfect wheel alignment.
Tighten the nuts (1) onto wheel shaft to the specified torque (Sect. C 3,
Frame torque settings).
Tighten the adjuster screws (2) to the specified torque (Sect. C 3,
Frame torque settings).
Check that the nuts (3) that retain the rear chain sprocket to the flange are tightened securely. This can be done with
the wheel installed, when you hold the bolts steady from the opposite end with an articulated 8-mm wrench.
If nuts (3) are replaced, apply some threadlocker and tighten them to the specified torque (Sect. C 3,
Frame torque
settings).
Checking brake pad wear. Changing brake pads
Warning
Brake fluid will damage painted surfaces if spilled on them. In addition, it will cause severe injury if spilled on the skin
or into your eyes. In the event of accidental contact with skin or eyes, wash the affected area with abundant running
water.
Caution
Please inform the Customer that new pads must be run-in carefully – in other words, the front brake must be used
carefully - for the first 100 Km to allow the friction material to bed in completely.
Checking front brake pad wear
Loosen the screws (1) and remove the front brake calipers from the forks.
Make sure the groove in the brake pad friction material has not worn out.
file:///C|/Documents%20and%20Settings/F4i/My...anual/wsm/usa/Mon695_MY07_D_4_5_00.18.1.html (22 of 29) [10/7/2008 8:42:49 PM]
Page 69

Maintenance operations
Caution
If one of the pads is worn, change both pads.
Change the brake pads as follows.
Remove the split pins (2) from the pad retaining pin.
Force the brake pads apart to force the caliper pistons into their housings.
Withdraw the brake pad retaining pin (3) from the outside.
Release the worn pads (4) from the spring (5) and remove them.
Note
Change pads which are shiny or vitrified.
Fit new pads and their springs (5 and 6). Insert the centering pin (3) and lock it using the split pins (2).
Operate the brake lever repeatedly so that the pads bed in under the action of the brake pistons.
Check that the brake fluid level in the master cylinder reservoir is above the MIN mark.
If necessary, top up as follows. Turn the handlebar so that the reservoir is level.
Unscrew the two cross-slot screws (6) and remove the reservoir cover.
Remove the inner membrane (7) from the reservoir.
file:///C|/Documents%20and%20Settings/F4i/My...anual/wsm/usa/Mon695_MY07_D_4_5_00.18.1.html (23 of 29) [10/7/2008 8:42:49 PM]
Page 70

Maintenance operations
Top up to max level using the specified brake fluid.
Reassemble.
Checking rear brake pad wear
Check through the slot between the two caliper halves that there is at least 1 mm of friction material on the pads.
Caution
If one of the pads is worn, change both pads.
To change the pads, proceed as follows:
Remove the split pin (1) from the caliper retaining pin. The split pin is on caliper inner side. Force the brake pads
apart to force the caliper pistons into their housings. Withdraw the brake pad retaining pin (2) from the outside.
Remove the brake pad retaining clip (3) from between the two caliper halves. Remove the worn pads.
file:///C|/Documents%20and%20Settings/F4i/My...anual/wsm/usa/Mon695_MY07_D_4_5_00.18.1.html (24 of 29) [10/7/2008 8:42:49 PM]
Page 71

Maintenance operations
Note
Change pads which are shiny or vitrified.
Insert the new pads and the clip (3). Insert the retaining pin (2) and push it fully home. Fit the split pin (1) with the
end (A) pointing to the wheel.
Operate the brake pedal repeatedly so that the pads bed in under the action of the brake fluid.
Check that the brake fluid level in the master cylinder reservoir (4) is between the MIN and MAX marks. If this is not
the case, unscrew the reservoir plug (4) and top up with brake fluid.
Note
In case of difficulties with pads replacement, remove the calipers (Sect. G 3, Removing the front brake system and G
6,
Removing the rear brake system).
Warning
The brake calipers are critical safety components. Observe the instructions given in Section G “Wheels - Suspension Brakes”. Be sure to tighten the brake caliper mounting bolts to the specified torque on refitting (Sect. C 3,
Frame
torque settings).
Adjusting the throttle and choke cables
Caution
Adjustment of the throttle and choke cables may affect the throttle body adjustments. Refer to “Adjusting idling
condition”, Sect. D 5.
The throttle twistgrip must have a free travel of 2-4 mm (measured on the twistgrip rim) in all steering positions.
file:///C|/Documents%20and%20Settings/F4i/My...anual/wsm/usa/Mon695_MY07_D_4_5_00.18.1.html (25 of 29) [10/7/2008 8:42:49 PM]
Page 72

Maintenance operations
Fine adjustment can be made by turning the adjuster (1) on the twistgrip.
For larger adjustments of the throttle cable, use the adjuster (2) located on the RH side of the throttle body.
Remove the cap, loosen the lock nut (3) and turn the adjuster (2) to obtain the required play.
Tighten the lock nut and refit the cap.
To adjust the choke control cable, turn the control level on the handlebar until fully open and check that the plate (6)
is touching the end stop.
In this condition, ensure that engine is at 2000 rpm. Turn screw (7) to adjust the rpm.
Likewise, loosen the lock nut (5) and work the adjuster (4) to adjust the throttle control cable.
Check for proper conditions of the outer sheaths of the throttle and choke cables at regular intervals. The outer plastic
sheath should not be damaged or cracked.
To ensure smooth operation of these cables, grease the cable ends with the recommended grease at regular intervals.
Work the throttle or operate the choke lever to make sure core cable is sliding smoothly. If not so, change the cable.
To lubricate the throttle control, unscrew the two screws (9) and remove cover (8).
file:///C|/Documents%20and%20Settings/F4i/My...anual/wsm/usa/Mon695_MY07_D_4_5_00.18.1.html (26 of 29) [10/7/2008 8:42:49 PM]
Page 73

Maintenance operations
Grease the cable end (10) and the pulley.
Refit the cover with extreme care. Insert the cable (10) in the slider (A) of the cover (8).
Tighten the two screws (9) to secure the cover.
Adjusting the position of the gear change and rear brake pedals
The position of the gear change and rear brake pedals in relation to the footpegs can be adjusted to suit rider
preferred riding position.
To adjust the position of the gear change pedal, proceed as follows:
Clamp the rod (1) and loosen the lock nuts (2) and (3).
Note
Lock nut (2) has a left-hand thread.
Fit an open-end wrench to the hexagon of the rod and turn the rod (1) until the gear change pedal is in the desired
position.
file:///C|/Documents%20and%20Settings/F4i/My...anual/wsm/usa/Mon695_MY07_D_4_5_00.18.1.html (27 of 29) [10/7/2008 8:42:49 PM]
Page 74

Maintenance operations
Tighten the two lock nuts onto the rod.
To adjust the position of the rear brake pedal, proceed as follows:
Loosen the lock nut (4).
Turn the pedal travel adjuster screw (5) until the pedal is in the desired position.
Tighten the lock nut (4).
Operate the pedal by hand and check that there is 1.5-2 mm of pedal free travel before the brake begins to operate.
If this is not the case, adjust the length of the brake cylinder control rod as follows:
Loosen the lock nut (7) on the brake cylinder control rod.
To increase the amount of pedal free travel, screw the rod further into the fork (6). Unscrew the rod to decrease.
Tighten the lock nut (7) and check the amount of pedal free travel.
Adjusting the rear shock absorber
The adjuster (1) is on the RH side at the bottom end of the rear shock absorber, near the mounting point to the
swingarm. This adjuster sets rebound damping.
The ring nuts (2) and (3) at the top end of the shock absorber are for external spring preload.
Turn the adjuster (1) clockwise for harder (H) damping and counterclockwise for softer (S) damping.
file:///C|/Documents%20and%20Settings/F4i/My...anual/wsm/usa/Mon695_MY07_D_4_5_00.18.1.html (28 of 29) [10/7/2008 8:42:49 PM]
Page 75

Maintenance operations
Standard setting:
from the fully closed position (clockwise) turn out the adjuster (1) by 18 clicks.
To change spring preload, slacken the upper ring nut (2) with a pin wrench. Tighten or slacken the lower ring nut (3)
to increase or decrease preload.
Warning
Use the special wrench only to turn the ring nut for preload adjustment. When applying pressure to the wrench,
ensure that wrench pin does not slip out suddenly from the slots in the ring nut. This could cause minor injuries to
your hands. Do not use wrenches which are too small or have short handles.
Standard spring length: 157 mm.
Warning
The shock absorber is filled with high-pressure gas and might cause injuries if inexpertly dismantled.
Caution
When carrying a passenger and a load, set maximum spring preload for improved handling and to keep safe ground
clearance. Set rebound damping accordingly.
file:///C|/Documents%20and%20Settings/F4i/My...anual/wsm/usa/Mon695_MY07_D_4_5_00.18.1.html (29 of 29) [10/7/2008 8:42:49 PM]
Page 76

Testers
5 - Testers
1 97900.0211 DDS (Ducati Diagnosis System) base unit
2 97900.0227 Power cord and diagnosis cable D607
3 97900.0222 Power cord and diagnosis cable 1060838 (Measurement Module)
4 97900.0218 Vacuum sensor
5 552.1.039.1A Pressure sensor
6 97900.0220 Pressure/vacuum tube
7 97900.0221 Fitting
8 97900.0228 Battery adapter
9 814.1.114.1A Oil pressure connection
10 514.1.032.1A Auxiliary test cable
11 552.1.037.1A Cylinder compression cable - M12 fitting
12 875.1.065.1A Oil pressure tube
13 97900.0230 Power supply
14 97900.0224 Power supply
15 88765.1371 Belt tension sensor
16 88765.1374 Belt tension sensor bracket
17 590.1.189.1A Fuel pressure tube
18 97900.0234 Clamp-type ammeter
file:///C|/Documents%20and%20Settings/F4i/My...anual/wsm/usa/Mon695_MY07_D_5_5_00.19.1.html (1 of 41) [10/7/2008 8:43:05 PM]
Page 77

Testers
19 514.1.033.1A Lighter socket adapter
Spare parts catalogue
Diagnosis tester DDS
Workshop special tools
Caution
Bold reference numbers in this section identify parts shown in this exploded view diagram. These parts do not appear
in the figures near the text.
Tester description
The “DDS” diagnostic system lets you diagnose any faults in the injection-ignition system via a serial port. This
system provides a full range of features to test a number of motorcycle devices, measure the current and voltage
outputs from any electrical items, test individual components and take pressure and temperature measurements.
The DDS (1) consists of a palmtop display (A), a BBAD self-diagnosis module (B), a display memory card (C) and a
BBAD memory card (D).
file:///C|/Documents%20and%20Settings/F4i/My...anual/wsm/usa/Mon695_MY07_D_5_5_00.19.1.html (2 of 41) [10/7/2008 8:43:05 PM]
Page 78

Testers
The palmtop touch screen display (A) displays data and allows settings to be made via the suitable pen, housed in the
hole on the side of the display.
Self-diagnosis module (B) establishes communication of the DDS (1) with the vehicle control unit.
The user interface software resides in the display memory card (C) located in the palmtop display (A).
The software for communicating with the DUCATI control units resides in the BBAD memory card (D) located in the
BBAD module (B).
The base unit features two connection areas: one at the top and one at the bottom.
The top one has 6 connectors:
- one VGA output (E);
- one port for measurement module connection (F);
- one RS232 serial port for peripherals (COM1) (G);
- one RS232 system serial port (COM2) (H);
- two USB general ports (USB1 and USB2) (L).
The bottom one has 3 connectors:
- USB connector (M);
- power connector (N);
- diagnosis connector (P).
file:///C|/Documents%20and%20Settings/F4i/My...anual/wsm/usa/Mon695_MY07_D_5_5_00.19.1.html (3 of 41) [10/7/2008 8:43:05 PM]
Page 79

Testers
A printer can be connected to the DDS (1) via the serial port (COM1) (G) positioned on top of the instrument (1) in
order to print test reports.
Specifications
Power supply:
- from the mains - 220 V;
- from the vehicle battery - 12 V.
Components supplied with the DDS
The DDS (1) is supplied in a DDS kit, together with:
- DDS rechargeable battery
- Battery charger
- Mains power supply
- USB memory card reader
- Power and diagnosis cable with fuse
- CD for DDS software installation - PC version
- USB cable
- Belt tension sensor
Instrument power supply
The DDS (1) can be powered as follows:
- from the mains: connect mains power supply (14) to power connector (N);
-
from the vehicle: connect the suitable cables (see "
Connection to the bike");
-
from the instrument own battery: the battery (Q) is located at the top of the instrument. Please refer to the "User's
Manual" supplied with the DDS for instructions on how to use the instrument (1) with its battery and how to charge
it.
Press button (T) to switch on the display.
file:///C|/Documents%20and%20Settings/F4i/My...anual/wsm/usa/Mon695_MY07_D_5_5_00.19.1.html (4 of 41) [10/7/2008 8:43:05 PM]
Page 80

Testers
Connection to the bike
Supply voltage must be between 9 and 16 Volt DC.
Make sure voltage never drops below this limit during operation: this could happen when starting the engine or when
the engine is idling if the bike battery is in less than perfect operating conditions. If the tester detects a power supply
voltage below 9 Volts, it will abort any procedures underway at that time. Once voltage is again within specified
limits, you will have to repeat procedure set-up.
The DDS (1) can be powered from the vehicle as follows:
-
connecting battery power supply (13) to the power connector (N) of the instrument and connecting battery power
supply to vehicle battery;
file:///C|/Documents%20and%20Settings/F4i/My...anual/wsm/usa/Mon695_MY07_D_5_5_00.19.1.html (5 of 41) [10/7/2008 8:43:05 PM]
Page 81

Testers
-
connecting the power and diagnosis cable (2) to instrument diagnosis connector (P); connecting battery adapter (8)
to power and diagnosis cable connector (R) and then connecting the adapter to the vehicle battery.
file:///C|/Documents%20and%20Settings/F4i/My...anual/wsm/usa/Mon695_MY07_D_5_5_00.19.1.html (6 of 41) [10/7/2008 8:43:05 PM]
Page 82
Testers
Note
For device connection and diagnosis procedures, refer to the user’s manual supplied with the tester
DDS diagnosis instrument
In short, the "DDS" has the following functions:
- Error reading (failures) for ignition-injection system errors stored in engine control unit memory and error deletion.
-
Parameter reading, such as engine rpm, coolant and air temperature, atmospheric pressure, throttle opening value,
battery voltage, injection times, ignition advance values and so on.
-
Active diagnosis. Enabling of ignition-injection system transducers to check for proper operation and correct control
signal (fuel pump, ignition coils, rev counter, injectors and so on). This function also allows entering the safety code
for bypassing the immobilizer system.
-
Road test. This function allows you to store engine parameters within a preset rpm range. At the end of their
acquisition, these parameters are then analyzed and displayed.
-
If connected to special feelers, the DDS can read voltage, current and temperature values as well as timing belt
tension values and pressure values into oil and fuel circuits.
Checking and adjusting timing belt tension
Note
A table at the end of this section explains the icons used in this procedure.
Note
Both timing belts can be checked and adjusted using the DDS leaving the engine onto the frame. For this purpose,
connect an optical reader to the DDS. The green led onto the reader shows correct positioning before the timing belt.
The reader also features an infra-red emitter (A) and a receiver (B) to detect timing belt vibrations whilst being duly
flicked with a finger.
Operations Reference See Section
Remove side covers N 4.2,
Removing the timing side
covers
Remove the spark plugs.
Rotate the crankshaft until bringing the piston of the horizontal cylinder at TDC during the combustion stroke.
This is indicated by the mark (C) on the timing layshaft belt roller (28) aligning with the mark (D) on the clutch cover
(20).
file:///C|/Documents%20and%20Settings/F4i/My...anual/wsm/usa/Mon695_MY07_D_5_5_00.19.1.html (7 of 41) [10/7/2008 8:43:05 PM]
Page 83

Testers
Switch on the DDS (1), refer to "Instrument power supply".
Connect the power and diagnosis cable (Measurement Module) (3) to measurement module connector (F) of the DDS
(1).
Connect the belt tension sensor (15) to power and diagnosis cable (Measurement Module) (3) connector (V).
Secure the belt tension sensor bracket (15) using belt cover screw (21).
Aim the middle green led of the sensor (15) at the centre of the belt section by positioning the sensor (15) at the
same level of the belt at a distance of 1-1.5 cm.
file:///C|/Documents%20and%20Settings/F4i/My...anual/wsm/usa/Mon695_MY07_D_5_5_00.19.1.html (8 of 41) [10/7/2008 8:43:05 PM]
Page 84

Testers
Press on "Measurement module" icon on DDS (1) to select the "Measurement module" function; then press on "Belt
tension" icon and then "Start" to enter the "Belt mechanical tension" page.
The page shows you which socket of the cable (Measurement Module) (3) is to be used with a capital A, B or C.
file:///C|/Documents%20and%20Settings/F4i/My...anual/wsm/usa/Mon695_MY07_D_5_5_00.19.1.html (9 of 41) [10/7/2008 8:43:05 PM]
Page 85

Testers
Lightly flick the belt with a finger and then read frequency value (Hz) on the DDS.
Note
Do not flick several times, as the DDS needs at least 1 second to read the value.
Warning
Check tension reading on the belt sections (22) and (23) indicated in the figure.
Belt tension values are indicated in Sect. C 1.1,
Timing/valves.
file:///C|/Documents%20and%20Settings/F4i/My...anual/wsm/usa/Mon695_MY07_D_5_5_00.19.1.html (10 of 41) [10/7/2008 8:43:05 PM]
Page 86

Testers
Warning
Timing belt tension could decrease in time as a result of normal wear and tear. When checking belt tension, restore
specified nominal values (Sect. C 1.1,
Timing/valves) or in any case set tension to at least 80% of nominal values
when reading is below 70 Hz.
Should the tension be incorrect, tension or slacken the belt by turning screws (24) and (25) securing the mobile
tensioner rollers.
Lift the mobile tensioner (26) by hand to stretch the timing belt or lower down to slacken.
Note
If the crankcase has been removed from the frame, turn screw (24) using the suitable tool (27) and position tool
pusher (U) on the tensioner.
Caution
Turn the pusher (U) counter clockwise to stretch the belt or clockwise to slacken.
Take belt tension value once again.
Repeat until reaching the specified tension value.
Once desired tension is set, tighten the screws (24) and (25) to the specified torque (Sect. C 3,
Engine torque
settings).
file:///C|/Documents%20and%20Settings/F4i/My...anual/wsm/usa/Mon695_MY07_D_5_5_00.19.1.html (11 of 41) [10/7/2008 8:43:05 PM]
Page 87
Testers
Set the crankshaft at the TDC of the vertical cylinder, in the combustion stroke (valve closed), and repeat the same
procedure used for the horizontal cylinder, reading tension on section (22) of the vertical belt.
Disconnect the belt tension sensor and the DDS from the vehicle.
Operations Reference See Section
Remove side covers N 4.2,
Refitting the timing side covers
Zero setting the throttle position sensor (TPS)
The linear-type TPS cannot be adjusted, follow the procedure below to ensure proper system operation.
Warning
When the throttle body, throttle position sensor, electronic control unit or wiring have been replaced, perform this
procedure first before starting the engine.
Ensure that the throttle is fully home on its end screw (choke control lever disabled and throttle control completely
closed).
Throttle position sensor angle should be learned by the CPU under the above conditions. Use the DDS as described
below.
Lift the fuel tank (Sect. L 2,
Removing the fuel tank).
Switch on the DDS (1), refer to "
Instrument power supply".
Connect the diagnosis connector (A) of the power and diagnosis cable (2) to the motorcycle diagnosis socket (B).
file:///C|/Documents%20and%20Settings/F4i/My...anual/wsm/usa/Mon695_MY07_D_5_5_00.19.1.html (12 of 41) [10/7/2008 8:43:05 PM]
Page 88

Testers
Enter the general functions menu, pressing "Menu Key 1" icon (C).
Press the "Vehicle selection" icon and press "Vehicle selection" icon in the following page; choose the model and
confirm, then select the version and confirm.
file:///C|/Documents%20and%20Settings/F4i/My...anual/wsm/usa/Mon695_MY07_D_5_5_00.19.1.html (13 of 41) [10/7/2008 8:43:05 PM]
Page 89

Testers
Press "System selection" icon displayed to show the vehicle systems that can be diagnosed.
Select "Engine electronic system" and press "Confirm" (D) to confirm. Then press "Self-diagnosis" icon to enter selfdiagnosis function.
file:///C|/Documents%20and%20Settings/F4i/My...anual/wsm/usa/Mon695_MY07_D_5_5_00.19.1.html (14 of 41) [10/7/2008 8:43:05 PM]
Page 90

Testers
The DDS queries the control unit and the elements under analysis are displayed together with their relevant values.
Note
Perform the necessary connections with the ignition key set to OFF.
Press "Settings" icon to display the special parameters.
Select "TPS reset" and press "Execute".
file:///C|/Documents%20and%20Settings/F4i/My...anual/wsm/usa/Mon695_MY07_D_5_5_00.19.1.html (15 of 41) [10/7/2008 8:43:05 PM]
Page 91

Testers
If the operation is performed, the message "Was the operation successful?" is displayed; press "Confirm" (D).
If there are problems in performing the operation, the relevant error messages are displayed: you need to confirm or
reject each message by pressing "Confirm" (D) or "Exit" (E), respectively.
The zero setting procedure establishes a connection between electronic control unit and throttle body. For this reason,
the zero setting procedure must be repeated each time the throttle body, throttle position sensor, electronic control
unit or wiring are replaced.
Adjusting idling condition
Connect exhaust gas analyser inserts part no. 88713.1010 to exhaust pipes pick-up points, using couplings (20).
file:///C|/Documents%20and%20Settings/F4i/My...anual/wsm/usa/Mon695_MY07_D_5_5_00.19.1.html (16 of 41) [10/7/2008 8:43:05 PM]
Page 92

Testers
Ensure that throttles are against the stop screw (throttle twistgrip fully closed). Ensure choke is off and that throttle
cable free play is correct. Reset the TPS as indicated in "
Zero setting the throttle position sensor (TPS)", in this
section.
Check:
- that throttle angle reading on DDS is 2.7° ± 0.1° with engine stopped;
-
that idle condition is acknowledged; if not, repeat the procedure indicated in "
Zero setting the throttle position
sensor (TPS)".
Open the by-pass screws (21) by one turn, from fully closed position.
Start the engine and allow oil to reach 75° C; switch off choke, if previously activated.
When oil temperature is above 75° C you can start the following adjustment procedure; always bear in mind that at
the end of the adjustment oil temperature should not exceed 100° C.
Idling should be between 1250±1350 rpm (1300±50)
If the value is included in the above range, check the CO level and ensure that values are min. 0.5 and max 0.9 for
both cylinders. If CO reading is lower or higher than indicated range, open or close by ¼ of a turn the by-pass screw
(21) of the cylinder having incorrect reading and allow 20 seconds before checking again with the gas analyser.
If idling speed is not within the above-indicated range, open or close by ¼ of a turn the by-pass screws (21) of both
file:///C|/Documents%20and%20Settings/F4i/My...anual/wsm/usa/Mon695_MY07_D_5_5_00.19.1.html (17 of 41) [10/7/2008 8:43:05 PM]
Page 93

Testers
cylinders and check again CO level once idling rpm is correct.
If adjustment results were negative, repeat the procedure, starting from throttle position sensor (TPS) reset.
Note
The vacuum gauge is not used since "cylinder synchronisation procedure" is not necessary.
Adjusting the choke
Work the choke control adjuster (22) to adjust choke lever (23) so that the lever (24) can travel smoothly all its
stroke.
Checking engine oil pressure
Note
A table at the end of this section explains the icons used in this procedure.
Take oil circuit pressure through engine oil pressure sensor outlet (21) as follows:
Remove the pressure switch (21) connector (A). Be sure to collect the seal.
file:///C|/Documents%20and%20Settings/F4i/My...anual/wsm/usa/Mon695_MY07_D_5_5_00.19.1.html (18 of 41) [10/7/2008 8:43:05 PM]
Page 94

Testers
Insert fitting (9) in the hose (12) fitting, and place two copper washers (20) in-between. Screw the connector (9) of
the hose (12) into the threaded hole (M10x1mm) in the RH cover. Screw the connector all the way in. Refit the
pressure switch (21) complete with seal to the connector (9) and reconnect it to the electric system connector (A).
Connect the pressure sensor (5), to the hose (12), in order to convert the pressure reading into an electric signal.
file:///C|/Documents%20and%20Settings/F4i/My...anual/wsm/usa/Mon695_MY07_D_5_5_00.19.1.html (19 of 41) [10/7/2008 8:43:05 PM]
Page 95

Testers
Switch on the DDS (1), refer to "Instrument power supply".
Connect the power and diagnosis cable (Measurement Module) (3) to measurement module connector (B) of the DDS
(1).
Connect the pressure sensor (5) to port (A) or (C) of cable (3).
file:///C|/Documents%20and%20Settings/F4i/My...anual/wsm/usa/Mon695_MY07_D_5_5_00.19.1.html (20 of 41) [10/7/2008 8:43:05 PM]
Page 96

Testers
Press "Measurement module" icon on DDS (1) to select the "Measurement module" function; then press on "Pressure
Measurement" icon (D) and then "Start" (E).
The page shows you which socket of the cable (Measurement Module) (3) is to be used with a capital A, B or C.
file:///C|/Documents%20and%20Settings/F4i/My...anual/wsm/usa/Mon695_MY07_D_5_5_00.19.1.html (21 of 41) [10/7/2008 8:43:05 PM]
Page 97

Testers
Start the engine.
Values can be displayed in three ways: as numbers (one mode) or as graphs (two modes); press "Display mode" (F)
to select the display mode.
Measured value is indicated next to letter (A) or (C) depending on the cable used: if socket (A) of cable (3) is used,
measured value will correspond to letter (A) on the screen.
file:///C|/Documents%20and%20Settings/F4i/My...anual/wsm/usa/Mon695_MY07_D_5_5_00.19.1.html (22 of 41) [10/7/2008 8:43:05 PM]
Page 98

Testers
Oil pressure test values:
Warm engine
(Oil temperature at least = 80°C)
1100 - 1300 rpm
over 0.8 bar
3500 - 4000 rpm
over 4 bar
Caution
Maximum pressure must not exceed 6.0 bar.
A pressure which is too high indicates that the pressure-relief valve is jammed. A pressure which is too low indicates
that the pressure-relief valve is jammed in the open position, that the spring is too weak, or that the oil pump is
faulty. Other causes of incorrect pressure readings include: badly worn seals and gaskets; badly worn engine.
Remove the gauges and refit the pressure switch (21) with its seal. Tighten it to the specified torque (Sect. C 3,
Engine torque settings).
Connect the electrical connector (A) to the pressure switch.
file:///C|/Documents%20and%20Settings/F4i/My...anual/wsm/usa/Mon695_MY07_D_5_5_00.19.1.html (23 of 41) [10/7/2008 8:43:05 PM]
Page 99

Testers
Disconnect the DDS.
Checking cylinder compression
Note
A table at the end of this section explains the icons used in this procedure.
The performance and efficiency of an engine are directly linked to the compression inside the combustion chambers of
the two cylinders. Compression which is too high/low or a large compression difference between the two cylinders will
cause a drop in engine performance and can cause engine breakdowns.
Start the engine and let it warm up until the fan switches on at least once.
Remove the outer structures.
Open the throttles fully.
Remove the spark plug-coil cables (20) from both spark plugs.
Remove the spark plug from the cylinder to be checked.
file:///C|/Documents%20and%20Settings/F4i/My...anual/wsm/usa/Mon695_MY07_D_5_5_00.19.1.html (24 of 41) [10/7/2008 8:43:05 PM]
Page 100

Testers
To prevent sparks, earth the spark plug cable.
Screw the cylinder compression cable (11) into the spark plug hole.
Connect the pressure sensor (5) to cable (11).
Switch on the DDS (1), refer to "
Connection to the bike".
Connect the power and diagnosis cable (Measurement Module) (3) to measurement module connector (B) of the DDS
(1).
Connect the pressure sensor (5) to port (A) or (C) of cable (3).
Note
Take the reading in one cylinder at a time.
Press "Measurement module" icon on DDS (1) to select the "Measurement module" function; then press on "Cylinder
compression" icon (D) and then "Start" (E).
file:///C|/Documents%20and%20Settings/F4i/My...anual/wsm/usa/Mon695_MY07_D_5_5_00.19.1.html (25 of 41) [10/7/2008 8:43:05 PM]
 Loading...