

Page 1

User's
Guide
PC6010
Page 2
Quick Reference Guide
This manual is for Basic and Advanced users. Each of these types of user can access a different set of
functions. The and symbols next to the title of each procedure show which users can
access that function.
Each user should read all the sections that describe the functions they can access. All users should
read pages i, and 1-2, for important information on security system operation.
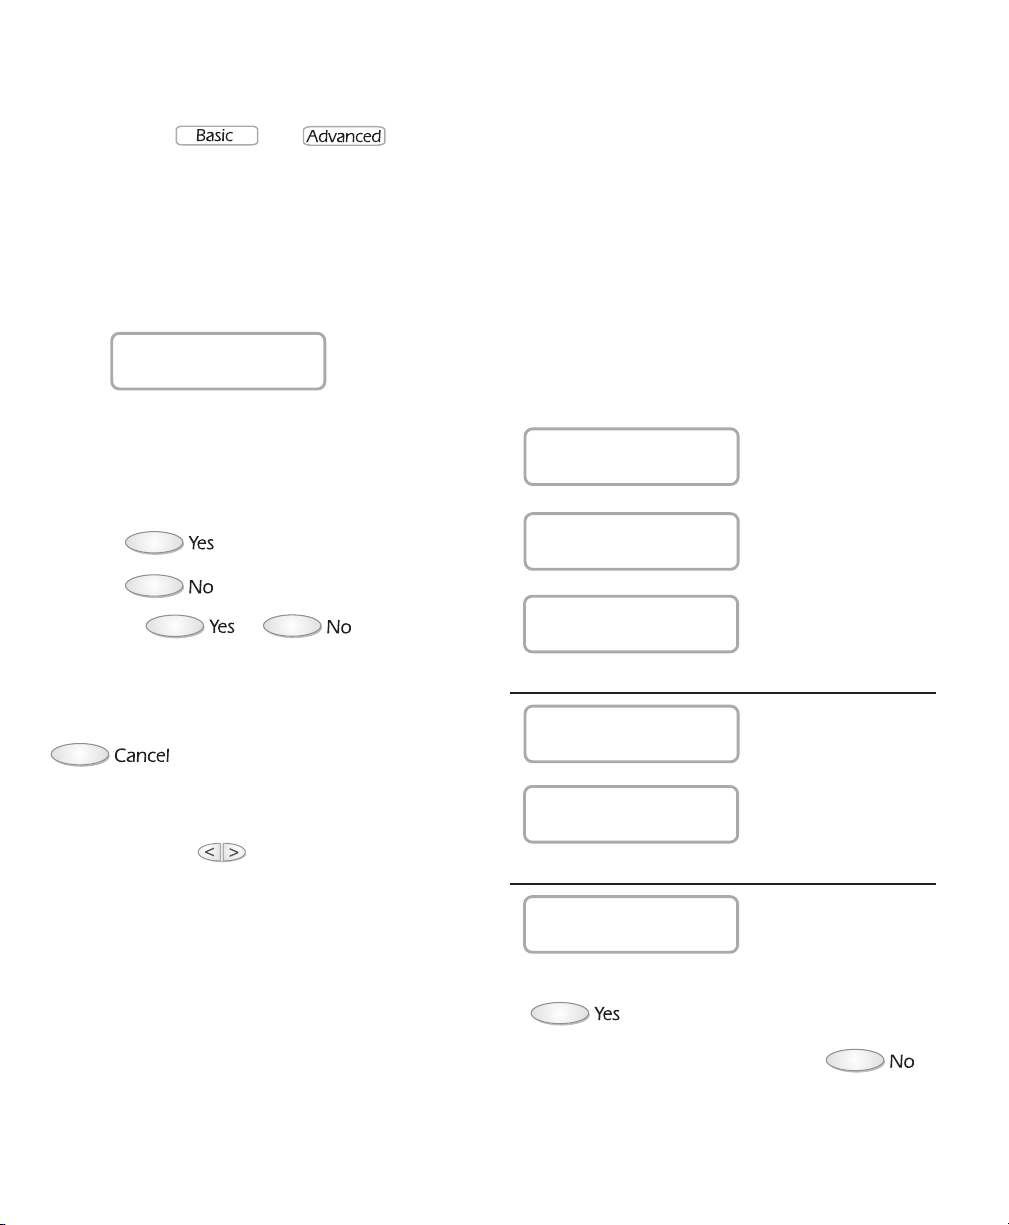
To use any function:
1. When the keypad is idle, it displays the time and
date:
12:00 2000/01/01
Enter Your Code
Enter your access code to go to the main menu.
2. The keypad prompts you with questions about
which function you want to choose. See the
appropriate section for information on each
function.
3. Press to select a function
Press to skip to the next function.
4. Answer or to each of the
questions until you are finished.
Remember: If you want to start over, press
at any time.
If you are viewing a list of items, the keypad
displays a flashing > when there is more
information. Use to see each item in the
list.
Main Menu:
This is the order of the prompts in the main menu.
For more information on each prompt, refer to the
page number indicated.
Users will see only the prompts they have access to.
Prompt Page No.
Do You Want To
Turn Areas On? ........................ 6
Do You Want To
Turn Areas Off? ...................... 10
Do you want to
Delay Auto-Arm? ...................... 15
End of basic user prompts
Activate
Door Strike? ...................... 16
Do You Want to
Reset Detectors? ...................... 16
End of advanced user prompts
End of List
View List Again?
To return to the beginning of the prompts, press
.
To return to the start screen, press .
Page 3

Table of Contents
Glossary 2
1 About Your Security System 3
1.1 Using This Manual ................................................................................................................................................ 3
1.2 Understanding Your Security System .................................................................................................................. 3
1.3 Remote Monitoring .............................................................................................................................................. 4
2 Turning Your Area(s) ON and OFF 5
2.1 Entering Your Access Code ................................................................................................................................... 5
2.2 Turning All Your Areas ON ................................................................................................................................... 6
2.3 Turning Some of Your Areas ON ......................................................................................................................... 7
2.4 Turning Area(s) ON - "Attempt Failed" Message............................................................................................... 8
2.5 Turning All Your Areas OFF................................................................................................................................ 10
2.6 Turning Some of Your Areas OFF ...................................................................................................................... 11
3 Silencing and Clearing Alarms & Faults 12
3.1 Turning Off the Bells/Sirens ............................................................................................................................... 12
3.2 Clearing the Alarms ............................................................................................................................................ 13
3.3 Viewing and Clearing Fault Conditions ............................................................................................................ 14
4 Automatic Arming 15
5 Other Functions 16
5.1 Unlocking Doors ................................................................................................................................................. 16
5.2 Resetting Detectors ............................................................................................................................................ 16
Index inside back cover
See the
Glossary on page 2
to learn more about
words used in this
manual.
1
Page 4
Glossary
Access code: A four- or six-digit code that allows you to turn areas on or off, and to use other
system functions.
Alarm: When a zone is violated (e.g. a smoke detector detects smoke, a motion detector
senses movement, a door with a contact is opened), it triggers an alarm.
Intrusion alarm: An alarm triggered by an intrusion detector (e.g. motion detectors, glassbreak
detectors, door/window contacts). Usually occurs when the system is turned on.
Fire alarm: An alarm triggered by fire, smoke or heat detectors. Fire alarms may be
triggered at any time, whether the system is on or off.
Area: A group of zones that can be turned on or off together. See Zone.
Auto-arming: When the system turns on one or more areas at a preset time of the day.
Central Station: If remote monitoring is enabled, your system will send alarms, faults and
emergency messages to the central station. The central station will then notify the local
authorities, if necessary.
Detector: A part of the system that can detect problems and report them to the control panel
(e.g. a motion detector can tell the control panel if there is movement in a protected area).
Entry time: A timer programmed by your installer. The timer begins counting down when
you enter an area that is on. You must enter an access code to turn the area off before the
timer runs out, or an alarm will be triggered.
Entry/exit doors: Your installer will program the doors you usually use to enter or exit the
premises as entry/exit doors. These doors have entry and exit times. Your installer will usually
place keypads near the entry/exit doors for easy access to system functions.
Exit time: A timer programmed by your installer. The timer begins counting down when you
turn your system on, to allow you a period of time in which to leave the premises. At the
end of the exit time the system will be turned on.
Fault: The control panel continuously checks the system for conditions that may reduce its
effectiveness. If the control panel finds one of these conditions (fault), it will indicate this at
the keypad(s) to alert you to the problem.
Main Menu: The first set of options available after you enter your access code starting with
"Do you want to turn areas on?", or "Your areas are ON/OFF... Exit Now?".
Security System: The main control panel, detectors, devices and keypads, which together
provide security monitoring of an area.
Start Screen: What the keypad displays before you enter your access code:
12:00 2000/01/01
Enter Your Code
Zone: A part of the premises monitored by a detector (smoke detector, door/window contact,
motion detector, glassbreak detector, etc.).
2
[120]
Page 5
About Your Security System
S E C T I O N 1
Your DSC security equipment has been designed to give you the greatest possible flexibility
and convenience. The liquid crystal display (LCD) keypad guides you through each operation
with easy-to-understand prompts. With unique sound sequences, the keypad signals
faults and other indications of system status.
Read this manual carefully to become familiar with the features that have been
implemented on your system. All users of this system should be instructed in the features
available to them.
1.1 Using This Manual _______________________________________________________________
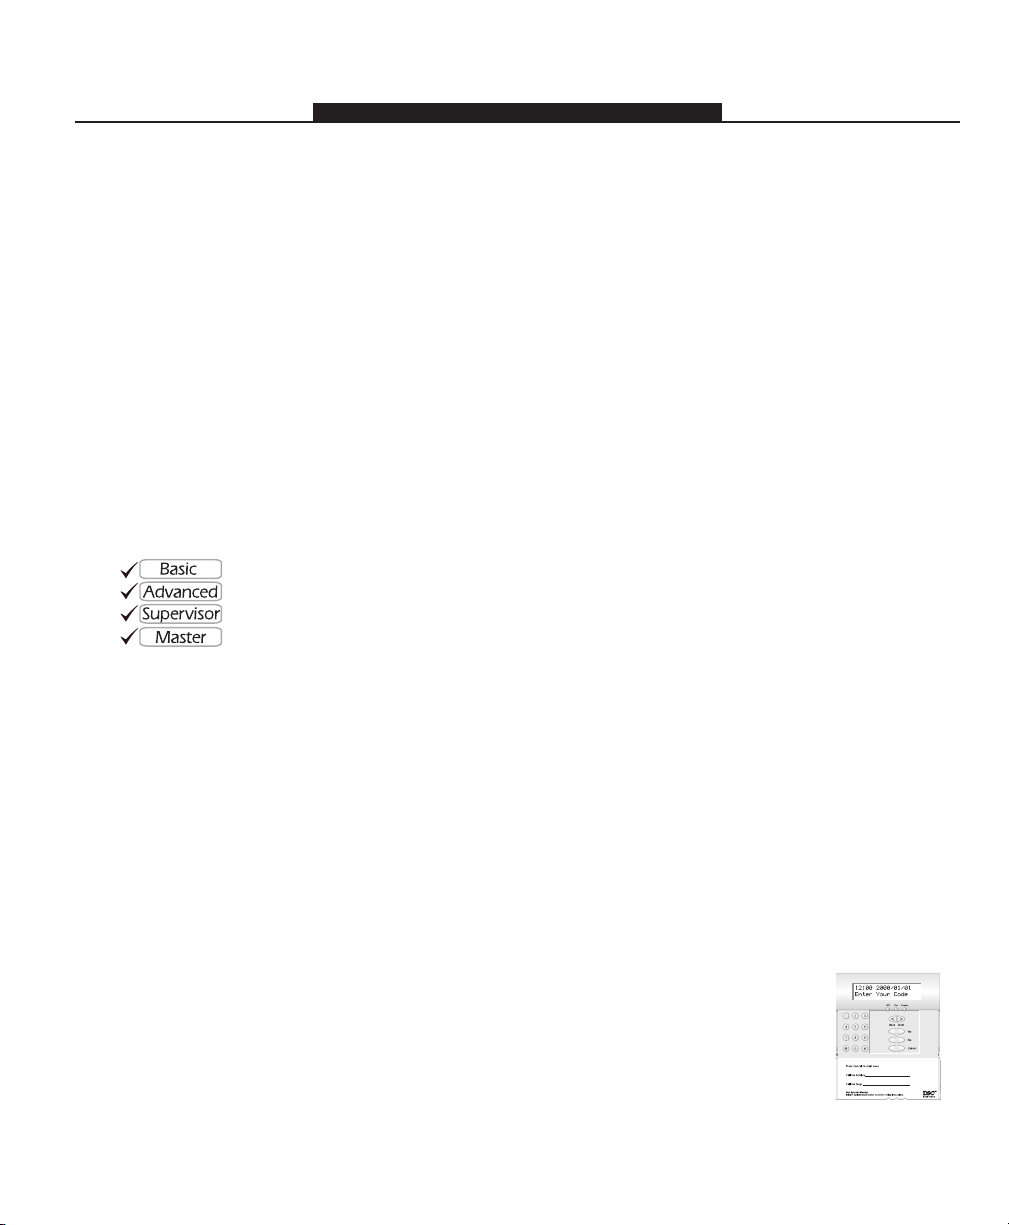
There are 4 possible types of users of an PC6010 security system. Each of the 4 user types
can access different levels of features.
This manual describes how to use the features that are available to Basic and Advanced
users. These features may also be available to Supervisor and Master users. For information
on additional functions which are available to Supervisor and Master users, please refer
to the Maintenance Manual.
Each user type has access to a different set of system functions. Each procedure indicates
which users will be able to access it, with a graphic similar to the following:
1.2 Understanding Your Security System ___________________________________________
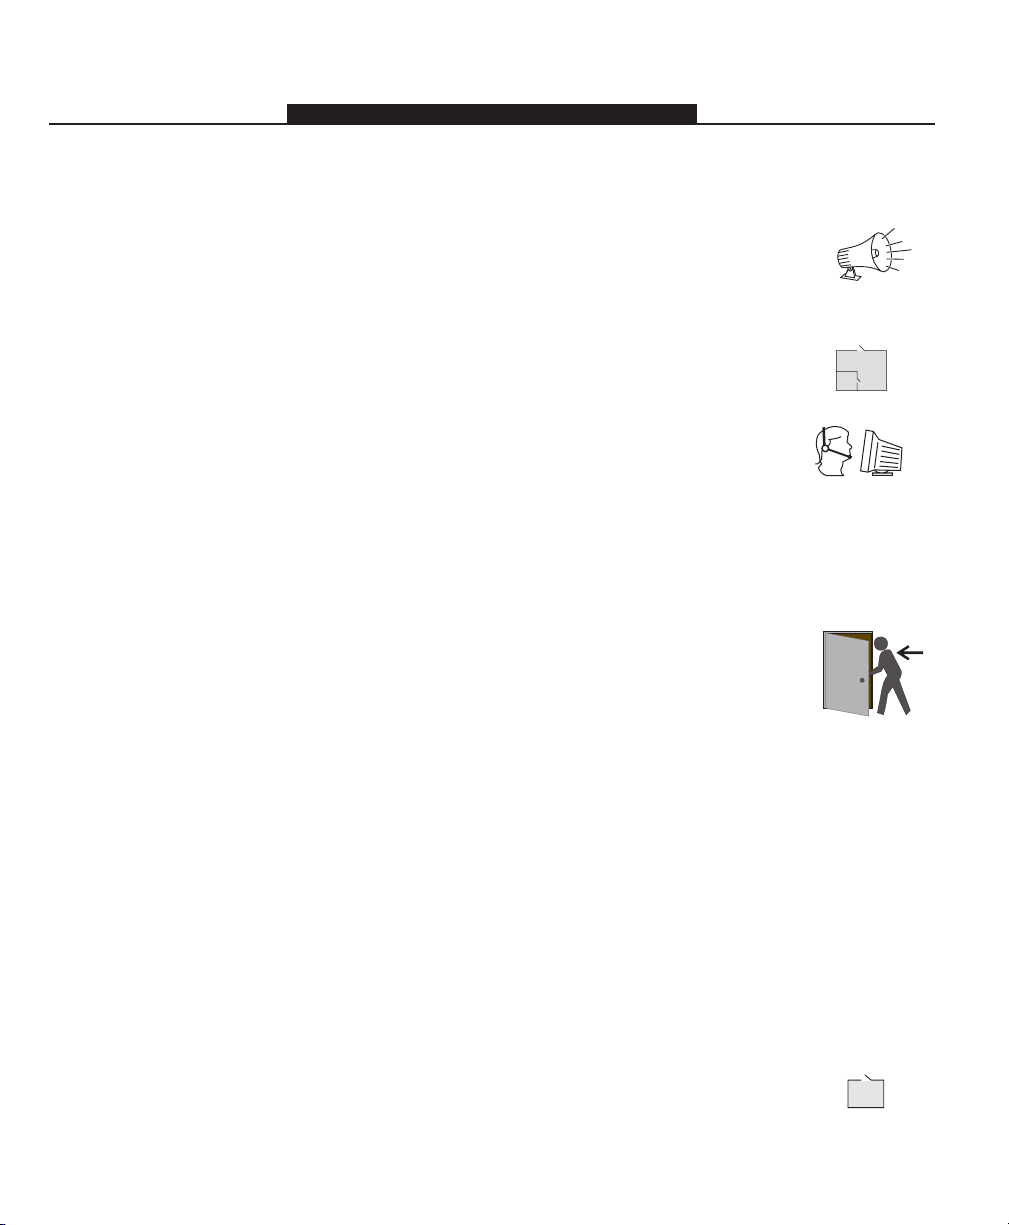
Your security system is made up of a control panel, keypads and various detectors
and sensors.
Control Panel
The control panel is the “brain” of your security system. It controls and monitors all the
keypads and sensors, and communicates with the central station (if remote monitoring is
turned on). The control panel will be mounted out of the way, in a utility closet or in a
basement. The metal cabinet contains the system electronics, fuses and stand-by battery.
There is normally no reason for anyone but the installer or service professional to have
access to the control panel.
Keypads
You can access system functions with your keypad(s), described in the User Guide. Each
keypad has a sounder. The keypad has a liquid crystal display (LCD) which shows system
messages. The keypad can send commands to the system and show the current system status.
You installer will mount the keypad(s) inside your premises, close to the entry/exit door(s).
3
Page 6
Zones and Areas
The security system has several zones (monitored areas). Each of these zones will be
connected to a sensor (motion detectors, glassbreak detectors, door contacts, etc.). If a
sensor goes into alarm, the keypad displays a message.
Your installer may have divided the system into different areas. Each area includes one or
more zones, and can be turned on and off independently of other areas. Your installer
should explain to you which areas have been programmed, and which zones belong to
which areas.
Access Codes
As a user of the system, you will be assigned a 4- or 6-digit access code. You can use your
access code to turn areas on and off, and to access other system functions.
Your access code may not allow you to use certain system functions. For instance, if your
code is only allowed to turn on area 1, you will not be able to turn on other areas.
1.3 Remote Monitoring _____________________________________________________________
The system can send alarms, troubles and emergency messages over telephone lines to a
central station. If you accidentally initiate an alarm, immediately call the central station to
prevent an unnecessary response.
NOTE: Your installer must enable monitoring for it to work.
IMPORTANT NOTICE
A security system cannot prevent emergencies. It is only intended to alert you and – if included – your
central station of an emergency situation. Security systems are generally very reliable but they may not
work under all conditions and they are not a substitute for prudent security practices or life and property
insurance. Your security system should be installed and serviced by qualified security professionals who
should instruct you on the level of protection that has been provided and on system operations.
4
Page 7

Turning Your Area(s) ON and OFF
S E C T I O N 2
This section describes how to turn your areas of the system ON and OFF. You will only be
able to turn on or off the areas which have been assigned to you. All users should read
this section carefully.
Remember - you can return to the start screen at any time by pressing .
However, pressing will not prevent areas from being turned on. To remain
in, or to re-enter areas, you must enter your access code and turn the areas off.
2.1 Entering Your Access Code ______________________________________________________
Before you can use any system features, you need to enter your access code. The keypad
always displays the start screen first:
12:00 2000/01/01
1.
Step
Enter Your Code
If you enter a valid code, the keypad gives 3 short beeps, and the keypad displays the
next prompt. For example, the keypad may display:
Do You Want To
Turn Areas On?
If the Code is Not Valid
Step
2. If you enter a code that is not valid, the keypad gives one long beep, and the system
prompts:
Enter your access code using the number pad.
Go to step 4 (if the code is valid).
Code Not Valid
Please Try Again
After 2 seconds, the keypad goes back to the start screen:
12:00 2000/01/01
Enter Your Code
Step
3. Enter your code. If you enter a valid code, the keypad gives 3 short beeps, and the
system prompts:
Do You Want To
Turn Areas On?
If the Code is Valid
Step
4. Answer or to each of the keypad prompts until you have
finished. Refer to the procedures in this manual for more information on each prompt.
5
Page 8

2.2 Turning All Your Areas ON ______________________________________________________
This procedure explains how to turn on all the areas that you have access to. Before you
turn areas on, you should check that they are not occupied, and that all zones are closed
(i.e. doors and windows are closed, there is no motion in the area).
1. 12:00 2000/01/01
Step
Enter Your Code
2. Keypad displays:
Step
Enter your access code.
Do You Want To
Turn Areas On?
3. Keypad displays:
Step
To confirm, press .
Turn ON All
Your Areas?
4. The keypad beeps 3 times, the ON light turns on and the keypad displays:
Step
To confirm, press .
All Your Areas Please Leave
Are Turning On
5. The keypad counts down the exit time (the number in the lower right-hand corner
Step
shows how much time is left). Leave the area through your entry/exit door. The area
will turn on after the exit time expires.
then, Now... 120
NOTE: Pressing
in, or to re-enter the area, you must enter your access code and turn the area off.
Attempt Failed
When you are trying to turn areas on, if you see the message
will not prevent the area from being turned on. To remain
Attempt Failed
View Problems?
one or more zones may be open, or have problems. See section 2.4 for instructions.
6
Page 9

2: Turning Your Area(s) ON and OFF
2.3 Turning Some of Your Areas ON _________________________________________________
This procedure explains how to turn on some of the areas that you have access to. Before
you turn any areas on, you should check that they are unoccupied, and that all the zones
are closed (i.e. doors and windows are closed, there is no motion in the area).
12:00 2000/01/01
1.
Step
Enter Your Code
Step
2. Keypad displays:
Do You Want To
Turn Areas On?
3. Keypad displays:
Step
Turn ON All
Your Areas?
Step
4. The keypad displays a list of each area you have access to. For example:
Enter your access code.
To confirm, press .
Press .
If you
need to turn on
the area you are
in, make sure
you turn it on
LAST!
Turn ON Area?
Area 1
If you do not want to turn on an area, press . The keypad displays the
next available area.
If this is an area you want to turn on, press
. The keypad displays:
Area 1
is Turning On
NOTE: After you turn on the area you are in, you will not be able to turn on any more
areas from this keypad. The keypad beeps 3 times, the ON light turns on and the keypad
displays:
Please Leave
Now... 120
The keypad counts down the exit time. Leave the area through your entry/exit door.
Step
5. If you come to the end of the list (and you haven't turned on the area you are in), the
keypad displays:
End of List
Exit Now?
To return to the beginning of the list of available areas, press .
To return to the start screen, press
.
7
Page 10

2.4 Turning Area(s) ON - "Attempt Failed" Message ________________________________
If you see the message "Attempt Failed" when you have tried to turn your area(s) on, one
or more zones may be open, or may have a fault. If possible, make sure that all of the
zones are closed when you turn an area on.
WARNING: Turning on areas with open zones reduces your security protection. If a zone
in your area is not working, or you cannot close it, call a Supervisor or Master user
immediately, so that the problem can be resolved.
Step
1. Use procedures 2.2 or 2.3 to try to turn on all or some of your areas.
2. Keypad displays:
Step
Turn On All Turn On Area?
Your Areas?
To confirm either of these options, press .
Step
3. The keypad displays:
OR Area 1
Attempt Failed
View Problems?
Step
4. The keypad displays a list of the zone(s) that are open, or that have faults, and the
area(s) they are in. Use the
the end of the list, the keypad displays:
To see a list of open zones, press .
keys to view each open zone. When you come to
End of List
Turn On Anyway?
Step
5. Check Open Zones
If you want to go and check that the listed zones are closed, press .
The keypad displays:
System Will Not
Turn Areas On!
Close all doors and windows, or stop motion in each zone that was listed, then go
back to step 2. If all the zones are secure, you will be able to turn on the selected
area(s) as described in procedures 2.2 and 2.3.
continued next page...
8
Page 11

Or, Turn Area(s) On Anyway
If you want to continue to turn on your area(s) with the listed zones open, or in fault,
press
. The keypad displays the following message:
Warning-Security
Reduced
If you see this message, you can continue to turn your area(s) on, but you should tell
a Supervisor or Master user about the problem zones.
The keypad displays:
Press (YES) to
Confirm...
To continue turning on your area(s), go to step 6.
To stop turning on the area(s), go to step 7.
6. To turn on your area(s) with the zone(s) open, press
Step
Warning
Confirmed
The system will turn on the area(s). If you have turned on the area you are in, the
keypad displays:
Please Leave
Now... 120
The keypad counts down the exit time. Leave the area through your entry/exit door.
Step
7. To stop turning on the area(s), press . The keypad displays:
2: Turning Your Area(s) ON and OFF
. The keypad displays:
System Will Not Turn ON All
Turn Areas On!
To turn on other areas, go back to step 1.
Report the problem zones to a Supervisor or Master user.
then Your Areas?
9
Page 12

2.5 Turning All Your Areas OFF ______________________________________________________
This procedure explains how to turn off all the areas that you have access to.
12:00 2000/01/01
1.
Step
Enter Your Code
2. If some of your areas are already off, the keypad displays:
Step
Enter your access code.
Do You Want To
Turn Areas On?
3. The keypad displays:
Step
Press .
Do You Want to
Turn Areas Off?
4. The keypad displays:
Step
To confirm, press .
Turn Off All
Your Areas?
5. The keypad beeps 3 times, the OFF light turns on and the keypad displays:
Step
To confirm, press .
All Your Areas
Are Now OFF!
6. The keypad returns to the start screen.
Step
10
Page 13

2: Turning Your Area(s) ON and OFF
2.6 Turning Some of Your Areas OFF ________________________________________________
This procedure explains how to turn off one or more of the areas to which you have
access.
Step
1. 12:00 2000/01/01
Enter Your Code
2. If some of your areas are already off, the keypad displays:
Step
Enter your access code.
Do You Want To
Turn Areas On?
3. The keypad displays:
Step
Press .
Do You Want to
Turn Areas Off? To confirm, press .
Step
4. The keypad displays:
Turn OFF All
Your Areas?
Step
5. The keypad displays a list of areas you have access to, and which are turned on. For
example:
Press .
Turn OFF Area?
Area 1
If you do not want to turn off an area, press .
If it is an area you want to turn off, press
Area 1
Is Now OFF!
Step
6. When you reach the end of the list, the keypad displays:
End of List
Exit Now?
To view areas again, press .
To return to the main menu, press
. The keypad displays:
.
11
Page 14

Silencing and Clearing Alarms & Faults
S E C T I O N 3
CAUTION: If you find that an alarm has occurred while you were away, it is possible
that an intruder or a fire may still be present. Go to a nearby safe location, and
call the local authorities to investigate.
If the alarm was unintentional, call the local authorities immediately to avoid an
unnecessary response.
3.1 Turning Off the Bells ____________________________________________________________
If the bells are sounding an alarm, you can shut them off by doing the following:
1. 12:00 2000/01/01
Step
Enter Your Code
2. If your area(s) were on and if the alarm is in the area the keypad is assigned to, the
Step
system will silence the bells in the area, and turn the area off. The keypad displays:
Area 1
is now OFF!
If your area(s) were off and if the alarm is in the area the keypad is assigned to, the
keypad displays:
Silence Local
Alarm?
The keypad displays:
Enter your access code.
To turn off the bells, press .
Local Alarm
Is Now OFF!
3. If the bells are still sounding in other areas, the keypad will display:
Step
Turn Off
Remote Alarms?
4. The bells turn off in the other area(s). The keypad displays:
Step
To turn off the bells, press .
Remote Alarms
Are Now OFF!
The keypad returns to the main menu.
12
Page 15

3: Silencing and Clearing Alarms & Faults
3.2 Clearing the Alarms _____________________________________________________________
This section explains how to acknowledge and clear alarms.
1. If you enter your code, or have turned off area(s) after an alarm has occurred, the
Step
keypad displays:
There are Alarms
View Alarm List?
If you press , the keypad displays the next menu item.
If you press
since the area(s) were last armed. For example,
, the keypad displays the list of alarms that have occurred
Area 1 >
Zone 1
2. Use the buttons to view each alarm. When you come to the end of the list,
Step
the keypad displays:
End of List
Clear Alarms?
3. If you do not want to clear the alarm memory, press . The keypad
Step
returns to the display in step 1.
To clear the alarm memory, press
. The keypad displays:
Detector Reset Alarm(s) Now
In Progress
The keypad returns to the main menu.
If the keypad displays
then Cleared!
Unable to Clear
All Alarm(s)!
the system was unable to reset one or more detectors. Report the problem to a
Supervisor or Master user.
13
Page 16

3.3 Viewing and Clearing Fault Conditions __________________________________________
The control panel continuously checks for a number of possible faults.
If one of these faults occur, the keypad beeps twice every 10 seconds. Enter your access
code, and follow the procedure below, to see a list of system faults.
NOTE: A fault condition reduces the security your system is designed to provide. Call a
Supervisor, or Master user to arrange service.
1.
Step
Step
12:00 2000/01/01
Enter Your Code
If there is a fault, the keypad displays:
Enter your access code.
System Fault
View Fault List?
2. The keypad displays the list of faults. For example:
To exit fault viewing, press .
To view faults, press
NOTE:
Advanced users
may see a
different list of
faults than Basic
users.
.
Telephone Line
Fault
3. When you come to the end of the list, the keypad displays:
Step
If you see a flashing >, use the keys to scroll
through the list of faults.
End of List
Clear Faults?
To return to the main menu, press .
To clear the faults, press .
Step
4. The system tries to reset the faults. If all the faults are reset, the keypad displays:
Fault(s) Now
Cleared!
Step
5. If the system cannot reset all the faults, the keypad displays:
Unable to Clear Call for Service
All Fault(s)!
To view the faults again, press .
To exit fault viewing, press
then, Exit Now?
.
14
Page 17

Automatic Arming
S E C T I O N 4
Automatic arming (auto-arming) is when the system automatically turns on one or more
areas of the system at preset times. All users can postpone auto-arming for a pre-set
period of time. Follow the procedure below.
Delaying Automatic Arming
Before the system begins auto-arming of an area, the keypads will warn users in the area
by beeping continuously (this is the auto-arm warning). If you hear the auto-arm warning,
you can delay the automatic arming. Enter your code at an area keypad. The keypad
displays:
Automatic Arming
in Progress!
To delay the automatic arming, follow the procedure below, starting at step 3.
If you know the system will be auto-arming at a particular time, you can delay the arming
before it starts. Follow the procedure below.
NOTE: If none of your areas are set up for automatic arming, or if automatic arming is
already delayed, or if the system is set up so that users cannot delay automatic arming,
the keypad will display "This Function is Not Available".
12:00 2000/01/01
1.
Step
Enter Your Code
2. The keypad displays:
Step
Enter your access code.
Do You Want To
Turn Areas On?
Do You Want to
3.
Step
Delay Auto-Arm?
Step
4. The keypad displays the first area which will be auto-armed:
Press until the keypad displays:
To confirm, press .
Area 1
Delay Auto-Arm?
5. The keypad displays:
Step
To confirm, press .
Automatic Arming
Has Been Delayed
The system will try again to arm the system at the end of the delay time programmed
by your installer. If there are more areas that will be auto-armed, the keypad displays
the next area.
6. At the end of the list of areas, the keypad displays:
Step
End of List
Exit Now?
To return to the list of areas, press .
To return to the start screen, press .
15
Page 18

Other Functions
S E C T I O N 5
5.1 Unlocking Doors _________________________________________________________________
Your installer may have set up the system so that users can unlock certain doors from the
keypad. Basic users will not have access to this feature. Ask your installer, or the Supervisor
or Master users which doors this feature will unlock. You will only be able to unlock doors
in the area(s) you are assigned to.
Step
Step
12:00 2000/01/01
1.
Enter Your Code
2. Press , until the keypad displays:
Enter your access code.
Activate
Door Strike?
3. To unlock the door(s), press . The door(s) unlock and the keypad buzzer
Step
sounds. The keypad displays:
Door Strike
Activated!
4. The keypad returns to the start screen.
Step
5.2 Resetting Detectors _____________________________________________________________
Your installer may have set up the system so that you can reset detectors from the keypad.
Basic users will not have access to this feature. Ask your installer, or the Supervisor or
Master users which detectors this feature will reset.
Step
Step
12:00 2000/01/01
1.
Enter Your Code
2. Press
Enter your access code.
, until the keypad displays:
Do You Want to
Reset Detectors?
3. To reset the detectors, press . The keypad displays:
Step
Detectors Reset
Exit Now?
4. To return to the start screen, press .
Step
To return to the main menu, press
.
16
Page 19

Index
A
Access code 4
Alarm 2
clearing 13
false 12
silencing 12
Alarm system 3
Area 2, 4
Automatic arming
defined 2
delaying 15
B
Back/Next Keys back cover
Bells
turning off 12
C
Cancel key back cover
Central station 4
Codes
access 4
Control panel 3
D
Delaying
auto-arming 15
Detector
resetting 16
Door
entry/exit 2
unlocking 16
E
Entering access codes 5
F
False alarm 12
Fault
defined 2
viewing 14
K
Keypad 3
keys back cover
lights back cover
L
Lights on keypad back cover
M
Main menu 2
Monitoring, remote 4
N
No key back cover
O
Off light back cover
On light back cover
P
Power light back cover
Problem 14. See also Fault
R
Remote monitoring 4
Resetting
alarms 13
detectors 16
S
Security system 3
Start screen 2
System
how it works 3
turning off 10
turning on 5
T
Trouble 14. See also Fault
Turning
area(s) off 10
area(s) on 6
U
User types 3
V
Viewing
alarms 13
faults 14
Y
Yes key back cover
Z
Zones 4
defined 2
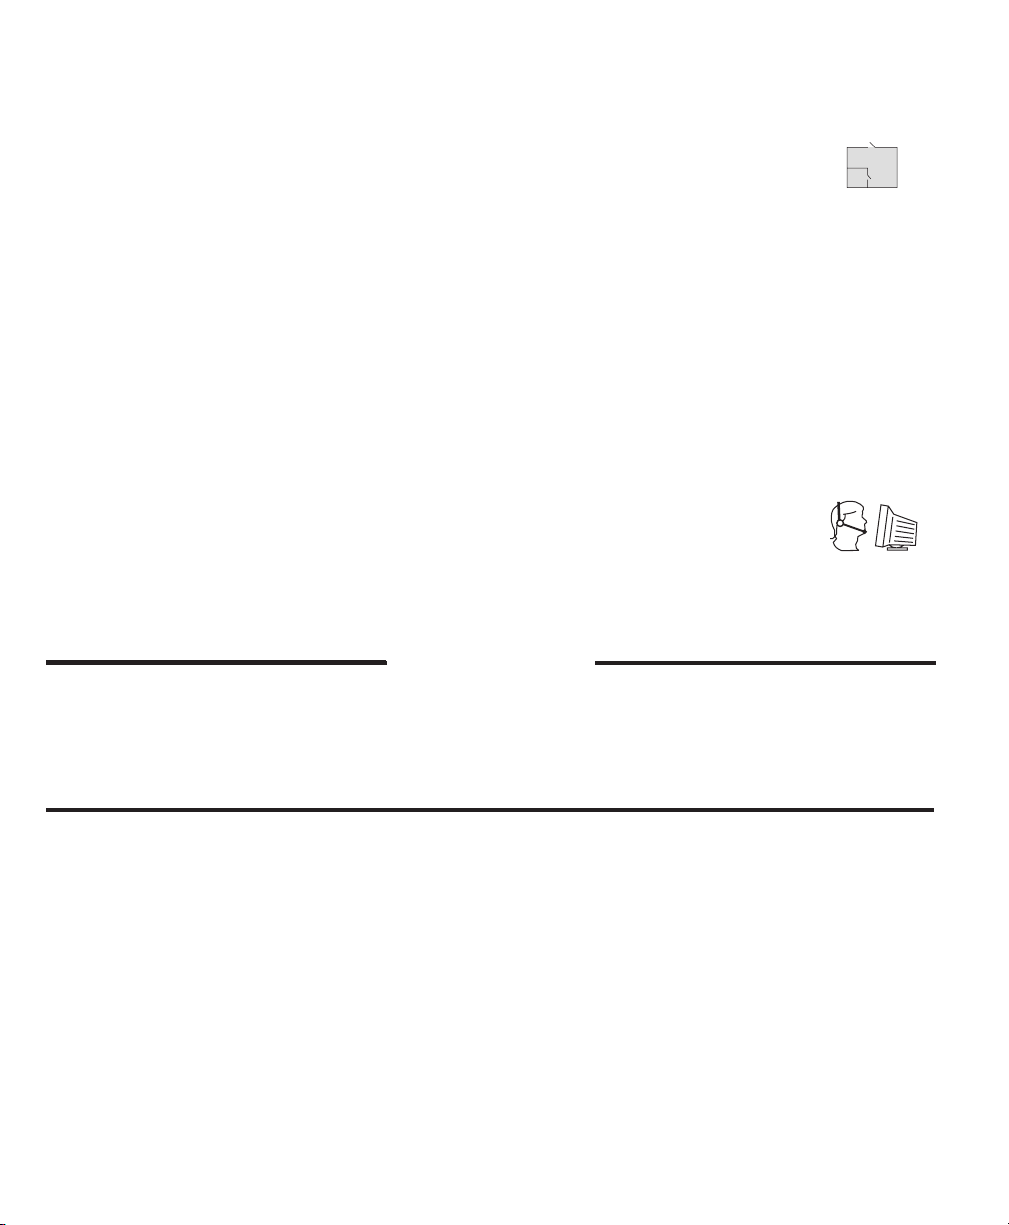
Page 20

1. Liquid Crystal
Display (LCD)
2. Number Pad
Keypad Buttons and Lights
3. System Lights
4. Arrow Keys
5. Yes, No
& Cancel Keys
1. Liquid Crystal Display (LCD):
The LCD displays prompts and system information on
two 16-character lines. This diagram shows the Start
Screen.
2. Number Pad:
Use the number pad to enter your access code.
3. System Lights:
The On and Off lights will only be lit as described, after
you have entered a valid access code. If no code has
been entered, only the Power light will be on.
Off Light
When you are turning areas on or off, the Off light will
turn on to tell you that the area displayed is currently
off. (See “Turning Your Areas ON and OFF” on page 5).
On Light
When you are turning areas on or off, the On light will
turn on to tell you the area displayed is currently on.
(See “Turning Your Areas ON and OFF” on page 5).
TM
©2000 Digital Security Controls Ltd. Printed in Canada 29004814 R002
Power Light
The Power light will always be on, unless the system, or
one of the modules, has lost AC power.
4. Back/Next Keys:
If you are viewing items in a list, use the keys to
move forward to the next item, or back to the previous
item. If there is more information to view, the keypad
will flash a
>>
> in the top right corner of the display.
>>
5. Yes, No and Cancel Keys:
For each feature, the system will display a question (e.g.
Do you want to turn areas on?). Press
answer yes and to answer no.
If you are unsure, or have lost your place in the system
programming, press
screen ("Enter Your Code").
NOTE: Pressing
from being turned on. To remain in, or to re-enter areas,
you must enter your access code and turn the areas off.
to return to the start
will not prevent areas
to
 Loading...