

Drive R6, R8 Owner's Handbook Manual
R6/R8 Owner’s Handbook (Z25988 Rev A) Page 1 of 12
ROLLATOR (R6 and R8)
OWNER’S HANDBOOK
R6/R8 Owner’s Handbook (Z25988 Rev A) Page 2 of 12
CONTENTS
1. Contents
2. Introduction
3. Parts Description
4. Personal Safety
5. Adjustments for
Comfort
6. Transportation &
Assembly
7. Care &
Maintenance
8. Brake Operation
9. Assembling the
Walker
10. Specification
11. Warranty
INTRODUCTION
The Drive Medical lightweight 4-wheeled rollator is
designed to aid the user to walk and, as an option,
carry items such as shopping.
The R6 is ideal for indoor use, whilst the R8 is suitable
for indoor and outdoor use. They are intended to be
lightweight and portable whilst offering stability and
security to the user.
All Drive Medical walkers are manufactured to the
highest quality standards and are CE marked.
They provide a robust and visually appealing product
whilst being a cost-effective solution to some mobility
problems.
R6/R8 Owner’s Handbook (Z25988 Rev A) Page 3 of 12
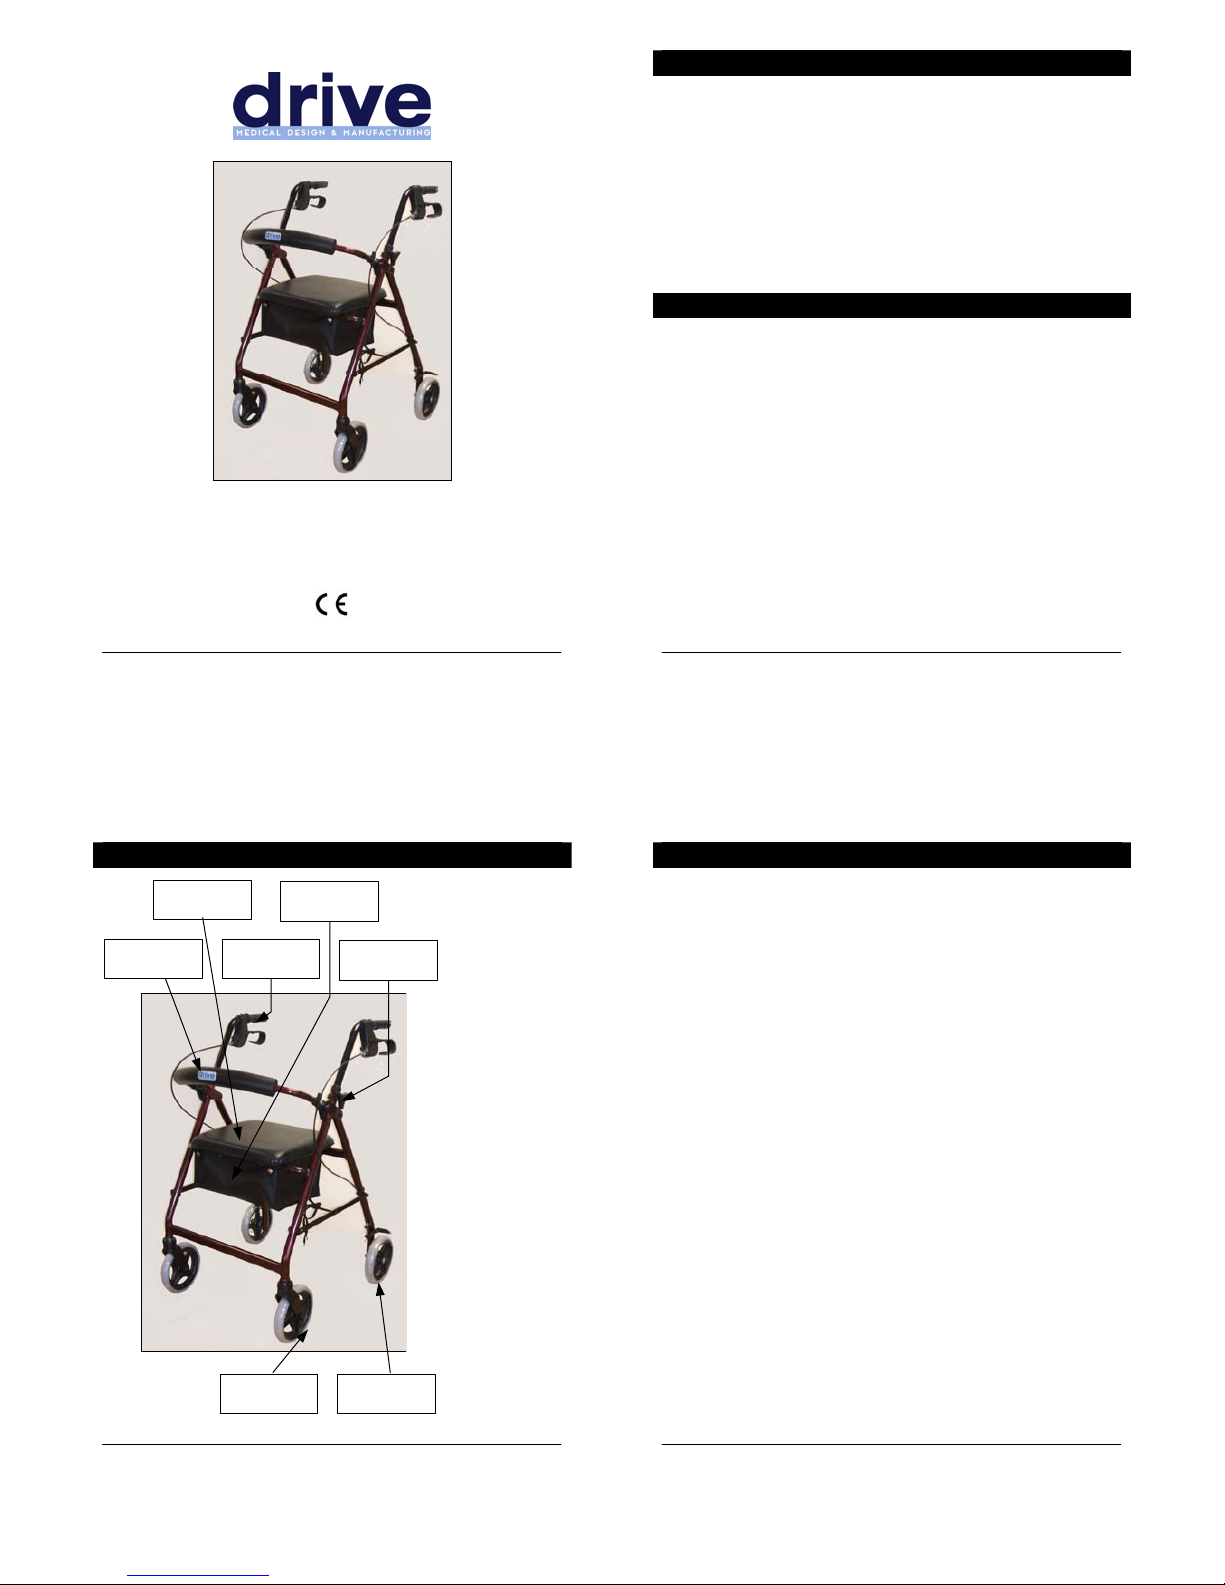
PARTS DESCRIPTION
FR. CASTOR
WHEEL
REAR WHEEL
(BRAKED)
SEAT
TIGHTENING
HANDLE
BACKREST
UNDERSEAT
BAG
BRAKE HANDLE
(LEVER)
The diagram
(left) shows
a four wheel
rollator
R6/R8 Owner’s Handbook (Z25988 Rev A) Page 4 of 12
PERSONAL SAFETY
• For your health and comfort, make sure that you
adopt a comfortable posture and that you can
operate the brakes with ease.
• Ensure that the handles are at equal heights and
securely locked in position.
• Ensure the walker is always fully folded out before
using.
• Ensure that all the wheels are stable and are on the
ground before using.
• Ensure that the brakes are adequate and test
before using.
• Ensure that the user sits in the centre of the seat.
• Do not use the four-wheel rollators on gradients 7° /
1 in 8 or above.
• Ensure that the brakes are always locked on when
sitting on the seat.
• Ensure that the latest health and safety practice is
used for carrying and lifting items, such as wheeled
walkers.
R6/R8 Owner’s Handbook (Z25988 Rev A) Page 5 of 12
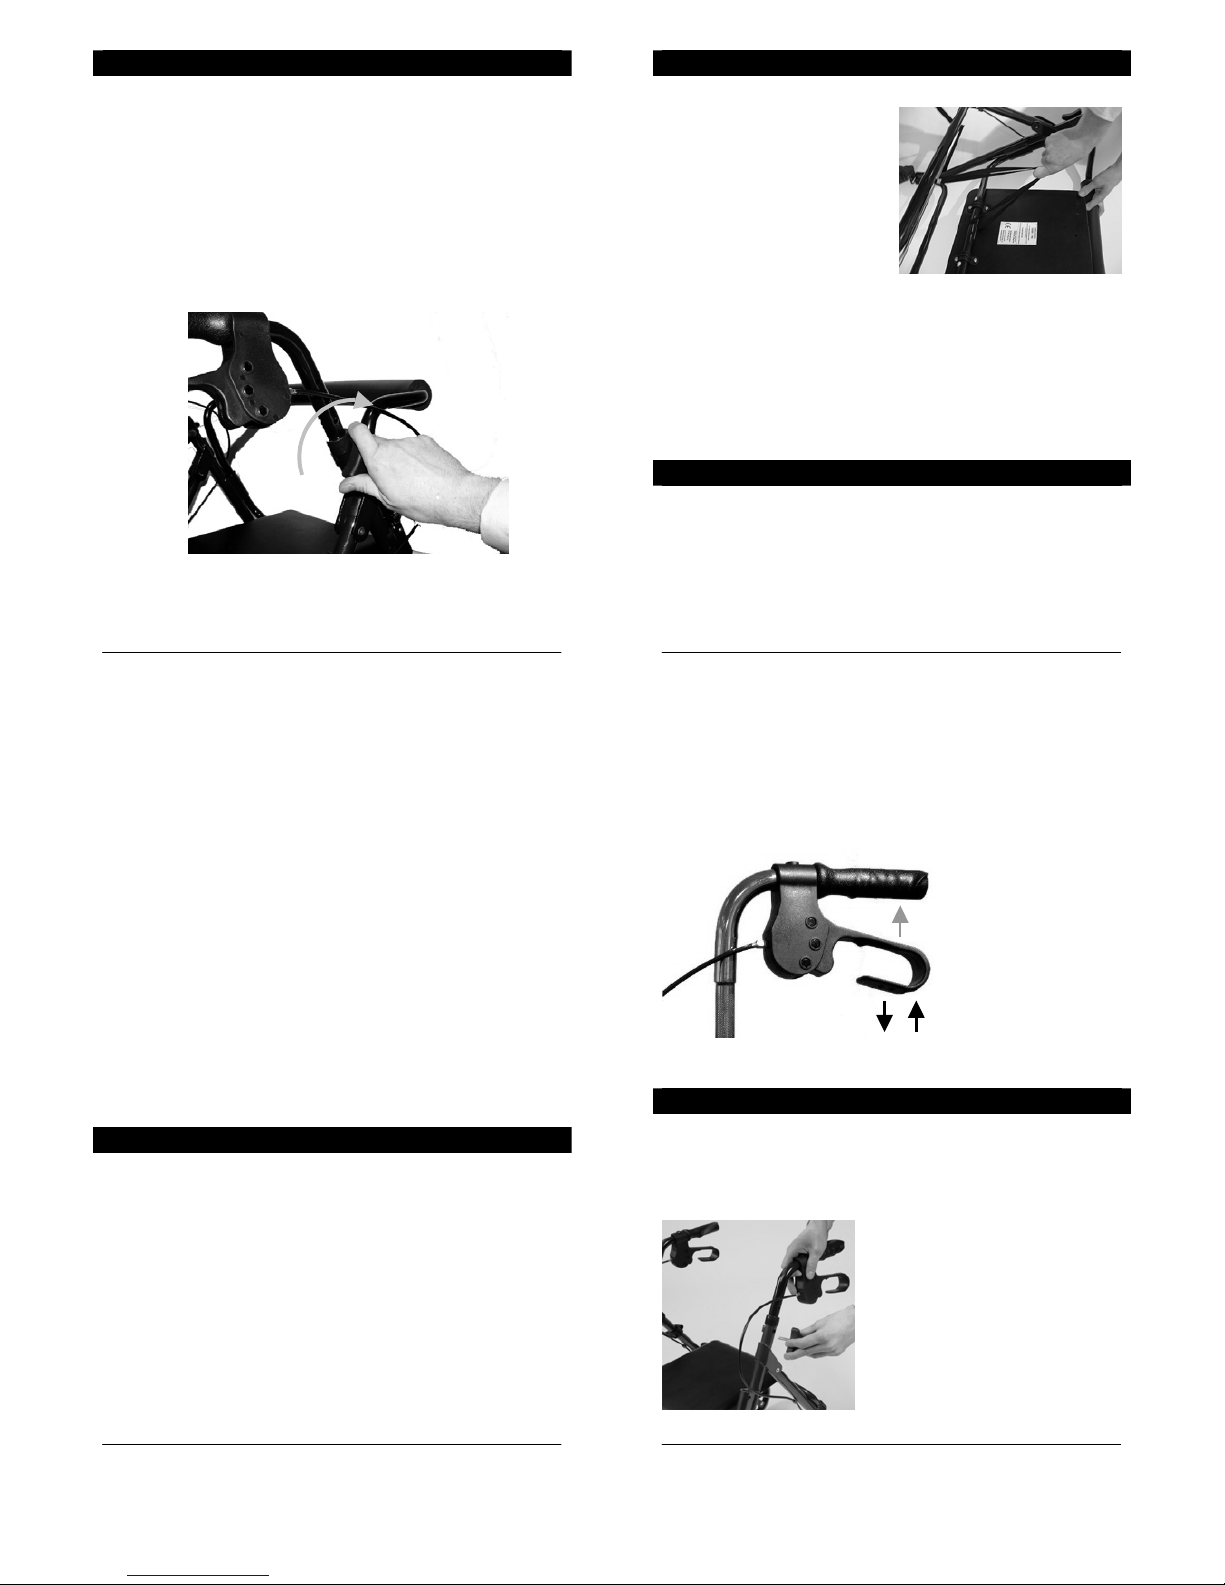
ADJUSTMENTS FOR COMFORT
• To adjust the height of the rollator, unscrew the
tightening handles at either side of the walker
anticlockwise.
• Adjust the height of the rollator to suit the user and
then tighten by turning the tightening handles
clockwise to secure (as shown in the photo). Ensure
that the tightening handles are on the outside of
the rollator.
R6/R8 Owner’s Handbook (Z25988 Rev A) Page 6 of 12
TRANSPORTATION AND ASSEMBLY
• To fold the rollator for
transporting, lift the
seat up and pull the
black cord whilst
holding the rollator
handles, lifting the
rollator at the same
time.
• To unfold the rollator before using, lift the rollator
by the handles and cord and place on the ground
wheels first. This action should enable you to unfold
the rollator after releasing the cord.
CARE AND MAINTENANCE
• Ensure the walker is used only as an aid for mobility.
• Ensure the walker is kept clean. Wipe down the
walker with a damp cloth on a regular basis.
• Check the moving parts (e.g. – wheels and height
adjustment) regularly.
R6/R8 Owner’s Handbook (Z25988 Rev A) Page 7 of 12
• Ensure that the brakes have been adjusted to suit
the wheels and user (if required).
• All the fasteners (screws, nuts and bolts) are to be
checked regularly to ensure they are securely
tightened.
• Check that the front castor wheel swivels freely.
Withdraw the walker from use if it does not.
• Only use an approved Drive Medical Ltd dealer for
any maintenance and repairs on your wheeled
walker.
BRAKE OPERATION
To operate the cable brakes:
• Squeeze the brake lever up to engage the brake (in
the direction shown the photo by the grey arrow).
To lock the brakes, push down on the brake lever
until it locks (as shown by the black downwards
arrow in the photo). To unlock the brakes, pull up on
the brake lever until the lock removes (as shown by
the black upwards arrow)
R6/R8 Owner’s Handbook (Z25988 Rev A) Page 8 of 12
NOTE: The brakes on
rollators are factory set
and should not require
adjustment. For
technical assistance on
the walker brakes,
contact your Drive
Medical Ltd dealer.
ASSEMBLING THE WALKER
Assembling the rollator:
1. Remove the rollator and all components from the
packaging. Fold out the rollator.
2. Remove any packaging
from the rollator tubing. Insert
the handlebar in to the tubing
ensuring the cable is to the
outside of the rollator frame.
Select the required height
and secure with the
tightening handle supplied.
Repeat for the other handle.
 Loading...