

Drive KG A800, KG 1600, KG 2000, KG 1800 User Manual

adult Kanga TS
frame & wheelchair
Item #
KG A800
KG 1600
KG 1800
KG 2000
www.drivemedical.com
EU Authorized Representative
Drive Medical LTD
Ainley’s Industrial Estate
Elland, West Yorkshire,
United Kingdom HX5 9JP
REV1.03.31.15REV1.03.31.15
Your Drive branded product is warrantied to be free of
defects in materials and workmanship for the lifetime
of the product for the original consumer purchaser.
This device was built to exacting standards and carefully inspected prior to shipment. This Lifetime Limited
Warranty is an expression of our confidence in the
materials and workmanship of our products and our
assurance to the consumer of years of dependable
service.
This warranty does not cover device failure due to
owner misuse or negligence, or normal wear and tear.
The warranty does not extend to non- durable components, such as rubber accessories, casters, and grips,
which are subject to normal wear and need periodic
replacement.
If you have a question about your Drive device or his
warranty, please contact an authorized Drive dealer.
Warning: The items and packaging in this shipment contain
chemicals known to the state of California to cause cancer,
birth defects or other reproductive harm.
*This product meets or exceeds all federal safety and environmental regulations.
limited lifetime
warranty
© 2015 Medical Depot, Inc. All rights reserved.
Drive is a trademark of Medical Depot, Inc.
Port Washington N.Y. 11050 USA Made in China
assembly
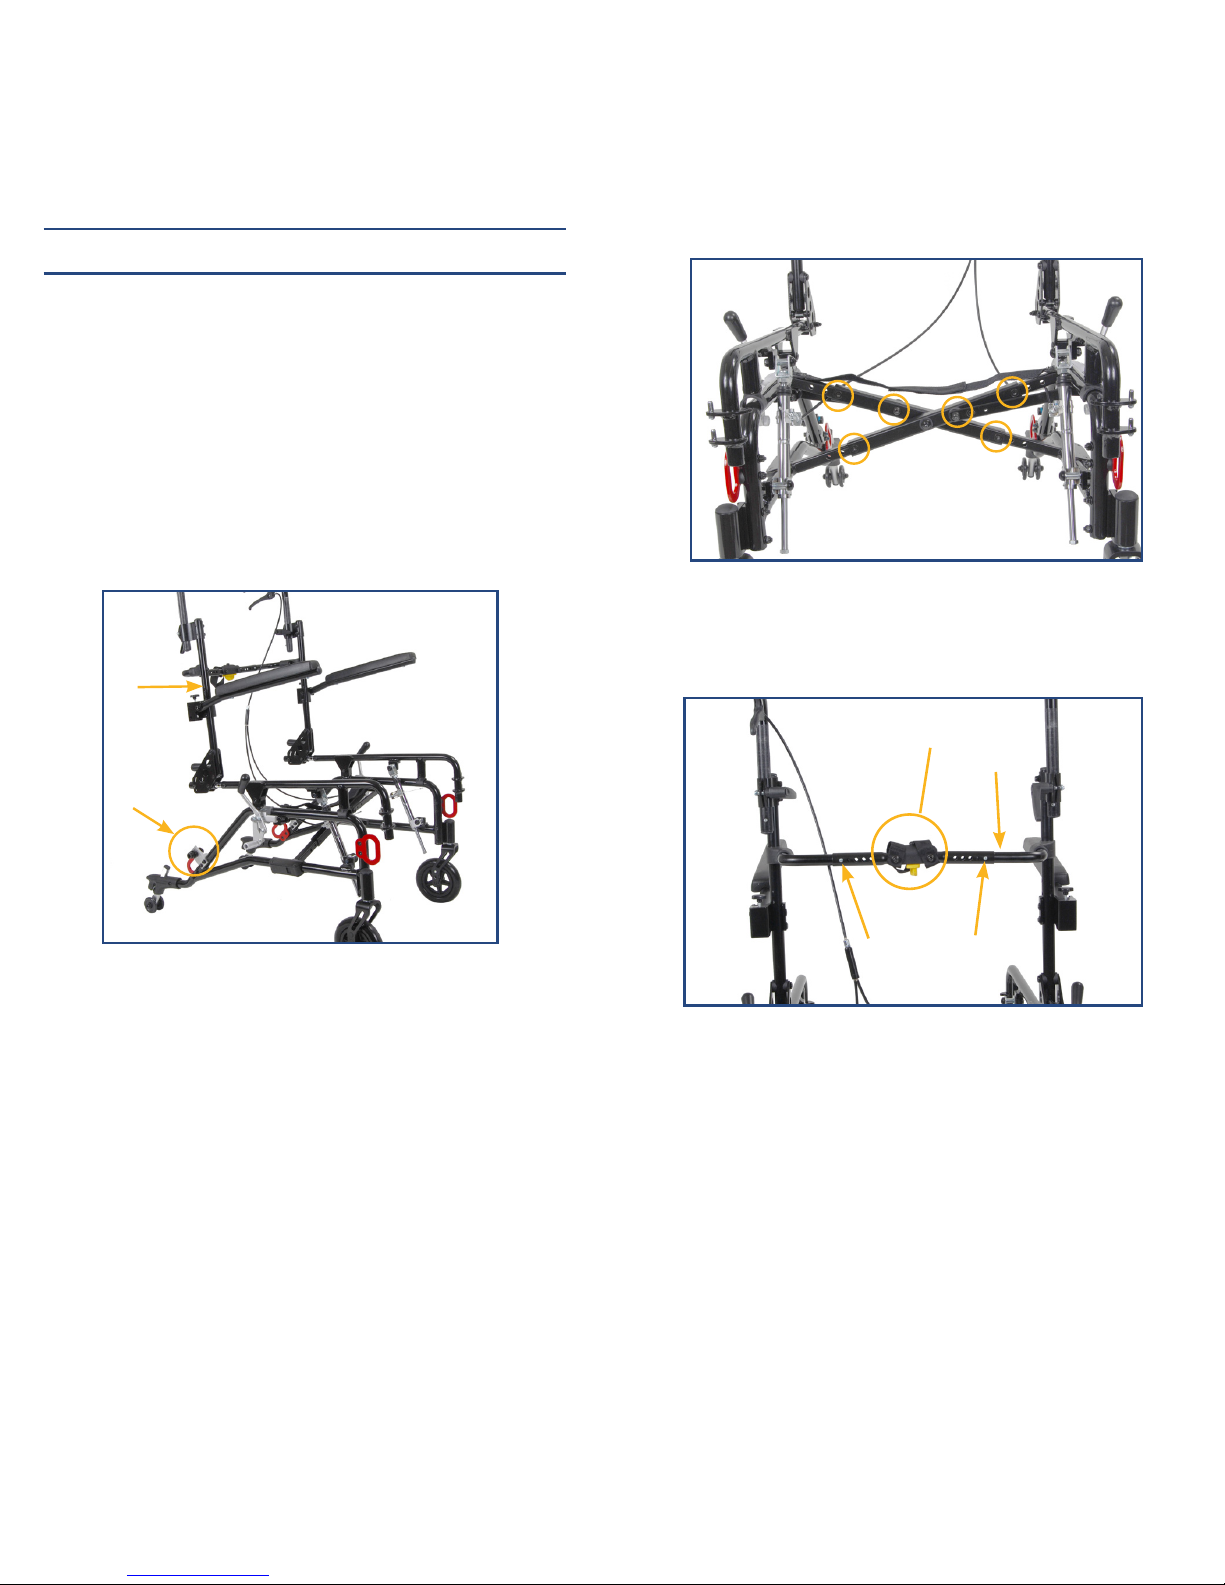
1. Open frame by pulling right and left side apart and
pushing down on the cross brace until fully extended.
2. Install right and left rear wheels by pushing the quick
release button (located in the center of the wheel)
on the axles and sliding it into the axle sleeve (A) until
it locks. To remove, push the quick release button and
pull out from axle sleeve.
3. Raise right and left back canes (B) until it clicks into
place.
4. Determine width of chair, 16” 18” or 20”. Remove
screws (circled below) and adjust cross brace
accordingly by pulling/pushing right and left side of
frame. Use 6mm allen wrench.
5. Loosen the rigidizer bar (C) by turning yellow knob
(D). Depress push pin (E) and adjust width accordingly.
B
A
C
E
E
D
6. Reinstall screws from step 4.
adjustments
Seat Depth
Seat depth can be adjusted by removing rear wheels and
Allen screw (G) pushing/pulling seat rail to desired posi¬tion and returning Allen screw. Use 5mm allen wrench.
Seat to Back Angle
Seat to back angle can be adjusted by loosening Allen
screw (J) on backrest pivot plate and moving the canes to
the desired position. Use 5mm allen wrench.
G
H
J
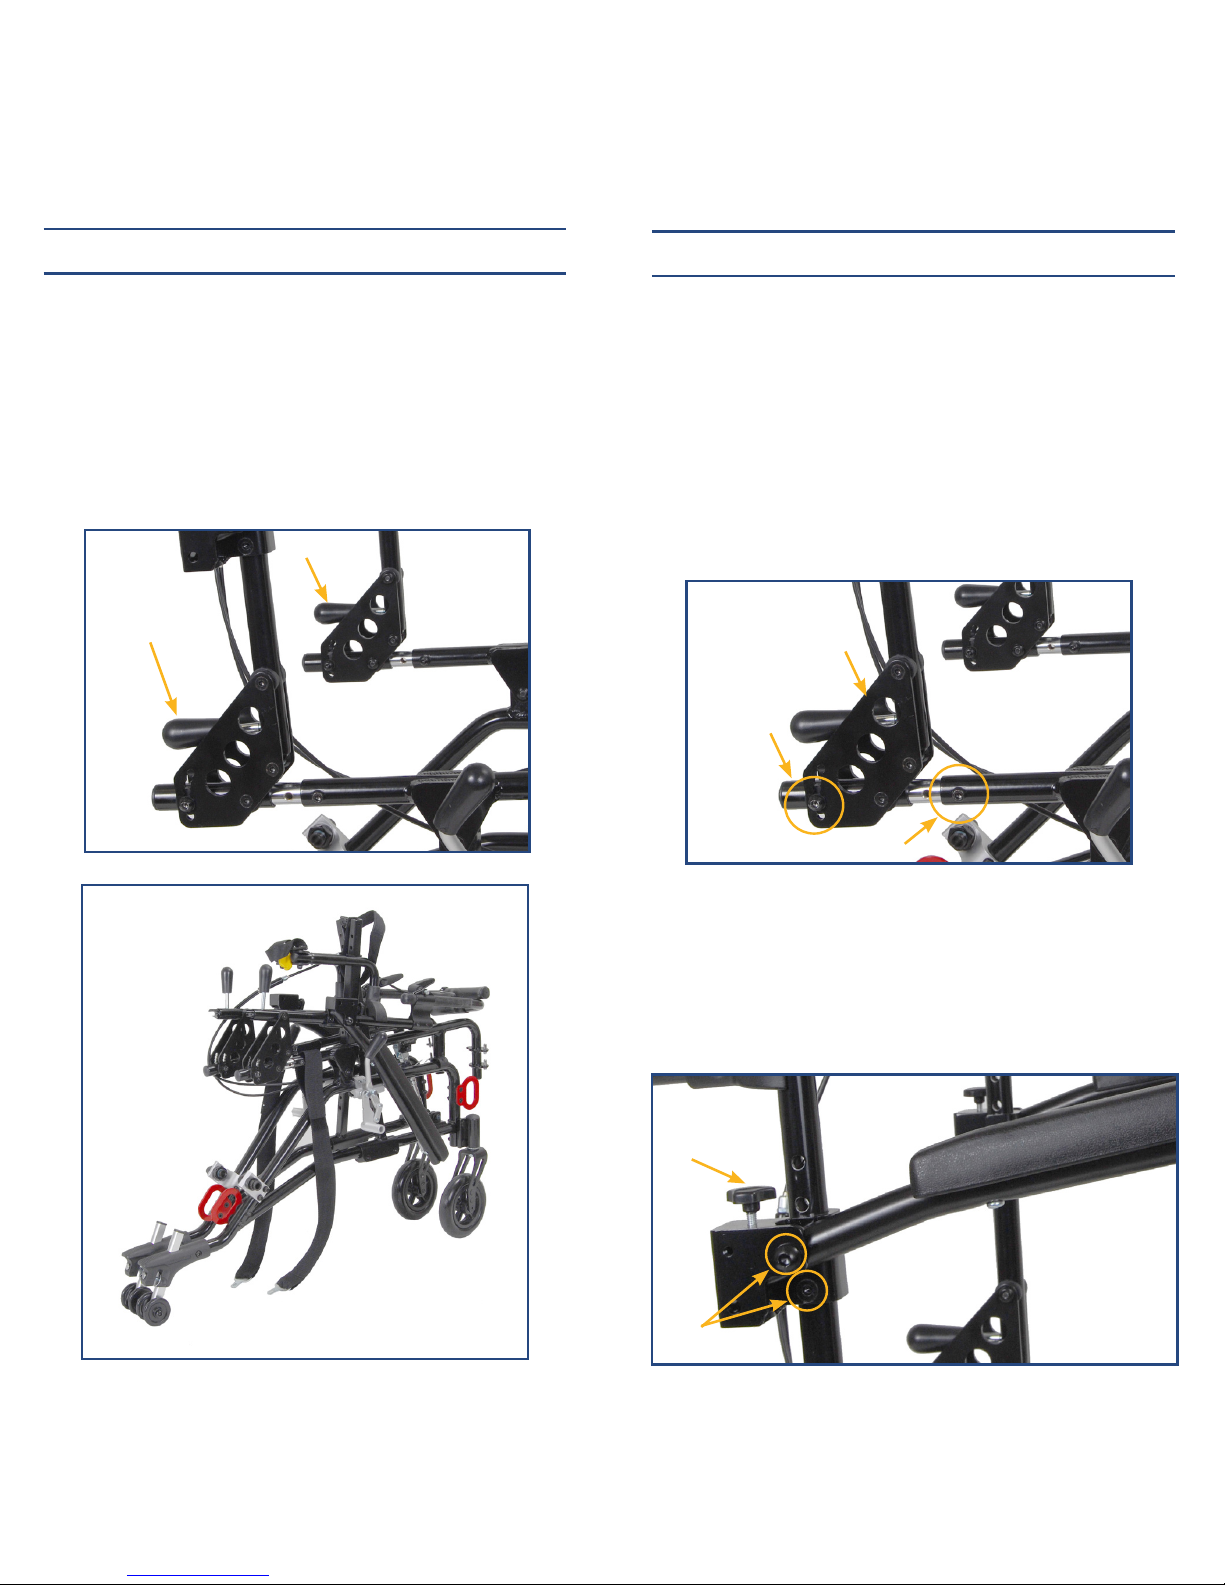
folding
1. Raise armrests.
2. Turn yellow rigidizer bar knob (D) to loosen bar.
3. Lift up footplate or remove footrest.
4. Lift levers (F) and fold back canes.
5. Lift strap on top of cross bar and press the side
frames together.
F
F
Armrests
Height can be adjusted by removing Allen screws (K) and
raising or lowering black bracket. Return Allen screws
and tighten. Angle can be adjusted by turning knob (L)
clockwise or counterclockwise. Use 5mm and 6mm allen
wrench.
K
L
 Loading...