

Drive Kanga TS User Manual

Your Drive brand product is warranted to be free
of defects in materials and workmanship for the
lifetime of the original consumer purchaser.
This device was built to exacting standards
and carefully inspected prior to shipment. This
Lifetime Limited Warranty is an expression of our
confidence in the materials and workmanship of
our products and our assurance to the consumer
of years of dependable service.
This warranty does not cover device failure
due to owner misuse or negligence, or normal
wear and tear. The warranty does not extend to
non-durable components, such as rubber
accessories, casters, and grips, which are subject
to normal wear and need periodic replacement.
If you have a question about your Drive device or
this warranty, please contact an authorized Drive
dealer.
limited lifetime
warranty
Kanga TS tilt in space
wheelchair
Item # KG 1000, KG 1200 & KG 1400
www.drivemedical.com
EU Authorized Representative
Drive Medical LTD
Ainley’s Industrial Estate
Elland, West Yorkshire,
United Kingdom HX5 9JP
© 2006 Medical Depot, Inc. All rights reserved.
Drive is a trademark of Medical Depot, Inc.
Port Washington N.Y. 11050 USA Made in China
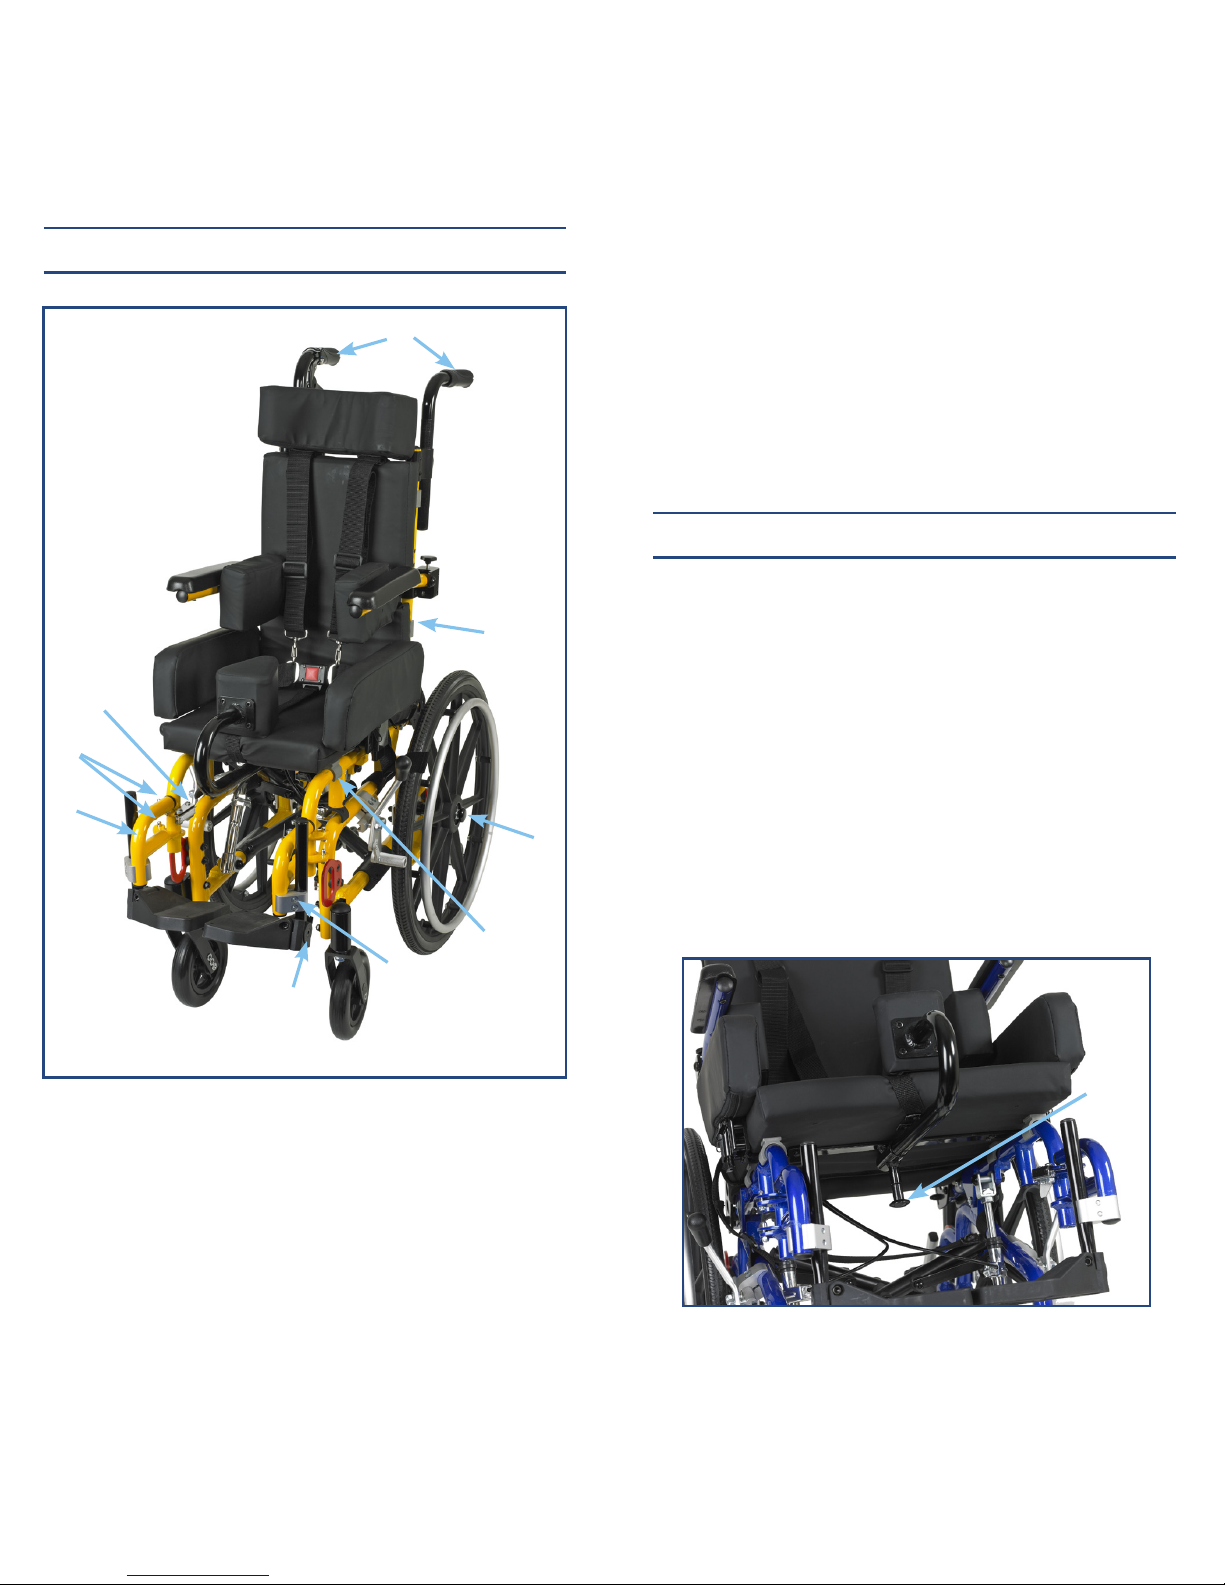
assembly
adjustments
Footrests
Raise or lower footrests by loosening Allen screws (H),
place at desired position and tighten Allen screw. Angle
of footplate can be adjusted by removing Allen screw
(I), removing footplate and replacing at desired position.
Replace Allan screw. Footrest can be swung away by
pushing release latch (J).
Abductor
Abductor can be removed or adjusted in depth by pulling
knob (K) down and pulling/pushing abductor assembly.
K
4. Mount seat and then back by positioning grey frame
clips (D) on the seat base and backposts and clicking
them into place.
5. Place four black seat and back brackets (E) (image
on next page) over frame and fasten with wing nuts
provided.
6. Mount right and left footrests by placing hangar (F)
over hangar pins (G), rotate footrest inward until it
locks onto frame.
1. Open frame by pulling right and left side apart and
pushing down on the cross brace until fully extended.
2. Install right and left rear wheels by pushing the quick
release button (A) on the axles and sliding it into the
axle sleeve (B) (image on next page) until it locks. To
remove, push the quick release button and pull out
from axle sleeve.
3. Lift up right and left push handle (C) until it clicks into
place.
A
D
H
I
J
G
F
D
C
 Loading...