

Doughpro Proluxe DP3300BZ Service Manual
Operations Manual
Rev 5
Model: DP3300BZ
Electromechanical Dough Press
formerly DOUGHPRO. New Name. Same Quality. Superior Service.
proluxe.com

Congratulations!
Your selection of the Doughpro DP3300
is a sound business decision. Doughpro
equipment is a result of the highest
quality engineering and time-tested
design. Your machine combined with
Doughpro’s reputation of innovation in
dough pressing equipment
manufacturing, insures the continuing
capability of delivering the bestdecorated product possible.
This manual describes installation,
operation, and maintenance procedures
for your new model DP3300.
Your model DP3300 machine will have
a long trouble-free life. Read this
manual carefully and keep it with your
machine; it’s your key to proper
operation and lasting service.
Installation
DOMESTIC
Use a separate 15 amp AC
circuit. Only industrial extension
cords with proper wire size
should be used; size 16/3 wire for
distance up to 25 feet, and size
14/3 for distance up to 50 feet.
INTERNATIONAL
Use a designated 16 amp AC
circuit. Only industrial extension
cords with proper wire size (2.5
sq. mm) shall be used.
Make sure there is a proper electrical
wall outlet located within reach of the
cord and plug attached to the press.
Then place the press in an area which
allows for “swing clearance” of the
lower platen plus vertical and horizontal
clearance of the press itself.
Limited Machine Warranty
Doughpro warrants this dough press
machine, when operated under normal
conditions, to be free from
manufacturing defects in material and
workmanship for a period of one year on
parts and labor from the invoice date.
This warranty will be effective only
when Doughpro authorizes the original
purchaser to return the product to the
factory in South Gate, California freight
prepaid and only when the product, upon
examination, has proven to be defective.
This warranty does not apply to any
machine that has been subjected to
misuse, negligence or accident.
Doughpro shall not be liable for the
injury, loss or damage, direct or
consequential, arising out of the use or
the inability to use the product.
No claim of any kind shall be greater in
amount than the sale price of the product
or part to which claim is made.
This is the sole warranty given by the company, it is in
lieu of any other warranties, expressed or implied, in
law or in fact, including the warranties of
merchantability and fitness for a particular use, and is
accepted such by the purchaser in taking delivery of
this product.
Specifications
Electrical:
120V/60Hz/1450W/12.5Amps/AC
Also available; specify when ordering:
240V/50-60Hz/1450W/6.04Amps
Includes 68” cord and NEMA
approved plug.
Shipping Weight:
200lbs. (91kg)
-1- DP3300 1410/20003/40002 5/03
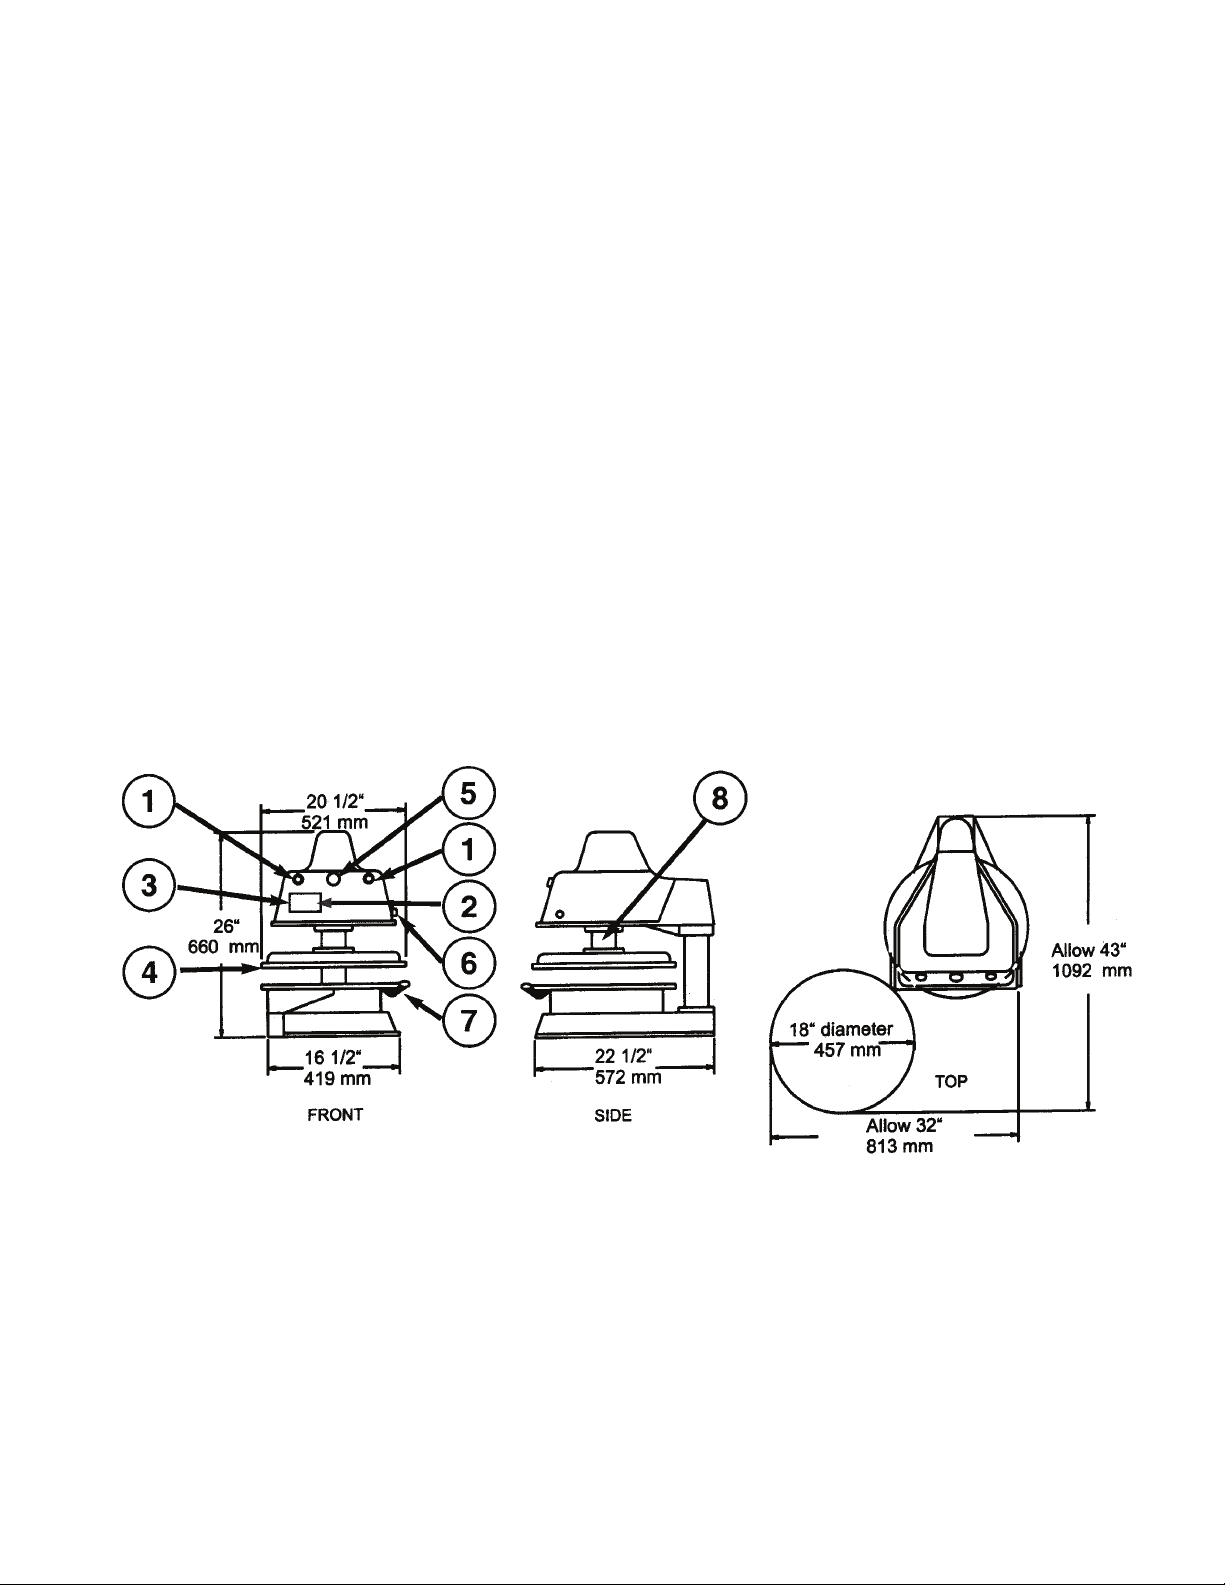
General Specifications
Please Note: Part Number 1101017602-Ref#
92-REPLACEMENT MOTOR BRUSH SET ACTUATOR
Must be changed annually due to wear and tear.
1. Piston Activation Buttons (2)
2. On/Off Power Switch
3. Digital Temperature & Time
Control – 0-200°F Temperature
Setting.
4. Upper Platen – Heated to help
the dough flow faster and more
evenly.
5. Disengage Switch – Releases
upper platen in case of
emergency.
6. Thickness Control Dial –
Controls the thickness of the
dough, (varies depending on size
of dough ball).
7. Lower Platen – Dough is placed
here; swings out for easy
removal of flattened dough.
8. Grease Port – Using a standard
grease gun, squeeze a food
approved, high temperature
grease into the port (once
monthly.).
Exterior Finish: Highly resistant white,
high gloss powder coat, approved for use
with food products. Molds are probrite
coated anti-stick surfaces.
-2- DP3300 1410/20003/40002 5/03
Safety Summary
WARNING
In case of power cord damage,
do not attempt to repair or
replace the power cord. Contact
the manufacturer or the local
distributor.
WARNING
Avoid touching hot surfaces
while operating the machine.
CAUTION
During normal operation, the
base of the machine must be
installed or placed above the wall
socket.
CAUTION
When servicing or cleaning the
machine, make sure that the
power cord is removed from the
wall socket.
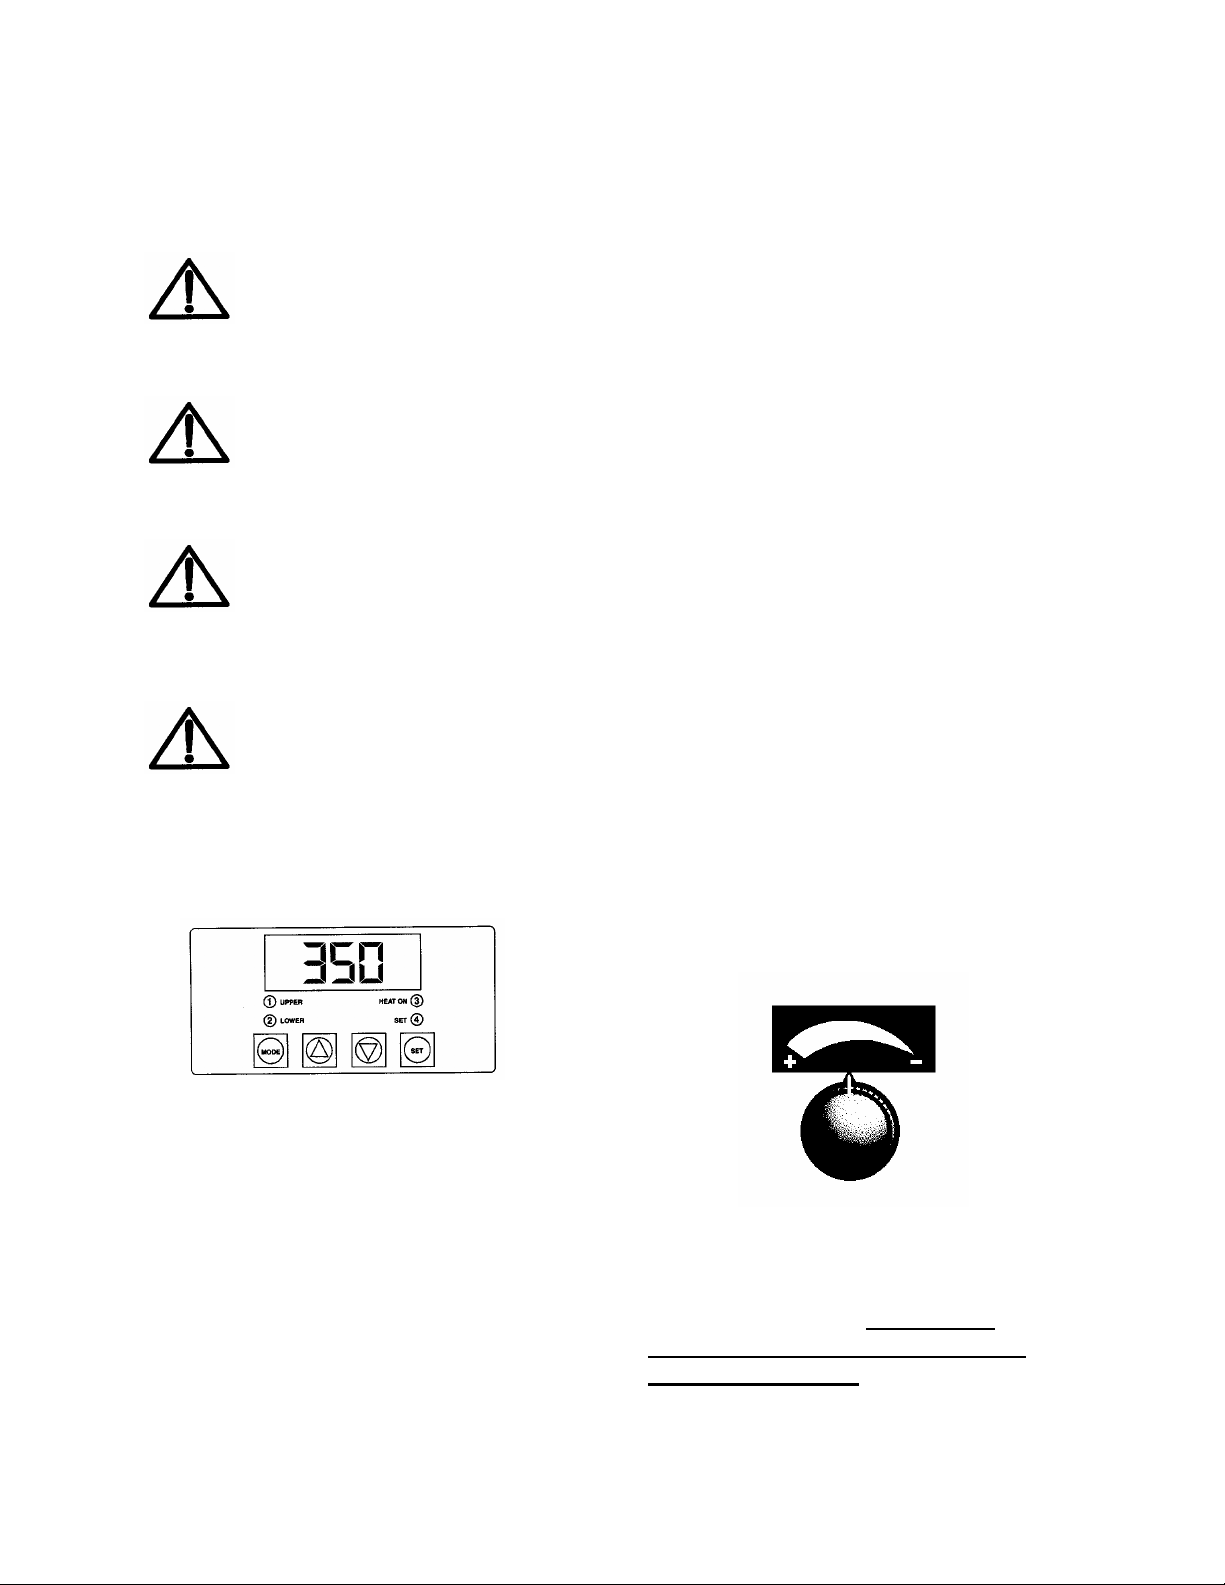
Operation Timer/Temperature
Control
Solid State Controller
This controller has three (3) control
features:
1. Temperature – Temperature may
be set from 100°-325°F (38°163°C)
2. Time – Time may be set from 1
second to 10 minutes.
3. Counter – Cycle counter counts
the number of applications from
1 to 9999 (see additional Notes –
Counter).
Controller Operation
1. If the temperature is not being
displayed, press the MODE
button until temperature is
displayed.
2. Push and hold SET button and
simultaneously push UP (V) or
DOWN (W) arrow buttons to the
desired temperature setting.
3. Press the MODE button until
time is displayed.
4. Push and hold SET button and
simultaneously push UP (V) or
DOWN (W) arrow button to the
desired timer setting.
Dough Pressing Operations
SETTING CRUST THICKNESS
CONTROL:
Setting crust thickness is as simple as the
twist of a dial. By means of trial and
error, rotate the dial until desired
thickness is obtained. Note: Never
force the dial past its stop position or
damage could occur.
-3- DP3300 1410/20003/40002 5/03

PRESSING DOUGH:
First allow the upper platen to reach
programmed temperature. In most
cases, 150°F (65.5°C) is ideal, but trial
and error testing will determine the best
temperature for your dough.
For best results, your dough should be
proofed before pressing, but it will also
press directly out of your refrigerator.
Flour is not required to press a crust
and should not be dusted on any part of
the machine.
Determining the proper timer setting
also requires some trial and error until
you obtain the correction thickness and
diameter of your product. Start with five
(5) seconds and go up or down from
there. Remember that the timer does
not actuate until the upper platen mates
with the lower platen and resistance is
felt.
1. Apply a quick spray of a good
water based food release on the
lower platen. Doughpro offers
its own food release spray
NATURALLY CLEAR Model
No. DPPC1. (See our catalog
and price list for information.)
Note: This spray will not affect
the taste of your crust in any
way.
2. Place your pre-portioned ball of
dough in the approximate center
of the lower platen. Add another
dash of spray to the top of the
dough ball.
3. Close the platen and, with both
hands, press the two green
buttons on the face of the press.
4. Hold the buttons in until
resistance is felt then release at
once. The timer will actuate and
when the time cycle is
completed, the upper platen will
rise automatically (timer is preset
at factory for six (6) seconds, but
this is easily changed by
following the upcoming
instructions.)
5. Remove the crust, place on disc,
screen, pan or peel, add toppings
and bake.
ADDITIONAL NOTES:
Temperature
Note
Fahrenheit/Centigrade (Celsius)
Conversion
The temperature controller can
be programmed to display either
°F or °C. To change: Press the
MODE button until the
temperature is displayed, then
push and hold the SET button for
10 seconds.
Timer
• The controller has a count down
timer that automatically activates
a buzzer at the completion of the
application.
• Timer display is minutes:
seconds. Range is 00:00 to
10:00; Colons (:) flash while
timer is running.
-4- DP3300 1410/20003/40002 5/03
 Loading...