

Page 1
EN
DEFRESPTITNLDASVNO
FI
RU
PLSKCS
HU
ENERGY & LIGHTING
TEC60, TEC60LPG
Generator
Operating manual . . . . . . . . . . . . . . . . . . . . . 8
TEC
Генератор
Инструкция по эксплуатации . . . . . . . . . 251
Generator
Instrukcja obsługi . . . . . . . . . . . . . . . . . . . 275
Generàtor
Návod na obsluhu. . . . . . . . . . . . . . . . . . . 298
Generàtor
Návod k obsluze . . . . . . . . . . . . . . . . . . . . 320
Generátor
Használati utasítás. . . . . . . . . . . . . . . . . . .342
Generator
Bedienungsanleitung . . . . . . . . . . . . . . . . .30
Générateur
Notice d’utilisation . . . . . . . . . . . . . . . . . . .53
Generador
Instrucciones de uso . . . . . . . . . . . . . . . . . .77
Gerador
Manual de instruções . . . . . . . . . . . . . . . . .99
Generatore
Istruzioni per l’uso . . . . . . . . . . . . . . . . . . . 121
Generator
Gebruiksaanwijzing. . . . . . . . . . . . . . . . . .143
Generator
Betjeningsvejledning . . . . . . . . . . . . . . . .165
Generator
Bruksanvisning. . . . . . . . . . . . . . . . . . . . . .186
Generator
Bruksanvisning. . . . . . . . . . . . . . . . . . . . . 208
Generaattori
Käyttöohje . . . . . . . . . . . . . . . . . . . . . . . . 229
Page 2

Page 3
TEC60, TEC60LPG
0V 0.0KW 12H
12.3 GEN OFF
5
4
3
21
1
1
2
2
3
Page 4
TEC60, TEC60LPG
5
3
2
1
6
4
7 8
109
3
1
2
3
4
4
Page 5

TEC60, TEC60LPG
1
2
5
1
6
5
Page 6
TEC60, TEC60LPG
1
2
4
3
7
6
Page 7

TEC60, TEC60LPG
TEC60
TEC60LPG
0,7 – 0,8 mm0,7 – 0,8 mm
8
544
626
679
446
9
7
Page 8

EN
TEC60, TEC60LPG
Please read this instruction manual carefully before first use, and store it in
a safe place. If you pass on the product to another person, hand over this
instruction manual along with it.
Table of contents
1 Explanation of symbols. . . . . . . . . . . . . . . . . . . . . . . . . . . . . . . . . . . . . . . . . . .9
2 Safety instructions . . . . . . . . . . . . . . . . . . . . . . . . . . . . . . . . . . . . . . . . . . . . . . .9
3 Target group for this manual. . . . . . . . . . . . . . . . . . . . . . . . . . . . . . . . . . . . . . 11
4 Scope of delivery . . . . . . . . . . . . . . . . . . . . . . . . . . . . . . . . . . . . . . . . . . . . . .12
5 Accessories . . . . . . . . . . . . . . . . . . . . . . . . . . . . . . . . . . . . . . . . . . . . . . . . . . .13
6 Intended use . . . . . . . . . . . . . . . . . . . . . . . . . . . . . . . . . . . . . . . . . . . . . . . . . .13
7 Technical description . . . . . . . . . . . . . . . . . . . . . . . . . . . . . . . . . . . . . . . . . . .13
8 Operating the generator . . . . . . . . . . . . . . . . . . . . . . . . . . . . . . . . . . . . . . . .15
9 Cleaning the generator. . . . . . . . . . . . . . . . . . . . . . . . . . . . . . . . . . . . . . . . . .21
10 Servicing the generator . . . . . . . . . . . . . . . . . . . . . . . . . . . . . . . . . . . . . . . . .21
11 Troubleshooting . . . . . . . . . . . . . . . . . . . . . . . . . . . . . . . . . . . . . . . . . . . . . . 26
12 Warranty . . . . . . . . . . . . . . . . . . . . . . . . . . . . . . . . . . . . . . . . . . . . . . . . . . . . 28
13 Disposal . . . . . . . . . . . . . . . . . . . . . . . . . . . . . . . . . . . . . . . . . . . . . . . . . . . . . 28
14 Technical data . . . . . . . . . . . . . . . . . . . . . . . . . . . . . . . . . . . . . . . . . . . . . . . . 29
8
Page 9
EN
TEC60, TEC60LPG Explanation of symbols
1 Explanation of symbols
WARNING!
!
Safety instruction: Failure to observe this instruction can cause fatal or
serious injury.
CAUTION!
Safety instruction: Failure to observe this instruction can lead to injury.
!
NOTICE!
A
Failure to observe this instruction can cause material damage and impair
the function of the product.
NOTE
Supplementary information for operating the product.
I
2 Safety instructions
The manufacturer accepts no liability for damage in the following cases:
• Damage to the product resulting from mechanical influences and excess voltage
• Alterations to the product without express permission from the manufacturer
• Use for purposes other than those described in the operating manual
In particular, the manufacturer will not be liable for any consequential damage, especially consequential damage caused by failure of the generator.
Note the following basic safety information when using electrical devices to protect
against:
• Electric shock
• Fire hazards
• Injury
9
Page 10

EN
Safety instructions TEC60, TEC60LPG
2.1 General safety
WARNING!
!
• Electrical devices are not toys
Keep electrical devices out of reach of children or infirm persons. Do
not allow them to use electrical devices without supervision.
• People (including children) whose physical, sensory or mental capacities prevent them from using this device safely may not be allowed to
operate it without the supervision of a responsible adult.
• Only use the device as intended.
• Do not make any alterations or conversions to the device.
• Installation, maintenance and repairs of the generator may only be car-
ried out by qualified personnel who are familiar with the risks involved
when handling generators as well as the relevant regulations. Inadequate repairs may cause serious hazards. For repair service, please
contact the manufacturer's branch office in your country (addresses on
the back page).
• Exhaust fumes contain carbon monoxide which is a highly toxic,
odourless and colourless gas. Do not inhale any exhaust fumes. Do
not leave the generator motor running in a closed garage or in a room
without windows.
!
CAUTION!
• The generator may only be used with the flap closed.
• Remove all flammable materials such as petrol, paints, solvents, etc.,
from the vicinity of the generator.
• Ensure that hot parts of the generator do not come in contact with any
flammable materials.
• Only refuel the generator when it is switched off and in a well-ventilated area. Petrol and liquid gas are highly flammable and can
explode.
• Do not refuel the generator when the vehicle engine is running if the
tank is in the vicinity of the generator.
• If petrol is spilled, wipe it up properly and wait until the fumes have
cleared before turning on the engine.
• Do not touch the generator and the cables with wet hands.
• Replace the fuses or thermo switch using only those with the same
technical data.
10
Page 11

EN
TEC60, TEC60LPG Target group for this manual
NOTICE!
A
2.2 Operating the device safely
• Do not fill up the tank too full. Petrol must not be allowed to fill up to
the neck of the tank. Check the lid is on properly.
• If a welding operation has be done on the vehicle disconnect all generator cables, otherwise the electronics may be damaged.
WARNING!
• Always disconnect the power supply when working on the device.
!
NOTICE!
A
3 Target group for this manual
This operating manual is for the user of the generator.
• Only operate the device if you are certain that the housing and the
cables are undamaged.
11
Page 12
EN
Scope of delivery TEC60, TEC60LPG
4Scope of delivery
TEC60
Designation Reference no.
TEC60 generator 9102900229
Changeover relay for making priority circuits 9102900148
Inverter
Control panel
Silencer
Exhaust pipe
Mounting material for silencer
Connection cables
Mounting material
Installation manual
Operating manual
TEC60LPG
Designation Reference no.
TEC60LPG generator 9102900230
Changeover relay for making priority circuits 9102900148
Inverter
Control panel
Silencer
Exhaust pipe
Mounting material for silencer
Connection cables
Mounting material
Installation manual
Operating manual
12
Page 13
EN
TEC60, TEC60LPG Accessories
5Accessories
Available as accessories (not included in the scope of delivery):
Part designation Reference no.
PR 250116, external sealing kit 9102900244
6 Intended use
The generator TEC60 (ref. no. 9102900229) and the generator TEC60LPG
(ref. no. 9102900230) are designed for use
cles for commercial use.
The generator is not suitable for installation in water vessels.
The generator produces a pure sine wave voltage of 230 V/50 Hz which can be
connected to the consumer with a total continuous load of
in motor homes, camper vans and vehi-
• TEC60: 6200 W
• TEC60LPG: 6000 W
The power quality is also suitable for sensitive consumers (such as PCs).
The generator can charge a 12 V battery.
7 Technical description
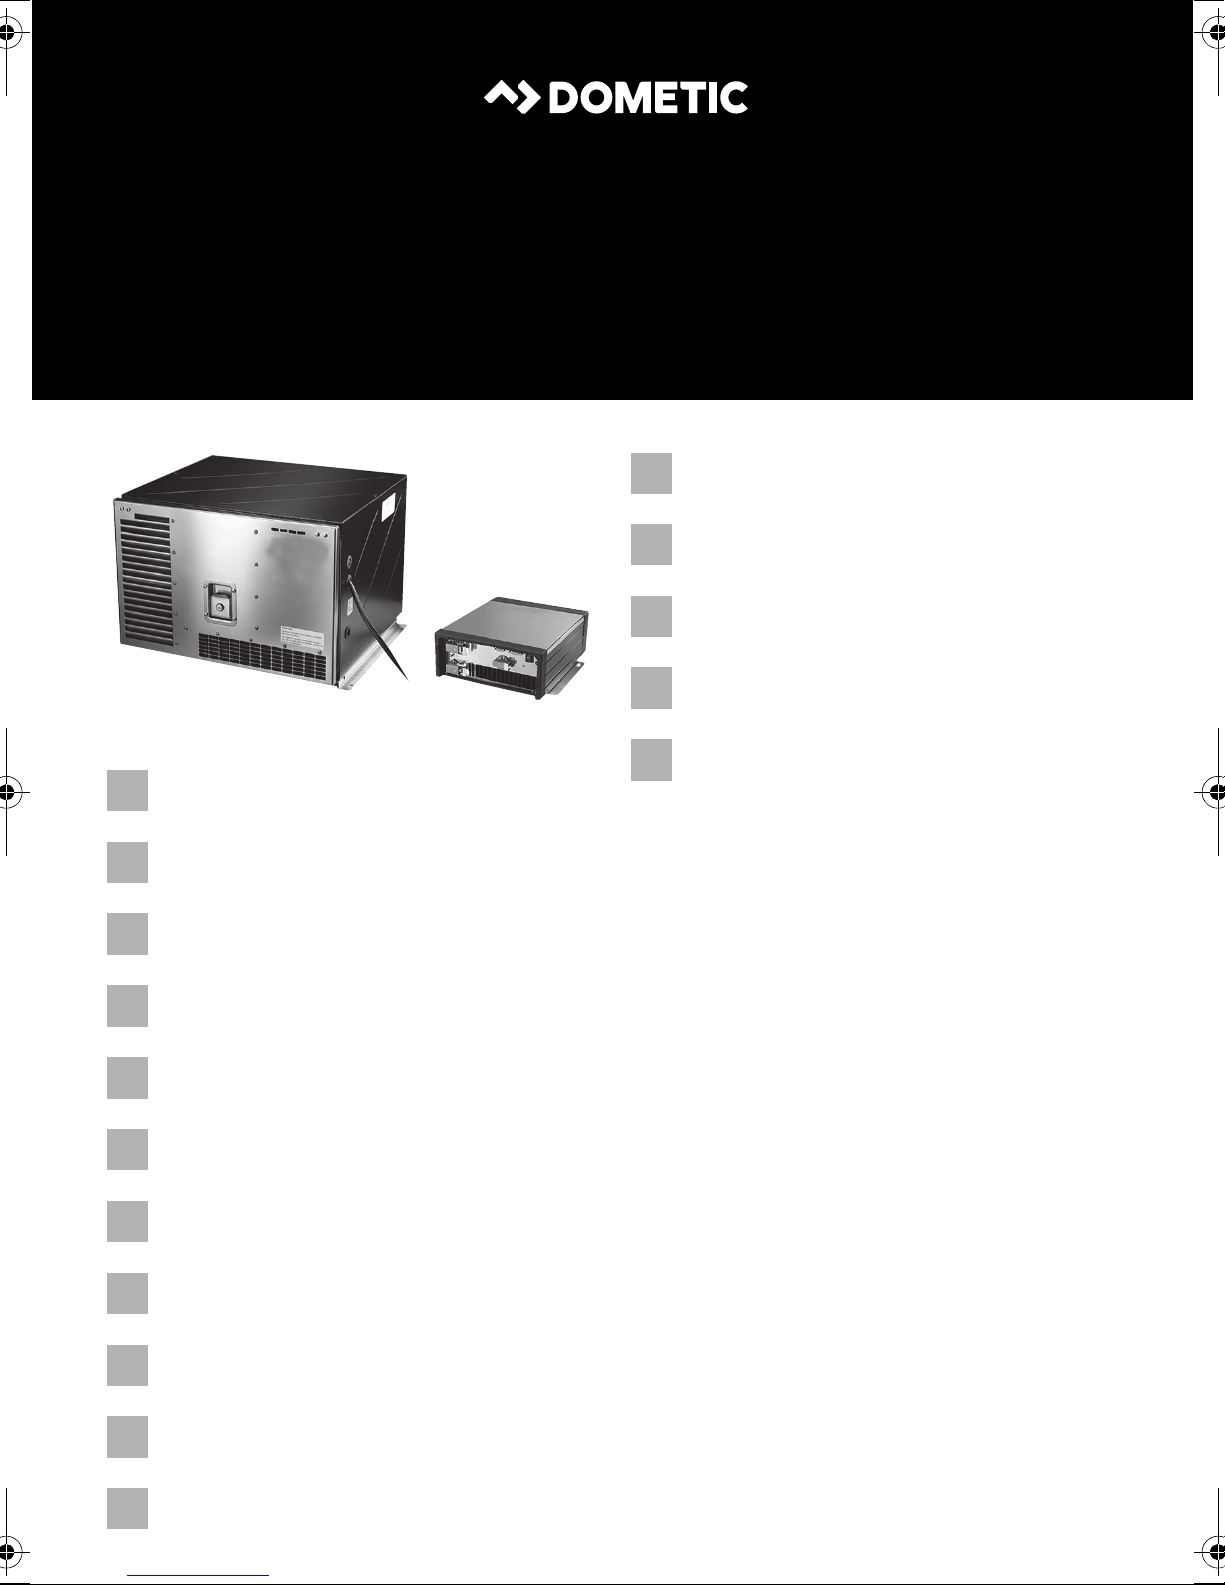
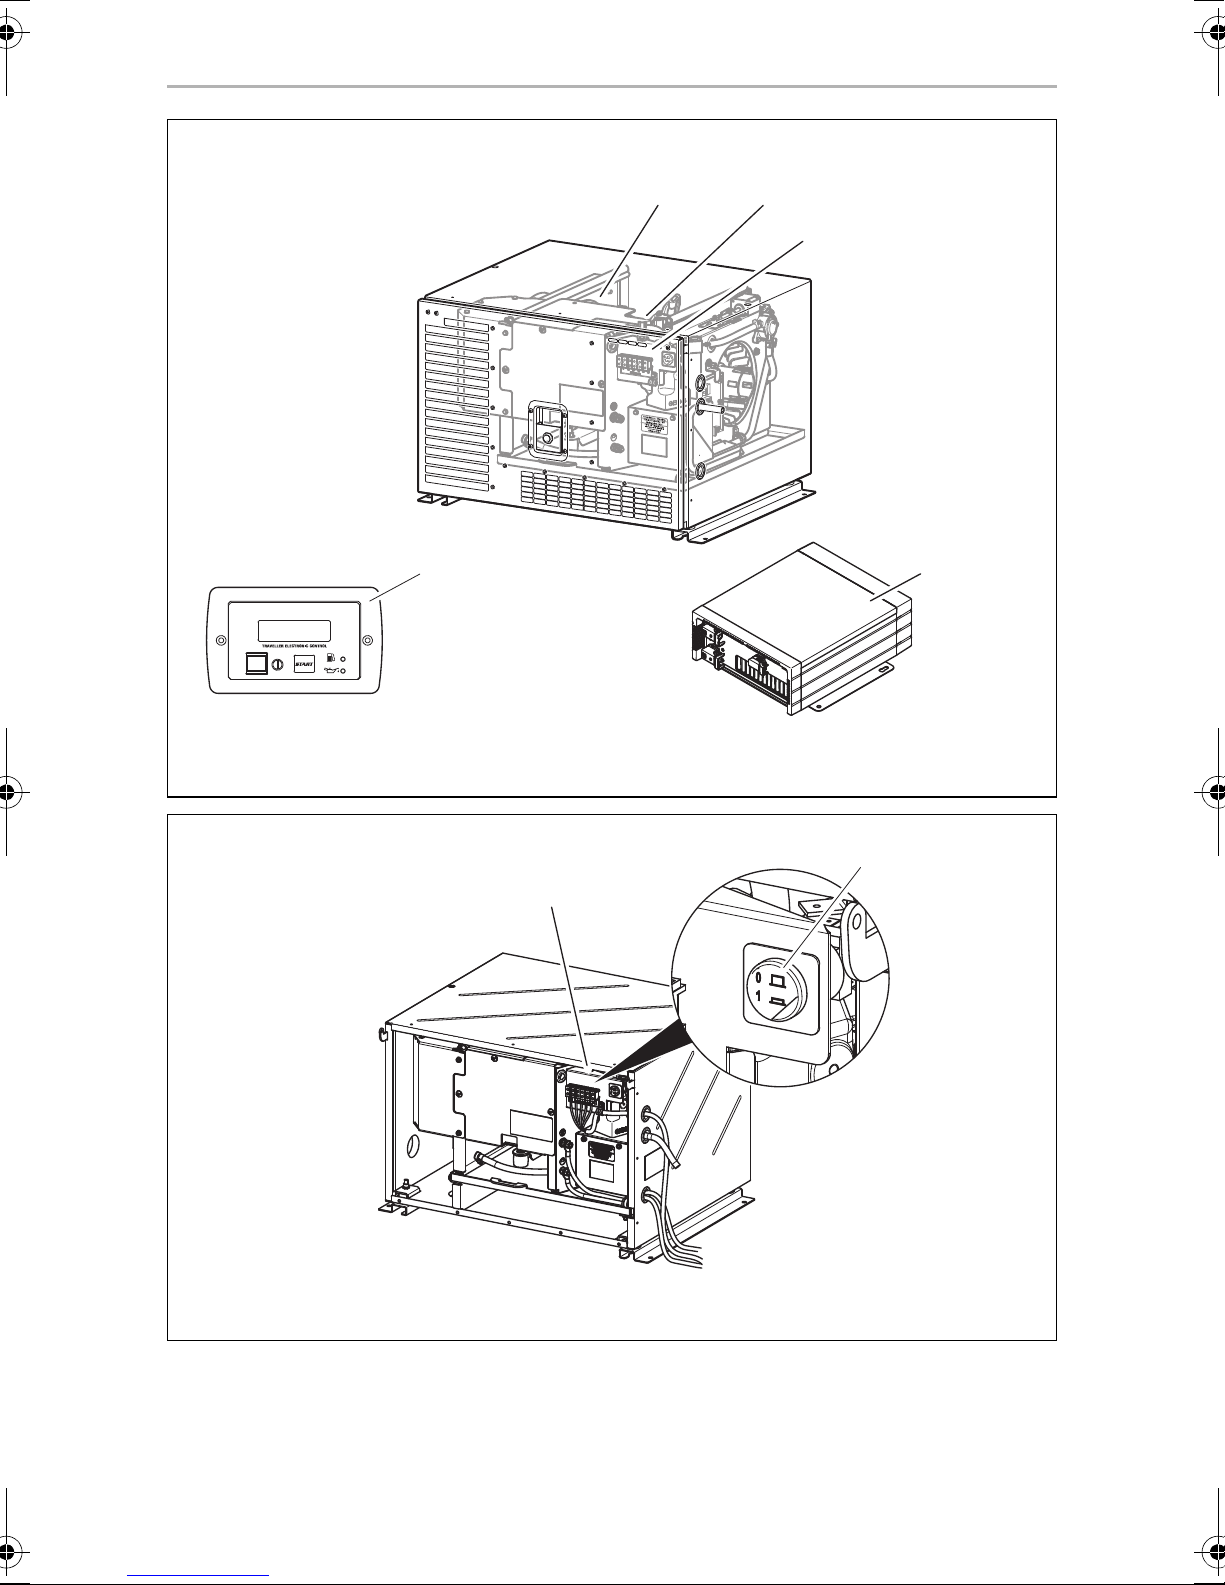
The generator consists of the following main parts (fig. 1, page 3):
• Power generator with permanent magnets (1)
• Combustion engine (2)
• Connection box (3)
• Inverter (4)
• Control panel (5)
The combustion engine (2) drives the power generator connected to it (1), which in
turn generates AC voltage.
The external inverter (4) transforms this AC voltage into a stable voltage of 230 V and
50 Hz, which is available at the inverter terminal. The socket for the connection cable
to the control panel is installed in the inverter.
The terminals and the main switch are installed in the connection box (3) located
behind the door.
13
Page 14
EN
Technical description TEC60, TEC60LPG
The control panel is used to operate the device (5).
The generator has an integrated battery charger for charging the connected battery.
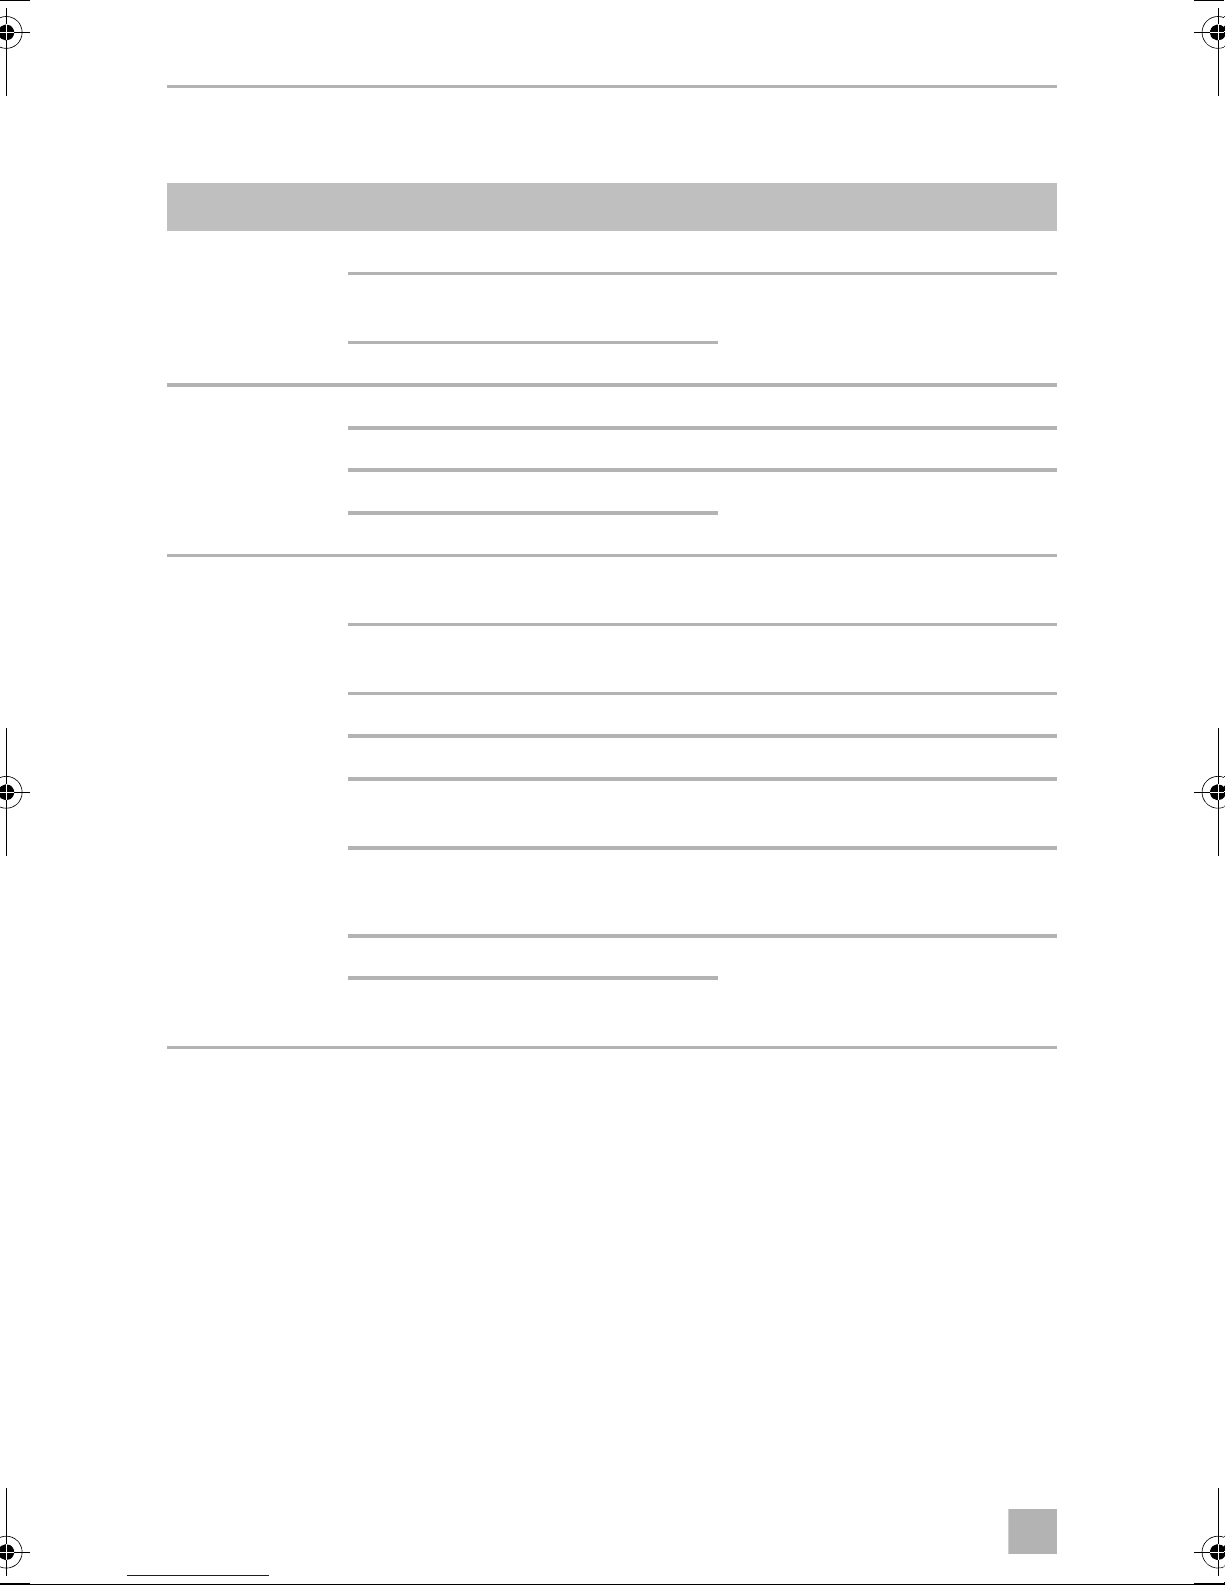
Control elements in the connection box
The connection box is located on the generator behind the cover.
No. in
fig. 2,
page 3
1 Main switch Switches the generator to standby or no
Description
function.
2 Thermal protection of the
inverter
Activates if the inverter overheats (see chapter
“Display messages” on page 17)
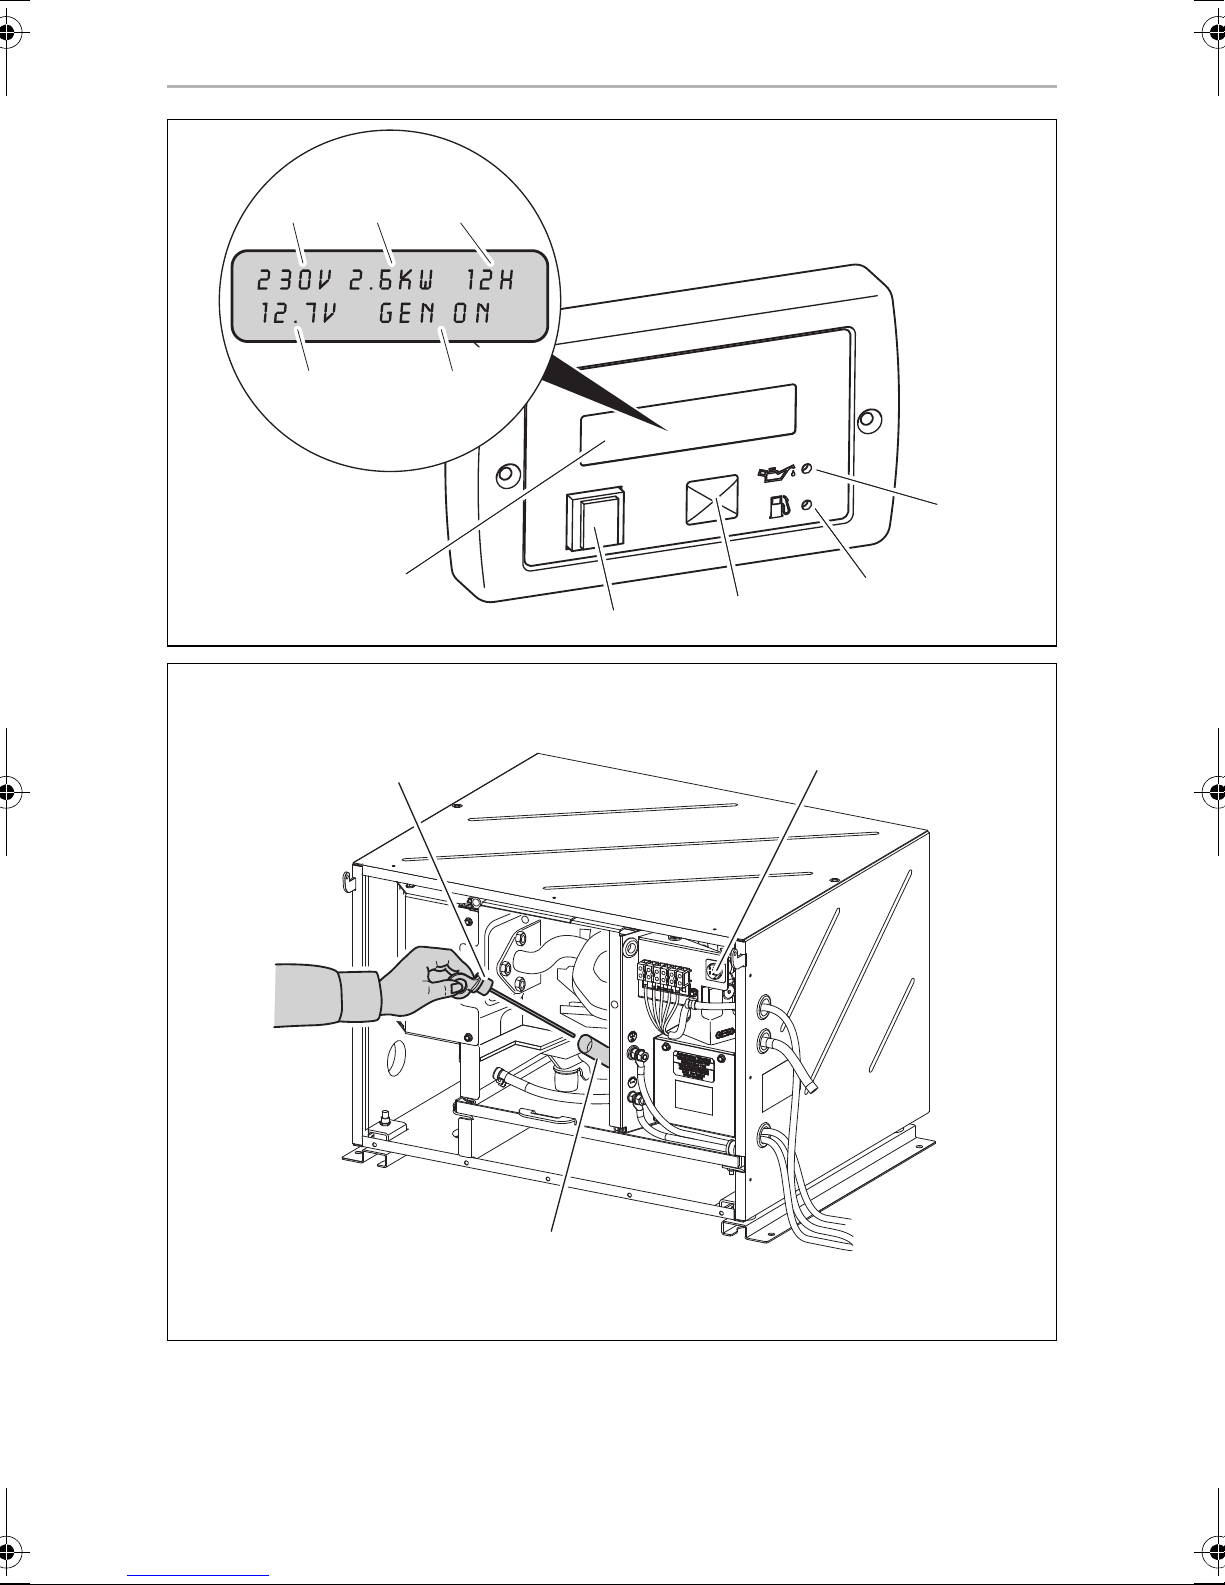
Control elements in the control panel
The control panel is installed in the vehicle interior.
No. in
fig. 3,
page 4
1 Display Shows the status reports.
2 On/Off switch P Switches the control panel on and off if the
3 Green button START/STOP Starts/stops the generator if the control panel
4 Only TEC60:
Description
main switch is at “I” or “1”.
Stops the generator in emergency.
is switched on and the main switch is at “I” or
“1”.
Lights up if the petrol goes into reserve.
Petrol gauge
5 Oil gauge Lights up if the oil level is too low in the
14
engine.
Page 15
EN
TEC60, TEC60LPG Operating the generator
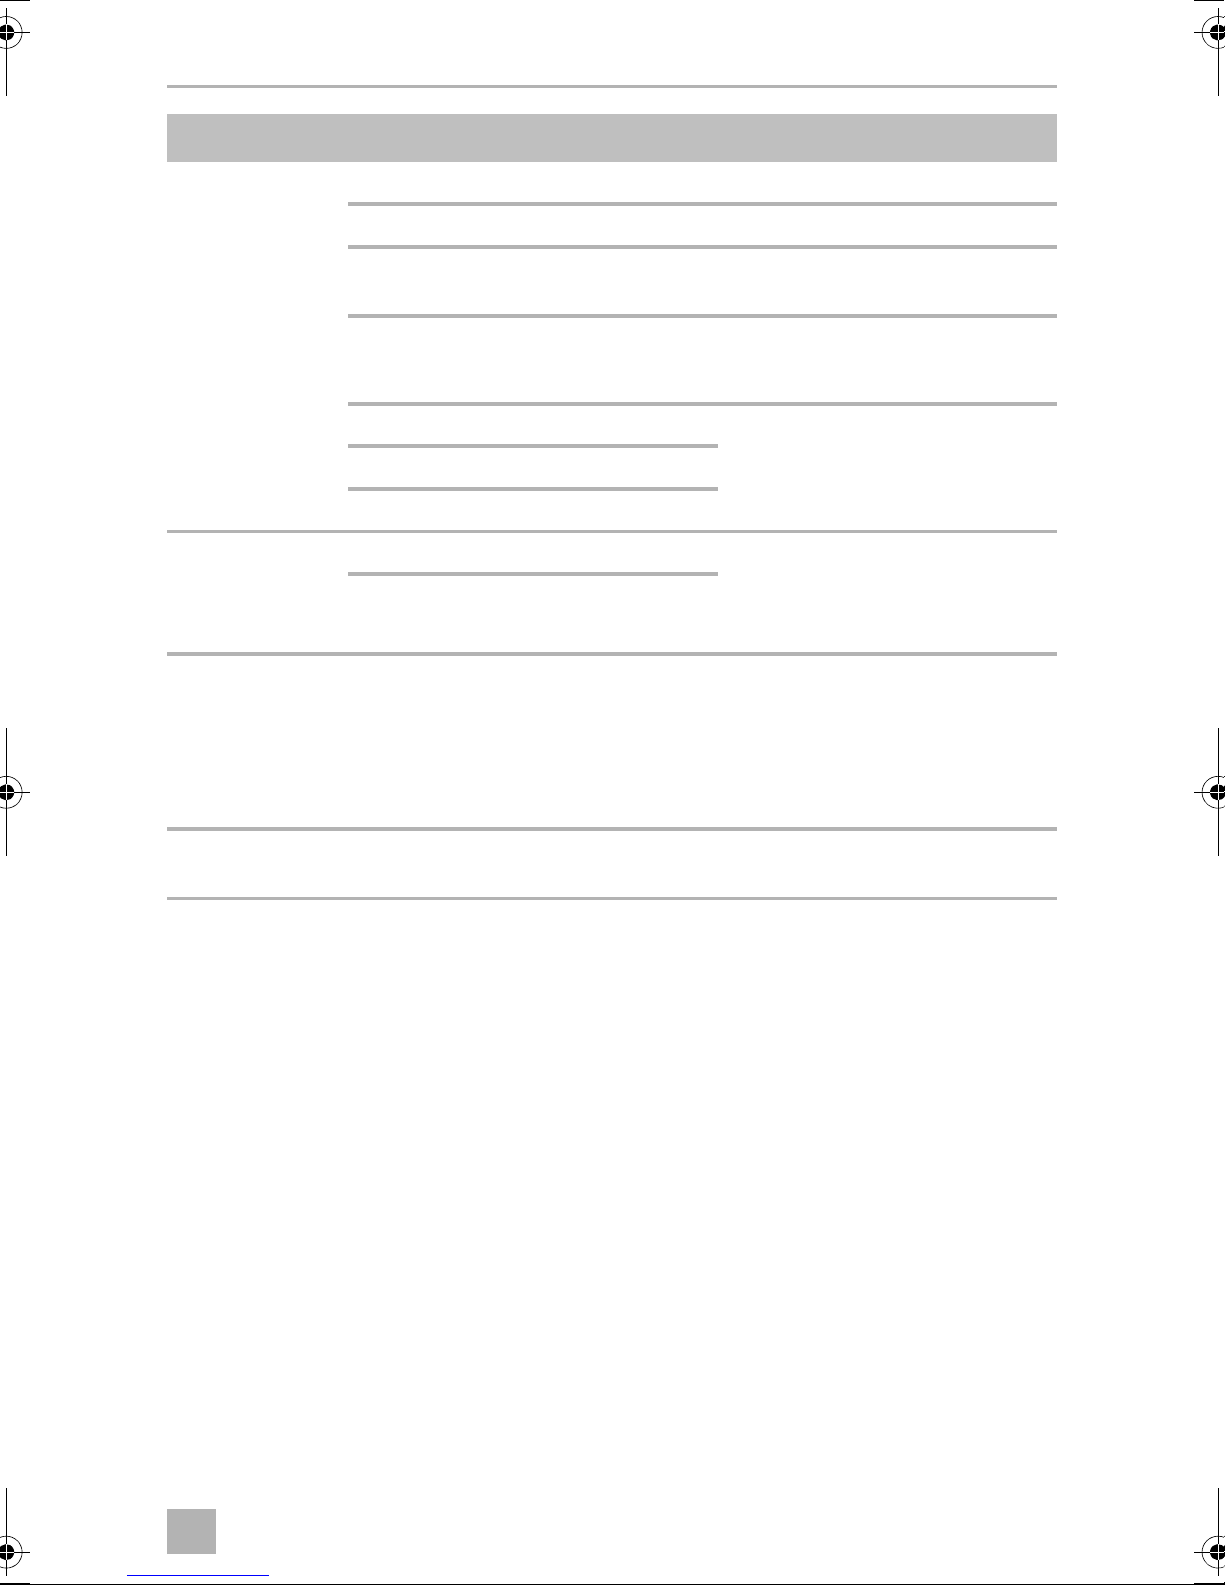
Displays
No. in
fig. 3,
page 4
6 AC supply Actual voltage output
7 Constant output Current capacity of connected consumer
8 Operating hours Time the generator is in operation
9 DC voltage Battery charging voltage
10 Messages Status reports of the generator (see chapter
Description
“Display messages” on page 17)
8 Operating the generator
NOTICE!
A
I
8.1 Basic notes on operation
!
Please note the following basic information:
• Always check the oil level before use (chapter “Checking the oil level” on
page 20).
Do not run the generator over 70 % of the maximum constant output for
the first 50 operating hours (run-in phase).
NOTE
By doing this you can prolong the service life of the generator and
optimise its output:
run the generator at a maximum of approx. 75 % of the maximum
continuous load after the run-in phase.
CAUTION! Beware of injury
Do not insert your fingers or objects into the air nozzles or the intake
grille.
• Even small overloads in the long-run will cause the generator to stop.
• Leave the generator running for a few minutes after use without any consumers
before stopping it.
15
Page 16

EN
Operating the generator TEC60, TEC60LPG
• Abrupt braking, accelerating and driving round bends in the vehicle can cause
problems in the generator's pump system and lead to unwanted shutdown.
• If you are not using your generator for a longer period of time, start it up at least
every 30 days and leave it running for 15 minutes or more.
8.2 Switching the generator to standby or no function
The generator can be switched to standby or no function with the main switch
(fig. 2 1, page 3) in the connection box.
8.3 Switching the control panel on and off
This switch on the control panel (fig. 3 2, page 4) is for switching the control panel
on and off.
➤ Switch the control panel on with the on/off switch.
✓ The display shows:
The display switches off automatically after 5 minutes if the start button is not
touched within this time.
Press the start button to switch on the display again.
✓ The generator can now be started.
GEN OFF.
8.4 Starting the generator
The generator can only be started if it is in standby and the control panel is switched
on.
NOTE
I
➤ Start up the generator with the start button (fig. 3 3, page 4).
If the generator is still warm, press the start button briefly to start it; press
longer for a cold generator.
16
Page 17
EN
TEC60, TEC60LPG Operating the generator
8.5 Stopping the generator
➤ Stop the generator with the green button “START/STOP” (fig. 3 3, page 4).
✓ The inverter shuts down immediately. The engine runs for 30 seconds to cool
down, then the engine stops too.
NOTICE!
Always stop the generator with the green button “START/STOP” to
A
avoid engine damages. The turn off procedure with the red button has
to be used only for emergency.
8.6 Display messages
Display message
Description
LOW BATTERY
The battery voltage has fallen
below the minimum value for
starting up (9 V).
Check OIL Level
OIL CHANGE
The number of prescribed operating hours has been reached for
changing the engine oil.
Only TEC60:
NO FUEL
Generator behaviour Measures
The generator does not start. Charge the battery.
The generator continues to run. Fill up with oil (see chapter
“Checking the oil level” on
page 20).
The generator continues to run. Change the oil (see chapter
“Changing the oil” on page 23),
then confirm the message by
pressing and holding down the
button START/STOP. Restart the
generator by again pressing and
holding down the button
START/STOP.
The generator continues to run. Refuel.
The petrol in the tank is in
reserve.
OIL ALERT
Insufficient engine oil.
The generator stops. Fill up with oil (see chapter
“Checking the oil level” on
page 20).
17
Page 18
EN
Operating the generator TEC60, TEC60LPG
Display message
Description
GENERATOR ALERT!
General alarm message
Example: The control ring on the
throttle valve of the carburettor
(stepper motor) is faulty.
OVERLOAD!
The consumers generate an
overload at the output.
SHORT CIRCUIT
The consumers cause a short circuit at the output.
OVER TEMPERATURE
Overheating
Generator behaviour Measures
The generator stops. Check the system by referring to
the troubleshooting table.
If the problem persists, contact
the manufacturer's branch office
in your country (addresses on the
back page).
The inverter switches off, therefore no voltage is supplied but
the engine carries on running
until it goes off.
The inverter switches off, therefore no voltage is supplied but
the engine carries on running
until it goes off.
The inverter switches off so no
voltage is supplied to cool the
generator, but the engine carries on running.
Reduce the connected load and
start the generator again.
Check the connected consumers then start the generator
again.
Leave the engine to cool down
for a few minutes then start the
generator again.
LOW POWER ENGINE
The inverter supply voltage has
dropped.
Overspeed
RPM too high
Start failed
Example: No fuel, cold temperature, spark plug to be replaced,
dirty air filter
GEN CAL
Message appears when the generator is started up; it shows the
calibration phase which takes
place before each start-up. The
generator does not supply any
voltage.
The generator stops. Reduce the connected load and
start the generator again.
The generator stops. Press the button START/STOP to
restart the generator. If the problem persists, contact the manufacturer's branch office in your
country (addresses on the back
page).
The generator is switched off. Press the start button to restart
the generator.
The generator is running but
does not supply any voltage.
Wait a moment.
18
Page 19

EN
TEC60, TEC60LPG Operating the generator
Display message
Description
GEN WAIT
Message appears while you are
waiting for the generator to start
again.
GEN ON
The generator is operating normally.
GEN OFF
Inverter lost comm
Engine lost comm
Generator behaviour Measures
The generator is switched off. Wait until the message has disap-
peared then attempt ignition
again.
Normal mode –
The generator is idle and can be
started.
The generator stops. Check the system by referring to
The generator stops. Check the system by referring to
–
the troubleshooting table.
If the problem persists, contact
the manufacturer's branch office
in your country (addresses on the
back page).
the troubleshooting table.
If the problem persists, contact
the manufacturer's branch office
in your country (addresses on the
back page).
Inverter failed
Eng. Param. Error
Inv. Param. Error
Software Error
The generator stops. Contact the manufacturer's
branch office in your country
(addresses on the back page).
The generator stops. Contact the manufacturer's
branch office in your country
(addresses on the back page).
The generator stops. Contact the manufacturer's
branch office in your country
(addresses on the back page).
The generator stops. Contact the manufacturer's
branch office in your country
(addresses on the back page).
19
Page 20

EN
Operating the generator TEC60, TEC60LPG
8.7 Checking the oil level
CAUTION!
!
Hot oil can cause burns.
Only check the oil level when the generator is switched off.
NOTE
The generator must be level.
I
Always check the oil level before use. To do this, proceed as follows:
➤ Open the generator flap.
➤ Switch the generator to no function with the main switch (fig. 4 1, page 4).
➤ Disconnect the positive terminal of the supply battery.
➤ Take the dipstick (fig. 4 2, page 4) out of the filler neck (fig. 4 3, page 4).
➤ Clean the dipstick (fig. 4 2, page 4) with a cloth.
➤ Put the dipstick (fig. 4 2, page 4) back into the filler neck (fig. 4 3, page 4).
➤ Take the dipstick (fig. 4 2, page 4) out of the filler neck.
➤ Check that the oil level is between the notch (maximum filling level) and the tip of
the dipstick.
If not, top up with more oil.
➤ Put the dipstick (fig. 4 2, page 4) back into the filler neck (fig. 4 3, page 4).
➤ Check that the oil level is not above the maximum level.
➤ Connect the generator to the positive terminal of the supply battery.
➤ Switch the generator to standby with the main switch (fig. 4 1, page 4).
➤ Close the generator flap.
20
Page 21

EN
TEC60, TEC60LPG Cleaning the generator
9Cleaning the generator
NOTICE! Beware of damage
A
➤ Clean the generator with a damp cloth from time to time.
➤ Remove any dirt from the air vents in the generator at regular intervals. Make sure
you do not damage the grilles of the generator in the process.
• Do not clean the generator with a high-pressure cleaner. Exposure
to water can damage the generator.
• Do not use sharp or hard objects or cleaning agents for cleaning as
these may damage the generator.
• To clean the generator, use water with a gentle cleaning agent.
Never use petrol, diesel or solvents.
10 Servicing the generator
NOTE
I
10.1 Maintenance table
!
I
Find your Dometic service partner on the internet:
http://service-location.dometic.com
WARNING!
Only have maintenance work carried out by specialist personnel who
are familiar with the relevant regulations. Inadequate maintenance may
cause serious hazards.
NOTE
Have the following maintenance work performed at regular intervals or
after the specified number of operating hours, whichever is sooner.
21
Page 22
EN
Servicing the generator TEC60, TEC60LPG
Interval Inspection/maintenance
In the first month
or after 20 hours.
Every 3 months or
after 50 hours.
Every 6 months or
after 100 hours.
Once a year or
every 300 hours
Every two years ➤ Check the petrol supply lines (TEC60) and gas supply lines
➤ Change the oil.
➤ Check the air filter (chapter “Servicing the air filter” on page 24).
➤ Check the air filter (chapter “Servicing the air filter” on page 24).
➤ Change the oil.
➤ Check the spark plug (chapter “Servicing the spark plugs” on
page 25).
➤ Check the valves.
➤ Check the fuel tank (only TEC 60) and fuel filter.
➤ Check the vibration damper.
(TEC60LPG).
10.2 Preparing maintenance work
CAUTION!
!
Note the following for all maintenance work:
• The generator must not be running.
• All the parts must be cooled down.
➤ Open the generator flap.
➤ Switch the generator to no function with the main switch (fig. 2 1, page 3).
➤ Disconnect the positive terminal of the supply battery.
For maintenance work, you can take the generator out (fig. 5, page 5):
WARNING!
!
➤ Undo the fastening screws (1).
➤ Remove the mounting plate (2) with the generator from the housing (3).
The mounting plate with generator is very heavy (> 70 kg) and could fall
out the housing if you take it out too far.
22
Page 23
EN
TEC60, TEC60LPG Servicing the generator
10.3 Finishing maintenance work
➤ Connect the generator to the positive terminal of the supply battery.
➤ Switch the generator to standby with the main switch (fig. 4 1, page 4).
➤ Close the generator flap.
10.4 Changing the oil
CAUTION!
Hot oil can cause burns.
!
NOTICE!
A
Only dispose of used oil at a specialist recycling station and observe the
local laws for environmental protection.
You may use the following oil:
• SAE 5W-30 grade oil (can be used at any temperature).
• Oil with single grade oil viscosity.
Select the appropriate viscosity according to the average temperature on-site.
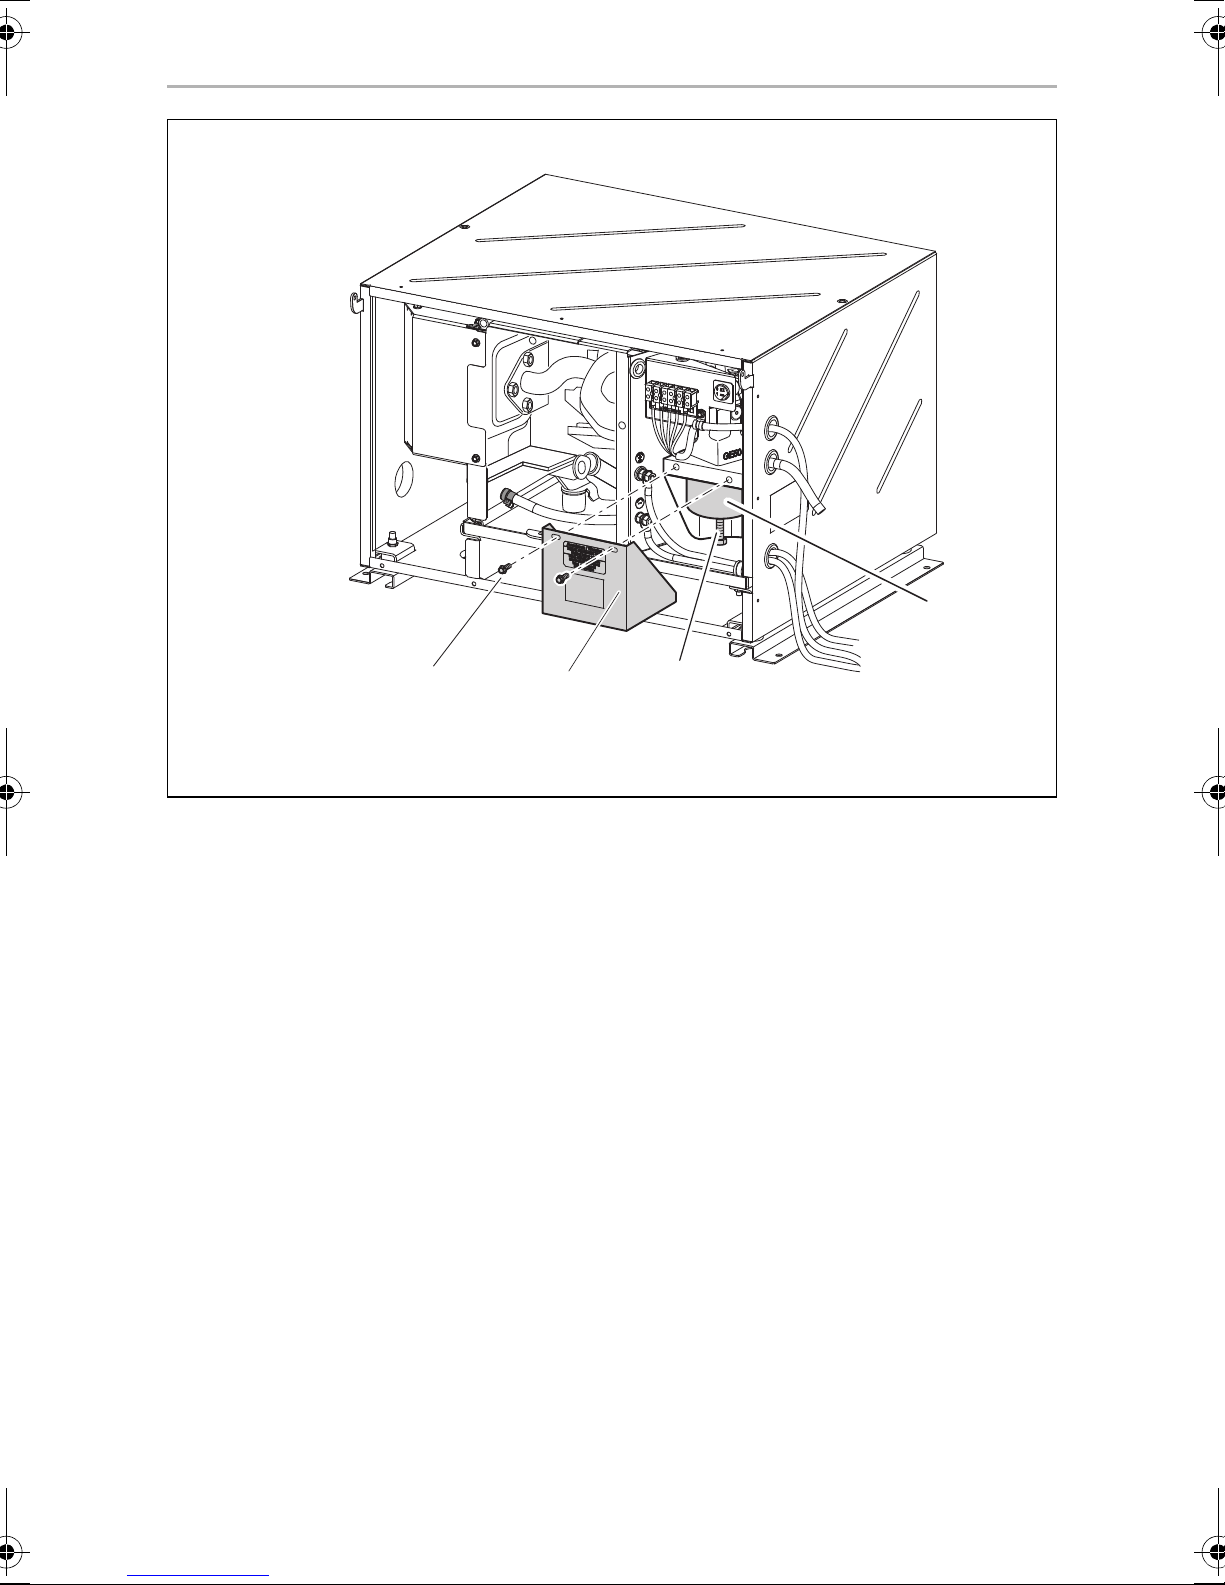
Change the oil as follows:
➤ Allow the generator to run until warm so that the oil can drain off faster and
completely.
➤ Place a suitable receptacle under the drain plug (fig. 6 1, page 5).
➤ Remove the dipstick.
➤ Take out the drain plug (fig. 6 1, page 5).
✓ The oil drains off.
➤ Pour fresh oil into the filler neck.
The amount of oil is: 1.1 l.
23
Page 24
EN
Servicing the generator TEC60, TEC60LPG
10.5 Servicing the air filter
WARNING! Danger of explosions
!
A
I
Do not use diesel oil or solvents with low boiling points for cleaning the
air filter. They could ignite or explode.
NOTICE!
Never leave the engine running without an air filter. Otherwise this
quickly wears out the engine.
NOTE
If the air filter is dirty, the air flow to the carburettor is reduced. Check the
filter regularly so that the carburettor can function properly. Check this
more frequently if the generator is being used in particularly dusty
environments.
➤ Prepare the maintenance work and pull the generator out of the housing slightly:
see chapter “Preparing maintenance work” on page 22.
➤ Remove the screws (fig. 7 1, page 5) and the filter cover (fig. 7 2, page 5).
➤ Remove the screw (fig. 7 3, page 5).
➤ Take out the air filter (fig. 7 4, page 5).
The air filter consists of two parts: a sponge filter and a paper filter.
➤ Check the condition of both parts of the filter carefully. Replace the damaged
filter parts.
➤ Clean the undamaged filter parts; see the following section.
➤ Finish the maintenance work, see chapter “Finishing maintenance work” on
page 23.
Cleaning the sponge filter
➤ Wash the sponge with a neutral detergent solution and rinse it thoroughly.
➤ Leave the sponge to dry completely.
➤ Soak the sponge in fresh engine oil.
➤ Squeeze out the excess oil.
24
Page 25

EN
TEC60, TEC60LPG Servicing the generator
Cleaning the paper filter
➤ Knock the dirt off the paper by banging it lightly on a hard surface or use com-
pressed air to blow through the filter.
Do not brush the paper as this will push the dirt into the fibres of the paper filter.
➤ Change the paper filter if it is heavily soiled.
10.6 Servicing the spark plugs
NOTICE!
A
• Screw the spark plugs in carefully. A loose spark plug can get very
hot and damage the engine.
• Only use the same type of spark plugs.
• When you insert a new spark plug, screw it in by 1/2 a turn once it is
firmly on the washer. If you are using used spark plugs, turning them
1/8 or 1/4 is suffice.
➤ Prepare the maintenance work, see chapter “Preparing maintenance work” on
page 22.
➤ Remove the spark plug connector.
➤ Remove the spark plug using a spark plug wrench.
➤ Make a visual inspection of the spark plugs.
Replace the spark plug if it is clearly worn or the isolator is damaged or broken.
If the spark plug is just dirty, clean it with a steel brush.
➤ Measure the distance between the electrodes with a thickness gauge (fig. 8,
page 7). It must be 0.7 – 0.8 mm and can be corrected by bending the electrode
if necessary.
➤ Check whether the spark plug seal is intact.
➤ If so, screw in the spark plugs by hand to avoid damaging the thread.
➤ Tighten the spark plugs using a spark plug wrench so that the washer is pressed
together.
➤ Finish the maintenance work, see chapter “Finishing maintenance work” on
page 23.
25
Page 26
EN
Troubleshooting TEC60, TEC60LPG
11 Troubleshooting
Fault Cause Remedy
The control panel
does not come on
when the on/off
switch is pressed.
The starter does
not work when the
start button is
pressed.
The starter turns
but the generator
does not start.
Starter battery is flat.
Power cable is disconnected or the plug
is removed.
The fuse (if available) is blown.
Starter battery is flat.
The main switch is at “0”.
Internal board is damaged.
Starter is not receiving any power.
TEC60:
No petrol.
TEC60LPG:
No liquid gas.
Too much oil in the engine.
Spark plug is not receiving any power.
Only TEC60:
Carburettor is not receiving any petrol.
➤ Charge the starter battery.
➤ Contact an authorised workshop.
➤ Charge the starter battery.
➤ Set the main switch to “I” or “1”.
➤ Contact an authorised workshop.
➤ Fill up with petrol.
➤ Replace the liquid gas bottle.
➤ Drain the oil.
➤ Check the electric connections.
➤ Clean the carburettor.
Air intake is blocked.
Inverter is damaged.
Power cable is disconnected or the plug
is removed.
➤ Check the air filter (see chapter
“Servicing the air filter” on
page 24).
➤ Contact an authorised workshop.
26
Page 27
EN
TEC60, TEC60LPG Troubleshooting
Fault Cause Remedy
The generator
tends to go off.
The generator is
running but does
not supply any voltage.
The generator
starts up very fast
and then the
“GENERATOR
ALERT” message
appears.
Too much oil in the engine.
Load is over 6,2 kW.
Only TEC60:
Carburettor is not receiving any petrol.
Air intake is blocked.
Inverter is damaged.
Electromagnet (inverter) is blocked.
Air filter is dirty.
Inverter is damaged.
RPM too low.
The stepper motor is faulty or the cable is
disconnected.
➤ Drain the oil.
➤ Switch off the consumers.
➤ Clean the carburettor.
➤ Check the air filter (see chapter
“Servicing the air filter” on
page 24).
➤ Contact an authorised workshop.
➤ Check the output wiring connec-
tion
➤ Contact an authorised workshop.
➤ Contact an authorised workshop.
The generated
voltage is unstable.
Inverter is damaged.
➤ Contact an authorised workshop.
27
Page 28

EN
Warranty TEC60, TEC60LPG
12 Warranty
The statutory warranty period applies. If the product is defective, please contact the
service partner in your country (addresses on the back on the instruction manual).
Our experts will be happy to help you and will discuss the warranty process with you
in more detail.
13 Disposal
➤ Place the packaging material in the appropriate recycling waste bins wherever
possible.
If you wish to finally dispose of the product, ask your local recycling centre
or specialist dealer for details about how to do this in accordance with the
M
applicable disposal regulations.
B
Protect the environment!
Do not dispose of any batteries with general household waste.
Return defective or used batteries to your retailer or dispose of them at
collection points.
28
Page 29

EN
TEC60, TEC60LPG Technical data
14 Technical data
Dometic TEC60 Dometic TEC60LPG
Ref. no.: 9102900229 9102900230
Rated output voltage: 230 Vw / 50 Hz
Max. constant output
(at 25 °C at sea level):
Battery charger output voltage: 12 Vg
Battery charger max. output
current:
Operating temperature range: –15 °C to +50 °C 0 °C to +50 °C
Total harmonic distortion: <3 %
Fuel: RON 91 regular grade pet-
Consumption: max. 3.7 l/h 2.19 kg/h
Motor output: 6.6 kW (8.9 PS)
Max. revolutions per minute:
Motor oil: 1.1 l
Sound level: 91 dB(A)
6200 W 6000 W
30 A
Liquid gas mix: propane
rol
3600 min
from 25 up to 100 % (by
volume)
–1
Sound level at distance of 7 m: 66 dB(A)
Dimensions: see fig. 9, page 7
Weight: 102 kg
Inspection/certification:
29
Page 30

DE
TEC60, TEC60LPG
Bitte lesen Sie diese Anleitung vor der Inbetriebnahme sorgfältig durch
und bewahren Sie sie auf. Geben Sie sie im Falle einer Weitergabe des
Produktes an den Nutzer weiter.
Inhaltsverzeichnis
1 Erklärung der Symbole . . . . . . . . . . . . . . . . . . . . . . . . . . . . . . . . . . . . . . . . . .31
2 Sicherheitshinweise . . . . . . . . . . . . . . . . . . . . . . . . . . . . . . . . . . . . . . . . . . . .31
3 Zielgruppe dieser Anleitung . . . . . . . . . . . . . . . . . . . . . . . . . . . . . . . . . . . . 33
4 Lieferumfang . . . . . . . . . . . . . . . . . . . . . . . . . . . . . . . . . . . . . . . . . . . . . . . . . 34
5 Zubehör. . . . . . . . . . . . . . . . . . . . . . . . . . . . . . . . . . . . . . . . . . . . . . . . . . . . . 35
6 Bestimmungsgemäßer Gebrauch . . . . . . . . . . . . . . . . . . . . . . . . . . . . . . . . 35
7 Technische Beschreibung . . . . . . . . . . . . . . . . . . . . . . . . . . . . . . . . . . . . . . 35
8 Generator bedienen . . . . . . . . . . . . . . . . . . . . . . . . . . . . . . . . . . . . . . . . . . . 37
9 Generator reinigen . . . . . . . . . . . . . . . . . . . . . . . . . . . . . . . . . . . . . . . . . . . . 43
10 Generator warten . . . . . . . . . . . . . . . . . . . . . . . . . . . . . . . . . . . . . . . . . . . . . 44
11 Störungen beseitigen . . . . . . . . . . . . . . . . . . . . . . . . . . . . . . . . . . . . . . . . . . 49
12 Gewährleistung. . . . . . . . . . . . . . . . . . . . . . . . . . . . . . . . . . . . . . . . . . . . . . . .51
13 Entsorgung . . . . . . . . . . . . . . . . . . . . . . . . . . . . . . . . . . . . . . . . . . . . . . . . . . .51
14 Technische Daten . . . . . . . . . . . . . . . . . . . . . . . . . . . . . . . . . . . . . . . . . . . . . 52
30
Page 31

DE
TEC60, TEC60LPG Erklärung der Symbole
1 Erklärung der Symbole
WARNUNG!
!
Sicherheitshinweis: Nichtbeachtung kann zu Tod oder schwerer
Verletzung führen.
VORSICHT!
Sicherheitshinweis: Nichtbeachtung kann zu Verletzungen führen.
!
ACHTUNG!
A
Nichtbeachtung kann zu Materialschäden führen und die Funktion des
Produktes beeinträchtigen.
HINWEIS
Ergänzende Informationen zur Bedienung des Produktes.
I
2 Sicherheitshinweise
Der Hersteller übernimmt in folgenden Fällen keine Haftung für Schäden:
• Beschädigungen am Produkt durch mechanische Einflüsse und Überspannungen
• Veränderungen am Produkt ohne ausdrückliche Genehmigung vom Hersteller
• Verwendung für andere als die in der Anleitung beschriebenen Zwecke
Er haftet insbesondere nicht für jegliche Folgeschäden, insbesondere auch nicht für
Folgeschäden, die durch den Ausfall des Generators entstehen können.
Beachten Sie folgende grundsätzliche Sicherheitsmaßnahmen beim Gebrauch von
elektrischen Geräten zum Schutz vor:
• elektrischem Schlag
• Brandgefahr
• Verletzungen
31
Page 32

DE
Sicherheitshinweise TEC60, TEC60LPG
2.1 Grundlegende Sicherheit
WARNUNG!
!
• Elektrogeräte sind kein Kinderspielzeug!
Kinder können Gefahren, die von elektrischen Geräten ausgehen,
nicht richtig einschätzen. Lassen Sie Kinder nicht ohne Aufsicht elektrische Geräte benutzen.
• Personen (einschließlich Kinder), die aufgrund ihrer physischen,
sensorischen oder geistigen Fähigkeiten oder ihrer Unerfahrenheit
oder Unkenntnis nicht in der Lage sind, das Gerät sicher zu benutzen,
sollten dieses Gerät nicht ohne Aufsicht oder Anweisung durch eine
verantwortliche Person nutzen.
• Benutzen Sie das Gerät nur zu seinem bestimmungsgemäßen
Gebrauch.
• Führen Sie keine Änderungen oder Umbauten am Gerät durch!
• Die Installation, Wartung und Reparaturen des Generators dürfen nur
von Fachkräften durchgeführt werden, die mit den Gefahren beim
Umgang mit Generatoren sowie den einschlägigen Vorschriften vertraut sind. Durch unsachgemäße Reparaturen können erhebliche
Gefahren entstehen. Wenden Sie sich im Reparaturfall an die Niederlassung des Herstellers in Ihrem Land (Adressen auf der Rückseite).
!
• Die Abgase enthalten Kohlenmonoxid, ein äußerst giftiges, geruch-
loses und farbloses Gas. Atmen Sie die Abgase nicht ein. Lassen Sie
den Motor des Generators nicht in einer geschlossenen Garage oder
in einem fensterlosen Raum laufen.
VORSICHT!
• Der Generator darf ausschließlich bei geschlossener Klappe benutzt
werden.
• Entfernen Sie alle leicht brennbaren Materialien wie Benzin, Lacke,
Lösungsmittel usw. aus der Nähe des Generators.
• Vergewissern Sie sich, dass keine heiß werdenden Teile des Generators mit leicht brennbaren Materialien in Berührung kommen.
• Tanken Sie den Generator nur abgeschaltet und in einem gut belüfteten Bereich auf. Benzin und Flüssiggas sind hoch entzündlich und können explodieren.
• Tanken Sie den Generator nicht bei angestelltem Fahrzeugmotor,
wenn sich der Tank in der Nähe des Generators befindet.
32
Page 33

DE
TEC60, TEC60LPG Zielgruppe dieser Anleitung
• Wenn Benzin verschüttet wird, wischen Sie es gut auf und warten Sie
vor dem Einschalten des Motors, bis sich die Dämpfe verzogen
haben.
• Berühren Sie den Generator und die Leitungen nicht mit feuchten
Händen.
• Ersetzen Sie die Sicherungen oder Thermoschalter nur durch solche
mit denselben technischen Daten.
ACHTUNG!
A
2.2 Sicherheit beim Betrieb des Gerätes
• Füllen Sie den Benzintank nicht zu voll. Im Hals des Tanks darf sich kein
Benzin befinden. Kontrollieren Sie, ob der Deckel richtig geschlossen
ist.
• Wenn Schweißarbeiten am Fahrzeug durchgeführt werden müssen,
trennen Sie alle Kabel zum Generator; sonst kann die Elekronik
beschädigt werden.
WARNUNG!
• Unterbrechen Sie bei Arbeiten am Gerät immer die Stromversorgung.
!
ACHTUNG!
A
3 Zielgruppe dieser Anleitung
• Betreiben Sie das Gerät nur, wenn das Gehäuse und die Leitungen
unbeschädigt sind.
Diese Bedienungsanleitung wendet sich an den Anwender des Generators.
33
Page 34

DE
Lieferumfang TEC60, TEC60LPG
4 Lieferumfang
TEC60
Bezeichnung Artikelnummer
Generator TEC60 9102900229
Umschaltrelais zur Realisierung einer Vorrangschaltung 9102900148
Wechselrichter
Bedienpanel
Schalldämpfer
Abgasleitung
Befestigungsmaterial für den Schalldämpfer
Anschlusskabel
Befestigungsmaterial
Einbauanleitung
Bedienungsanleitung
TEC60LPG
Bezeichnung Artikelnummer
Generator TEC60LPG 9102900230
Umschaltrelais zur Realisierung einer Vorrangschaltung 9102900148
Wechselrichter
Bedienpanel
Schalldämpfer
Abgasleitung
Befestigungsmaterial für den Schalldämpfer
Anschlusskabel
Befestigungsmaterial
Einbauanleitung
Bedienungsanleitung
34
Page 35

DE
TEC60, TEC60LPG Zubehör
5Zubehör
Als Zubehör erhältlich (nicht im Lieferumfang enthalten):
Teilebezeichnung Artikelnummer
PR 250116, externer Dichtungssatz 9102900244
6 Bestimmungsgemäßer Gebrauch
Der Generator TEC60 (Art.-Nr. 9102900229) und der Generator TEC60LPG
(Art.-Nr. 9102900230) sind ausgelegt für die Verwendung in Wohnwagen, Wohnmobilen und kommerziell genutzten Fahrzeugen.
Der Generator ist nicht für die Installation in Wasserfahrzeugen geeignet.
Der Generator erzeugt eine reine Sinus-Wechselspannung von 230 V/50 Hz, an die
Verbraucher angeschlossen werden können mit einer Gesamtdauerlast von:
• TEC60: 6200 W
• TEC60LPG: 6000 W
Die Stromqualität ist auch für empfindliche Verbraucher (z. B. PCs) geeignet.
Der Generator kann eine 12-V-Batterie aufladen.
7 Technische Beschreibung
Der Generator besteht aus folgenden Hauptelementen (Abb. 1, Seite 3):
• Stromgenerator mit Dauermagneten (1)
• Verbrennungsmotor (2)
• Anschlussbox (3)
• Inverter (4)
• Bedienpanel (5)
Der Verbrennungsmotor (2) versetzt den fest mit ihm verbundenen
Stromgenerator (1) in Drehung, und dieser erzeugt eine Wechselspannung.
Der externe Inverter (4) formt diese Wechselspannung zu einer stabilen Spannung
von 230 V und 50 Hz, die an den Klemmen des Inverters zur Verfügung steht. Am
Inverter ist die Buchse für das Anschlusskabel an das Bedienpanel angebracht.
An der Anschlussbox (3) hinter der Tür sind die Anschlussklemmen und der Hauptschalter angebracht.
35
Page 36

DE
Technische Beschreibung TEC60, TEC60LPG
Die Bedienung erfolgt über ein Bedienpanel (5).
Der Generator besitzt einen integrierter Batterielader zum Aufladen der angeschlossenen Batterie.
Bedienelemente am Generator
Die Anschlussbox des Generators befindet sich hinter der Klappe.
Pos. in
Abb. 2,
Seite 3
1 Hauptschalter Schaltet den Generator betriebsbereit oder
2 Thermische Sicherung Löst aus bei Überhitzung des Inverters (siehe
Beschreibung
funktionslos.
Kapitel „Displaymeldungen“ auf Seite 39)
Bedienelemente am Bedienpanel
Das Bedienpanel ist im Fahrzeuginneren angebracht.
Pos. in
Abb. 3,
Seite 4
1 Display Zeigt Statusmeldungen an.
2 Ein-/Ausschalter „P“ Schaltet das Bedienpanel ein und aus, wenn
3 Grüner Taster „START/STOP“ Startet/stoppt den Generator, wenn das
4 Nur TEC60:
5 Ölanzeige Leuchtet, wenn der Ölstand im Motor zu
Beschreibung
der Hauptschalter auf „I“ bzw. „1“ steht.
Stoppt den Generator im Notfall.
Bedienpanel eingeschaltet ist und der Hauptschalter auf „I“ bzw. „1“ steht.
Leuchtet, wenn das Benzin auf Reserve steht.
Benzinanzeige
gering ist.
36
Page 37

DE
TEC60, TEC60LPG Generator bedienen
Displayanzeigen
Pos. in
Abb. 3,
Seite 4
6 Wechselspannung Aktuelle Ausgangsspannung
7 Dauerleistung Aktuelle Leistung der angeschlossenen
8 Betriebsstunden Zeit, die der Generator im Betrieb ist
9 Gleichspannung Ladespannung der Batterie
10 Meldungen Statusmeldung des Generators (siehe Kapitel
Beschreibung
Verbraucher
„Displaymeldungen“ auf Seite 39)
8 Generator bedienen
ACHTUNG!
A
I
Beanspruchen Sie den Generator in den ersten 50 Betriebsstunden
(Einlaufphase), nicht über 70 % der maximalen Dauerleistung.
HINWEIS
So können Sie die Lebensdauer des Generators verlängern und seine
Leistung optimieren:
Beanspruchen Sie den Generator nach der Einlaufphase maximal mit
einer Last von ca. 75 % der maximalen Dauerleistung.
8.1 Grundsätzliche Hinweise zur Bedienung
VORSICHT! Verletzungsgefahr!
!
Beachten Sie folgende grundsätzliche Hinweise:
• Kontrollieren Sie vor jeder Verwendung den Ölstand
(Kapitel „Ölstand kontrollieren“ auf Seite 42).
Stecken Sie keine Finger oder Gegenstände in die Luftdüsen oder das
Ansauggitter.
• Auch geringe Überlastungen führen auf Dauer dazu, dass der Generator stoppt.
• Lassen Sie den Generator nach dem Gebrauch einige Minuten ohne
Verbraucher in Betrieb, bevor Sie ihn stoppen.
37
Page 38

DE
Generator bedienen TEC60, TEC60LPG
• Scharfes Abbremsen, Beschleunigen und Kurvenfahrten des Fahrzeugs können
Probleme im Pumpsystem des Generators hervorrufen und zu seinem ungewollten Ausschalten führen.
• Wenn Sie den Generator für längere Zeit nicht benutzen, starten Sie ihn
mindestens alle 30 Tage und lassen Sie ihn mindestens 15 Minuten laufen.
8.2 Generator betriebsbereit oder funktionslos schalten
Mit dem Hauptschalter (Abb. 2 1, Seite 3) an der Anschlussbox wird der
Generator betriebsbereit oder funktionslos geschaltet.
8.3 Bedienpanel ein- und ausschalten
Mit dem Ein-/Ausschalter (Abb. 3 2, Seite 4) am Bedienpanel wird das
Bedienpanel ein- und ausgeschaltet.
➤ Schalten Sie mit dem Ein-/Ausschalter das Bedienpanel ein.
✓ Das Display zeigt:
Das Display schaltet sich nach 5 min automatisch aus, wenn innerhalb dieser Zeit
der Startertaster nicht betätigt wurde.
Durch Drücken des Startertasters können Sie das Display wieder einschalten.
✓ Der Generator kann nun gestartet werden.
GEN OFF.
8.4 Generator starten
Der Generator kann nur gestartet werden, wenn er betriebsbereit geschaltet ist und
wenn das Bedienpanel eingeschaltet ist.
HINWEIS
I
➤ Starten Sie den Generator mit dem Starttaster (Abb. 3 3, Seite 4).
Bei noch warmem Generator drücken Sie zum Anlassen nur kurz auf den
Starttaster, bei kaltem Generator länger.
38
Page 39

DE
TEC60, TEC60LPG Generator bedienen
8.5 Generator stoppen
➤ Stoppen Sie den Generator mit dem grünen Taster „START/STOP“ (Abb. 3 3,
Seite 4).
✓ Der Inverter schaltet sofort ab. Der Generator läuft für 30 Sekunden weiter um
den Generator zu kühlen, danach stoppt auch der Generator.
ACHTUNG!
Stoppen Sie den Generator immer mit dem grünen Taster
A
„START/STOP“, um Schäden am Generator zu vermeiden.
Schalten Sie den Generator nur im Notfall am roten Hauptschalter
funktionslos.
8.6 Displaymeldungen
Displaymeldung
Beschreibung
LOW BATTERY
Die Batteriespannung ist unter
den Mindestwert für die Ausführung von Startversuchen abgesunken (9 V).
Check OIL Level
OIL CHANGE
Die Zählung der Betriebsstunden hat den vorgegebenen Wert
für den Motorölwechsel erreicht.
Verhalten des Generators Maßnahmen
Der Generator springt nicht an. Batterie laden.
Der Generator läuft weiter. Öl nachfüllen (siehe Kapitel
„Ölstand kontrollieren“ auf
Seite 42).
Der Generator läuft weiter. Den Ölwechsel durchführen
(siehe Kapitel „Öl wechseln“ auf
Seite 45), dann die Meldung
durch anhaltendes Drücken des
Ta s t e r s „ S TA R T/
STOP“bestätigen. Den
Generator durch weiteres anhaltendes Drücken des
Tasters„START/STOP“ erneut
starten.
Nur TEC60:
NO FUEL
Das Benzin im Tank steht auf
Reserve.
OIL ALERT
Motoröl fehlt.
Der Generator läuft weiter. Tanken.
Der Generator stoppt. Öl nachfüllen (siehe Kapitel
„Ölstand kontrollieren“ auf
Seite 42).
39
Page 40

DE
Generator bedienen TEC60, TEC60LPG
Displaymeldung
Beschreibung
GENERATOR ALERT!
Allgemeine Alarmmeldung
Beispiel: Der Kontrollring der
Drosselklappe vom Vergaser
(Schrittmotor) ist defekt.
OVERLOAD!
Die Verbraucher erzeugen eine
Überlast am Ausgang.
SHORT CIRCUIT
Die Verbraucher erzeugen einen
Kurzschluss am Ausgang.
OVER TEMPERATURE
Überhitzung
Verhalten des Generators Maßnahmen
Der Generator stoppt. Das System mit Hilfe der Tabelle
Störungen, Ursachen und Abhilfen überprüfen.
Falls das Problem fortbesteht,
wenden Sie sich an die Niederlassung des Herstellers in Ihrem
Land (Adressen auf der Rückseite).
Der Inverter schaltet ab, daher
wird keine Spannung mehr
abgegeben, aber der Motor
läuft weiter, bis er ausgeht.
Der Inverter schaltet ab, daher
wird keine Spannung mehr
abgegeben, aber der Motor
läuft weiter, bis er ausgeht.
Der Inverter schaltet ab, daher
wird keine Spannung mehr
abgegeben, aber der Motor
läuft weiter, um den Generator
zu kühlen.
Die angeschlossene Last verringern und den Generator erneut
starten.
Den Zustand der angeschlossenen Verbraucher kontrollieren,
dann den Generator erneut starten.
Den Generator abkühlen lassen,
ein paar Minuten warten, dann
den Generator erneut starten.
LOW POWER ENGINE
Abfall der Versorgungsspannung des Inverters.
Overspeed
Zu hohe Drehzahl
Start failed
Beispiel: Kein Benzin, kalte Temperaturen, defekte Zündkerze,
verschmutzter Luftfilter
GEN CAL
Meldung, die beim Start des
Generators erscheint; sie zeigt
die Kalibrierungsphase an, die
jedem Start vorangeht. Der
Generator gibt noch keine Spannung ab.
Der Generator stoppt. Die angeschlossene Last verrin-
gern und den Generator erneut
starten.
Der Generator stoppt. Den Generator erneut starten.
Falls das Problem fortbesteht,
wenden Sie sich an die Niederlassung des Herstellers in Ihrem
Land (Adressen auf der Rückseite).
Der Generator ist ausgeschaltet. Den Generator erneut starten.
Der Generator dreht, erzeugt
aber keine Spannung.
Einen Augenblick warten.
40
Page 41

DE
TEC60, TEC60LPG Generator bedienen
Displaymeldung
Beschreibung
GEN WAIT
Meldung, die in der Pause zwischen zwei Startversuchen
erscheint.
GEN ON
Normaler Betrieb des
Generators.
GEN OFF
Inverter lost comm
Verhalten des Generators Maßnahmen
Der Generator ist ausgeschaltet. Warten, bis die Meldung ver-
schwindet, dann einen erneuten
Zündversuch machen.
Normalbetrieb –
Der Generator steht still und
kann gestartet werden
Der Generator stoppt. Das System mit Hilfe der Tabelle
–
Störungen, Ursachen und Abhilfen überprüfen.
Falls das Problem fortbesteht,
wenden Sie sich an die Niederlassung des Herstellers in Ihrem
Land (Adressen auf der Rückseite).
Engine lost comm
Inverter failed
Eng. Param. Error
Inv. Param. Error
Der Generator stoppt. Das System mit Hilfe der Tabelle
Störungen, Ursachen und Abhilfen überprüfen.
Falls das Problem fortbesteht,
wenden Sie sich an die Niederlassung des Herstellers in Ihrem
Land (Adressen auf der Rückseite).
Der Generator stoppt. Wenden Sie sich an die Nieder-
lassung des Herstellers in Ihrem
Land (Adressen auf der Rückseite).
Der Generator stoppt. Wenden Sie sich an die Nieder-
lassung des Herstellers in Ihrem
Land (Adressen auf der Rückseite).
Der Generator stoppt. Wenden Sie sich an die Nieder-
lassung des Herstellers in Ihrem
Land (Adressen auf der Rückseite).
Software Error
Der Generator stoppt. Wenden Sie sich an die Nieder-
lassung des Herstellers in Ihrem
Land (Adressen auf der Rückseite).
41
Page 42

DE
Generator bedienen TEC60, TEC60LPG
8.7 Ölstand kontrollieren
VORSICHT!
!
Heißes Öl kann Verbrennungen hervorrufen.
Prüfen Sie den Ölstand nur bei ausgeschaltetem Generator.
HINWEIS
Der Generator muss waagerecht stehen.
I
Kontrollieren Sie vor jeder Verwendung den Ölstand. Gehen Sie hierzu wie folgt vor:
➤ Öffnen Sie die Klappe des Generators.
➤ Schalten Sie den Generator mit dem Hauptschalter (Abb. 4 1, Seite 4)
funktionslos.
➤ Trennen Sie die Verbindung zum Pluspol der Versorgungsbatterie.
➤ Ziehen Sie den Messstab (Abb. 4 2, Seite 4) aus dem Einfüllstutzen
(Abb. 4 3, Seite 4).
➤ Reinigen Sie den Messstab (Abb. 4 2, Seite 4) mit einem Lappen.
➤ Stecken Sie den Messstab (Abb. 4 2, Seite 4) komplett in den Einfüllstutzen
(Abb. 4 3, Seite 4).
➤ Ziehen Sie den Messstab (Abb. 4 2, Seite 4) aus dem Einfüllstutzen.
➤ Kontrollieren Sie, ob der Ölstand zwischen der Kerbe (maximaler Füllstand) und
der Spitze des Messstabes liegt.
Falls nicht, füllen Sie Öl nach.
➤ Stecken Sie den Messstab (Abb. 4 2, Seite 4) komplett in den Einfüllstutzen
(Abb. 4 3, Seite 4).
➤ Prüfen Sie, dass der Ölstand sich nicht über dem Maximumfüllstand befindet.
➤ Verbinden Sie den Generator mit dem Pluspol der Versorgungsbatterie.
➤ Schalten Sie den Generator mit dem Hauptschalter (Abb. 4 1, Seite 4)
betriebsbereit.
➤ Schließen Sie die Klappe des Generators.
42
Page 43

DE
TEC60, TEC60LPG Generator reinigen
9 Generator reinigen
ACHTUNG! Beschädigungsgefahr!
A
➤ Reinigen Sie das Gehäuse des Generators gelegentlich mit einem feuchten
Tuch.
➤ Entfernen Sie regelmäßig Verschmutzungen von den Belüftungsöffnungen des
Generators. Achten Sie darauf, dass Sie dabei nicht die Lamellen des Generators
beschädigen.
• Reinigen Sie den Generator nicht mit einem Hochdruckreiniger.
Eindringendes Wasser kann den Generator beschädigen.
• Verwenden Sie keine scharfen oder harten Gegenstände oder Reinigungsmittel zur Reinigung, da dies zu einer Beschädigung des
Generators führen kann.
• Verwenden Sie zur Reinigung des Generators lediglich Wasser mit
einem schonenden Reinigungsmittel. Verwenden Sie auf keinen Fall
Benzin, Diesel oder Lösungsmittel.
43
Page 44

DE
Generator warten TEC60, TEC60LPG
10 Generator warten
HINWEIS
I
10.1 Wartungstabelle
!
I
Finden Sie Ihren Dometic Servicepartner im Internet:
http://service-location.dometic.com
WARNUNG!
Lassen Sie alle Wartungsarbeiten nur von Fachkräften durchgeführt werden, die mit den einschlägigen Vorschriften vertraut sind. Durch unsachgemäße Wartungsarbeiten können erhebliche Gefahren entstehen.
HINWEIS
Lassen Sie folgende Wartungsarbeiten in den angegebenen Abständen
oder nach der angegebenen Zahl von Betriebsstunden ausführen, je
nachdem, welcher Fall früher eintritt.
Intervall Prüfung/Wartung
Im ersten Monat
oder nach
20 Stunden
Alle 3 Monate
oder nach
50 Stunden
Alle 6 Monate
oder nach
100 Stunden
Jährlich oder alle
300 Stunden
Alle 2 Jahre ➤ Lassen Sie die Benzinleitungen (TEC60) oder Gasleitungen
➤ Lassen Sie das Öl wechseln.
➤ Lassen Sie den Luftfilter warten (Kapitel „Luftfilter warten“ auf
Seite 46).
➤ Lassen Sie den Luftfilter warten (Kapitel „Luftfilter warten“ auf
Seite 46).
➤ Lassen Sie das Öl wechseln.
➤ Lassen Sie die Zündkerze warten (Kapitel „Zündkerze warten“ auf
Seite 48).
➤ Lassen Sie die Ventile warten.
➤ Lassen Sie den Benzintank (nur TEC60) und den Kraftstofffilter
warten.
➤ Lassen Sie den Vibrationsdämpfer warten.
(TEC60LPG) warten.
44
Page 45

DE
TEC60, TEC60LPG Generator warten
10.2 Wartungsarbeiten vorbereiten
VORSICHT!
!
➤ Öffnen Sie die Klappe des Generators.
➤ Schalten Sie den Generator mit dem Hauptschalter (Abb. 2 1, Seite 3)
funktionslos.
➤ Trennen Sie die Verbindung zum Pluspol der Versorgungsbatterie.
Für Wartungsarbeiten können Sie den Generator herausziehen (Abb. 5, Seite 5):
!
Beachten Sie bei allen Wartungsarbeiten:
• Der Generator darf nicht in Betrieb sein.
• Alle Teile müssen abgekühlt sein.
WARNUNG!
Die Trägerplatte mit Generator ist sehr schwer (> 70 kg) und kann aus
dem Gehäuse fallen, wenn Sie sie zu weit herausziehen.
➤ Lösen Sie die Befestigungsschrauben (1).
➤ Ziehen Sie die Trägerplatte (2) mit dem Generator aus dem Gehäuse (3).
10.3 Wartungsarbeiten abschließen
➤ Verbinden Sie den Generator mit dem Pluspol der Versorgungsbatterie.
➤ Schalten Sie den Generator mit dem Hauptschalter (Abb. 4 1, Seite 4)
betriebsbereit.
➤ Schließen Sie die Klappe des Generators.
10.4 Öl wechseln
VORSICHT!
Heißes Öl kann Verbrennungen hervorrufen.
!
ACHTUNG!
A
Geben Sie Altöl unbedingt an Spezialfirmen für die Entsorgung oder
Rückgewinnung, und beachten Sie die Gesetze des betreffenden Landes zum Schutz der Umwelt.
45
Page 46

DE
Generator warten TEC60, TEC60LPG
Folgende Öle können Sie verwenden:
• Öl der Klasse SAE 5W-30 (Verwendung bei allen Temperaturen möglich).
• Öl mit Einbereichs-Viskosität.
Wählen Sie die geeignete Viskosität in Abhängigkeit von der mittleren
Ortstemperatur.
So wechseln Sie das Öl:
➤ Lassen Sie den Generator drei bis fünf Minuten warmlaufen, damit das Öl
flüssiger wird und schnell und vollständig abfließt.
➤ Stellen Sie einen geeigneten Behälter unter die Ablassschraube (Abb. 6 1,
Seite 5).
➤ Entfernen Sie den Ölmessstab.
➤ Nehmen Sie die Ablassschraube (Abb. 6 2, Seite 5) ab.
✓ Das Öl fließt ab.
➤ Füllen Sie das frische Öl in den Ölstutzen.
Die Ölmenge beträgt: 1,1 l.
10.5 Luftfilter warten
WARNUNG! Explosionsgefahr!
!
A
I
Verwenden Sie kein Dieselöl oder Lösungsmittel mit niedrigem
Verdampfungspunkt zur Reinigung des Luftfilters. Diese können sich
entzünden oder explodieren.
ACHTUNG!
Lassen Sie den Motor nie ohne Luftfilter laufen. Sonst nutzt sich der
Motor schnell ab.
HINWEIS
Wenn der Luftfilter verschmutzt ist, wird der Luftstrom zum Vergaser
verringert. Damit der Vergaser gut funktioniert, sollten Sie den Filterzustand regelmäßig kontrollieren. Kontrollieren Sie ihn entsprechend
häufiger, wenn der Generator in besonders staubiger Umgebung
benutzt wird.
➤ Bereiten Sie die Wartungsarbeiten vor und ziehen Sie den Generator ein Stück
aus dem Gehäuse: siehe Kapitel „Wartungsarbeiten vorbereiten“ auf Seite 45.
46
Page 47

DE
TEC60, TEC60LPG Generator warten
➤ Entfernen Sie die Flügelmutter (1) und die Filterabdeckung (2).
➤ Entfernen Sie die Flügelmutter (3).
➤ Entnehmen Sie den Luftfilter (Abb. 7 4, Seite 5).
Der Luftfilter besteht aus zwei Elementen: einem Schwammfilter und einem
Papierfilter.
➤ Kontrollieren Sie den Zustand beider Filterelemente sorgfältig. Wechseln Sie
beschädigte Filterelemente aus.
➤ Reinigen Sie unbeschädigte Filterelemente: siehe folgende Abschnitte.
➤ Schließen Sie die Wartungsarbeiten ab: siehe Kapitel „Wartungsarbeiten
abschließen“ auf Seite 45.
Schwammfilter reinigen
➤ Waschen Sie den Schwamm mit einer neutralen Waschmittellösung, und spülen
Sie ihn sorgfältig aus.
➤ Lassen Sie den Schwamm vollständig trocknen.
➤ Tränken Sie den Schwamm mit sauberem Motoröl.
➤ Drücken Sie das überschüssige Öl aus.
Papierfilter reinigen
➤ Befreien Sie das Papier durch wiederholtes leichtes Schlagen auf eine harte
Fläche von Verunreinigungen, oder blasen Sie den Filter von innen nach außen
mit Pressluft aus.
Bürsten Sie das Papier nicht ab, denn dadurch würde der Schmutz in die Fasern
des Papierfilters eindringen.
➤ Wechseln Sie bei starker Verschmutzung den Papierfilter aus.
47
Page 48

DE
Generator warten TEC60, TEC60LPG
10.6 Zündkerze warten
ACHTUNG!
A
➤ Bereiten Sie die Wartungsarbeiten vor: siehe Kapitel „Wartungsarbeiten vorbe-
reiten“ auf Seite 45.
➤ Nehmen Sie den Kerzenstecker ab.
➤ Nehmen Sie die Zündkerze mit einem Zündkerzenschlüssel heraus.
• Ziehen Sie die Zündkerze sorgfältig an. Eine nicht fest angezogene
Zündkerze kann sehr heiß werden und Schäden am Motor hervorrufen.
• Verwenden Sie ausschließlich gleichwertige Zündkerzen.
• Wenn Sie eine neue Zündkerze einsetzen, ziehen Sie diese um eine
1/2 Drehung an, wenn sie fest auf der Beilegscheibe aufsitzt. Bei der
Verwendung von gebrauchten Zündkerzen genügt eine 1/8 oder
eine 1/4 Drehung.
➤ Kontrollieren Sie die Zündkerze durch Sichtkontrolle.
Wenn die Zündkerze offensichtlich abgenutzt oder der Isolator beschädigt oder
angebrochen ist, wechseln Sie die Zündkerze aus.
Wenn die Zündkerze nur verschmutzt ist, reinigen Sie diese mit einer Stahlbürste.
➤ Messen Sie den Abstand zwischen den Elektroden mit einem Dickenmesser
(Abb. 8, Seite 7). Er muss 0,7 – 0,8 mm betragen und kann ggf. durch Biegen
der Elektrode korrigiert werden.
➤ Prüfen Sie, ob die Zündkerzendichtung intakt ist.
➤ Wenn ja, schrauben Sie die Zündkerze mit der Hand an, um eine Beschädigung
des Gewindes zu vermeiden.
➤ Ziehen Sie die Zündkerze mit einem Zündkerzenschlüssel so an, dass die
Unterlegscheibe zusammengedrückt wird.
➤ Schließen Sie die Wartungsarbeiten ab: siehe Kapitel „Wartungsarbeiten
abschließen“ auf Seite 45.
48
Page 49

DE
TEC60, TEC60LPG Störungen beseitigen
11 Störungen beseitigen
Störung Ursache Behebung
Bei Drücken des
Ein-/Ausschalters
geht das Bedienpanel nicht an.
Bei Drücken des
Starttasters dreht
der Anlasser nicht.
Der Anlasser dreht,
aber der Generator
springt nicht an.
Starterbatterie leer.
Stromkabel unterbrochen oder Stecker
abgezogen.
Sicherung (falls vorhanden) ist ausgelöst.
Starterbatterie leer.
Der Hauptschalter steht auf „0“.
Platine beschädigt.
Anlasser wird nicht mit Strom versorgt.
TEC60:
Kein Benzin.
TEC60LPG:
Kein Flüssiggas
Zu viel Öl im Motor.
Zündkerze bekommt kein Strom.
➤ Laden Sie die Starterbatterie.
➤ Wenden Sie sich an eine autori-
sierte Fachwerkstatt.
➤ Laden Sie die Starterbatterie.
➤ Stellen Sie den Hauptschalter auf
„I“ bzw. „1“.
➤ Wenden Sie sich an eine autori-
sierte Fachwerkstatt.
➤ Füllen Sie Benzin nach.
➤ Ersetzen Sie die Flüssiggasfla-
sche.
➤ Lassen Sie Öl ab.
➤ Prüfen Sie die elektrischen Ver-
bindungen.
Nur TEC60:
Vergaser bekommt kein Benzin.
Luftansaugung verstopft.
Inverter beschädigt.
Stromkabel unterbrochen.
➤ Reinigen Sie den Vergaser.
➤ Kontrollieren Sie den Luftfilter
(siehe Kapitel „Luftfilter warten“
auf Seite 46).
➤ Wenden Sie sich an eine autori-
sierte Fachwerkstatt.
49
Page 50

DE
Störungen beseitigen TEC60, TEC60LPG
Störung Ursache Behebung
Der Generator
neigt zum Ausgehen.
Der Generator ist
angesprungen,
erzeugt aber keine
Spannung.
Der Generator startet mit starker
Beschleunigung
und bleibt dann
mit der Meldung
„GENERATOR
ALERT“ stehen.
Zu viel Öl im Motor.
Last über 6,2 kW.
Nur TEC60:
Vergaser bekommt kein Benzin.
Luftansaugung verstopft.
Inverter beschädigt.
Elektromagnet (Anlasser) blockiert.
Luftfilter verschmutzt.
Inverter beschädigt.
Drehzahl ist zu niedrig.
Schrittmotor defekt.
➤ Lassen Sie Öl ab.
➤ Schalten Sie Verbraucher ab.
➤ Reinigen Sie den Vergaser.
➤ Kontrollieren Sie den Luftfilter
(siehe Kapitel „Luftfilter warten“
auf Seite 46).
➤ Wenden Sie sich an eine autori-
sierte Fachwerkstatt.
➤ Prüfen Sie die elektrischen Ver-
bindungen.
➤ Wenden Sie sich an eine autori-
sierte Fachwerkstatt.
➤ Wenden Sie sich an eine autori-
sierte Fachwerkstatt.
Die erzeugte Spannung ist instabil.
Inverter beschädigt.
➤ Wenden Sie sich an eine autori-
sierte Fachwerkstatt.
50
Page 51

DE
TEC60, TEC60LPG Gewährleistung
12 Gewährleistung
Es gilt die gesetzliche Gewährleistungsfrist. Sollte das Produkt defekt sein, wenden
Sie sich bitte an einen Service-Partner in Ihrem Land (Adressen siehe Rückseite der
Anleitung).
Unsere Spezialisten helfen Ihnen gerne weiter und besprechen mit Ihnen den weiteren Verlauf der Gewährleistung.
13 Entsorgung
➤ Geben Sie das Verpackungsmaterial möglichst in den entsprechenden
Recycling-Müll.
Wenn Sie das Produkt endgültig außer Betrieb nehmen, informieren Sie
sich bitte beim nächsten Recyclingcenter oder bei Ihrem Fachhändler
M
über die zutreffenden Entsorgungsvorschriften.
B
Schützen Sie Ihre Umwelt!
Akkus und Batterien gehören nicht in den Hausmüll.
Geben Sie bitte Ihre defekten Akkus oder verbrauchten Batterien beim
Händler oder bei einer Sammelstelle ab.
51
Page 52

DE
Technische Daten TEC60, TEC60LPG
14 Technische Daten
Dometic TEC60 Dometic TEC60LPG
Art.-Nr.: 9102900229 9102900230
Ausgangsnennspannung: 230 Vw / 50 Hz
Max. Dauerleistung
(bei 25 °C auf Meereshöhe):
Ausgangsspannung Batterielader: 12 Vg
Max. Ausgangsstrom Batterielader: 30 A
Betriebstemperaturbereich: –15 °C bis +50 °C 0 °C bis +50 °C
Gesamte harmonische Verzerrung: <3 %
Kraftstoff: Normalbenzin ROZ 91 Flüssiggasmischung:
Verbrauch: max. 3,7 l/h 2,19 kg/h
Motorleistung: 6,6 kW (8,9 PS)
Max. Drehzahl:
Motoröl: 1,1 l
Schallpegel: 91 dB(A)
Schallpegel in 7 m Abstand: 66 dB(A)
6200 W 6000 W
Propan (25 – 100 %)
3600 min
–1
Abmessungen: siehe Abb. 9, Seite 7
Gewicht: 102 kg
Prüfung/Zertifikat:
52
Page 53

FR
TEC60, TEC60LPG
Veuillez lire ce manuel attentivement avant de mettre l'appareil en service
et conservez-le. En cas de passer le produit, veuillez le transmettre au
nouvel acquéreur.
Sommaire
1 Explication des symboles . . . . . . . . . . . . . . . . . . . . . . . . . . . . . . . . . . . . . . . 54
2 Consignes de sécurité . . . . . . . . . . . . . . . . . . . . . . . . . . . . . . . . . . . . . . . . . 54
3 Groupe cible de cette notice . . . . . . . . . . . . . . . . . . . . . . . . . . . . . . . . . . . . 57
4 Contenu de la livraison . . . . . . . . . . . . . . . . . . . . . . . . . . . . . . . . . . . . . . . . . 57
5 Accessoires . . . . . . . . . . . . . . . . . . . . . . . . . . . . . . . . . . . . . . . . . . . . . . . . . . 58
6 Usage conforme . . . . . . . . . . . . . . . . . . . . . . . . . . . . . . . . . . . . . . . . . . . . . . 59
7 Description technique . . . . . . . . . . . . . . . . . . . . . . . . . . . . . . . . . . . . . . . . . 59
8 Utilisation du générateur . . . . . . . . . . . . . . . . . . . . . . . . . . . . . . . . . . . . . . . .61
9 Nettoyage du générateur . . . . . . . . . . . . . . . . . . . . . . . . . . . . . . . . . . . . . . . 68
10 Maintenance du générateur . . . . . . . . . . . . . . . . . . . . . . . . . . . . . . . . . . . . . 68
11 Guide de dépannage . . . . . . . . . . . . . . . . . . . . . . . . . . . . . . . . . . . . . . . . . . 73
12 Garantie. . . . . . . . . . . . . . . . . . . . . . . . . . . . . . . . . . . . . . . . . . . . . . . . . . . . . 75
13 Retraitement . . . . . . . . . . . . . . . . . . . . . . . . . . . . . . . . . . . . . . . . . . . . . . . . . 75
14 Caractéristiques techniques . . . . . . . . . . . . . . . . . . . . . . . . . . . . . . . . . . . . . 76
53
Page 54

FR
Explication des symboles TEC60, TEC60LPG
1 Explication des symboles
AVERTISSEMENT !
!
!
A
Consigne de sécurité : le non-respect de ces consignes peut entraîner
la mort ou de graves blessures.
ATTENTION !
Consigne de sécurité : le non-respect de ces consignes peut entraîner
des blessures.
AVIS !
Le non-respect de ces consignes peut entraîner des dommages matériels et des dysfonctionnements du produit.
REMARQUE
Informations complémentaires sur l'utilisation du produit.
I
2 Consignes de sécurité
Le fabricant décline toute responsabilité pour des dommages dans les cas suivants :
• des influences mécaniques et des surtensions ayant endommagé le matériel
• des modifications apportées au produit sans autorisation explicite de la part du
fabricant
• une utilisation différente de celle décrite dans la notice
Il décline notamment toute responsabilité pour tous les dommages consécutifs, en
particulier pour les dommages consécutifs à une panne du générateur.
Lors de l’utilisation d’appareils électriques, les consignes générales de sécurité suivantes doivent être respectées afin d’éviter :
• une décharge électrique,
• un incendie,
• des blessures.
54
Page 55

FR
TEC60, TEC60LPG Consignes de sécurité
2.1 Consignes générales de sécurité
AVERTISSEMENT !
!
• Les appareils électriques ne sont pas des jouets pour enfants !
Les enfants ne peuvent pas estimer correctement les dangers éventuels des appareils électriques. Ne laissez pas les enfants utiliser des
appareils électriques sans surveillance.
• Ne laissez pas des personnes (enfants compris) incapables d’utiliser
l’appareil de manière sûre, en raison de déficiences physiques, sensorielles ou mentales ou de leur manque d’expérience ou de connaissances, utiliser cet appareil sans surveillance.
• Utilisez l'appareil conformément à l'usage pour lequel il a été conçu.
• Ne procédez à aucune modification ni transformation de l'appareil !
• L'installation, la maintenance et les réparations du générateur doivent
être effectuées uniquement par un personnel qualifié et parfaitement
informé des dangers relatifs à la manipulation des générateurs et des
règlements spécifiques. Toute réparation mal effectuée risquerait
d'entraîner de graves dangers. Si des réparations sont nécessaires,
adressez-vous à la succursale du fabricant de votre pays (adresses au
dos de la notice).
!
• Les gaz d’échappement contiennent du monoxyde de carbone, un
gaz incolore et inodore, extrêmement toxique. Ne respirez pas les
gaz d’échappement. Ne faites pas tourner le moteur du générateur
dans un garage fermé ou dans une pièce sans fenêtres.
ATTENTION !
• Le générateur doit uniquement être utilisé avec la trappe fermée.
• Éloignez toutes les matières inflammables (essence, vernis,
détergents, etc.) qui se trouvent à proximité du générateur.
• Veillez à ce qu'aucune pièce du générateur, susceptible de chauffer,
n'entre en contact avec les matières facilement inflammables.
• N'alimentez le générateur en carburant que lorsqu'il est arrêté et dans
une pièce suffisamment aérée. L'essence et le gaz liquide sont fortement inflammables et risquent d'exploser.
• N'alimentez pas le générateur en carburant lorsque le moteur du véhicule est en marche, si le réservoir se trouve à proximité du générateur.
• Si de l'essence s'échappe, essuyez-la correctement et attendez que la
vapeur se soit dissipée avant d'allumer le moteur.
• Ne touchez pas le générateur et les conduites avec les mains
humides.
55
Page 56

FR
Consignes de sécurité TEC60, TEC60LPG
• Remplacez les fusibles ou thermocontacts par des pièces présentant
les mêmes caractéristiques techniques uniquement.
AVIS !
A
2.2 Consignes de sécurité
• Ne remplissez pas de trop le réservoir à essence. Le goulot du réservoir ne doit pas contenir d'essence. Veillez à ce que le couvercle soit
bien fermé.
• Lorsque des travaux de soudure doivent être effectués sur le véhicule,
débranchez tous les câbles menant au générateur ; dans le cas
contraire, l’électronique risque d’être endommagée.
AVERTISSEMENT !
• Coupez l'alimentation électrique au cours de travaux sur l'appareil.
!
AVIS !
A
• Faites fonctionner l'appareil uniquement si le boîtier et les conduites
sont intacts.
56
Page 57

FR
TEC60, TEC60LPG Groupe cible de cette notice
3 Groupe cible de cette notice
Ce manuel s'adresse à l'utilisateur du générateur.
4 Contenu de la livraison
TEC60
Désignation Numéro de produit
Générateur TEC60 9102900229
Relais de commutation pour la réalisation d’un raccordement
prioritaire
Onduleur
Panneau de commande
Silencieux
Conduite de gaz d’échappement
Matériel de fixation pour le silencieux
Câble de raccordement
Matériel de fixation
Notice d'installation
Manuel d'utilisation
9102900148
57
Page 58

FR
Accessoires TEC60, TEC60LPG
TEC60LPG
Désignation Numéro de produit
Générateur TEC60LPG 9102900230
Relais de commutation pour la réalisation d’un raccordement
prioritaire
Onduleur
Panneau de commande
Silencieux
Conduite de gaz d’échappement
Matériel de fixation pour le silencieux
Câble de raccordement
Matériel de fixation
Notice d'installation
Manuel d'utilisation
5Accessoires
9102900148
Disponibles en accessoires (non compris dans la livraison) :
Désignation des pièces Numéro de produit
PR 250116, kit de joints externes 9102900244
58
Page 59

FR
TEC60, TEC60LPG Usage conforme
6Usage conforme
Les générateurs TEC60 (numéro d'article 9102900229) et TEC60LPG (numéro
d'article 9102900230) sont conçus pour une utilisation dans les caravanes, campings-cars et véhicules commerciaux.
Le générateur n’est pas conçu pour une utilisation dans les bateaux.
Le générateur crée une tension alternative sinusoïdale pure de 230 V / 50 Hz à
laquelle les consommateurs d’énergie peuvent être reliés avec une charge continue
totale de :
• TEC60: 6200 W
• TEC60LPG: 6000 W
La qualité du courant est également adaptée aux consommateurs d’énergie de forte
sensibilité (p. ex. PC).
Le générateur peut charger une batterie de 12 V.
7 Description technique
Le générateur est composé des éléments principaux suivants (fig. 1, page 3) :
• Générateur de courant avec aimants permanents (1)
• Moteur à combustion (2)
• Boîte de raccordement (3)
• Onduleur (4)
• Panneau de commande (5)
Le moteur à combustion (2) met en rotation le générateur de courant (1) raccordé, ce
dernier génère alors une tension alternative.
L'onduleur externe (4) transforme cette tension alternative en une tension stable de
230 V et 50 Hz, disponible sur les bornes du générateur. La douille pour le câble de
raccordement au panneau de commande se trouve au niveau de l'onduleur.
Les bornes de raccordement et le commutateur principal se trouvent au niveau de la
boîte de raccordement (3) située derrière la porte.
La commande est assurée depuis un panneau de commande (5).
59
Page 60

FR
Description technique TEC60, TEC60LPG
Le générateur possède un chargeur de batterie intégré permettant de charger la batterie raccordée.
Éléments de commande sur le générateur
La boîte de raccordement du générateur se trouve derrière le clapet.
Pos. dans
fig. 2,
page 3
1 Commutateur principal Met le générateur en fonction ou hors ser-
2 Protection thermique Se déclenche en cas de surchauffe de l'ondu-
Description
vice.
leur (voir chapitre « Affichages à l'écran »,
page 64)
Éléments de commande sur le panneau de commande
Le panneau de commande se trouve à l'intérieur du véhicule.
Pos. dans
fig. 3,
page 4
1 Écran Affiche les messages d'état.
2 Interrupteur Marche / Arrêt
3 Bouton vert « START/STOP » Démarre/arrête le générateur lorsque le pan-
4 Uniquement TEC60 :
5 Indicateur du niveau d'huile S'allume lorsque le niveau d'huile dans le
Description
?
« P »
Indicateur du niveau
d'essence
Active et désactive le panneau de commande
lorsque le commutateur principal se trouve
sur «I» ou «1».
Arrête le générateur en cas d'urgence.
neau de commande est activé et lorsque le
commutateur principal se trouve sur « I » ou
«1».
S'allume lorsque l'essence est sur la réserve.
moteur est trop faible.
60
Page 61

FR
TEC60, TEC60LPG Utilisation du générateur
Affichages à l'écran
Pos. dans
fig. 3,
page 4
6 Tension alternative Tension de sortie actuelle
Description
7 Puissance de sortie perma-
nente
8 Heures de service Indique les heures de fonctionnement du
9 Tension continue Tension de charge de la batterie
10 Messages Message d'état du générateur (voir chapitre
Puissance actuelle du consommateur d'énergie raccordé
générateur
« Affichages à l'écran », page 64)
8Utilisation du générateur
AVIS !
A
I
Lors des 50 premières heures de service (phase de démarrage), ne sollicitez pas le générateur à plus de 70 % de la puissance de sortie permanente maximale.
REMARQUE
La durée de vie du générateur peut ainsi être allongée et sa puissance
optimisée :
Après la phase de démarrage, sollicitez le générateur à une charge
maximale d'env. 75 % de la puissance continue maximale.
61
Page 62

FR
Utilisation du générateur TEC60, TEC60LPG
8.1 Remarques générales sur l'utilisation
ATTENTION ! Risque de blessures !
!
Veuillez respecter les consignes suivantes :
• Contrôlez le niveau d'huile avant chaque utilisation (chapitre « Contrôle du
niveau d'huile », page 67).
• Même de petites surcharges entraînent, sur la durée, un arrêt du générateur.
• Après son utilisation, laissez tournez le générateur quelques minutes sans
consommateur d'énergie avant de le couper.
• Un freinage brusque, une accélération ou des déplacements en virage du véhicule peuvent entraîner des problèmes dans le système de pompes du générateur et par conséquent son arrêt non intentionnel.
• Si vous n'utilisez pas le générateur pendant une longue période, démarrez-le au
moins tous les 30 jours et laissez-le tourner pendant 15 minutes au minimum.
Ne glissez ni les doigts, ni un quelconque objet dans les buses de ventilation ou la grille d'aspiration.
8.2 Mise en service ou hors service du générateur
Le commutateur principal (fig. 2 1, page 3) sur la boîte de raccordement permet
d'activer et de désactiver le générateur.
8.3 Mise en marche / à l'arrêt du panneau de commande
L'interrupteur Marche/Arrêt (fig. 3 2, page 4) sur le panneau de commande permet de mettre ce dernier en marche et à l'arrêt.
➤ Activez le panneau de commande à l'aide de l'interrupteur Marche/Arrêt.
✓ L'écran affiche :
L'écran se coupe automatiquement au bout de 5 min si l'interrupteur de démarrage n'a pas été actionné au cours de cette période.
En actionnant l'interrupteur de démarrage, l'écran peut être redémarré.
✓ Le générateur peut alors démarrer.
GEN OFF.
62
Page 63

FR
TEC60, TEC60LPG Utilisation du générateur
8.4 Démarrage du générateur
Le générateur peut uniquement être démarré lorsqu'il est opérationnel (mis en
marche) et lorsque le panneau de commande est activé.
REMARQUE
I
➤ Démarrez le générateur à l'aide de l'interrupteur de démarrage (fig. 3 3,
page 4).
8.5 Arrêt du générateur
➤ Arrêtez le générateur à l'aide de l'interrupteur vert MARCHE/ARRÊT (fig. 3 3,
page 4).
Lorsque le générateur est encore chaud, appuyez brièvement sur l'interrupteur de démarrage pour le démarrer, s'il est froid appuyez plus longuement.
✓ L'onduleur s'arrête immédiatement. Le générateur continue de fonctionner pen-
dant 30 secondes afin de refroidir le générateur, puis le générateur s'arrête lui
aussi.
AVIS !
A
Arrêtez toujours le générateur avec la touche verte « START/STOP » afin
d'éviter des dommages du générateur.
Arrêtez le fonctionnement générateur au niveau du commutateur principal rouge uniquement en cas d'urgence.
63
Page 64

FR
Utilisation du générateur TEC60, TEC60LPG
8.6 Affichages à l'écran
Message à l'écran
Description
LOW BATTERY
La tension de la batterie est tombée sous la valeur minimale
requise pour les tentatives de
démarrage (9 V).
Check OIL Level
OIL CHANGE
Le compteur d'heures de service
a atteint la valeur indiquée pour
la vidange de l'huile moteur.
Comportement du générateur
Le générateur ne réagit pas. Charger la batterie.
Le générateur continue de tourner.
Le générateur continue de tourner.
Mesures
Faire l'appoint en huile (voir chapitre « Contrôle du niveau
d'huile », page 67).
Vidanger l'huile (voir chapitre
« Vidange d'huile », page 70),
puis confirmer le message en
maintenant l'interrupteur
«START/
STOP » enfoncé. Redémarrer le
générateur en maintenant toujours l'interrupteur
«START/STOP» enfoncé.
Uniquement TEC60 :
NO FUEL
Le réservoir d'essence est sur la
réserve.
OIL ALERT
Huile moteur manquante.
GENERATOR ALERT!
Message d'alarme général
Exemple : L'anneau de contrôle
du papillon d'obturation du carburateur (moteur pas à pas) est
défectueux.
OVERLOAD!
Les consommateurs d'énergie
génèrent une surcharge au
niveau de la sortie.
Le générateur continue de tourner.
Le générateur s'arrête. Faire l'appoint en huile (voir cha-
Le générateur s'arrête. Contrôler le système à l'aide du
L'onduleur se coupe, plus
aucune tension n'est disponible, toutefois le moteur continue de tourner jusqu'à ce qu'il
s'arrête.
Faire l'appoint.
pitre « Contrôle du niveau
d'huile », page 67).
tableau Pannes, origines et solutions.
Si le problème persiste, adressez-vous à la succursale du fabricant de votre pays (adresses au
dos de la notice).
Réduisez la charge raccordée et
redémarrez le générateur.
64
Page 65

FR
TEC60, TEC60LPG Utilisation du générateur
Message à l'écran
Description
SHORT CIRCUIT
Les consommateurs d'énergie
génèrent un court-circuit au
niveau de la sortie.
OVER TEMPERATURE
Surchauffe
LOW POWER ENGINE
Panne de la tension d'alimentation de l'onduleur.
Overspeed
Régime trop élevé
Comportement du générateur
L'onduleur se coupe, plus
aucune tension n'est disponible, toutefois le moteur continue de tourner jusqu'à ce qu'il
s'arrête.
L'onduleur se coupe, plus
aucune tension n'est disponible, toutefois le moteur continue de tourner pour refroidir le
générateur.
Le générateur s'arrête. Réduisez la charge raccordée et
Le générateur s'arrête. Redémarrer le générateur. Si le
Mesures
Contrôler l'état des consommateurs d'énergie raccordés puis
redémarrer le générateur.
Laisser refroidir le générateur,
attendre quelques minutes puis
redémarrer le générateur.
redémarrez le générateur.
problème persiste, adressezvous à la succursale du fabricant
de votre pays (adresses au dos
de la notice).
Start failed
Exemple : pas d'essence, températures froides, bougies
d'allumage défectueuses, filtre à
air sali
GEN CAL
Message apparaissant lors du
démarrage du générateur ; il
indique la phase de calibrage
associée à chaque démarrage.
Le générateur ne délivre plus de
tension.
GEN WAIT
Message apparaissant lors de la
pause entre deux tentatives de
démarrage.
GEN ON
Fonctionnement normal du
générateur.
Le générateur est coupé. Redémarrer le générateur.
Le générateur tourne mais ne
délivre plus de tension.
Le générateur est coupé. Attendre que le message dispa-
Fonctionnement normal –
Attendre un instant.
raisse puis refaire une tentative
de démarrage.
GEN OFF
Le générateur s'arrête et peut
être démarré
–
65
Page 66

FR
Utilisation du générateur TEC60, TEC60LPG
Message à l'écran
Description
Inverter lost comm
Engine lost comm
Inverter failed
Comportement du générateur
Le générateur s'arrête. Contrôler le système à l'aide du
Le générateur s'arrête. Contrôler le système à l'aide du
Le générateur s'arrête. Adressez-vous à la succursale du
Mesures
tableau Pannes, origines et solutions.
Si le problème persiste, adressez-vous à la succursale du fabricant de votre pays (adresses au
dos de la notice).
tableau Pannes, origines et solutions.
Si le problème persiste, adressez-vous à la succursale du fabricant de votre pays (adresses au
dos de la notice).
fabricant de votre pays (adresses
au dos de la notice).
Eng. Param. Error
Inv. Param. Error
Software Error
Le générateur s'arrête. Adressez-vous à la succursale du
fabricant de votre pays (adresses
au dos de la notice).
Le générateur s'arrête. Adressez-vous à la succursale du
fabricant de votre pays (adresses
au dos de la notice).
Le générateur s'arrête. Adressez-vous à la succursale du
fabricant de votre pays (adresses
au dos de la notice).
66
Page 67

FR
TEC60, TEC60LPG Utilisation du générateur
8.7 Contrôle du niveau d'huile
ATTENTION !
!
L'huile chaude peut entraîner des brûlures.
Contrôlez le niveau d'huile uniquement lorsque le générateur est
coupé.
REMARQUE
Le générateur doit être installé à l'horizontale.
I
Contrôlez le niveau d'huile avant chaque utilisation. Procédez comme suit :
➤ Ouvrez la trappe du générateur.
➤ Coupez le générateur avec le commutateur principal (fig. 4 1, page 4).
➤ Coupez la connexion vers le pôle positif de la batterie d'alimentation.
➤ Retirez la jauge (fig. 4 2, page 4) de la tubulure de remplissage (fig. 4 3,
page 4).
➤ Essuyez la jauge (fig. 4 2, page 4) avec un chiffon.
➤ Insérez complètement la jauge (fig. 4 2, page 4) dans la tubulure de remplis-
sage (fig. 4 3, page 4).
➤ Retirez la jauge (fig. 4 2, page 4) de la tubulure de remplissage.
➤ Contrôlez si le niveau d'huile se trouve entre la rainure (niveau maximal) et la
pointe de la jauge.
Si ce n'est pas le cas, faites l'appoint en huile.
➤ Insérez complètement la jauge (fig. 4 2, page 4) dans la tubulure de remplis-
sage (fig. 4 3, page 4).
➤ Veiller à ce que le niveau d'huile ne dépasse pas le niveau de remplissage maxi-
mal.
➤ Reliez le générateur au pôle positif de la batterie d'alimentation.
➤ Mettez le générateur en marche avec le commutateur principal (fig. 4 1,
page 4).
➤ Fermez la trappe du générateur.
67
Page 68

FR
Nettoyage du générateur TEC60, TEC60LPG
9 Nettoyage du générateur
AVIS ! Risques d'endommagement !
A
➤ Nettoyez de temps à autre le boîtier du générateur avec un chiffon humide.
➤ Éliminez régulièrement les impuretés des orifices de ventilation du générateur.
Veillez à ne pas endommager les lamelles du générateur.
• Ne nettoyez pas le générateur avec un nettoyeur haute pression.
Toute infiltration d'eau peut endommager le générateur.
• N’utilisez aucun objet coupant ou dur, ni de détergents pour le nettoyage. Cela pourrait endommager le générateur.
• Pour nettoyer le générateur, utilisez uniquement de l'eau et un
détergent doux. N'utilisez en aucun cas de l'essence, du diesel ou
un solvant.
10 Maintenance du générateur
REMARQUE
I
10.1 Tableau de maintenance
!
I
Retrouvez votre partenaire Dometic sur internet :
http://service-location.dometic.com
AVERTISSEMENT !
Confiez toutes les opérations de maintenance à un personnel qualifié et
parfaitement informé des directives en vigueur. Tout travail de maintenance mal effectué risquerait d'entraîner de graves dangers.
REMARQUE
Faites réaliser les opérations de maintenance indiquées ci-dessous dans
les intervalles de temps indiqués ou après les heures de fonctionnement
spécifiées, selon l'événement arrivant en premier.
68
Page 69

FR
TEC60, TEC60LPG Maintenance du générateur
Intervalle Contrôle / maintenance
Au cours du premier mois ou
après 20 heures
Tous les 3 mois
ou après 50
heures.
Tous les 6 mois
ou après 100
heures.
Une fois par an ou
toutes les
300 heures
Tous les 2 ans ➤ Faites procéder à la maintenance de conduites d'essence (TEC60)
➤ Vidangez l'huile.
➤ Faites entretenir le filtre à air (chapitre « Entretien du filtre à air »,
page 71).
➤ Faites entretenir le filtre à air (chapitre « Entretien du filtre à air »,
page 71).
➤ Vidangez l'huile.
➤ Faites entretenir la bougie d'allumage (chapitre « Entretien de la
bougie d'allumage », page 72).
➤ Faites entretenir les soupapes.
➤ Faites entretenir le réservoir à essence (uniquement TEC60) et le
filtre à carburant.
➤ Faites entretenir l'amortisseur de vibrations.
ou de gaz (TEC60LPG).
10.2 Préparation des opérations de maintenance
ATTENTION !
!
➤ Ouvrez la trappe du générateur.
➤ Coupez le générateur avec le commutateur principal (fig. 2 1, page 3).
➤ Coupez la connexion vers le pôle positif de la batterie d'alimentation.
Le générateur peut être extrait pour les opérations de maintenance (fig. 5, page 5)
:
!
À noter lors de chaque opération de maintenance :
• Le générateur ne doit pas être en cours de fonctionnement.
• Toutes les pièces doivent être refroidies.
AVERTISSEMENT !
La plaque de support du générateur est très lourde (> 70 kg) et risque
de tomber du boîtier si elle est trop tirée.
➤ Desserrez les vis de fixation (1).
➤ Tirez la plaque de support (2) avec le générateur en dehors du boîtier (3).
69
Page 70

FR
Maintenance du générateur TEC60, TEC60LPG
10.3 Fin des opérations de maintenance
➤ Reliez le générateur au pôle positif de la batterie d'alimentation.
➤ Mettez le générateur en marche avec le commutateur principal (fig. 4 1,
page 4).
➤ Fermez la trappe du générateur.
10.4 Vidange d'huile
ATTENTION !
L'huile chaude peut entraîner des brûlures.
!
AVIS !
A
Remettez impérativement l'ancienne huile à une entreprise spécialisée
dans le recyclage ou la récupération et respectez les consignes de prévention de l'environnement en vigueur dans le pays concerné.
Vous pouvez utiliser les huiles suivantes :
• Huile de classe SAE 5W-30 (utilisation possible sous toutes les températures).
• Huile de viscosité monocouche.
Sélectionnez la bonne viscosité en fonction de la température moyenne du lieu.
Pour vidanger l'huile :
➤ laissez tourner le générateur à chaud pendant trois à cinq minutes afin que l'huile
devienne plus liquide et s'écoule plus rapidement et complètement.
➤ Placez un récipient approprié sous la vis de vidange (fig. 6 1, page 5).
➤ Retirez le bâtonnet de mesure de l'huile.
➤ Retirez la vis de vidange (fig. 6 1, page 5).
✓ L'huile s'écoule alors.
➤ Versez la nouvelle huile dans la tubulure.
Quantité d'huile : 1,1 l.
70
Page 71

FR
TEC60, TEC60LPG Maintenance du générateur
10.5 Entretien du filtre à air
AVERTISSEMENT ! Risque d’explosion !
!
A
I
N'utilisez pas de gazole ou de solution dont le point de vaporisation est
bas pour nettoyer le filtre à air. Ces derniers risquent de s'enflammer et
d'exploser.
AVIS !
Ne laissez pas le moteur tourner sans filtre à air. Le moteur s'userait alors
rapidement.
REMARQUE
Lorsque le filtre à air est encrassé, le flux d'air vers le carburateur est
réduit. Afin que le carburateur fonctionne correctement, l'état du filtre à
air doit être contrôlé régulièrement. Contrôlez-le encore plus fréquemment lorsque le générateur est utilisé dans des espaces particulièrement
poussiéreux.
➤ Préparez les opérations de maintenance et retirez légèrement le générateur du
boîtier : voir chapitre « Préparation des opérations de maintenance », page 69.
➤ Retirez les vis (fig. 7 1, page 5)) et le cache du filtre (fig. 7 2, page 5)).
➤ Retirez la vis (fig. 7 3, page 5)).
➤ Retirez le filtre à air (fig. 7 4, page 5).
Le filtre à air est constitué de deux éléments : un filtre à mousse et un filtre à
papier.
➤ Contrôlez scrupuleusement l'état des deux éléments filtrants. Remplacez les élé-
ments filtrants endommagés.
➤ Nettoyez les éléments filtrants intacts : voir les paragraphes suivants.
➤ Terminez les opérations de maintenance : voir chapitre « Fin des opérations de
maintenance », page 70.
71
Page 72

FR
Maintenance du générateur TEC60, TEC60LPG
Nettoyage du filtre à mousse
➤ Lavez la mousse avec une solution savonneuse et rincez-la soigneusement.
➤ Laissez sécher la mousse complètement.
➤ Imbibez la mousse d'huile de moteur propre.
➤ Pressez-la pour éliminer le surplus d'huile.
Nettoyage du filtre à papier
➤ Nettoyez le papier en donnant plusieurs petits coups sur les dépôts de saletés ou
soufflez de l'air comprimé sur le filtre, de l'intérieur vers l'extérieur.
Ne brossez pas le papier, la poussière risquerait de pénétrer dans les fibres du
filtre à papier.
➤ S'il est fortement encrassé, remplacez le filtre à papier.
10.6 Entretien de la bougie d'allumage
AVIS !
A
➤ Préparez les opérations de maintenance : voir chapitre « Préparation des opéra-
tions de maintenance », page 69.
➤ Retirez le connecteur de la bougie.
➤ Utilisez une clé pour bougie d'allumage pour retirer celle-ci.
➤ Procédez à un contrôle visuel de la bougie.
Lorsque la bougie est usagée ou lorsque l'isolant est endommagé ou coupé,
remplacez la bougie.
• Serrez avec soin la bougie d'allumage. Une bougie d'allumage mal
serrée peut devenir très chaude et endommager le moteur.
• Utilisez exclusivement des bougies d'allumage de même valeur.
• Lors de la mise en place d'une nouvelle bougie, serrez-la d'1/2 tour
une fois qu'elle repose sur la rondelle. En cas d'utilisation de bougies
déjà utilisées, 1/8 ou 1/4 de tour suffit.
Si la bougie est uniquement encrassée, nettoyez-la avec une brosse métallique.
➤ Mesurez la distance entre les électrodes à l'aide d'un gabarit (fig. 8, page 7).
Elle doit être de 0,7 – 0,8 mm et peut être rectifiée en coudant l'électrode.
➤ Vérifiez si le joint de la bougie est intact.
➤ Si oui, vissez la bougie à la main afin de ne pas endommager le filetage.
72
Page 73

FR
TEC60, TEC60LPG Guide de dépannage
➤ Serrez la bougie avec une clé à bougie de manière à compresser la rondelle.
➤ Terminez les opérations de maintenance : voir chapitre « Fin des opérations de
maintenance », page 70.
11 Guide de dépannage
Dysfonctionnement Cause Solution
Le panneau de commande ne démarre pas
lorsque l'interrupteur
Marche / Arrêt est
actionné.
Le démarreur ne tourne
pas lorsque l'interrupteur de démarrage est
actionné.
Le démarreur tourne
mais le générateur ne
se lance pas.
Batterie de démarrage vide.
Câble électrique coupé ou connecteur retiré.
Le fusible (si existant) a sauté.
Batterie de démarrage vide.
Le commutateur principal est positionné sur « 0 ».
Platine endommagée.
Le démarreur n'est pas alimenté en
courant.
TEC60 :
Pas d'essence.
TEC60LPG :
Pas de gaz liquide
Trop d'huile dans le moteur.
➤ Chargez la batterie de démar-
rage.
➤ Prenez contact avec un atelier
spécialisé.
➤ Chargez la batterie de démar-
rage.
➤ Amenez le commutateur princi-
pal en position « I » ou « 1 ».
➤ Prenez contact avec un atelier
spécialisé.
➤ Effectuez le plein d'essence.
➤ Changez la bouteille de gaz
liquide.
➤ Évacuez l'huile.
La bougie d'allumage n'est pas alimentée en courant.
Uniquement TEC60 :
Le carburateur ne reçoit pas
d'essence.
Aspiration d'air colmatée.
Onduleur endommagé.
Câble d'alimentation interrompu.
➤ Vérifiez les raccordements élec-
triques.
➤ Nettoyez le carburateur.
➤ Contrôlez le filtre à air (voir le
chapitre « Entretien du filtre à
air », page 71).
➤ Prenez contact avec un atelier
spécialisé.
73
Page 74

FR
Guide de dépannage TEC60, TEC60LPG
Dysfonctionnement Cause Solution
Le générateur ralentit. Trop d'huile dans le moteur.
Charge supérieure à 6,2 kW.
Uniquement TEC60 :
Le carburateur ne reçoit pas
d'essence.
Aspiration d'air colmatée.
Onduleur endommagé.
Électroaimant (démarreur) bloqué.
Filtre à air encrassé.
Le générateur a
démarré, mais ne
délivre aucune tension.
Le générateur démarre
avec une forte accélération puis s'immobilise
avec le message
« GENERATOR ALERT».
Onduleur endommagé.
Régime trop faible.
Moteur pas à pas défectueux.
➤ Évacuez l'huile.
➤ Coupez les consommateurs
d'énergie.
➤ Nettoyez le carburateur.
➤ Contrôlez le filtre à air (voir le
chapitre « Entretien du filtre à
air », page 71).
➤ Prenez contact avec un atelier
spécialisé.
➤ Vérifiez les raccordements élec-
triques.
➤ Prenez contact avec un atelier
spécialisé.
➤ Prenez contact avec un atelier
spécialisé.
La tension générée est
instable.
Onduleur endommagé.
➤ Prenez contact avec un atelier
spécialisé.
74
Page 75

FR
TEC60, TEC60LPG Garantie
12 Garantie
Le délai légal de garantie s'applique. Si le produit s'avérait défectueux, veuillez vous
adresser à un de nos partenaires de service présent dans votre pays (voir adresses au
dos du présent manuel).
Nos spécialistes vous aideront avec plaisir et répondront à vos questions concernant
la suite de la procédure pour la garantie.
13 Retraitement
➤ Jetez les emballages dans les conteneurs de déchets recyclables prévus à cet
effet.
Lorsque vous mettrez votre produit définitivement hors service, informezvous auprès du centre de recyclage le plus proche ou auprès de votre
M
revendeur spécialisé sur les prescriptions relatives au retraitement des
déchets.
B
Protégez l'environnement !
Les piles et les batteries usagées ne sont pas des déchets ménagers.
Rapportez les piles défectueuses ou les batteries usagées à votre revendeur ou à un centre de collecte.
75
Page 76

FR
Caractéristiques techniques TEC60, TEC60LPG
14 Caractéristiques techniques
Dometic TEC60 Dometic TEC60LPG
N° de produit : 9102900229 9102900230
Tension nominale de sortie : 230 Vw / 50 Hz
Puissance continue max.
(à 25 °C au niveau de la mer) :
Tension de sortie du chargeur de
batterie :
Courant de sortie max. du chargeur
de batterie :
Plage de température de
fonctionnement :
Distorsion harmonique totale : <3 %
Carburant : Essence ordinaire
Consommation : max. 3,7 l/h 2,19 kg/h
Puissance du moteur : 6,6 kW (8,9 CV)
Régime max. :
Huile de moteur : 1,1 l
6200 W 6000 W
12 Vg
30 A
–15 °C à +50 °C 0 °C à +50 °C
Mélange gaz liquide :
ROZ 91
3600 min
Propane (25 – 100 %)
–1
Niveau sonore : 91 dB(A)
Niveau sonore à 7 m : 66 dB(A)
Dimensions : voir fig. 9, page 7
Poids : 102 kg
Contrôle/certificat :
76
Page 77

ES
TEC60, TEC60LPG
Antes de poner en funcionamiento el producto, lea atentamente estas instrucciones y consérvelas para futuras consultas. En caso de vender o entregar el producto a otra persona, entregue también estas instrucciones.
Índice
1 Explicación de los símbolos . . . . . . . . . . . . . . . . . . . . . . . . . . . . . . . . . . . . . 78
2 Indicaciones de seguridad . . . . . . . . . . . . . . . . . . . . . . . . . . . . . . . . . . . . . . 78
3 Destinatarios de estas instrucciones . . . . . . . . . . . . . . . . . . . . . . . . . . . . . . 80
4 Volumen de entrega . . . . . . . . . . . . . . . . . . . . . . . . . . . . . . . . . . . . . . . . . . . .81
5 Accesorios. . . . . . . . . . . . . . . . . . . . . . . . . . . . . . . . . . . . . . . . . . . . . . . . . . . 82
6 Uso adecuado . . . . . . . . . . . . . . . . . . . . . . . . . . . . . . . . . . . . . . . . . . . . . . . . 82
7 Descripción técnica . . . . . . . . . . . . . . . . . . . . . . . . . . . . . . . . . . . . . . . . . . . 82
8 Manejo del generador . . . . . . . . . . . . . . . . . . . . . . . . . . . . . . . . . . . . . . . . . 84
9 Limpiar el generador. . . . . . . . . . . . . . . . . . . . . . . . . . . . . . . . . . . . . . . . . . . 90
10 Mantenimiento del generador . . . . . . . . . . . . . . . . . . . . . . . . . . . . . . . . . . . 90
11 Solución de averías . . . . . . . . . . . . . . . . . . . . . . . . . . . . . . . . . . . . . . . . . . . . 95
12 Garantía legal . . . . . . . . . . . . . . . . . . . . . . . . . . . . . . . . . . . . . . . . . . . . . . . . 97
13 Gestión de residuos . . . . . . . . . . . . . . . . . . . . . . . . . . . . . . . . . . . . . . . . . . . 97
14 Datos técnicos. . . . . . . . . . . . . . . . . . . . . . . . . . . . . . . . . . . . . . . . . . . . . . . . 98
77
Page 78

ES
Explicación de los símbolos TEC60, TEC60LPG
1 Explicación de los símbolos
¡ADVERTENCIA!
!
!
A
Indicación de seguridad: su incumplimiento puede acarrear la
muerte o graves lesiones.
¡ATENCIÓN!
Indicación de seguridad: su incumplimiento puede acarrear
lesiones.
¡AVISO!
Su incumplimiento puede acarrear daños materiales y perjudicar el
correcto funcionamiento del producto.
NOTA
Información adicional para el manejo del producto.
I
2 Indicaciones de seguridad
El fabricante declina toda responsabilidad ante daños ocurridos en los siguientes
casos:
• daños en el producto debido a influencias mecánicas y sobretensiones
• modificaciones realizadas en el producto sin el expreso consentimiento del
fabricante
• utilización del aparato para fines distintos a los descritos en las instrucciones
El fabricante no se hace responsable de ningún daño resultante, especialmente de
los daños resultantes que pudieran producirse como consecuencia de una avería en
el generador.
Al utilizar los aparatos eléctricos, respete las siguientes normas básicas de seguridad
para protegerse de:
• descargas eléctricas
• peligro de incendio
• lesiones
78
Page 79

ES
TEC60, TEC60LPG Indicaciones de seguridad
2.1 Seguridad básica
¡ADVERTENCIA!
!
• ¡Los aparatos eléctricos no son juguetes!
Los niños no tienen capacidad de percibir los peligros que representan los aparatos eléctricos. No deje que los niños usen aparatos eléctricos sin estar bajo su vigilancia.
• Las personas (incluidos los niños) que, debido a sus capacidades físicas, sensoriales o mentales, a su falta de experiencia o a desconocimiento, no pueden utilizar el aparato de forma segura, no tienen
permitido utilizar este aparato sin la vigilancia y las instrucciones de
una persona sobre la que recae tal responsabilidad.
• Utilice el aparato solo para aquellos fines para los que ha sido concebido.
• No realice modificaciones en el aparato.
• Solo personal técnico que conozca tanto los posibles peligros relacio-
nados con el uso de generadores como las normas correspondientes
tiene autorización para realizar las tareas de instalación y la reparación
del generador. Las reparaciones que se realicen incorrectamente pueden dar lugar a situaciones de considerable peligro. En caso de reparaciones, diríjase a la filial del fabricante en su país (direcciones al
dorso).
!
• Los gases de escape contienen monóxido de carbono, un gas tóxico
inoloro e incoloro. No inhale los gases de escape. No deje el motor
del generador en un garaje cerrado ni en un recinto sin ventanas.
¡ATENCIÓN!
• El generador solo se puede utilizar con la tapa cerrada.
• Retire de los alrededores del generador todas las sustancias ligera-
mente inflamables como gasolina, barniz, disolventes, etc.
• Asegúrese de que ninguna parte del generador que se caliente
durante el funcionamiento pueda entrar en contacto con ninguna sustancia fácilmente inflamable.
• Para llenar el depósito del generador, éste debe estar apagado y en
un área bien ventilada. La gasolina y el gas licuado son altamente inflamables y pueden provocar explosiones.
• No llene el depósito del generador cuando el motor del vehículo esté
en marcha si el depósito de este último se encuentra cerca del generador.
79
Page 80

ES
Destinatarios de estas instrucciones TEC60, TEC60LPG
• Si se derrama gasolina, límpiela a fondo y espere a que dejen de emanar los efluvios antes de encender el motor.
• No toque el generador ni los cables con las manos húmedas.
• Los fusibles e interruptores térmicos se han de cambiar por otros que
presenten las mismas características técnicas.
¡AVISO!
A
2.2 Seguridad durante el funcionamiento del aparato
!
A
• No llene demasiado el depósito de gasolina. En el cuello del depósito
no debe haber nada de gasolina. Controle si la tapa está bien cerrada.
• Si es necesario realizar labores de soldadura en el vehículo, desconecte el cable que va al generador. De lo contrario, el sistema electrónico puede resultar dañado.
¡ADVERTENCIA!
• Siempre que realice tareas en el aparato desconecte la alimentación
de corriente.
¡AVISO!
• Utilice el aparato sólo cuando la carcasa y los cables no presenten
daños.
3 Destinatarios de estas instrucciones
Estas instrucciones de uso van dirigidas al usuario del generador.
80
Page 81

ES
TEC60, TEC60LPG Volumen de entrega
4 Volumen de entrega
TEC 60
Denominación Número de artículo
Generador TEC60 9102900229
Relé de conmutación para establecer una conexión de prioridad 9102900148
Inversor
Panel de control
Silenciador
Conducto de gases de escape
Material de fijación para el silenciador
Cable de conexión
Material de fijación
Instrucciones de montaje
Instrucciones de uso
TEC60LPG
Denominación Número de artículo
Generador TEC60LPG 9102900230
Relé de conmutación para establecer una conexión de prioridad 9102900148
Inversor
Panel de control
Silenciador
Conducto de gases de escape
Material de fijación para el silenciador
Cable de conexión
Material de fijación
Instrucciones de montaje
Instrucciones de uso
81
Page 82

ES
Accesorios TEC60, TEC60LPG
5Accesorios
Disponibles como accesorios (no incluidos en el volumen de entrega):
Nombre de las piezas Número de artículo
PR 250116, juego de juntas externas 9102900244
6Uso adecuado
El generador TEC60 (n.° de art. 9102900229) y el generador TEC 60LPG (n.° de art.
9102900230) están concebidos para su uso en autocaravanas, caravanas y vehículos de uso comercial.
El generador no se ha concebido para ser instalado en embarcaciones.
El generador genera una tensión alterna senoidal de 230 V/50 Hz a la que se pue-
den conectar consumidores con una carga total constante de:
• TEC60: 6200 W
• TEC60LPG: 6000 W
La calidad de la corriente también resulta adecuada para consumidores sensibles
(por ejemplo, PCs).
El generador puede cargar una batería de 12 V.
7 Descripción técnica
El generador consta de los siguientes elementos principales (fig. 1, página 3):
• Generador de corriente con imanes permanentes (1)
• Motor de combustión (2)
• Caja de conexión (3)
• Inversor (4)
• Panel de control (5)
El motor de combustión (2) pone en rotación el generador de corriente (1), que está
unido a él de forma fija, y el generador crea una tensión alterna.
El inversor externo (4) convierte esta tensión alterna en una tensión estable de 230 V
y 50 Hz, que queda disponible en los terminales del inversor. En el inversor está ubicada la clavija para el cable de conexión al panel de control.
82
Page 83

ES
TEC60, TEC60LPG Descripción técnica
En la caja de conexión (3) situada detrás de la puerta se encuentran los terminales de
conexión y el interruptor principal.
El manejo tiene lugar a través de un panel de control (5).
El generador lleva integrado un cargador para recargar la batería conectada.
Elementos de mando en el generador
La caja de conexión del generador se encuentra detrás de la tapa.
Pos. en
fig. 2,
página 3
1 Interruptor principal Pone en modo standby el generador y lo
2 Fusible térmico Salta cuando se produce sobrecalentamiento
Descripción
apaga.
del inversor (véase capítulo “Mensajes en
pantalla” en la página 86)
Elementos de mando en el panel de control
El panel de control está dispuesto en el interior del vehículo.
Pos. en
fig. 3,
página 4
1 Pantalla Indica mensajes de estado.
2 Interruptor On/Off “
3 Pulsador verde
4 Solo TEC60:
Descripción
P " Enciende y apaga el panel de control cuando
“START/STOP”
Indicación de gasolina
?
el interruptor principal está en “I” o en “1”.
Detiene el generador en caso de emergen-
cia.
Pone en marcha/detiene el funcionamiento
del generador cuando el panel de control
está encendido y el interruptor principal está
en “I” o “1”.
Se ilumina cuando el nivel de gasolina está en
la reserva.
5 Indicación de aceite Se ilumina cuando el nivel de aceite del
motor es demasiado bajo.
83
Page 84

ES
Manejo del generador TEC60, TEC60LPG
Indicaciones de display
Pos. en
fig. 3,
página 4
6 Tensión alterna Tensión de salida actual
7 Potencia constante Potencia actual de los consumidores conec-
8 Horas de funcionamiento Tiempo que el generador está en funciona-
9 Tensión continua Tensión de carga de la batería
10 Mensajes Mensaje de estado del generador (véase
Descripción
tados
miento
capítulo “Mensajes en pantalla” en la
página 86)
8 Manejo del generador
¡AVISO!
A
I
8.1 Indicaciones básicas para el manejo
!
En las primeras 50 horas de funcionamiento (fase inicial) no utilice el
generador a más del 70 % de su potencia constante máxima.
NOTA
Así podrá prolongar la vida útil del generador y optimizar su rendimiento:
Tras la fase inicial, no utilice el generador a más de aproximadamente el
75 % de su potencia constante máxima.
¡ATENCIÓN! ¡Peligro de sufrir lesiones!
No introduzca el dedo ni ningún objeto en las toberas de aire ni en la
rejilla de aspiración.
Tenga en cuenta las siguientes indicaciones básicas:
• Controle el nivel de aceite antes de cada uso (capítulo “Controlar el nivel de
aceite” en la página 89).
• Con el tiempo, también cargas reducidas provocan una parada del generador.
84
Page 85

ES
TEC60, TEC60LPG Manejo del generador
• Tras el uso , dej e el g ener ador unos minutos en funcionamiento sin consumidores
antes de pararlo.
• Las frenadas bruscas, los acelerones y los trayectos en curva pueden causar problemas en el sistema de bombeo del generador y provocar que se apague
imprevistamente.
• Si no se utiliza el generador durante bastante tiempo, póngalo en marcha por lo
menos cada 30 días durante un mínimo de 15 minutos.
8.2 Encender o apagar el generador
Con el interruptor principal (fig. 2 1, página 3) de la caja de conexión, se pone en
standby y se apaga el generador.
8.3 Encender y apagar el panel de control
Con el interruptor On/Off (fig. 3 2, página 4) del panel de control se enciende y
apaga dicho panel.
➤ Encienda el panel de control con el interruptor On/Off.
✓ La pantalla muestra:
La pantalla se apaga automáticamente tras 5 minutos si durante este tiempo no
se ha accionado el pulsador de arranque.
Pulsando dicho pulsador se puede volver a encender la pantalla.
✓ Ahora se puede poner en marcha el generador.
GEN OFF.
8.4 Poner en marcha el generador
El generador solo se puede poner en marcha si está en standby y si el panel de control está encendido.
NOTA
I
Cuando el generador todavía está caliente solo es necesario apretar
brevemente el pulsador de arranque para ponerlo en marcha, y si está
frío, hay que apretarlo durante más tiempo.
➤ Ponga en marcha el generador con el pulsador de arranque (fig. 3 3, página 4).
85
Page 86

ES
Manejo del generador TEC60, TEC60LPG
8.5 Parar el generador
➤ Pare el generador con el pulsador verde “START/STOP” (fig. 3 3, página 4).
✓ El inversor se detiene inmediatamente. El generador sigue funcionando durante
30 segundos para enfriarse y, seguidamente, se detiene también.
¡AVISO!
Pare siempre el generador con el pulsador verde “START/STOP” para
A
evitar que se produzcan daños en él.
Solo en caso de emergencia se puede parar el generador con el interruptor principal rojo.
8.6 Mensajes en pantalla
Indicación en pantalla
Descripción
LOW BATTERY
La tensión de batería ha descendido por debajo del valor
mínimo necesario para intentar
arrancar (9 V).
Check OIL Level
OIL CHANGE
El contador de horas de
funcionamiento ha alcanzado el
valor establecido para cambiar el
aceite del motor.
Comportamiento del
generador
El generador no arranca. Cargue la batería.
El generador sigue en marcha. Rellenar aceite (véase capítulo
El generador sigue en marcha. Cambie el aceite (véase capítulo
Medidas
“Controlar el nivel de aceite” en
la página 89).
“Cambiar el aceite (fig. 6,
página 5)” en la página 92) y, a
continuación, confirme el mensaje pulsando prolongadamente el pulsador “START/
STOP”. Para poner nuevamente
en marcha el generador, pulse
otra vez prolongadamente el
pulsador “START/STOP”.
Solo TEC60:
NO FUEL
La gasolina del depósito está en
la reserva.
OIL ALERT
Falta aceite del motor.
86
El generador sigue en marcha. Llenar el depósito.
El generador se para. Rellenar aceite (véase capítulo
“Controlar el nivel de aceite” en
la página 89).
Page 87

ES
TEC60, TEC60LPG Manejo del generador
Indicación en pantalla
Descripción
GENERATOR ALERT!
Mensaje general de alarma
Ejemplo: El anillo de control de
la válvula de estrangulación del
carburador (motor paso a paso)
está averiado.
OVERLOAD!
Los consumidores generan una
sobrecarga en la salida.
SHORT CIRCUIT
Los consumidores provocan un
cortocircuito en la salida.
OVER TEMPERATURE
Sobrecalentamiento
Comportamiento del
generador
El generador se para. Compruebe el sistema con
El inversor se desactiva, por lo
que deja de suministrarse tensión y el motor sigue en rotación
hasta que se para.
El inversor se desactiva, por lo
que deja de suministrarse tensión y el motor sigue en rotación
hasta que se para.
El inversor se desactiva, por lo
que deja de suministrarse tensión, pero el motor sigue en
rotación para enfriar el generador.
Medidas
ayuda de la tabla de averías, causas y soluciones.
En caso de que no sea posible
eliminar el problema, diríjase a la
filial del fabricante en su país
(direcciones al dorso).
Disminuya la carga y vuelva a
poner en marcha el generador.
Controle el estado de los consumidores conectados y seguidamente vuelva a poner en marcha
el generador.
Deje enfriar el generador
durante unos minutos y seguidamente vuelva a poner en marcha
el generador.
LOW POWER ENGINE
Caída de la tensión de alimentación del inversor.
Overspeed
Velocidad demasiado alta
Start failed
Ejemplo: no hay gasolina, temperatura fría, bujía averiada, filtro de aire sucio
GEN CAL
Mensaje que aparece al poner
en marcha el generador; muestra la fase de calibración que
antecede a cada puesta en marcha. El generador todavía suministra tensión.
El generador se para. Disminuya la carga y vuelva a
poner en marcha el generador.
El generador se para. Ponga nuevamente en marcha el
generador. En caso de que no
sea posible eliminar el problema, diríjase a la filial del fabricante en su país (direcciones al
dorso).
El generador está apagado. Ponga nuevamente en marcha el
generador.
El generador gira, pero no
genera tensión.
Espere un momento.
87
Page 88

ES
Manejo del generador TEC60, TEC60LPG
Indicación en pantalla
Descripción
GEN WAIT
Mensaje que aparece en el intermedio entre dos intentos de
arranque.
GEN ON
Funcionamiento normal del
generador
GEN OFF
Inverter lost comm
Comportamiento del
generador
El generador está apagado. Espere hasta que desaparezca el
Funcionamiento normal –
El generador se para y se puede
poner en marcha
El generador se para. Compruebe el sistema con
Medidas
mensaje y seguidamente vuelva
a intentar nuevamente el arranque.
–
ayuda de la tabla de averías, causas y soluciones.
En caso de que no sea posible
eliminar el problema, diríjase a la
filial del fabricante en su país
(direcciones al dorso).
Engine lost comm
Inverter failed
Eng. Param. Error
Inv. Param. Error
Software Error
El generador se para. Compruebe el sistema con
ayuda de la tabla de averías, causas y soluciones.
En caso de que no sea posible
eliminar el problema, diríjase a la
filial del fabricante en su país
(direcciones al dorso).
El generador se para. Diríjase a la filial del fabricante en
su país (direcciones al dorso).
El generador se para. Diríjase a la filial del fabricante en
su país (direcciones al dorso).
El generador se para. Diríjase a la filial del fabricante en
su país (direcciones al dorso).
El generador se para. Diríjase a la filial del fabricante en
su país (direcciones al dorso).
88
Page 89

ES
TEC60, TEC60LPG Manejo del generador
8.7 Controlar el nivel de aceite
¡ATENCIÓN!
!
El aceite caliente puede provocar quemaduras.
Para comprobar el nivel de aceite el generador debe estar apagado.
NOTA
El generador debe estar en horizontal.
I
Controle el nivel de aceite antes de cada uso. Para ello proceda de la siguiente
manera:
➤ Abra la tapa del generador.
➤ Apague el generador con el interruptor principal (fig. 4 1, página 4).
➤ Desconecte la conexión al polo positivo de la batería de alimentación.
➤ Extraiga la varilla de medición (fig. 4 2, página 4) del tubo de llenado
(fig. 4 3, página 4).
➤ Limpie la varilla de medición (fig. 4 2, página 4) con un paño.
➤ Introduzca la varilla de medición (fig. 4 2, página 4) totalmente en el tubo de
llenado (fig. 4 3, página 4).
➤ Extraiga la varilla de medición (fig. 4 2, página 4) del tubo de llenado.
➤ Controle si el nivel de aceite está entre la marca (nivel de llenado máximo) y la
punta de la varilla de medición.
De no ser así, rellene aceite.
➤ Introduzca la varilla de medición (fig. 4 2, página 4) totalmente en el tubo de
llenado (fig. 4 3, página 4).
➤ Compruebe que el nivel de aceite no se encuentre por encima del nivel máximo.
➤ Conecte el generador con el polo positivo de la batería de alimentación.
➤ Con el interruptor principal (fig. 4 1, página 4) ponga el generador en standby.
➤ Cierre la tapa del generador.
89
Page 90

ES
Limpiar el generador TEC60, TEC60LPG
9 Limpiar el generador
¡AVISO! Peligro de ocasionar daños materiales
A
➤ Limpie de vez en cuando la carcasa del generador con un paño húmedo.
➤ Limpie con regularidad las aberturas de ventilación del generador. Al hacerlo
preste atención a no dañar las láminas del generador.
• No limpie el generador con un limpiador de alta presión. La entrada
de agua podría dañar el generador.
• Para la limpieza no utilice ningún objeto afilado o duro ni detergentes, ya que ello podría dañar el generador.
• Para limpiar el generador utilice únicamente agua con un detergente
suave. No utilice bajo ningún concepto gasolina, diésel o disolventes.
10 Mantenimiento del generador
NOTA
I
10.1 Tabla de mantenimiento
!
I
Encuentre su interlocutor de servicio de Dometic en internet:
http://service-location.dometic.com
¡ADVERTENCIA!
Encargue todos los trabajos de mantenimiento a personal especializado
que conozca las normativas pertinentes. Los trabajos de mantenimiento
que se realicen incorrectamente pueden dar lugar a situaciones de considerable peligro.
NOTA
Encargue la realización de los siguientes trabajos de mantenimiento en
los intervalos indicados o tras el número de horas de funcionamiento
indicadas, dependiendo de qué se produzca antes.
90
Page 91

ES
TEC60, TEC60LPG Mantenimiento del generador
Intervalo Comprobación/mantenimiento
El primer mes o
después de 20 h
Cada 3 meses o
después de 50 h
Cada 6 meses o
después de 100 h
Una vez al año o
cada 300 h
Cada dos años ➤ Encargue el mantenimiento de los conductos de gasolina (TEC60) o
➤ Haga cambiar el aceite.
➤ Encargue el mantenimiento del filtro de aire (capítulo “Manteni-
miento del filtro de aire” en la página 93).
➤ Encargue el mantenimiento del filtro de aire (capítulo “Manteni-
miento del filtro de aire” en la página 93).
➤ Haga cambiar el aceite.
➤ Encargue el mantenimiento de la bujía de encendido (capítulo
“Mantenimiento de la bujía de encendido” en la página 94).
➤ Encargue el mantenimiento de las válvulas.
➤ Encargue el mantenimiento del depósito de gasolina (solo TEC 60) y
del filtro de combustible.
➤ Encargue el mantenimiento del amortiguador de vibraciones.
de los conductos de gas (TEC60LPG).
10.2 Preparativos para los trabajos de mantenimiento
¡ATENCIÓN!
!
➤ Abra la tapa del generador.
➤ Apague el generador con el interruptor principal (fig. 2 1, página 3).
➤ Desconecte la conexión al polo positivo de la batería de alimentación.
Para los trabajos de mantenimiento se puede extraer el generador (fig. 5,
página 5):
!
➤ Afloje los tornillos de fijación (1).
Para todos los trabajos de mantenimiento tenga en cuenta:
• El generador no debe estar en funcionamiento.
• Todas las piezas deben estar frías.
¡ADVERTENCIA!
La placa soporte con el generador es muy pesada (>70 kg) y se puede
caer de la carcasa si se extrae excesivamente.
➤ Extraiga la placa soporte (2) con el generador de la carcasa (3).
91
Page 92

ES
Mantenimiento del generador TEC60, TEC60LPG
10.3 Finalizar los trabajos de mantenimiento
➤ Conecte el generador con el polo positivo de la batería de alimentación.
➤ Con el interruptor principal (fig. 4 1, página 4) ponga el generador en standby.
➤ Cierre la tapa del generador.
10.4 Cambiar el aceite (fig. 6, página 5)
¡ATENCIÓN!
El aceite caliente puede provocar quemaduras.
!
¡AVISO!
A
El aceite usado debe eliminarlo o reciclarlo una empresa especializada.
Respete a este efecto las leyes relativas a la protección del medio
ambiente que rijan en el país en el que se encuentre.
Puede utilizar los siguientes aceites:
• Aceite de la clase SAE 5W-30 (se puede utilizar con todas las temperaturas).
• Aceite con viscosidad de gama única.
Seleccione la viscosidad adecuada en función de la temperatura media del lugar.
Para cambiar el aceite:
➤ Deje que el generador se caliente funcionando entre tres y cinco minutos para
que el aceite se haga más líquido y salga así más rápidamente y por completo.
➤ Coloque un recipiente adecuado debajo del tornillo de purga (fig. 6 1,
página 5).
➤ Retire la varilla de medición de aceite.
➤ Retire el tornillo de purga (fig. 6 1, página 5).
✓ El aceite sale.
➤ Llene aceite limpio por el tubo de llenado.
La cantidad de aceite es de 1,1 l.
92
Page 93

ES
TEC60, TEC60LPG Mantenimiento del generador
10.5 Mantenimiento del filtro de aire
¡ADVERTENCIA! ¡Peligro de explosión!
!
A
I
Para limpiar el filtro de aire no utilice aceite diésel ni disolventes con un
bajo punto de evaporación, pues podrían inflamarse o explotar.
¡AVISO!
No ponga nunca el motor en funcionamiento sin filtro de aire, pues ello
provocaría un desgaste prematuro del motor.
NOTA
Si el filtro de aire está sucio, disminuye la corriente de aire hacia el carburador. Para que el carburador funcione bien es necesario controlar a
intervalos regulares el estado del filtro. Contrólelo con más frecuencia si
el generador se utiliza en un entorno especialmente polvoriento.
➤ Prepare los trabajos de mantenimiento y extraiga un poco el generador de la car-
casa; véase capítulo “Preparativos para los trabajos de mantenimiento” en la
página 91.
➤ Retire los tornillos (fig. 7 1, página 5) y la tapa del filtro (fig. 7 2, página 5).
➤ Retire los tornillos (fig. 7 3, página 5).
➤ Extraiga el filtro de aire (fig. 7 4, página 5).
El filtro de aire consta de dos elementos: un filtro de esponja y un filtro de papel.
➤ Controle detalladamente el estado de ambos elementos de filtro. Cambie los
elementos de filtro dañados.
➤ Limpie los elementos de filtro que no estén dañados; consulte para ello los
siguientes apartados.
➤ Finalice los trabajos de mantenimiento; véase al respecto el capítulo “Finalizar los
trabajos de mantenimiento” en la página 92.
Limpiar el filtro de esponja
➤ Lave la esponja con una solución de detergente neutra y enjuáguelo bien.
➤ Deje que la esponja se seque del todo.
➤ Impregne la esponja con aceite de motor limpio.
➤ Exprima el aceite sobrante.
93
Page 94

ES
Mantenimiento del generador TEC60, TEC60LPG
Limpiar el filtro de papel
➤ Elimine la suciedad golpeando repetidamente con suavidad el papel contra una
superficie dura o bien soplando aire comprimido de dentro hacia fuera.
No cepille el papel, pues con ello penetraría la suciedad en las fibras del filtro de
papel.
➤ Si el filtro de papel está muy sucio, cámbielo.
10.6 Mantenimiento de la bujía de encendido
¡AVISO!
A
• Apriete cuidadosamente la bujía de encendido. Una bujía que no
esté bien apretada se puede calentar mucho y provocar daños en el
motor.
• Utilice únicamente bujías equivalentes.
• Al colocar una nueva bujía de encendido, apriétela media vuelta
cuando esté fija sobre la arandela. En el caso de bujías de encendido
ya usadas basta con apretarla 1/4 o 1/8 de vuelta.
➤ Prepare los trabajos de mantenimiento; véase al respecto el capítulo “Preparati-
vos para los trabajos de mantenimiento” en la página 91.
➤ Retire el conector de la bujía.
➤ Extraiga la bujía con una llave de bujías.
➤ Controle la bujía con una inspección visual.
Si la bujía presenta síntomas obvios de desgaste o si el aislador está dañado o
roto, deberá cambiar la bujía.
Si la bujía únicamente está sucia, límpiela con un cepillo metálico.
➤ Mida la distancia entre los electrodos con un medidor de espesores (fig. 8,
página 7). La distancia debe ser entre 0,7 y 0, 8 mm, y si es necesario se puede
corregir doblando el electrodo.
➤ Compruebe si la junta de la bujía está intacta.
➤ De ser así, enrosque manualmente la bujía para evitar que se dañe la rosca.
➤ Apriete la bujía con una llave de bujías de modo que se presione la arandela de
apoyo.
➤ Finalice los trabajos de mantenimiento; véase al respecto el capítulo “Finalizar los
trabajos de mantenimiento” en la página 92.
94
Page 95

ES
TEC60, TEC60LPG Solución de averías
11 Solución de averías
Avería Causa Solución
Al presionar el pulsador On/Off no
se enciende el
panel de control.
Al presionar el pulsador de arranque
no gira el motor de
arranque.
El motor de arranque gira, pero el
generador no se
pone en marcha.
Batería de arranque descargada.
Cable de corriente interrumpido o
enchufe extraído.
Ha saltado el fusible (en caso de haberlo).
Batería de arranque descargada.
El interruptor principal está en “0”.
Placa dañada.
El motor de arranque no recibe alimentación de corriente.
TEC60:
No hay gasolina.
TEC60LPG:
No hay gas licuado
Demasiado aceite en el motor.
La bujía de encendido no recibe alimentación de corriente.
➤ Cargue la batería de arranque.
➤ Diríjase a un taller autorizado.
➤ Cargue la batería de arranque.
➤ Coloque el interruptor principal
en la posición “I” o “1”.
➤ Diríjase a un taller autorizado.
➤ Rellene gasolina.
➤ Cambie la bombona de gas
licuado.
➤ Deje salir el aceite.
➤ Compruebe las conexiones eléc-
tricas.
Solo TEC60:
El carburador no recibe alimentación de
gasolina.
Aspiración de aire obstruida.
Inversor dañado.
Cable de corriente interrumpido.
➤ Limpie el carburador.
➤ Controle el filtro de aire (véase
capítulo “Mantenimiento del filtro
de aire” en la página 93).
➤ Diríjase a un taller autorizado.
95
Page 96

ES
Solución de averías TEC60, TEC60LPG
Avería Causa Solución
El generador
tiende a apagarse.
El generador se ha
puesto en marcha,
pero no genera
tensión.
El generador
arranca con una
fuerte aceleración
pero se para con el
mensaje “GENERATOR ALERT”.
Demasiado aceite en el motor.
Carga superior a 6,2 kW.
Solo TEC60:
El carburador no recibe alimentación de
gasolina.
Aspiración de aire obstruida.
Inversor dañado.
Electroimán (motor de arranque) bloqueado.
Filtro de aire sucio.
Inversor dañado.
La velocidad es demasiado baja.
Motor paso a paso averiado.
➤ Deje salir el aceite.
➤ Desconecte los consumidores.
➤ Limpie el carburador.
➤ Controle el filtro de aire (véase
capítulo “Mantenimiento del filtro
de aire” en la página 93).
➤ Diríjase a un taller autorizado.
➤ Compruebe las conexiones eléc-
tricas.
➤ Diríjase a un taller autorizado.
➤ Diríjase a un taller autorizado.
La tensión generada es inestable.
Inversor dañado.
➤ Diríjase a un taller autorizado.
96
Page 97

ES
TEC60, TEC60LPG Garantía legal
12 Garantía legal
Rige el plazo de garantía legal. Si el producto presenta algún defecto, diríjase a nuestro socio de servicio en su país (ver direcciones en el dorso de este manual).
Nuestros especialistas estarán encantados de poder ayudarle y de poder orientarle
en los siguientes pasos a dar respecto a la garantía.
13 Gestión de residuos
➤ Deseche el material de embalaje en el contenedor de reciclaje correspondiente.
Cuando vaya a desechar definitivamente el producto, infórmese en el
centro de reciclaje más cercano o en un comercio especializado sobre las
M
normas pertinentes de eliminación de materiales.
B
¡Proteja el medio ambiente!
Las baterías y pilas no son basura doméstica.
Entregue las baterías defectuosas o las pilas vacías en un establecimiento
o deposítelas en un contenedor especializado.
97
Page 98

ES
Datos técnicos TEC60, TEC60LPG
14 Datos técnicos
Dometic TEC60 Dometic TEC60LPG
N.° de art.: 9102900229 9102900230
Tensión nominal de salida: 230 Vw / 50 Hz
Potencia constante máxima
(a 25 °C a la altura del nivel del
mar):
Tensión de salida del cargador de
batería:
Corriente máx. de salida del cargador de batería:
Rango de temperatura de
funcionamiento:
Distorsión total armónica: <3 %
Combustible: Gasolina normal
Consumo: Máx. 3,7 l/h 2,19 kg/h
Potencia del motor: 6,6 kW (8,9 PS)
Velocidad máx.:
6200 W 6000 W
12 Vg
30 A
de –15°C a +50°C de 0°C a +50°C
Mezcla de gas licuado
ROZ 91
3600 min
Propano (25 – 100 %)
–1
Aceite del motor: 1,1 l
Nivel de ruido: 91 dB(A)
Nivel de ruido a 7 m: 66 dB(A)
Dimensiones: Véase fig. 9, página 7
Peso: 102 kg
Homologación/Certificados:
98
Page 99

PT
TEC60, TEC60LPG
Por favor, leia atentamente este manual antes da colocação em funcionamento do aparelho e guarde-o em local seguro. Em caso de transmissão do
produto, entregue o manual ao novo utilizador.
Índice
1 Explicação dos símbolos . . . . . . . . . . . . . . . . . . . . . . . . . . . . . . . . . . . . . . .100
2 Indicações de segurança . . . . . . . . . . . . . . . . . . . . . . . . . . . . . . . . . . . . . . .100
3 Destinatários do presente manual . . . . . . . . . . . . . . . . . . . . . . . . . . . . . . . .102
4 Material fornecido. . . . . . . . . . . . . . . . . . . . . . . . . . . . . . . . . . . . . . . . . . . . .103
5 Acessórios . . . . . . . . . . . . . . . . . . . . . . . . . . . . . . . . . . . . . . . . . . . . . . . . . . .104
6 Utilização adequada . . . . . . . . . . . . . . . . . . . . . . . . . . . . . . . . . . . . . . . . . . .104
7 Descrição técnica . . . . . . . . . . . . . . . . . . . . . . . . . . . . . . . . . . . . . . . . . . . . .104
8 Operar o gerador . . . . . . . . . . . . . . . . . . . . . . . . . . . . . . . . . . . . . . . . . . . . .106
9 Limpar o gerador. . . . . . . . . . . . . . . . . . . . . . . . . . . . . . . . . . . . . . . . . . . . . . 112
10 Manutenção do gerador . . . . . . . . . . . . . . . . . . . . . . . . . . . . . . . . . . . . . . . 112
11 Eliminar falhas . . . . . . . . . . . . . . . . . . . . . . . . . . . . . . . . . . . . . . . . . . . . . . . . 117
12 Garantia . . . . . . . . . . . . . . . . . . . . . . . . . . . . . . . . . . . . . . . . . . . . . . . . . . . . . 119
13 Eliminação . . . . . . . . . . . . . . . . . . . . . . . . . . . . . . . . . . . . . . . . . . . . . . . . . . .119
14 Dados técnicos . . . . . . . . . . . . . . . . . . . . . . . . . . . . . . . . . . . . . . . . . . . . . . .120
99
Page 100

PT
Explicação dos símbolos TEC60, TEC60LPG
1 Explicação dos símbolos
AVISO!
!
!
A
Indicação de segurança: o incumprimento pode provocar a morte ou
ferimentos graves.
PRECAUÇÃO!
Indicação de segurança: o incumprimento pode provocar
ferimentos.
NOTA!
O incumprimento pode causar danos materiais e pode prejudicar o
funcionamento do produto.
OBSERVAÇÃO
Informações suplementares sobre a operação do produto.
I
2Indicações de segurança
O fabricante não se responsabiliza por danos nos seguintes casos:
• Danos no produto resultantes de influências mecânicas e sobretensões
• Alterações ao produto sem autorização expressa do fabricante
• Utilização para outras finalidades que não as descritas no manual de instruções
O mesmo não se responsabiliza em caso de danos recorrentes, sobretudo danos
recorrentes que possam ocorrer devido a falhas de funcionamento do gerador.
Tenha em atenção as seguintes medidas de segurança fundamentais na utilização de
aparelhos elétricos para a proteção contra:
• choque elétrico
• perigo de incêndio
• ferimentos
100
 Loading...