

Page 1
DS-Series™ Printer Quick Reference
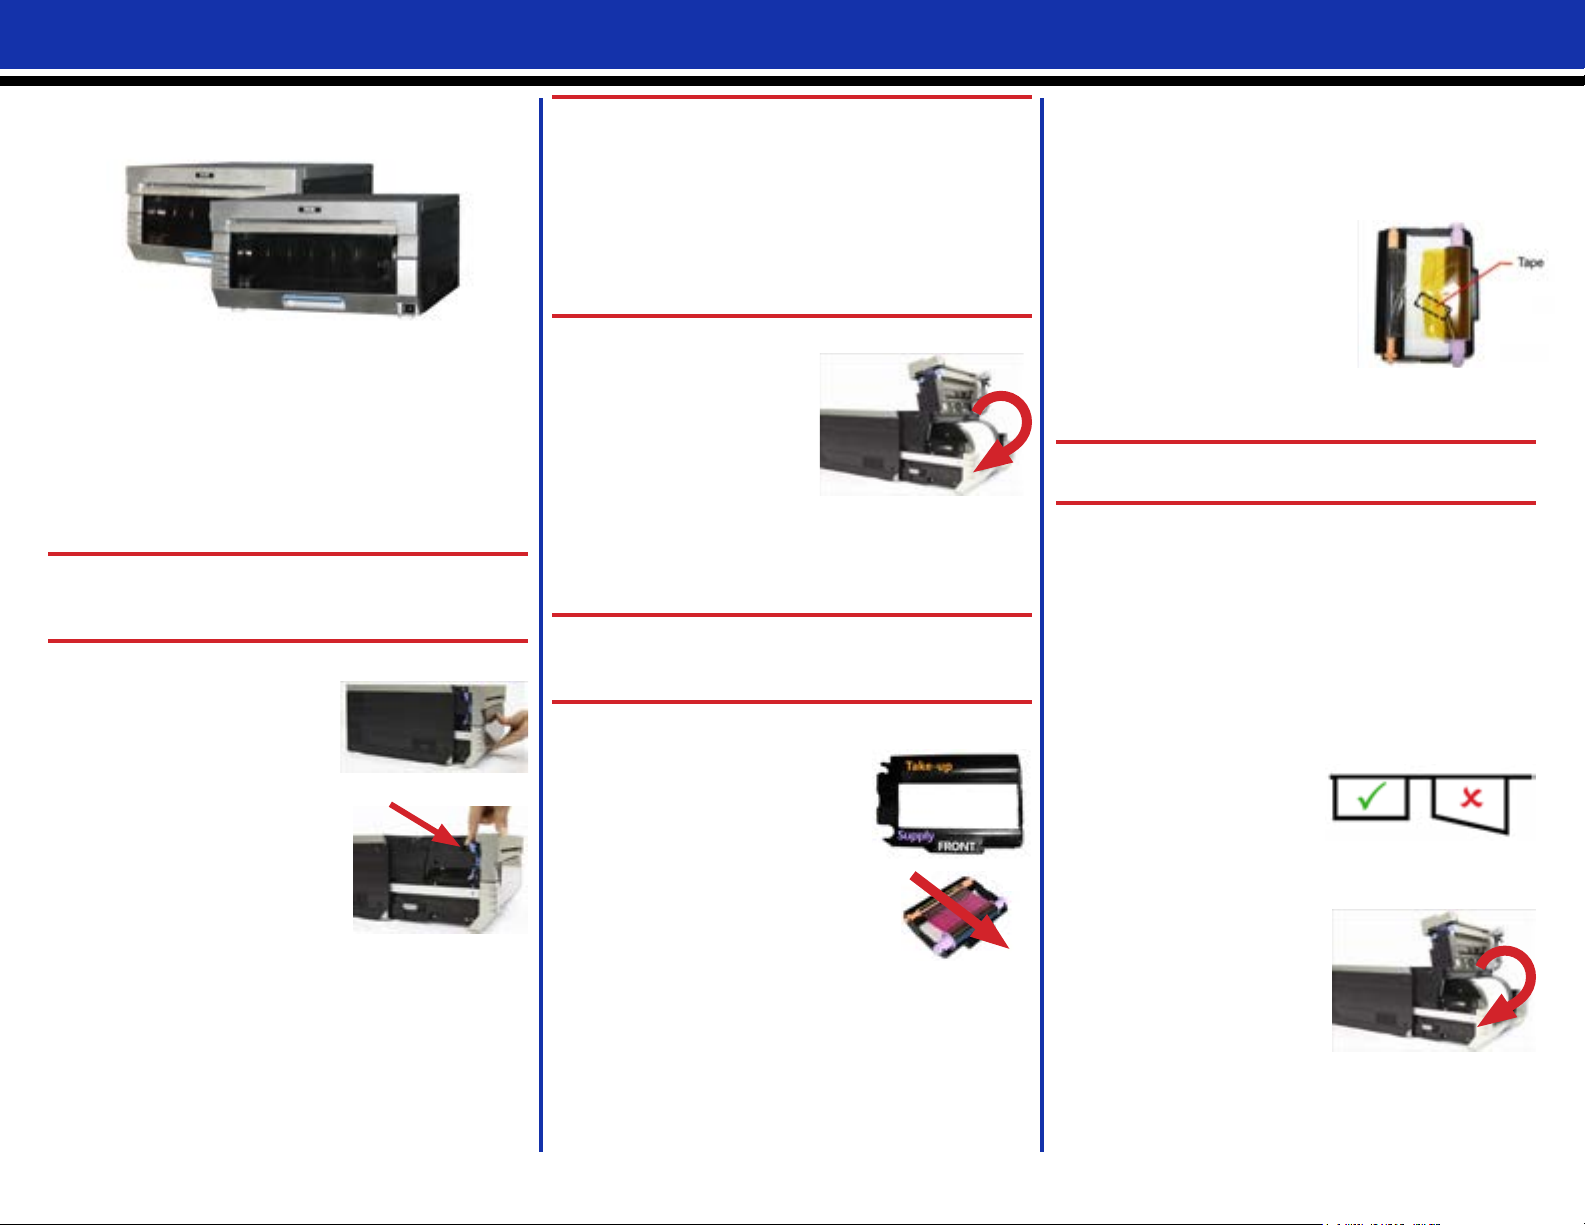
DS40 & DS80 Printers
The DS40 and DS80 are quite similar. The
instructions for one will work for the other.
The main difference is in the media width size:
• DS40 printers use 5” or 6” wide media sets.
• DS80 printers use 10” wide media sets.
The easiest way to determine what kind of printer
you have is to look at the label on the front.
ATTENTION:
Always replace paper and ribbon at the same
time.
Installing a Paper Roll
1. Pull out the media
compartment drawer by
lifting the blue handle
under the scrap box and
pulling gently.
2. Release the paper
compartment release lever.
3. Remove the scrap box. Set
it aside.
4. Remove the paper roll from
the printer.
5. Remove the spools ends from the paper roll
by pulling gently on the spools.
6. Set the spools into a new roll of paper.
ATTENTION:
Be sure there is no gap between the paper and
the spools. Failure to set correctly can result
in paper jams. Set the paper into the paper
compartment. Make sure the paper roll is seated
so that the leading edge of the paper roll is
coming over the top of the paper roll and feeding
into the paper compartment from the bottom.
7. Remove the seal on the paper.
8. Advance the paper
so that the paper is
feeding into the printer
from the bottom of the
paper compartment.
The printer beeps when
the paper is in the correct position.
9. Replace the scrap box, and close the top of
the paper compartment.
10. Close the paper compartment.
ATTENTION:
The printer will not operate without the scrap bin
in place.
Installing a New Ribbon
1. Remove the old ribbon and
discard it.
2. Set a new ribbon into the
ribbon cassette. Advance the
ribbon, leaving no slack.
3. Place the cassette in the printer
with the supply side in the front.
4. Close the media compartment
drawer.
5. The printer will cycle through the lights as
it adjusts the media. When the media is
aligned, four blank test images are printed.
Repairing a Ribbon Tear
1. Open the media compartment.
2. Remove the ribbon cassette.
3. Cut the ribbon. Carefully remove any
remaining ribbon from
inside the mechanism.
4. Reattach the ribbon using
cellophane tape, as shown.
5. Advance the ribbon several
times until the tape is no
longer showing.
6. Make sure there is no slack in the ribbon.
Replace the cassette in the printer.
ATTENTION:
Make sure the ribbon is placed in correctly.
7. Close the media compartment drawer. The
printer will re-initialize.
Removing a Paper Jam
1. Pull out the media compartment.
2. Release the paper compartment release
lever.
3. Remove the scrap box. Set it aside.
4. Remove the paper roll from the printer. Pull
any paper remaining from the printer.
5. Cut off any partially
printed, wrinkled or
otherwise inferior paper
evenly with scissors.
6. Replace the paper and feed the paper into
the printer.
7. Replace the scrap box,
and close the media
compartment drawer.
8. The printer will cycle
through the lights as it
adjusts the media. When
the media is aligned, four blank test images
are printed.
DNP Imagingcomm America Corporation 1 Release: v01.2017
© 2017. All rights reserved. PN: 35-260-2-SA
Page 2
DS-Series™ Printer Quick Reference
DS40 & DS80 Printers
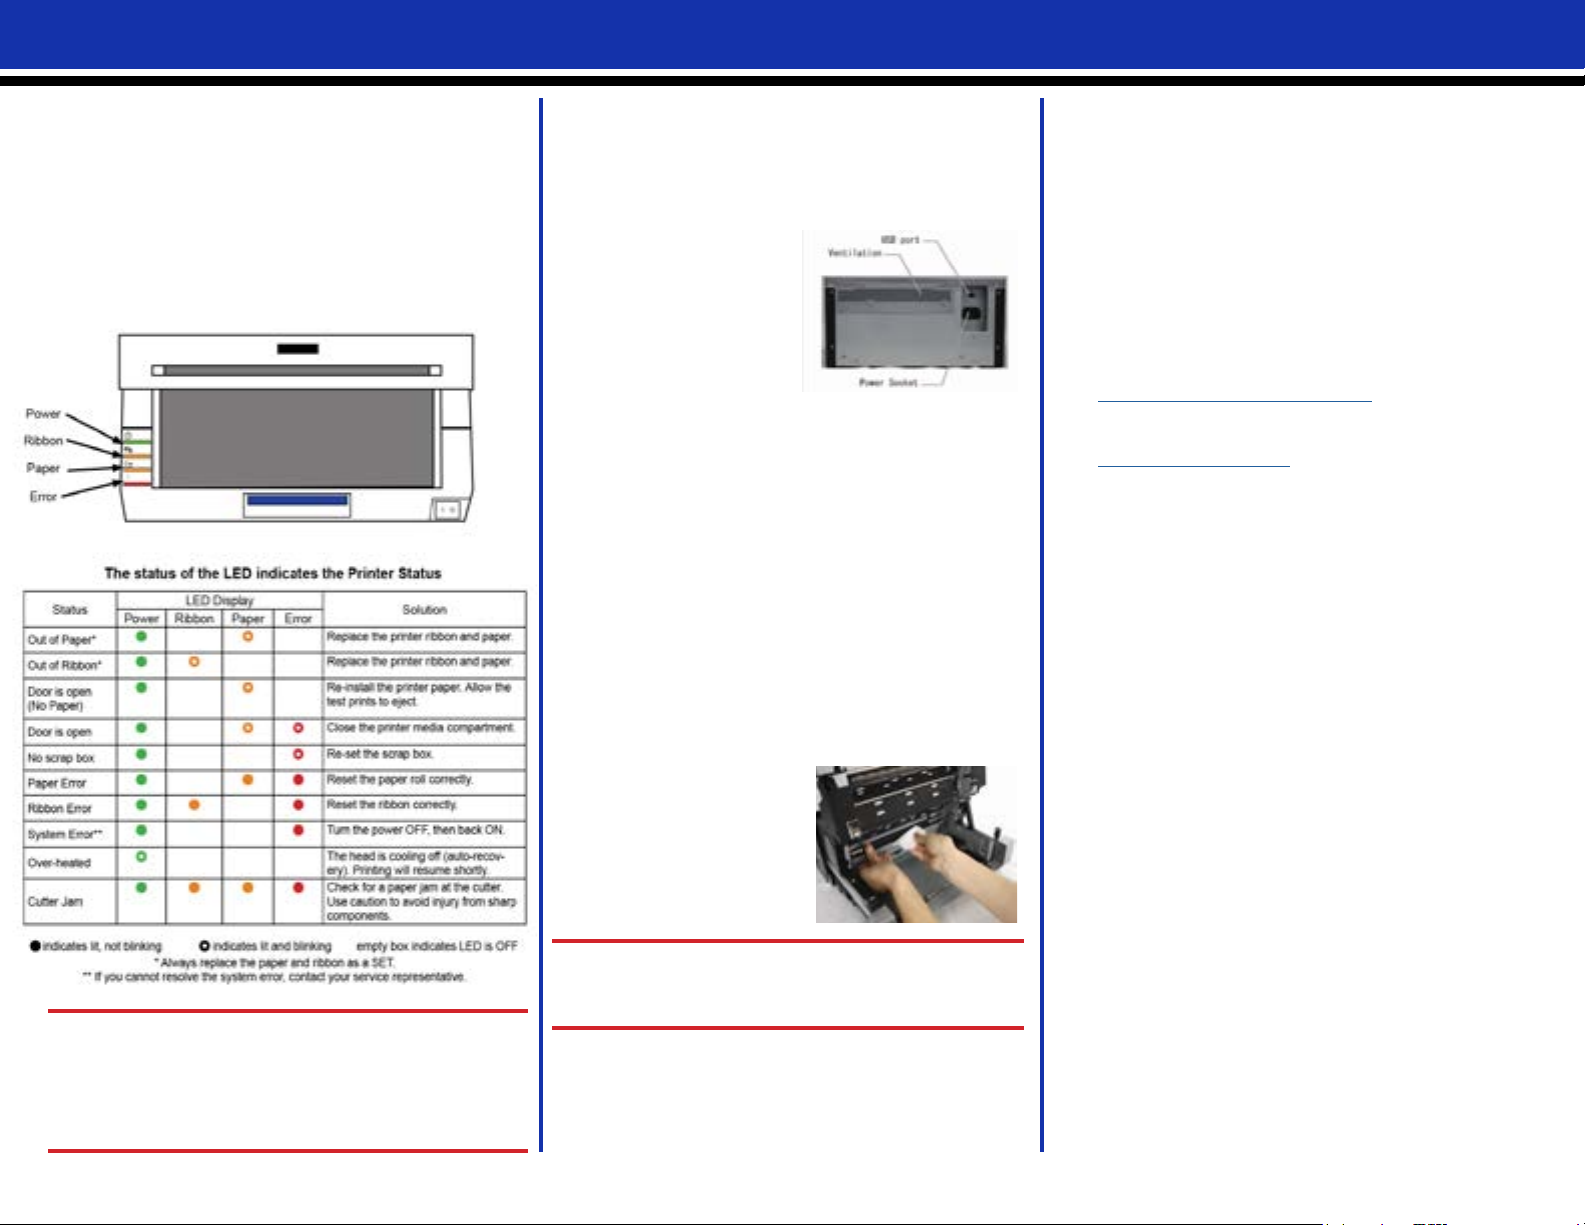
LED Displays
Use the blinking LEDs in conjunction with the
system messages to pinpoint problems with the
printer, such as paper jams, ribbon errors, open
printer doors, etc.. If a problem persists, call
Technical Support.
Cleaning the Printer
If printer is overheating regularly, you may need
to clear the ventilation area of the printer.
1. Gently maneuver the printer towards you,
supporting it on both sides.
2. When you can reach
behind the printer,
disconnect any
cables.
3. Turn the printer
so the back of the
printer is facing you.
4. Remove any dust from the ventilation area
of the printer using a dust cloth or hand-held
For Technical Support
For technical support or to order media:
Phone:
1-855-367-7604
Outside the US:
(724) 696-89575
Email:
dnpsupport@dnp.imgcomm.com
Website:
www.dnpimagingcomm.com
or
www.dnpphoto.com
vacuum.
5. Reconnect the cables to the printer, and
place it back.
Cleaning the Platen Roller
Only clean the platen roller when directed to do
so by Technical Support.
1. Open the printer media compartment drawer.
2. Release the paper compartment lever.
3. Remove the scrap box.
4. Remove the paper cassette.
5. Using an approved
alcohol pad that was
provided in the printer
cleaning kit, wipe the
platen roller while
rotating the roller
slightly.
ATTENTION:
Use only the alcohol pads provided in the kit.
Take care to avoid sharp edges.
ATTENTION:
Paper and ribbon spools for the DS40 and DS80
printers are designed to run out at the same time.
6. Replace the paper roll and scrap box.
7. Close the media compartment drawer.
Always replace paper and ribbon cassettes
together.
DNP Imagingcomm America Corporation 2 Release: v01.2017
© 2017. All rights reserved. PN: 35-260-2-SA
DNP Imagingcomm America Corp.
4524 Enterprise Dr. NW
Concord NC 28027
All particulars of the product and its use contained in the document are provided by DNP
Imagingcomm America Corporation (DNP IAM) in good faith. All warranties implied or
expressed, including but not limited to implied warranties of merchantability, or tness of
purpose, are excluded. Neither the whole nor any part of the information contained in, or
the product described in, this document may be adapted or reproduced in any material
Tomo™, Hot Folder Print™, PrintCenter™, DS-Series Printers™, and PrintTurbine™ are
Copyright © DNP Imagingcomm America Corporation 2004 - 2015. All rights reserved.
form without the prior written authorization of DNP IAM.
trademarks and NexLab® is a registered trademark of
DNP Imagingcomm America Corporation.
PrintRush® and Party Print® are registered trademarks of
Other product names and companies mentioned herein are the
Dai Nippon Printing Company LTD.
trademarks of their respective owners.
Page 3

DS-Series™ Printer Quick Reference
DS80DX Printers
DS80D Printer
TU80X Turning Unit
Replacing the Simplex Media
1. Pull out the media
compartment drawer by
lifting the blue handle
under the scrap box and
pulling gently.
2. Press the blue paper compartment release
lever on the side of the
paper compartment.
3. Remove the scrap box and
set it aside.
4. Remove the paper roll
from the printer. Remove
the spool ends from the paper roll by pulling
gently on the spools until they come off.
5. Set the spools into a new roll of paper.
ATTENTION:
Be sure there is no gap between the paper and
the spools. Failure to set correctly results in
paper jams.
6. Set the paper into the paper compartment.
Make sure the paper
roll is seated so that
the leading edge of the
paper roll is coming over
the top of the paper roll.
7. Remove the PULL
sticker from the paper.
DNP Imagingcomm America Corporation 3 Release: v01.2017
© 2017. All rights reserved. PN: 35-260-2-SA
8. Advance the paper so that the paper is
coming over the top of the paper roll and
feeding into the printer at the front edge of the
paper compartment. The printer beeps when
the paper is in the correct position.
9. Replace the scrap bin and close the top of
the paper compartment.
10. If you are nished, close the media
compartment drawer.
ATTENTION:
The printer will not operate without the scrap bin
in place.
Installing a New Ribbon
1. Remove the old ribbon and
discard it. Set a new ribbon into
the ribbon cassette. Advance
the ribbon in the direction
shown, leaving no slack.
2. Place the cassette in the
printer with the supply side in
the front.
3. Close the media
compartment drawer.
4. The printer will cycle through the status lights
as the media adjusts. When the media is
ready, four blank test images are printed.
ATTENTION (DS80DX ONLY):
Due to two different paper supplies (rolled
simplex and sheeted duplex paper) the printer
ribbon will run out before the paper. For ONLY
DS80DX printers, it is advised to change the
ribbon and paper as necessary, and not at the
same time.
Replacing the Duplex Sheet Paper
1. Remove the slide ramp from the printer.
2. Gently remove
the scrap box
by lifting the box up
and away from the
turning unit.
3. Use the handle to
pull the paper tray out of
the turning unit.
4. Throw away any left over
paper.
5. Verify that the silver
paper lift and white
paper guide tab are in
the correct positions and seated properly.
6. Locate the
new sheet
paper pack.
7. Place the
paper pack in
the paper tray, making sure that the top and
bottom protective sheets are in place.
8. Seat the paper guide against the paper taking care no to bend the paper.
9. Replace the paper tray in the turning unit,
seating it completely in the turning unit.
10. Replace the scrap box by aligning notches on
the bottom of the box with the grooves in the
turning unit housing.
11. Replace the slide ramp on the printer so that
the paper feeds into the paper catchers.
Page 4

DS-Series™ Printer Quick Reference
DS80DX Printers Troubleshooting
LED Displays
Use the blinking LEDs in conjunction with the
system messages to pinpoint problems with the
printer, such as paper jams, ribbon errors, open
printer doors, etc.. If a problem persists, call
Technical Support.
Fixing Simplex Paper Jams
1. Open the printer.
2. Remove the ribbon cassette by pulling it up
and out.
3. Pull any paper remaining in the direction
indicated and cut off the excess evenly with
scissors.
4. Remove the scrap box and rewind the paper.
Cut off any partially printed, wrinkled or
otherwise inferior paper evenly with scissors.
NOTE:
Make sure you cut the paper as evenly as
possible. Failure to do so
can result in another paper
jam.
5. Advance the paper so that the paper is
feeding into the printer from the bottom of
the paper compartment. The printer beeps
when the paper is in the
correct position.
6. Replace the scrap bin,
and close the top of the
paper compartment.
7. Close the paper and
media compartment drawer.
8. The printer will cycle through the lights as
it adjusts the media. When the media is
aligned, four blank test images are printed.
Fixing a Ribbon Tear
1. Open the media compartment drawer.
2. Remove the ribbon
cassette.
3. Cut the ribbon. Carefully
remove any remaining
ribbon from inside the
mechanism.
4. Reattach the ribbon
using cellophane tape, as
shown.
5. Advance the ribbon several
times towards the take-up
spool until the tape is no
longer showing.
6. Make sure there is no slack
in the ribbon. Replace the
cassette in the printer.
ATTENTION:
Make sure the ribbon is placed in correctly.
The media compartment drawer will not close if
placed improperly.
7. Close the media compartment drawer. The
printer will re-initialize.
ATTENTION (DS80DX ONLY):
Due to two different paper supplies (rolled
simplex and sheeted duplex paper) the printer
ribbon will run out before the paper. For ONLY
DS80DX printers, it is advised to change the
ribbon and paper as necessary, and not at the
same time.
DNP Imagingcomm America Corporation 4 Release: v01.2017
© 2017. All rights reserved. PN: 35-260-2-SA
Page 5

DS-Series™ Printer Quick Reference
DS620A & DS820A Printers
Installing the Paper
1. Pull out the media compartment drawer by
lifting the handle under the scrap box and
pulling gently.
2. Release the paper compartment release
lever.
3. Remove the scrap box. Set
it aside.
4. Remove the paper roll from
the printer.
5. Remove the spools ends
from the paper roll by pulling gently on the
spools until they come off.
6. Set the spools into a new roll of paper.
ATTENTION:
Be sure there is no gap between the paper and
the spools. Failure to set correctly can result in
paper jams.
7. Set the paper into the paper compartment.
Make sure the paper roll is seated so that the
leading edge of the paper roll is coming over
the top of the paper roll and feeding into the
paper compartment from the bottom.
8. Remove the seal on the paper.
9. Advance the paper
so that the paper is
feeding into the printer
from the bottom of the
paper compartment.
The printer beeps
when the paper is in
the correct position.
10. Replace the scrap bin, and close the top of
the paper compartment.
11. Close the paper compartment.
ATTENTION:
The printer will not operate without the scrap bin
in place.
Installing a New Ribbon
1. Remove the old ribbon from the printer and
discard it.
2. Set a new ribbon into the ribbon cassette.
3. Advance the ribbon in the
direction shown, leaving
no slack.
4. Place the cassette in the
printer with the supply
side in the front.
5. Close the media compartment drawer.
6. The printer will cycle through the lights as
it adjusts the media. When the media is
aligned, four blank test images are printed.
NOTE:
If you have installed the media and a red error
light is shown on the front of the printer, reseat
the paper and ribbon to clear the error condition.
Fixing a Ribbon Tear
1. Open the media compartment.
2. Remove the ribbon
cassette.
3. Cut the ribbon. Carefully
remove any remaining
ribbon from inside the
mechanism.
4. Reattach the ribbon using
cellophane tape, as shown.
5. Advance the ribbon several times until the
tape is no longer showing.
6. Make sure there is no slack in the ribbon.
Replace the cassette in the printer.
ATTENTION:
Make sure the ribbon is placed in correctly.
7. Close the media compartment drawer. The
printer will re-initialize.
Fixing Paper Jams
1. Pull out the media compartment.
2. Release the paper compartment release
lever.
3. Remove the scrap box. Set it aside.
4. Remove the paper roll
from the printer. Pull
any paper remaining
from the printer.
5. Cut off any partially printed, wrinkled or
otherwise inferior paper evenly with scissors.
6. Replace the paper and feed the paper into
the printer.
7. Replace the scrap box, and close the media
compartment drawer.
8. The printer will cycle through the lights as it
adjusts the media. When the
media is aligned, four blank
test images are printed.
DNP Imagingcomm America Corporation 5 Release: v01.2017
© 2017. All rights reserved. PN: 35-260-2-SA
Page 6

DS-Series™ Printer Quick Reference
DS620A & 820A Printers
LED Displays
Use the blinking LEDs in conjunction with the
system messages to pinpoint problems with the
printer, such as paper jams, ribbon errors, open
printer doors, etc.. If a problem persists, call
Technical Support.
Cleaning the Printer
If printer is overheating regularly, you may need
to clear the ventilation area of the printer.
1. Gently maneuver the printer towards you,
supporting it on both sides.
2. When you can reach
behind the printer,
disconnect any
cables.
3. Turn the printer
so the back of the
printer is facing you.
4. Remove any dust from the ventilation area
of the printer usin a dust cloth or hand-held
vacuum.
5. Reconnect the cables to the printer, and
place it back.
For Technical Support
For technical support or to order media:
Phone:
1-855-367-7604
Outside the US:
(724) 696-89575
Email:
dnpsupport@dnp.imgcomm.com
Website:
www.dnpimagingcomm.com
or
www.dnpphoto.com
DNP Imagingcomm America Corp.
4524 Enterprise Dr. NW
Concord NC 28027
All particulars of the product and its use contained in the document are provided by DNP
Imagingcomm America Corporation (DNP IAM) in good faith. All warranties implied or
expressed, including but not limited to implied warranties of merchantability, or tness of
purpose, are excluded. Neither the whole nor any part of the information contained in, or
ATTENTION:
the product described in, this document may be adapted or reproduced in any material
Paper and ribbon spools for the DS620A printer
Tomo™, Hot Folder Print™, PrintCenter™, DS-Series Printers™, and PrintTurbine™ are
is designed to run out at the same time.
Always replace paper and ribbon cassettes
together.
Copyright © DNP Imagingcomm America Corporation 2004 - 2015. All rights reserved.
DNP Imagingcomm America Corporation 6 Release: v01.2017
© 2017. All rights reserved. PN: 35-260-2-SA
form without the prior written authorization of DNP IAM.
trademarks and NexLab® is a registered trademark of
DNP Imagingcomm America Corporation.
PrintRush® and Party Print® are registered trademarks of
Other product names and companies mentioned herein are the
Dai Nippon Printing Company LTD.
trademarks of their respective owners.
 Loading...