

Page 1
Section 3 - Conguration
Wi-Fi Settings
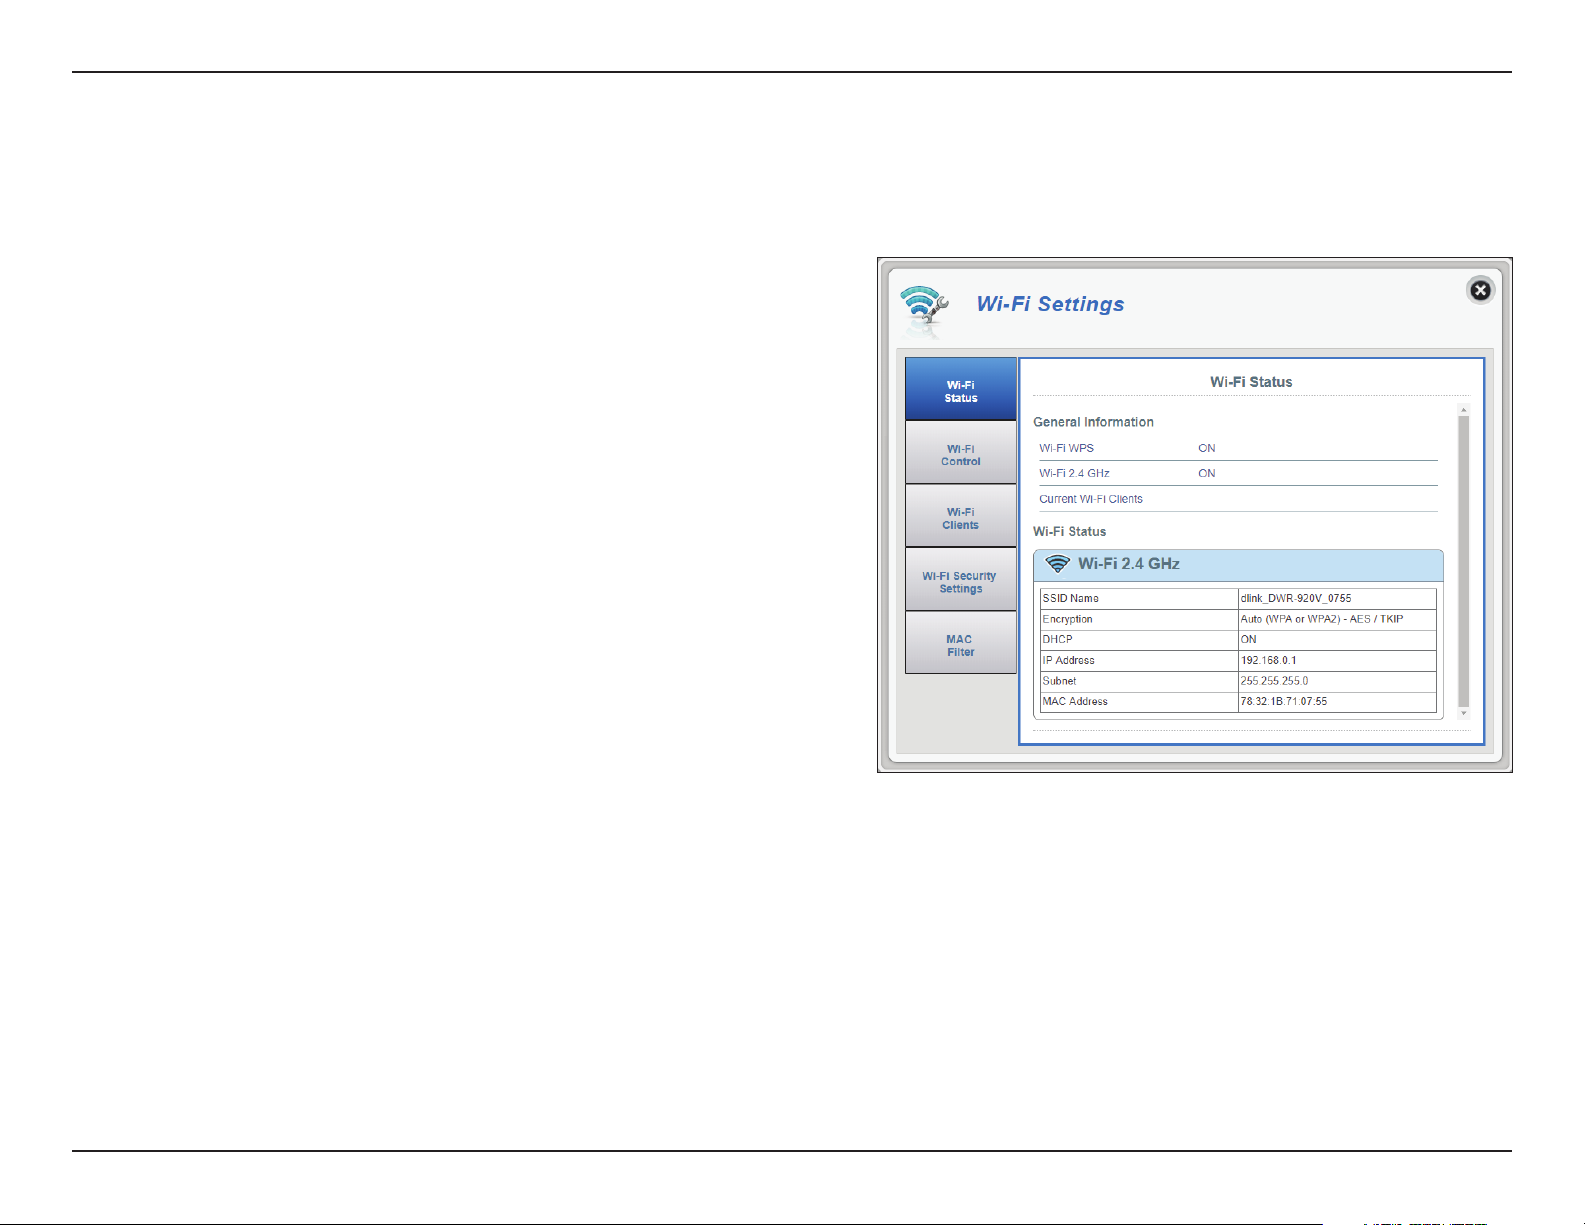
Wi-Fi Status
This page displays your current Wi-Fi status and Wi-Fi settings.
General Information
Wi-Fi WPS
Wi-Fi 2.4 GHz
Current Wi-Fi Clients
Wi-Fi Status
SSID Name
Encryption
IP Address
Subnet
DHCP
Displays whether Wi-Fi Protected Setup (WPS) is
enabled and the conguration method used.
Displays whether Wi-Fi is enabled.
Displays the number of clients connected to your Wi-Fi
network.
Displays the name of your Wi-Fi network.
Displays your current Wi-Fi security encryption mode.
Displays whether DHCP server is enabled.
Your router’s IP address.
Your router’s subnet mask.
MAC Address
Your router’s MAC address.
35D-Link DWR-920V User Manual
Page 2
Section 3 - Conguration
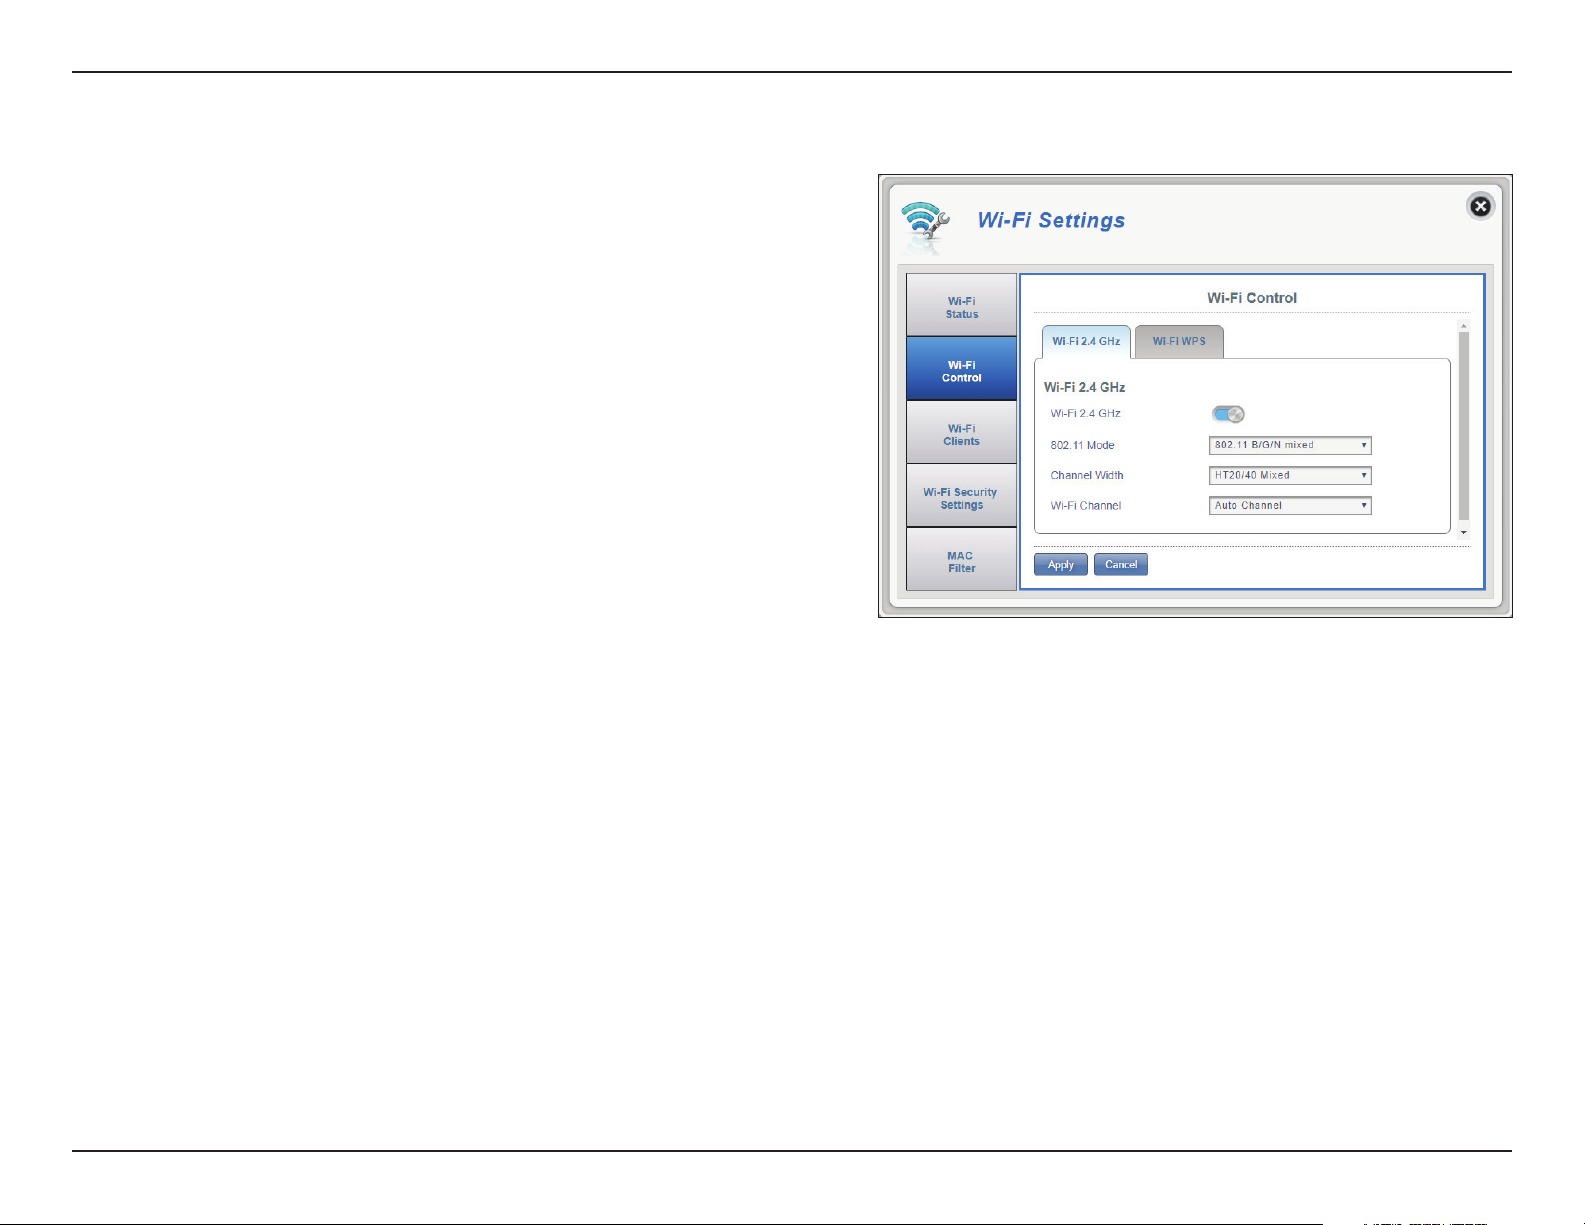
Wi-Fi 2.4 GHz
Wi-Fi Control
Wi-Fi 2.4 GHz
802.11 Mode
Channel Width
Wi-Fi Channel
Toggle the switch to enable/disable Wi-Fi functionality
on your router.
The type of Wi-Fi connection currently being accepted by
the router. Select 802.11 N Only for best performance
or 802.11 B/G/N Mixed for broadest compatibility.
B/G/N Mixed is the default setting.
The current channel width being used by your router. A
wider 40 Mhz channel may increase performance but
could cause interference with other Wi-Fi devices. This
router will automatically reduce to 20 Mhz if inter ference
is detected. Choose HT20 if you have devices that do not
support 40 Mhz channels.
Choose the clearest channel to help optimize the
performance and coverage of your wireless network. By
default the channel is set to Auto Channel. This can be
changed to t the channel setting for an existing wireless
network or to customize your wireless network. Note that
not all channels are available in all regions. If you cannot
see your SSID from your device, try manually setting a
low-numbered channel.
Click Apply to save changes.
36D-Link DWR-920V User Manual
Page 3
Section 3 - Conguration
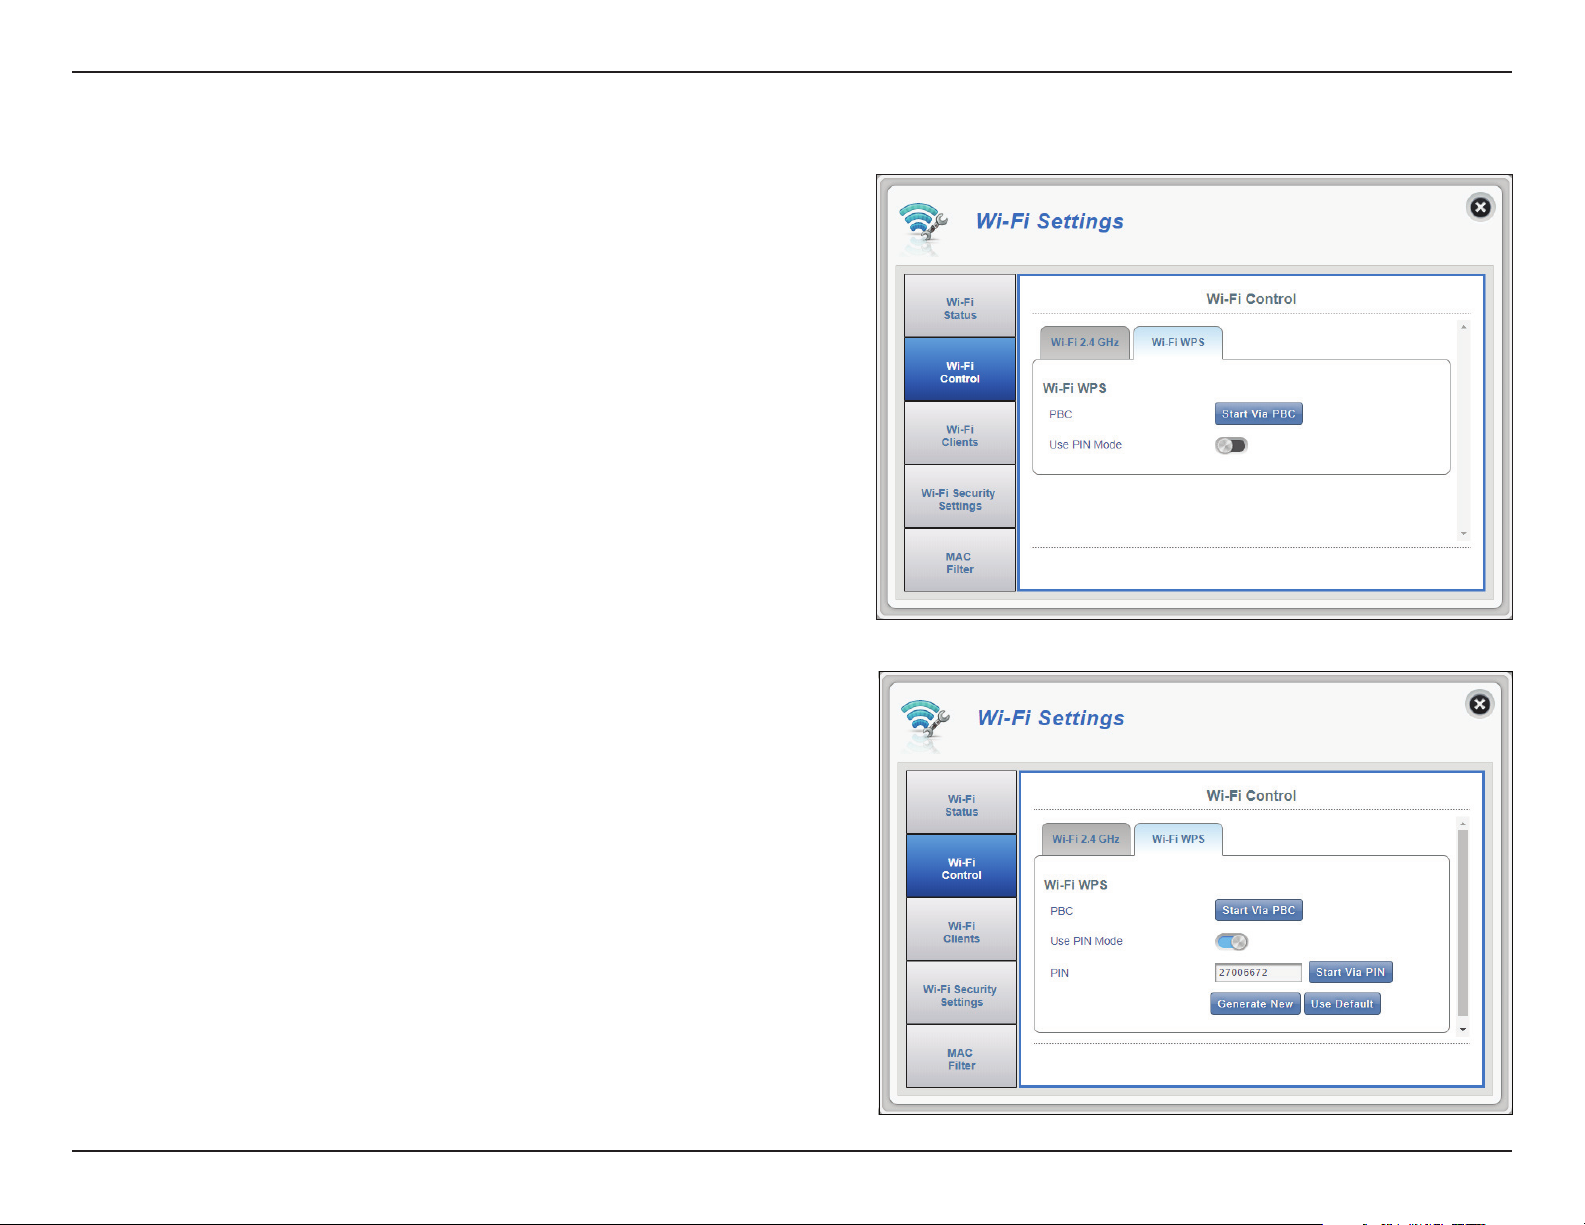
Wi-Fi WPS
PBC
Use PIN Mode
PIN
Push Button Conguration (PBC) enables you to easily
connect your devices to the DWR-920V by pushing a PBC
button on both devices. Press your device’s PBC button
and then click Start Via PBC, to begin the WPS process.
Move the toggle to enable PIN protection for use with
the WPS feature.
Note: WPS PIN Mode is disabled by default. This mode is
less secure and is not recommended. It is retained in this
product for compatibility purposes only.
The PIN is a unique number that can be used to
congure your router. Click Generate New to generate
a new random PIN, or select Use Default to restore
the factory PIN. Note that if the WPS PIN feature is
enabled, using a new PIN is strongly recommended.
Click Apply to save changes.
37D-Link DWR-920V User Manual
Page 4
Section 3 - Conguration
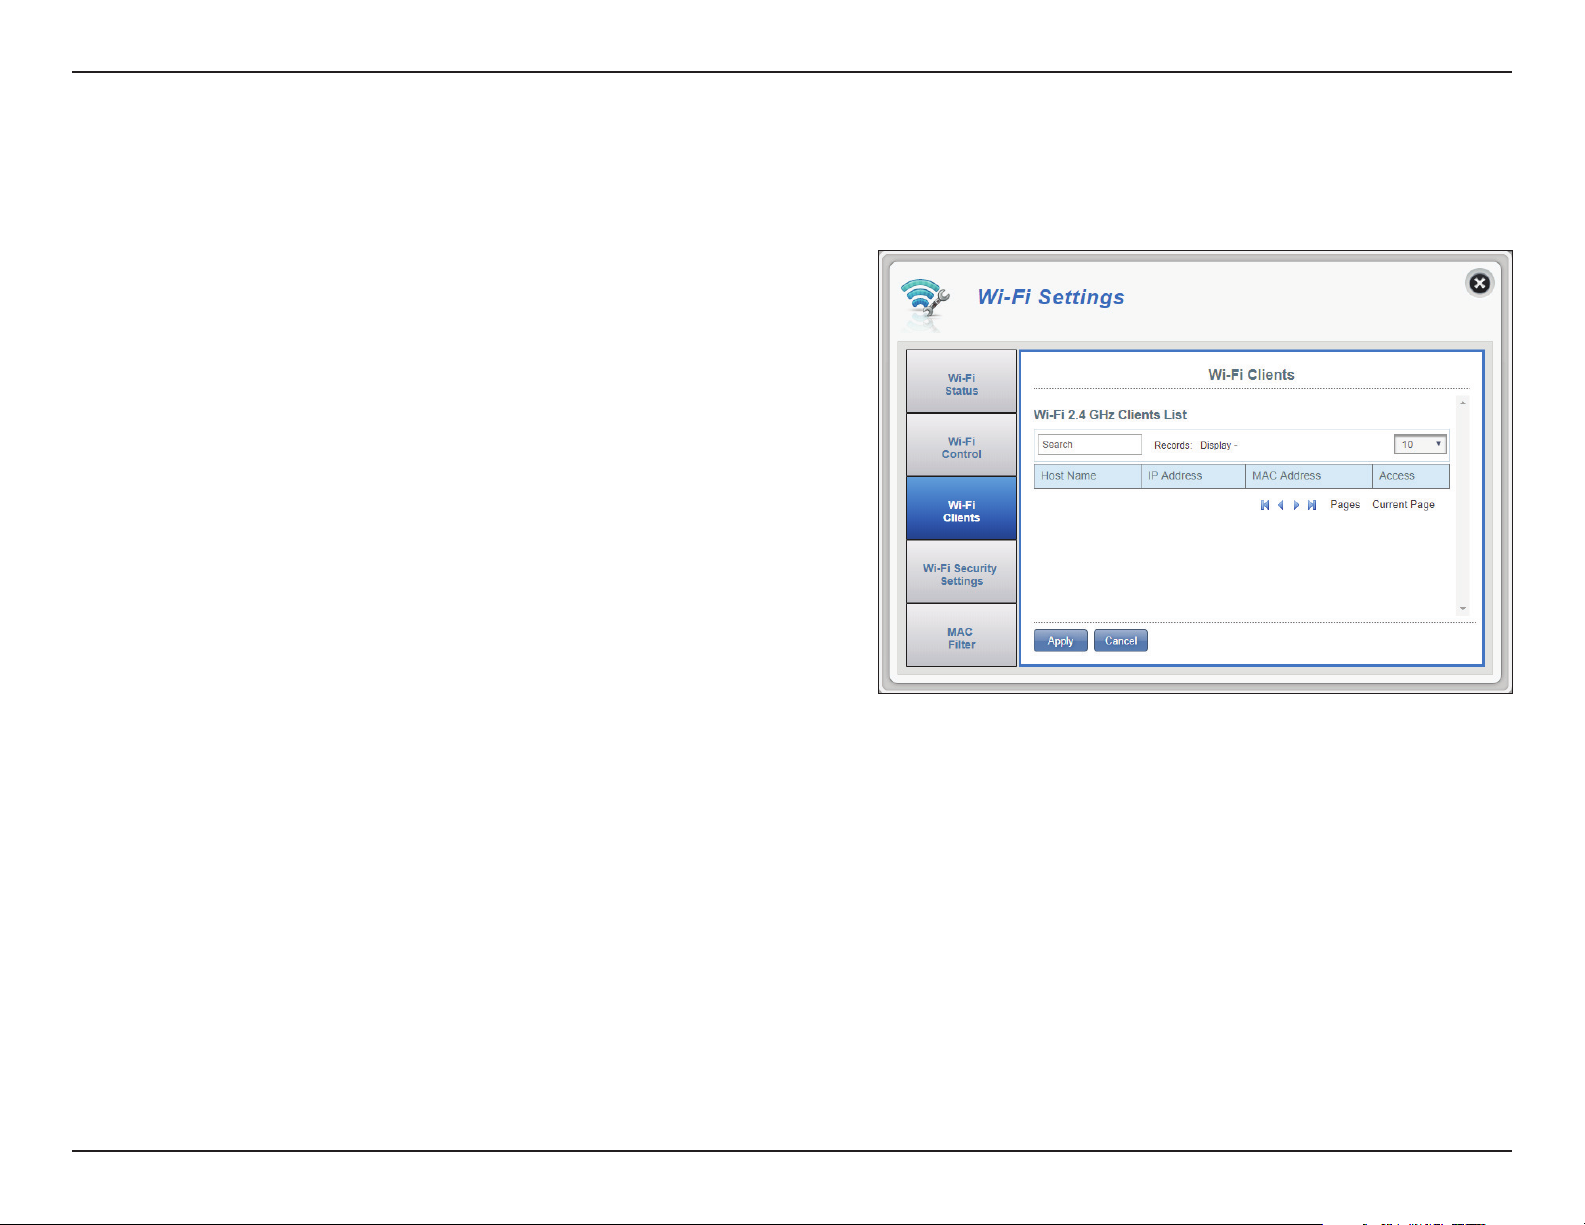
Wi-Fi Clients
This page shows your current client list and allows you to lter clients by host name, IP address and MAC address. This ltering option enables you
to allow or deny access to specic wireless clients.
Wi-Fi 2.4 GHz Clients List
Host Name
IP Address
MAC Address
Access
A unique name for each wireless client that is connected
to your router.
The IP address of the wireless client that is connected
to your router.
The hardware address of the client’s wireless adapter.
Toggle this switch to allow or deny access to specic
clients.
Note: If you deny access to a Wi-Fi client, you will see their
MAC address in the MAC Filter on page 41. If required,
you can re-allow access to the client there.
Click Apply to save changes.
38D-Link DWR-920V User Manual
Page 5
Section 3 - Conguration
Wi-Fi Security Settings
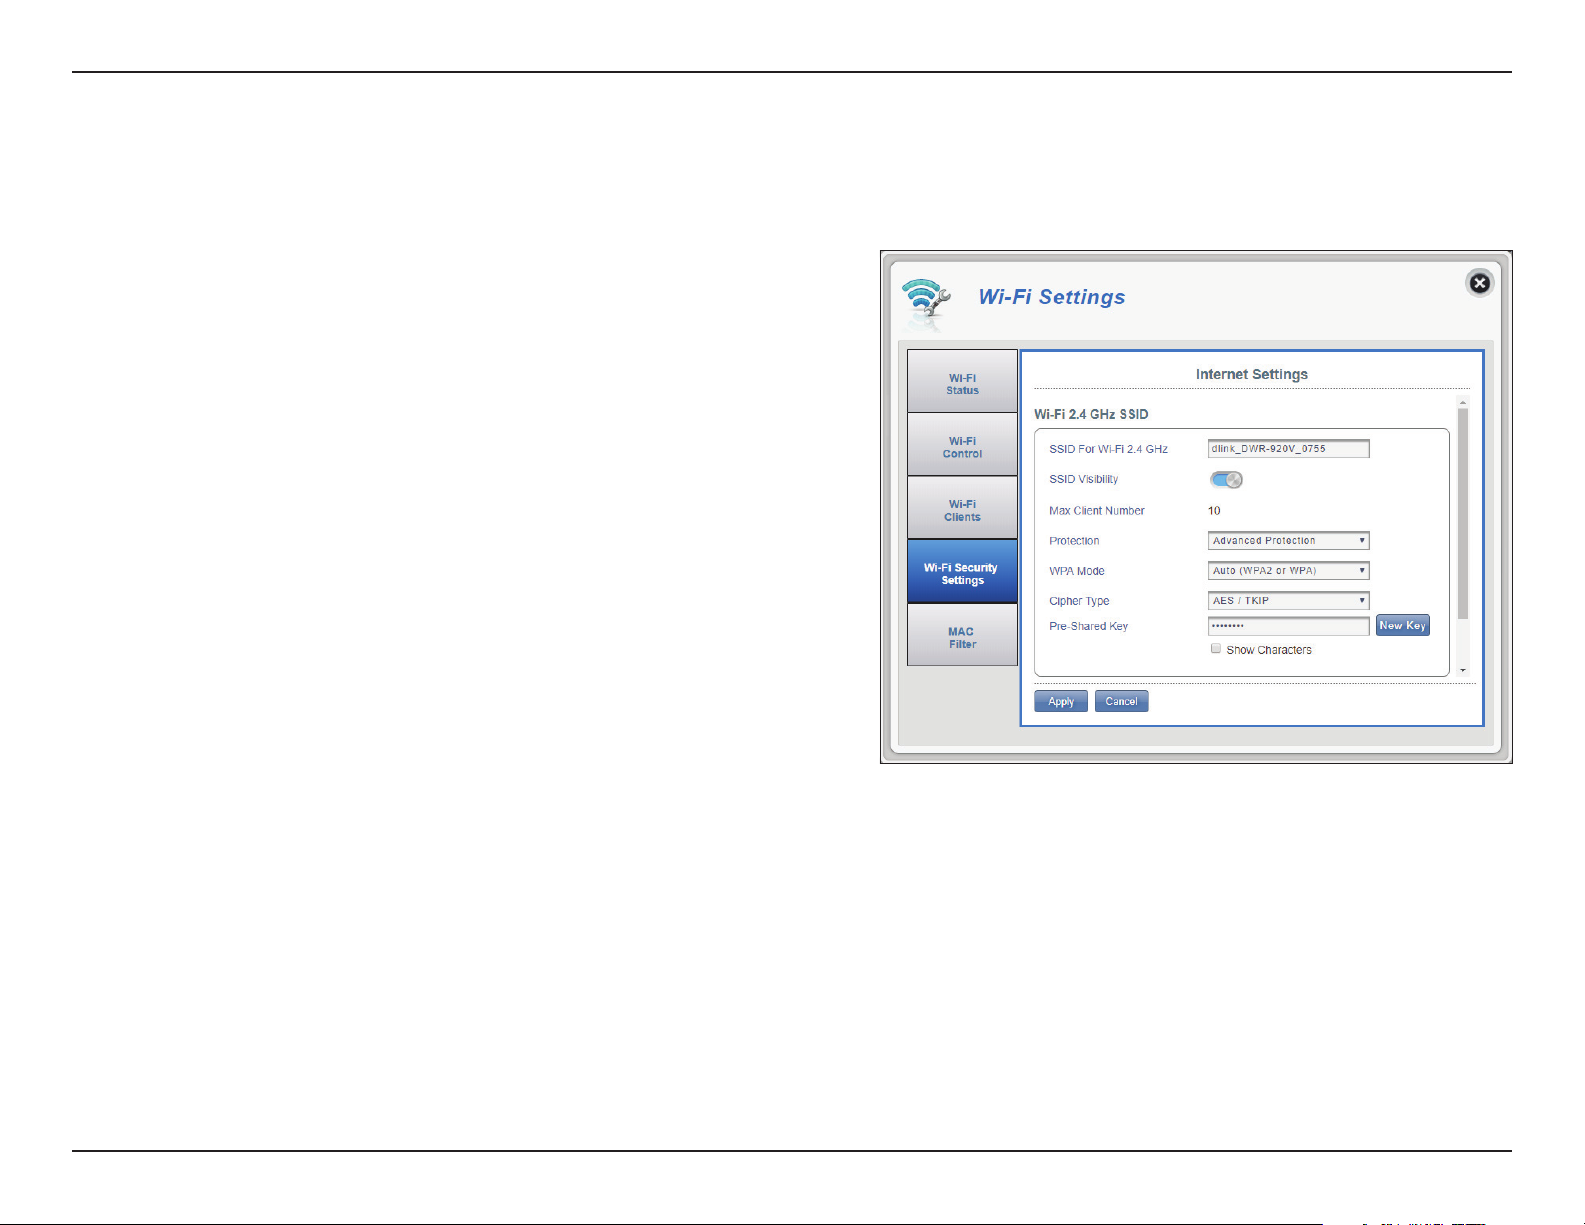
In this page you can view your Wi-Fi security settings, here you can alter things like your SSID name, SSID visibility and access Wi-Fi security features.
Wi-Fi 2.4 GHz SSID
SSID For Wi-Fi 2.4 GHz
SSID Visibility
Max Client Number
Protection
If you selected Advanced Protection:
WPA Mode
Displays the name of your Wi-Fi network. Click in the
box to edit.
Click the toggle to change your SSID visibility to
clients.
The maximum number of clients allowed on your
network.
By default Advanced Protection is selected. You
may also select Basic Protection or No Protection.
Auto (WPA or WPA2) - The router will automatically
determine the version of WPA to be used based on
the client that is connecting to it.
WPA2 - Clients will only be able to associate with
the router using the WPA2 standard. Clients which
do not support WPA2 will not be able to associate
with the router.
39D-Link DWR-920V User Manual
Page 6
Section 3 - Conguration
Cipher Type
Pre-Shared Key
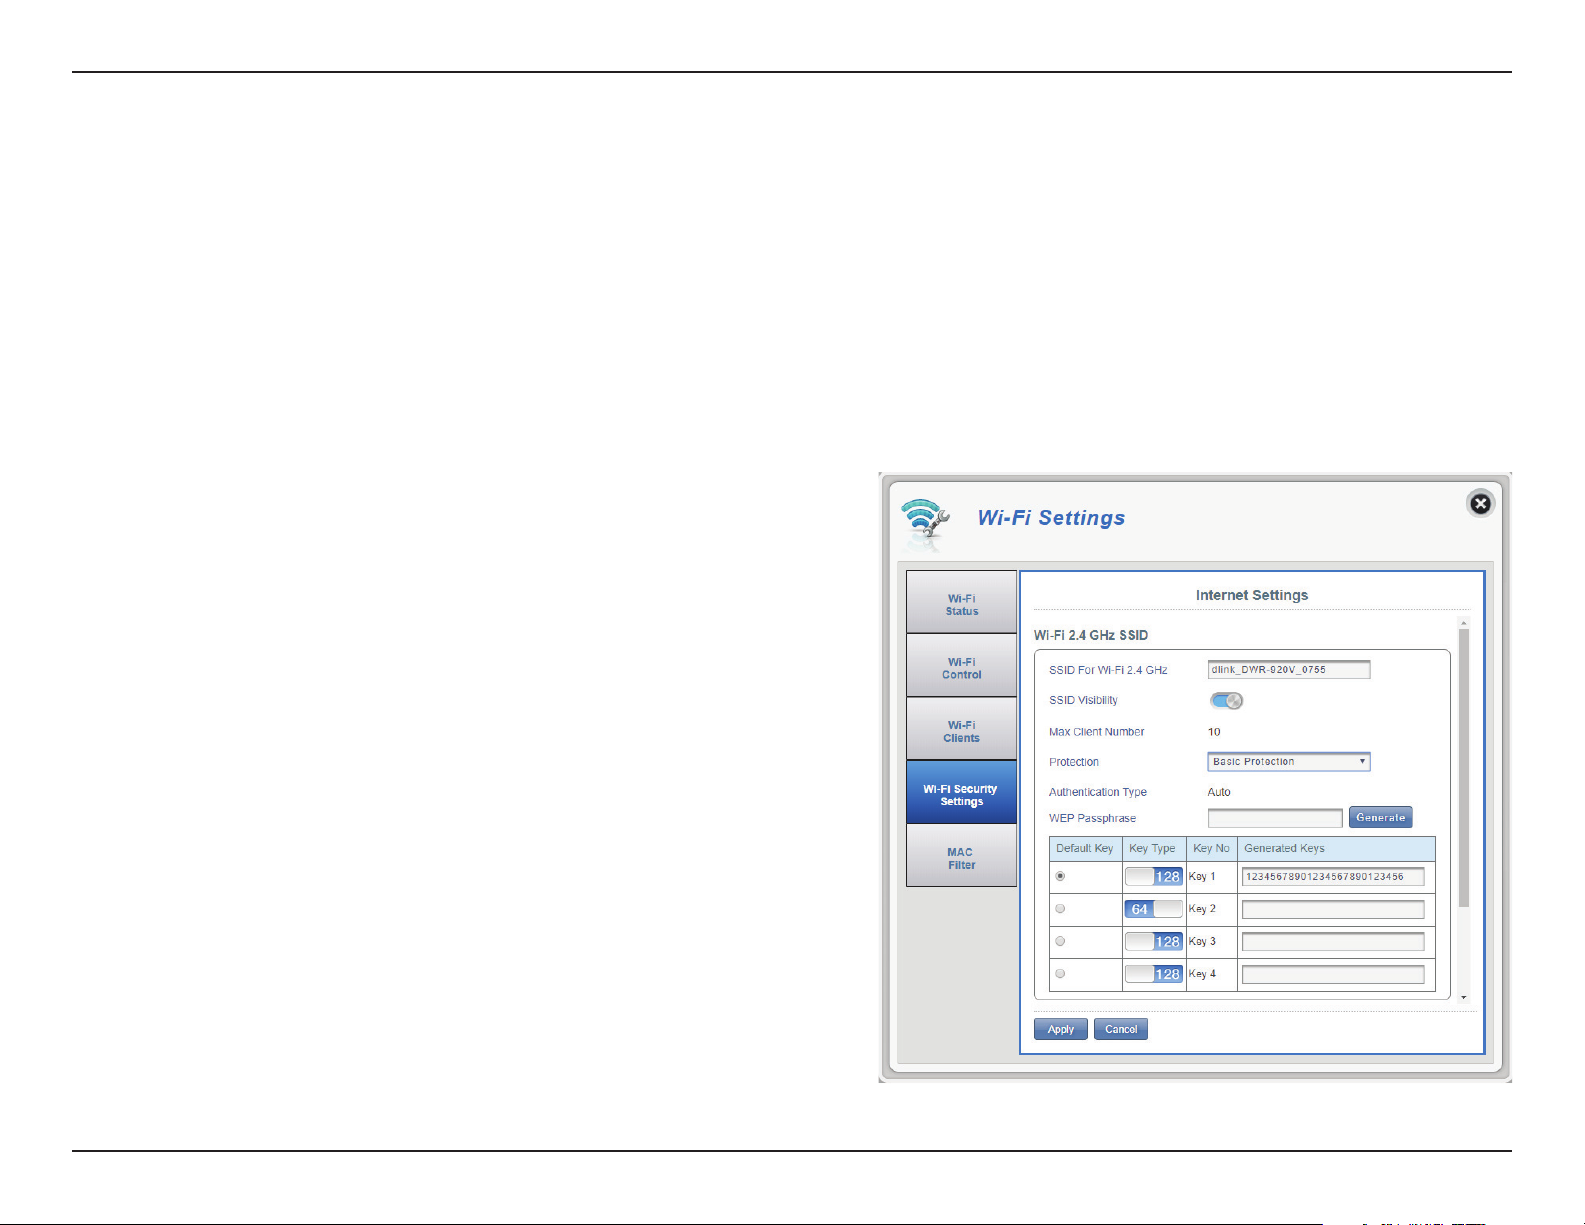
If you selected Basic Protection:
Authentication Type:
WEP Passphrase:
AES - A newer cipher used by the WPA2 standard.
Note: Use of this cipher type is required in order to achieve 802.11n speeds.
AES/TKIP - TKIP is an encryption method commonly used by older devices. Select this option
for greater compatibility with old and new devices.
The pre-shared key is the password which clients require in order to connect to your network.
Enter a password of between 8 and 63 characters in length.
Click Apply to save changes.
Shared - The encryption key used authenticate
wireless client and encrypt data.
Enter your passphrase to be used when connecting
to the router. Once you have entered a passphrase,
click Generate to create keys automatically, or enter
them manually below.
Key 1-4:
You can predetermine up to 4 WEP keys. Select the
WEP key you wish to use by clicking on the radial
buttons next to the keys. Select whether you wish
to use 64 bit or 128 bit characters in your key using
the slider menu. Enter the desired key in the eld
provided.
Click Apply to save the current settings.
40D-Link DWR-920V User Manual
Page 7
Section 3 - Conguration
MAC Filter
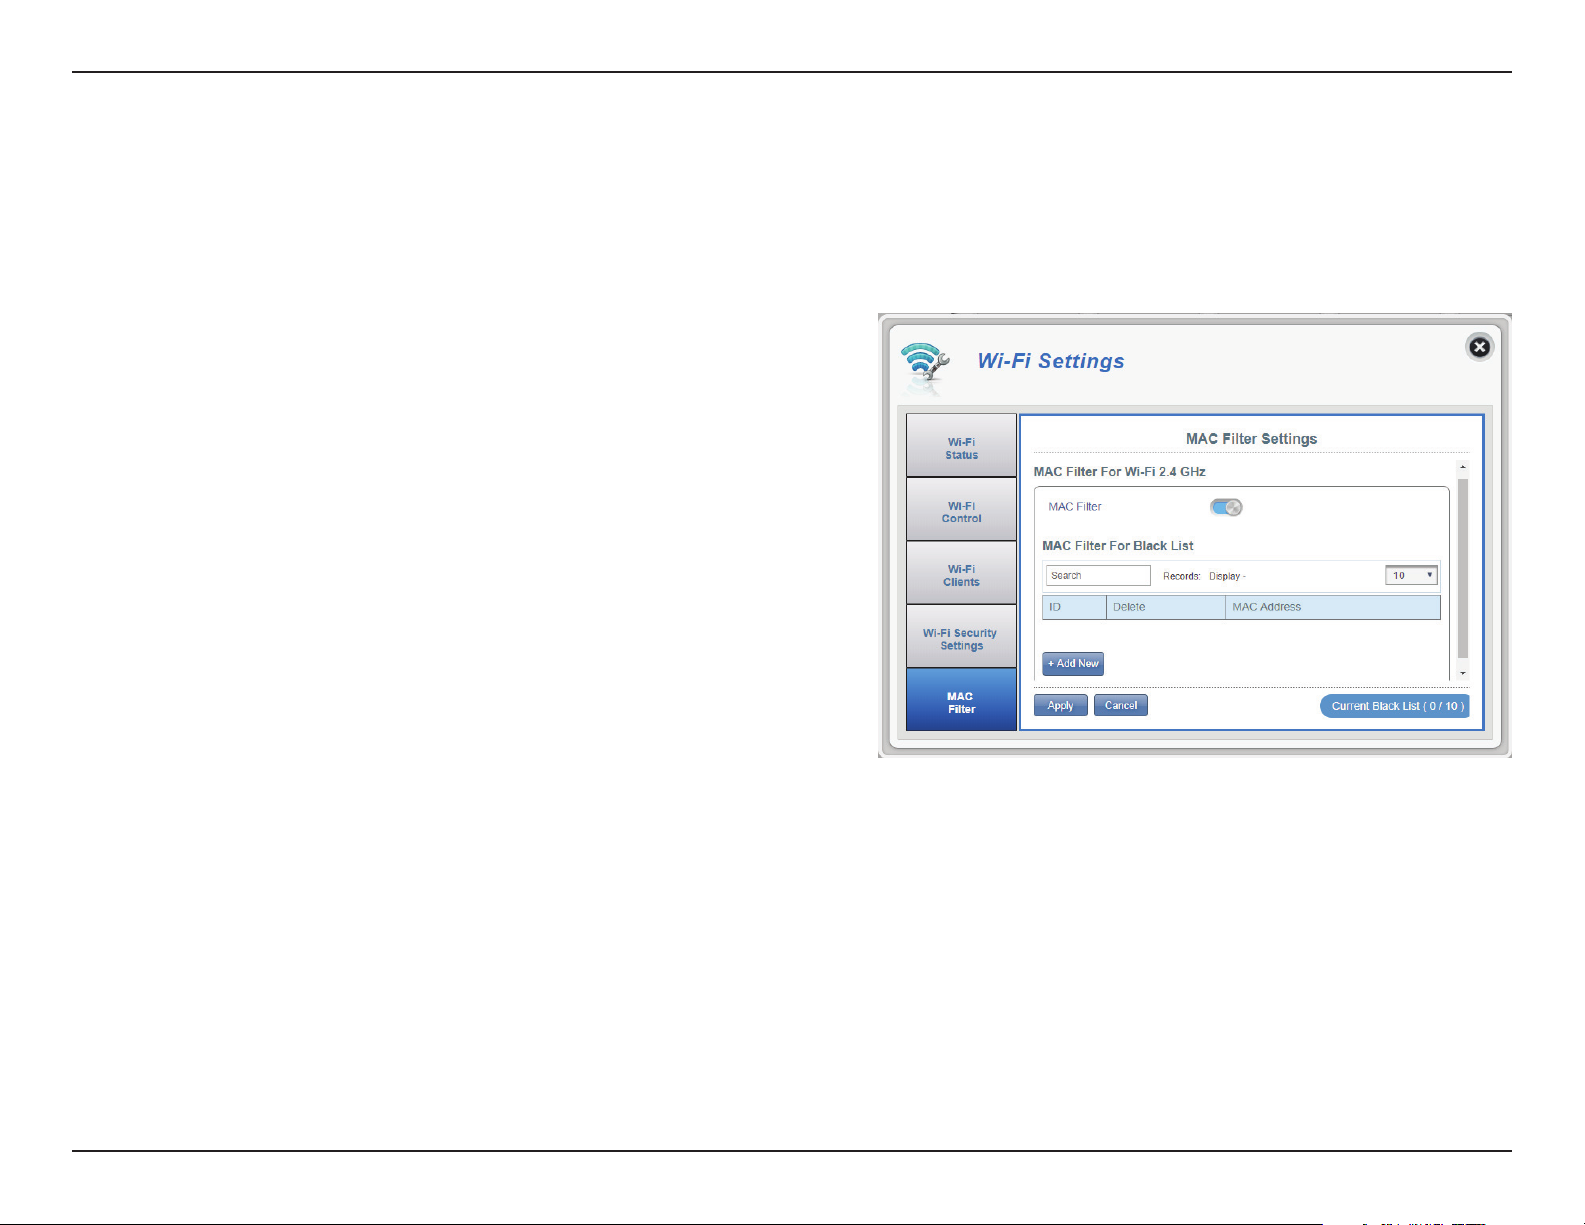
This page allows you to set MAC lters (Media Access Control) which allow or deny LAN (Local Area Network) computers from accessing the network.
A MAC address is a unique ID assigned by the manufacturer for devices that connect to a network. You can either manually add a MAC address or
select the MAC address from the list of clients that are currently connected to the router.
MAC Filter Settings
MAC Filter
MAC Filter For Black
List
ID
Delete
MAC Address
Add New
Toggle this switch to enable/disable the MAC lter.
Here is a list of clients’ MAC addresses that have been
denied access to your network.
ID number given to client blacklisted clients by your
router.
Check this box to delete clients from the black list.
Specify the MAC address of the computer to be
ltered.
Select the Add New button and manually enter the
MAC address of the client that you wish to deny access
to your network.
Note: You can view the current list of clients connected to
your network and their MAC addresses in Wi-Fi Clients
on page 38.
Click Apply to save changes.
41D-Link DWR-920V User Manual
Page 8
Section 3 - Conguration
Applications
Short Messages
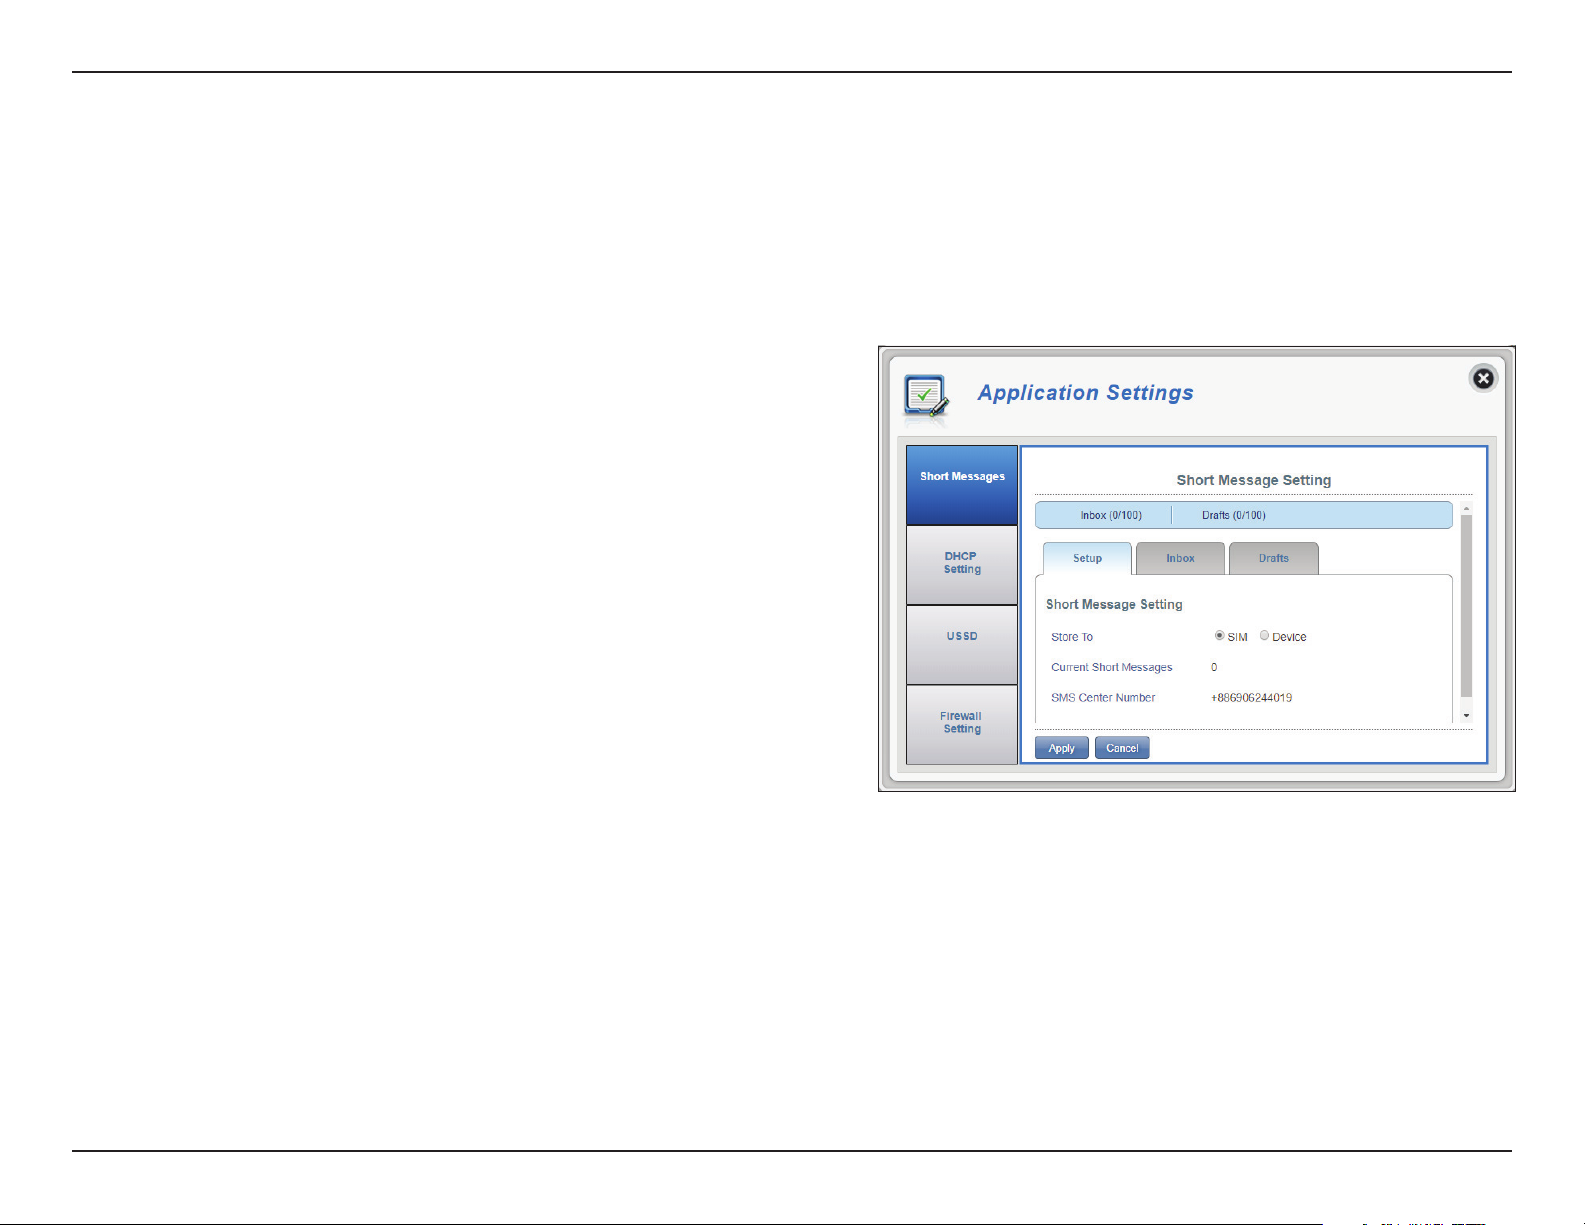
On the Short Messages Settings page you can organize, send and receive Short Message Service (SMS) messages by selecting between a Setup,
Inbox and Drafts tab. These messages can either be saved to the router’s internal memory or on the SIM/UICC card itself.
Setup
Store To
Current Short
Messages
SMS Center
Number
Choose between the location to store contact
numbers, either on your SIM/UICC card or the
DWR-920V device.
The current number of messages received.
Your SIM/UICC card’s contact number.
Click Apply to save changes.
42D-Link DWR-920V User Manual
Page 9
Section 3 - Conguration
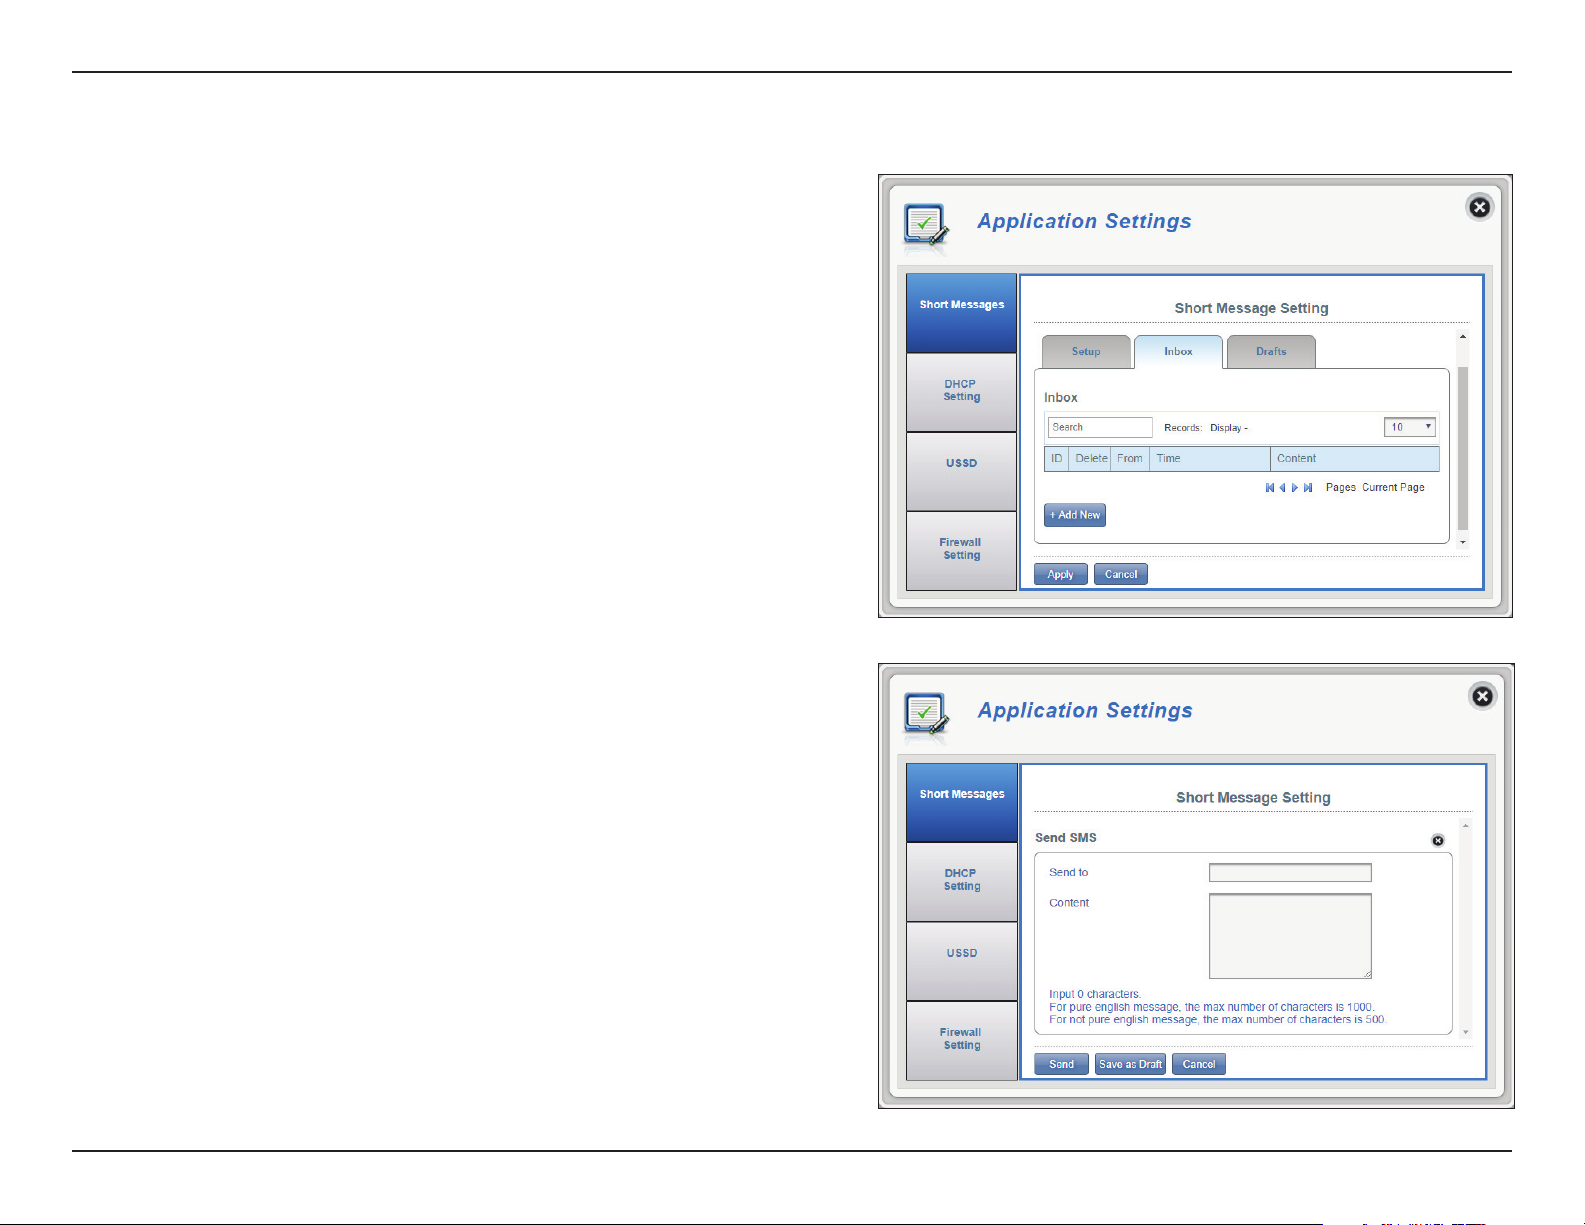
Inbox
ID
A chronological number given to each message you
receive.
Delete
From
Time
Content
Add New
If you clicked Add New:
Send to
Content
Check this box to select and delete a message in
your inbox.
The SMS sender’s number.
The time the message was received.
The SMS message’s content.
Click Add New to send a new message.
Click Apply to save changes.
Enter the phone number of the intended recipient
here.
Type your message content here.
Click Send to send your message. Click Save as Draft
to save the message as a draft and send it later.
43D-Link DWR-920V User Manual
Page 10
Section 3 - Conguration
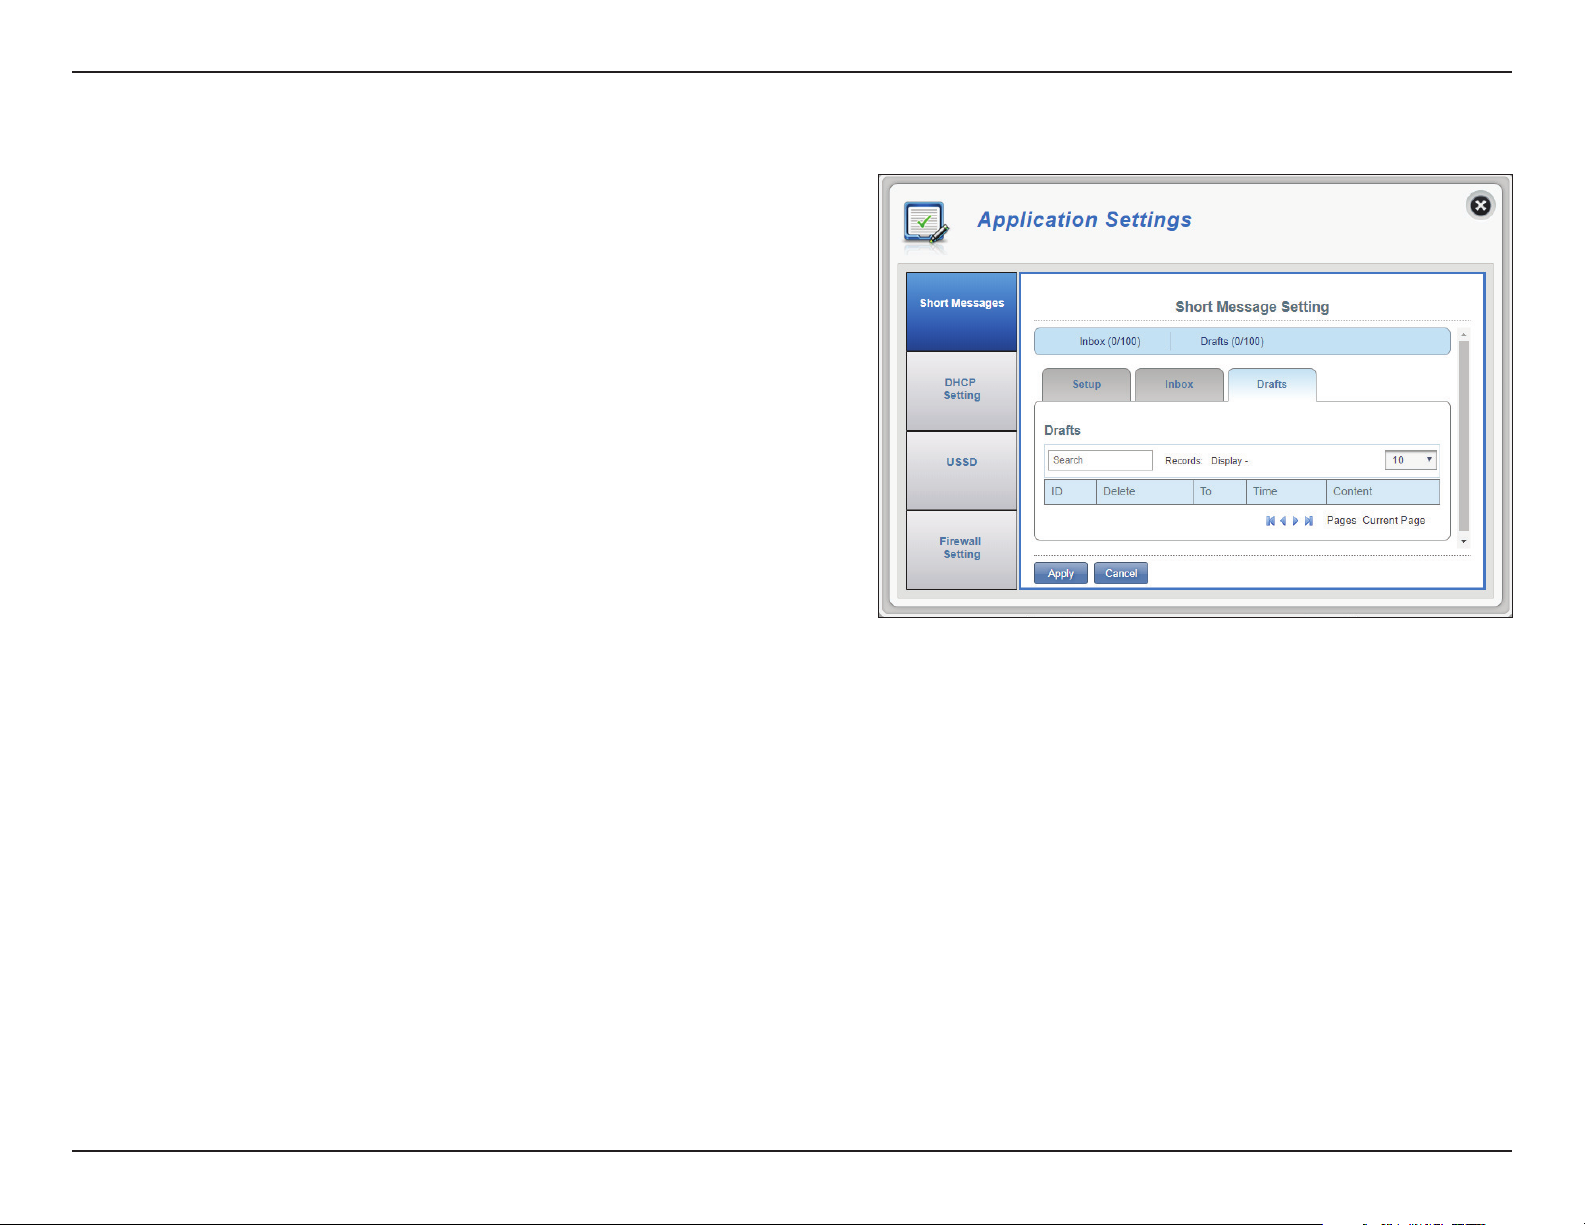
Drafts
ID
A chronological number given to each message you
save to draft.
Delete
To
Time
Content
Check this box to select and delete a message in
your drafts folder.
The SMS recipient’s number.
The time the message was last edited.
The SMS message’s content.
Click Apply to save changes.
44D-Link DWR-920V User Manual
Page 11
Section 3 - Conguration
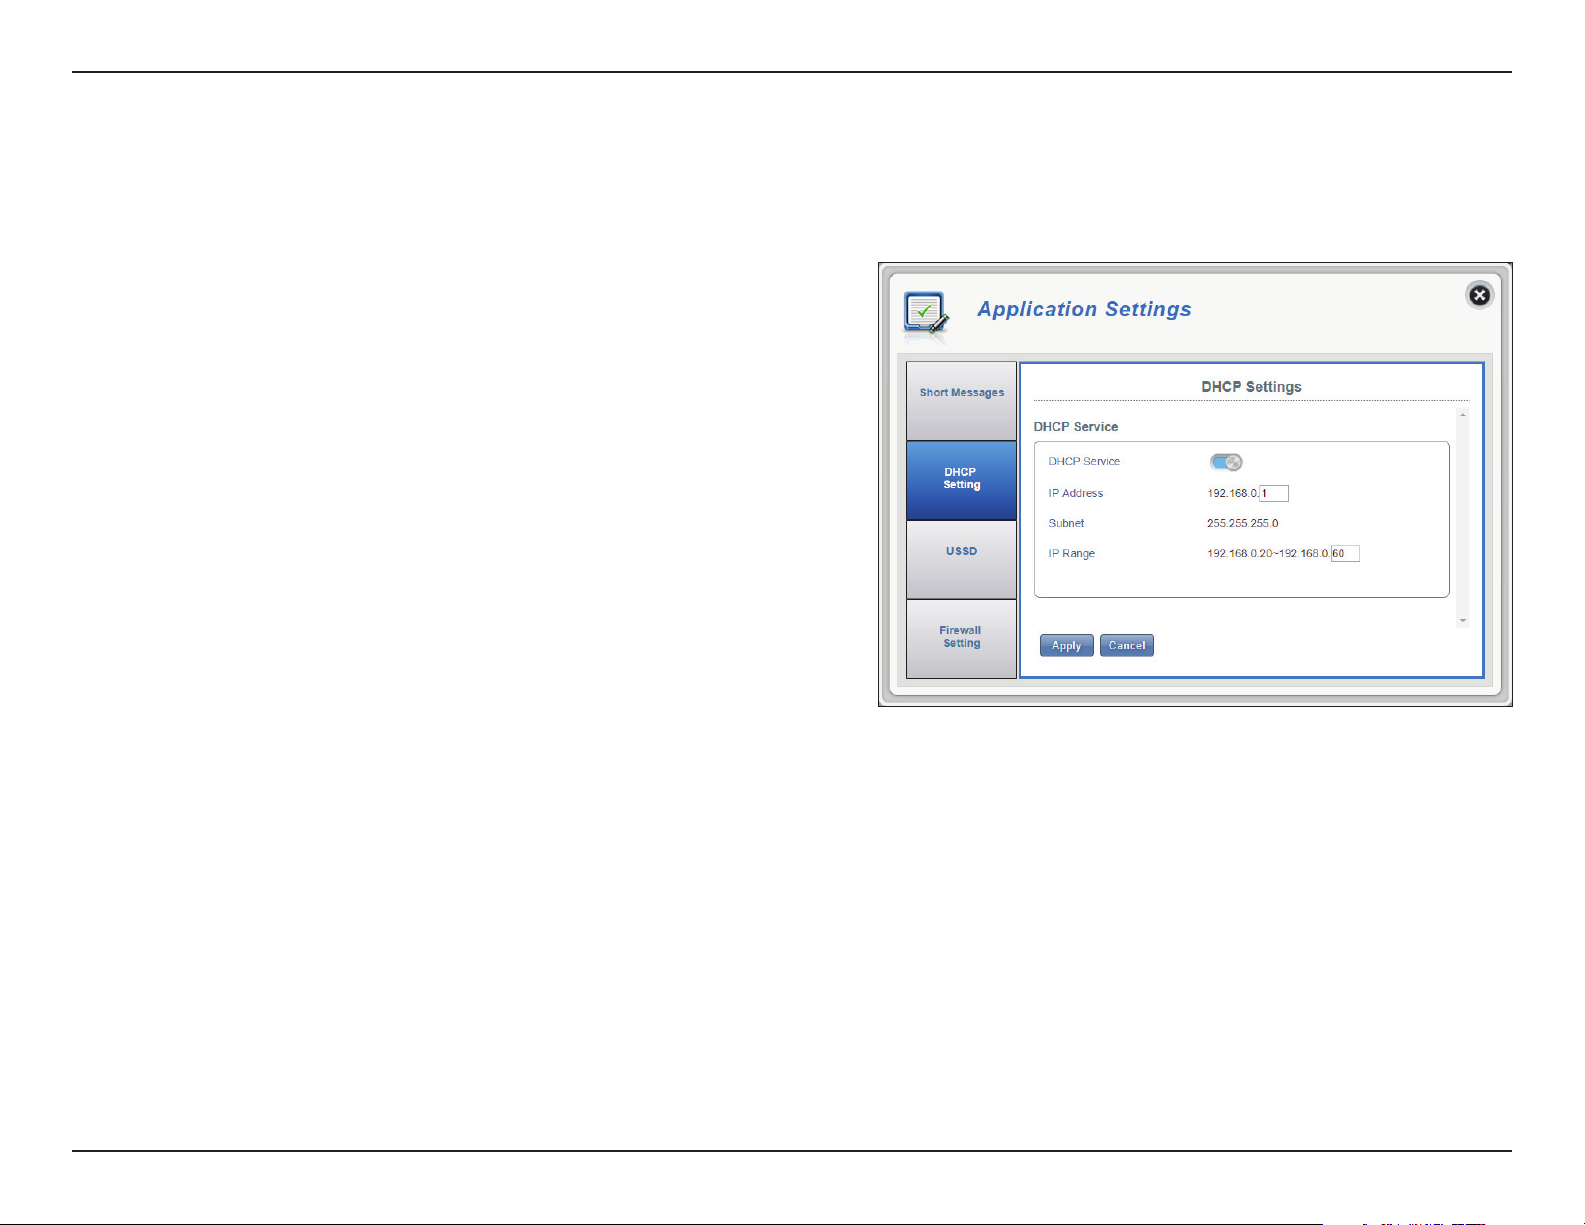
DHCP Setting
Here you can disable or enable your router’s DHCP Service, congure the IP address for the DWR-920V, and set the range of IP addresses assigned
by the DHCP server.
DHCP Service
DHCP Service
IP Address
Subnet
IP Range
Enable or disable the DHCP Service.
Click on the last digit to alter your router’s current IP
address.
The subnet mask that your router is using.
Click on the last digits to alter the range of IP addresses
assigned by the DHCP server.
Click Apply to save changes.
45D-Link DWR-920V User Manual
Page 12
Section 3 - Conguration
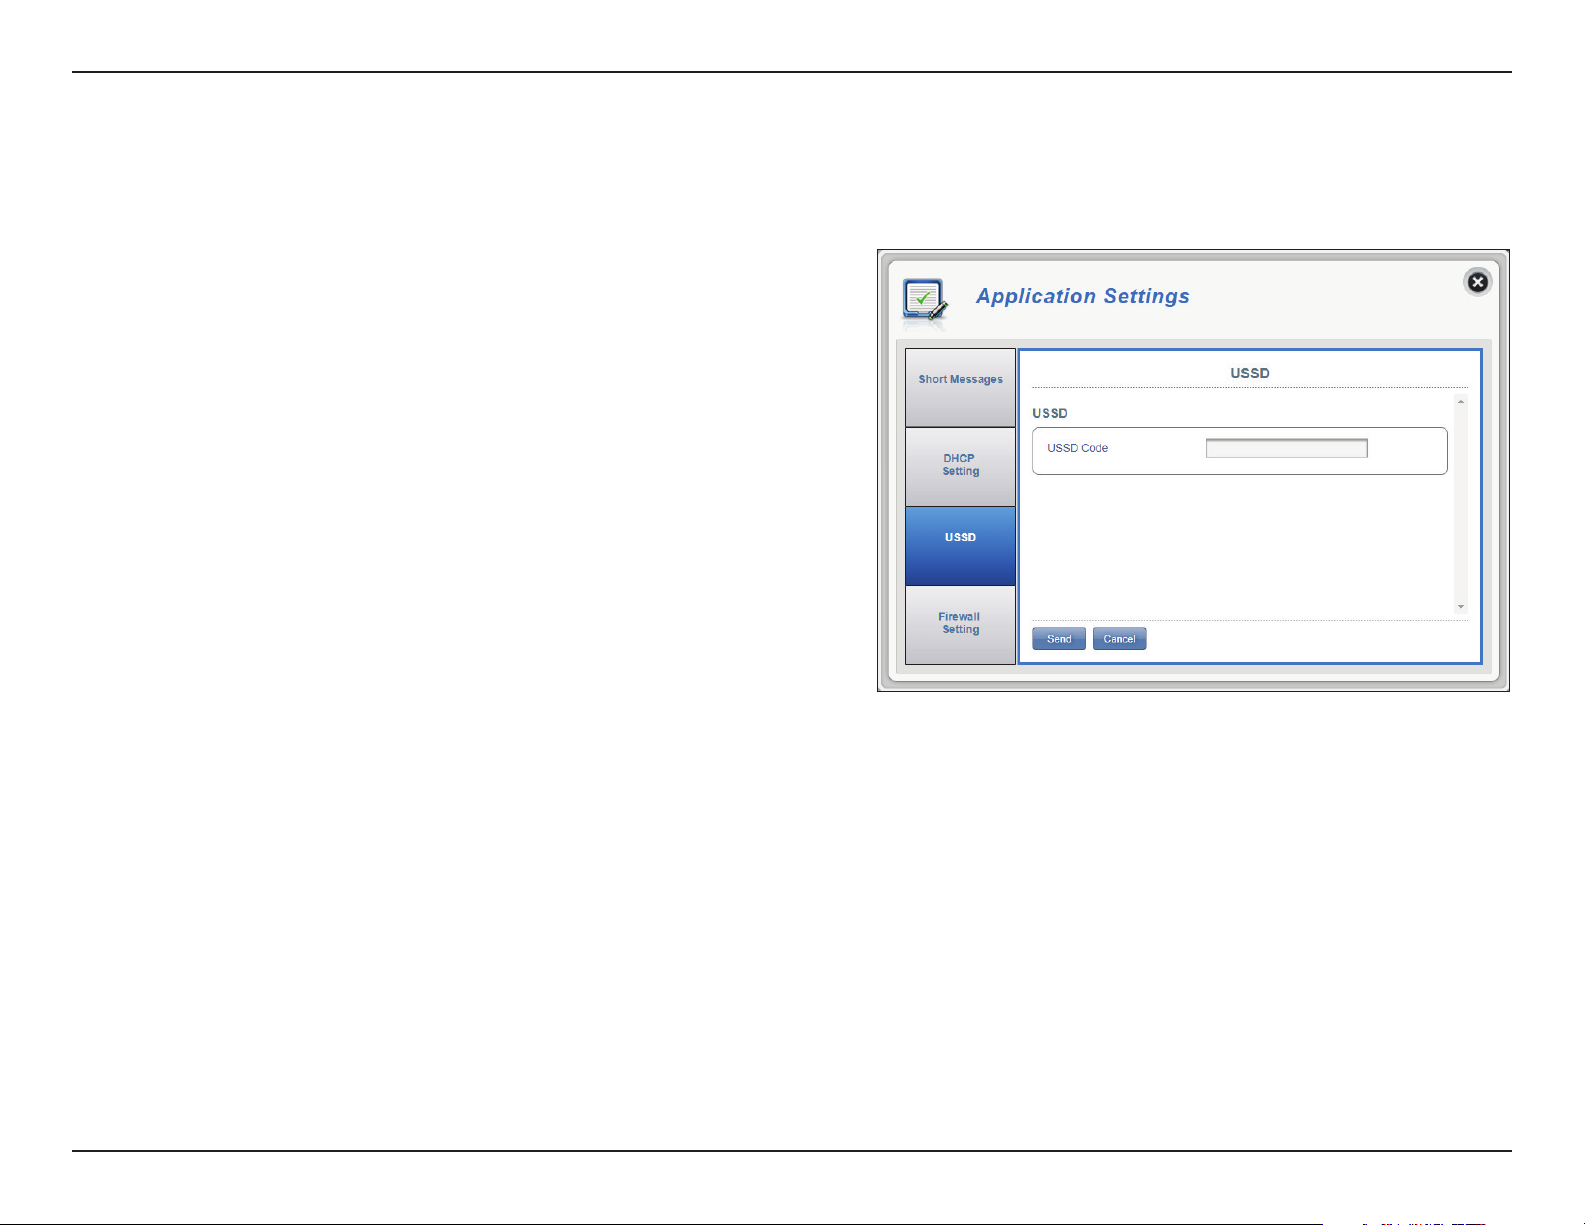
USSD
Unstructured Supplementary Service Data (USSD) allows ISP-specic applications to be activated with an SMS message.
USSD
USSD Code
Enter an application activation code and click
the Send button. This will allow you to activate
applications by sending an SMS to your ISP.
46D-Link DWR-920V User Manual
Page 13
Section 3 - Conguration
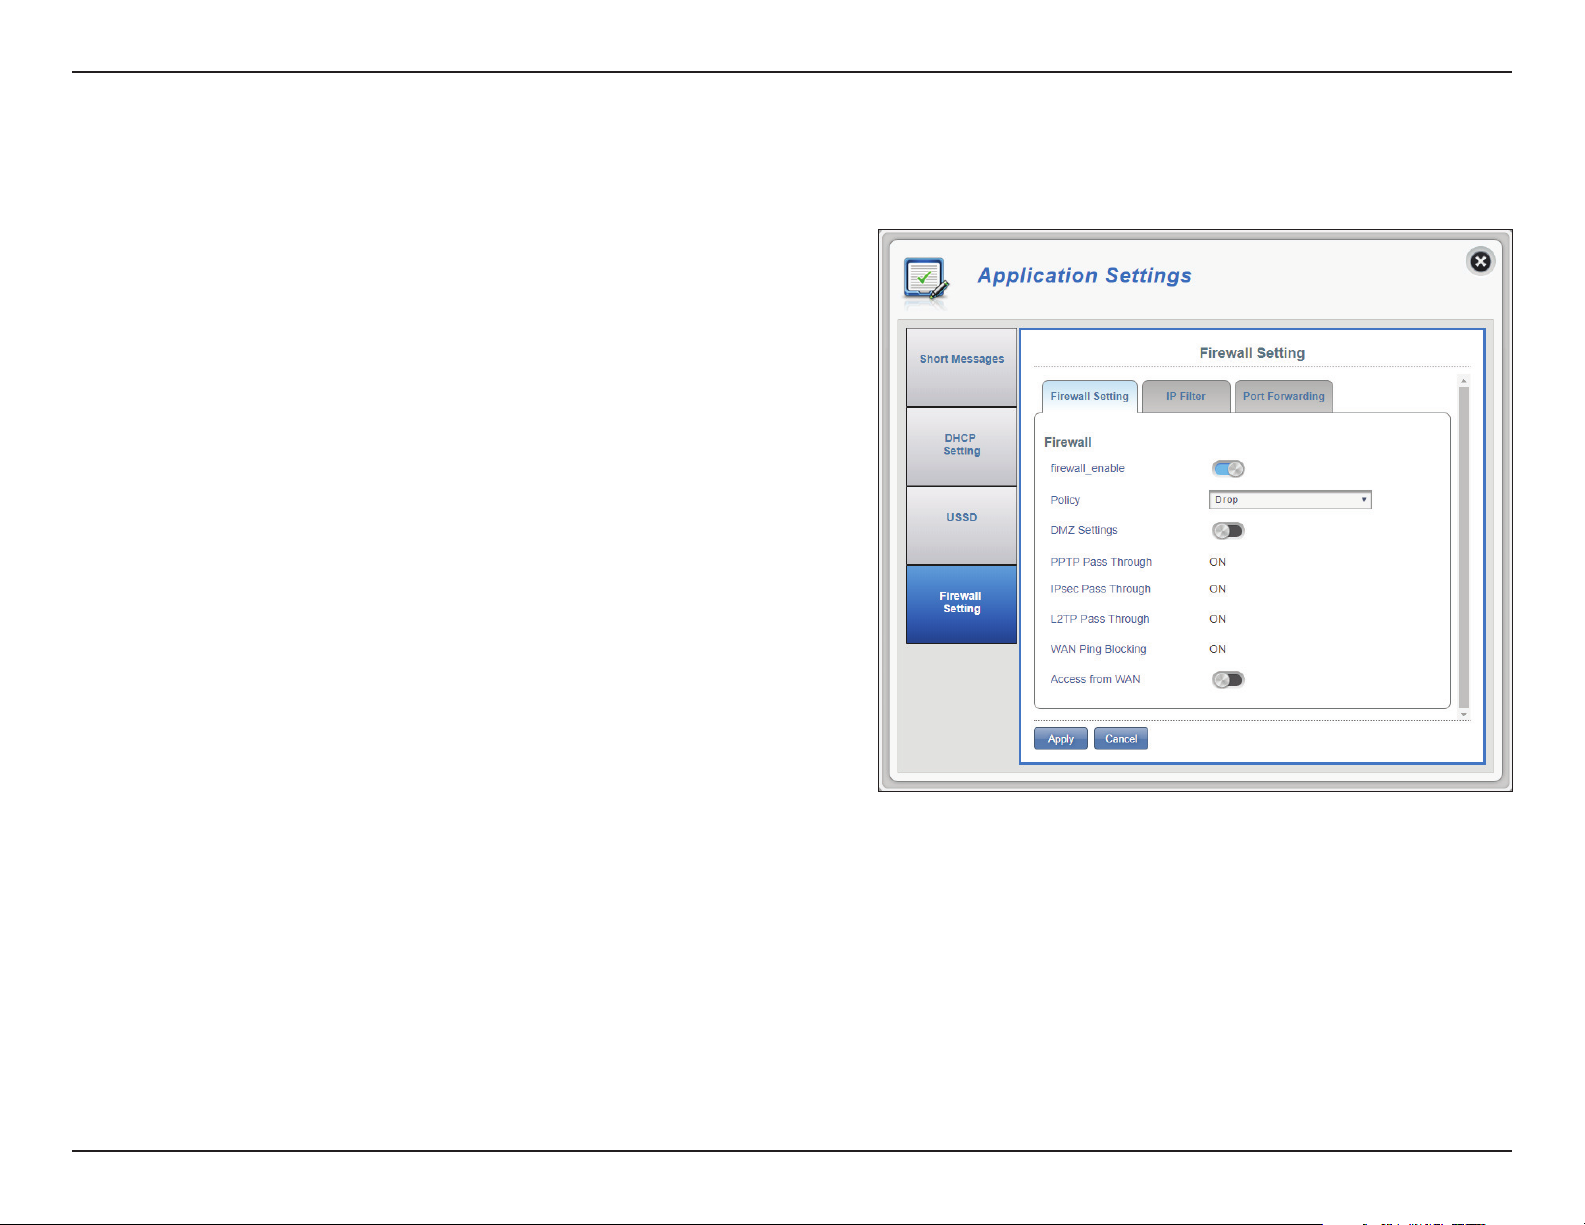
Firewall Setting
A rewall helps protect your network from external cyber attack and intrusions. This page allows you to alter your router’s rewall settings.
Firewall Settings
Firewall Enable
DMZ Settings
PPTP Pass Through
IPsec Pass Through
L2TP Pass Through
Clicking this toggle activates the IP Filter. For more
information see IP Filter on page 49.
Toggling the DMZ (Demilitarized Zone) will expose a
chosen computer to the outside world by completely
disabling all rewalls and routing all inbound trac
to the target IP.
Note: This feature is only recommended for advanced
users. Enabling this option will potentially expose your
computer to attacks over the Internet.
Allows clients to connect to their corporate network
or VPN using the PPTP protocol.
Allows clients to connect to their corporate network
or VPN using the IPsec protocol.
Allows clients to connect to their corporate network
or VPN using the L2TP protocol.
WAN Ping Blocking
Access from WAN
When enabled the DWR-920V will not
respond to pings from WAN.
Clicking this toggle allows access from WAN. This
setting may open your router to external security
threats and is not recommended for most users.
Click Apply to save changes.
47D-Link DWR-920V User Manual
Page 14
Section 3 - Conguration
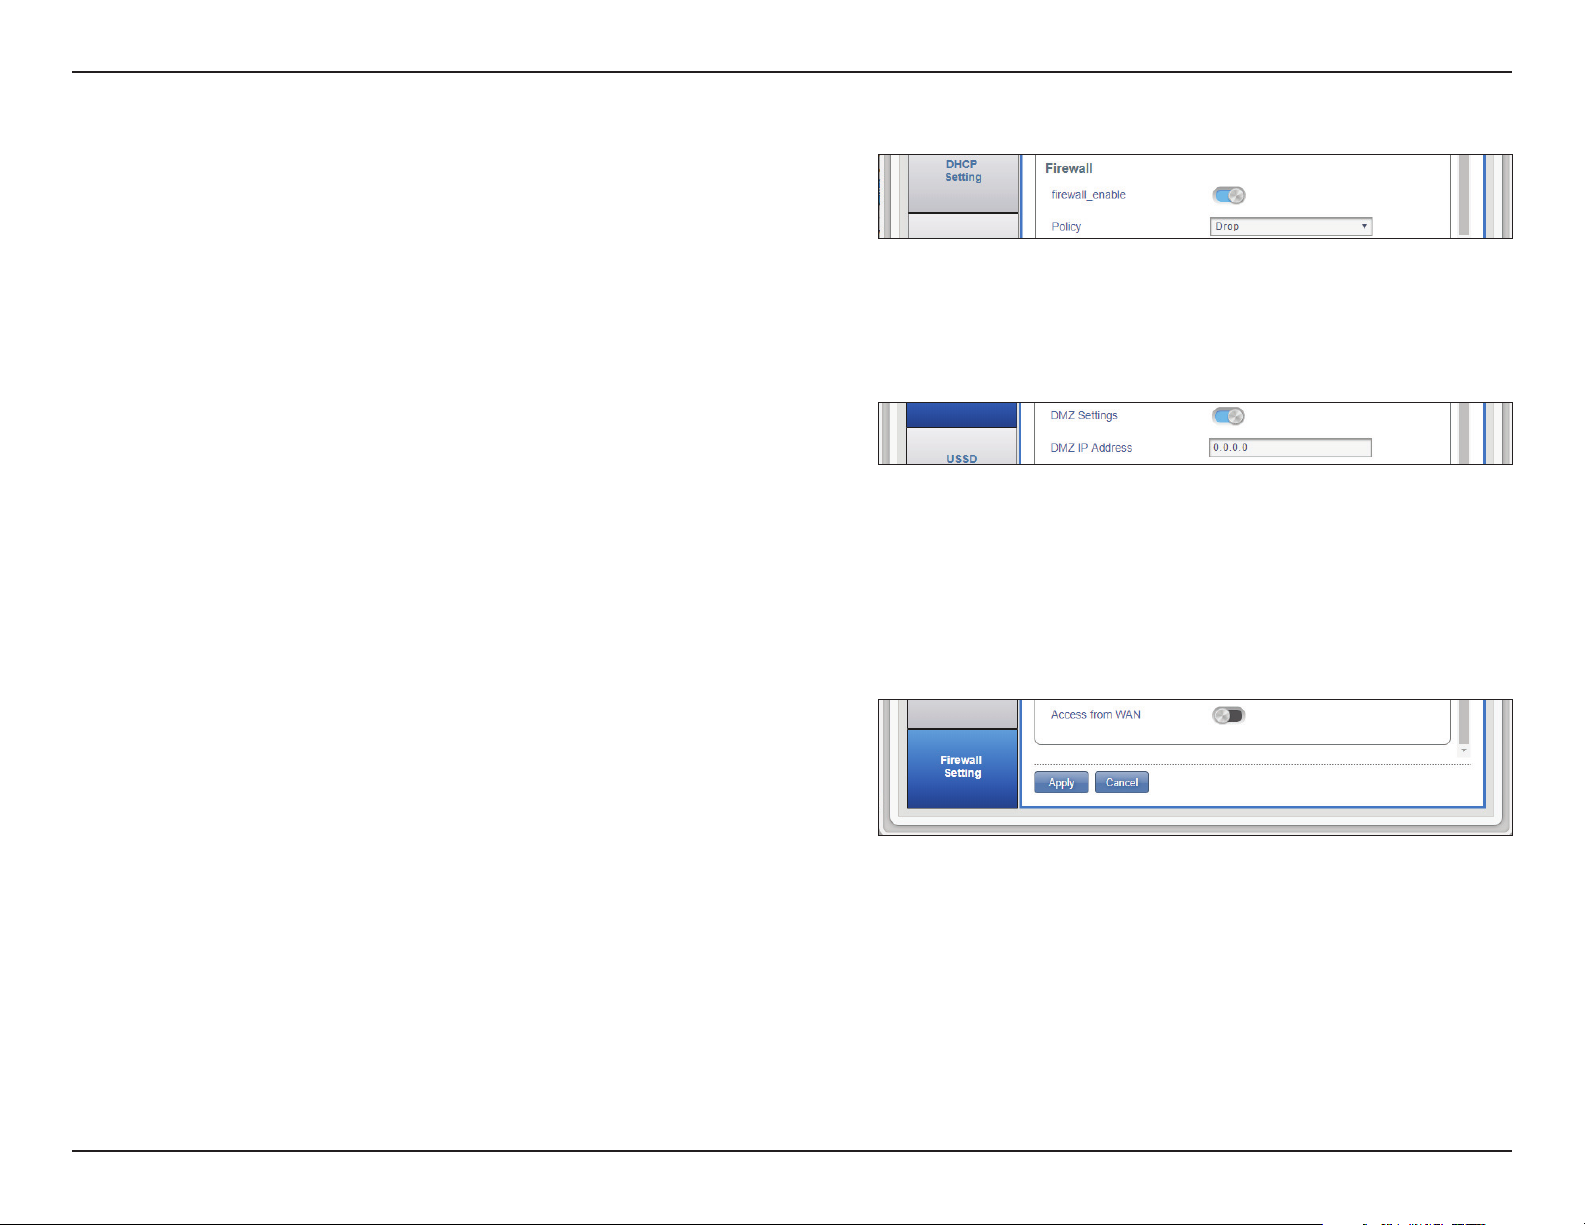
If you selected Firewall Enable:
Policy Choose Drop to block all IP addresses dened in the IP
Filter section or Accept to only allow those addresses
access to your network.
If you selected DMZ Settings:
DMZ IP Address Enter the IP address of the DMZ.
If you selected Access from WAN:
Access from WAN Allows the conguration interface to be access over
WAN. This setting is not recommended.
Click Apply to save changes.
48D-Link DWR-920V User Manual
Page 15
Section 3 - Conguration
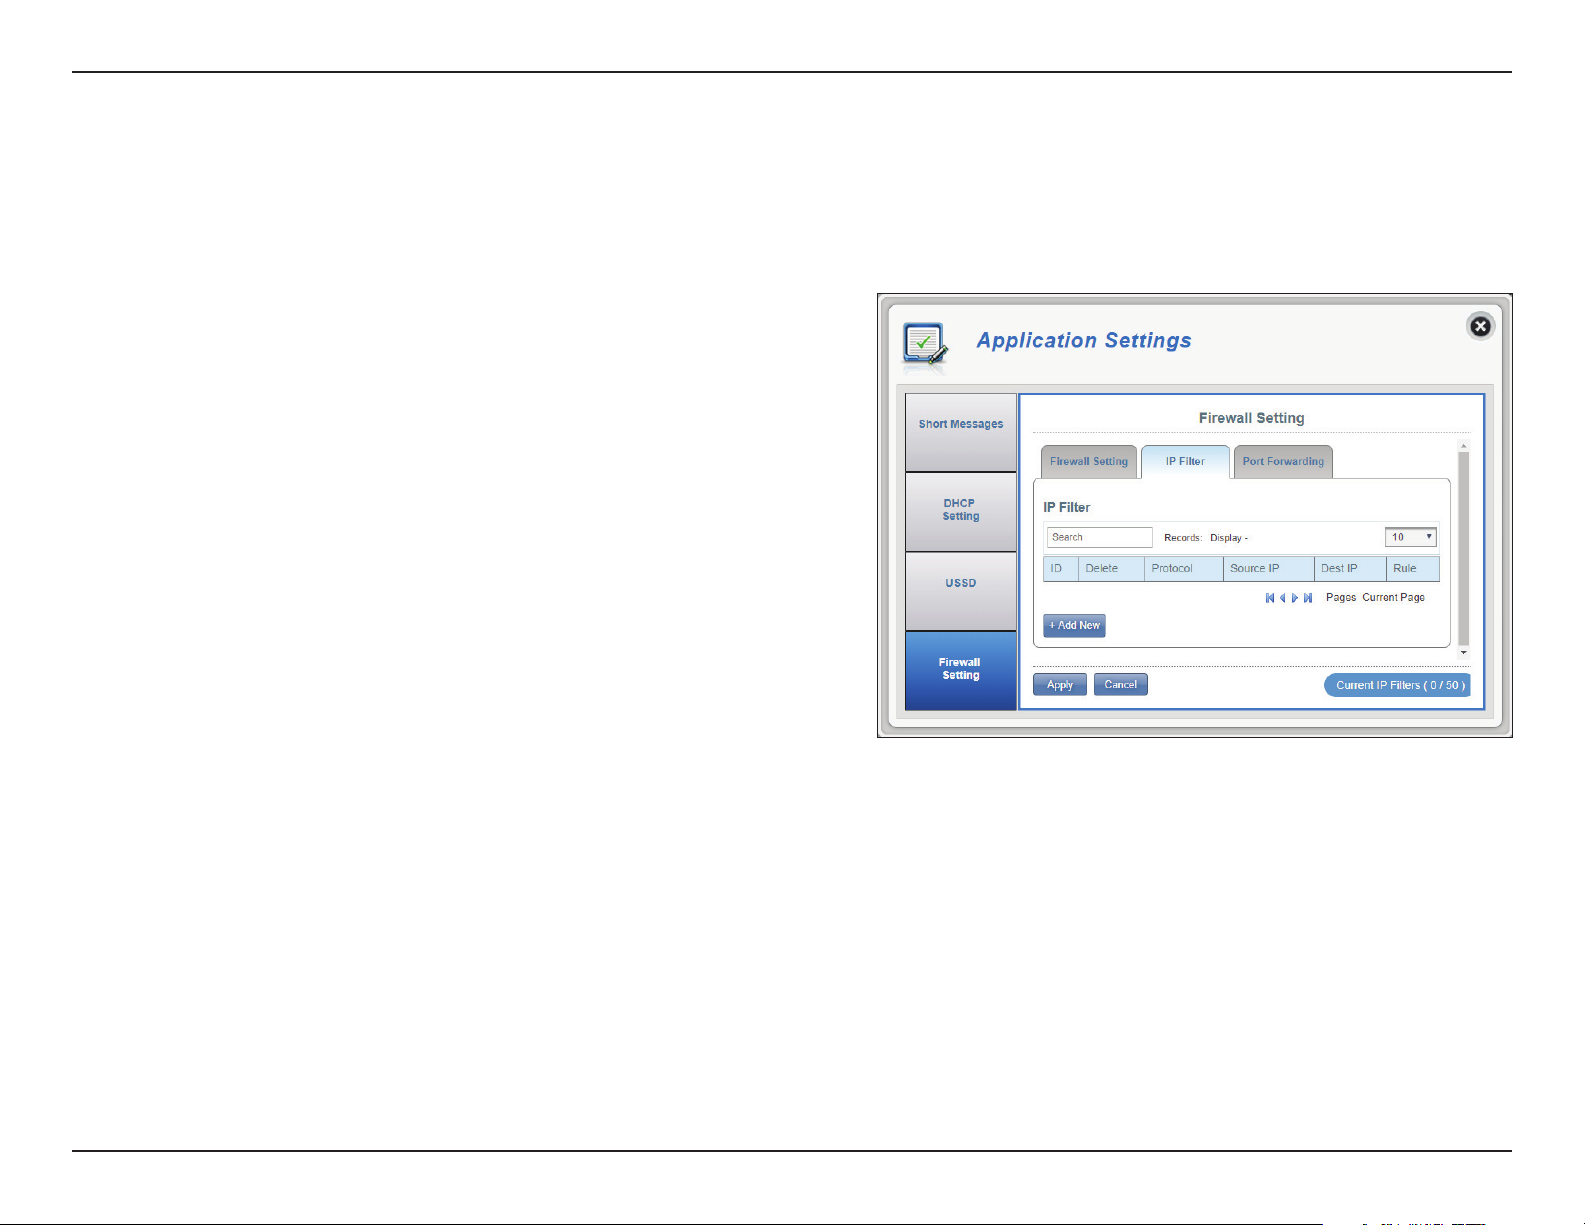
IP Filter
The DWR-920V can lter certain IP addresses and ports. IP ltering allows you to direct specic trac to a specied local client based on source IP
address or protocol. The DWR-920V supports a maximum of 50 lters.
ID
ID number given to new IP lters.
Delete
Protocol
Source IP
Dest IP
Rule
Click here to select the lters you wish to delete.
The protocol for the IP lter rule.
The source IP address to be ltered.
The destination IP address to be ltered.
The rule that the lter will follow; either to drop or
to accept.
Click Add New to add a new rule.
Click Apply to save changes.
49D-Link DWR-920V User Manual
Page 16

Section 3 - Conguration
If you selected Add New IP Filter:
Add IP Filter
Protocol
Source IP
Subnet
Source Port Number
Source Port Range
Dest IP
Destination Port
Number
Destination Port Range
Select the protocol for ports that you want to allow or
deny access to. Choose between T CP, UDP or ICMP
or all of the above.
Enter the source IP address that you wish to lter.
Enter the subnet mask of the source IP address you
wish to lter.
Enable this feature if you wish enter a single port or a
range of ports to be ltered based on origin. Disabling
this feature will cause all incoming connection tting
other criteria to be ltered.
This option will appear if Source Port Number is
toggled. Enter an incoming port range to which your
lter will apply.
Type in the destination IP address. Leave this blank
to apply your lter to incoming connections to any
destination IP
Click the toggle if you wish enter a single port or a
range of ports to be ltered. Separate port numbers
with a comma.
Enter a destination port range to which your lter
will apply.
50D-Link DWR-920V User Manual
Page 17

Section 3 - Conguration
Port Forwarding
This page will allow you to open a single port or a range of ports to specic IP addresses. The DWR-920V supports a maximum of 50 lters.
ID
ID number given to the new rule.
Delete
Protocol
Destination IP
Port
Click here to select the rules you wish to delete.
The selected protocol for the IP lter rule.
The IP address that will be port forwarded to.
The port number that incoming traffic will be
forwarded from.
Click Add New to add a new port.
51D-Link DWR-920V User Manual
Page 18

Section 3 - Conguration
If you selected Add Port Forwarding
Add Port Forwarding
Destination IP Address
Protocol
Private Port
Global Port
Destination Port Range
The IP address you want to allow port forwarding on.
Select the protocol for ports that you want to allow or
deny access to. Choose between T CP, UDP or Other.
If you select Other you will be asked to specify the
protocol in addition to the ports.
Select the port number or numbers for your service
on your local network. Enter a single port or a range.
If entering multiple ports, separate port numbers
with a comma.
Select the port number or numbers for your service
to be exposed to the Internet. Enter a single port
or a range. If entering multiple ports, separate port
numbers with a comma.
Click Apply to save your changes.
52D-Link DWR-920V User Manual
Page 19

Section 3 - Conguration
About DWR-920V
System
System Information
FW Version
Hardware Version
IMEI
SIM/UICC IMSI
Model Name
System Uptime
The current rmware version of the DWR-920V.
The current rmware version of the DWR-920V.
International Mobile Equipment Identity is a unique
number assigned to every mobile device.
The SIM/USIM/UICC card has a unique number called
an International Mobile Subscriber Identity (IMSI). This
is used to identify and authenticate users on cellular
devices.
The model name of your D-Link router.
The length of time since last restart.
Note: The FW version number and Modem Version
number displayed on the image above may dier from
the model you have purchased due to rmware updates
or regional variation.
53D-Link DWR-920V User Manual
Page 20

Section 3 - Conguration
Admin Settings
Account
This tab allows you to customize your own username and password as well as adjust the UI’s automatic logout timer.
Username
Password
Conrm Password
Auto logout after
Adjust your login username here.
Enter your new password here.
Conrm the new password here.
Click on the drop-down arrow to select the length of
time before being automatically logged out of the
interface.
Click Apply to save your changes.
54D-Link DWR-920V User Manual
Page 21

Section 3 - Conguration
Language
This tab allows you to change the default language of the router’s web interface.
Language
Select your desired language here.
Click Apply to save your changes.
55D-Link DWR-920V User Manual
Page 22

Section 3 - Conguration
Date & Time
In this section, you can adjust the date, time, and network time synchronization settings of your router.
SNTP
Primary,
Secondary and
Tertiary SNTP
Server
Time Zone
Synchronization
Cycle
Daylight Saving
Click the toggle to Enable or Disable automatic
time synchronization with a Simple Network Time
Protocol (SNTP) server.
Enter an SNTP server address which will be used to
synchronize the router’s time and date.
Select your current Coordinated Universal Time
zone (UTC).
You can specify in hours how frequently the
DWR-920V will update the time from an SNTP
server.
Select to Enable if your region uses Daylight Saving
Time. If you have selected Enable, enter the details
of your region’s Daylight Saving scheme below.
Click Apply to save your changes.
56D-Link DWR-920V User Manual
Page 23

Section 3 - Conguration
If you disabled automatic synchronization with an SNTP server.
Time Zone
Date & Time
Selected Date and Time
Daylight Saving
Start Date
End Date
Select your current Coordinated Universal Time
zone (UTC).
Adjust the dials with your mouse to set the date and
time.
Displays your new adjusted time.
Toggle if your location observes daylight savings.
Enter in the details of when daylight savings begins
in your location.
Enter in the details of when daylight savings ends in
your location.
Click Apply to save your changes.
57D-Link DWR-920V User Manual
Page 24

Section 3 - Conguration
Settings Prole
Import Proles
In the Import Proles tab, you can import previously saved settings for the router.
Select
Browse your computer for previously exported
settings.
Click Apply Import to proceed.
58D-Link DWR-920V User Manual
Page 25

Section 3 - Conguration
Export Proles
In the Export Proles tab you can export your current conguration to a computer.
To Get Current
Prole
Click the Click Me button to download the current
settings of your DWR-920V.
59D-Link DWR-920V User Manual
Page 26

Section 3 - Conguration
Reset and Reboot
In the Reset and Reboot tab you can reboot your router or reset it to factory default settings. You can also manually reset your router by removing
the battery cover and using an implement such as a straightened paperclip to press and hold the reset button on the router for 5 seconds.
Reset to Default
Reboot
Select the Reset to Default button to
reset the DWR-920V to factory default
settings.
Select the Reboot button to reboot the
DWR-920V.
60D-Link DWR-920V User Manual
Page 27

Section 3 - Conguration
Firmware Upgrade
This page allows you to manually upgrade your router’s rmware.
Upgrade My Router
Upgrade My Router
Open File
Current Version
Select Manual to manually upgrade your router’s
rmware. To upgrade automatically, select Remote
Server from the drop down menu and then click
Check Remote Server and follow the on-screen
instructions.
If you have selected a manual upgrade, select the
appropriate le for the upgrade.
The current version of your rmware.
Note: The FW version number displayed on the image
to the right may dier from your router due to rmware
updates or regional variation.
Click the Start Update button.
61D-Link DWR-920V User Manual
Page 28

Section 3 - Conguration
Network Statistics
This page displays the packets transmitted and received by your
router. The trac counter will reset if the device is rebooted. Click
the Clear All Data button to refresh the statistics.
62D-Link DWR-920V User Manual
Page 29

Section 3 - Conguration
Connecting to a Wireless Network
Using Windows 10
When connecting to the DWR-920V wirelessly for the rst time, you will need to know the default network name (SSID) and
security key (Wi-Fi password) being used. These can be found on a label on the underside of the battery cover.
To join an existing network, locate the wireless network icon in the taskbar, next to the time display and click
on it.
Wireless Icon
Clicking on this icon will display a list of wireless networks which are within connecting proximity of your
computer. Select the desired network by clicking on the SSID.
dlink_DWR-920V_xxxx
63D-Link DWR-920V User Manual
Page 30

Section 3 - Conguration
To connect to the SSID, click Connect.
To automatically connect with the router when your device next detects the SSID, click the Connect
Automatically check box.
dlink_DWR-920V_xxxx
You will then be prompted to enter the network security key (Wi-Fi password) for the wireless network. Enter
the password into the box and click Next to connect to the network.
dlink_DWR-920V_xxxx
64D-Link DWR-920V User Manual
Page 31

Section 4 - Connecting to a Wireless Network
Using Windows 8
It is recommended to enable wireless security (WPA/WPA2) on your wireless router or access point before conguring your
wireless adapter. If you are joining an existing network, you will need to know the security key (Wi-Fi password) being used.
To join an existing network, locate the wireless network icon in the taskbar, next to the time display.
Wireless Icon
Clicking on this icon will display a list of wireless networks which are within connecting proximity of your
computer. Select the desired network by clicking on the network name.
dlink_DWR-920V_xxxx
65D-Link DWR-920V User Manual
Page 32

Section 4 - Connecting to a Wireless Network
You will then be prompted to enter the network security key (Wi-Fi password) for the wireless network. If this
is the rst time connecting to your router, a unique security key for your router will be displayed on a sticker
in the router’s battery bay. Enter the password into the box and click Next.
If you wish to use Wi-Fi Protected Setup (WPS) to connect to the router, you can also press the WPS button on
your router at this point to enable the WPS function.
dlink_DWR-920V_xxxx
When you have established a successful connection to a wireless network, the word Connected will appear
next to the name of the network to which you are connected.
dlink_DWR-920V_xxxx
66D-Link DWR-920V User Manual
Page 33

Section 4 - Connecting to a Wireless Network
Connecting to a Wireless Network
Using Windows 7
Windows 7 users may use the built-in wireless utility to connect to a wireless network. If you are using another company’s utility
or Windows 2000, please refer to the user manual of your wireless adapter for help with connecting to a wireless network. Most
utilities will have a “site survey” option similar to the Windows 7 utility as seen below.
If you receive the Wireless Networks Detected bubble, click on the center of the bubble
to access the utility. You can also click on the wireless icon in your system tray (lower-right
corner).
Wireless Icon
The utility will display any available wireless networks in your area.
dlink_DWR-920V_xxxx
67D-Link DWR-920V User Manual
Page 34

Section 4 - Connecting to a Wireless Network
Highlight the wireless network (SSID) you would like to connect to and click the Connect
button.
If you get a good signal but cannot access the Internet, check your TCP/IP settings for your
wireless adapter. Refer to Networking Basics on page 78 for more information.
dlink_DWR-920V_xxxx
68D-Link DWR-920V User Manual
Page 35

Section 4 - Connecting to a Wireless Network
Conguring Wireless Encryption
It is recommended to enable wireless encryption (WPA/WPA2) on your wireless router or access point before conguring your wireless adapter. If
you are joining an existing network, you will need to know the security key or passphrase being used.
1. Click on the wireless icon in your system tray (lower-right corner).
Wireless Icon
2. The utility will display any available wireless networks in your area.
dlink_DWR-920V_xxxx
69D-Link DWR-920V User Manual
Page 36

Section 4 - Connecting to a Wireless Network
3. Highlight the wireless network (SSID) you would like to connect to and click the Connect
button.
dlink_DWR-920V_xxxx
4. The following window appears while your computer tries to connect to the router.
70D-Link DWR-920V User Manual
Page 37

Section 4 - Connecting to a Wireless Network
5. Enter the same security key or passphrase that is on your router and click Connect.
It may take 20-30 seconds to connect to the wireless network. If the connection fails,
please verify that the security settings are correct. The key or pass phrase must be
exactly the same as on the wireless router.
71D-Link DWR-920V User Manual
Page 38

Section 4 - Connecting to a Wireless Network
Using Windows Vista™
Windows® Vista™ users may use the built-in wireless utility. If you are using another company’s utility or Windows® 2000, please refer to the user
manual of your wireless adapter for help with connecting to a wireless network. Most utilities will have a “site survey” option similar to the Windows®
Vista™ utility as seen below.
If you receive the Wireless Networks Detected bubble, click on the center of the bubble
to access the utility.
or
Right-click on the wireless computer icon in your system tray (lower-right corner next to
the time). Select Connect to a network.
The utility will display any available wireless networks in your area. Click on a network
(displayed using the SSID) and click the Connect button.
If you get a good signal but cannot access the Internet, check the TCP/IP settings for your
wireless adapter. Refer to Networking Basics on page 78 for more information.
dlink_DWR-920V_xxxx
72D-Link DWR-920V User Manual
Page 39

Section 4 - Connecting to a Wireless Network
Conguring Wireless Encryption
It is recommended to enable wireless encryption (WEP/WPA/WPA2) on your wireless router or access point before conguring your wireless adapter.
If you are joining an existing network, you will need to know the security key or passphrase being used.
1. Open the Windows® Vista™ Wireless Utility by right-clicking on the wireless computer
icon in your system tray (lower right corner of screen). Select Connect to a network.
2. Highlight the wireless network (SSID) you would like to connect to and click Connect.
dlink_DWR-920V_xxxx
73D-Link DWR-920V User Manual
Page 40

Section 4 - Connecting to a Wireless Network
3. Enter the same security key or pass phrase that is on your router and click Connect.
It may take 20-30 seconds to connect to the wireless network. If the connection fails, please
verify that the security settings are correct. The key or passphrase must be exactly the same
as on the wireless router.
74D-Link DWR-920V User Manual
Page 41

Section 4 - Connecting to a Wireless Network
Connect to a Wireless Network
Using Windows® XP
Windows® XP users may use the built-in wireless utility (Zero Conguration Utility). The following instructions are for Service Pack 2 users. If you are
®
using another company’s utility or Windows
network. Most utilities will have a “site survey” option similar to the Windows® XP utility as seen below.
If you receive the Wireless Networks Detected bubble, click on the center of the bubble
to access the utility.
Right-click on the wireless computer icon in your system tray (lower-right corner next to
the time). Select View Available Wireless Networks.
2000, please refer to the user manual of your wireless adapter for help with connecting to a wireless
or
The utility will display any available wireless networks in your area. Click on a network
(displayed using the SSID) and click the Connect button.
If you get a good signal but cannot access the Internet, check the TCP/IP settings for your
wireless adapter. Refer to Networking Basics on page 78 for more information.
dlink_DWR-920V_xxxx
75D-Link DWR-920V User Manual
Page 42

Section 5 - Troubleshooting
Troubleshooting
This chapter provides solutions to problems that can occur during the installation and operation of the DWR-920V. Read the following descriptions
if you are having problems.
1. Why can’t I access the web-based conguration utility?
When entering the IP address of your router (192.168.0.1 for example), you are not connecting to a website on the Internet nor do you have to be
connected to the Internet. The device has the utility built-in to a ROM chip in the device itself. Your computer must be on the same IP subnet to
connect to the web-based utility.
• Make sure you have an updated Java-enabled web browser. We recommend the following:
- Internet Explorer 9 or higher, Chrome 28.0, Firefox 23.0, or Safari 6.
• If attempting to connect wirelessly, ensure that the wireless indicator on the OLED display is lit. Also, ensure that you are connected
to the correct SSID for your mobile router.
• Make sure that the computer you are using is not connected to any other devices (such as routers or switches) which might have the
same IP address as the DWR-920V, as this may cause an IP address conict. If you have a conict, temporarily unplug any other devices
from your computer while you congure the DWR-920V. You can also change the IP address of the DWR-920V in the Network section
of the conguration utility. You may also need to renew your computer’s IP address conguration. To do this, start the Command
utility: Click on Start > Run. In the run box type cmd and click OK. (Windows Vista users type cmd in the Start Search box.) This will
bring up a black screen with white text. At the command prompt, type ipcong /release and wait for the process to be completed.
Next, type ipcong /renew which will renew your computer’s IP address conguration.
• Disable any Internet security software running on the computer. Software rewalls such as ZoneAlarm, BlackICE, Sygate, Norton
Personal Firewall, and Windows
rewall software for more information on disabling or conguring it.
• Congure your Internet settings:
- Go to Start > Settings > Control Panel. Double-click the Internet Options Icon. From the Security tab, click the Default Level
button to restore the settings to their defaults.
- Click the Connection tab and set the dial-up option to Never Dial a Connection. Click the LAN Settings button. Make sure nothing
is checked. Click OK.
- Go to the Advanced tab and click the button to restore these settings to their defaults. Click OK three times.
®
XP rewall may block access to the conguration pages. Check the help les included with your
76D-Link DWR-920V User Manual
Page 43

Section 5 - Troubleshooting
- Close your web browser (if open) and re-open it.
2. What can I do if I forgot my password?
If you forgot your password, you must reset your router. Please note that this process will change all your settings back to the factory defaults.
77D-Link DWR-920V User Manual
Page 44

Appendix A - Networking Basics
Networking Basics
Check your IP address
After you install your new D-Link adapter, by default, the TCP/IP settings should be set to obtain an IP address from a DHCP server (i.e. wireless
router) automatically. To verify your IP address, please follow the steps below.
Click on Start > Run. In the run box type cmd and click OK.
(Windows
At the prompt, type ipcong and press Enter.
®
Vista™ users type cmd in the Start Search box.)
This will display the IP address, subnet mask, and the default
gateway of your adapter.
If the address is 0.0.0.0, check your adapter installation, security settings, and the settings on your router. Some rewall software programs may
block a DHCP request on newly installed adapters.
78D-Link DWR-920V User Manual
Page 45

Appendix A - Networking Basics
Statically Assign an IP address
If you are not using a DHCP capable gateway/router, or you need to assign a static IP address, please follow the steps below:
Step 1
Windows® 8
Click on Start > Control Panel > Network and Internet Connections > Network Connections > Congure your Internet
Protocol (IP) settings.
Windows
Windows
Windows® XP
®
7
®
Vista
Click on Start > Control Panel > Network and Internet > Network and Sharing Center > Manage Network Connections.
™
Click on Start > Control Panel > Network and Internet > Network and Sharing Center > Manage Network Connections.
Click on Start > Control Panel > Network Connections.
Step 2
Right-click on the Local Area Connection which represents your network adapter and select Properties.
Step 3
Highlight Internet Protocol (TCP/IP) and click Properties.
Step 4
Click Use the following IP address and enter an IP address that is on the same subnet as your network
or the LAN IP address on your router.
Example: If the router´s LAN IP address is 192.168.0.1, make your IP address 192.168.0.X where X is a
number between 2 and 99. Make sure that the number you choose is not in use on the network. Set
Default Gateway the same as the LAN IP address of your router (192.168.0.1).
Set Primary DNS the same as the LAN IP address of your router (192.168.0.1). The Secondary DNS is not
needed or you may enter a DNS server from your ISP.
Step 5
Click OK twice to save your settings.
79D-Link DWR-920V User Manual
Page 46

Appendix B - Technical Specications
Technical Specications
Radio Frequency Bands
• LTE: Band 4/12/41/66
• DC-HSPA+/HSPA+/HSUPA/HSDPA/WCDMA: B2/B5
Cellular Access
• LTE up to 150 Mbps Down/50 Mbps Up
• DC-HSPA+ up to 42 Mbps Up/5.76 Mbps Down
• HSPA+ up to 21 Mbps Up/ 5.76 Mbps Down
• HSPA up to 7.2 Mbps/5.76 Mbps Down
• UMTS up to 384 Kbps Up/384 Kbps Down
• EDGE up to 237 Kbps Up/118 Kbps Down
• GPRS up to 85.6 Kbps Up/42.8 Kbps Down
2
1
Wi-Fi Access Point
• 802.11n
• 802.11g
• 802.11b
Antenna
• 2 x 2.4G Internal Wi-Fi Antennas
Firewall
• NAT
• Port Range Forwarding
• DMZ
• UPnP
Dimensions (L x W x H)
• 121 x 117.3 x 43.5 mm (4.76 x 4.62 x 1.71 in)
Weight
• 205 g (7.23 oz)
Operating Temperature
• 0 to 40 ˚C (32 to 104 ˚F)
Storage Temperature
• -10 to 70 ˚C (14 to 158 ˚F)
SIM/UICC Slot
• Standard mini-SIM/UICC card interface
Indicators
• LED Indicators
Wireless Encryption
• 64 / 128-bit WEP (Wired Equivalent Privacy)
• WPA & WPA2 (Wi-Fi Protected Access)
• WPA-PSK & WPA2-PSK (Wi-Fi Protected Access - Pre-Shared Key)
1 Supported frequency band is dependent upon regional hardware version.
2 Data rates are theoretical. Data transfer rate depends on network capacity, signal strength, and other factors.
80D-Link DWR-920V User Manual
Page 47

Appendix C - Regulatory Information
Regulatory Information
Federal Communication Commission Interference Statement
This equipment has been tested and found to comply with the limits for a Class B digital device, pursuant to Part 15 of the FCC Rules. These limits
are designed to provide reasonable protection against harmful interference in a residential installation. This equipment generates, uses and
can radiate radio frequency energy and, if not installed and used in accordance with the instructions, may cause harmful interference to radio
communications. However, there is no guarantee that interference will not occur in a particular installation. If this equipment does cause harmful
interference to radio or television reception, which can be determined by turning the equipment o and on, the user is encouraged to try to
correct the interference by one of the following measures:
- Reorient or relocate the receiving antenna.
- Increase the separation between the equipment and receiver.
- Connect the equipment into an outlet on a circuit dierent from that to which the receiver is connected.
- Consult the dealer or an experienced radio/TV technician for help.
Non-modications Statement:
Any changes or modications not expressly approved by the party responsible for compliance could void the user’s authority to operate this
equipment.
Caution:
This device complies with Part 15 of the FCC Rules. Operation is subject to the following two conditions:
(1) This device may not cause harmful interference, and (2) this device must accept any interference received, including interference that
may cause undesired operation.
FCC Radiation Exposure Statement
This device complies with FCC radiation exposure limits set forth for an uncontrolled environment and it also complies with Part 15 of the FCC
RF Rules. This equipment must be installed and operated in accordance with provided instructions and the antenna(s) used for this transmitter
must be installed to provide a separation distance of at least 20 cm from all persons and must not be co-located or operating in conjunction with
any other antenna or transmitter. End-users and installers must be provide with antenna installation instructions and consider removing the nocollocation statement.
81D-Link DWR-920V User Manual
81
 Loading...