

Version 1.0 | 05/24/2013
User Manual
Wireless N300 Multi-WAN Router
DWR-116

Preface
D-Link reserves the right to revise this publication and to make changes in the content hereof without obligation to notify any
person or organization of such revisions or changes.
Manual Revisions
Revision Date Description
1.0 May 24, 2013 • Initial release for Revision A1
Trademarks
D-Link and the D-Link logo are trademarks or registered trademarks of D-Link Corporation or its subsidiaries in the United
States or other countries. All other company or product names mentioned herein are trademarks or registered trademarks of
their respective companies.
Copyright © 2013 by D-Link Corporation.
All rights reserved. This publication may not be reproduced, in whole or in part, without prior expressed written permission
from D-Link Corporation.
iD-Link DWR-116 User Manual

Table of Contents
Table of Contents
Preface ................................................................................. i
Manual Revisions ........................................................................... i
Trademarks ...................................................................................... i
Product Overview .............................................................. 1
Package Contents ......................................................................... 1
System Requirements ................................................................. 1
Introduction ...................................................................................2
Hardware Overview ..................................................................... 3
Back Panel ...............................................................................3
Front Panel and LEDs ........................................................... 4
Top .............................................................................................5
Installation .........................................................................6
Connect to Your Network .......................................................... 6
Wireless Installation Considerations ......................................7
Conguration ..................................................................... 8
Web-based Conguration Utility ............................................ 8
Setup ................................................................................................. 9
Internet Connection Setup Wizard ................................. 9
Manual Internet Connection Setup .............................16
Internet Connection Type ................................................16
Dynamic IP (DHCP) .............................................................17
PPPoE ......................................................................................18
PPTP .........................................................................................19
L2TP .........................................................................................20
3G / 4G LTE ............................................................................21
Static IP ...................................................................................22
Failover Setting ....................................................................23
Wireless Connection Setup Wizard ..............................24
Wireless Settings .................................................................28
Wi-Fi Protected Setup .......................................................32
Network Settings ................................................................33
Router Settings ...............................................................33
DHCP Server Settings ...................................................34
Advanced ......................................................................................35
Virtual Server ........................................................................35
Application Rules ................................................................36
QoS Engine............................................................................37
MAC Address Filter .............................................................38
URL Filter ................................................................................39
Outbound Filter ...................................................................40
Inbound Filter ......................................................................41
SNMP .......................................................................................42
Routing ...................................................................................43
Advanced Wireless .............................................................44
Advanced Network ............................................................45
Tools ................................................................................................46
Admin .....................................................................................46
Time .........................................................................................47
Syslog ......................................................................................48
Email Settings ......................................................................49
iiD-Link DWR-116 User Manual

Table of Contents
System ....................................................................................50
Firmware ................................................................................51
Dynamic DNS .......................................................................52
System Check .......................................................................53
Schedules ..............................................................................54
Status ..............................................................................................55
Device Information ............................................................55
Logs .........................................................................................56
Statistics .................................................................................57
Wireless ..................................................................................58
Support ..................................................................................59
Wireless Security .............................................................60
What is WEP? ................................................................................60
Congure WEP .............................................................................61
What is WPA? ................................................................................62
Congure WPA-PSK ....................................................................63
Troubleshooting ..............................................................80
Wireless Modes ............................................................................82
Networking Basics ...........................................................83
Check your IP address ...............................................................83
Statically Assign an IP address ...............................................84
Technical Specications .................................................. 85
Congure WPA (RADIUS) .........................................................64
Windows® 8 ...................................................................................65
WPA/WPA2 ............................................................................65
Windows® 7 ...................................................................................67
WPA/WPA2 ............................................................................67
WPS ..........................................................................................69
Windows Vista® ............................................................................73
WPA/WPA2 ............................................................................74
WPS/WCN 2.0 .......................................................................76
Windows® XP ................................................................................77
WPA/WPA2 ............................................................................78
iiiD-Link DWR-116 User Manual

Section 1 - Product Overview
• D-Link DWR-116 Wireless N300 Multi-WAN Router
• Power Adapter
• Manual and Warranty on CD
• External Wi-Fi antenna
Note: Using a power supply with a different voltage rating than the one included with the DWR-116 will cause damage and void the
warranty for this product.
Product Overview
Package Contents
System Requirements
• A compatible 3G/4G LTE USB modem
Computer with the following:
• Windows®, Macintosh, or Linux-based operating system
• An installed Ethernet adapter
Browser Requirements:
• Internet Explorer® 7 and higher
• Mozilla Firefox 12.0 and higher
• Google™ Chrome 20.0 and higher
• Apple Safari 4 and higher
1D-Link DWR-116 User Manual

Section 1 - Product Overview
Introduction
The D-Link Wireless N300 Multi-WAN Router allows users to access mobile broadband networks worldwide. Once
connected, users can transfer data and stream media. Simply connect your USB modem to share your 3G/4G LTE Internet
connection through a secure 802.11n wireless network or using the 10/100 Ethernet port.
The Wireless N300 Multi-WAN Router can be installed quickly and easily almost anywhere. This router is great for situations
where an impromptu wireless network must be set up, or wherever conventional network access is unavailable. The
DWR-116 can even be installed in buses, trains, or boats, allowing passengers to check e-mail or chat online while
commuting.
2D-Link DWR-116 User Manual
Section 1 - Product Overview
Hardware Overview
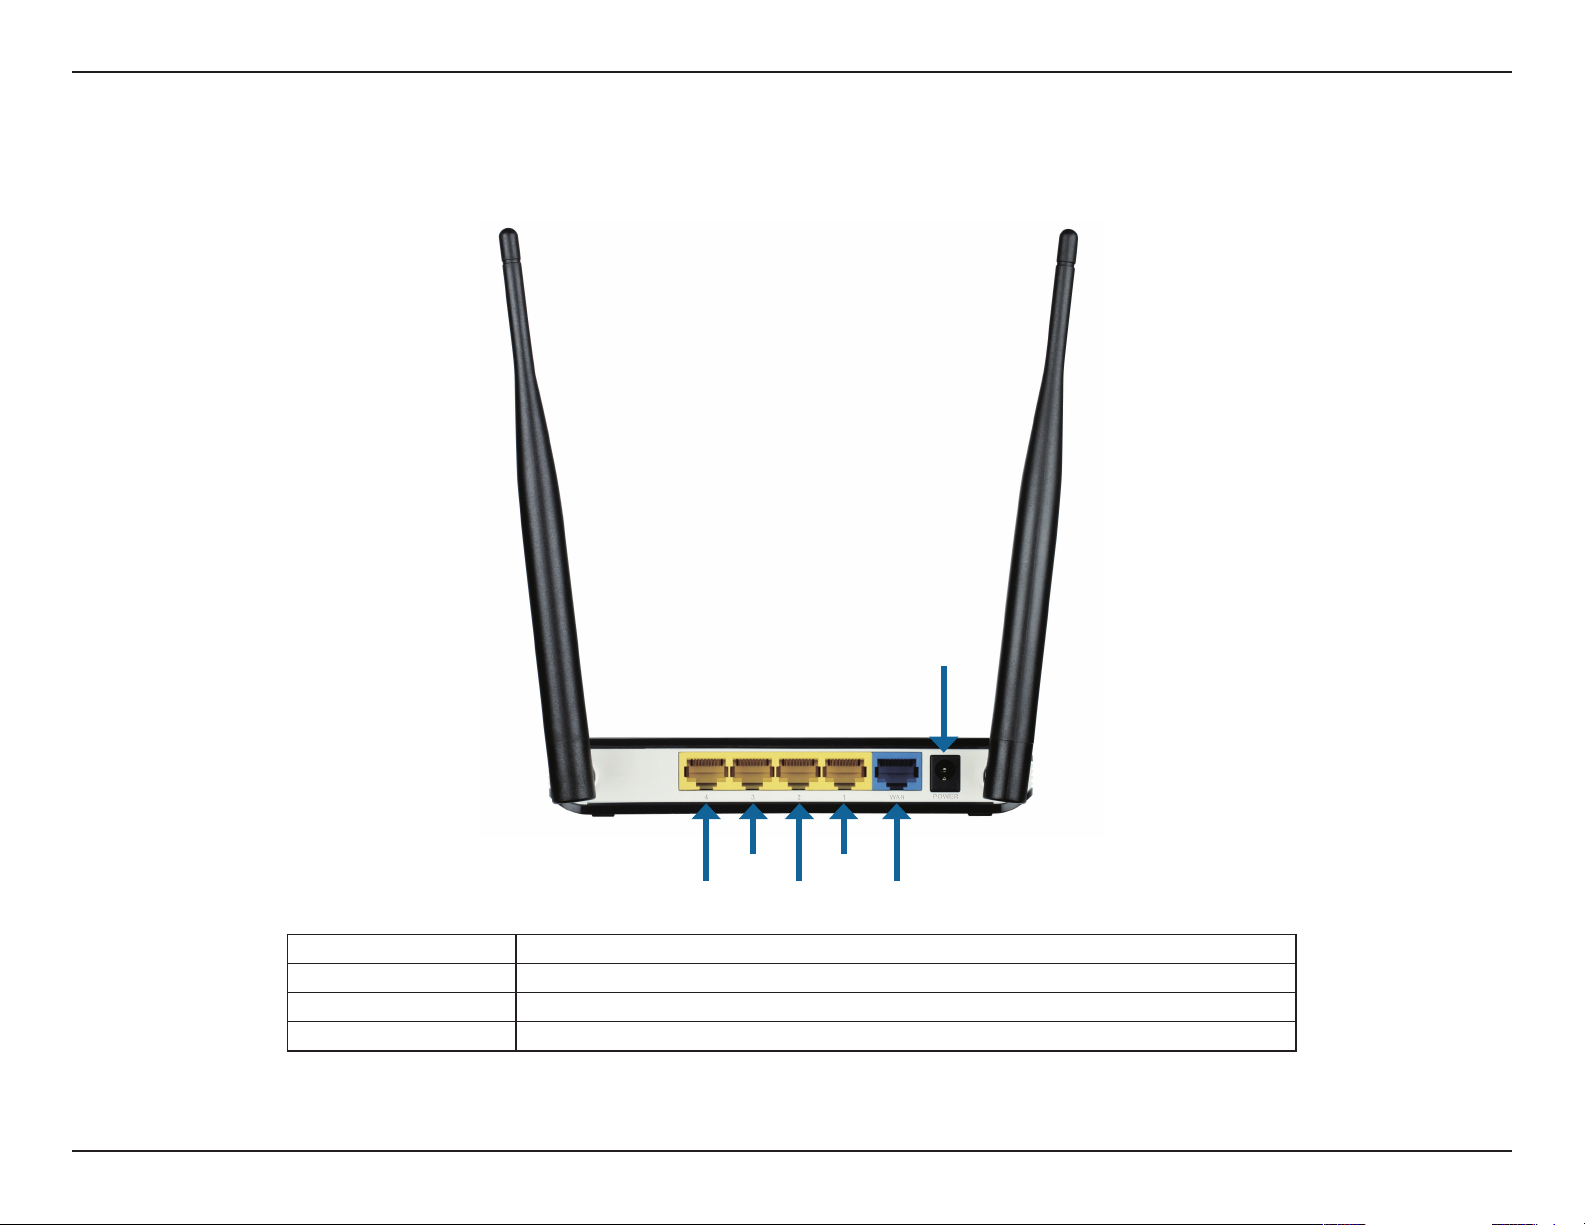
Back Panel
POWER
LAN 3
LAN 4
Port Function
LAN Port Connects to wired computers or devices.
WAN Port Connects to the Internet.
Power Port Connects to the power adapter.
LAN 1
LAN 2
WAN
3D-Link DWR-116 User Manual
Section 1 - Product Overview
Hardware Overview
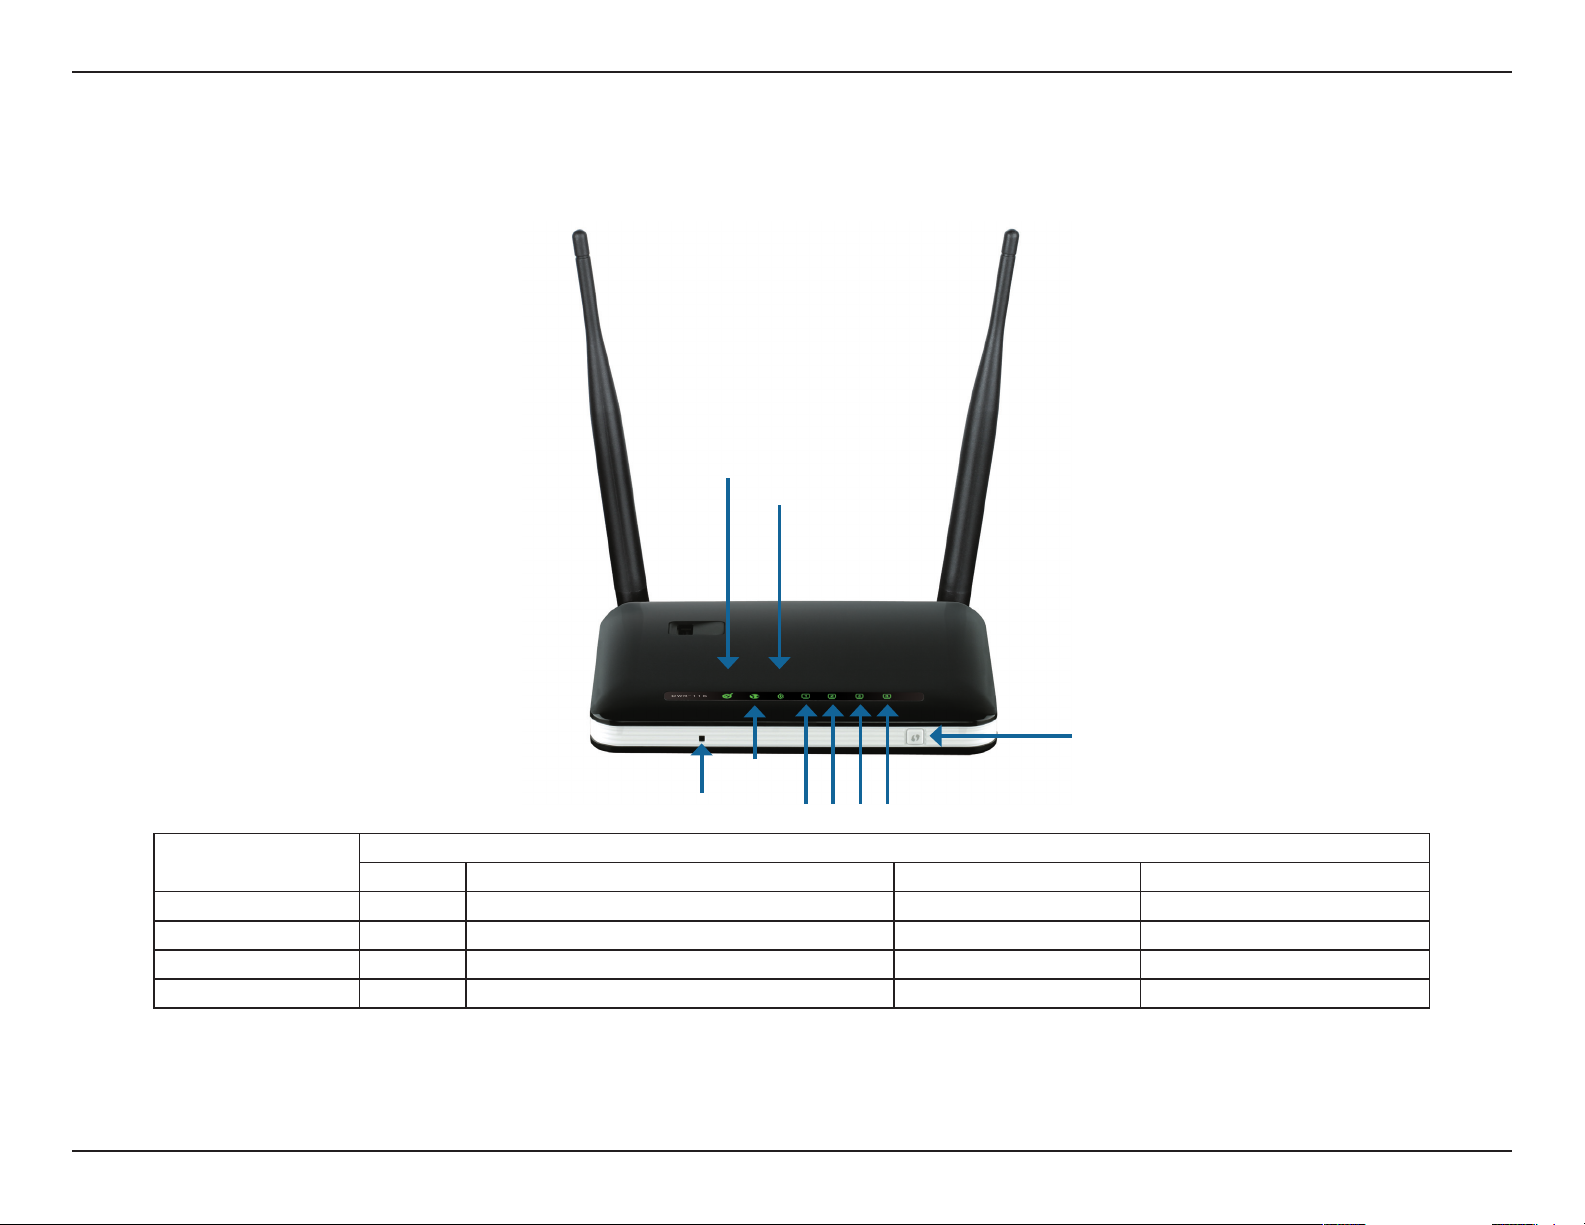
Front Panel and LEDs
3G/4G LTE
Wi-Fi
WPS BUTTON
WAN
RESET BUTTON
LED Description
Color Solid Blinking Blinking (Fast)
3G/4G LTE Green 3G/4G LTE connection established Data transmitting -
WAN Green WAN connection established Data transmitting -
Wi-Fi Green Wi-Fi active and available Data transmitting Device in WPS mode
LAN 1 - LAN 4 Green Ethernet connection established Data transmitting -
Note: WPS mode can be activated by pressing, and holding the WPS button until the Wi-Fi LED begins to ash rapidly. You can
nd more details about activating WPS mode in the section titled “Wi-Fi Protected Setup” on page 32
LAN Ports 1 to 4
4D-Link DWR-116 User Manual
Section 1 - Product Overview
Hardware Overview
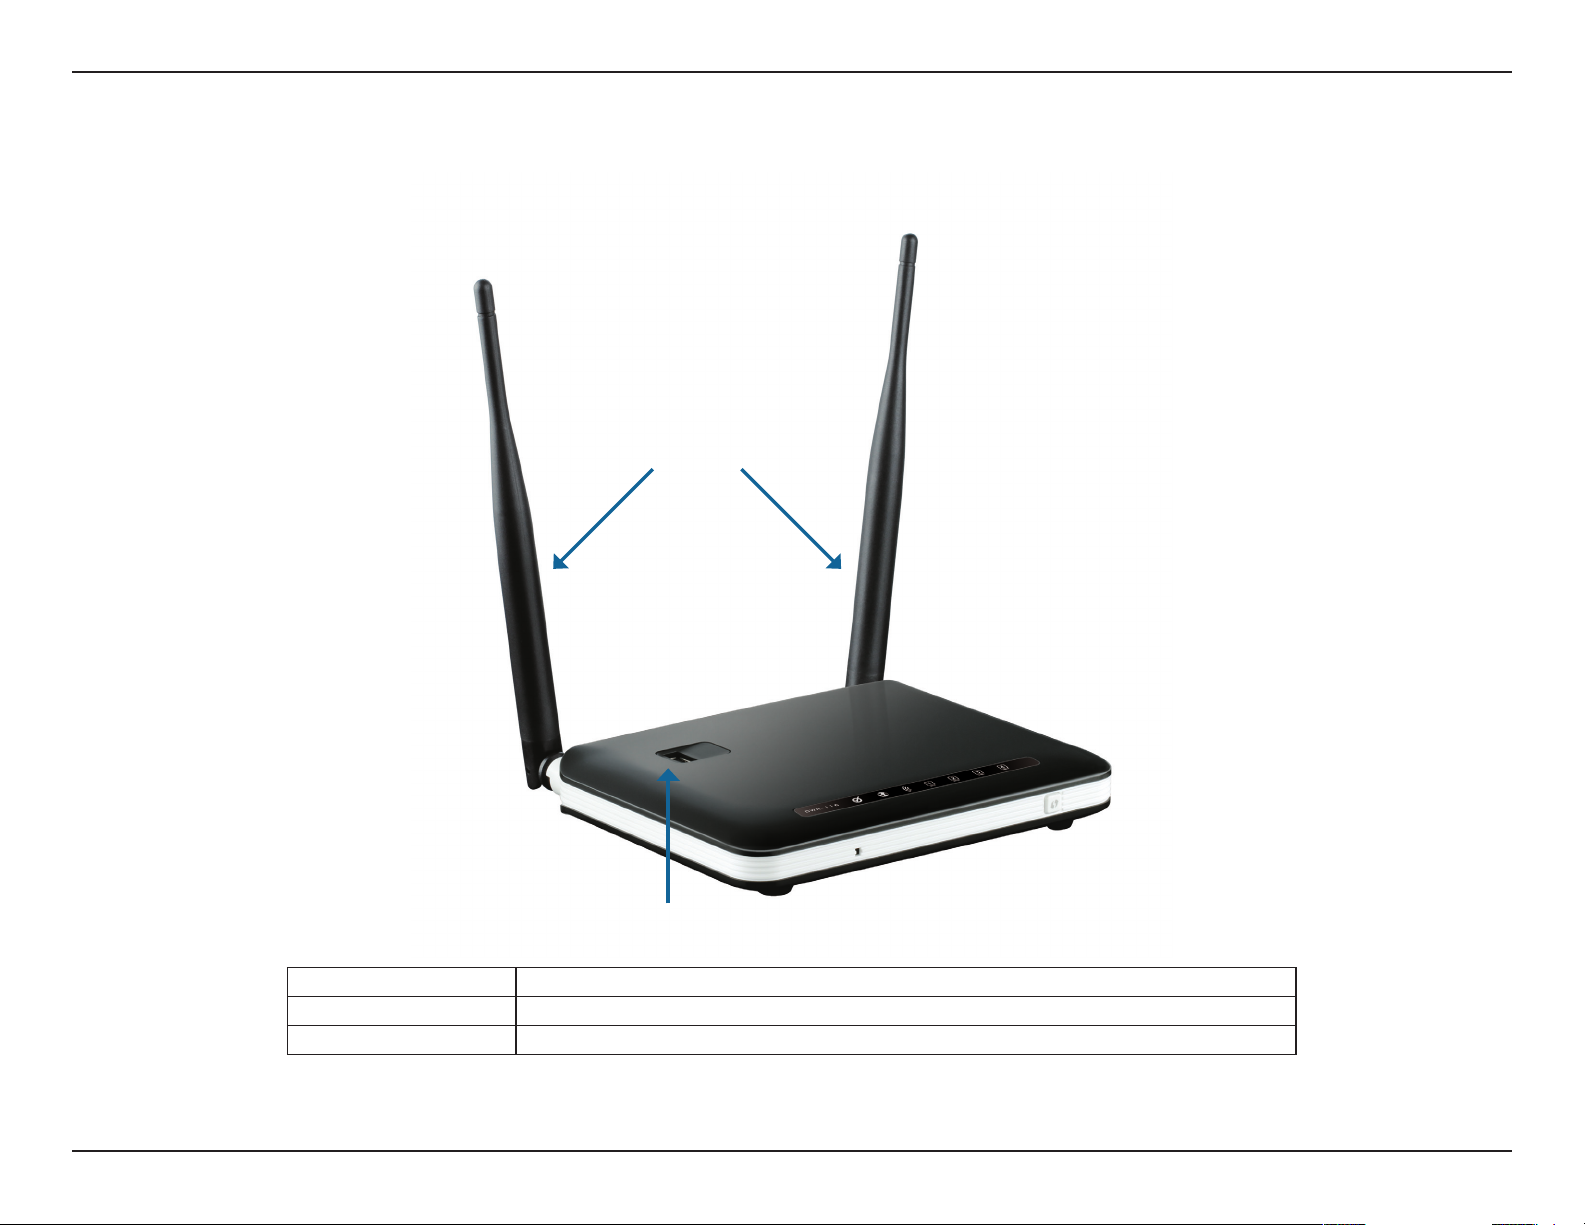
Top
External Antennas
USB 2.0 Port
Port Function
USB Port Connects to 3G/4G LTE Modem Dongle
Antennas External WiFi Antennas
5D-Link DWR-116 User Manual

Section 2 - Installation
Installation
This section will guide you through the installation process. Placement of the router is very important. Do not place the router
in an enclosed area such as a closet or cabinet, or in an attic or garage.
Connect to Your Network
Note: Ensure that your DWR-116 Wireless N300 Multi-WAN Router is disconnected and powered off before performing the
installation steps below.
1. Connect a USB modem to the USB port located on the top of the router.
2. Insert an Ethernet network cable into the LAN port on the back of the router. Plug the other end of the Ethernet cable into
the LAN port of your computer or laptop. The Ethernet LED will turn green if the Ethernet connection is successfully established.
Note: The DWR-116 Wireless N300 Multi-WAN Router’s LAN ports are “Auto-MDI/MDIX.” Therefore, patch or crossover Ethernet
cables can be used.
3. Configure the device using the setup utility.
6D-Link DWR-116 User Manual

Section 2 - Installation
Wireless Installation Considerations
The DWR-116 can be accessed using a wireless connection from virtually anywhere within the operating range of your wireless
network. Keep in mind, however, that the quantity, thickness and location of walls, ceilings, or other objects that the wireless
signals must pass through, may limit the range. Ranges vary depending on the types of materials and background RF (radio
frequency) noise in your home or office. The key to maximizing the wireless range is to follow these basic guidelines:
1. Minimize the number of walls and ceilings between the router and other network devices. Each wall or ceiling
can reduce your adapter’s range from 3 to 90 feet (1 to 30 meters).
2. Be aware of the direct line between network devices. A wall that is 1.5 feet thick (0.5 meters), at a 45-degree
angle appears to be almost 3 feet (1 meter) thick. At a 2-degree angle it looks over 42 feet (14 meters) thick.
Position devices so that the signal will travel straight through a wall or ceiling (instead of at an angle) for better
reception.
3. Try to position access points, wireless routers, and computers so that the signal passes through open doorways
or drywall. Materials such as glass, metal, brick, insulation, concrete and water can affect wireless performance.
Large objects such as fish tanks, mirrors, file cabinets, metal doors and aluminum studs may also have a negative
effect on range.
4. If you are using 2.4 GHz cordless phones, make sure that the 2.4 GHz phone base is as far away from your
wireless device as possible. The base transmits a signal even if the phone in not in use. In some cases, cordless
phones, X-10 wireless devices, and electronic equipment such as ceiling fans, fluorescent lights, and home
security systems may dramatically degrade wireless connectivity.
7D-Link DWR-116 User Manual
Section 3 - Conguration
Configuration
This section will show you how to configure your new D-Link mobile router using the web-based configuration utility.
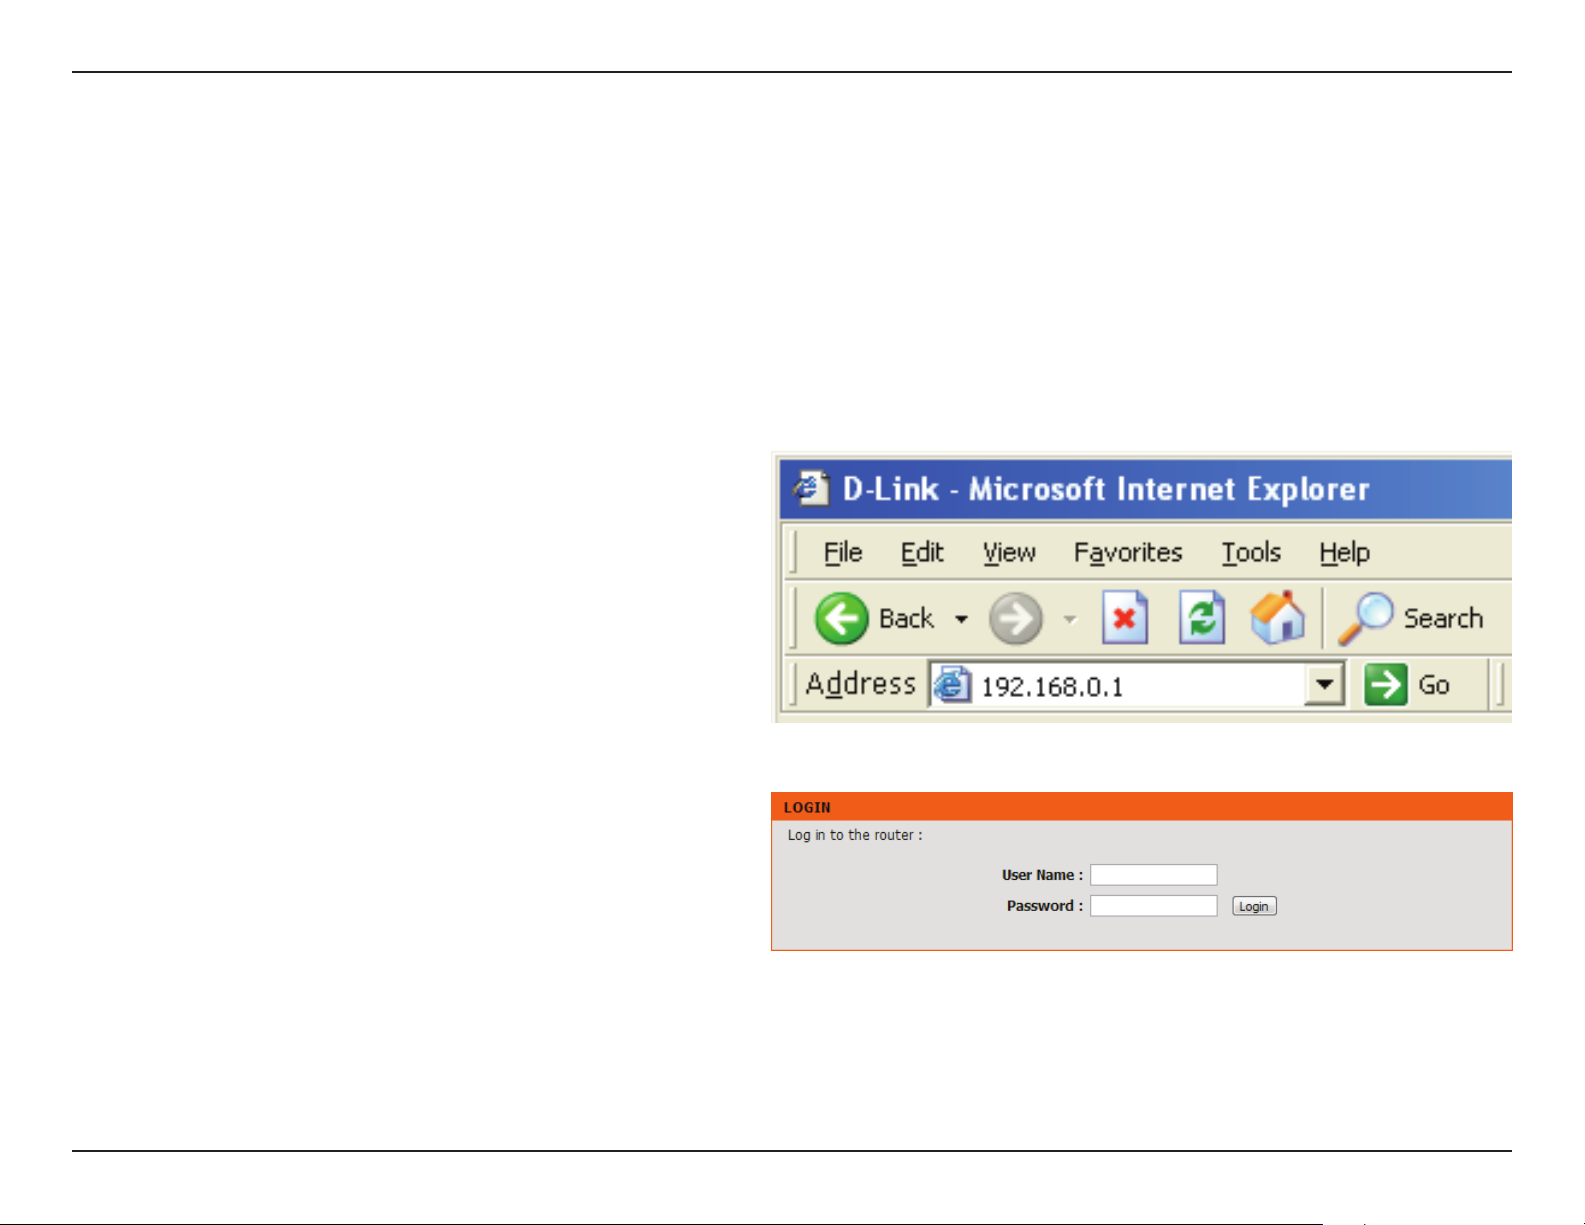
Web-based Configuration Utility
To access the configuration utility, open a web-browser such as
Internet Explorer and enter the IP address of the router. The default
IP address of the router is 192.168.0.1.
Type Admin and then enter the password. By default, the password
is blank.
If you get a Page Cannot be Displayed error, please refer to the
Troubleshooting section for assistance.
8D-Link DWR-116 User Manual
Section 3 - Conguration
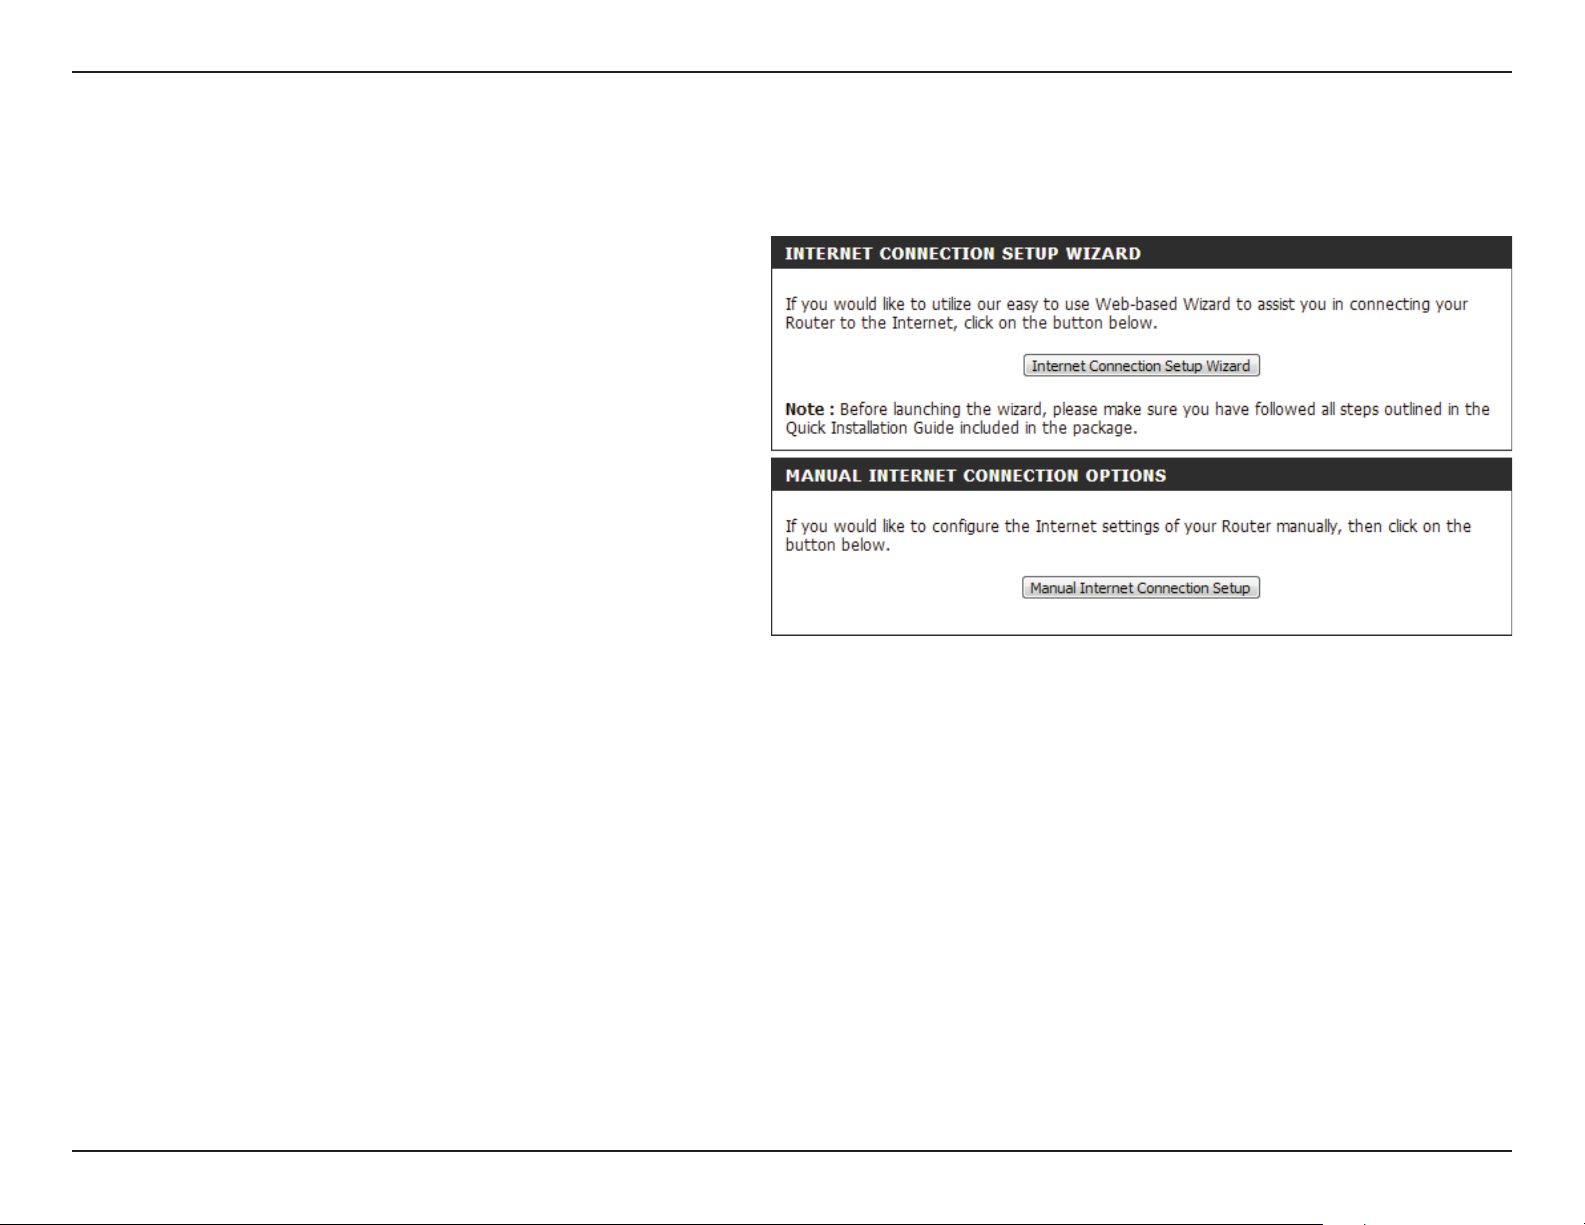
Setup
Internet Connection Setup Wizard
The setup wizard guides you through the initial setup of your router.
There are two ways to setup your Internet connection. You can use the
Web-based Internet Connection Setup Wizard or you can manually
configure using the Manual Internet Connection Setup wizard.
This wizard will guide you through a step-by-step process to
configure your D-Link router to connect to the Internet.
Click Internet Connection Setup Wizard to begin.
If you want to enter your settings without running the wizard, click
Manual Internet Connection Setup and skip to page “Manual
Internet Connection Setup” on page 16.
9D-Link DWR-116 User Manual
Section 3 - Conguration
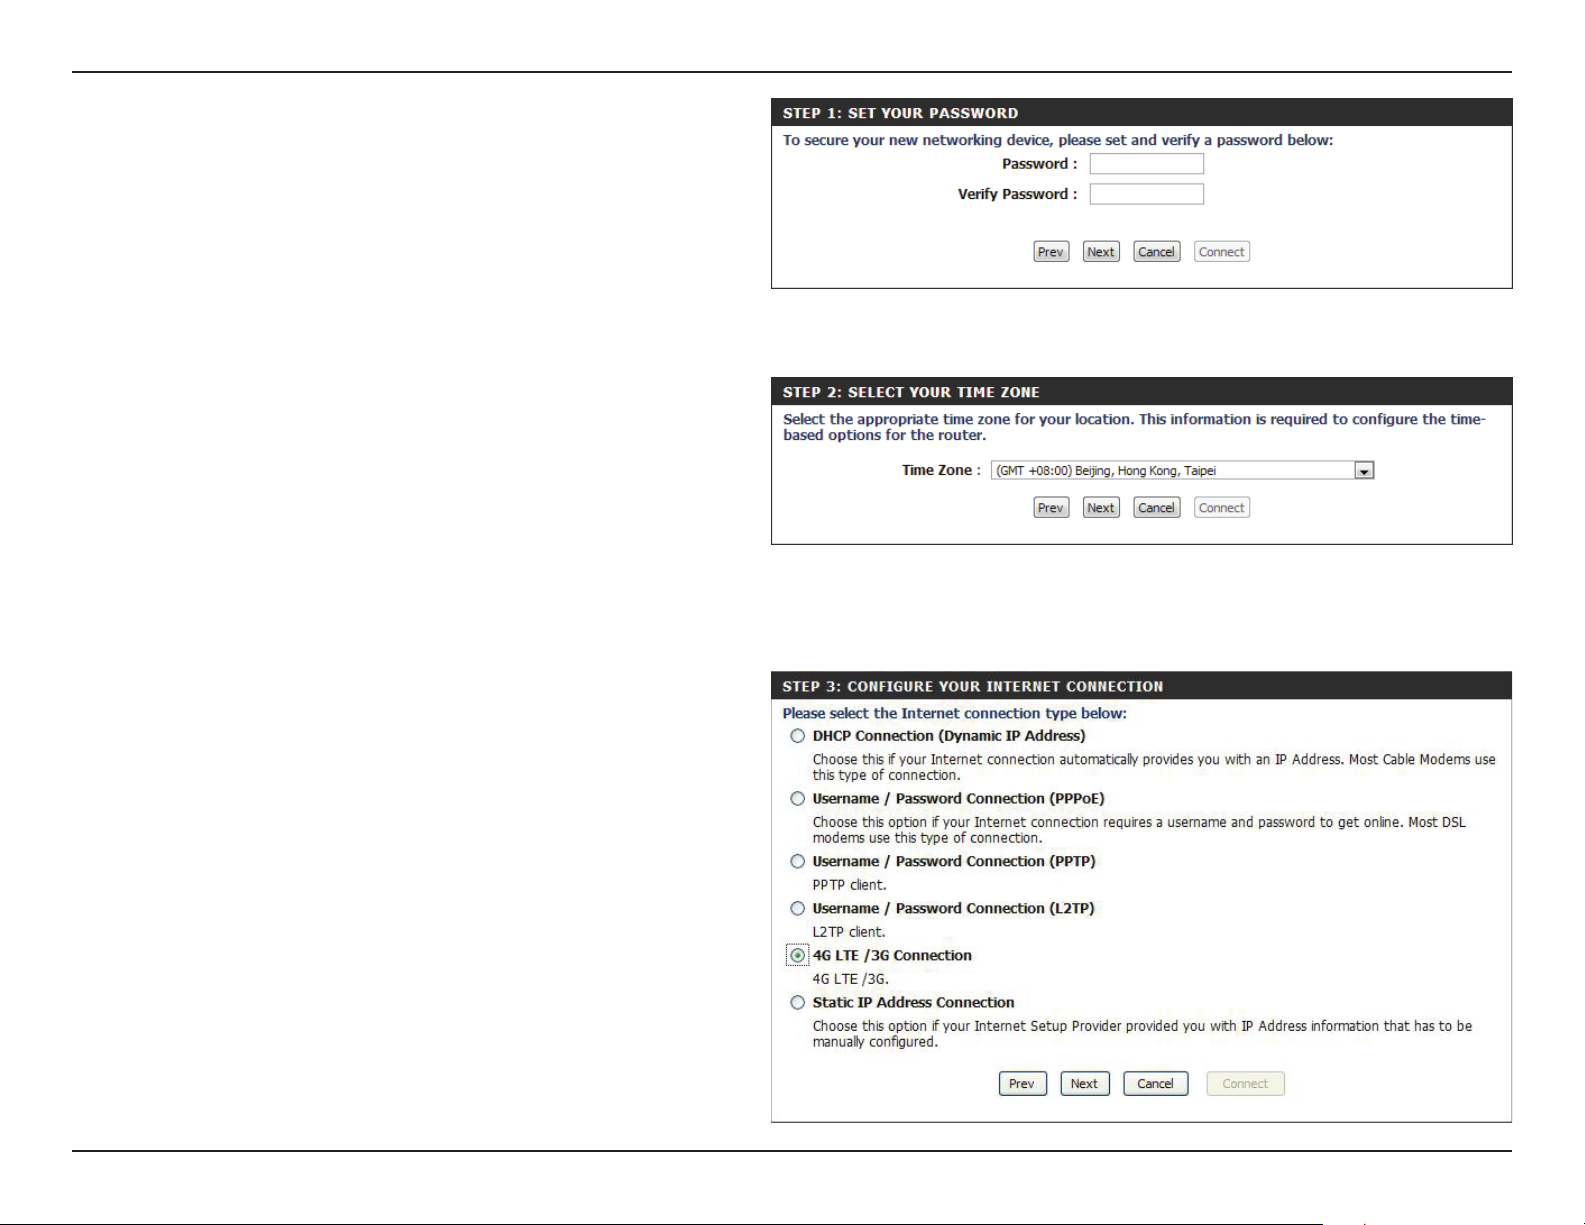
Create a new password that will be used to access the router and
then click Next to continue.
Click Prev to go back to the previous page or click Cancel to close
the wizard.
Select your time zone from the drop-down box and then click Next
to continue.
Click Prev to go back to the previous page or click Cancel to close
the wizard.
Select the Internet connection type. The connection types are
explained on the following page. If you are unsure of the correct
connection type, you may have to contact your Internet Service
Provider (ISP).
Click Prev to go back to the previous page or click Cancel to close
the wizard.
Note: The DWR-116 supports several kinds of WAN interfaces, allowing
you to assign either a WAN or a WWAN(3G/4G LTE) connection as the
backup WAN. If the Primary WAN is down or unavailable, configure
the backup WAN to Enable, and all the traffic will be routed through
backup WAN. This feature is called WAN Failover. You can use WAN
Failover if you need redundancy to your Internet connection or any
other network.
10D-Link DWR-116 User Manual

Section 3 - Conguration
The subsequent configuration pages will differ depending on the selection you make during step 3 of the wizard.
DHCP Connection
(Dynamic IP
Address):
Username
/ Password
Connection
(PPPoE):
Username
/ Password
Connection (PPTP):
Username
/ Password
Connection (L2TP):
3G/4G LTE
Connection:
Static IP Address
Connection:
Choose this if your Internet connection automatically provides you with an IP Address. Most cable modems use this type of
connection. See page 12 for information about how to configure this type of connection.
Choose this option if your Internet connection requires a username and password to connect. Most DSL modems use this style
of connection. See page 12 for information about how to configure this type of connection.
Choose this option if your Internet connection requires Point-to-Point Tunneling Protocol (PPTP). See page 13 for information
about how to configure this type of connection.
Choose this option if your Internet connection requires Layer 2 Tunneling Protocol (L2TP). See page 13 for information about how
to configure this type of connection.
Choose this option if your Internet Setup Provider provided you with a user name and password to use with your 3G / 4G LTE
enabled USB Dongle. See page 14 for information about how to configure this type of connection.
Choose this option if your Internet Setup Provider provided you with IP Address information that has to be manually configured.
See page 14 for information about how to configure this type of connection.
11D-Link DWR-116 User Manual

Section 3 - Conguration
DHCP Connection (Dynamic IP Address):
Mac Address:
Host Name:
Username / Password Connection (PPPoE):
IP Address:
The default MAC Address is set to the Internet
port’s physical interface MAC address on the
broadband router. It is not recommended that
you change the default MAC address unless
required by your ISP. You can use the Clone
button to replace the Internet port’s MAC
address with the MAC address of your PC.
Enter the host name for your router or
computer.
Click Next to continue, Prev to go back to
the previous page or click Cancel to close the
wizard.
Fill in if provided by your ISP. If not, keep the
default value.
Username:
Password:
Service Name:
The username/account name that your ISP
provides to you for PPPoE dial-up.
Password that your ISP provides to you for
PPPoE dial-up.
(Optional) Fill in if provided by your ISP.
Click Next to continue, Prev to go back to
the previous page or click Cancel to close the
wizard.
12D-Link DWR-116 User Manual

Section 3 - Conguration
Username / Password Connection (PPTP):
Address Mode:
PPTP IP Address:
PPTP Subnet Mask:
PPTP Gateway IP
Address:
PPTP Server IP
Address:
User Name:
Password:
Username / Password Connection (L2TP):
Address Mode:
Choose Static IP only if your ISP assigns you an IP address.
Otherwise, please choose Dynamic IP.
Enter the information provided by your ISP.
Enter the information provided by your ISP.
Enter the information provided by your ISP.
IP address of PPTP server.
User/account name that your ISP provides to you for PPTP dialup.
Password that your ISP provides to you for PPTP dial-up.
Choose Static IP only if your ISP assigns you an IP address.
Otherwise, please choose Dynamic IP.
L2TP IP Address:
L2TP Subnet Mask:
L2TP Gateway IP
Address:
L2TP Server IP
Address:
User Name:
Password:
Enter the information provided by your ISP.
Enter the information provided by your ISP.
Enter the information provided by your ISP.
IP address of PPTP server.
User/account name that your ISP provides to you for PPTP dialup.
Password that your ISP provides to you for PPTP dial-up.
13D-Link DWR-116 User Manual

Section 3 - Conguration
3G/4G LTE Connection
User Name:
Password:
Dialed Number:
Authentication:
APN:
Static IP Address Connection
IP Address:
(Optional) Fill in only if requested by ISP.
(Optional) Fill in only if requested by ISP.
Enter the number to be dialed.
Select PAP, CHAP, or Auto detection. The
default authentication method is Auto.
(Optional) Enter the APN information.
Enter the IP address assigned to your network
connection.
Subnet Mask:
Gateway Address:
Primary DNS
Address:
Secondary DNS
Address
Enter the subnet mask.
Enter the default gateway.
Enter the primary DNS server.
Enter the secondary DNS server.
14D-Link DWR-116 User Manual

Section 3 - Conguration
You have completed the Setup Wizard.
Click Connect to save your settings.
A popup will appear, to confirm your settings.
Click OK to save your settings.
15D-Link DWR-116 User Manual

Section 3 - Conguration
Manual Internet Connection Setup
Internet Connection Type
Several different Internet connection types can be selected
depending upon the specifications of your Internet Service
Provider (ISP).
My Internet
Connection is:
Failover Internet
Connection is:
Select the Internet connection type specied
by your Internet Service Provider (ISP). The
corresponding settings will be displayed
below. Please see the following pages for
details on how to congure these dierent
connection types.
This connection can serve as a backup for
your default connection. Click on the Failover
Setting dropdown box in order to congure
this setting. Please refer to page “Failover
Setting” on page 23 for more details on how to
congure settings.
16D-Link DWR-116 User Manual

Section 3 - Conguration
Dynamic IP (DHCP)
This section will help you to obtain IP address information
automatically from your ISP. Use this option if your ISP didn’t
provide you with IP address information and/or a username and
password.
Host Name:
Primary DNS
Server:
Secondary DNS
Server:
MTU (Maximum
Transmission
Unit):
MAC Address:
Auto-reconnect:
(Optional) Required by some ISPs.
(Optional) Fill in with IP address of primary
DNS server.
(Optional) Fill in with IP address of secondary
DNS server.
You may need to change the Maximum
Tr a n s mission Unit ( M TU) for o p t i m a l
performance. The default value is 1500.
The default MAC address is set to the Internet
port’s physical interface MAC address on the
broadband router. It is not recommended that
you change the default MAC address unless
required by your ISP. You can use the Clone
button to replace the Internet port’s MAC
address with the MAC address of your PC.
This feature enables this product to renew
WAN IP address automatically when the lease
time is expiring.
Click Save Settings to save your changes,
or click Don’t Save Settings to discard your
changes.
17D-Link DWR-116 User Manual

Section 3 - Conguration
Choose this Internet connection if your ISP provides you with a
PPPoE account.
PPPoE
Username:
Password:
Verify Password:
Service Name:
IP Address:
Primary DNS Server:
Secondary DNS
Server:
MAC Address:
Maximum Idle Time:
The username/account name that your ISP
provides to you for PPPoE dial-up.
Password that your ISP provides to you for
PPPoE dial-up.
Fill in with the same password in Password eld.
(Optional) Fill in if provided by your ISP.
(Optional) Fill in if provided by your ISP. If not, keep the default value.
(Optional) Fill in if provided by your ISP. If not, keep the default value.
(Optional) Fill in if provided by your ISP. If not, keep the default value.
MAC address of WAN interface. You can also copy MAC address of your PC to its WAN interface by pressing the Clone button.
The Restore MAC button will reset the router to its default MAC address.
The amount of time of inactivity before disconnecting established PPPoE session. Setting it to zero or enabling Reconnect
Mode: Always-on setting will disable this feature.
Maximum
Transmission Unit
(MTU):
Auto-reconnect:
You may need to change the Maximum Transmission Unit (MTU) for optimal performance. The default setting of PPPoE is 1492.
The device will dial-up PPPoE connection automatically.
Click Save Settings to save your changes, or click Don’t Save Settings to discard your changes.
18D-Link DWR-116 User Manual

Section 3 - Conguration
Choose this Internet connection if your ISP provides you PPTP
account.
PPTP
Address Mode:
PPTP IP Address:
PPTP Subnet
Mask:
PPTP Gateway
IP Address:
PPTP Server IP
Address:
Username:
Password:
Verify Password:
Choose Static IP only if your ISP assigns you an
IP address. Otherwise, please choose Dynamic IP.
Enter the information provided by your ISP.
(Only applicable for Static IP PPTP.)
Enter the information provided by your ISP.
(Only applicable for Static IP PPTP.)
Enter the information provided by your ISP.
(Only applicable for Static IP PPTP.)
IP address of PPTP server.
User/account name that your ISP provides to you for PPTP dial-up.
Password that your ISP provides to you for PPTP dial-up.
Fill in with the same password in Password eld.
Reconnect
Mode:
Maximum Idle
Time:
Choose Always-on when you want to establish PPTP connection all the time. If you choose Connect-on-demand, the device
will establish PPTP connection when local users want to surf the Internet, and disconnect if there is no trac after the time
period set under Maximum Idle Time.
The time of no activity to disconnect your PPTP session. Set it to zero or choose Always-on to disable this feature.
Click Save Settings to save your changes, or click Don’t Save Settings to discard your changes.
19D-Link DWR-116 User Manual

Section 3 - Conguration
Choose this Internet connection if your ISP provides you L2TP
account.
L2TP
Address Mode:
L2TP IP Address:
L2TP Subnet
Mask:
L2TP Gateway IP
Address:
L2TP Server IP
Address:
Username:
Password:
Verify Password:
Choose Static IP only if your ISP assigns you an
IP address. Otherwise, please choose Dynamic IP.
Enter the information provided by your ISP.
(Only applicable for Static IP L2TP.)
Enter the information provided by your ISP.
(Only applicable for Static IP L2TP.)
Enter the information provided by your ISP.
(Only applicable for Static IP L2TP.)
IP address of L2TP server.
User/account name that your ISP provides to you for L2TP dial-up.
Password that your ISP provides to you for L2TP dial-up.
Fill in with the same password in Password eld.
Reconnect
Mode:
Maximum Idle
Time:
Choose Always-on when you want to establish L2TP connection all the time. Choose Connect-on-demand and the device will
establish L2TP connection when local users want to surf Internet, and disconnect if no trac after time period of Maximum Idle
Time.
The time of no activity to disconnect your L2TP session. Set it to zero or choose Always-on to disable this feature.
Click Save Settings to save your changes, or click Don’t Save Settings to discard your changes.
20D-Link DWR-116 User Manual

Section 3 - Conguration
3G / 4G LTE
Choose this Internet connection if you already use a SIM card
for 3G/4G LTE Internet service from your mobile service provider
company. The fields here may not be necessary for your connection.
The information on this page should only be used if required by your
service provider.
Username:
Password:
Dialed Number:
Authentication:
APN:
PIN:
Reconnect Mode:
Maximum Idle
Time:
Primary DNS
Server:
(Optional) Fill in only if requested by ISP.
(Optional) Fill in only if requested by ISP.
Enter the number to be dialed.
PAP, CHAP, or Auto detection. The default
authentication method is Auto.
(Optional) Enter the APN information.
Enter the PIN associated with your SIM card.
Choose whether the device will reconnect to the 3G/4G network automatically or manually
The time of no activity required to disconnect the established 3G/4G LTE session. Set it to zero or choose Auto in Reconnect
Mode to disable.
(Optional) Fill in if provided by your ISP. If not, keep the default value.
Secondary DNS
Server:
Keep Alive:
Bridge Ethernet
Ports:
(Optional) Fill in if provided by your ISP. If not, keep the default value.
Disable or Use LCP Echo Request. This depends on ISP requirement.
Activate this feature to change Ethernet WAN port to LAN port.
21D-Link DWR-116 User Manual

Section 3 - Conguration
Static IP
Choose this Internet connection if your ISP assigns you a static IP
address.
IP Address:
Subnet Mask:
Default Gateway:
Primary DNS
Server:
Secondary DNS
Server:
MTU:
MAC Address:
Enter the IP address assigned to your network
connection.
Enter the subnet mask.
Enter the default gateway.
Enter the primary DNS server.
Enter the secondary DNS server.
You may n eed t o change the M a ximum
Transmission Unit (MTU) for optimal performance.
The default value is 1500.
The default MAC Address is set to the Internet
port’s physical interface MAC address on the
broadband router. It is not recommended that you
change the default MAC address unless required
by your ISP. You can use the Clone button to
replace the Internet port’s MAC address with the
MAC address of your Ethernet card.
Click Save Settings to save your changes, or click
Don’t Save Settings to discard your changes.
22D-Link DWR-116 User Manual

Section 3 - Conguration
Failover Setting
This connection can serve as a backup for your default connection.
Failover Type:
Remote Host for
Keep Alive:
Primary WAN:
This option can be set to either Load Sharing
or to Failover. With Load Sharing, the data
usage is distributed evenly over the two
dierent internet connections. With Failover,
the secondary Internet connection will be
in standby mode, until the primary Internet
connection fails.
This option should be set to an external IP
address that can be used to ensure that the
3G/4G LTE connection will be kept from going
oine due to inactivity. An example would be
Google’s public DNS servers (8.8.8.8 or 8.8.4.4)
or your Internet service providers DNS servers.
This will automatically be set to the connection
type selected during the Internet connection
Setup Wizard, or set to the My Internet
Connection is option which is found on the
Manual Internet Connections settings page.
Secondary WAN:
This can be set by clicking on Add New Rule,
the available options will be shown in the drop
down box that appears.
Click Save Settings to save your changes,
or click Don’t Save Settings to discard your
changes.
23D-Link DWR-116 User Manual

Section 3 - Conguration
Wireless Connection Setup Wizard
This section will help you to manually congure the wireless
settings of your router. Please note that changes made on this
section may also need to be duplicated on your wireless devices
and clients. The Wireless Settings page allows you to congure
how your router connects to the Internet. There are several ways
to set up your wireless connection.
You can click on the Wireless Connection Setup Wizard button
to start a wizard that will guide you through setting up your
wireless settings.
If you want to manually congure your settings, click the Manual
Wireless Connection Setup button and skip to “Manual Wireless
Connection Setup” on page 28.
You can also set up a wireless connection to a device
automatically, or congure your router automatically through
Windows by clicking the Wi-Fi Protected Setup button. This is
described in “Wi-Fi Protected Setup (WPS)” on page 32.
24D-Link DWR-116 User Manual

Section 3 - Conguration
This wizard will guide you through a step-by-step process to
congure your D-Link router’s wireless . Click Next to continue.
Note: While using the wizard, you can click Prev to go back to
the previous page or you can click Cancel to close the wizard
Enter a name for your wireless network, then click Next to
continue.
25D-Link DWR-116 User Manual

Section 3 - Conguration
Select a level of wireless security to use, then click Next to
continue.
If you chose BEST or BETTER, select whether to use TKIP or
AES encryption, then enter a password to use for your wireless
network. It is recommended that you use AES if your wireless
computers and devices support it, as it is more secure.
Click Next to continue.
26D-Link DWR-116 User Manual

Section 3 - Conguration
If you chose GOOD, select whether to use a HEX or ASCII
password, then enter a password to use for your wireless
network. If you choose HEX, you will need to enter a 10 or 26
digit password using only hex characters (0-9, A-F). If you choose
ASCII, the password can be between 5 to 13 alphanumeric
characters. Click Next to continue.
This completes the Wireless Connection Setup Wizard. Click Save
to save your changes and reboot the router.
27D-Link DWR-116 User Manual

Section 3 - Conguration
Wireless Settings
This section will help you to manually configure the wireless
settings of your router. Please note that changes made on this
section may also need to be duplicated on your Wireless Client.
Enable Wireless:
Wireless Network
Name:
802.11 Mode:
Auto Channel Scan:
Wireless Channel:
Select this checkbox to enable wireless access.
When you set this option, the following
parameters take eect.
Also known as the SSID (Service Set Identier),
this is the name of your Wireless Local Area
Network (WLAN). Enter a name using up to
32 alphanumeric characters. The SSID is casesensitive. The default name is “dlink_DWR-116”.
B/G/N mixed: Enable this mode if your network
contains a mix of 802.11b and 802.11g devices.
G mode: Enable this mode if your network
has only 802.11g devices. If you have both
802.11b and 802.11g wireless clients, disable
this mode.
Click Auto Channel Scan to automatically select the channel that it will operate on. This option is recommended because the
router will choose the channel with the least amount of interference.
Choose the clearest channel to help optimize the performance and coverage of your wireless network. By default the channel is
set to 11. This can be changed to t the channel setting for an existing wireless network or to customize your wireless network.
Visibility Status:
Select Invisible if you do not want the SSID of your wireless network to be broadcast by the DWR-116. The SSID of your router
will not be seen by site survey utilities. Therefore while setting up your wireless clients, you will have to manually enter your
SSID to connect to the router.
28D-Link DWR-116 User Manual

Section 3 - Conguration
Security Mode: This device supports three wireless security modes,
WEP, WPA-Personal, WPA-Enterprise or None.
WEP is the original wireless encryption standard.
WPA provides a higher level of security and WPAPersonal does not require an authentication
server. When WPA-Enterprise is enabled, the router
uses EAP (802.1x) to authenticate clients via a
remote RADIUS server.
Click Save Settings to save your changes, or click
Don’t Save Settings to discard your changes.
If you choose WEP, the following options will appear:
Authentication:
WEP Encryption:
Default WEP
Key:
WEP Key:
Select whether to u s e O p e n o r S h a r e d
authentication.
Select whether to use 64-bit or 128-bit encryption.
Select which WEP key (1-4) to use as the default
key. This will also change the WEP Key text box to
that WEP key for your to congure(1-4).
Set the WEP key/password for your wireless
network. Based on whether you are using 64 or
128-bit encryption, and whether you are using a
HEX or ASCII key, you will need to enter dierent
numbers of characters for your key, as indicated
below the WEP Key text box. ASCII keys may use
letters and numbers only, and HEX keys may use
numbers 0-9 and letters A-F only.
29D-Link DWR-116 User Manual

Section 3 - Conguration
If you choose WPA-Personal, the following options will appear:
WPA Mode:
Cipher Type:
Network Key:
Select whether to use WPA2 only or WPA only.
WPA2 only is the most secure, provided that all
of your clients can support it.
Select whether to use the TKIP or AES cipher. The
AES cipher is the most secure, provided that all of
your clients can support it.
Enter the key/password you want to use for
your wireless network. The key must be 8 to 63
characters long, and may only contain letters and
numbers.
30D-Link DWR-116 User Manual

Section 3 - Conguration
If you choose WPA-Enterprise, the following options will appear:
WPA Mode:
Cipher Type:
RADIUS Server IP
Address:
RADIUS Server
Port:
RADIUS Server
Shared
Secret:
Select whether to use WPA2 only or WPA only.
WPA2 only is the most secure, provided that all
of your clients can support it.
Select whether to use the TKIP or AES cipher. The
AES cipher is the most secure, provided that all of
your clients can support it.
Enter the IP address of your RADIUS server.
Enter the port used for your RADIUS server.
Enter the shared secret/password for your RADIUS
server.
31D-Link DWR-116 User Manual

Section 3 - Conguration
Wi-Fi Protected Setup
Wi-Fi Protected Setup (WPS) System is a simplified method for
securing your wireless network during the “Initial setup” as well
as the “Add New Device” processes. The process is just as easy as
pressing a button for the Push-Button Method or correctly entering
an 8-digit code.
Enable:
AP PIN:
Generate New
PIN:
Config Mode:
Config Status:
Disable WPS-PIN
Method:
Config Method:
WPS Status:
Enable/disable the Wi-Fi Protected Setup feature.
Shows the current PIN.
Create a random number that is a valid PIN. This
becomes the router’s PIN. You can then copy this
PIN to the user interface of the wireless client.
Select whether the router is the Enrollee or the
Registrar. If this is set to enrollee, the router will
try to connect to other devices. If it is set to registrar, other devices will try to connect to the router.
Displays the current state of WPS conguration. Clicking the Release button will disable any previously paired devices from connecting.
You will need to recongure WPS on those devices to connect them again.
This checkbox will disable pin authentication for WPS. You will have to use the push button on the router and the device you are
trying to connect in order to establish a WPS pairing.
Select whether the WPS authentication will use Pin code or push button method.
Displays the current state of the router’s WPS system.
Trigger:
The Trigger button acts like the physical WPS push button, and will search for devices nearby that are trying to establish a WPS
connection.
Note: The DWR-116 has a WPS push button on the front panel that will activate WPS mode by pressing and holding the button
for approximately 6 seconds. The Wi-Fi LED will begin to ash rapidly when WPS mode has been activated.
32D-Link DWR-116 User Manual

Section 3 - Conguration
Network Settings
Router Settings
This section will help you to change the internal network settings
of your router and to configure the DHCP Server settings.
Router IP
Address:
Default Subnet
Mask:
Local Domain
Name:
Enter the IP address of the router. The default
IP address is 192.168.0.1.
If you change the IP address, you will need to
enter the new IP address in your browser in
order to access the web-based conguration
utility.
Enter the Subnet Mask of the router. The
default subnet mask is 255.255.255.0.
Enter the local domain name for your network.
Click Save Settings to save your changes,
or click Don’t Save Settings to discard your
changes.
33D-Link DWR-116 User Manual

Section 3 - Conguration
DHCP Server Settings
The DWR-116 has a built-in DHCP (Dynamic Host Control Protocol)
server. The DHCP server assigns IP addresses to devices on
the network that request them. By default, the DHCP Server is
enabled on the device. The DHCP address pool contains a range
of IP addresses, which are automatically assigned to the clients
on the network.
Enable DHCP
Server:
DHCP IP
Address Range:
DHCP Lease
Time:
Primary DNS IP
Address:
Secondary DNS
IP Address:
Primary WINS IP
Address:
Secondary WINS
IP Address:
Select this box to enable the DHCP server on
your router.
Enter the starting and ending IP address for
the server’s IP address pool.
The time period for the IP address lease. Enter
the lease time in minutes.
Assign a primary DNS Server to DHCP clients.
Assign a DNS Server to DHCP clients.
Assign a primary WINS Server to DHCP clients.
Assign a WINS Server to DHCP clients.
Click Save Settings to save your changes,
or click Don’t Save Settings to discard your
changes.
34D-Link DWR-116 User Manual

Section 3 - Conguration
Advanced
Virtual Server
The device can be configured as a virtual server so that users can
access services such as Web or FTP via the public (WAN) IP address
of the router.
Well-known
Services:
Copy to:
Use schedule
rule:
ID:
Server IP: Port:
Enable:
Schedule Rule #:
This contains a list of pre-dened services.
Copies the rule to the line of the specied ID.
You may select Always On or choose the number
of a schedule rule that you have dened.
Identies the virtual server.
Enter the IP address of the computer on your local
network that you want to allow the incoming
service. In the next box, enter the port number
that you would like to open.
Select this box to enable the rule.
Specify the schedule rule number.
Click Save Settings to save your changes, or click
Don’t Save Settings to discard your changes.
35D-Link DWR-116 User Manual

Section 3 - Conguration
Application Rules
Some applications require multiple connections, such as Internet
gaming, video conferencing, Internet telephony and others. These
applications have difficulties working through NAT (Network Address
Translation). Application Rules allow some of these applications
work with the DWR-116.
Popular
Applications:
Copy to ID:
ID:
Trigger:
Incoming Ports:
Enable:
Select from a list of popular applications.
Copies the predened application rule to the line
of the specied ID.
Identies the rule.
The name of the trigger.
Specify the incoming port for the trigger rule.
Select this box to enable the rule.
Click Save Settings to save your changes, or click
Don’t Save Settings to discard your changes.
36D-Link DWR-116 User Manual

Section 3 - Conguration
QoS Engine
The QoS Engine improves your online experience by ensuring
that certain applications traffic is prioritized over other network
traffic, such as FTP or Web. For best performance, use the Automatic
Classification option to automatically set the priority for the
applications.
Enable QoS
Packet Filter:
Upstream
Bandwidth:
ID:
Local IP : Ports:
Remote IP :
Ports:
QoS Priority:
Enable:
Select this box to enable the QoS Packet Filter.
Specify the maximum upstream bandwidth here
(e.g. 400 kbps).
Identies the rule.
Specify the local IP address and then specify the
port after the colon.
Specify the remote IP address and then the port
after the colon.
Select Low, Normal, or High.
Select a checkbox to enable the particular QoS
rules individually.
Click Save Settings to save your changes, or click
Don’t Save Settings to discard your changes.
37D-Link DWR-116 User Manual

Section 3 - Conguration
MAC Address Filter
The MAC (Media Access Controller) Address Filter option is used
to control network access based on the MAC Address of the network
adapter. A MAC address is a unique ID assigned by the manufacturer
of the network adapter. This feature can be configured to ALLOW or
DENY network/Internet access.
MAC Address
Control:
Connection
Control:
Association
Control:
ID:
MAC Address:
IP Address:
Wake On LAN:
C:
Select this box to enable MAC ltering.
Wireless and wired clients with C selected
can connect to this device and allow/deny
connections from unspecied MAC addresses.
Wireless clients with A selected can associate to
the wireless LAN; and allow/deny connections
from unspecied MAC addresses.
Identies the rule.
Specify the MAC address of the computer to be
ltered.
Specify the last section of the IP address.
Click Trigger to congure Wake On LAN.
If this box is selected, the rule will follow the connection control setting specied in MAC ltering settings.
If this box is selected, the rule will follow the connection control setting specied in MAC ltering settings.
A:
Click Save Settings to save your changes, or click Don’t Save Settings to discard your changes.
38D-Link DWR-116 User Manual

Section 3 - Conguration
URL Filter
URL Filter allows you to set up a list of websites that will be blocked
from users on your network.
URL Filtering:
ID:
URL:
Enable:
Select this box to enable URL Filtering.
Identies the rule.
Enter URL that you would like to block.
Click to enable the specic URL lter.
Click Save Settings to save your changes, or click
Don’t Save Settings to discard your changes.
39D-Link DWR-116 User Manual

Section 3 - Conguration
Outbound Filter
Outbound Filter enables you to control what packets are
allowed to pass through the router. Outbound filter applies on
all outbound packets.
Outbound Filter:
Use Schedule
Rule:
Copy to ID:
ID:
Source IP : Ports:
Destination IP :
Ports:
Enable:
Schedule Rule #:
Previous Page:
Select this box to Enable the lter.
You may select Always On or choose the
number of a schedule rule that you have
dened.
Copies the predened lter to the specied ID
Identies the lter.
Specify the local IP address and then specify
the port after the colon.
Specify the remote IP address and then the
port after the colon.
Select this box to enable the lter.
Specify the schedule rule number.
Go back to the previous lter page.
Next Page:
Advance to the next lter page.
Click Save Settings to save your changes,
or click Don’t Save Settings to discard your
changes.
40D-Link DWR-116 User Manual
 Loading...