

Version 1.00| 11/19/2014
DIR-885L
DIR-885L
User Manual
AC3150 Ultra Wi-Fi Router
Preface
D-Link reserves the right to revise this publication and to make changes in the content hereof without obligation to notify any
person or organization of such revisions or changes.
Manual Revisions
Revision Date Description
1.00 November 19, 2014 Initial release
Trademarks
D-Link and the D-Link logo are trademarks or registered trademarks of D-Link Corporation or its subsidiaries in the United States or other countries.
All other company or product names mentioned herein are trademarks or registered trademarks of their respective companies.
Apple®, Apple logo®, Safari®, iPhone®, iPad®, iPod touch® and Macintosh® are trademarks of Apple Inc., registered in the U.S. and other countries.
App Store
Chrome™ browser, Google Play™ and Android™ are trademarks of Google Inc.
SM
is a service mark of Apple Inc.
Internet Explorer®, Windows® and the Windows logo are trademarks of the Microsoft group of companies.
Copyright © 2014 by D-Link Corporation, Inc.
All rights reserved. This publication may not be reproduced, in whole or in part, without prior expressed written permission from D-Link Corporation, Inc.
The purpose of this product is to create a constant network connection for your devices. As such, it does not have a standby mode or use a power
management mode. If you wish to power down this product, please simply unplug it from the power outlet.
Power Usage
This device is an Energy Related Product (ErP) with High Network Availability (HiNA), and automatically switches to a power-saving Network Standby
mode within 1 minute of no packets being transmitted. It can also be turned o through a power switch to save energy when it is not needed.
Network Standby: 8.4 watts
Switched O: 0.1 watts
iD-Link DIR-885L User Manual

Table of Contents
Table of Contents
Preface ................................................................................. i
Manual Revisions ........................................................................... i
Trademarks ...................................................................................... i
Power Usage .................................................................................... i
Product Overview .............................................................. 1
Package Contents .........................................................................1
System Requirements ................................................................. 2
Introduction ................................................................................... 3
Features ............................................................................................4
Antenna Setup ...............................................................................5
Hardware Overview .....................................................................6
Connections ...........................................................................6
LEDs ........................................................................................... 7
Installation ......................................................................... 8
Before you Begin ...........................................................................8
Wireless Installation Considerations ......................................9
Manual Setup ...............................................................................10
Pictures ..............................................................................29
Videos.................................................................................31
Music ..................................................................................33
Folders ...............................................................................36
Favorites ............................................................................39
Using the mydlink SharePort™ app for Android™ ...40
Main Menu .......................................................................44
Documents .......................................................................45
Pictures ..............................................................................47
Videos.................................................................................49
Music ..................................................................................51
Folders ...............................................................................54
Favorites ............................................................................58
Conguration ................................................................... 59
Device Mode ........................................................................60
Home ..............................................................................................61
Internet ...................................................................................61
DIR-885L .................................................................................62
Getting Started ................................................................ 12
Setup Wizard ................................................................................13
QRS Mobile App ..........................................................................18
mydlink SharePort ...................................................................... 23
Using the mydlink SharePort™ app for iPad®,
iPhone®, and iPod touch® ................................................23
Main Menu .......................................................................26
Documents .......................................................................27
Connected Clients ..............................................................63
USB Device ............................................................................64
Settings ..........................................................................................65
Wizard .....................................................................................65
Internet (Router Mode) .....................................................65
IPv6 .....................................................................................74
Wireless (Router Mode) ....................................................92
iiD-Link DIR-885L User Manual

Table of Contents
Guest Zone .......................................................................94
Connect a Wireless Client to your Router ....................119
WPS Button ................................................................................119
Network ..................................................................................96
SharePort ...............................................................................98
Create User .......................................................................99
mydlink ................................................................................100
Features .......................................................................................101
QoS Engine.........................................................................101
Firewall Settings ............................................................... 102
IPv4/IPv6 Rules ............................................................ 104
Port Forwarding ............................................................... 105
Virtual Server ................................................................ 106
Website Filter .....................................................................107
Static Routes ......................................................................108
IPv6 .................................................................................. 109
Dynamic DNS .................................................................... 110
IPv6 Host ........................................................................ 111
Management ............................................................................. 112
Time & Schedule .............................................................. 112
Time ................................................................................. 112
Schedule ........................................................................ 113
System Log .........................................................................114
Admin ..................................................................................115
Windows® 8 ................................................................................120
WPA/WPA2 ......................................................................... 120
Windows® 7 ................................................................................122
WPA/WPA2 ......................................................................... 122
WPS ....................................................................................... 125
Windows Vista® .........................................................................129
WPA/WPA2 ......................................................................... 130
Windows® XP .............................................................................132
WPA/WPA2 ......................................................................... 133
Troubleshooting ............................................................135
Wireless Basics ...............................................................139
What is Wireless? ...................................................................... 140
Tips ................................................................................................142
Wireless Modes .........................................................................143
Networking Basics .........................................................144
Check your IP address ............................................................ 144
Statically Assign an IP address ............................................ 145
Wireless Security ......................................................... 146
What is WPA? ................................................................ 146
System ............................................................................ 116
Upgrade .............................................................................. 117
Statistics .............................................................................. 118
Technical Specications ................................................ 147
Safety Statements .........................................................148
iiiD-Link DIR-885L User Manual
Section 1 - Product Overview
Product Overview
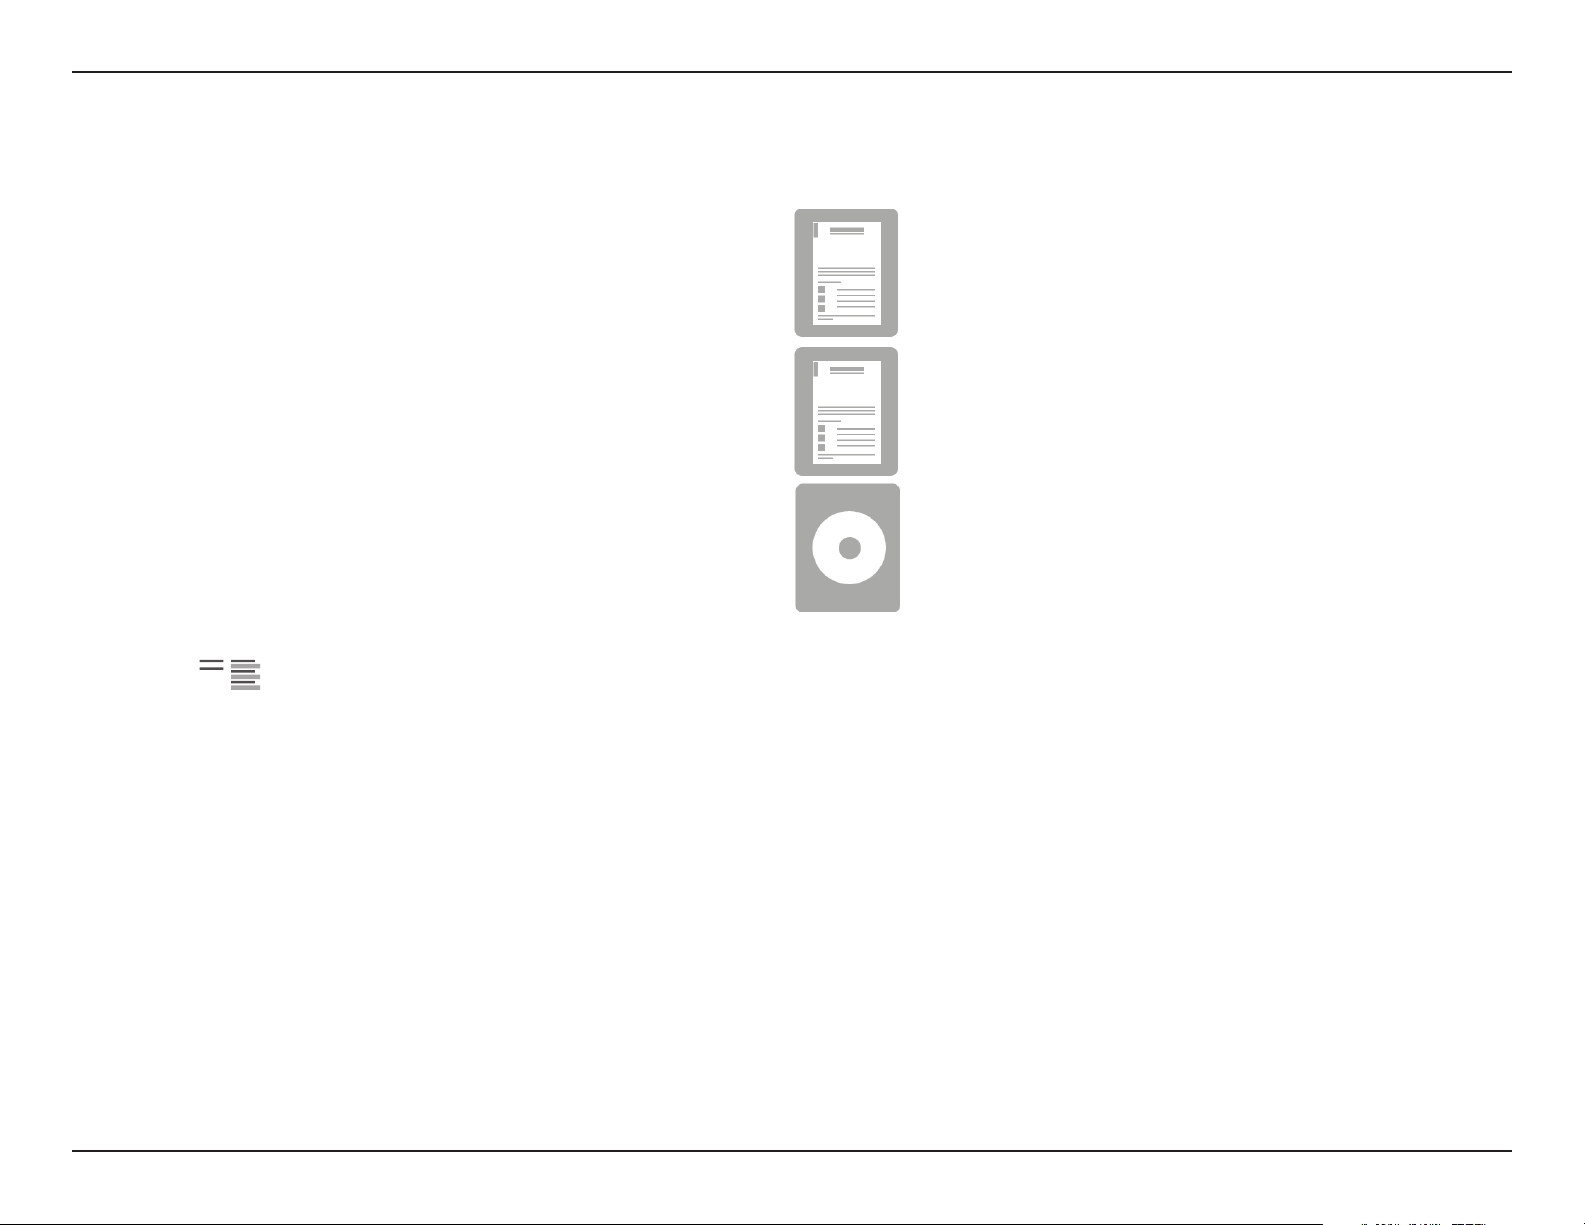
Package Contents
Wi-Fi Conguration Note
DIR-885L
Ethernet Cable
Power Adapter
Wi-Fi Conguration Note
Quick Installation Guide
D-Link Cloud Service Mobile Apps Guide
CD-ROM
If any of the above items are missing, please contact your reseller.
Note: Using a power supply with a dierent voltage rating than the one included with the DIR-8L will cause damage and void the warranty
for this product.
1D-Link DIR-885L User Manual

Section 1 - Product Overview
System Requirements
Network Requirements
Web-based Conguration
Utility Requirements
mydlink Requirements
• An Ethernet-based cable or DSL modem
• 802.11ac (draft), n, g, b, or a wireless or Ethernet port
Computer with the following:
• Windows®, Macintosh, or Linux-based operating system
• An installed Ethernet adapter
Browser Requirements:
• Internet Explorer 7 or higher
• Firefox 3.5 or higher
• Safari 4 or higher
• Chrome 8 or higher
Windows
installed. Visit www.java.com to download the latest version.
• iPhone/iPad/iPod touch (iOS 4.0 or higher)
• Android device (2.3 or higher)
• Computer with the following browser requirements:
®
Users: Make sure you have the latest version of Java
• Internet Explorer 7 or higher
• Firefox 3 or higher
• Safari 5 or higher
• Chrome 5 or higher
iPhone, iPad, and iPod touch are registered trademarks of Apple Inc. Android is a trademark of Google, Inc.
2D-Link DIR-885L User Manual

Section 1 - Product Overview
The D-Link DIR-885L AC3150 Ultra Wi-Fi Router uses advanced AC beamforming technology to maximize the speed and range
of your wireless signal to signicantly outperform 802.11n and other 802.11ac devices. It also comes equipped with four Gigabit
ports to provide speeds up to 10x faster than standard 10/100 ports. With the addition of Advanced Quality of Service (QoS),
data streams are separated, which helps organize and prioritize your network trac so your video streaming, gaming, and
VoIP calls run smoother over both your wired and wireless network.
The DIR-885L supports a host of cloud features including QRS Mobile, which allows you to setup and congure the router using
a mobile app. You can set up your router right from your sofa, no PC required.
The AC3150 Ultra Wi-Fi Router is also mydlink-enabled, which gives you access to your home network no matter where
you go. Now you can monitor and manage your home network right from your laptop, iPhone®, iPad®, or Android™ device.
mydlink-enabled routers can be congured to send an email to keep you informed anywhere, anytime when new devices are
connecting to your network or unwanted access is detected. Monitor in real-time websites that are being visited with recent
browser history displayed on the mydlink™ Lite app – which is great for parents.
SharePort technology lets you take advantage of the USB 3.0 port found on the back of your DIR-885L (as well as an additional
USB 2.0 port). Plug in a USB storage drive and you can use the mydlink SharePort™ app for iPad®, iPhone®, iPod touch®, and
Android™ device to access les, stream videos, view photos, or listen to music on your laptop or mobile devices. Plug in a printer
and you can use the mydlink SharePort app to share that printer with all of your devices.
Introduction
The DIR-885L AC3150 Ultra Wi-Fi Router provides incredible speeds, smart antenna technology, fast ports, cloud features, and
terric security features. It also features an innovative design and easy installation options.
3D-Link DIR-885L User Manual

Section 1 - Product Overview
• Faster Wireless Networking - The DIR-885L uses advanced AC beamforming to provide up to a full 3200 Mbps*
wireless connection with concurrent 801.11ac and 802.11n wireless clients . It also operates on both the 2.4
GHz and 5 GHz bands to allow separation of trac so users can participate in high-bandwidth activities, such
as video streaming, online gaming, and real-time audio, without aecting low-priority trac like email and web
surng.
• Cloud Features - The DIR-885L support the QRS Mobile app to setup the router using a mobile device. It is
also mydlink-enabled so you can remotely access and mange your DIR-885L from a mobile device. The mydlink
SharePort™ app can be used to share les, stream videos, view photos, and play music. SharePort Plus lets you
share a printer.
• Compatible with 802.11n/g/b/a Devices - The DIR-885L is still fully compatible with the 802.11n, IEEE 802.11g
and 802.11a standards, so it can connect with existing 802.11n, 802.11g, 802.11b, and 802.11a wireless devices.
• Advanced Firewall Features - The web-based user interface displays a number of advanced network
management features including:
Features
• Content Filtering - Easily applied content ltering based on MAC address, URL, and/or domain name.
• Filter Scheduling - These lters can be scheduled to be active on certain days, or for a duration of
hours or minutes.
• Secure Multiple/Concurrent Sessions - The DIR-885L can pass through VPN sessions. It supports
multiple and concurrent IPSec and PPTP sessions, so users behind the DIR-885L can securely access
corporate networks.
• User-friendly Setup Wizard - Through its easy-to-use web-based user interface, the DIR-885L lets you control
what information is accessible to those on the wireless network, whether from the Internet, or from your
company’s server. Congure your router to your specic settings within minutes.
* Maximum wireless signal rate derived from IEEE Standard 802.11a, 802.11b, 802.11g, and 802.11n specications. Actual data throughput will vary. Network conditions and
environmental factors, including volume of network trac, building materials and construction, and network overhead, lower actual data throughput rate. Environmental
conditions will adversely aect wireless signal range.
4D-Link DIR-885L User Manual
Section 1 - Product Overview
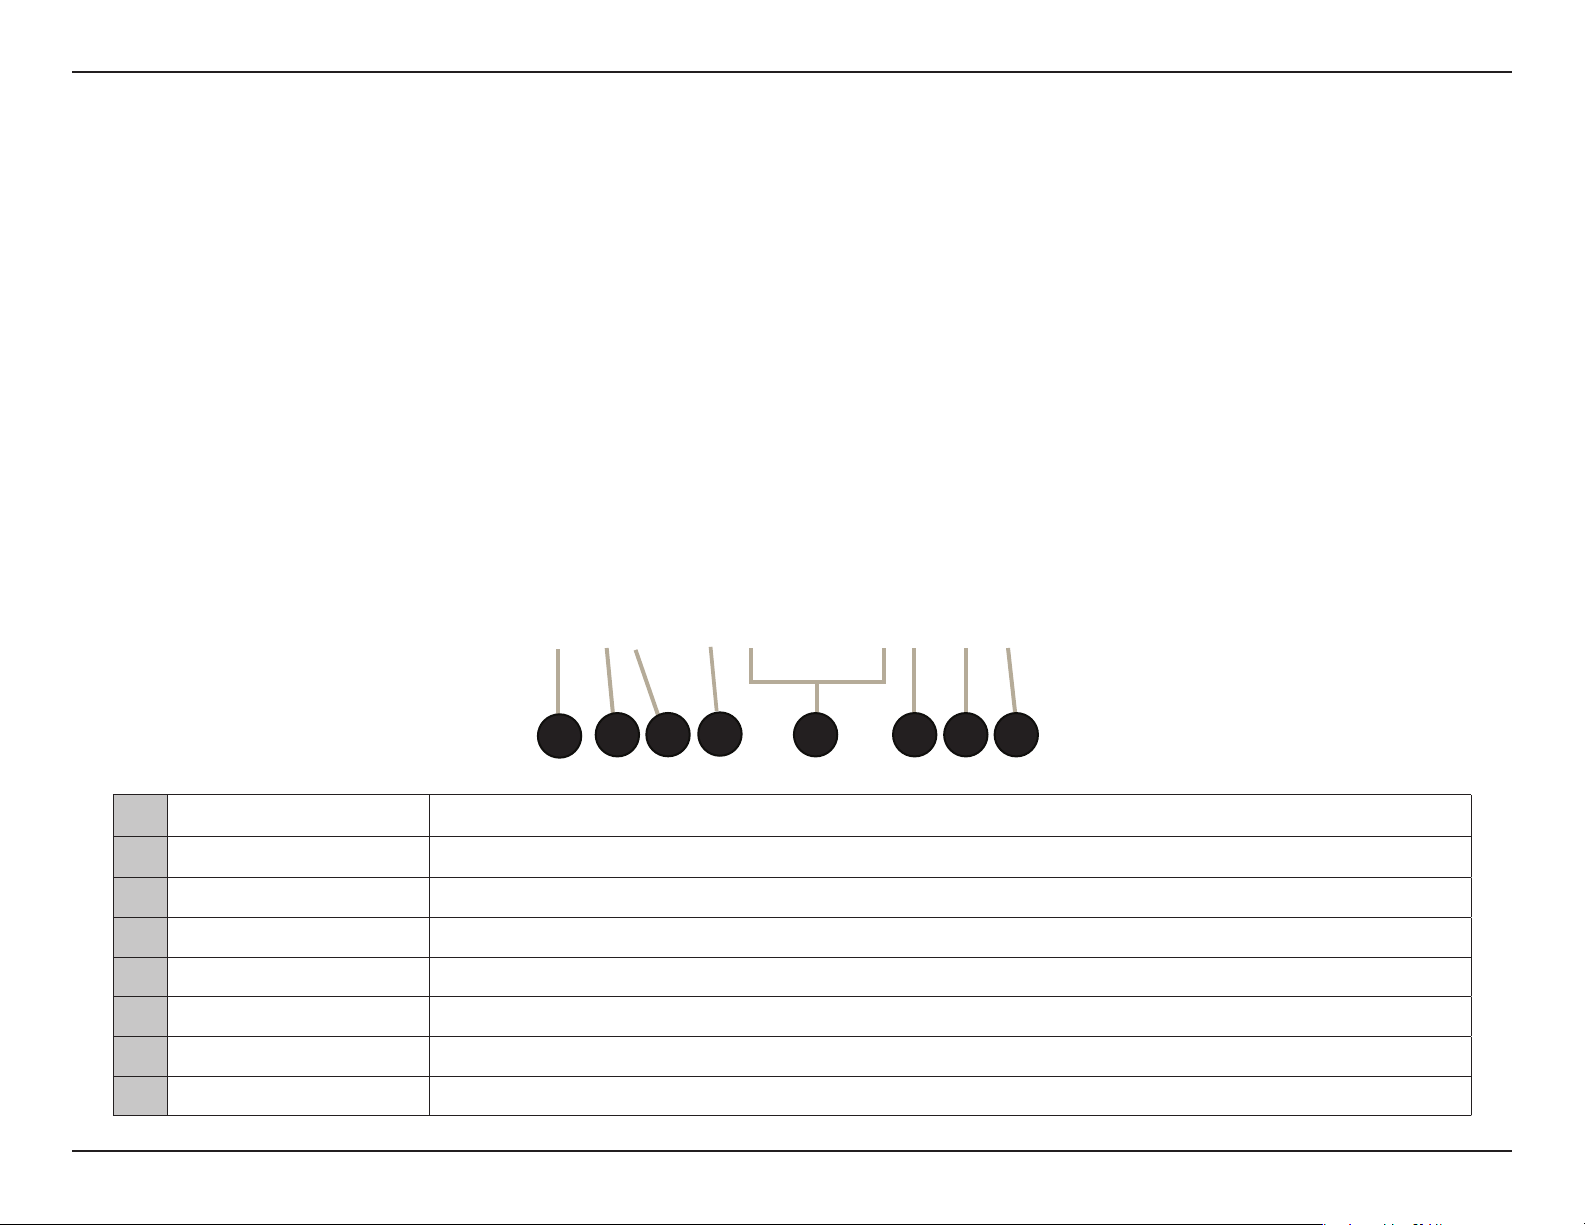
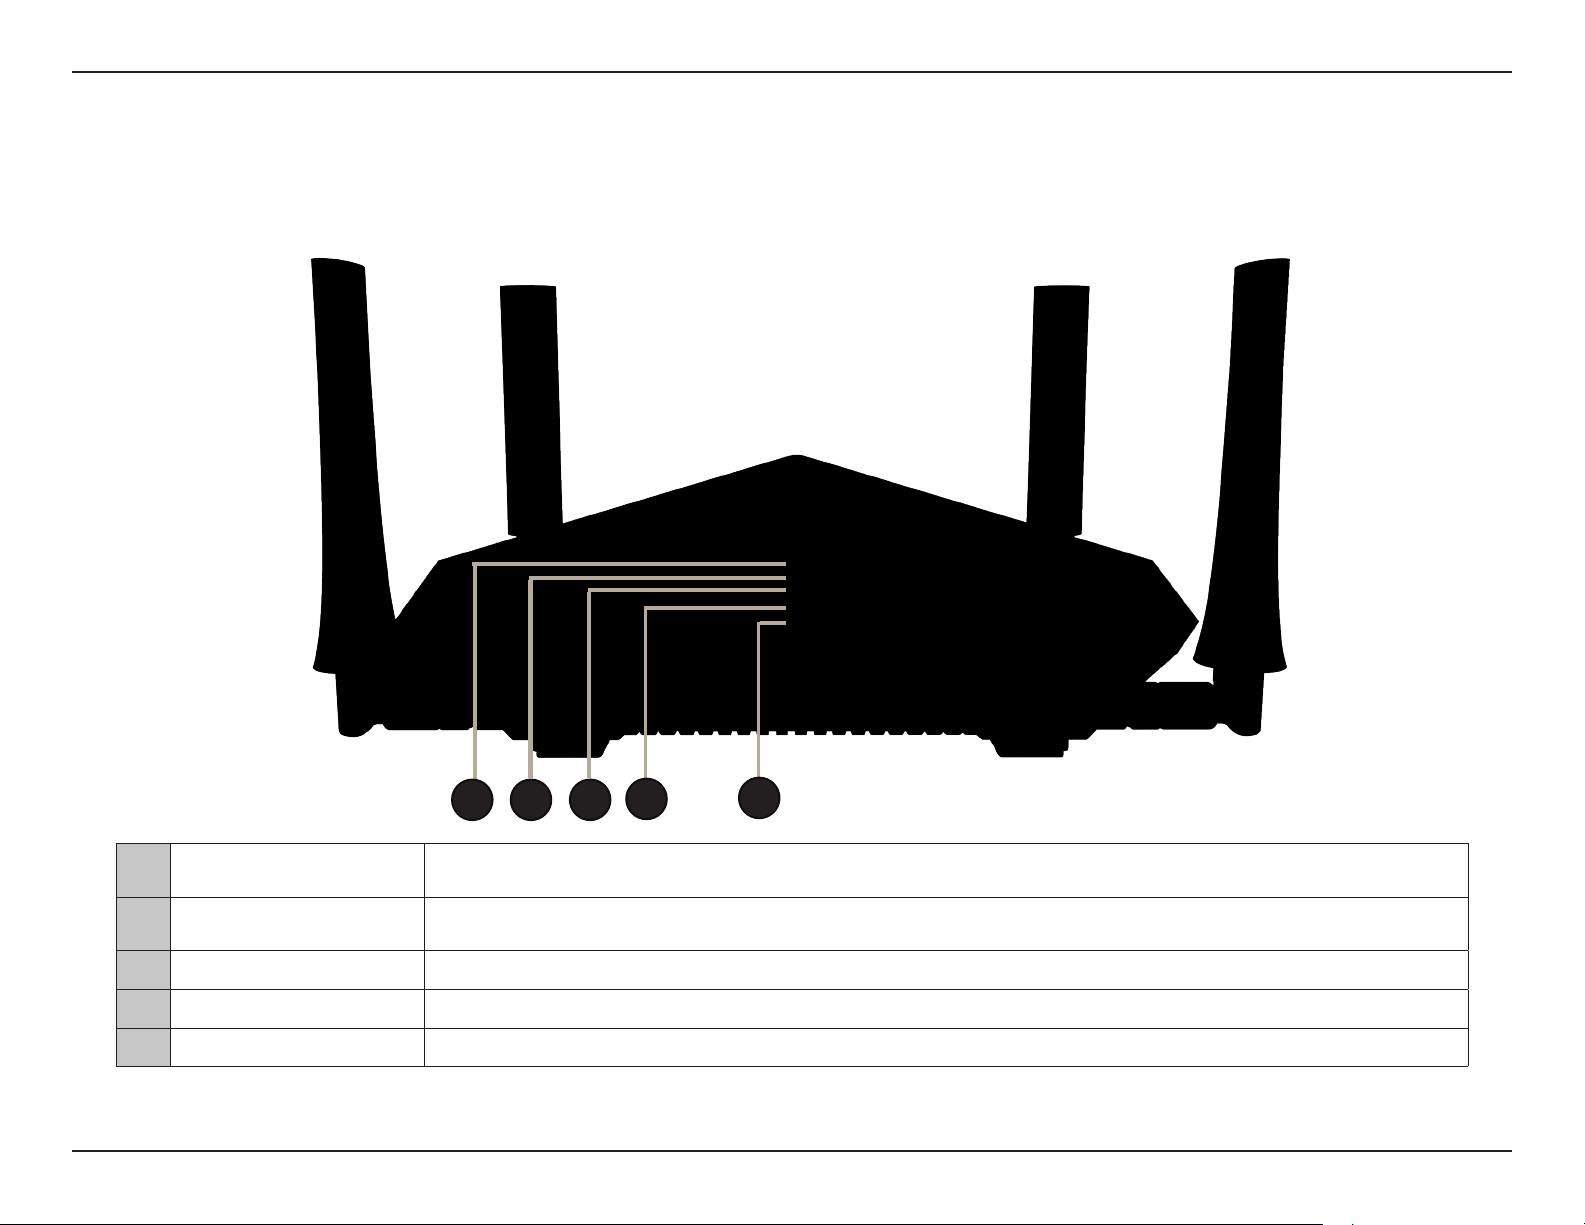
Hardware Overview
Connections
4
3 718
2
1 USB 3.0 Port Connect a USB ash drive to share content , or connect it to a USB printer to share it on your network.
2 Mode Switch
3 Reset Button Insert a paperclip in the hole and wait for several seconds to reset the router to default settings.
4 WPS Button Press to start the WPS process and automatically create a secure connection to a WPS client.
5 Gigabit LAN Ports (1-4) Connect Ethernet devices such as computers, switches, storage (NAS) devices and game consoles.
6 Gigabit Internet Port Using an Ethernet cable, connect your broadband modem to this port.
7 Power Button Press the power button to power on and o.
8 Power Receptor Receptor for the supplied power adapter.
5 6
6D-Link DIR-885L User Manual
Section 1 - Product Overview
Hardware Overview
LEDs
1 2 3
1 Power LED
2 Internet LED
3 Wireless (2.4 GHz) LED A solid blue light indicates that the 2.4 GHz wireless band is enabled.
4 Wireless (5 GHz) LED A solid blue light indicates that the 5 GHz wireless band is enabled.
5 USB 3.0 LED A solid blue light indicates that a USB device detected in the USB 3.0 port.
A solid blue light indicates a proper connection to the power supply. The light will be a solid orange
during boot up.
A solid light indicates connection on the Internet port. If the LED is orange, the connection is good but the
router cannot connect to the Internet.
4
5
7D-Link DIR-885L User Manual

Section 2 - Installation
This section will walk you through the installation process. Placement of the router is very important. Do not place the router
in an enclosed area such as a closet, cabinet, or in the attic or garage.
• Please congure the router with the computer that was last connected directly to your modem.
• You can only use the Ethernet port on your modem. If you were using the USB connection before using the router,
then you must turn o your modem, disconnect the USB cable and connect an Ethernet cable to the Internet port
on the router, and then turn the modem back on. In some cases, you may need to call your ISP to change connection
types (USB to Ethernet).
• If you have DSL and are connecting via PPPoE, make sure you disable or uninstall any PPPoE software such as WinPoET,
BroadJump, or EnterNet 300 from your computer or you will not be able to connect to the Internet.
Installation
Before you Begin
8D-Link DIR-885L User Manual

Section 2 - Installation
The D-Link wireless router lets you access your network using a wireless connection from virtually anywhere within the operating
range of your wireless network. Keep in mind that the number, thickness and location of walls, ceilings, or other objects that the
wireless signals must pass through may limit the range. Typical ranges vary depending on the types of materials and background
RF (radio frequency) noise in your home or business. The key to maximizing wireless range is to follow these basic guidelines:
1. Keep the number of walls and ceilings between the D-Link router and other network devices to a minimum -
each wall or ceiling can reduce your adapter’s range from 3-90 feet (1-30 meters.) Position your devices so that
the number of walls or ceilings is minimized.
2. Be aware of the direct line between network devices. A wall that is 1.5 feet thick (0.5 meters), at a 45-degree
angle appears to be almost 3 feet (1 meter) thick. At a 2-degree angle it looks over 42 feet (14 meters) thick!
Position devices so that the signal will travel straight through a wall or ceiling (instead of at an angle) for better
reception.
3. Building materials make a dierence. A solid metal door or aluminum studs may have a negative eect on range.
Try to position access points, wireless routers, and computers so that the signal passes through drywall or open
doorways. Materials and objects such as glass, steel, metal, walls with insulation, water (sh tanks), mirrors, le
cabinets, brick, and concrete will degrade your wireless signal.
Wireless Installation Considerations
4. Keep your product away (at least 3-6 feet or 1-2 meters) from electrical devices or appliances that generate RF
noise.
5. If you are using 2.4 GHz cordless phones or X-10 (wireless products such as ceiling fans, lights, and home security
systems), your wireless connection may degrade dramatically or drop completely. Make sure your 2.4 GHz phone
base is as far away from your wireless devices as possible. The base transmits a signal even if the phone is not
in use.
9D-Link DIR-885L User Manual
Section 2 - Installation
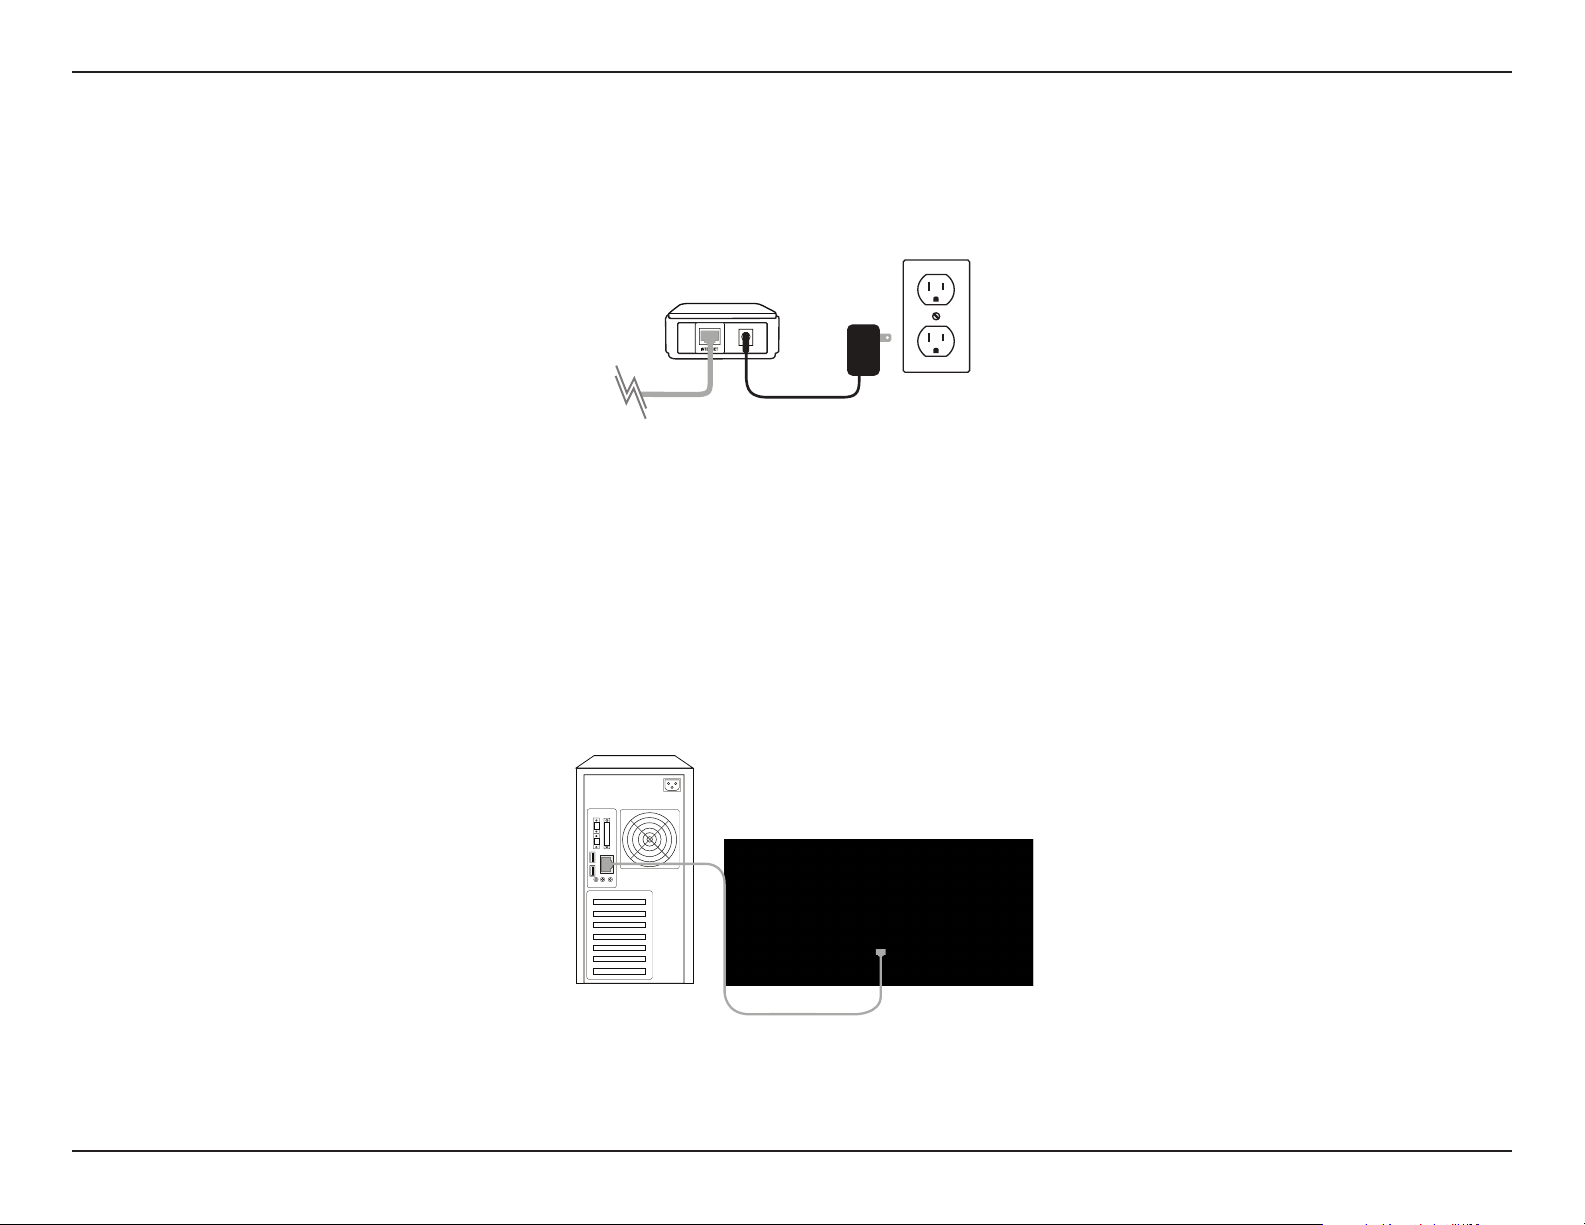
1. Turn o and unplug your cable or DSL broadband modem. This is required.
2. Position your router close to your modem and a computer. Place the router in an open area of your intended
work area for better wireless coverage.
3. Unplug the Ethernet cable from your modem (or existing router if upgrading) that is connected to your computer.
Plug it into the LAN port labeled 1 on the back of your router. The router is now connected to your computer.
Manual Setup
Modem
Computer
4
DIR-885L
10D-Link DIR-885L User Manual
Section 2 - Installation
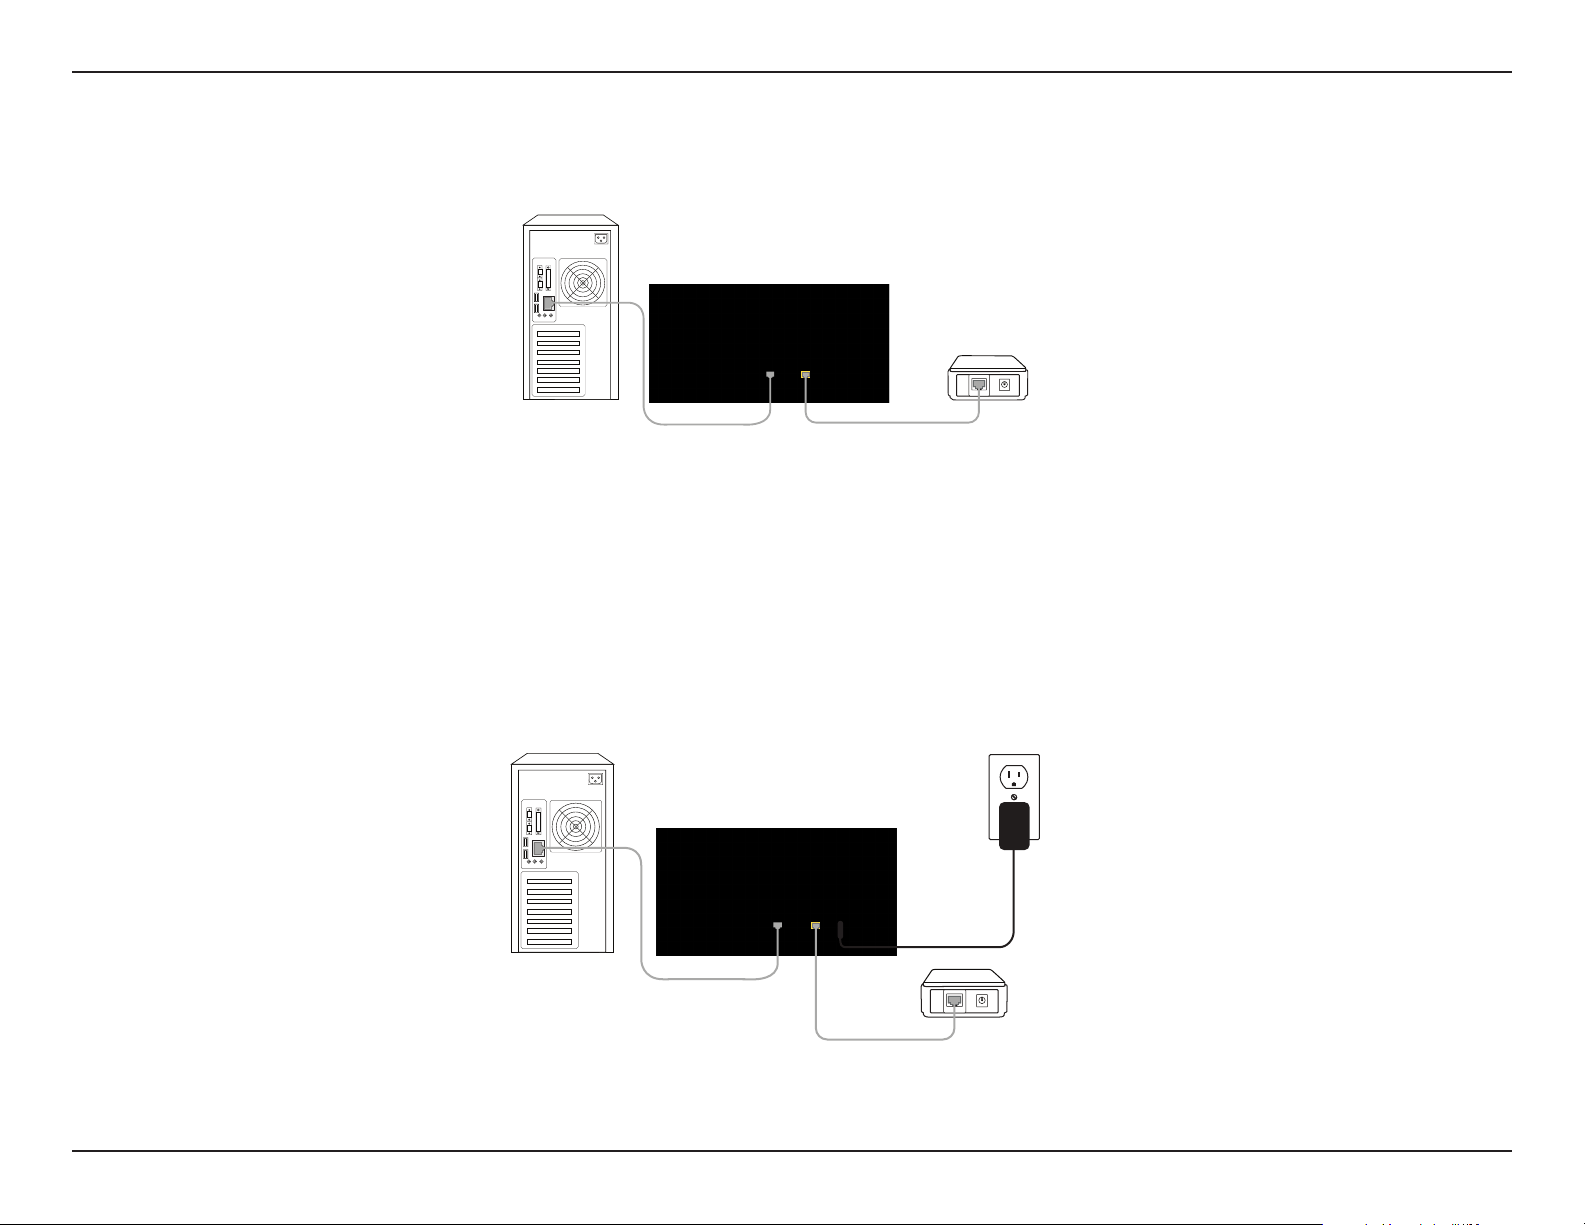
4. Plug one end of the included Ethernet cable that came with your router into the yellow port labeled INTERNET
on the back of the router. Plug the other end of this cable into the Ethernet port on your modem.
5. Reconnect the power adapter to your cable or DSL broadband modem and wait for two minutes.
6. Connect the supplied power adapter into the power receptor on the back of the router and then plug it into a
power outlet or surge protector. Press the power button and verify that the power LED is lit. Allow 1 minute for
the router to boot up.
Computer
4
DIR-885L
Modem
INTERNET
Note: This unit is to be used with power supply model WA-36C12R.
4
DIR-885L
Computer
INTERNET
Modem
7. If you are connecting to a broadband service, you may be online already and further conguration will be optional.
11D-Link DIR-885L User Manual

Section 3 - Getting Started
There are several dierent ways you can congure your router to connect to the Internet and connect to your clients:
• D-Link Setup Wizard - This wizard will launch when you log into the router for the rst time. Refer to page 13.
• QRS Mobile App - Use your iPhone, iPad, or iPod touch to congure your router. Refer to page 18.
• Manual Setup - Log into the router and manually congure your router. Refer to page 59
Getting Started
12D-Link DIR-885L User Manual

Section 3 - Getting Started
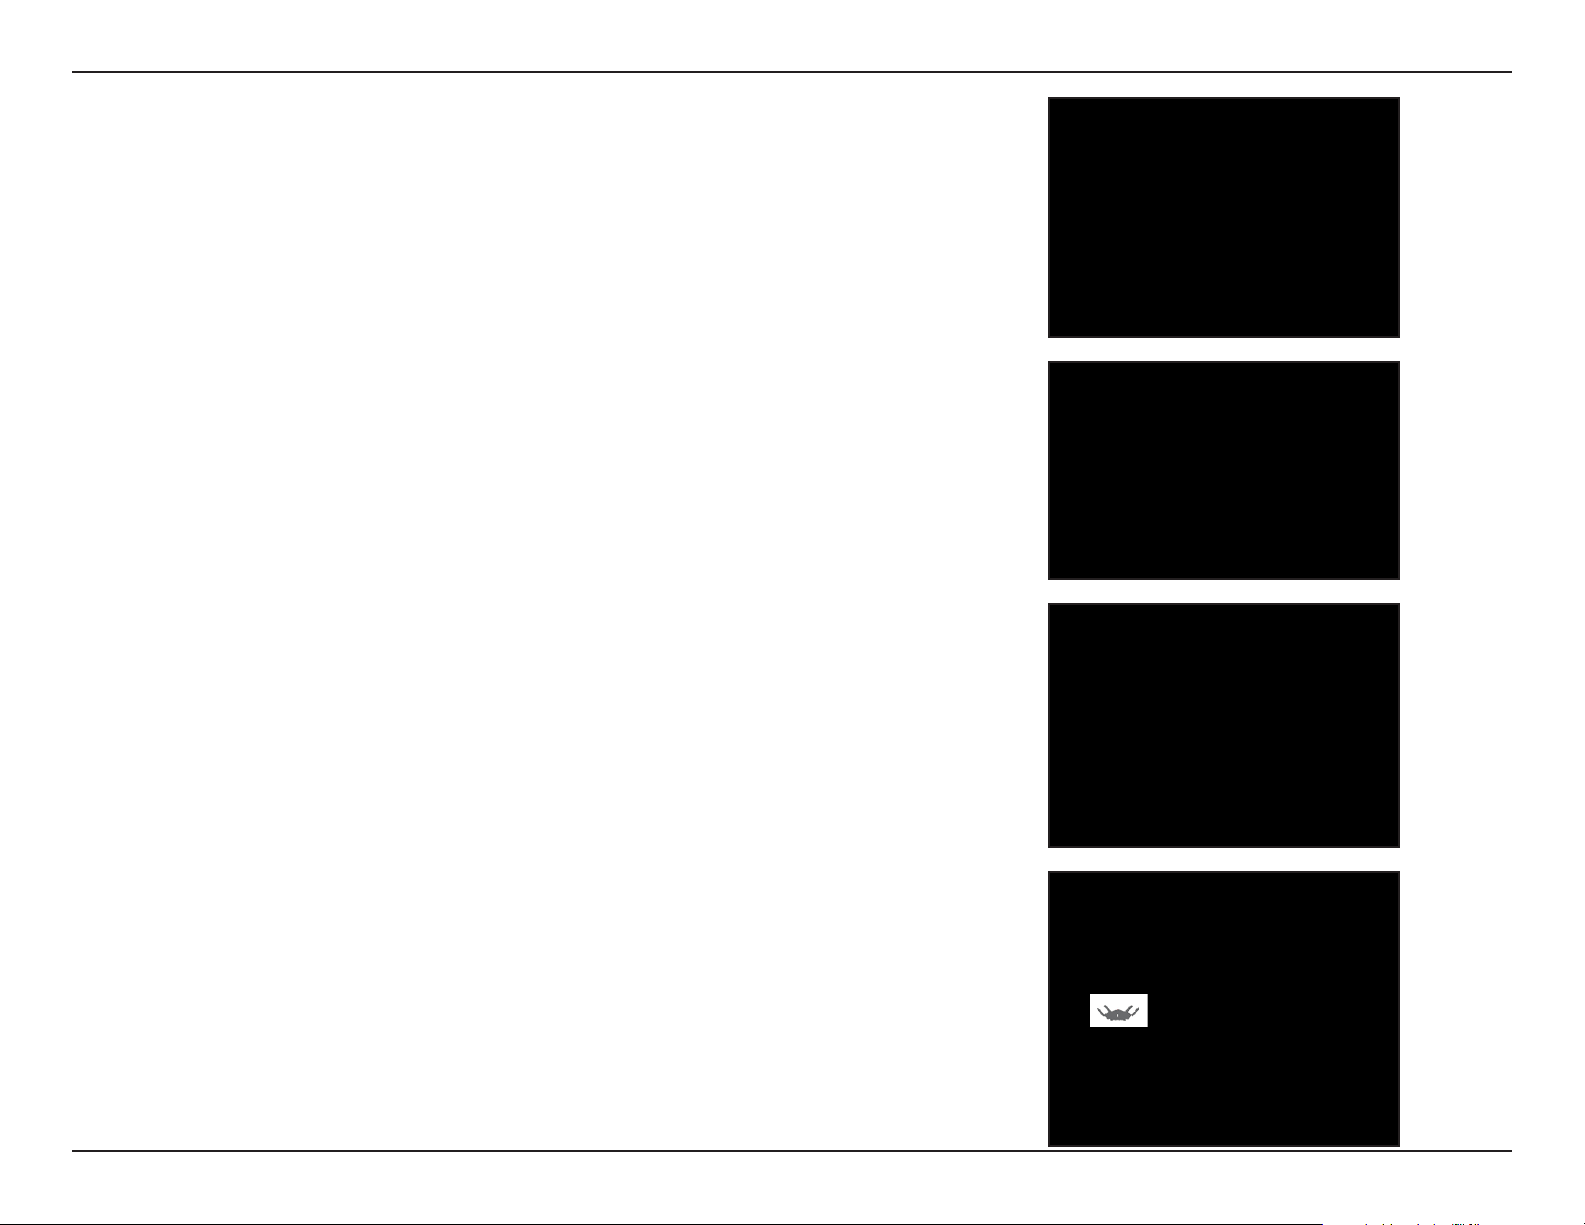
If this is your rst time installing the router, open your web browser and
enter http://dlinkrouter.local/ in the address bar. Alternatively, enter
the IP address of the router (default: http://192.168.0.1). Please refer
to page 59.
The wizard is designed to guide you through a step-by-step process to
congure your new D-Link router and connect to the Internet.
Click Next to continue.
Setup Wizard
Please wait while your router detects your Internet connection type. If
the router detects your Internet connection, you may need to enter your
ISP information such as username and password.
13D-Link DIR-885L User Manual

Section 3 - Getting Started
If the router does not detect a valid Internet connection, a list of
connection types to choose from will be displayed.
Select your Internet connection type (this information can be obtained
from your Internet service provider) and click Next to continue.
If the router detected or you selected PPPoE, enter your PPPoE username
and password and click Next to continue.
Note: Make sure to remove your PPPoE software from your computer. The
software is no longer needed and will not work through a router.
If the router detected or you selected Static, enter the IP and DNS settings
supplied by your ISP. Click Next to continue.
14D-Link DIR-885L User Manual

Section 3 - Getting Started
For both the 2.4 GHz and 5 GHz segments, create a Wi-Fi network name
(SSID) using up to 32 characters.
Create a Wi-Fi password (between 8-63 characters). Your wireless clients
will need to have this passphrase or key entered to be able to connect
to your wireless network.
Click Next to continue.
In order to secure the router, please enter a new password. You will be
prompted for this password every time you want to use the router’s web
conguration utility. Click Next to continue.
The Summary window will display your settings. Click Next if you are
satised, or click Back to make changes to them.
15D-Link DIR-885L User Manual
Section 3 - Getting Started
To use the mydlink service (mydlink.com or the mydlink Lite app), you
must have an account. Select Yes if you have a mydlink account already,
or No if you want to create one. Click Next to continue.
If you do not want to register at this time, click Skip.
If you clicked Yes , enter your mydlink account name (email address) and
password. Click Next to register your mydlink account with the router.
If you clicked No, ll out the requested information and click Next to
create your mydlink account.
At the end of the wizard, you will be presented with a nal summary of
your settings. Click Finish to close the wizard.
16D-Link DIR-885L User Manual

Section 3 - Getting Started
The mydlink App will allow you to receive notices, browse network users,
and congure your router from an iPhone/iPad/iPod touch (iOS 3.0 or
higher), or Android device (1.6 or higher).
To download the "mydlink Lite" app, visit the Apple Store, Android Market
or http://mydlink.com/Lite.
PC and Mac users can use the mydlink portal at http://mydlink.com.
17D-Link DIR-885L User Manual
Section 3 - Getting Started
QRS Mobile app allows you to install and congure your router from your mobile device.
Step 1
Search for the free QRS Mobile App on the iTunes Store or Google Play.
QRS Mobile App
For the iTunes Store, you may
also scan this code to download.
Step 2
Once your app is installed, you may now congure your router. Connect
to the router wirelessly by going to your wireless utility on your device.
Scan for the Wi-Fi name (SSID) as listed on the supplied info card. Select
and then enter your Wi-Fi password.
For Google Play, you may also
scan this code to download.
Step 3
Once you connect to the router, launch the QRS mobile app from the
Home screen of your device.
18D-Link DIR-885L User Manual

Section 3 - Getting Started
Step 4
You will see the welcome screen. Tap Start to proceed, then Next once
the Operation Mode screen appears.
Step 5
At this point, please ensure that you the router is connected to a modem.
Plug one end of the provided Ethernet cable into your DSL or cable
modem, and plug the other end into the port marked INTERNET on the
DIR-885L. Tap Next to automatically detect your Internet connection
and proceed to the next step.
19D-Link DIR-885L User Manual

Section 3 - Getting Started
Step 6
You will be prompted to set up each wireless frequency band in turn;
the 2.4 GHz band followed by the 5 GHz band.
Firstly, enter a network name (SSID) of your choice, or leave it unchanged
to accept the default SSID. Each wireless band can be assigned its own
SSID.
Secondly, choose a Wi-Fi password of at least 8 characters. Any device
trying to connect to the router wirelessly will need to enter this password
the rst time it connects.
Finally, tap Next to proceed.
Step 7
Enter the administrator password of your choice. Unlike the Wi-Fi
password, this password is only required when you need to congure
the router. See page 59 for details of when this password is used. Tap Next
to proceed.
20D-Link DIR-885L User Manual

Section 3 - Getting Started
Step 8
If you already have a mydlink account, select Yes, I have a mydlink
account and enter your mydlink email address and password. Lastly, tap
Sign In to set up the router to use your mydlink account.
If you do not have a mydlink account, select No, I want to create a new
mydlink account. Enter your email address, choose a mydlink password
and check the I accept the mydlink terms and conditions box. Finally,
tap Register to create your new mydlink account.
If you do not want to congure your router with mydlink at this stage,
tap Skip to proceed.
Step 9
If you wish to receive push notications whenever a new rmware update
is available, check the Notify me when new rmware is available box
and tap Next.
Otherwise, just tap Next to proceed.
21D-Link DIR-885L User Manual

Section 3 - Getting Started
Step 10
You will be presented with a summary of your chosen settings. If you wish
to make any changes, tap Back to step back through the previous pages.
Otherwise, tap Next to complete the setup.
Congratulations, your device has been successfully congured! You may
now exit the QRS app.
22D-Link DIR-885L User Manual

Section 3 - Getting Started
Using the mydlink SharePort™ app for iPad®, iPhone®, and iPod touch®
The mydlink SharePort™ app is a streamlined mobile application that allows you to conveniently stream media and share les
stored on a removable storage connected to your router. Once the router is set up, you can start the app and easily connect
from a local network or through the Internet to access your photos, videos, music, and documents. It allows you to create your
own personal cloud storage. You can upload les and photos from your mobile device to the removable storage via the app
from anywhere in the world!
Note: In order to ensure smooth streaming performance, you will need a minimum of 2 Mbit/s upload bandwidth for your router’s Internet
connection. Streaming performance will vary depending on the quality of your Internet connection.
Note: If you choose to skip the mydlink SharePort registration during the initial setup of your DIR-885L, you may begin the registration process
anytime by accessing the mydlink SharePort feature from within the router conguration. Please see page 94 for details on how to begin
the mydlink shareport registration process.
mydlink SharePort
1. If you are connecting remotely through the mydlink SharePort™
app from the Internet, you will need a mydlink account.
2. Make sure the device is powered on. Then plug your USB drive into
the USB port of the device.
Note: If you connect a removable storage with many les or a large capacity, it
may take a while for the router to scan and catalog your les.
23D-Link DIR-885L User Manual
Section 3 - Getting Started
3. Use your iPhone, iPad or iPod touch to search for and download the
free mydlink SharePort™ app from the App Store.
If you have a QR code reader, you can scan the code for mydlink
SharePort™ to the right.
4. If you are connecting to the router from a local network:
On your mobile device, go to your Wi-Fi settings and connect
to your router’s wireless network using the default Wi-Fi
settings. Locate the Wi-Fi name (SSID) and password for your
device as printed on the included Wi-Fi Configuration Card.
If you are connecting to the router from a remote network:
Go directly to the next step.
24D-Link DIR-885L User Manual
Section 3 - Getting Started
5. Tap the mydlink SharePort icon, and the app will load.
6. At the mydlink SharePort device list page, tap the gear icon at the
top right to enter the Settings page.
7. Enter your Admin Login and your mydlink Account Login information
in the elds and click Done. You will be taken back to the device
list where you can select the device for use with mydlink SharePort.
8. You can now use the mydlink SharePort app interface to stream
media and access les stored on your removable drive. The wireless
icon at the bottom will be lit blue to indicate a Local Access
connection. It will be green to indicate you are connected to the
router through Remote Access.
Note: If you see a red wireless icon, your router’s network environment may not
be suitable for a direct network connection and you may experience slow
network speeds.
25D-Link DIR-885L User Manual

Section 3 - Getting Started
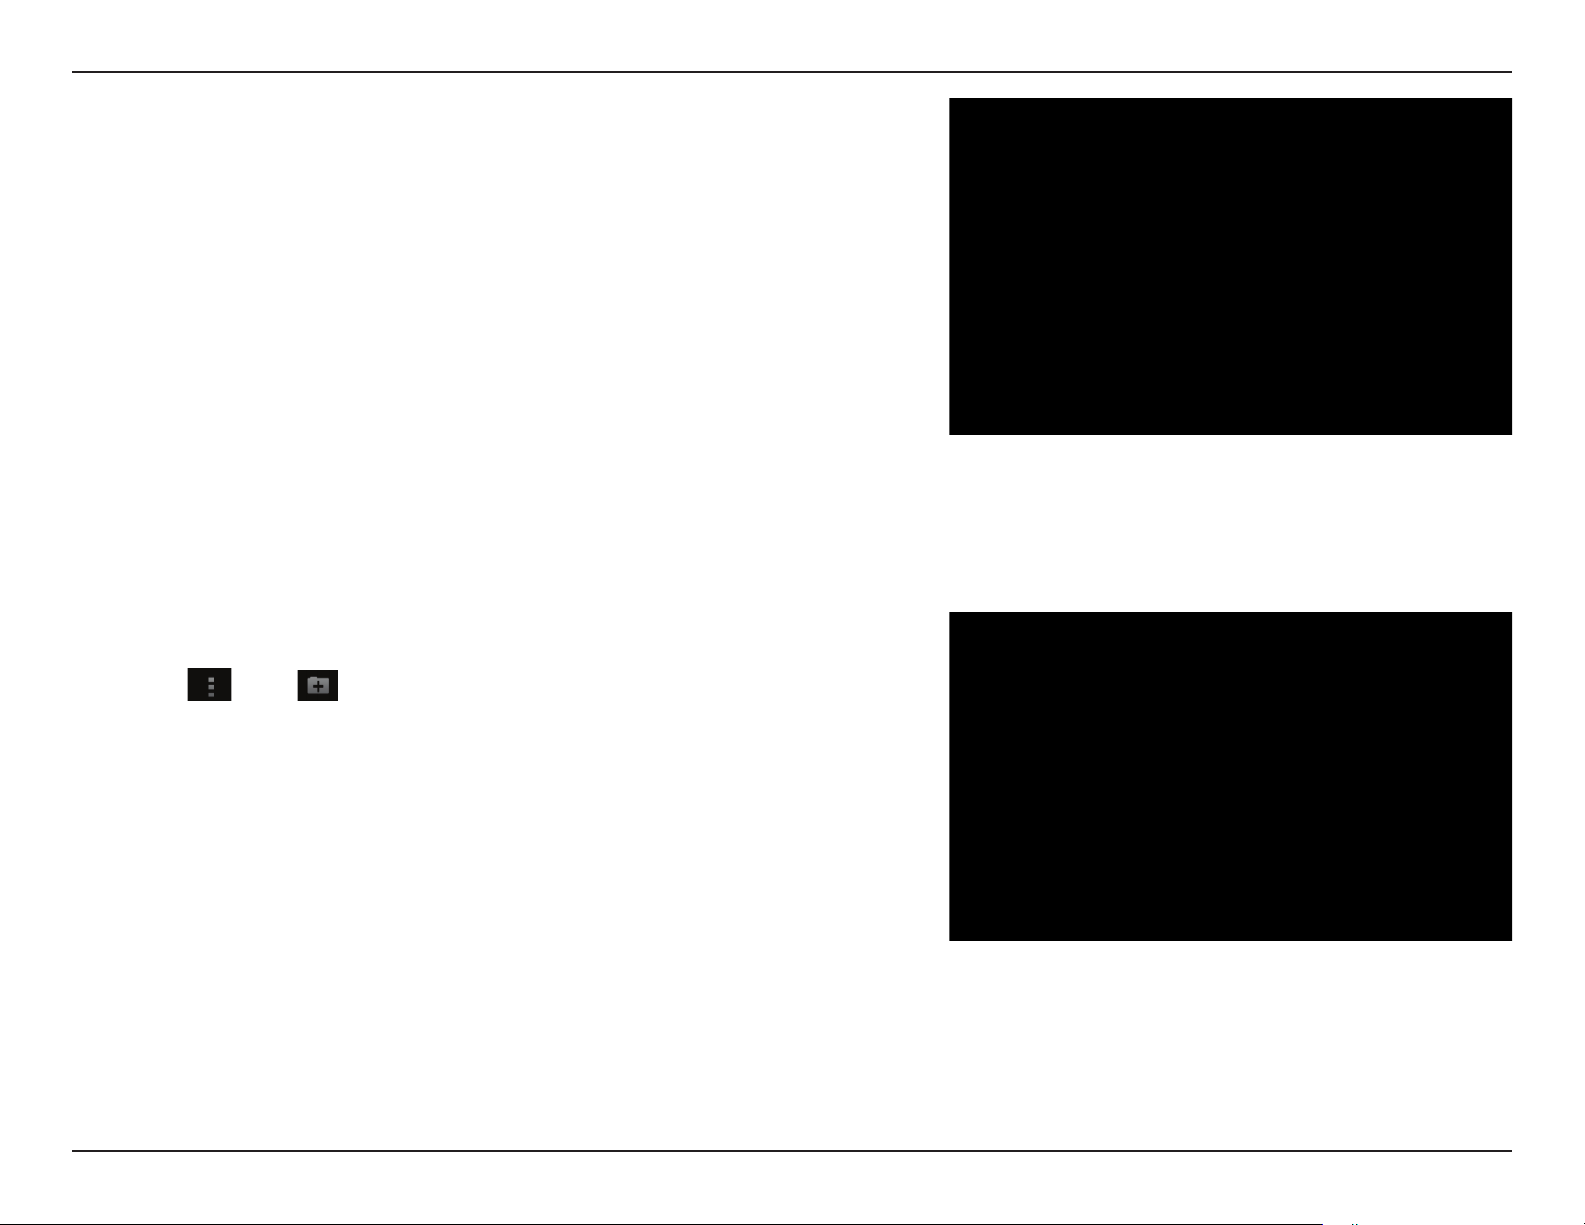
The mydlink SharePort main menu has dierent sections that let you see all the documents, photos, movies, or music stored
on your removable storage. Tap < or >, or swipe left or right to move between the dierent sections. The Wi-Fi icon at the
bottom indicates an active local network connection (blue) or remote connection (green/red). Tap Log In if it is not lit, or Log
Out to return to the login page.
Main Menu
Tap on the document icon to view documents.
Tap the camera icon to view photos.
Tap on the movie icon to play videos.
Tap on the music icon to play audio les.
Tap on the folder icon to browse all les in a folder view.
Tap on the star icon to access your favorite les.
26D-Link DIR-885L User Manual
Section 3 - Getting Started
The Documents section allows you to share, print, and view documents
streamed from your DIR-885L to your mobile device. Tap the document
icon on the main menu to browse the documents on your mobile device.
Documents
Search Bar:
Enter a lename here to search your storage.
Tap to mark les for deletion.
Tap the star icon next to each le to download it to your device and
add it into your Favorites section.
Tapping this icon gives you additional options:
• Mail: Tap to e-mail the le.
• iCloud: Tap to store the le on iCloud.
• AirPrint: Tap to print the le.
• Open In...: Tap to use a third-party app to open the le.
The bottom menu bar includes these options:
Tap to go back to the main menu.
Tap to update the list of les.
Tap to reorder the les alphabetically.
27D-Link DIR-885L User Manual

Section 3 - Getting Started
Tap on a le to start the document viewer. In the viewer:
Tap to add/remove the le from your Favorites.
Tap to bring up the same options as >.
Note: Some les may require a third-party app to view them.
28D-Link DIR-885L User Manual

Section 3 - Getting Started
The Pictures section allows you to stream images from your DIR-885L to
your mobile device. Tap the camera icon on the main menu to browse
your photo collection on your removable storage.
Pictures
Search Bar:
Enter a lename here to search your storage.
Tap to mark les for deletion.
Tap the star icon next to each le to download it to your device and
add it into your Favorites section.
Tapping this icon gives you additional options:
• Mail: Tap to e-mail the image.
• iCloud: Tap to store the image on iCloud.
• AirPrint: Tap to print the image.
• Facebook: Tap to upload the image to your Facebook account.
• Twitter: Tap to upload the image to your Twitter account.
• Open In...: Tap to use a third-party app to open the le.
The bottom menu bar includes these options:
Tap to go back to the main menu.
Tap to start a slideshow of your photos. Tap the screen again to bring
up the menu.
Tap to update the list of les.
Tap to reorder the les alphabetically.
29D-Link DIR-885L User Manual

Section 3 - Getting Started
Tap on a le to start the photo viewer. In the viewer:
Tap to add/remove the current image from your Favorites.
Tap to start the slideshow.
Tap to bring up the same options as >.
30D-Link DIR-885L User Manual

Section 3 - Getting Started
The Videos section allows you to stream video clips and movies from
your DIR-885L to your mobile device. Tap the movie icon on the main
menu to browse your videos on your removable storage.
Videos
Search Bar:
Enter a lename here to search for a specic le.
Tap to mark les for deletion.
Tap the star icon next to a le to download it to your device and add
it into your Favorites section.
Tapping this icon gives you additional options:
• Mail: Lets you e-mail the le.
• iCloud: Lets you store the le on iCloud.
• Open In...: Lets you use a third-party app to open the le.
The bottom menu bar includes these options:
Tap to go back to the main menu.
Tap to update the list of les.
Tap to reorder the les alphabetically.
31D-Link DIR-885L User Manual

Section 3 - Getting Started
Tap on a le to start playing it. In the player:
Tap to play/pause the video. You can scroll to any time on the time
line by holding and sliding your nger.
Tap to enter/exit fullscreen mode.
Tap to add/remove the le from your Favorites.
Tapping this icon gives you additional options:
• Mail: Lets you e-mail the video.
• iCloud: Lets you store the video on iCloud.
• Open In...: Lets you use a third-party app to open the le.
32D-Link DIR-885L User Manual

Section 3 - Getting Started
The Music section allows you to stream songs from your DIR-885L to
your mobile device. Tap the music icon on the main menu to browse
your music collection on your removable storage.
Music
Search Bar:
Enter a lename here to search your storage.
Tap to create a playlist and mark les for deletion.
Tap the star icon next to each le to download it to your device and
add it into your Favorites section.
Tapping this icon gives you additional options:
• Mail: Lets you e-mail the le.
• iCloud: Lets you store the le on iCloud.
• Open In...: Lets you use a third-party app to open the le.
The bottom menu bar includes these options:
Tap to go back to the main menu.
Tap to update the list of les.
Tap to reorder the les alphabetically.
33D-Link DIR-885L User Manual

Section 3 - Getting Started
Tap on a le to start playing it. In the player:
Tap to repeat all. Tap again to repeat a single song.
Tap to skip to the previous/next song.
Tap to enable/disable shue mode.
To create a playlist:
Tap Edit > Add Playlist.
Enter a name for the playlist, then tap Save.
The name of the playlist will appear in the browser next to the
icon.
34D-Link DIR-885L User Manual

Section 3 - Getting Started
To add songs to a playlist:
Tap the playlist in the browser.
Tap Add Music... to add songs to the current playlist.
Tick the songs you wish to add and tap Done.
To delete songs from the playlist:
Tap Edit in the playlist browser and mark the les to be
deleted.
Tap Delete.
35D-Link DIR-885L User Manual

Section 3 - Getting Started
You can browse your removable storage in a folder view in the folders
section. Tapping the lename will open the viewer/player for that le
type as described in the previous pages. You can also upload les from
your mobile device to the removable storage attached to your router.
Folders
Search Bar:
Enter a lename here to search your storage.
Tap to take you to the editing screen where you can add a folder and
mark les for deletion or copying.
Tap the star icon next to each le to download it to your device and
add it into your Favorites section.
Tapping the > icon gives you additional options depending on the
le type.
The bottom menu bar includes these options:
Tap to go back to the main menu.
Tap to upload les from your device to your removable storage.
Tap to update the list of les.
Tap to reorder the les alphabetically.
36D-Link DIR-885L User Manual

Section 3 - Getting Started
To delete les:
Tap Edit at the top right.
Tick the circle next to a le to mark it for deletion.
Tap on Delete at the bottom to delete the le.
To copy les:
Tap on Copy to bring up a window where you can select
the folder to copy to.
Browse to the directory you want to copy the marked les
to and tap Paste.
You can also tap Add Folder to create a new folder.
To create a new folder:
Browse to the directory you wish to create a new folder in.
Tap Edit at the top right.
Tap Add Folder to add a new folder.
Enter the name of the new folder, then tap Save.
Tap OK to conrm folder creation.
37D-Link DIR-885L User Manual

Section 3 - Getting Started
To upload images and videos from your mobile device:
Browse to the folder you wish to upload to.
Tap Upload at the bottom.
Select the photos/videos you wish to upload.
Tap Done.
During the upload process, the size of the le and the upload progress
will be displayed.
To upload more les, tap the + icon at the top right and repeat the steps
listed above.
38D-Link DIR-885L User Manual

Section 3 - Getting Started
The Favorites section allows you to quickly access your most often used
les, no matter what le type, in a special section. Files added to the
Favorites section will be copied here for playback in a centralized location.
Tap to mark les for deletion from the local storage in Favorites. The
le will still be accessible in other mydlink SharePort sections.
Tapping this icon gives you additional options depending on the le
type.
The bottom menu bar includes these options:
Tap to go back to the main menu.
Tap to update the list of les.
Favorites
Tap to reorder the les alphabetically.
Tap on a le to start the le viewer. In the viewer:
Tap to add/remove the le from your Favorites.
Tap to bring up additional options.
Note: The le options available will vary depending on the le type.
39D-Link DIR-885L User Manual

Section 3 - Getting Started
The mydlink SharePort™ app is a streamlined mobile application that allows you to conveniently stream media and share les
stored on a removable storage connected to your router. Once the router is set up, you can start the app and easily connect
from a local network or through the Internet to access your photos, videos, music, and documents. It allows you to create your
own personal cloud storage; you can upload les and photos from your mobile device to the removable storage via the app
from anywhere in the world!
Note: In order to ensure smooth streaming performance, you will need a minimum of 2 Mbit/s upload bandwidth for your router’s Internet
connection. Streaming performance will vary depending on the quality of your Internet connection.
If you are connecting remotely through the mydlink SharePort™ app
from the Internet, you will need a mydlink account.
Make sure the device is powered on. Then plug your USB drive into the
USB port of the device.
Using the mydlink SharePort™ app for Android™
Note: If you connect a removable storage with many les or a large capacity, it may
take a while for the router to scan and catalog your les.
40D-Link DIR-885L User Manual

Section 3 - Getting Started
Use your Android mobile device to search for and download the free
mydlink SharePort™ app from Google Play™.
If you have a QR code reader, you can scan the code for mydlink
SharePort™ to the right.
On your mobile device, go to your Wi-Fi settings and connect to your
router’s wireless network using the default Wi-Fi settings. Your Wi-Fi
network details can be found on the included Wi-Fi conguration card
included with your router, or on the bottom of the router.
41D-Link DIR-885L User Manual

Section 3 - Getting Started
Once connected, tap the mydlink SharePort™ icon, and the app will load.
At the login page:
You can tap ? to see diagrams with descriptions of the two types of
connections available.
If you are unsure about which connection method to choose, you can
click Remote Access.
Local Access:
Local mode will connect you to storage on your current network. For
example, if you are at home connecting to your router, choose this
mode.
Remote Access:
Remote mode will connect you to storage on your
router in a dierent location. For example, you are at
your oce connecting to your router at home.
42D-Link DIR-885L User Manual

Section 3 - Getting Started
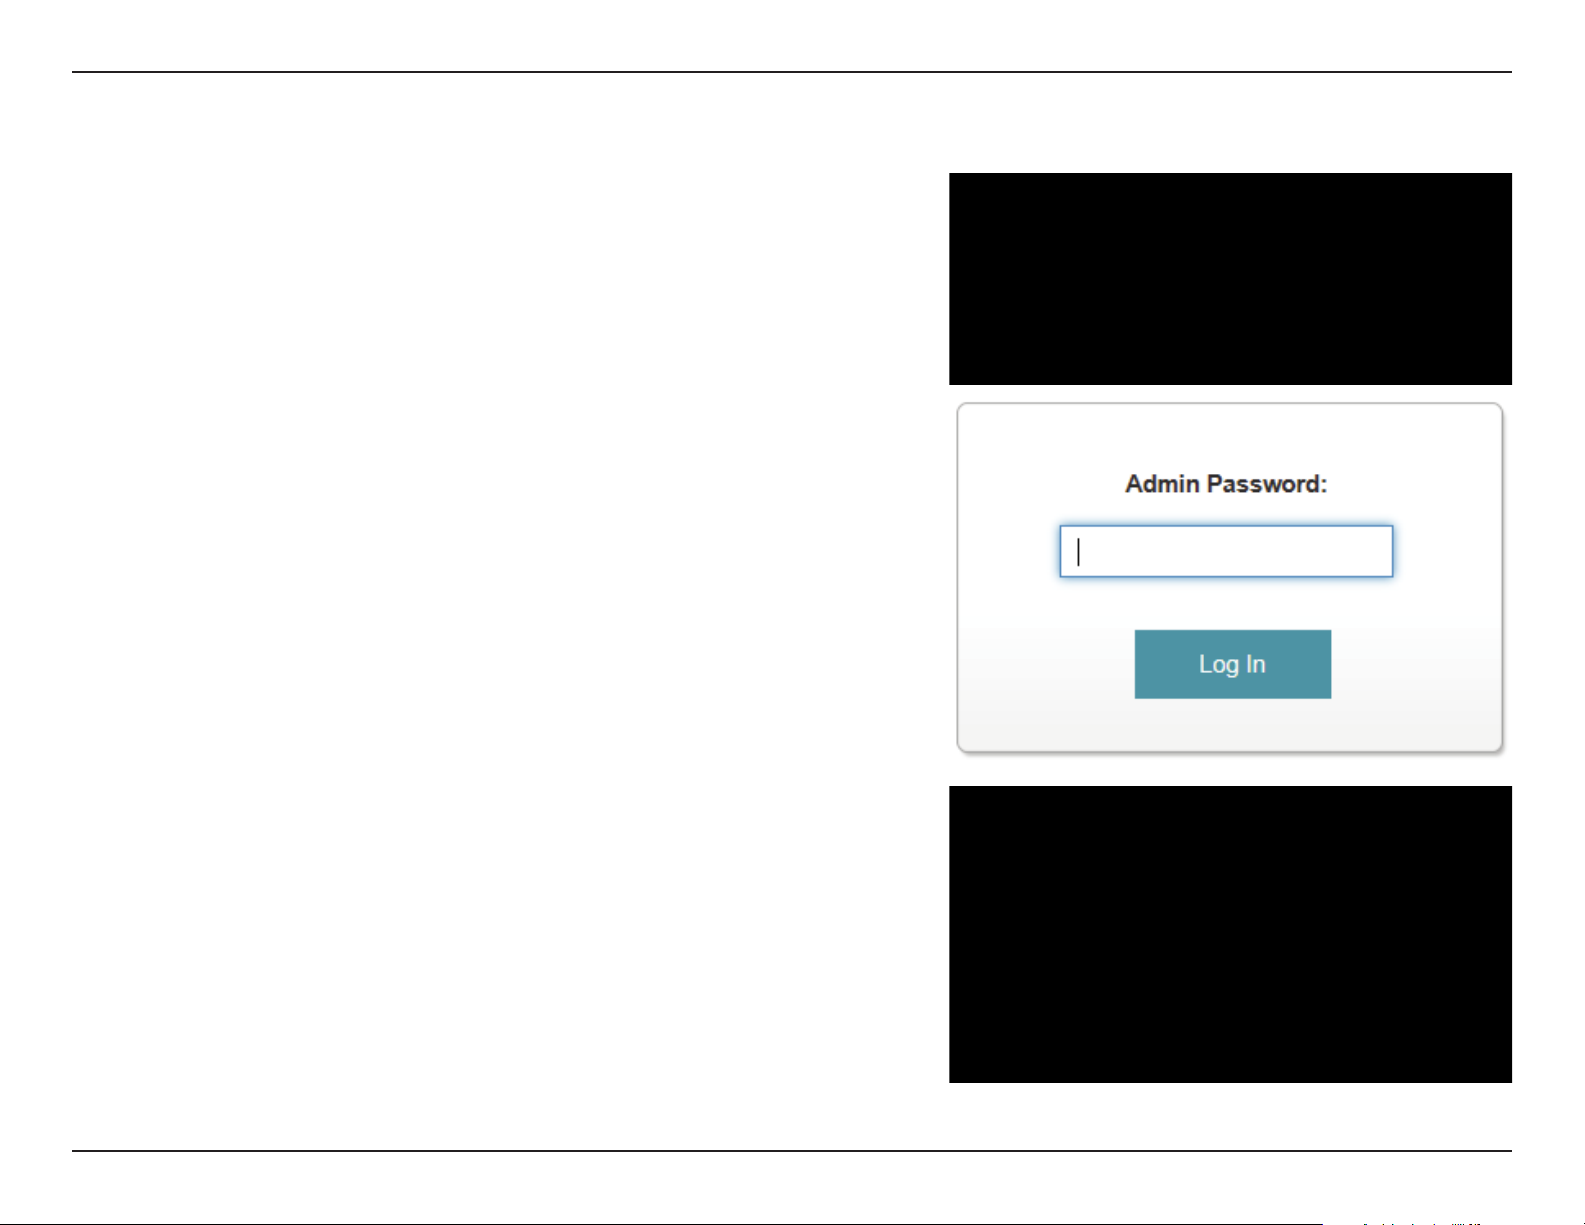
If you are directly connected to the DIR-885L’s wireless network,
tap Local Access and enter the Admin Password of your router, then
tap Log In.
If you are connecting through the Internet tap Remote Access
and enter your mydlink login information, then tap Log In. Tap on
your router on the devices page that appears. You can now share
your les.
After logging in, select your router from the device list.
You can use the mydlink SharePort™ app interface to stream media
and access les stored on your removable drive.
The wireless icon at the bottom will be lit blue to indicate
a Local Access connection. It will be green to indicate you
are connected to the router through Remote Access.
Note: If you see a red wireless icon, your router’s network environment may not
be suitable for a direct network connection and you may experience slow
network speeds.
43D-Link DIR-885L User Manual

Section 3 - Getting Started
The mydlink SharePort main menu has dierent sections that let you see all the documents, photos, movies, or music stored
on your removable storage. Tap < or >, or swipe left or right to move between the dierent sections. The Wi-Fi icon at the
bottom indicates an active local network connection (blue) or remote connection (green/red). Tap Log In if it is not lit, or Log
Out to return to the login page.
Main Menu
Tap on the document icon to view documents.
Tap the camera icon to view pictures.
Tap on the movie icon to play videos.
Tap on the music icon to play audio les.
Tap on the folder icon to browse all les in a folder
view.
Tap on the star icon to access your favorite les.
Note: Available features may dier depending on the Android OS version of
your device.
44D-Link DIR-885L User Manual

Section 3 - Getting Started
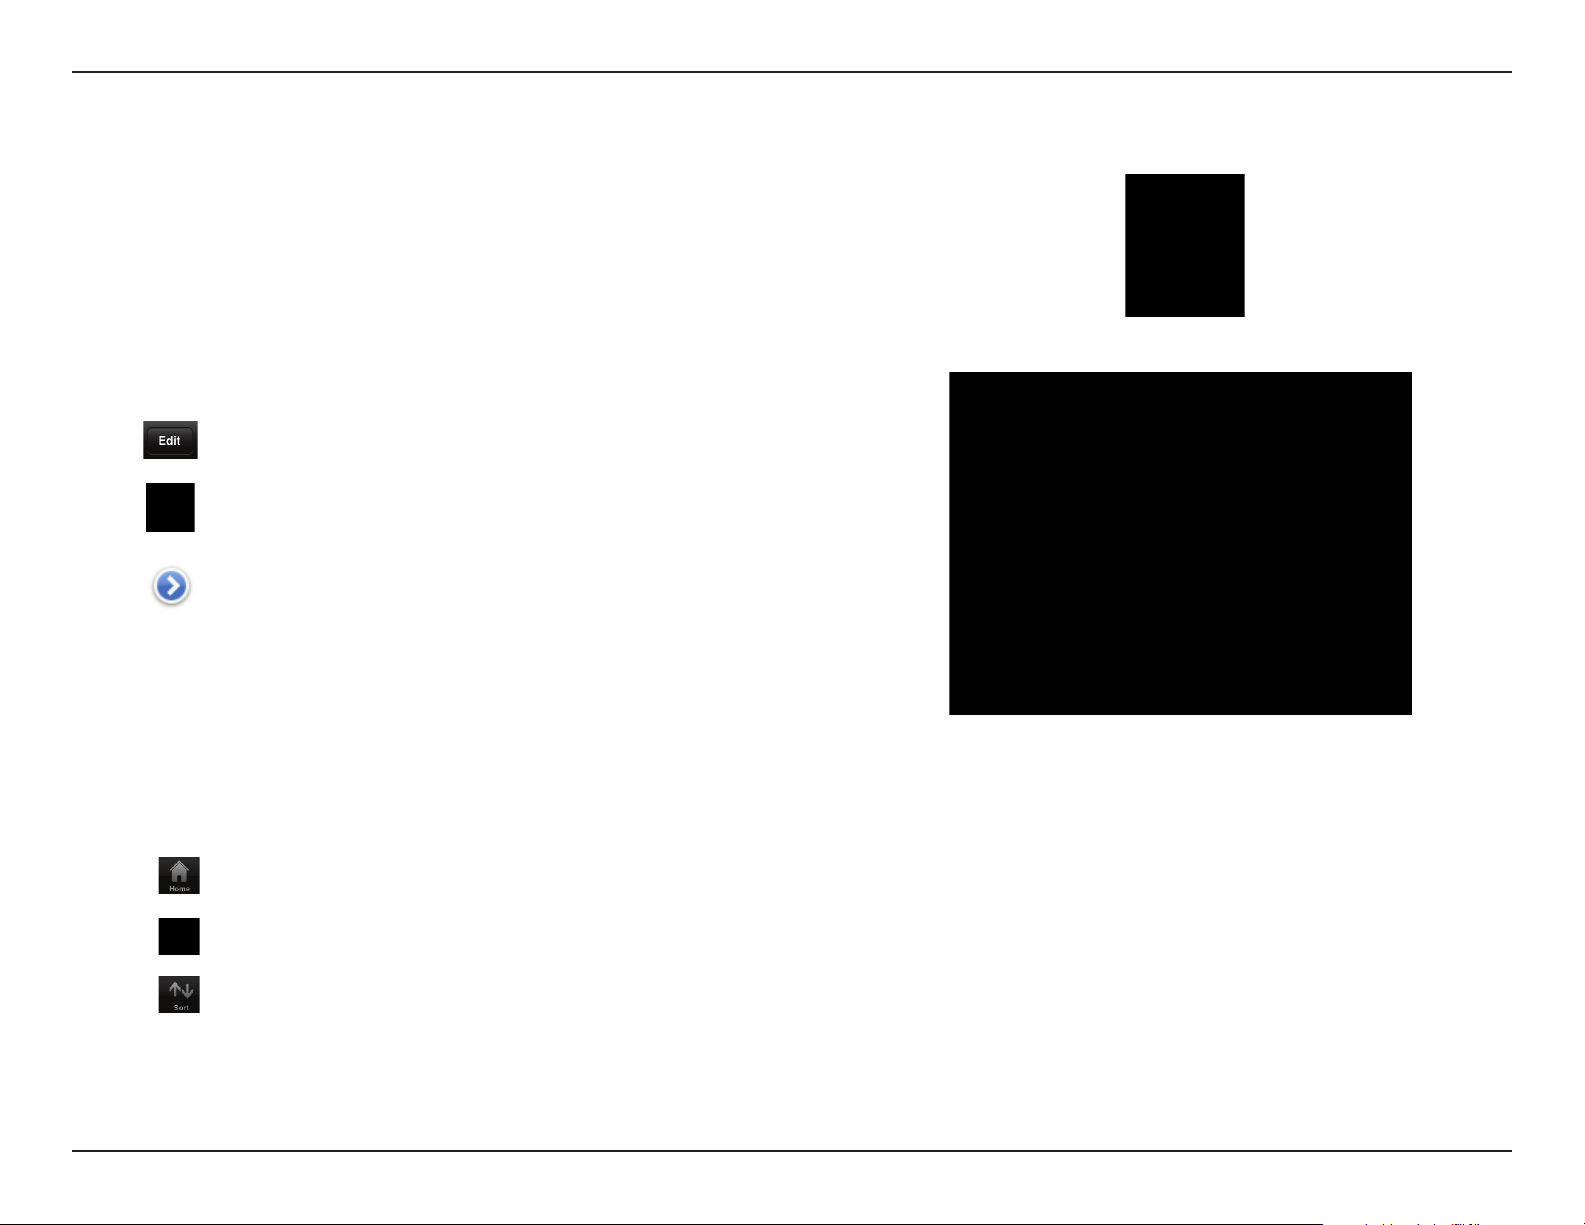
The Documents section allows you to share, print, and view documents
streamed from your DIR-885L to your mobile device. Tap the document
icon on the main menu to browse the les on your mobile device.
Documents
Search Bar:
Type in the name of a le to search for it.
Tap to return to the main menu.
Tap to refresh, sort, or mark les for deletion.
Tap the star icon next to each le to download it to your device and
add it into your Favorites section.
Tap for additional options:
Tap to return to the main menu.
Tap to update the list of les.
Tap to sort the les by name, size, type, or date.
Check a le then tap to delete it.
45D-Link DIR-885L User Manual

Section 3 - Getting Started
Tap on a le to start the document viewer. In the viewer:
Tap the screen to bring up zoom in/out buttons.
Drag the screen up or down to scroll between pages.
Tap
to perform File, Find, Zoom, Reading View, Go To
Page, and Bookmarks actions.
Note: Available actions may dier depending on your Android OS.
46D-Link DIR-885L User Manual

Section 3 - Getting Started
The Pictures section allows you to view images streamed from your
DIR-885L to your mobile device. Tap the camera icon on the main menu
to browse your photo collection on your removable storage.
Pictures
Search Bar:
Type in the name of a le to search for it.
Tap to return to the main menu.
Tap to start a slideshow.
Tap to refresh, sort, or mark les for deletion.
Tap the star icon next to each le to download it to your device and
add it into your Favorites section.
Tap for additional options:
Tap to return to the main menu.
Tap to update the list of les.
Tap to sort the les by name, size, type, or date.
Check a le then tap to delete it.
47D-Link DIR-885L User Manual

Section 3 - Getting Started
Tap on an image le to start the image viewer. In the viewer:
Tap the star icon to download it to your device and add it into your
Favorites section.
Tap to start a slideshow. Tap the image to stop the slideshow.
Tap to delete the current image. Tap OK to conrm.
Tap to bring up additional options using other applications.
Tap to access the image editor.
Note: This function may vary depending on the version of your Android OS.
48D-Link DIR-885L User Manual

Section 3 - Getting Started
The Videos section allows you to stream video clips and movies from
your DIR-885L to your mobile device. Tap the movie icon on the main
menu to browse your videos on your removable storage.
Videos
Search Bar:
Type in the name of a le to search for it.
Tap to return to the main menu.
Tap to refresh, sort, or mark les for deletion.
Tap the star icon next to a le to download it to your device and add
it into your Favorites section.
Tap for additional options:
Tap to return to the main menu.
Tap to update the list of les.
Tap to sort the les by name, size, type, or date.
Check a le then tap this icon to delete it.
49D-Link DIR-885L User Manual

Section 3 - Getting Started
Tap on a le to start playing it. Tap on the screen to bring up the scroll
bar, pause button, and play button.
Tap to resume playback.
Tap to pause the video.
Note: Available features may vary depending on the Android OS version installed
on your device.
50D-Link DIR-885L User Manual

Section 3 - Getting Started
The Music section allows you to stream songs from your DIR-885L to
your mobile device. Tap the music icon on the main menu to browse
your music collection on your removable storage.
Music
Search Bar:
Type in the name of a le to search for it.
Tap to return to the main menu.
Tap to refresh, sort, or mark les for deletion.
Tap to browse your playlists.
Tap the star icon next to a le to download it to your device and add
it into your Favorites section.
Tap for additional options:
Tap to return to the main menu.
Tap to update the list of les.
Tap to sort the les by name, size, type, or date.
Check a le then tap this icon to delete it.
51D-Link DIR-885L User Manual

Section 3 - Getting Started
Tap on a le to start playing it. In the player:
Tap on the up/down arrow to show/hide the player controls.
Tap to repeat all. Tap again to repeat a single song.
Tap to skip to the previous/next song.
Tap to play or pause the song.
Tap to enable/disable shue mode.
To create a playlist:
Tap
Tap Add new playlist...
Enter a name for the playlist, then tap OK. The name of the
playlist will appear in the browser next to the
You can tap
icon.
then to refresh the playlist page.
52D-Link DIR-885L User Manual

Section 3 - Getting Started
To add songs to a playlist:
Tap a playlist to see its contents.
Tap Add Music... to add songs to the current playlist.
Tick the songs you wish to add and tap
To delete songs from the playlist:
Tap Edit in the playlist browser and mark the les to be deleted.
Tap
then tap OK to conrm.
to save.
53D-Link DIR-885L User Manual

Section 3 - Getting Started
You can browse your removable storage in a folder view in the folders
section. Tapping the lename will open the viewer/player for that le
type as described in the previous pages. You can also upload les from
your mobile device to the removable storage attached to your router.
Folders
Search Bar:
Type in the name of a le to search for it.
Tap to return to the main menu.
Tap to access le options.
In the le browser:
Tap to return to the main menu.
Tap to upload les.
Tap to refresh, sort, create a new folder, or mark les for deletion and
copying.
54D-Link DIR-885L User Manual

Section 3 - Getting Started
Tap to select les and perform the following actions:
Tap to update the list of les.
Tap to sort the les by name, size, type, or date.
Tap to create a new folder.
Mark a le then tap this icon to delete it.
Mark a le then tap this icon to copy it.
To delete les:
Tap on
and tick the box next to a le for deletion.
Tap on
To copy les:
Tap on
each le for copying.
Tap on
to delete your selected les. Tap OK to conrm.
to select les for copying. Tick the box next to
to browse to the destination.
55D-Link DIR-885L User Manual
Section 3 - Getting Started
Tap Paste or Cancel.
You can also tap New Folder if you wish to create a folder
in the current directory.
To create a new folder:
Browse to the directory you wish to create a new folder in.
Tap
then .
Enter the name of the folder in the box, then tap OK.
56D-Link DIR-885L User Manual

Section 3 - Getting Started
To upload images and videos from your mobile device:
Browse to the folder you wish to upload to.
Tap
and browse to the le or les you wish to upload
from the local device.
Tick the box next to each of the les you wish to upload.
Tap Upload.
During the upload process, the size of the le and the upload progress
will be displayed under the le name.
To remove a le from the upload queue, tap the X next to it.
57D-Link DIR-885L User Manual

Section 3 - Getting Started
The Favorites section allows you to quickly access your most often used
les, no matter what le type, in a special section. Files added to the
Favorites section will be copied here for playback in a centralized location.
Favorites
Search Bar:
Type in the name of a le to search for it.
Tap to return to the main menu.
Tap to refresh, sort, or mark les for deletion.
Tap for additional options:
Tap to return to the main menu.
Tap to update the list of les.
Tap to sort the les by name, size, type, or date.
Check a le then tap to delete it.
58D-Link DIR-885L User Manual
Section 4 - Conguration
To access the conguration utility, open a web-browser such as Internet Explorer
and enter http://dlinkrouter.local.
Windows and Mac users may also connect by typing the IP address of the router (by
default this is http://192.168.0.1) in the address bar.
Enter your password. If you previously followed the setup wizard (see page 13), please
use the admin password you entered during the wizard. Otherwise, leave the
password blank. Click Log In to proceed.
Note: If you cannot remember your password and cannot log in, press the reset button
(see page 6) to restore the router to its default settings.
Conguration
The router’s home page will open displaying its current connection status.
The bar at the top of the page has quick access to Settings and Management
functions. You may quickly jump back Home at any time.
Note: The system will automatically log out after a period of inactivity.
59D-Link DIR-885L User Manual

Section 4 - Conguration
The DIR-885L can be placed into two device modes: Router Mode.
The default mode is Router Mode. To change the device mode, in the Settings
menu on the bar on the top of the page, click Internet to see the Internet
configuration options. On the Device Mode drop-down menu, select either Router
Mode . The router will then reboot into the new mode.
Router Mode is the most commonly used mode, and unlocks all functionality. If you
are unsure which mode to choose, select Router Mode.
Device Mode
60D-Link DIR-885L User Manual

Section 4 - Conguration
The Home page displays the current status of the router in the form of an interactive diagram. You can click each icon to display
information about each part of the network at the bottom of the screen. The menu bar at the top of the page will allow you
to quickly navigate to other pages.
The Home page displays whether or not the router is currently connected to the
Internet. If it is disconnected, click Click to repair to bring up the setup wizard
(see page 13).
To bring up more details about your Internet connection, click on the Internet
icon. Click IPv4 or IPv6 to see details of the IPv4 connection and IPv6 connection
respectively.
Home
Internet
Click Release to disconnect from the Internet. If you do this and wish to reconnect,
click Renew.
To recongure the Internet settings, refer to page 65.
61D-Link DIR-885L User Manual

Section 4 - Conguration
Click on the DIR-885L icon to view details about the router and its wireless settings.
Here you can see the router’s current wireless settings, as well as its MAC address
and IPv4/IPv6 addresses.
To recongure the network settings, either click Go to settings on the lower left, or
click Settings (at the top of the page) and then Network on the menu that appears.
Refer to page 96.
To recongure the wireless settings, either click Go to settings, on the lower right, or
click Settings (at the top of the page) and then Wireless on the menu that appears.
Refer to page 92.
DIR-885L
62D-Link DIR-885L User Manual

Section 4 - Conguration
Click on the Connected Clients icon to view details about the router and its wireless
settings.
On this page you can see all the clients currently connected to the router, and their
IP addresses.
To edit each client’s settings, click the pencil icon on the client you want to edit.
Connected Clients
Name:
Vendor:
MAC Address:
IP Address:
Reserve IP:
Parental
Control:
Enter a custom name for this client.
Displays the vendor of the device.
Displays the MAC address of the device.
Enter a specic IP address for this client.
Enable to reserve this IP address for this client.
Allow or Block access to the router.
Click Save when you are done.
63D-Link DIR-885L User Manual

Section 4 - Conguration
Click on the USB Device icon to view details about the currently connected USB
device, DLNA media server, SharePort, and Windows File Sharing.
If you have a USB device connected, you can see its name and how much free space
it has.
To congure your SharePort settings, click Go to settings and refer to page 98.
USB Device
64D-Link DIR-885L User Manual

Section 4 - Conguration
In the Settings menu on the bar on the top of the page, click Wizard to open the setup wizard. This is the same wizard that appears when you start
the router for the rst time. Refer to page 13 for details.
In the Settings menu on the bar on the top of the page, click Internet to see the
Internet conguration options.
Settings
Wizard
Internet (Router Mode)
My Internet
Connection Is:
For Dynamic IP (DHCP) refer to page 66.
For Static IP refer to page 67.
For PPPoE refer to page 68.
For PPTP refer to page 69.
For L2TP refer to page 71.
For DS-Lite refer to page 73.
To congure an IPv6 connection, click the IPv6 link. Refer to page 74.
Choose your Internet connection type from the drop-down menu.
You will be presented with the appropriate options for your
connection type. Click Advanced Settings... to expand the list and
see all of the options.
65D-Link DIR-885L User Manual

Section 4 - Conguration
Select Dynamic IP (DHCP) to obtain IP address information automatically from your Internet Service Provider (ISP). Select this option if your ISP
does not give you an IP address to use.
Dynamic IP (DCHP)
Host Name:
Primary DNS
Server:
Secondary DNS
Server:
MTU:
MAC Address
Clone:
The host name is optional but may be required by some ISPs. Leave
it blank if you are not sure.
Enter the primary DNS server IP address assigned by your ISP. This
address is usually obtained automatically from your ISP.
Enter the secondary DNS server IP address assigned by your ISP. This
address is usually obtained automatically from your ISP.
Maximum Transmission Unit - you may need to change the MTU for
optimal performance with your ISP.
The default MAC address is set to the Internet port’s physical interface
MAC address on the router. You can use the drop-down menu to
replace the Internet port’s MAC address with the MAC address of a
connected client.
Click Save when you are done.
66D-Link DIR-885L User Manual

Section 4 - Conguration
Select Static IP if your IP information is provided by your Internet service provider (ISP).
Static IP
IP Address:
Subnet Mask:
Default
Gateway:
Primary DNS
Server:
Secondary DNS
Server:
MTU:
MAC Address
Clone:
Enter the IP address provided by your ISP.
Enter the subnet mask provided by your ISP.
Enter the default gateway address provided by your ISP.
Enter the primary DNS server IP address assigned by your ISP.
Enter the secondary DNS server IP address assigned by your ISP.
Maximum Transmission Unit - you may need to change the MTU for
optimal performance with your ISP.
The default MAC address is set to the Internet port’s physical interface
MAC address on the router. You can use drop-down menu to replace
the Internet port’s MAC address with the MAC address of a connected
client.
Click Save when you are done.
67D-Link DIR-885L User Manual

Section 4 - Conguration
Select PPPoE if your Internet connection requires you to enter a username and password. This information is provided by your Internet service
provider (ISP).
PPPoE
Username:
Password:
Reconnect
Mode:
Maximum Idle
Time:
Address Mode:
IP Address:
Service Name:
Primary DNS
Server:
Enter the username provided by your ISP.
Enter the password provided by your ISP.
Select either Always-on, On-Demand, or Manual.
Enter a maximum idle time during which the Internet connection
is maintained during inactivity. To disable this feature, enable Autoreconnect.
Select Static IP if your ISP assigned you the IP address, subnet mask,
gateway, and DNS server addresses. In most cases, select Dynamic IP.
Enter the IP address provided by your ISP (Static IP only).
Enter the ISP service name (optional).
Enter the primary DNS server IP address assigned by your ISP.
Secondary DNS
Server:
MTU:
Enter the secondary DNS server IP address assigned by your ISP.
Maximum Transmission Unit - you may need to change the MTU for
optimal performance with your ISP.
Click Save when you are done.
68D-Link DIR-885L User Manual

Section 4 - Conguration
Choose PPTP (Point-to-Point-Tunneling Protocol ) if your Internet Service Provider (ISP) uses a PPTP connection. Your ISP will provide you with a
username and password.
PPTP
PPTP Server IP
Address:
Username:
Password:
Reconnect
Mode:
Maximum Idle
Time:
Address Mode:
PPTP IP
Address:
PPTP Subnet
Mask:
Enter the PPTP server IP address provided by your ISP.
Enter the username provided by your ISP.
Enter the password provided by your ISP.
Select either Always-on, On-Demand, or Manual.
Enter a maximum idle time during which the Internet connection
is maintained during inactivity. To disable this feature, enable Autoreconnect.
Select Static IP if your ISP assigned you the IP address, subnet mask,
gateway, and DNS server addresses. In most cases, select Dynamic IP.
Enter the IP address provided by your ISP (Static IP only).
Enter the subnet mask provided by your ISP (Static IP only).
PPTP Gateway
IP Address:
Primary DNS
Server:
Enter the gateway IP address provided by your ISP (Static IP only).
Enter the primary DNS server IP address assigned by your ISP.
69D-Link DIR-885L User Manual

Section 4 - Conguration
Secondary DNS
Server:
Enter the secondary DNS server IP address assigned by your ISP.
MTU:
Maximum Transmission Unit - you may need to change the MTU for
optimal performance with your ISP.
Click Save when you are done.
70D-Link DIR-885L User Manual

Section 4 - Conguration
Choose L2TP (Layer 2 Tunneling Protocol) if your Internet Service Provider (ISP) uses a L2TP connection. Your ISP will provide you with a username
and password.
L2TP
L2TP Server IP
Address:
Username:
Password:
Reconnect
Mode:
Maximum Idle
Time:
Address Mode:
L2TP IP
Address:
L2TP Subnet
Mask:
Enter the L2TP server IP address provided by your ISP.
Enter the username provided by your ISP.
Enter the password provided by your ISP.
Select either Always-on, On-Demand, or Manual.
Enter a maximum idle time during which the Internet connection
is maintained during inactivity. To disable this feature, enable Autoreconnect.
Select Static IP if your ISP assigned you the IP address, subnet mask,
gateway, and DNS server addresses. In most cases, select Dynamic IP.
Enter the IP address provided by your ISP (Static IP only).
Enter the subnet mask provided by your ISP (Static IP only).
L2TP Gateway
IP Address:
Primary DNS
Server:
Enter the gateway IP address provided by your ISP (Static IP only).
Enter the primary DNS server IP address assigned by your ISP.
71D-Link DIR-885L User Manual

Section 4 - Conguration
Secondary DNS
Server:
Enter the secondary DNS server IP address assigned by your ISP.
MTU:
Maximum Transmission Unit - you may need to change the MTU for
optimal performance with your ISP.
Click Save when you are done.
72D-Link DIR-885L User Manual

Section 4 - Conguration
DS-Lite is an IPv6 connection type. After selecting DS-Lite, the following parameters will be available for conguration:
DS-Lite
DS-Lite
Conguration:
AFTR IPv6
Address:
B4 IPv6
Address:
WAN IPv6
Address:
IPv6 WAN
Default
Gateway:
Select DS-Lite DHCPv6 to let the router allocate the AFTR IPv6
address automatically. Select Manual Conguration to enter the
AFTR IPv6 address manually.
If you selected Manual Conguration above, enter the AFTR IPv6
address used here.
Enter the B4 IPv4 address value used here.
Once connected, the WAN IPv6 address will be displayed here.
Once connected, the IPv6 WAN default gateway address will be
displayed here.
Click Save when you are done.
73D-Link DIR-885L User Manual

Section 4 - Conguration
To congure an IPv6 connection, click the IPv6 link. To return to the IPv4 settings, click IPv4.
IPv6
My Internet
Connection Is:
For Auto Detection refer to page 75.
For Static IPv6 refer to page 77.
For Auto Conguration (SLAAC/DHCPv6) refer to page 79.
For PPPoE refer to page 81.
For IPv6 in IPv4 Tunnel refer to page 83.
For 6 to 4 refer to page 85.
For 6rd refer to page 86.
For Local Connectivity Only refer to page 88.
Choose your IPv6 connection type from the drop-down menu. You
will be presented with the appropriate options for your connection
type. Click Advanced Settings... to expand the list and see all of
the options.
74D-Link DIR-885L User Manual

Section 4 - Conguration
This is a connection method where the ISP assigns your IPv6 address when your router requests one from the ISP’s server. Some ISPs require you
to make some settings on your side before your router can connect to the IPv6 Internet.
Auto Detection
DNS Type:
Primary DNS
Server:
Secondary DNS
Server:
Enable DHCP-
PD:
LAN IPv6
Address:
LAN IPv6 LinkLocal Address:
Enable
Automatic
IPv6 Address
Assignment:
Select either Obtain DNS server address automatically or Use the
following DNS address.
If you selected Use the following DNS address above, enter the
primary DNS server address.
If you selected Use the following DNS address above, enter the
secondary DNS server address.
Enable or disable prex delegation services.
If you disabled DHCP-PD, enter the LAN (local) IPv6 address for the
router.
Displays the router’s LAN link-local address.
Enable or disable the Automatic IPv6 Address Assignment feature.
Enable
Automatic
DHCP-PD in
LAN:
Enable or disable automatic DHCP-PD services.
75D-Link DIR-885L User Manual

Section 4 - Conguration
Conguration
Auto
Type:
Select Stateful (DHCPv6), SLAAC + RDNSS or SLAAC + Stateless
DHCPv6.
Router
Advertisement
Lifetime:
Enter the IPv6 address lifetime (in minutes).
Click Save when you are done.
76D-Link DIR-885L User Manual

Section 4 - Conguration
Select Static IP if your IPv6 information is provided by your Internet service provider (ISP).
Static IPv6
Use Link-Local
Address:
IPv6 Address:
Subnet Prex
Length:
Default
Gateway:
Primary DNS
Server:
Secondary DNS
Server:
LAN IPv6
Address:
Enable or disable a link-local address.
If you disabled Use Link-Local Address, enter the address supplied
by your ISP.
If you disabled Use Link-Local Address, enter the subnet prex
length supplied by your ISP.
Enter the default gateway for your IPv6 connection.
Enter the primary DNS server address.
Enter the secondary DNS server address.
Enter the LAN (local) IPv6 address for the router.
LAN IPv6 LinkLocal Address:
Enable
Automatic
IPv6 Address
Assignment:
Displays the router’s LAN link-local address.
Check to enable the Automatic IPv6 Address Assignment feature.
77D-Link DIR-885L User Manual

Section 4 - Conguration
Conguration
Auto
Type:
Select Stateful (DHCPv6), SLAAC + RDNSS or SLAAC + Stateless
DHCPv6.
Router
Advertisement
Lifetime:
Enter the IPv6 address lifetime (in minutes).
Click Save when you are done.
78D-Link DIR-885L User Manual

Section 4 - Conguration
This is a connection method where the ISP assigns your IPv6 address when your router requests one from the ISP’s server. Some ISPs require you
to make some settings on your side before your router can connect to the IPv6 Internet.
Auto Conguration (SLAAC/DHCPv6)
DNS Type:
Primary DNS
Server:
Secondary DNS
Server:
Enable DHCP-
PD:
LAN IPv6
Address:
LAN IPv6 LinkLocal Address:
Enable
Automatic
IPv6 Address
Assignment:
Select either Obtain DNS server address automatically or Use the
following DNS address.
If you selected Use the following DNS address above, enter the
primary DNS server address.
If you selected Use the following DNS address above, enter the
secondary DNS server address.
Enable or disable prex delegation services.
If you disabled DHCP-PD, enter the LAN (local) IPv6 address for the
router.
Displays the router’s LAN link-local address.
Enable or disable the Automatic IPv6 Address Assignment feature.
Enable
Automatic
DHCP-PD in
LAN:
Enable or disable automatic DHCP-PD services.
79D-Link DIR-885L User Manual

Section 4 - Conguration
Conguration
Auto
Type:
Select Stateful (DHCPv6), SLAAC + RDNSS or SLAAC + Stateless
DHCPv6
Router
Advertisement
Lifetime:
Enter the IPv6 address lifetime (in minutes).
Click Save when you are done.
80D-Link DIR-885L User Manual

Section 4 - Conguration
Select PPPoE if your Internet connection requires you to enter a username and password. This information is provided by your Internet service
provider (ISP).
PPPoE
PPPoE Session:
Username:
Password:
Address Mode:
IP Address:
MTU:
DNS Type:
Primary DNS
Server:
Choose Share with IPv4 to re-use your IPv4 PPPoE username and
password, or Create a new session.
If you selected Create a new session above, enter the PPPoE
username provided by your ISP here.
If you selected Create a new session above, enter the PPPoE
password provided by your ISP here.
Select Static IP if your ISP assigned you the IP address, subnet mask,
gateway, and DNS server addresses. In most cases, select Dynamic IP.
Enter the IP address provided by your ISP (Static IP only).
Maximum Transmission Unit - you may need to change the MTU for
optimal performance with your ISP.
Select either Obtain DNS server address automatically or Use the
following DNS address.
If you selected Use the following DNS address above, enter the
primary DNS server address.
Secondary DNS
Server:
Enable DHCP-
PD:
If you selected Use the following DNS address above, enter the
secondary DNS server address.
Enable or disable prex delegation services.
81D-Link DIR-885L User Manual

Section 4 - Conguration
LAN IPv6
Address:
Enter the LAN (local) IPv6 address for the router.
LAN IPv6 LinkLocal Address:
Enable
Automatic
IPv6 Address
Assignment:
Auto
Conguration
Type:
Router
Advertisement
Lifetime:
Displays the router’s LAN link-local address.
Enable or disable the Automatic IPv6 Address Assignment feature.
Select Stateful (DHCPv6), SLAAC + RDNSS or SLAAC + Stateless
DHCPv6
Enter the IPv6 address lifetime (in minutes).
Click Save when you are done.
82D-Link DIR-885L User Manual

Section 4 - Conguration
The user can congure the IPv6 connection to run in IPv4 Tunnel mode. IPv6 over IPv4 tunneling encapsulates IPv6 packets in IPv4 packets so
that IPv6 packets can be sent over an IPv4 infrastructure.
IPv6 in IPv4 Tunnel
Remote IPv4
Address:
Remote IPv6
Address:
Local IPv4
Address:
Local IPv6
Address:
Subnet Prex
Length:
DNS Type:
Primary DNS
Server:
Enter the IPv4 remote address you will use.
Enter the IPv6 remote address you will use.
Enter the IPv4 local address you will use.
Enter the IPv6 local address you will use.
Enter the subnet prex length supplied by your ISP.
Select either Obtain DNS server address automatically or Use the
following DNS address.
If you selected Use the following DNS address above, enter the
primary DNS server address.
Secondary DNS
Server:
Enable DHCP-
PD:
LAN IPv6
Address:
If you selected Use the following DNS address above, enter the
secondary DNS server address.
Enable or disable prex delegation services.
If you disabled DHCP-PD, enter the LAN (local) IPv6 address for the
router.
83D-Link DIR-885L User Manual

Section 4 - Conguration
LAN IPv6 LinkLocal Address:
Displays the router’s LAN link-local address.
Enable
Automatic
IPv6 Address
Assignment:
Enable
Automatic
DHCP-PD in
LAN:
Auto
Conguration
Type:
Router
Advertisement
Lifetime:
Enable or disable the Automatic IPv6 Address Assignment feature.
Enable or disable automatic DHCP-PD services.
Select Stateful (DHCPv6), SLAAC + RDNSS or SLAAC + Stateless
DHCPv6
Enter the IPv6 address lifetime (in minutes).
Click Save when you are done.
84D-Link DIR-885L User Manual

Section 4 - Conguration
In this section the user can congure the IPv6 6 to 4 connection settings. 6to4 is an IPv6 address assignment and automatic tunneling technology that is used to provide unicast IPv6 connectivity between IPv6 sites and hosts across the IPv4 Internet.
6 to 4
6 to 4 Address:
6 to 4 Relay:
Primary DNS
Server:
Secondary DNS
Server:
LAN IPv6
Address:
LAN IPv6 LinkLocal Address:
Enable
Automatic
IPv6 Address
Assignment:
Displays the 6 to 4 address.
Enter the 6 to 4 relay supplied by your ISP.
Enter the primary DNS server address.
Enter the secondary DNS server address.
Enter the LAN (local) IPv6 address for the router.
Displays the router’s LAN link-local address.
Check to enable the Automatic IPv6 Address Assignment feature.
Auto
Conguration
Type:
Router
Advertisement
Lifetime:
Select Stateful (DHCPv6), SLAAC + RDNSS or SLAAC + Stateless
DHCPv6
Enter the IPv6 address lifetime (in minutes).
Click Save when you are done.
85D-Link DIR-885L User Manual

Section 4 - Conguration
In this section the user can congure the IPv6 6rd connection settings.
6rd
Assign IPv6
Prex:
Primary DNS
Server:
Secondary DNS
Server:
Enable Hub and
Spoke Mode:
6rd
Conguration:
6rd IPv6 Prex:
6rd Border
Relay IPv4
Address:
Currently unsupported.
Enter the primary DNS server address.
Enter the secondary DNS server address.
Enable if you want to minimize the number of routes to the
destination by using a hub and spoke method of networking.
Choose the 6rd DHCPv4 Option to automatically discover and
populate the data values, or Manual Conguration to enter the
settings yourself.
Enter the 6rd IPv6 prex and mask length supplied by your ISP
(manual conguration only).
Enter the 6rd border relay IPv4 address settings supplied by your ISP
(manual conguration only).
LAN IPv6
Address:
LAN IPv6 LinkLocal Address:
Enter the LAN (local) IPv6 address for the router.
Displays the router’s LAN link-local address.
86D-Link DIR-885L User Manual

Section 4 - Conguration
IPv6 Address
Enable
Automatic
Assignment:
Check to enable the Automatic IPv6 Address Assignment feature.
Auto
Conguration
Type:
Router
Advertisement
Lifetime:
Select Stateful (DHCPv6), SLAAC + RDNSS or SLAAC + Stateless
DHCPv6
Enter the IPv6 address lifetime (in minutes).
Click Save when you are done.
87D-Link DIR-885L User Manual

Section 4 - Conguration
Local Connectivity Only allows you to set up an IPv6 connection that will not connect to the Internet.
Local Connectivity Only
Enable ULA:
Use Default
ULA Prex:
ULA Prex:
Current IPv6
ULA Settings:
Click here to enable Unique Local IPv6 Unicast Addresses settings.
Checking this box will automatically congure the ULA prex for
the default setting.
If you wish to choose your own ULA prex, enter it here.
This section will display the current settings for your IPv6 ULA.
Click Save when you are done.
88D-Link DIR-885L User Manual

Section 4 - Conguration
Select Dynamic IP (DHCP) to obtain IP address information automatically from your Internet Service Provider (ISP). Select this option if your ISP
does not give you an IP address to use.
Dynamic IP (DCHP)
Host Name:
Primary DNS
Server:
Secondary DNS
Server:
MTU:
The host name is optional but may be required by some ISPs. Leave
it blank if you are not sure.
Enter the primary DNS server IP address assigned by your ISP. This
address is usually obtained automatically from your ISP.
Enter the secondary DNS server IP address assigned by your ISP. This
address is usually obtained automatically from your ISP.
Maximum Transmission Unit - you may need to change the MTU for
optimal performance with your ISP.
Click Save when you are done.
90D-Link DIR-885L User Manual

Section 4 - Conguration
Select Static IP if your IP information is provided by your Internet service provider (ISP).
Static IP
IP Address:
Subnet Mask:
Default
Gateway:
Primary DNS
Server:
Secondary DNS
Server:
MTU:
Enter the IP address provided by your ISP.
Enter the subnet mask provided by your ISP.
Enter the default gateway address provided by your ISP.
Enter the primary DNS server IP address assigned by your ISP.
Enter the secondary DNS server IP address assigned by your ISP.
Maximum Transmission Unit - you may need to change the MTU for
optimal performance with your ISP.
Click Save when you are done.
91D-Link DIR-885L User Manual

Section 4 - Conguration
In the Settings menu on the bar on the top of the page, click Wireless to see the
wireless conguration options. To congure the router’s guest zone, click the Guest
Zone link. Refer to page 94 for details. Click Advanced Settings... to expand the list
and see all of the options. The following options apply to both the 2.4 GHz and the
5 GHz wireless frequency bands:
Wireless (Router Mode)
Status:
Wi-Fi Name
(SSID):
Password:
Security Mode:
802.11 Mode:
Wi-Fi Channel:
Transmission
Power:
Channel Width:
Enable or disable the wireless frequency band.
Create a name for your wireless network using up to 32 characters.
Create a password to use for wireless security. Wireless clients will
need to enter this password to successfully connect to the network.
Choose None, WEP, or WPA/WPA2-(Personal) (recommended).
Select the desired wireless networking standards to use. The available
options will depend on the wireless frequency band, as well as the
currently selected security mode.
Select the desired channel. The default is Auto (recommended).
Select the desired wireless transmission power.
Select Auto 20/40 if you are using both 802.11n and non-802.11n
wireless devices, or select 20 MHz if you are not using any 802.11n
wireless clients.
Visibility Status:
The default setting is Visible. Select Invisible if you do not want to
broadcast the SSID of your wireless network.
92D-Link DIR-885L User Manual

Section 4 - Conguration
Schedule:
Use the drop-down menu to select the time schedule that the rule
will be enabled on. The schedule may be set to Always Enable, or
you can create your own schedules in the Schedules section (refer
to page 113).
Click Save when you are done.
93D-Link DIR-885L User Manual

Section 4 - Conguration
The guest zone feature will allow you to create temporary zones that can be used by
guests to access the Internet. These zones will be separate from your main wireless
network. You may congure dierent zones for the 2.4 GHz and 5 GHz wireless bands.
In the Settings menu on the bar on the top of the page, click Wireless, then click
the Guest Zone link. Click Advanced Settings... to expand the list and see all of
the options. The following options apply to both the 2.4 GHz and the 5 GHz wireless
frequency bands:
Guest Zone
Status:
Wi-Fi Name
(SSID):
Password:
Internet Access
Only:
Enable or disable the guest zone for each wireless frequency band.
Enter a wireless network name (SSID) that is dierent from your main
wireless network.
Create a password to use for wireless security. Wireless clients will
need to enter this password to successfully connect to the guest zone.
Enabling this option will confine connectivity to the Internet,
disallowing guests from accessing other local network devices.
Click Save when you are done.
94D-Link DIR-885L User Manual

Section 4 - Conguration
This section will allow you to change the local network settings of the router and to
congure the DHCP settings. In the Settings menu on the bar on the top of the page,
click Network. Click Advanced Settings... to expand the list and see all of the options.
Network
LAN IP Address:
Subnet Mask:
Management
Link:
Local Domain
Name:
Enable DNS
Relay:
Enter the IP address of the router. The default IP address is
192.168.0.1.
If you change the IP address, once you click Save, you will need
to enter the new IP address in your browser to get back into the
conguration utility.
Enter the subnet mask of the router. The default subnet mask is
255.255.255.0.
The default address to access the router’s configuration is
http://dlinkrouter.local. Here, you can replace dlinkrouter with a
name of your choice.
Enter the domain name (optional).
Disable to transfer the DNS server information from your ISP to your
computers. If enabled, your computers will use the router for a DNS
server.
Status:
DHCP IP
Address Range:
Enable or disable the DHCP server.
Enter the starting and ending IP addresses for the DHCP server’s IP
assignment.
Note: If you statically (manually) assign IP addresses to your computers
or devices, make sure the IP addresses are outside of this range or you
may have an IP conict.
96D-Link DIR-885L User Manual

Section 4 - Conguration
DHCP Lease
Time:
Enter the length of time for the IP address lease in minutes.
Always
Broadcast:
UPnP:
WAN Port
Speed:
IPv4 Multicast
Stream:
IPv6 Multicast
Stream:
Enable this feature to broadcast your networks DHCP server to LAN/
WLAN clients.
Enable or disable Universal Plug and Play (UPnP). UPnP provides
compatibility with networking equipment, software and peripherals.
You may set the port speed of the Internet port to 10 Mbps, 100
Mbps, 1000 Mbps, or Auto (recommended).
Enable to allow IPv4 multicast trac to pass through the router from
the Internet.
Enable to allow IPv6 multicast trac to pass through the router from
the Internet.
Click Save when you are done.
97D-Link DIR-885L User Manual

Section 4 - Conguration
This page will allow you to set up access to les on an external USB device plugged
into the router. You can do this through the local network or from the Internet using
either a web browser or an app on your smartphone or tablet. In the Settings menu
on the bar on the top of the page, click SharePort.
SharePort
Status:
DLNA Media
Server:
Windows
File Sharing
(SAMBA):
Web File Access:
Direct Links:
To manage user accounts for SharePort access, click Create User and refer to the
next page for details.
Check to enable DLNA media server functions, allowing connected
clients access to media les over the network.
Choose a name for your DLNA media server so that it can be found.
Choose either Allow all users to access (no password) or Require
router’s admin password to specify whether the router’s password
will be required for access.
Enable remote access to les stored on a USB device plugged into
the router through a web browser.
This area will display the HTTP and HTTPS links to connect to your
SharePort drive through a web browser from a device on your
network.
Click Save when you are done.
98D-Link DIR-885L User Manual

Section 4 - Conguration
The Create User page allows you to manage your SharePort user accounts. The current
list of user accounts will be displayed, along with their current permissions and access
path. If they do not have an account set up, users will be restricted to guest access;
only having access to the “Guest” folder on the media server. The router can store a
maximum of ten accounts (including the “Admin” account).
If you wish to remove an account, click on its trash can icon in the Delete column. If
you wish to edit an account, click on its pencil icon in the Edit column. If you wish to
create a new account, click the Create User button
following options will appear:
Create User
. If you edit or create a user, the
User Name:
Password:
Permission:
Folder:
Enter the desired user name for the new account.
Enter the password which the user will need to enter when logging in.
Select either Read Only or Read/Write to control whether the user
can edit, add, or delete les on the device.
Choose the parent folder that the user will be able to access. Files
and folders on a higher level will be unavailable. “root” means that
the user can access all les on the device. To change the selected
folder, click Browse and browse to the desired folder.
Click OK when you are done. The new user should be added to the
list of user accounts. To save the new list, click Save. To return to the
SharePort page, click SharePort.
99D-Link DIR-885L User Manual
 Loading...