

Page 1
This product can be
configured using Internet
Explorer 5.x or above;
Netscape 6.2.x or above;
Apple Safari; Linux Nautilus.
DSM-602H
DSM-604H
Digital Media Storage
Before You Begin
You must have at least the following for configuration:
1. A DHCP server assigning IP addresses during the initial setup process.
2. A computer with Windows XP, 2000, ME, 98se, Apple MAC OSX, or Linux
based operating system with an installed Ethernet adapter.
3. Activating UPnP in Windows XP and ME is optional, but is highly recommended
for ease of use.
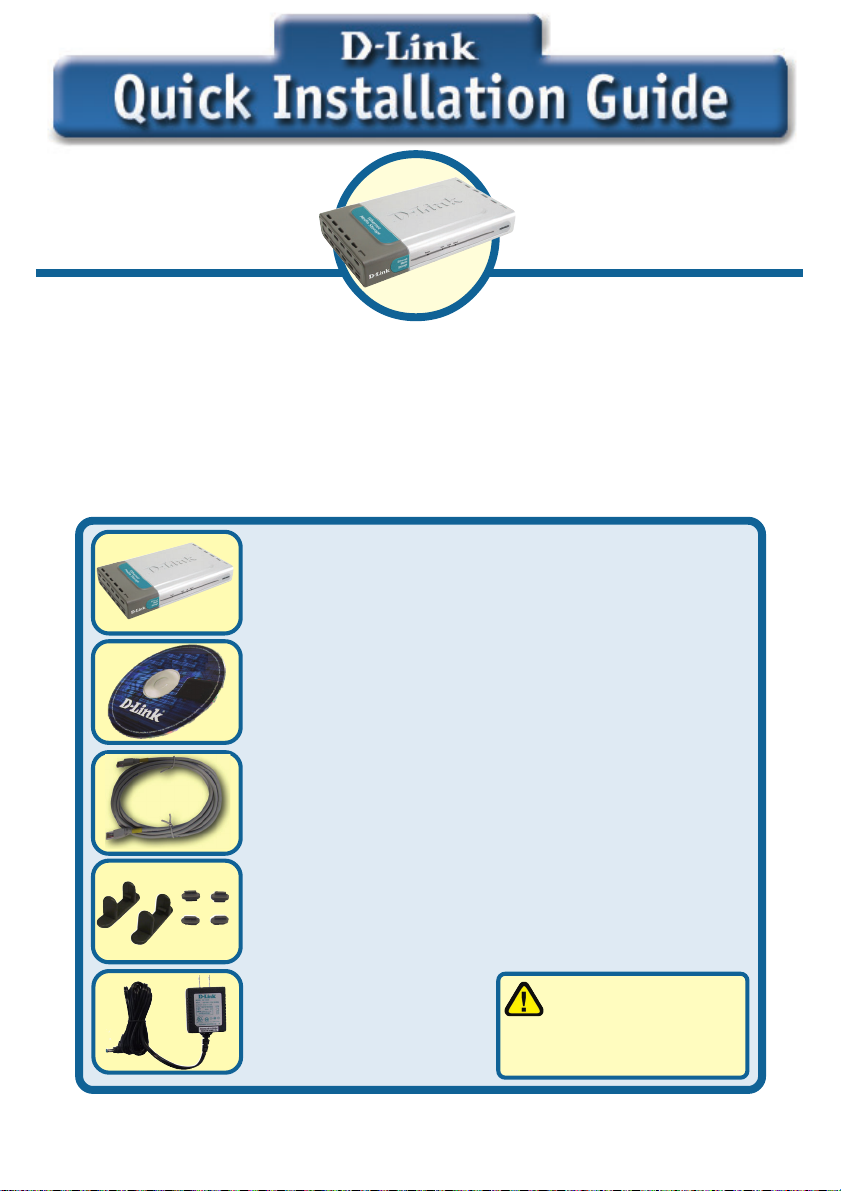
Check Your Package Contents
DSM-602H 20GB Digital Media Storage
or
DSM-604H 40GB Digital Media Storage
CD-ROM (Containing Manual and Warranty)
Ethernet (CAT5 UTP/Straight-Through) Cable
Stacking and Vertical Stands
Using a power supply
5V DC Power Adapter
If any of the above items are missing, please contact your reseller.
©2004 D-Link Systems, Inc. All rights reserved. Trademarks or registered trademarks are the property of their respective holders. Software and
specifications subject to change without notice. DSM-602H/604H. 022704
1
with a different voltage
rating will damage and void
the warranty of this product.
Page 2
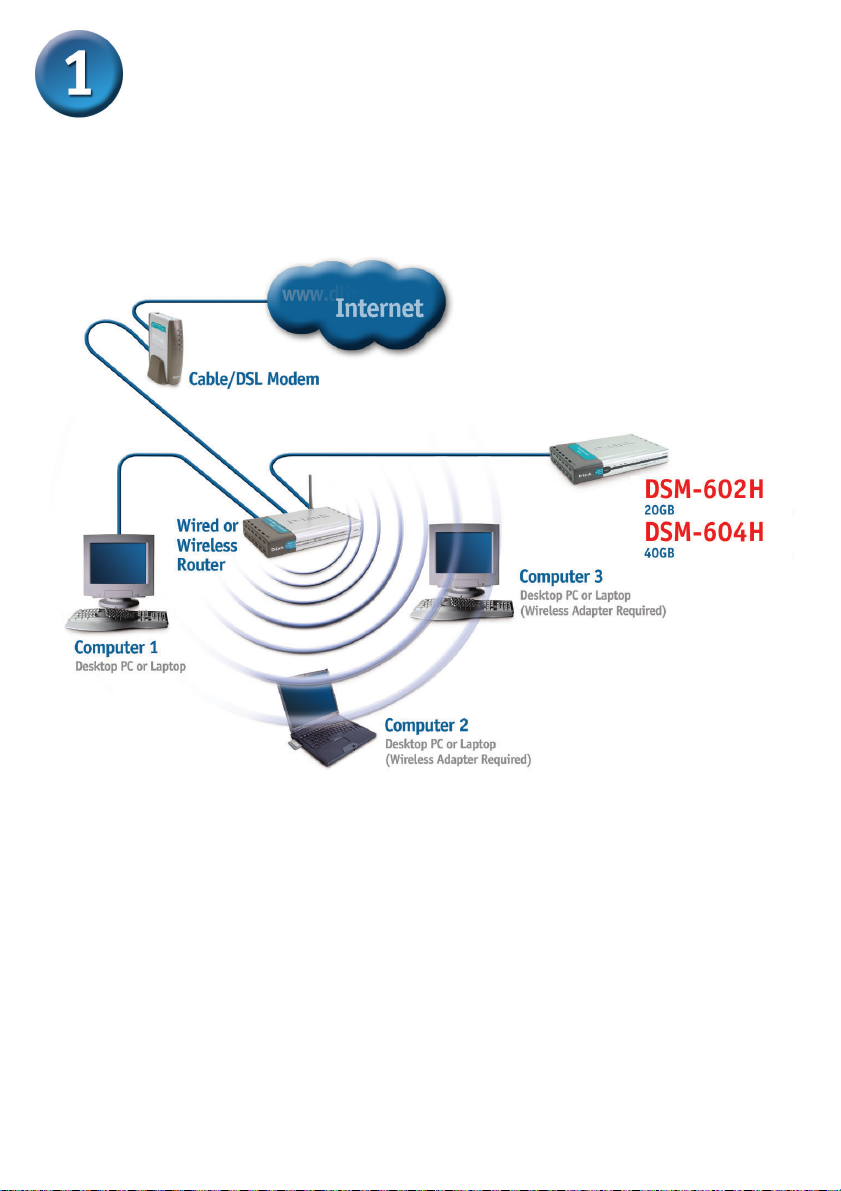
DSM-602H/604H Overview
When you have completed the steps in this Quick Installation Guide, your connected
network may look similar to this:
Digital Media StorageDigital Media Storage
Digital Media Storage
Digital Media StorageDigital Media Storage
Digital Media StorageDigital Media Storage
Digital Media Storage
Digital Media StorageDigital Media Storage
2
Page 3
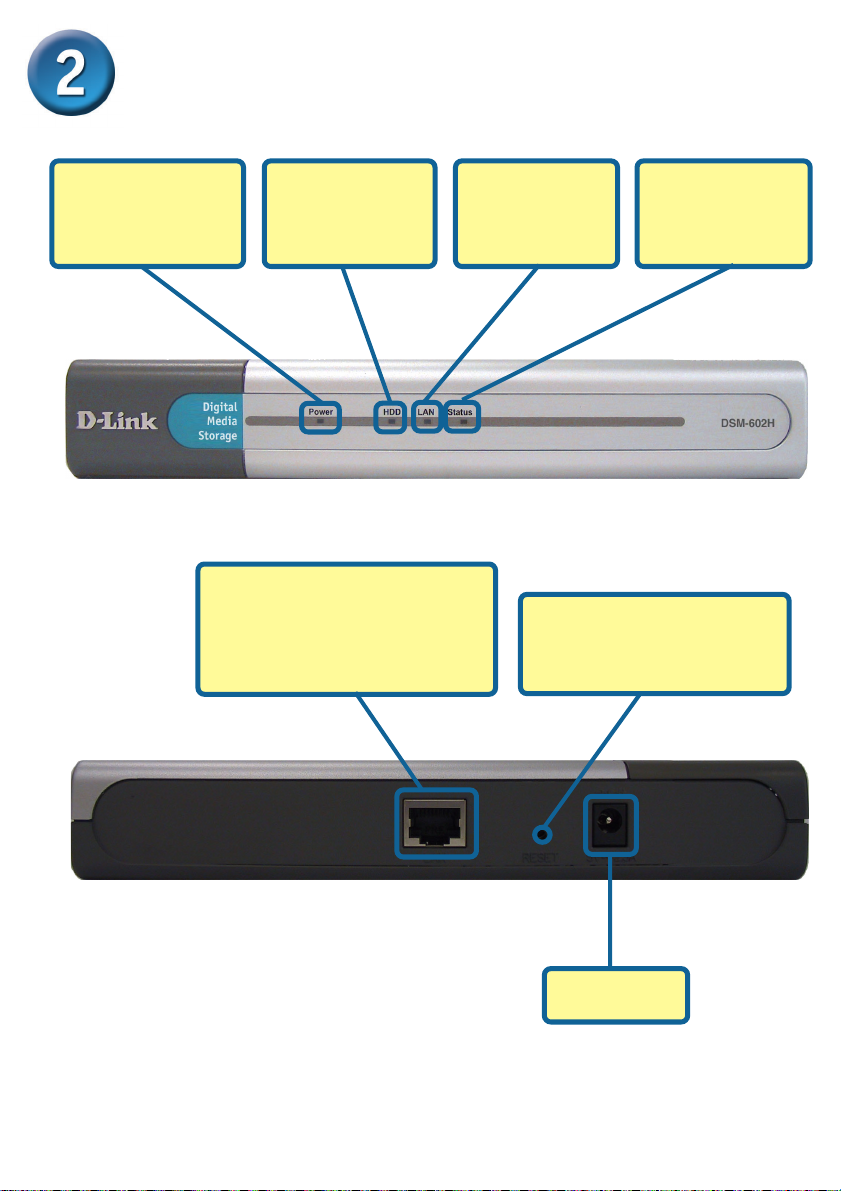
Hardware Overview
Power
Indicates when the
DSM-602H/604H is
powered on.
HDD
Indicates when
there is activity on
the hard disk drive.
LAN Port
This allows you to connect the
DSM-602H/604H to your Ethernet
network. This LAN port also
supports Auto MDI/MDI-X.
LAN
Displays activity
on the Local Area
Network.
Status
Status light blinks
steadily to indicate
proper functionality.
Reset Button
Pressing this button restores
the DSM-602H/604H to its
original factory default settings.
Connector for
Power Adapter.
3
Page 4
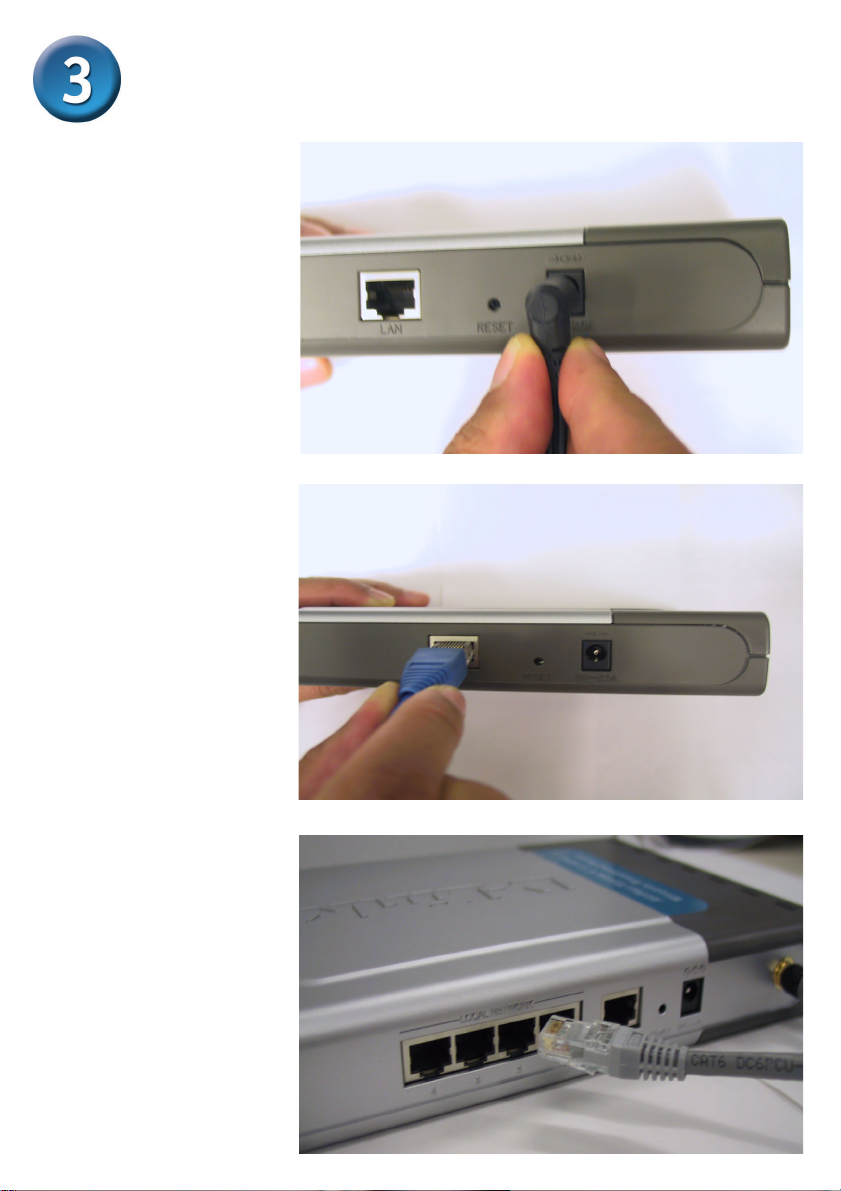
Hardware Installation
A. First, connect the power
adapter to the connector
on the back panel of the
DSM-
602H/604H. Then
plug the other end of the
power adapter into a wall
outlet or power strip. The
Power LED will be on to
indicate proper operation.
B. Connect an Ethernet
cable to the Ethernet jack
located on the back of
the DSM-
602H/604H.
C. After the Ethernet cable
is securely connected,
connect the other end of
the Ethernet cable to your
network router or switch.
4
Page 5

Access the DSM-602H/604H in Windows
ME or XP
For Windows ME or XP users, it is recommended to activate UPnP for ease of
use. To learn how to activate UPnP, please refer to page 20 of the manual.
Double Click My Network
Places on the Windows
Desktop.
Once connected, the DSM602H/604H will appear on
the My Network Places
screen as UPnP E-
Storage if UPnP is
activated in your Windows
ME or XP.
Your setup in Windows XP or ME is now complete!
5
Page 6

Access the DSM-602H/604H in Windows
98 or 2000
Double Click My
Computer on the
Windows Desktop.
Under Tools, select
Map Network
Device.
6
Page 7

Access the DSM-602H/604H in Windows
98 or 2000 (continued)
Select the drive
name you wish to
map your DSM602H/604H to.
Select Browse to
connect your DSM602H/604H from the
network.
Select your DSM-
602H/604H share
folder.
Click OK.
7
Page 8

Access the DSM-602H/604H in Windows
98 or 2000 (continued)
Click Finish.
You will see your
DSM-602H/604H
mapped as one of
your hard drive
within the My
Computer.
Your setup in Windows 98 or 2000 is now complete!
8
Page 9

Access the DSM-602H/604H in Macintosh
OSX
Click Safari
Under the Bookmarks menu,
select Show All Bookmarks
Select Rendezvous
from the left window
pane.
Then on the right
window pane highlight
DSM-602H/604H.
Under Finder, select
the Go menu. Select
Connect to Server.
9
Page 10

Access the DSM-602H/604H in Macintosh
OSX (continued)
Once Safari loads, the DSM-602H/
604H will automatically be found.
Once found,
highlight the
DSM-602H/604H
in the left pane
window .
Click Connect
Click OK
10
Page 11

Access the DSM-602H/604H in Macintosh
OSX (continued)
By default, there is no password.
Click OK
The DSM-602H/604H will appear on
your desktop. Double-click on the
shared drive to access your Digital
Media Storage!
Your setup in MAC OSX is now complete!
11
Page 12

Technical Support
You can find the most recent software and user documentation on the D-Link website.
D-Link provides free technical support for customers within the United States and
within Canada for the duration of the warranty period on this product.
U.S. and Canadian customers can contact D-Link technical support through our
website or by phone.
Tech Support for customers within the United States:
D-Link Technical Support over the Telephone:
(877) 453-5465
24 hours a day, seven days a week
D-Link Technical Support over the Internet:
http://support.dlink.com
email: support@dlink.com
Tech Support for customers within Canada:
D-Link Technical Support over the Telephone:
(800) 361-5265
Monday to Friday 8:30am to 9:00pm EST
D-Link Technical Support over the Internet:
http://support.dlink.ca
email: support@dlink.ca
12
 Loading...