

D-Link DSM-260 Quick Installation Manual

QUICK
INSTALLATION
GUIDE
MIRRORSTREAMER TV ADAPTER
FOR MIRACAST™ WIRELESS DISPLAY
DSM-260
GUÍA DE INSTALACIÓN RÁPIDA
快速安裝指南
PETUNJUK PEMASANGAN CEPAT
DSM-260
2
ENGLISH
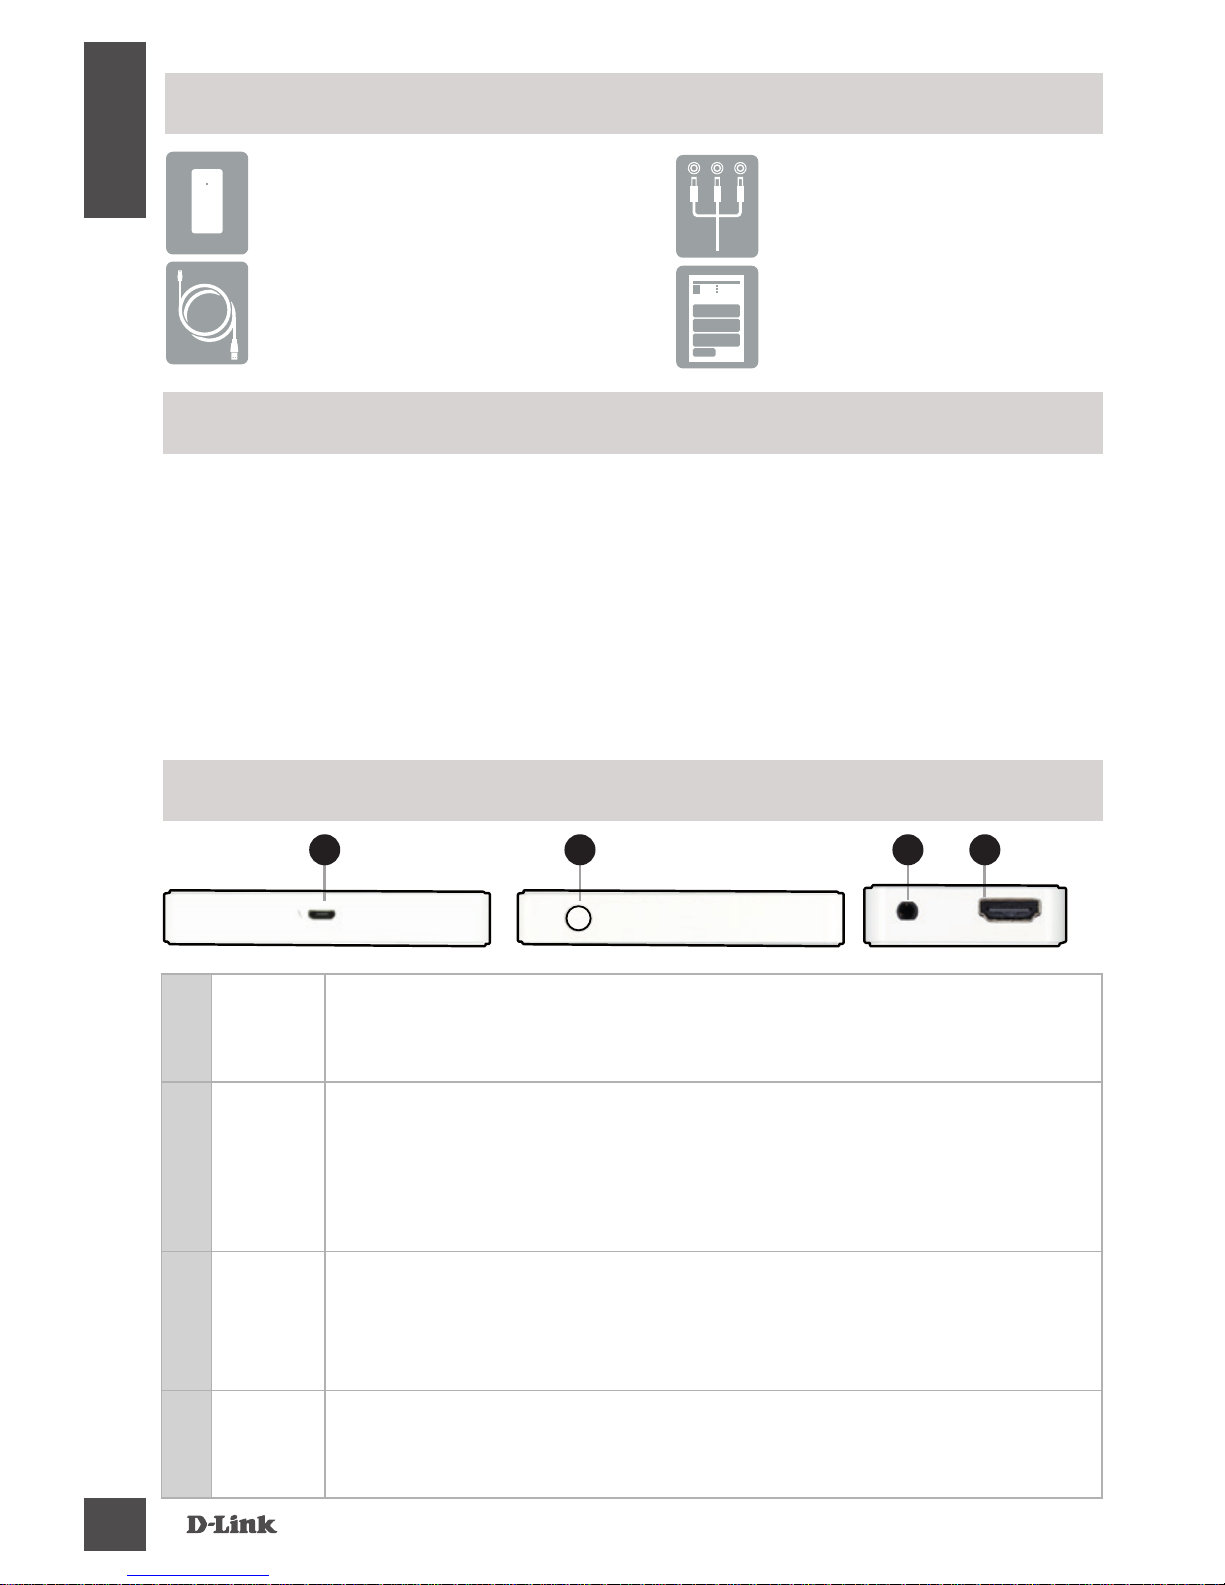
If any of the above items are missing, please contact your reseller.
DSM-260 MirrorStreamer
TV Adapter
Micro USB Cable
A/V Cable
Quick Install Guide
Package Contents
Minimum Requirements
• Mobile Device (Smart Phone/Tablet) or Laptop with
installed wireless adapter
• TV with an HDMI input (for HD quality) or composite analog
connections.
• Wireless router with Internet connection (WAN Mode)
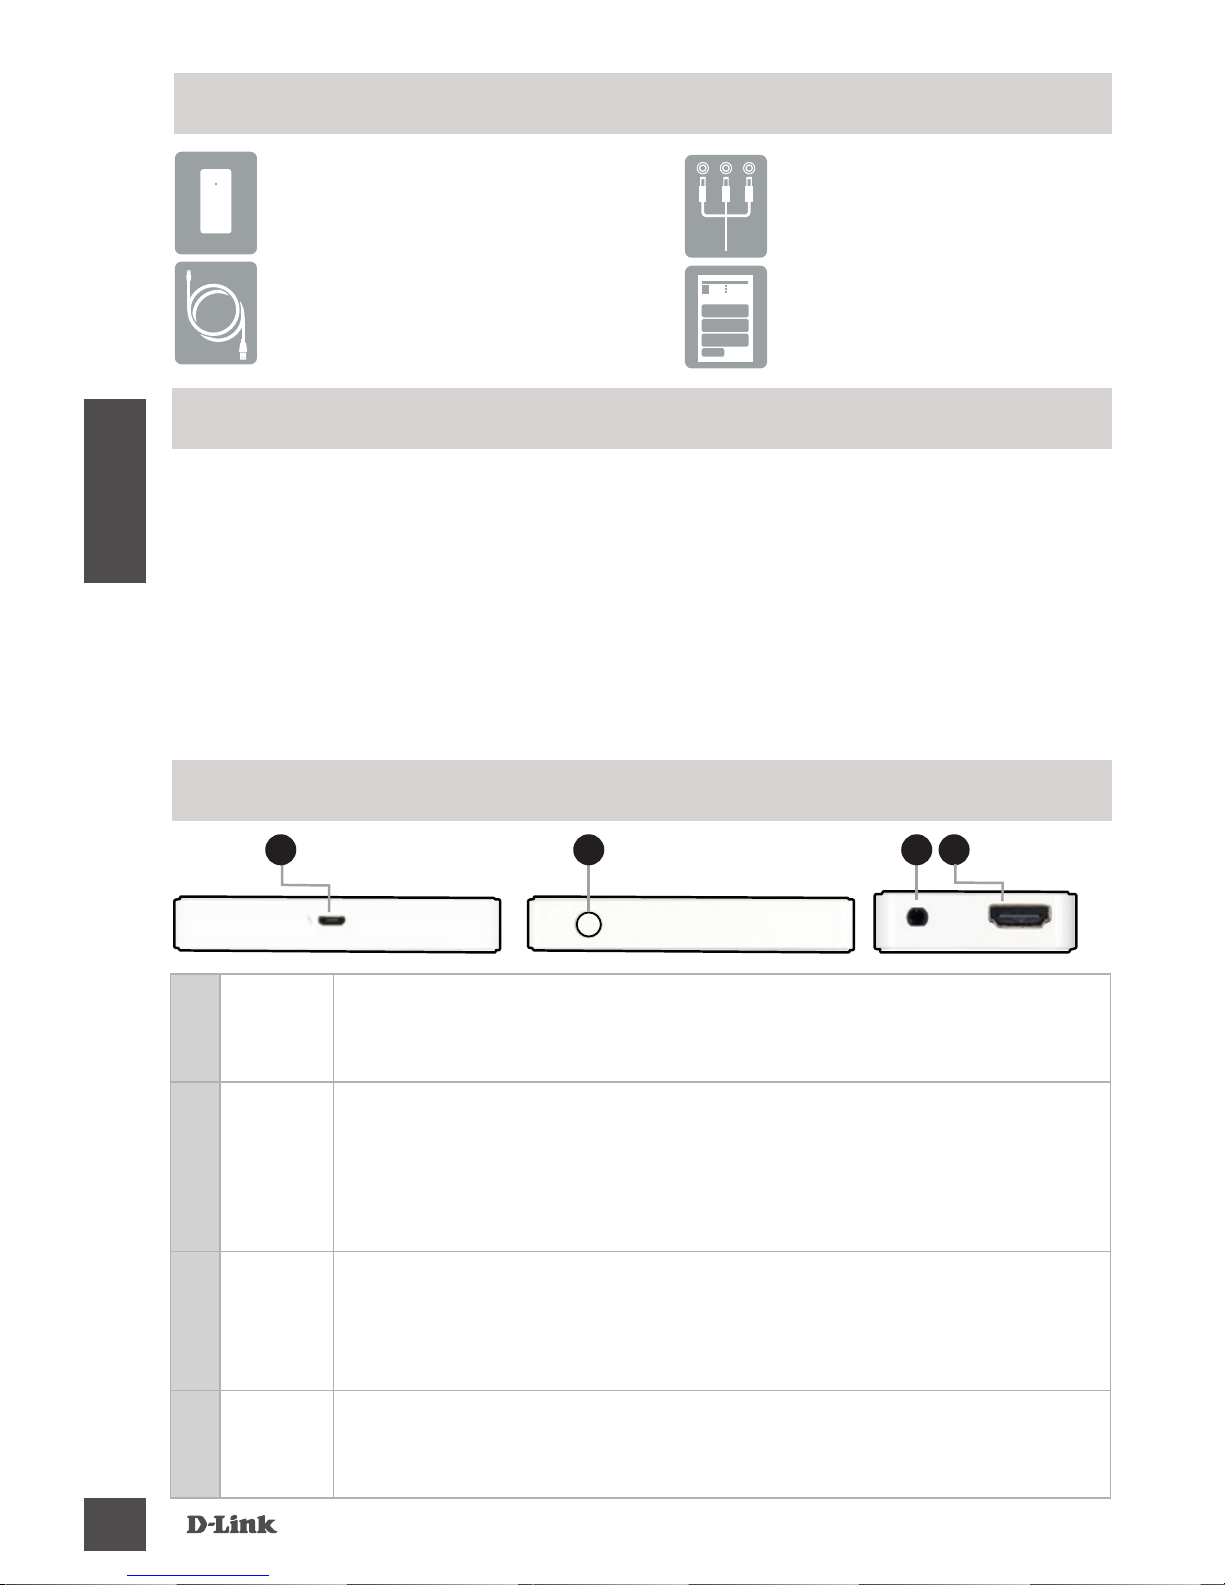
1
Micro
USB
Port
Connect the supplied USB cable here
2
Mode/
Reset
Press and hold up to 5 seconds to toggle between Miracast and DLNA
mode.
Press and hold between 5-10 seconds to reboot the DSM-260.
Press and hold over 15 seconds to reset the DSM-260 to the factory
default settings.
3
A/V
Port
Firmly connect the supplied A/V cable here and the other end into
your TV or home theater receiver. If you are using an HDMI connection,
you do not have to connect this cable. Note that you can only receive
up to 480p quality with a composite connection.
4
HDMI
Port
Connect an HDMI cable (not included) here and the other end
into your TV or home theater receiver. Must be used for HD quality
(720p/1080p) display.
Hardware Overview
21
Left Side Right Side Bottom
3 4
DSM-260
3
ENGLISH
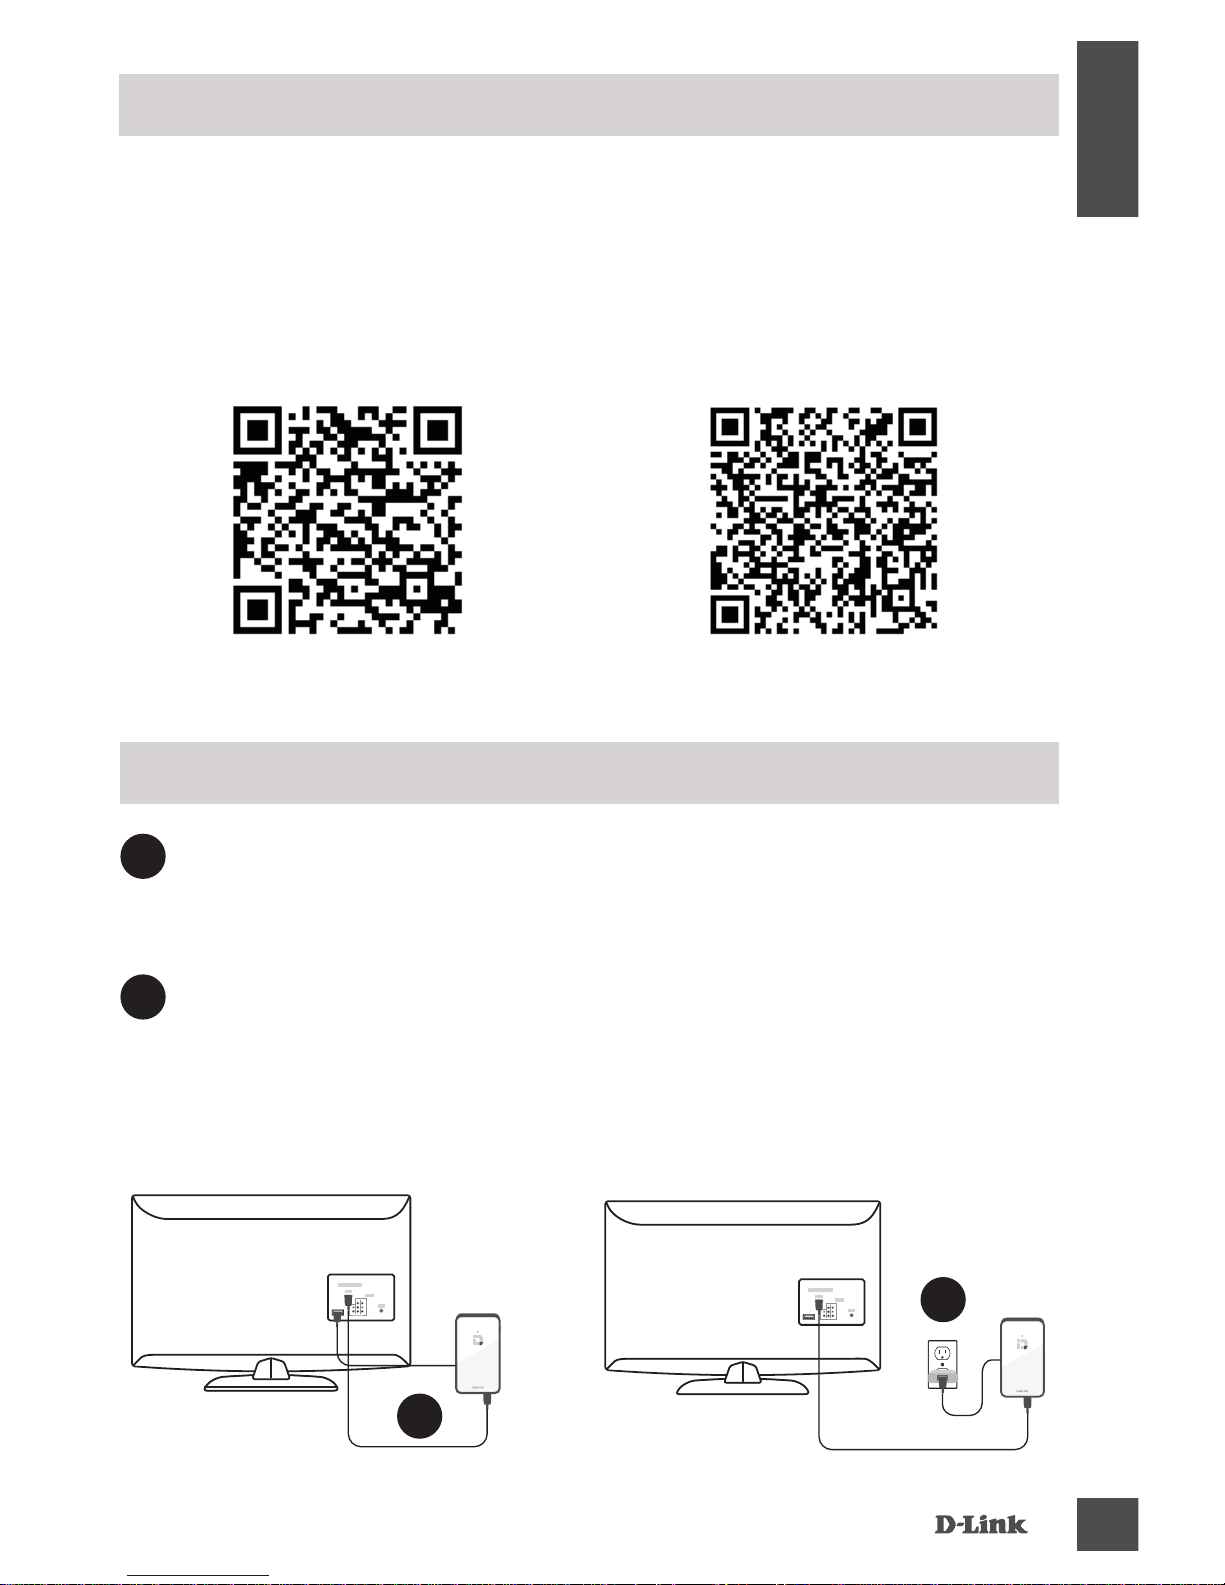
Download the D-Link Media app from either the App Store (iOS)
or Google Play (Android) or scan the QR code below.
Note: Your TV remote may work with the DSM-260 but you will
need the Media app to enter text.
Before you Start
Apple iOS Android
1
1
Plug an HDMI cable to the HDMI port on the DSM-260 then
connect to an HDMI port on your TV. Note that HDMI is
required for HD resolution.
Connect to Your TV
2
Plug the supplied micro USB cable to the USB port on the
DSM-260 then connect to a USB port on your TV or to a USB
power adapter (not included).
Note: The USB port is only for power, not data transfer.
HDMI
HDMI
OR
2
DSM-260
4
ENGLISH
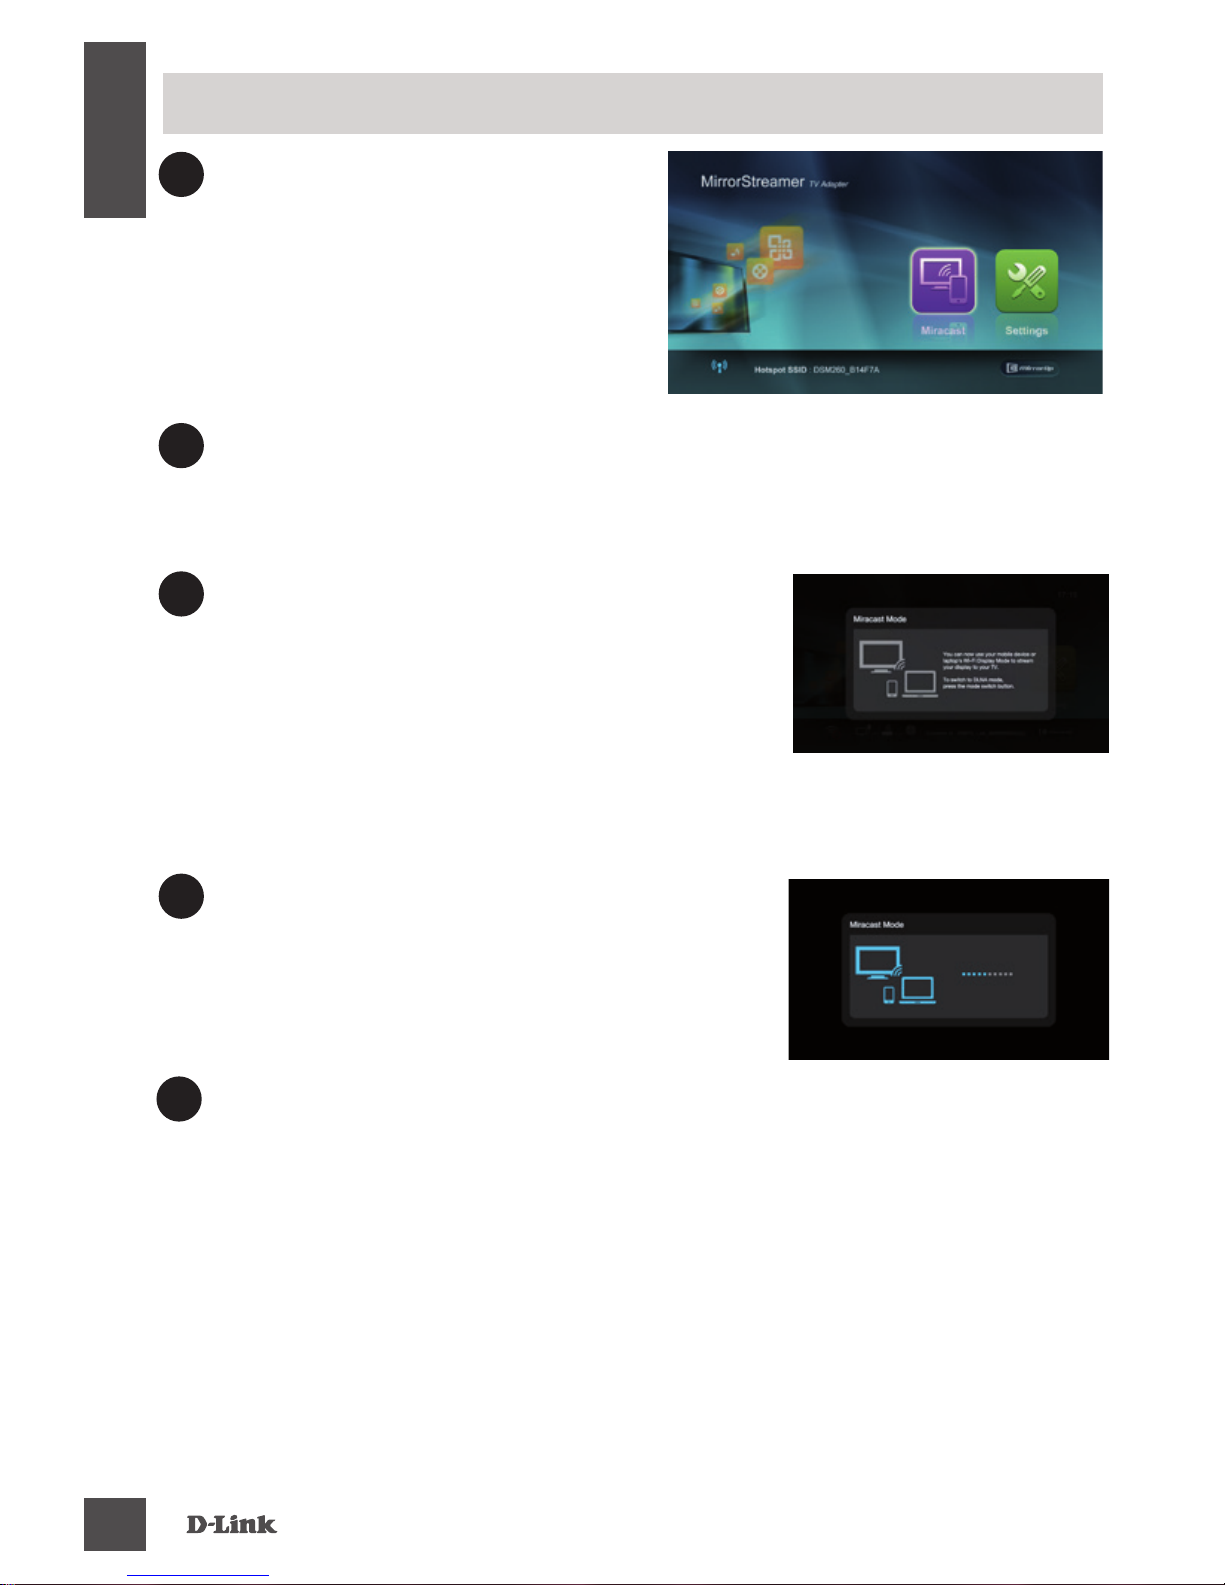
3
The LED on the top of the DSM260 will illuminate blue. Switch
your TV channel to the correct
HDMI input source. You will
see the D-Link logo on the TV
followed by the main menu.
4
On your mobile device, open the wireless utility and connect
to the DSM-260. The wireless settings will be displayed on
the bottom of the menu screen.
5
Once you connect you can use either
your TV remote or the downloaded
D-Link Media app to navigate. Select
Miracast and enter.
Note: The remainder of this Install Guide will assume that you
have installed the D-Link Media app.
Miracast Users
6
On your mobile device, change the
wireless display to ON and select
the DSM-260. Allow a few seconds to
authenticate.
7
The display on your mobile device will now be displayed on
your TV.
Your Miracast setup is complete!
DSM-260
5
ENGLISH
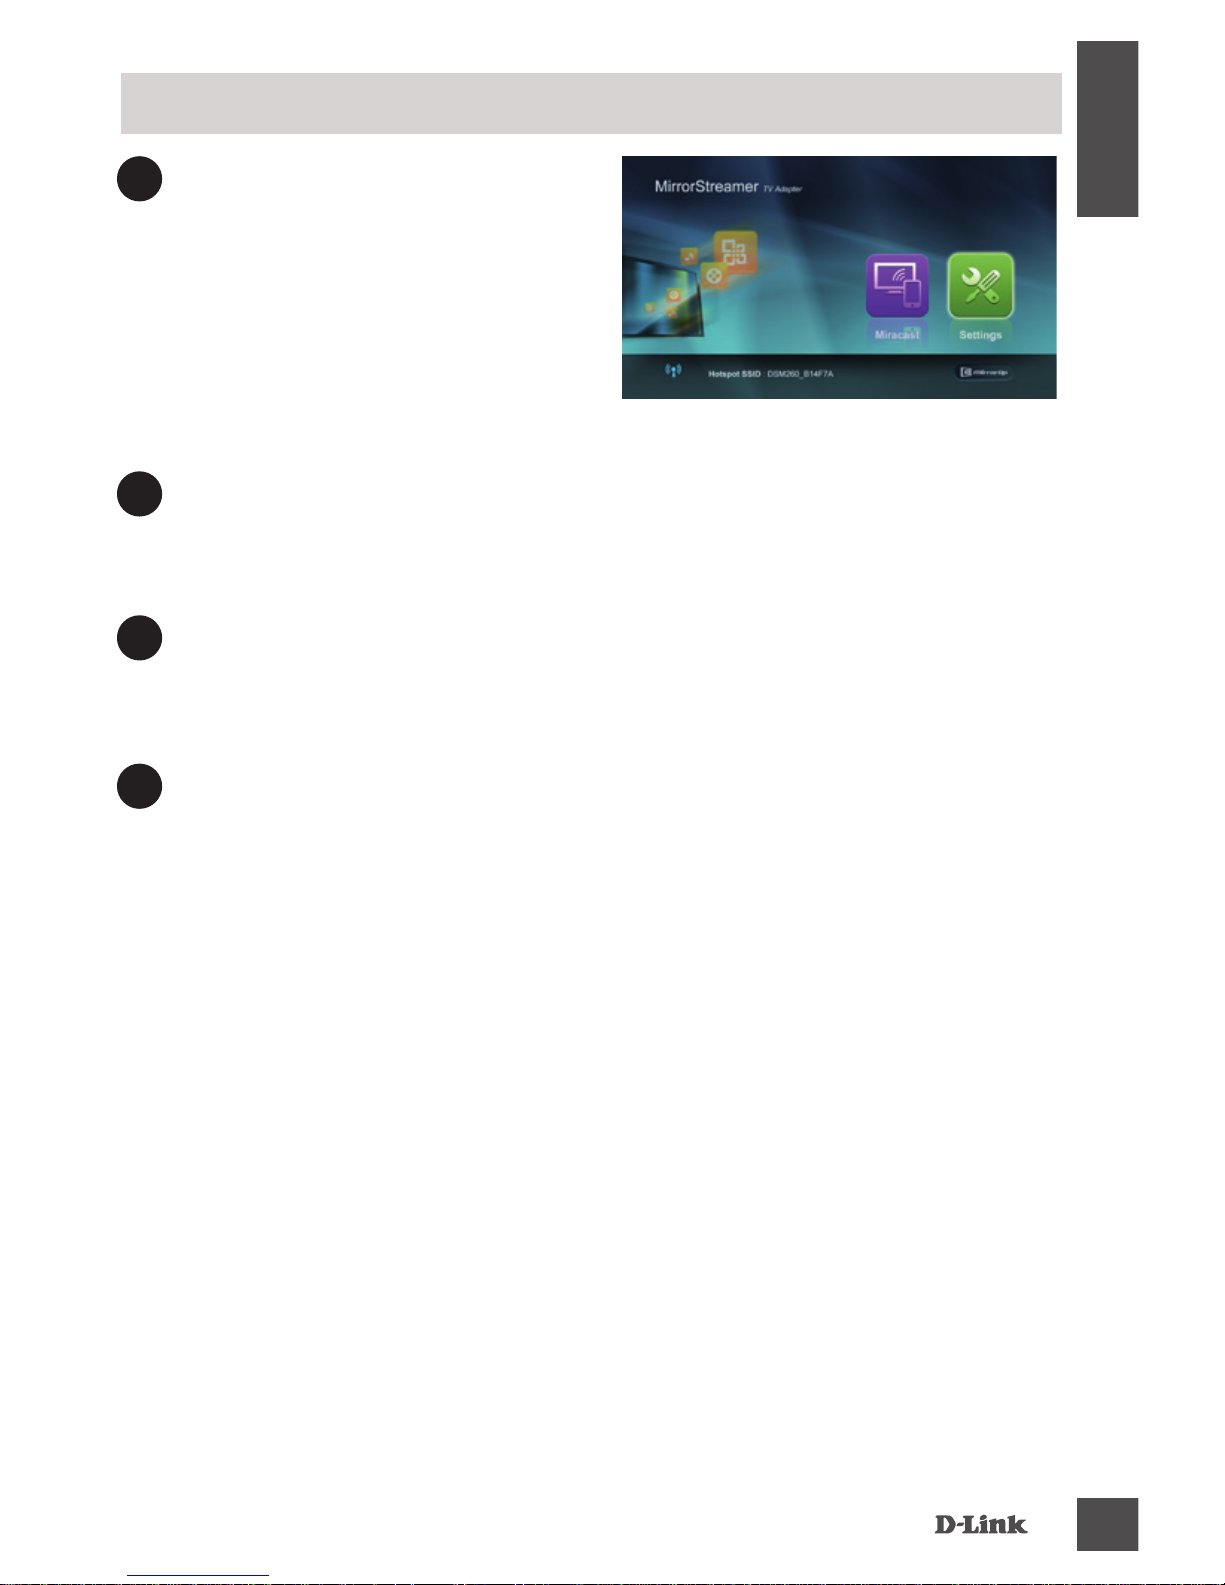
3
The LED on the top of the
DSM-260 will illuminate blue.
Switch your TV channel to the
correct HDMI input source.
You will see the D-Link logo on
the TV followed by the main
menu.
4
On your mobile device, open the wireless utility and connect
to the DSM-260. The wireless settings will be displayed on
the bottom of the menu screen.
5
Once you connect you can use either your TV remote or the
downloaded D-Link Media app to navigate. Select Setting
and press OK.
Non-Miracast Users (DLNA*)
6
Select Network and press the right arrow button. Select
WAN (if connecting to wireless router) or Wi-Fi Hotspot
(if displaying content from your device only without an
Internet connection).
* DLNA (Digital Living Network Alliance) is a industry standard
technology that allows devices on your home network to share
video, music, and photos.
DSM-260
6
ENGLISH
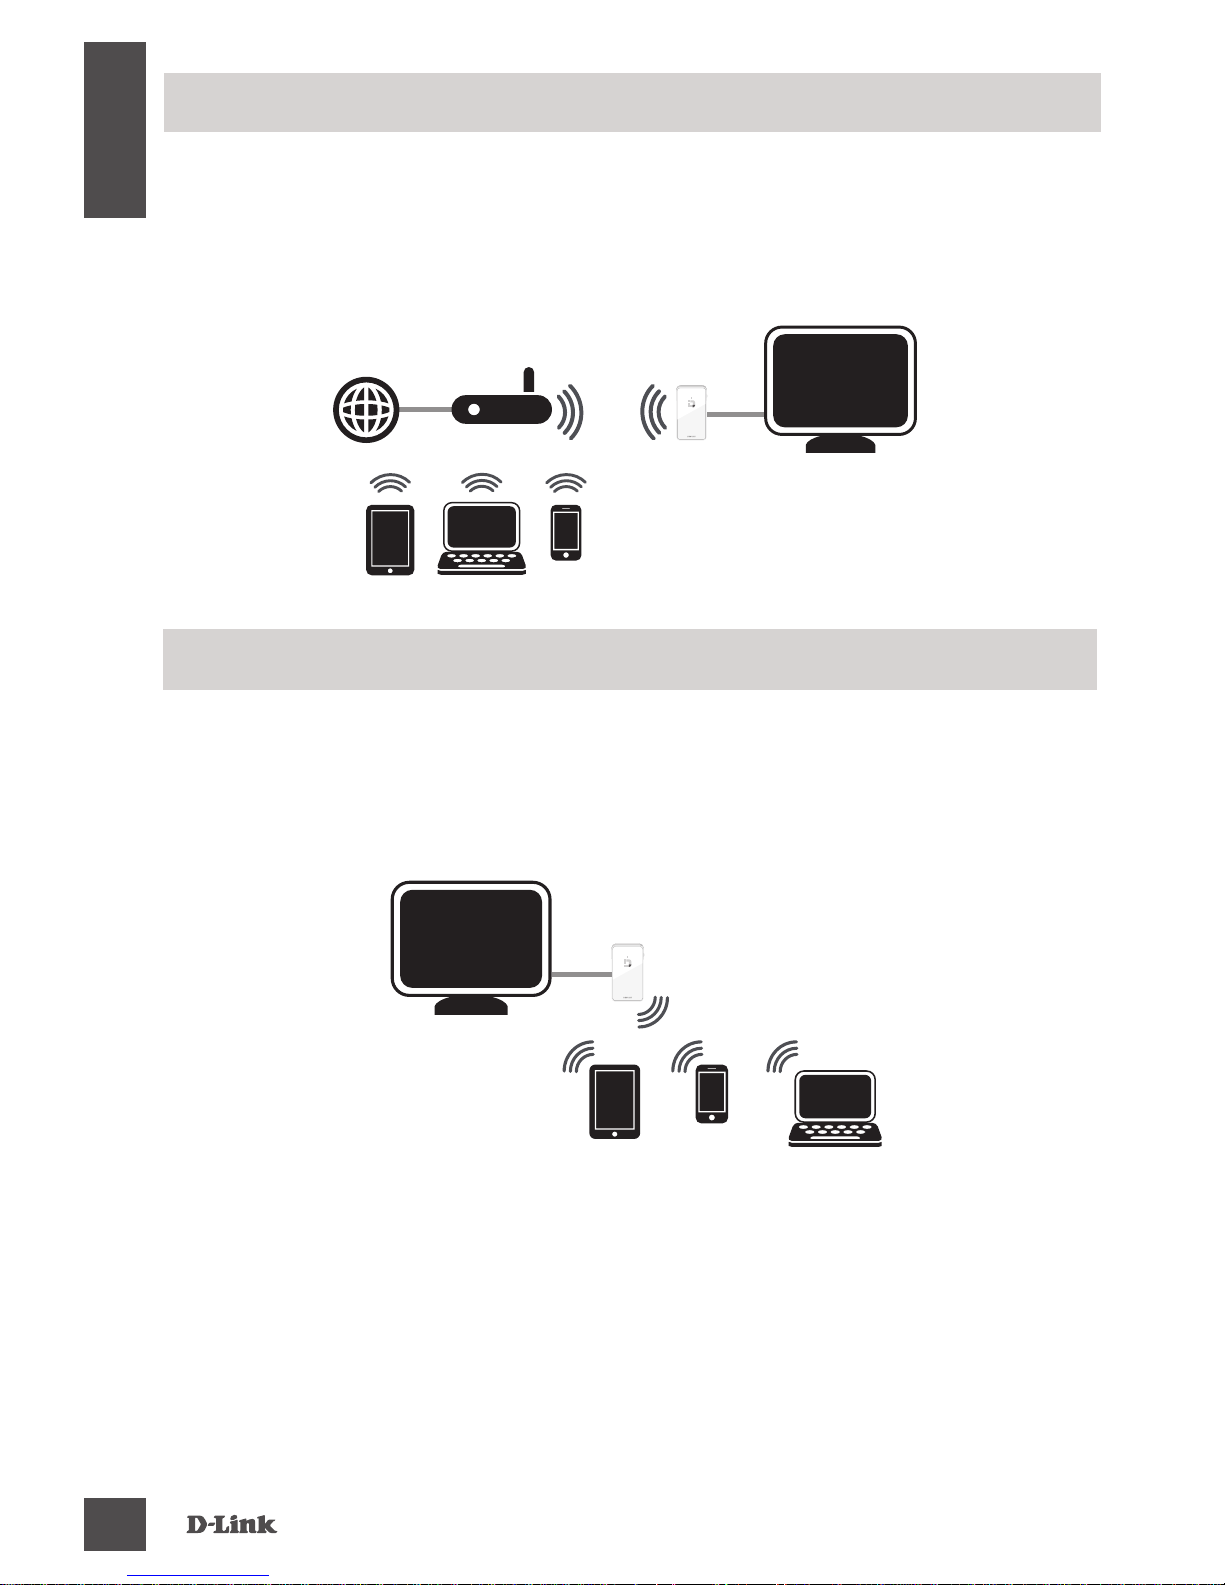
WAN Mode - If you want to stream content from the Internet
(e.g., stream a video from YouTube) to your TV, use this mode.
The DSM-260 and your mobile devices must connect to your
wireless router.
A - WAN Mode
Wi-Fi Hotspot Mode (default) - This mode allows you to
connect wirelessly from the DSM-260 to your laptop or mobile
device and stream local content to your TV. If you need an
Internet connection, use WAN Mode.
B - Wi-Fi Hotspot Mode
DSM-260
7
ENGLISH
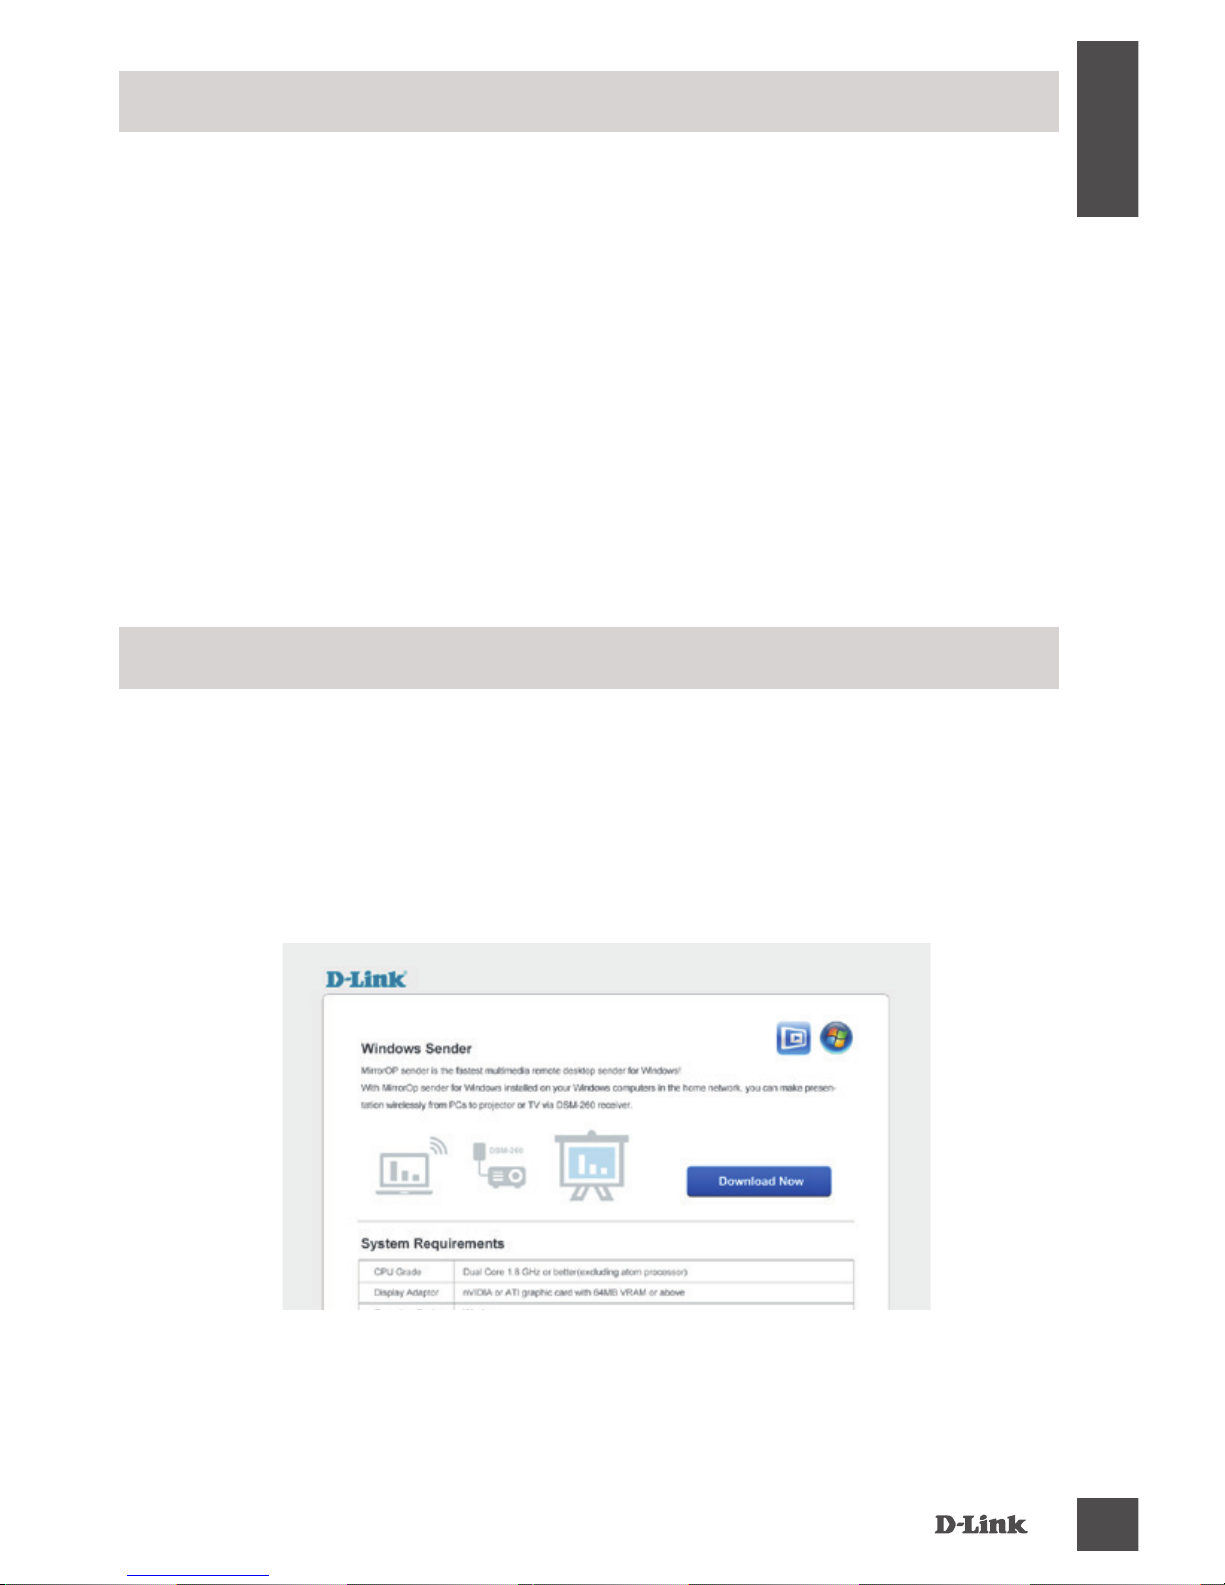
Another alternative to non-Miracast devices is to download
the MirrorOp app. The DSM-260 is a MirrorOp receiver and
will work with MirrorOp-enabled senders such as your
Windows and Mac devices.
The MirrorOp sender for Windows is included with the
DSM-260. Download it from the DSM-260 and then install it
on your laptop.
MirrorOp
1. Link your laptop to the DSM-260 Hotspot SSID via Wi-Fi.
Launch your browser and input the IP address: 192.168.8.1
in the address bar and press enter. The download page
will appear.
2. Download the sender application and install it on your
laptop.
A - Download via Wi-Fi Hotspot mode
DSM-260
8
ENGLISH
4. Download the sender application and install it on your
laptop.
Launch the MirrorOp Sender app, select the DSM-260 from
the list of available MirrorOp receivers, and press Play.
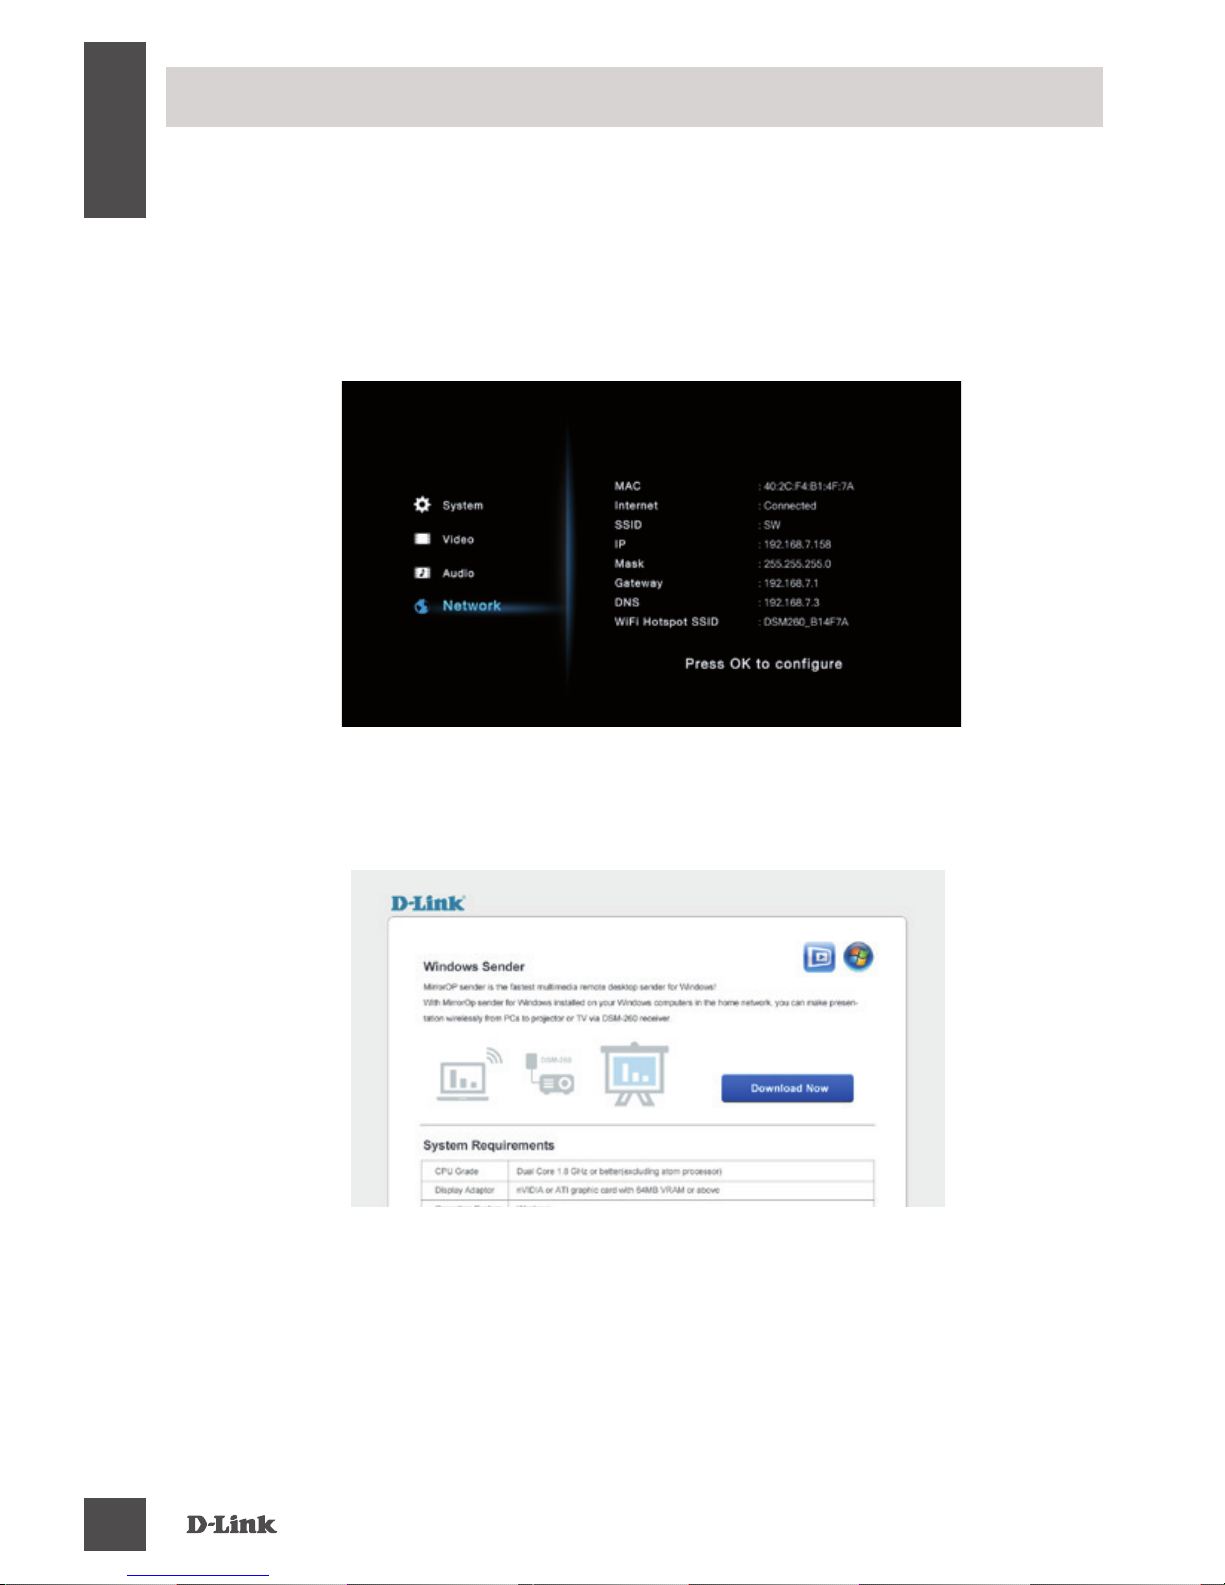
3. Launch your browser and input the IP address in the
address bar and press enter. The download page will
appear.
1. Link the DSM-260 to the router via Wi-Fi and then link your
laptop to the router via Wi-Fi.
2. Find the IP address as shown in the DSM-260 settings
window.
B - Download via WAN mode

DSM-260
9
ENGLISH
If are unable to see a picture on your TV:
If connected directly to your TV
• Ensure that the USB adapter is connected properly to
your DSM-260 and that it is plugged in to a working USB
port (or power adapter).
• Verify that the cables for your DSM-260 and your TV are
pushed in all the way and in the correct ports.
If connected to your home theater receiver
• Verify that the cables for your DSM-260, TV, and receiver
are pushed in all the way and in the correct ports.
Troubleshooting

DSM-260
10
ENGLISH
TECHNICAL SUPPORT
Australia:
Tel: 1300-766-868
24/7 Technical Support
Web: http://www.dlink.com.au
E-mail: support@dlink.com.au
India:
Tel: +91-832-2856000
Toll Free 1800-233-0000
Web: www.dlink.co.in
E-Mail: helpdesk@dlink.co.in
Singapore, Thailand, Indonesia,
Malaysia, Philippines, Vietnam:
Singapore - www.dlink.com.sg
Thailand - www.dlink.co.th
Indonesia - www.dlink.co.id
Malaysia - www.dlink.com.my
Philippines - www.dlink.com.ph
Vietnam - www.dlink.com.vn
Korea:
Tel : +82-2-2028-1810
Monday to Friday 9:00am to 6:00pm
Web : http://d-link.co.kr
E-mail : g2b@d-link.co.kr
New Zealand:
Tel: 0800-900-900
24/7 Technical Support
Web: http://www.dlink.co.nz
E-mail: support@dlink.co.nz
South Africa and Sub Sahara
Region:
Tel: +27 12 661 2025
08600 DLINK (for South Africa only)
Monday to Friday 8:30am to 9:00pm
South Africa Time
Web: http://www.d-link.co.za
E-mail: support@d-link.co.za
Saudi Arabia (KSA):
Tel: +966 01 217 0008
Fax: +966 01 217 0009
Saturday to Wednesday 9.30AM to 6.30PM
Thursdays 9.30AM to 2.00 PM
E-mail: Support.sa@dlink-me.com
D-Link Middle East - Dubai, U.A.E.
Plot No. S31102,
Jebel Ali Free Zone South,
P.O.Box 18224, Dubai, U.A.E.
Tel: +971-4-8809022
Fax: +971-4-8809066 / 8809069
Technical Support: +971-4-8809033
General Inquiries: info.me@dlink-me.com
Tech Support: support.me@dlink-me.com
Egypt
1, Makram Ebeid Street - City Lights Building
Nasrcity - Cairo, Egypt
Floor 6, ofce C2
Tel.: +2 02 26718375 - +2 02 26717280
Technical Support: +2 02 26738470
General Inquiries: info.eg@dlink-me.com
Tech Support: support.eg@dlink-me.com
Kingdom of Saudi Arabia
Ofce # 84 ,
Al Khaleej Building ( Mujamathu Al-Khaleej)
Opp. King Fahd Road, Olaya
Riyadh - Saudi Arabia
Tel: +966 1 217 0008
Technical Support:
+966 1 2170009 / +966 2 6522951
General Inquiries: info.sa@dlink-me.com
Tech Support: support.sa@dlink-me.com
You can nd software updates and user documentation on the D-Link website.
Tech Support for customers in
DSM-260
11
ENGLISH
TECHNICAL SUPPORT
Pakistan
Islamabad Ofce:
61-A, Jinnah Avenue, Blue Area,
Suite # 11, EBC, Saudi Pak Tower,
Islamabad - Pakistan
Tel.: +92-51-2800397, 2800398
Fax: +92-51-2800399
Karachi Ofce:
D-147/1, KDA Scheme # 1,
Opposite Mudassir Park, Karsaz Road,
Karachi – Pakistan
Phone: +92-21-34548158, 34326649
Fax: +92-21-4375727
Technical Support: +92-21-34548310,
34305069
General Inquiries: info.pk@dlink-me.com
Tech Support: support.pk@dlink-me.com
Iran
Unit 5, 5th Floor, No. 20, 17th Alley ,
Bokharest St. , Argentine Sq. ,
Tehran IRAN
Postal Code : 1513833817
Tel: +98-21-88880918,19
+98-21-88706653,54
General Inquiries: info.ir@dlink-me.com
Tech Support: support.ir@dlink-me.com
Morocco
M.I.T.C
Route de Nouaceur angle RS et CT 1029
Bureau N° 312 ET 337
Casablanca , Maroc
Phone : +212 663 72 73 24
Email: support.na@dlink-me.com
Lebanon RMA center
Dbayeh/Lebanon
PO Box:901589
Tel: +961 4 54 49 71 Ext:14
Fax: +961 4 54 49 71 Ext:12
Email: taoun@dlink-me.com
Bahrain
Technical Support: +973 1 3332904
Kuwait:
Technical Support: + 965 22453939 /
+965 22453949
Türkiye Merkez İrtibat Ofisi
Ayazağa Maslak yolu
Erdebil Cevahir İş Merkezi No: 5/A
Ayazağa / Maslak İstanbul
Tel: +90 212 2895659
Ücretsiz Müşteri Destek Hattı: 0 800
211 00 65
Web:www.dlink.com.tr
Teknik Destek: support.tr@dlink.com.tr
073-796-2797
DSM-260
12
ESPAÑOL
Si alguno de los elementos anteriores no se encuentra, por favor póngase en
contacto con su distribuidor.
DSM-260 MirrorStreamer
TV Adapter
Cable Micro USB
Cable A/V
Guía de Instalación
Rápida
Contenido del Empaque
Requerimientos Mínimos
• Dispositivo móvil (Smart Phone / Tablet) o portátil con
adaptador inalámbrico instalado
• TV con una entrada HDMI (para calidad HD) o conexiones
analógicas compuestas.
• Router Inalámbrico con conexión a Internet (Modo WAN)
1
Puerto
Micro
USB
Conecte el cable USB incluido aquí
2
Modo/
Reset
Mantenga pulsado hasta 5 segundos para alternar entre el modo
Miracast y DLNA.
Mantenga presionado entre 5-10 segundos para reiniciar el DSM-260.
Mantenga pulsado durante 15 segundos para reiniciar el DSM-260 a los
ajustes predeterminados de fábrica.
3
Puerto
A/V
Conecte aquí rmemente el cable A/V y el otro extremo a su Televisor o
al receptor de su Home Theater. Si está utilizando una conexión HDMI,
no es necesario conectar este cable. Tenga en cuenta que sólo se
puede recibir, con una conexión compuesta, hasta 480p de resolución
4
Puerto
HDMI
Conecte un cable HDMI (no incluido) aquí y el otro extremo a su
televisor o al receptor de su Home Theater. Debe ser usado para
calidad HD (720p/1080p) de visualización.
Descripción General del Hardware
21
Lado izquierdo Lado derecho
Parte inferior
3 4
 Loading...