

Page 1

Section 3 - Configuration
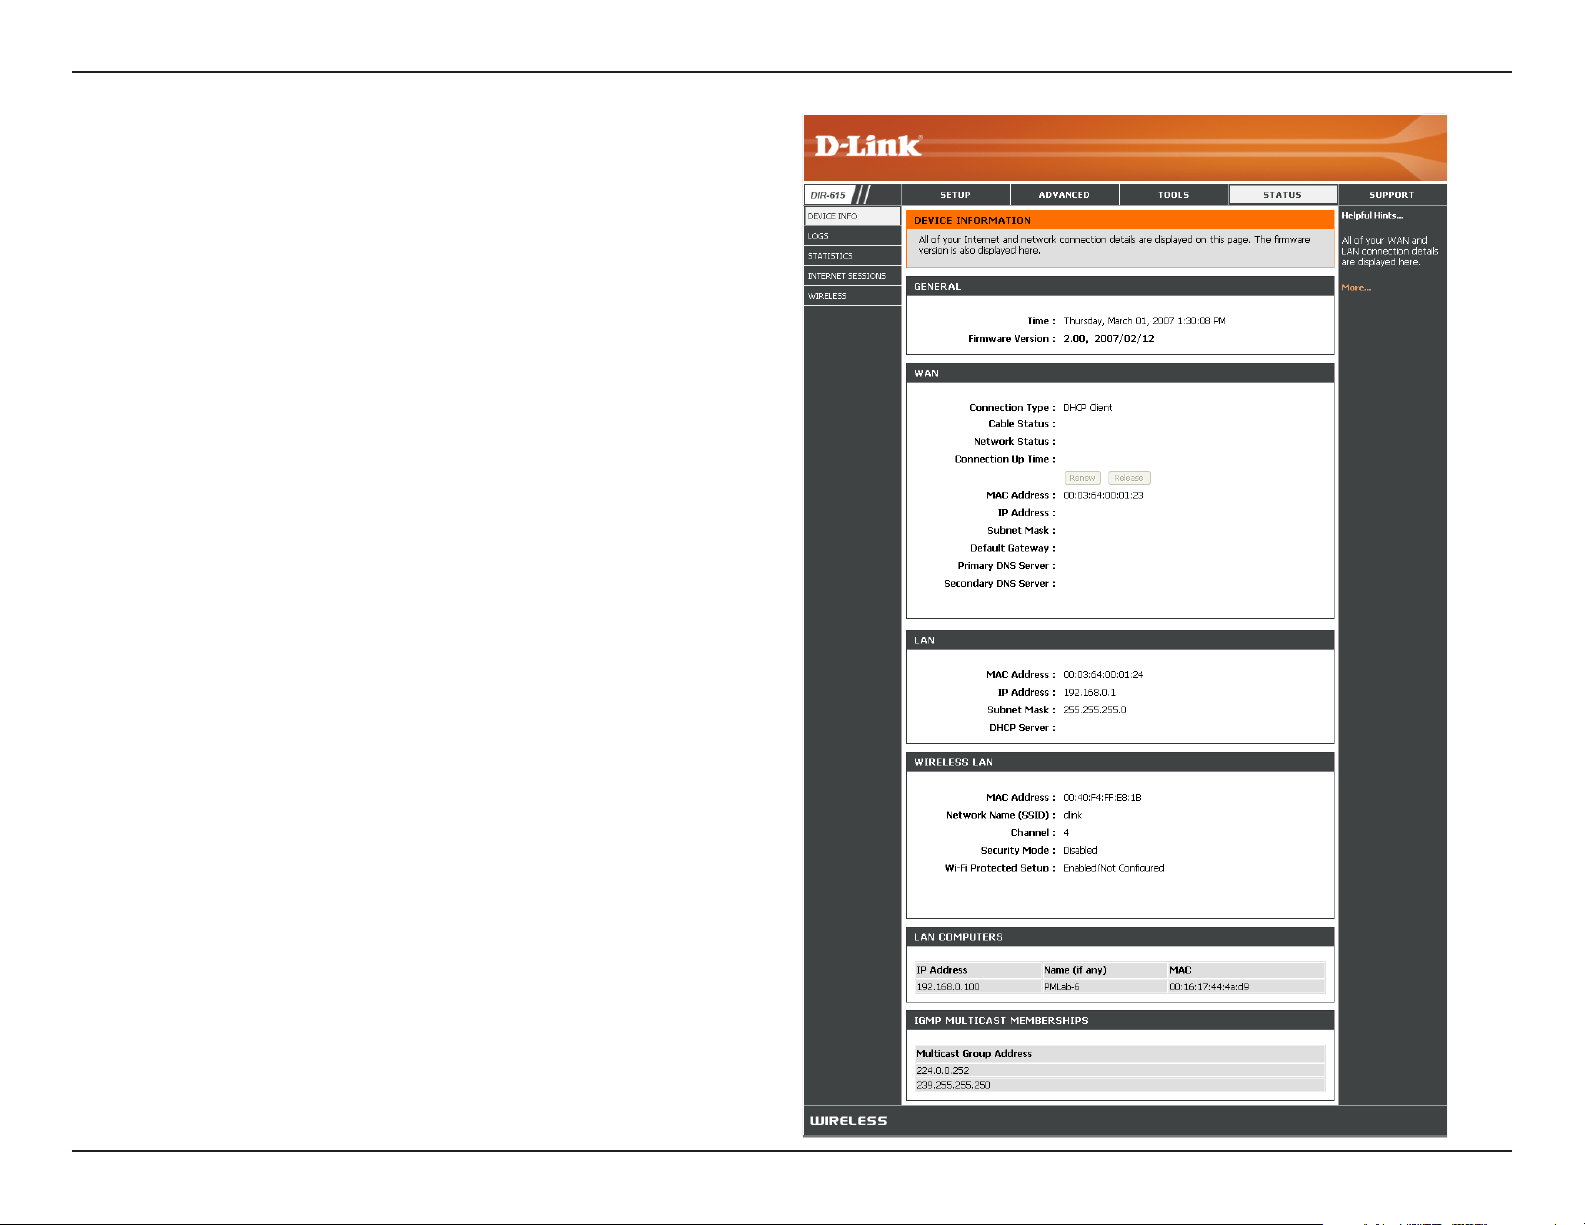
Device Information
This page displays the current information for the DIR-615. It will display the LAN, WAN (Internet), and Wireless
information.
If your Internet connection is set up for a Dynamic IP address then a Release button and a Renew button will be
displayed. Use Release to disconnect from your ISP and use Renew to connect to your ISP.
If your Internet connection is set up for PPPoE, a
Connect button and a Disconnect button will be
displayed. Use Disconnect to drop the PPPoE
connection and use Connect to establish the PPPoE
connection.
See the following page for more information.
61D-Link DIR-615 User Manual
Page 2
Section 3 - Configuration
General:
WAN:
LAN:
Wireless LAN:
LAN Computers:
IGMP Multicast
Memberships:
Displays the router’s time and firmware version.
Displays the MAC address and the public IP
settings for the router.
Displays the MAC address and the private (local)
IP settings for the router.
Displays the wireless MAC address and your
wireless settings such as SSID and Channel.
Displays computers and devices that are connected
to the router via Ethernet and that are receiving an
IP address assigned by the router (DHCP).
Displays the Multicast Group IP Address.
62D-Link DIR-615 User Manual
Page 3
Section 3 - Configuration
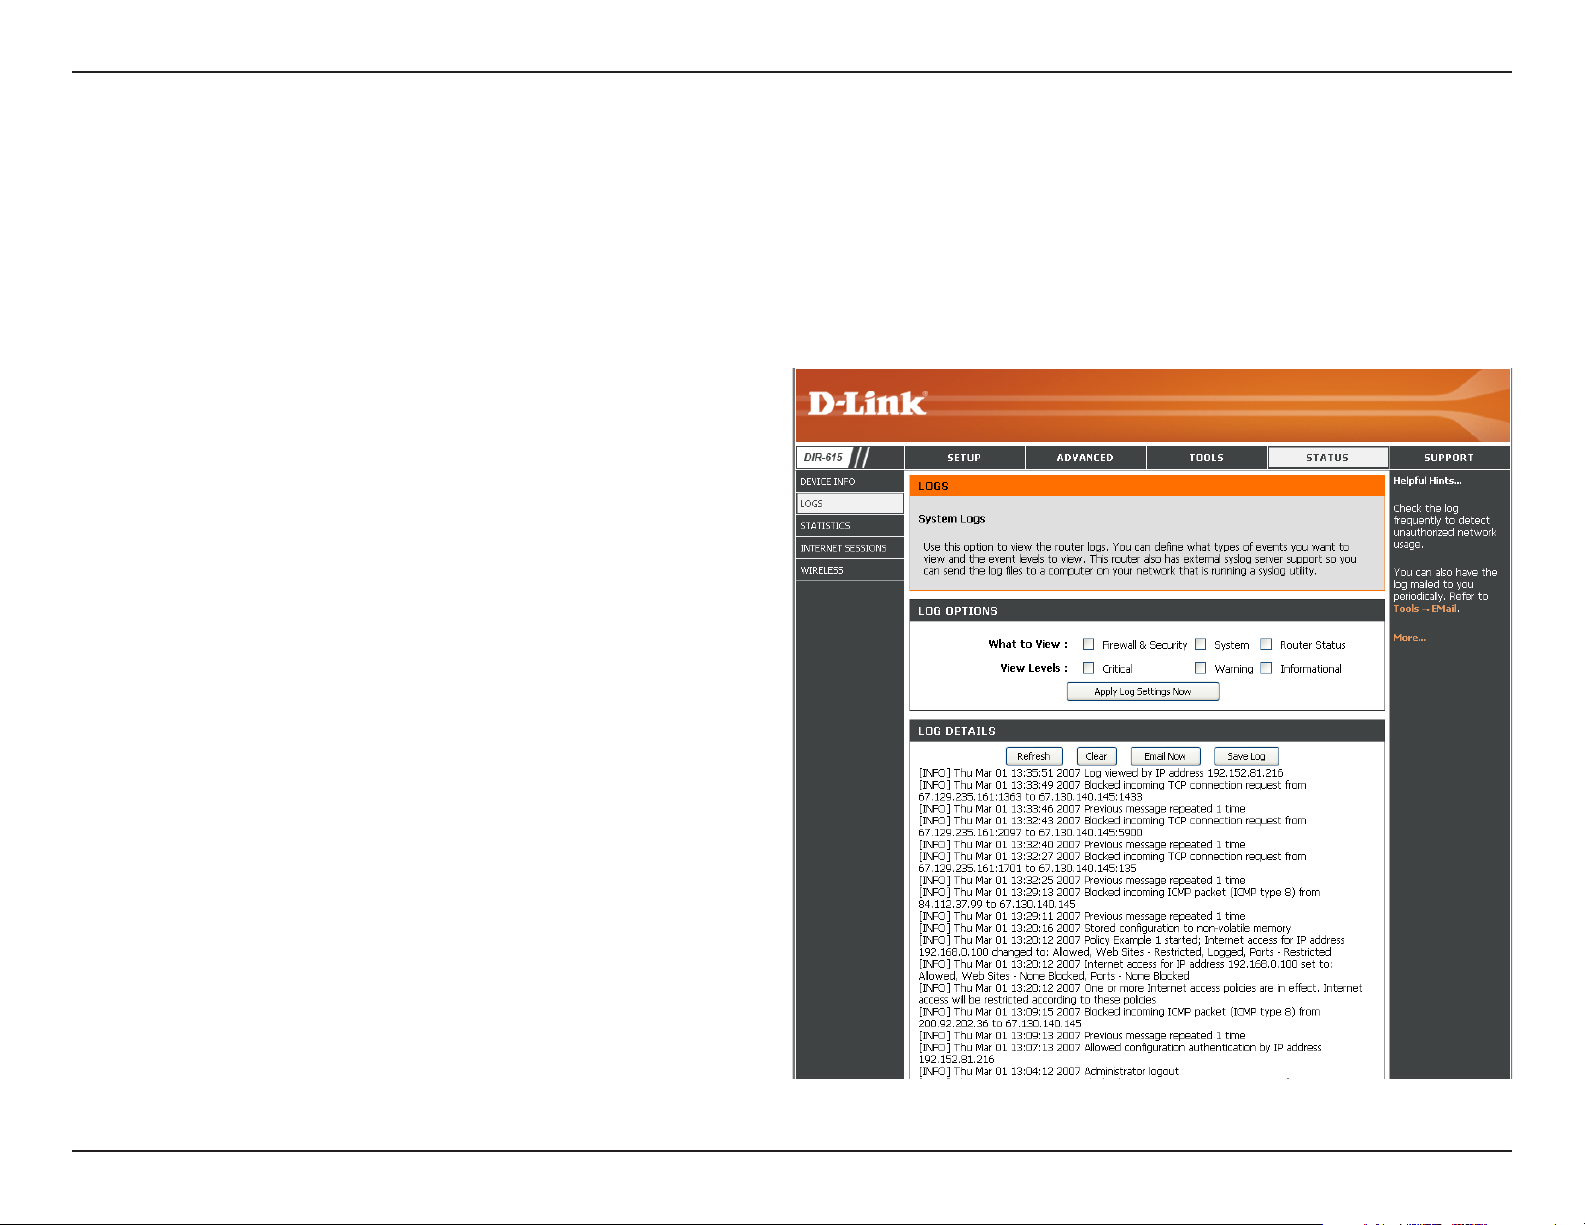
Log
The router automatically logs (records) events of possible interest in it’s internal memory. If there isn’t enough internal
memory for all events, logs of older events are deleted but logs of the latest events are retained. The Logs option allows
you to view the router logs. You can define what types of events you want to view and the level of the events to view.
This router also has external Syslog Server support so you can send the log files to a computer on your network that
is running a Syslog utility.
What to View:
View Levels:
Apply Log
Settings:
Refresh:
Clear:
Email Now:
Save Log:
You can select the types of messages that you want
to display from the log. Firewall & Security, System,
and Router Status messages can be selected.
There are three levels of message importance:
Informational, Warning, and Critical. Select the levels
that you want displayed in the log.
Will filter the log results so that only the selected
options appear.
Updates the log details on the screen so it displays
any recent activity.
Clears all of the log contents.
This option will send a copy of the router log to the
e-mail address configured in the Tools > Email
Settings screen.
This option will save the router to a log file on your
computer.
63D-Link DIR-615 User Manual
Page 4
Section 3 - Configuration
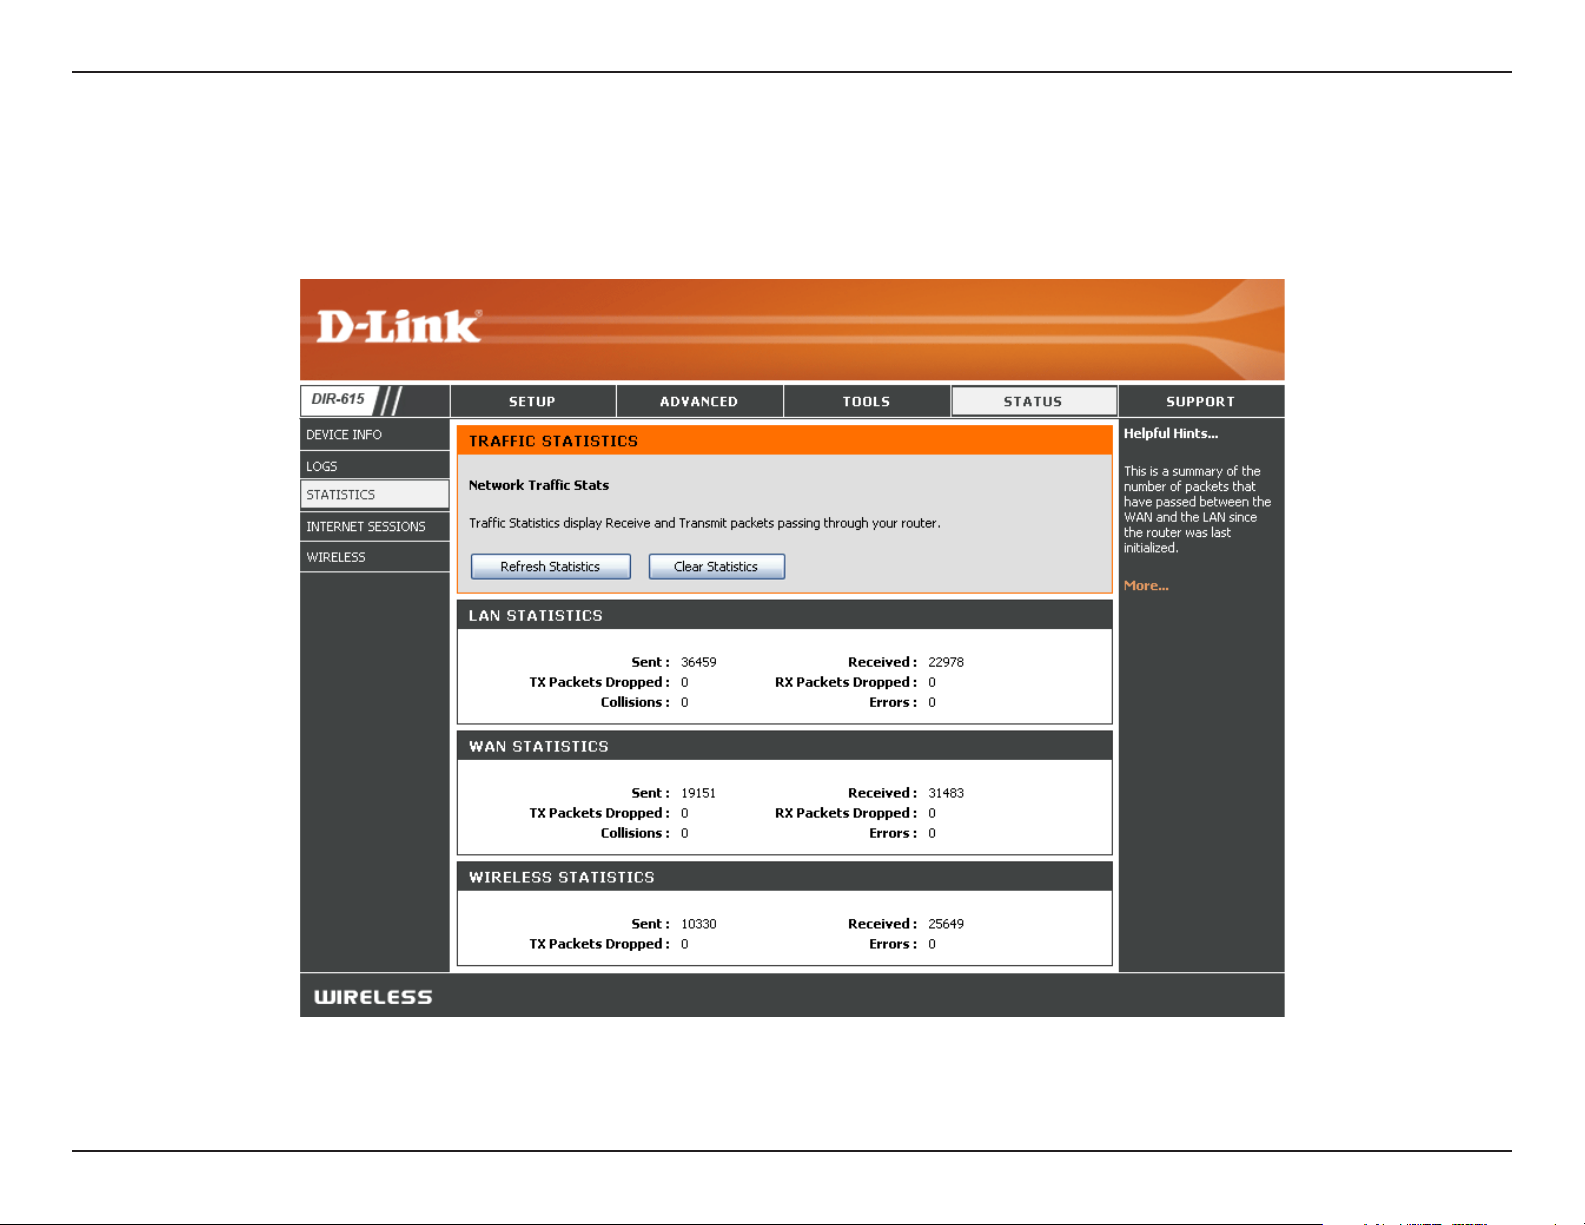
Stats
The screen below displays the Traffic Statistics. Here you can view the amount of packets that pass through the DIR-615 on
both the Internet and the LAN ports. The traffic counter will reset if the device is rebooted.
64D-Link DIR-615 User Manual
Page 5

Section 3 - Configuration
Internet Sessions
The Internet Sessions page displays full details of active Internet sessions through your router. An Internet session is a
conversation between a program or application on a LAN-side computer and a program or application on a WAN-side
computer.
Local:
NAT:
Internet:
Protocol:
State:
The IP address and, where appropriate, port
number of the local application.
The port number of the LAN-side application as
viewed by the WAN-side application.
The IP address and, where appropriate, port
number of the application on the Internet.
The communications protocol used for the
conversation.
State for sessions that use the TCP protocol:
NO: None -- This entry is used as a placeholder for a future connection that may occur.
SS: SYN Sent -- One of the systems is attempting to start a connection.
EST: Established -- the connection is passing data.
FW: FIN Wait -- The client system has requested that the connection be stopped.
CW: Close Wait -- The server system has requested that the connection be stopped.
TW: Time Wait -- Waiting for a short time while a connection that was in FIN Wait is fully closed.
LA: Last ACK -- Waiting for a short time while a connection that was in Close Wait is fully closed.
CL: Closed -- The connection is no longer active but the session is being tracked in case there are any retransmitted
packets still pending.
The direction of initiation of the conversation:
Out - Initiated from LAN to WAN.
In - Initiated from WAN to LAN.
65D-Link DIR-615 User Manual
Page 6

Section 3 - Configuration
The preference given to outbound packets of this conversation by the QoS Engine logic. Smaller numbers represent higher
Dir:
priority.
Priority:
Time Out:
The number of seconds of idle time until the router considers the session terminated. The initial value of Time Out depends
on the type and state of the connection.
300 seconds - UDP connections.
240 seconds - Reset or closed TCP connections. The connection does not close instantly so that lingering packets
can pass or the connection can be re-established.
7800 seconds - Established or closing TCP connections.
66D-Link DIR-615 User Manual
Page 7

Section 3 - Configuration
Wireless
The wireless client table displays a list of current connected wireless clients. This table also displays the connection
time and MAC address of the connected wireless clients.
67D-Link DIR-615 User Manual
Page 8
Section 3 - Configuration
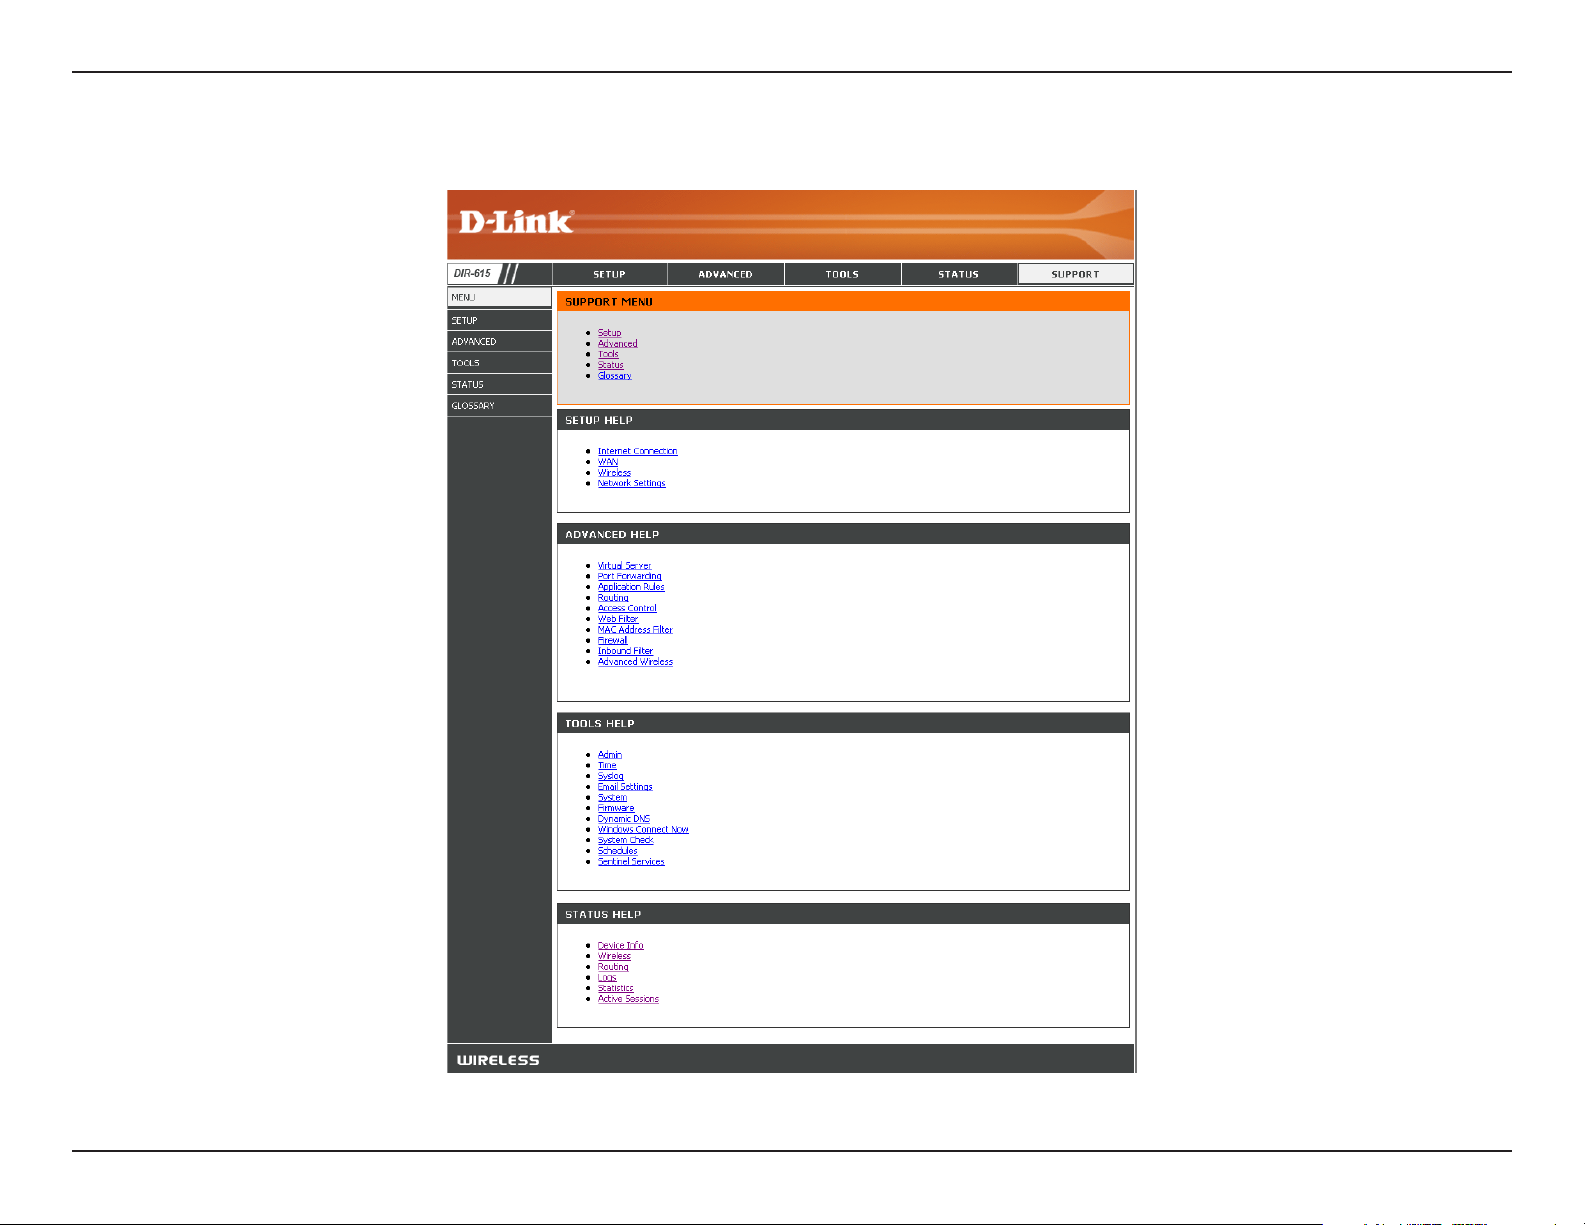
Support
68D-Link DIR-615 User Manual
Page 9

Section 4 - Security
Wireless Security
This section will show you the different levels of security you can use to protect your data from intruders. The
DIR-615 offers the following types of security:
• WPA2 (Wi-Fi Protected Access 2) • WPA2-PSK(Pre-Shared Key)
• WPA (Wi-Fi Protected Access) • WPA-PSK (Pre-Shared Key)
• WEP (Wired Equivalent Privacy)
What is WEP?
WEP stands for Wired Equivalent Privacy. It is based on the IEEE 802.11 standard and uses the RC4 encryption
algorithm. WEP provides security by encrypting data over your wireless network so that it is protected as it is transmitted
from one wireless device to another.
To gain access to a WEP network, you must know the key. The key is a string of characters that you create. When using
WEP, you must determine the level of encryption. The type of encryption determines the key length. 128-bit encryption
requires a longer key than 64-bit encryption. Keys are defined by entering in a string in HEX (hexadecimal - using
characters 0-9, A-F) or ASCII (American Standard Code for Information Interchange – alphanumeric characters) format.
ASCII format is provided so you can enter a string that is easier to remember. The ASCII string is converted to HEX
for use over the network. Four keys can be defined so that you can change keys easily.
69D-Link DIR-615 User Manual
Page 10

Section 4 - Security
What is WPA?
WPA, or Wi-Fi Protected Access, is a Wi-Fi standard that was designed to improve the security features of WEP (Wired
Equivalent Privacy).
The 2 major improvements over WEP:
• Improved data encryption through the Temporal Key Integrity Protocol (TKIP). TKIP scrambles the keys
using a hashing algorithm and, by adding an integrity-checking feature, ensures that the keys haven’t
been tampered with. WPA2 is based on 802.11i and uses Advanced Encryption Standard (AES) instead
of TKIP.
• User authentication, which is generally missing in WEP, through the extensible authentication protocol
(EAP). WEP regulates access to a wireless network based on a computer’s hardware-specific MAC
address, which is relatively simple to be sniffed out and stolen. EAP is built on a more secure public-key
encryption system to ensure that only authorized network users can access the network.
WPA-PSK/WPA2-PSK uses a passphrase or key to authenticate your wireless connection. The key is an alpha-numeric
password between 8 and 63 characters long. The password can include symbols (!?*&_) and spaces. This key must
be the exact same key entered on your wireless router or access point.
WPA/WPA2 incorporates user authentication through the Extensible Authentication Protocol (EAP). EAP is built on a
more secure public key encryption system to ensure that only authorized network users can access the network.
70D-Link DIR-615 User Manual
Page 11

Section 4 - Security
Wireless Security Setup Wizard
To run the security wizard, browse to the Setup page and then click the Launch Wireless Security Setup Wizard
71D-Link DIR-615 User Manual
Page 12

Section 4 - Security
Auto: Select to auto generate your wireless security settings. This option can be
used when using a wireless adapter that supports Wi-Fi Protected Setup.
Manual: Select this option to run the wireless setup wizard which will guide you to
configure your wireless settings. Skip to page 73.
Wireless Wizard - Auto
The router has automatically generated your wireless settings. Please write down and keep this information for your
reference. Click Save.
72D-Link DIR-615 User Manual
Page 13

Section 4 - Security
Click Next to continue.
Enter the SSID (Service Set Identifier). The SSID is the
name of your wireless network. Create a name using up to
32 characters. The SSID is case-sensitive.
Select the level of security for your wireless network:
• Best - WPA2 Authentication
• Better - WPA Authentication
• Good - WEP Encryption
• None - No security
Wireless Wizard - Manual
Click Next to continue.
If you selected Best or Better, enter a password between
8-63 characters.
If you selected Good, enter 13 characters or 26 Hex digits.
Click Next to continue.
73D-Link DIR-615 User Manual
Page 14

Section 4 - Security
If you selected Good, the following screen will show you your
WEP key to enter on your wireless clients.
Click Save to finish the Security Wizard.
If you selected Better, the following screen will show you your
Pre-Shared Key to enter on your wireless clients.
Click Save to finish the Security Wizard.
If you selected Best, the following screen will show you your
Pre-Shared Key to enter on your wireless clients.
Click Save to finish the Security Wizard.
If you selected WPA-Enterprise, the RADIUS information will be displayed. Click Save to finish the Security Wizard.
74D-Link DIR-615 User Manual
Page 15

Section 4 - Security
Configure WEP
It is recommended to enable encryption on your wireless router before your wireless network adapters. Please establish
wireless connectivity before enabling encryption. Your wireless signal may degrade when enabling encryption due to
the added overhead.
1. Log into the web-based configuration by opening a
web browser and entering the IP address of the router
(192.168.0.1). Click on Setup and then click Wireless
Settings on the left side.
2. Next to Security Mode, select WEP.
3. Next to WEP Key Length, select the level of encryption
(64 or 128-bit).
Hex - (recommended) Letters A-F and numbers 0-9
are valid.
4. Next to WEP Key 1, enter a WEP key that you create. Make
sure you enter this key exactly on all your wireless devices.
You may enter up to 4 different keys.
5. Next to Authentication, select Shared Key.
6. Click Save Settings to save your settings. If you are
configuring the router with a wireless adapter, you will lose
connectivity until you enable WEP on your adapter and
enter the same WEP key as you did on the router.
75D-Link DIR-615 User Manual
Page 16

Section 4 - Security
Configure WPA-Personal (PSK)
It is recommended to enable encryption on your wireless router before your wireless network adapters. Please establish
wireless connectivity before enabling encryption. Your wireless signal may degrade when enabling encryption due to
the added overhead.
1. Log into the web-based configuration by opening a
web browser and entering the IP address of the router
(192.168.0.1). Click on Setup and then click Wireless
Settings on the left side.
2. Next to Security Mode, select WPA-Personal.
3. Next to WPA Mode, select Auto, WPA2 Only, or WPA Only.
Use Auto if you have wireless clients using both WPA and
WPA2.
4. Next to Cypher Type, select TKIP and AES, TKIP, or AES.
If you have wireless clients that use both types, use TKIP
and AES.
5. Next to Group Key Update Interval, enter the amount of time
before the group key used for broadcast and multicast data
is changed (3600 is default).
6. Next to Pre-Shared Key, enter a key (passphrase). The key
is entered as a pass-phrase in ASCII format at both ends of
the wireless connection. The pass-phrase must be between
8-63 characters.
7. Click Save Settings to save your settings. If you are
configuring the router with a wireless adapter, you will lose connectivity until you enable WPA-PSK on your adapter
and enter the same passphrase as you did on the router.
76D-Link DIR-615 User Manual
Page 17

Section 4 - Security
Configure WPA-Enterprise (RADIUS)
It is recommended to enable encryption on your wireless router before your wireless network adapters. Please establish
wireless connectivity before enabling encryption. Your wireless signal may degrade when enabling encryption due to
the added overhead.
1. Log into the web-based configuration by opening a web browser
and entering the IP address of the router (192.168.0.1). Click
on Setup and then click Wireless Settings on the left side.
2. Next to Security Mode, select WPA-Enterprise.
3. Next to WPA Mode, select Auto, WPA2 Only, or WPA Only. Use
Auto if you have wireless clients using both WPA and WPA2.
4. Next to Cypher Type, select TKIP and AES, TKIP, or AES. If you
have wireless clients that use both types, use TKIP and AES.
5. Next to Group Key Update Interval, enter the amount of time
before the group key used for broadcast and multicast data is
changed (3600 is default).
6. Next to Authentication Timeout, enter the amount of time before
a client is required to re-authenticate (60 minutes is default).
7. Next to RADIUS Server IP Address enter the IP Address of your
RADIUS server.
8. Next to RADIUS Server Port, enter the port you are using with your RADIUS server. 1812 is the default port.
9. Next to RADIUS Server Shared Secret, enter the security key.
77D-Link DIR-615 User Manual
Page 18

Section 4 - Security
10. If the MAC Address Authentication box is selected then the
user will need to connect from the same computer whenever
logging into the wireless network.
11. Click Advanced to enter settings for a secondary RADIUS
Server.
12. Click Apply Settings to save your settings.
78D-Link DIR-615 User Manual
Page 19

Section 5 - Connecting to a Wireless Network
Connect to a Wireless Network
Add Wireless Device Wizard
This feature allows you to add any wireless devices that support Wi-Fi Protected Setup (WPS).
Click Next.
Select the method you would like to use for adding a
new wireless device onto your wireless network.
79D-Link DIR-615 User Manual
Page 20

Section 5 - Connecting to a Wireless Network
PIN: PIN requires you to enter your wireless device’s
PIN information.
Enter the wireless device’s PIN information in
the box and click on Connect.
Push Button: Push button allows you to connect
a wireless device onto your wireless
networ k t hro ugh butt on p res s
method.
Click on Connect button when you
are ready.
To successfully add a new wireless device, you would
have to enter either the PIN information or the button
must be pressed within 120 seconds.
Manual: Use this option if you uncertain if your
wireless device support WPS, it will display
your current wireless settings.
80D-Link DIR-615 User Manual
Page 21

Section 5 - Connecting to a Wireless Network
81D-Link DIR-615 User Manual
Page 22

Section 5 - Connecting to a Wireless Network
Using Windows® XP
Windows® XP users may use the built-in wireless utility (Zero Configuration Utility). The following instructions are for
Service Pack 2 users. If you are using another company’s utility or Windows® 2000, please refer to the user manual
of your wireless adapter for help with connecting to a wireless network. Most utilities will have a “site survey” option
similar to the Windows® XP utility as seen below.
If you receive the Wireless Networks Detected bubble, click
on the center of the bubble to access the utility.
or
Right-click on the wireless computer icon in your system tray
(lower-right corner next to the time). Select View Available
Wireless Networks.
The utility will display any available wireless networks in your
area. Click on a network (displayed using the SSID) and click
the Connect button.
If you get a good signal but cannot access the Internet, check you
TCP/IP settings for your wireless adapter. Refer to the Networking
Basics section in this manual for more information.
82D-Link DIR-615 User Manual
Page 23

Section 5 - Connecting to a Wireless Network
Configure WEP
It is recommended to enable WEP on your wireless router or access point before configuring your wireless adapter. If
you are joining an existing network, you will need to know the WEP key being used.
1. Open the Windows® XP Wireless Utility by right-clicking
on the wireless computer icon in your system tray
(lower-right corner of screen). Select View Available
Wireless Networks.
2. Highlight the wireless network (SSID) you would like to
connect to and click Connect.
83D-Link DIR-615 User Manual
Page 24

Section 5 - Connecting to a Wireless Network
3. The Wireless Network Connection box will appear. Enter the same
WEP key that is on your router and click Connect.
It may take 20-30 seconds to connect to the wireless network. If the
connection fails, please verify that the WEP settings are correct. The
WEP key must be exactly the same as on the wireless router.
84D-Link DIR-615 User Manual
Page 25

Section 5 - Connecting to a Wireless Network
Configure WPA-PSK
It is recommended to enable WEP on your wireless router or access point before configuring your wireless adapter. If
you are joining an existing network, you will need to know the WEP key being used.
1. Open the Windows® XP Wireless Utility by right-clicking
on the wireless computer icon in your system tray
(lower-right corner of screen). Select View Available
Wireless Networks.
2. Highlight the wireless network (SSID) you would like to
connect to and click Connect.
85D-Link DIR-615 User Manual
Page 26

Section 5 - Connecting to a Wireless Network
3. The Wireless Network Connection box will appear. Enter the
WPA-PSK passphrase and click Connect.
It may take 20-30 seconds to connect to the wireless network. If the
connection fails, please verify that the WPA-PSK settings are correct.
The WPA-PSK passphrase must be exactly the same as on the
wireless router.
86D-Link DIR-615 User Manual
Page 27

Section 6 - Troubleshooting
Troubleshooting
This chapter provides solutions to problems that can occur during the installation and operation of the DIR-615. Read
the following descriptions if you are having problems. (The examples below are illustrated in Windows® XP. If you have
a different operating system, the screen shots on your computer will look similar to the following examples.)
1. Why can’t I access the web-based configuration utility?
When entering the IP address of the D-Link router (192.168.0.1 for example), you are not connecting to a website on
the Internet or have to be connected to the Internet. The device has the utility built-in to a ROM chip in the device itself.
Your computer must be on the same IP subnet to connect to the web-based utility.
• Make sure you have an updated Java-enabled web browser. We recommend the following:
• Internet Explorer 6.0 or higher
• Netscape 8 or higher
• Mozilla 1.7.12 (5.0) or higher
• Opera 8.5 or higher
• Safari 1.2 or higher (with Java 1.3.1 or higher)
• Camino 0.8.4 or higher
• Firefox 1.5 or higher
• Verify physical connectivity by checking for solid link lights on the device. If you do not get a solid link light, try using
a different cable or connect to a different port on the device if possible. If the computer is turned off, the link light may
not be on.
• Disable any Internet security software running on the computer. Software firewalls such as Zone Alarm, Black Ice,
Sygate, Norton Personal Firewall, and Windows® XP firewall may block access to the configuration pages. Check the
help files included with your firewall software for more information on disabling or configuring it.
87D-Link DIR-615 User Manual
Page 28

Section 6 - Troubleshooting
• Configure your Internet settings:
• Go to Start > Settings > Control Panel. Double-click the Internet Options Icon. From the Security tab,
click the button to restore the settings to their defaults.
• Click the Connection tab and set the dial-up option to Never Dial a Connection. Click the LAN Settings
button. Make sure nothing is checked. Click OK.
• Go to the Advanced tab and click the button to restore these settings to their defaults. Click OK three
times.
• Close your web browser (if open) and open it.
• Access the web management. Open your web browser and enter the IP address of your D-Link router in the address
bar. This should open the login page for your the web management.
• If you still cannot access the configuration, unplug the power to the router for 10 seconds and plug back in. Wait
about 30 seconds and try accessing the configuration. If you have multiple computers, try connecting using a different
computer.
2. What can I do if I forgot my password?
If you forgot your password, you must reset your router. Unfortunately this process will change all your settings back
to the factory defaults.
To reset the router, locate the reset button (hole) on the rear panel of the unit. With the router powered on, use a
paperclip to hold the button down for 10 seconds. Release the button and the router will go through its reboot process.
Wait about 30 seconds to access the router. The default IP address is 192.168.0.1. When logging in, the username is
admin and leave the password box empty.
88D-Link DIR-615 User Manual
Page 29

Section 6 - Troubleshooting
3. Why can’t I connect to certain sites or send and receive e-mails when connecting through my router?
If you are having a problem sending or receiving e-mail, or connecting to secure sites such as eBay, banking sites, and
Hotmail, we suggest lowering the MTU in increments of ten (Ex. 1492, 1482, 1472, etc).
Note: AOL DSL+ users must use MTU of 1400.
To find the proper MTU Size, you’ll have to do a special ping of the destination you’re trying to go to. A destination could
be another computer, or a URL.
• Click on Start and then click Run.
• Windows® 95, 98, and Me users type in command (Windows® NT, 2000, and XP users type in cmd) and
press Enter (or click OK).
• Once the window opens, you’ll need to do a special ping. Use the following syntax:
ping [url] [-f] [-l] [MTU value]
Example: ping yahoo.com -f -l 1472
89D-Link DIR-615 User Manual
Page 30

Section 6 - Troubleshooting
You should start at 1472 and work your way down by 10 each time. Once you get a reply, go up by 2 until you get a
fragmented packet. Take that value and add 28 to the value to account for the various TCP/IP headers. For example,
lets say that 1452 was the proper value, the actual MTU size would be 1480, which is the optimum for the network
we’re working with (1452+28=1480).
Once you find your MTU, you can now configure your router with the proper MTU size.
To change the MTU rate on your router follow the steps below:
• Open your browser, enter the IP address of your router (192.168.0.1) and click OK.
• Enter your username (admin) and password (blank by default). Click OK to enter the web configuration
page for the device.
• Click on Setup and then click Manual Configure.
• To change the MTU enter the number in the MTU field and click Save Settings to save your settings.
• Test your e-mail. If changing the MTU does not resolve the problem, continue changing the MTU in
increments of ten.
90D-Link DIR-615 User Manual
 Loading...