

Page 1
DISH® Wally
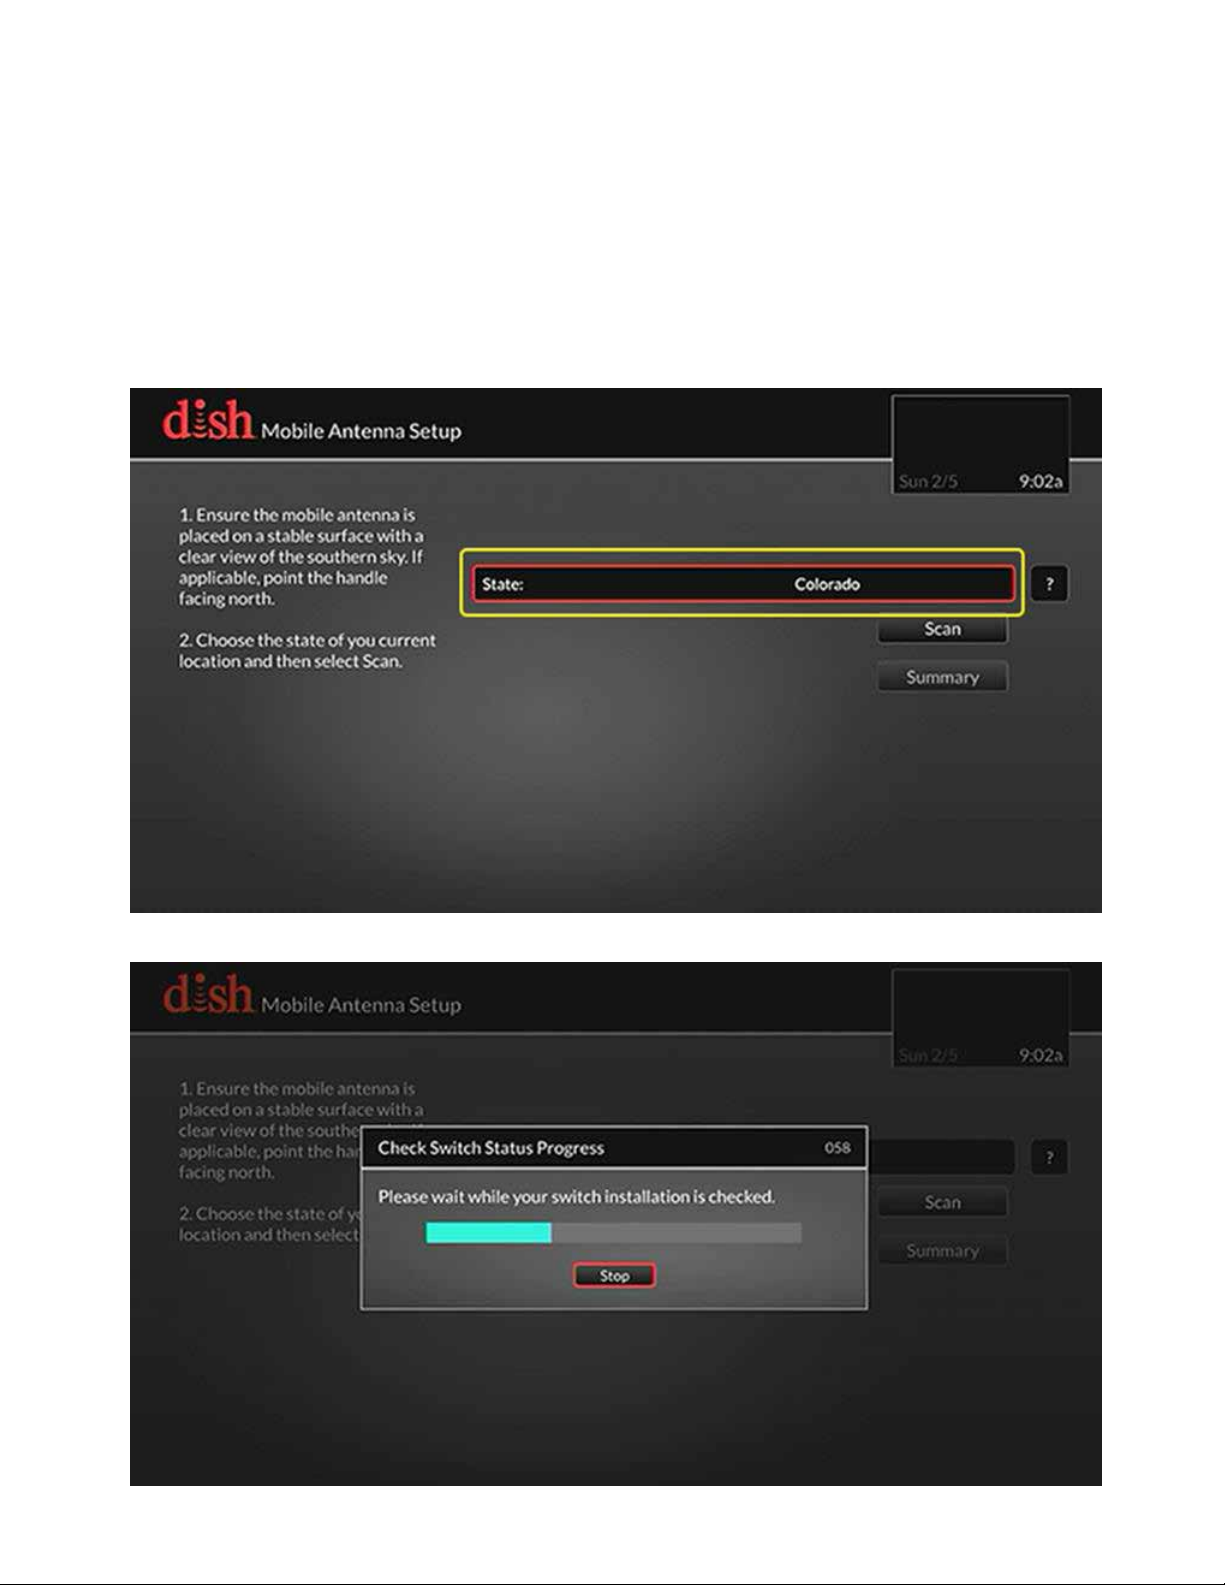
It is important to follow the directions included with your product for the best possible experience. In order for the DISH Wally
receiver to work properly, the mobile antenna must ALWAYS have a clear view of the southern sky. This allows the Wally receiver
to pick up DISH programming. If you do NOT have a clear view of the southern sky, you will be prompted to continually select your
state and scan with no results, or the Check Switch Status Progress bar will remain at 100% and programming will never be received
(referenced screen shots shown below).
In either scenario, simply reposition the mobile satellite antenna to obtain a clear view of the southern sky, and scan again. You will
then be able to activate your receiver, and view DISH programming.
Additionally, please don’t forget to always ensure your coaxial cable is tightly connected to both the Wally and your mobile antenna.
Receiver Setup
™
Page 2
Receiver Setup for New Receivers
If using a new receiver with the DISH® Playmaker antenna, the
receiver will go through an Installation Wizard to help with the
setup process.
1.
Follow the on-screen instructions to program the remote control.
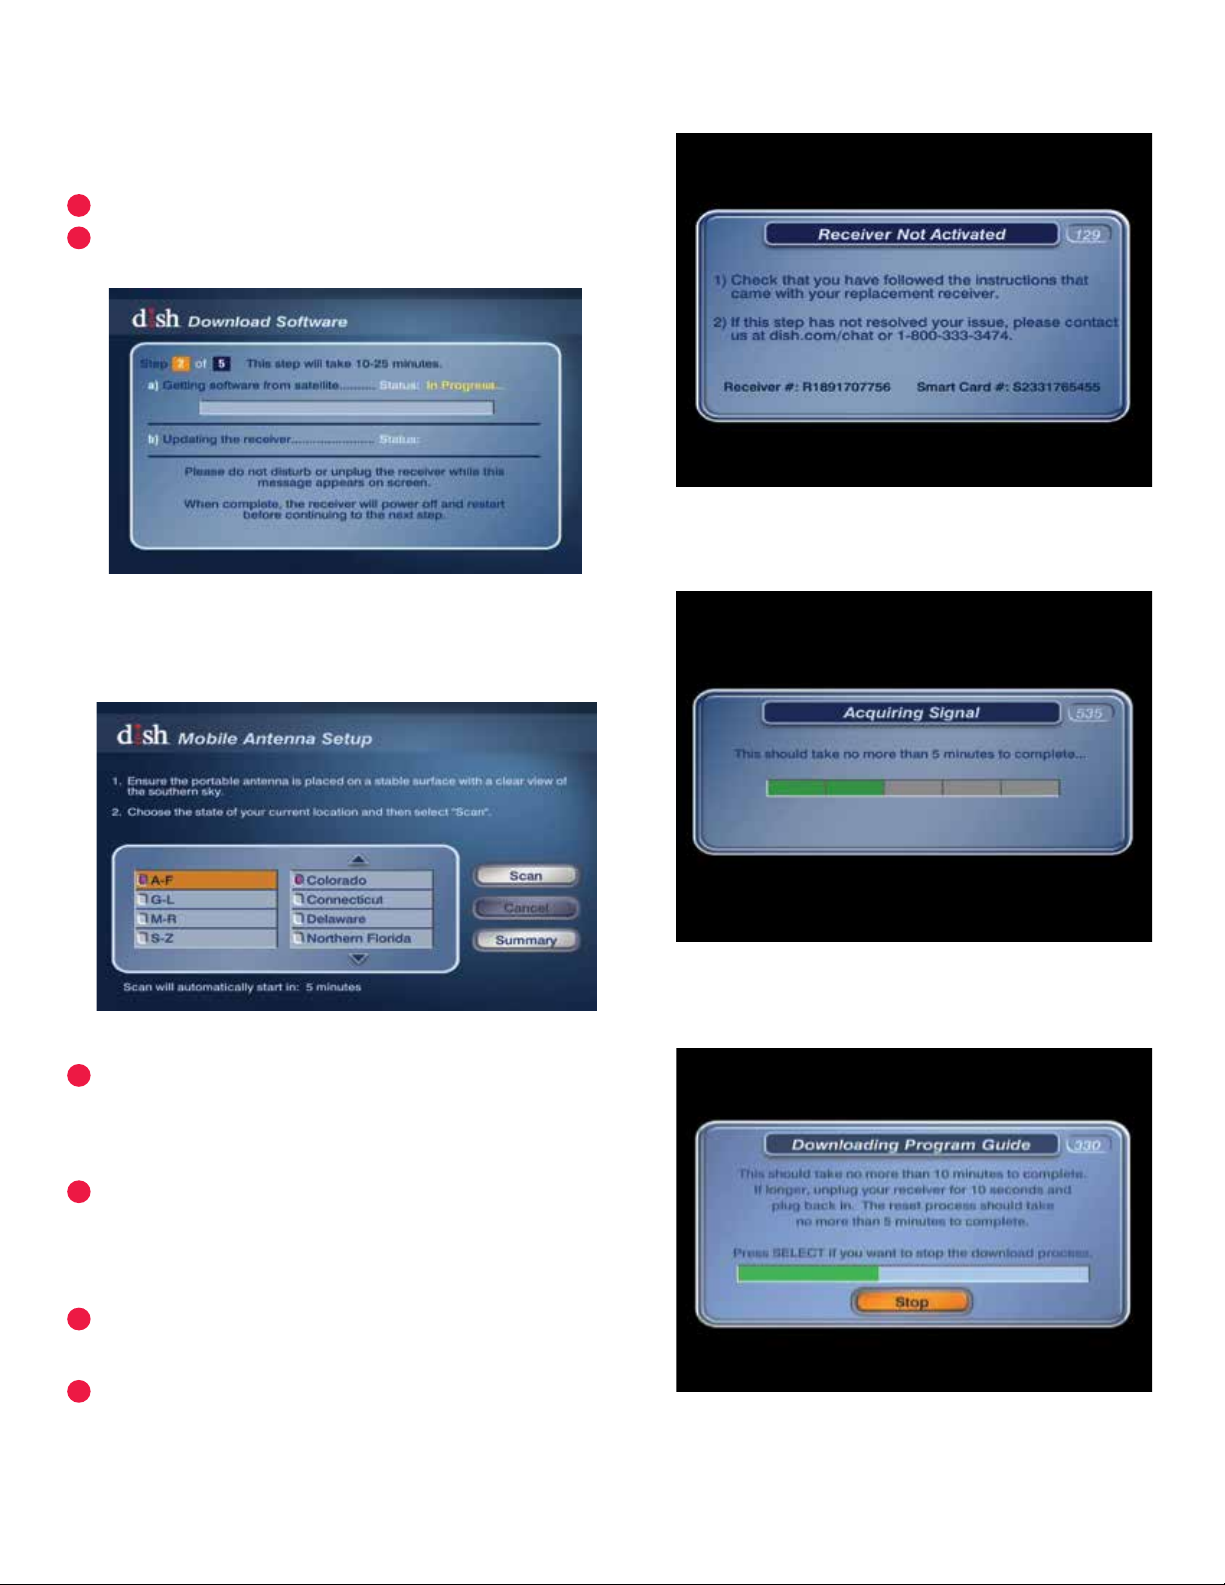
During step 2 of the Installation Wizard, the unit will need to
2.
acquire satellites and update the receiver (see fig. 1).
Figure 1
This step will require a search initiated by the Mobile Setup
screen. Fill in the required information, and then select “Scan”
to begin the search routine (see fig. 2).
Figure 3
Figure 2
3.
During the search routine, the antenna will scan for
satellites. The antenna may make a slight grinding sound
when searching for satellites; this is normal and does not
harm the unit. Once the search routine is complete, the
receiver will update.
4.
The receiver may reboot automatically as part of the update
process. If so, select the state of your current location on the
Mobile Antenna Setup screen as in figure 2. Press “Scan” to
begin the search routine.
The satellite will search for and acquire satellites.
If not already activated, the receiver will need to be activated
5.
(see fig. 3). To activate the receiver, call Winegard Company at
1-866-593-0348.
6.
After the receiver has been activated, the receiver will begin
acquiring signal (see fig. 4) and downloading the Electronic
Programming Guide (see fig. 5). Once the download is
complete, you can start watching TV.
Receiver setup instructions are accurate at time of printing and may
change without notice.
Figure 4
Figure 5
Page 3

Receiver Setup for Currently Active
or Previously Used Receivers
If the receiver you will be using with the DISH® Playmaker
antenna is an older receiver that has not been used in several
years, you may need to connect the receiver to a DISH home
satellite to be updated before proceeding with the mobile
setup.
After the receiver has been powered on, the receiver will
1.
enter the Mobile Setup menu.
If mobile setup menu does not appear, press and hold
NOTE
seconds to reset the receiver.
power button on the front panel of the receiver for 3
After the satellites have been acquired, the Electronic
4.
Programming Guide will download (see fig. 8).
Figure 8
Select the state of your current location, and then select
2.
“Scan” to begin the search routine (see fig. 6).
Figure 6
The satellite will begin searching and will locate the desired
3.
satellites (see fig. 7).
Updating Receiver Software
For optimal performance, update receiver software
occasionally. To allow the software to update, leave the satellite
on signal, and press the Power button on the remote or front
panel of the receiver; this will put the receiver in Standby
mode (see fig. 9). Do not unplug the receiver at this time.
If the receiver is in Standby mode for more than five minutes,
no sof tware update is necessary. Turn the receiver back on to
TIP
resume normal operation
Figure 9
Figure 7
If prompted with a message stating fewer satellites than
previously used were found, select SAV E or YES to continue.
TIP
After being in Standby mode for a few minutes, the software
will automatically begin to update (see fig. 10). Upon
completion of the update, the receiver will reboot. Return to
step 1 of “Receiver Setup for Currently Active or Previously
Used Receivers” to re-acquire satellites and complete setup.
Figure 10
4
 Loading...