

Dish LCD40-500, LCD30-500 Owner's Manual

fety
Table of Contents
Safety ................................................................................iii
Introduction .......................................................................1
Monitor Description ..........................................................3
Monitor Display and Media Box ....................................................3
Media Box Front Panel .................................................................4
Media Box Back Panel .................................................................5
Using the Monitor’s Inputs ............................................................7
Using the Remote Control ............................................................8
Using the Monitor’s Features.........................................13
One-Button Features ..................................................................13
Remote Control Buttons .............................................................15
Menu System ..............................................................................16
Picture Menu ..............................................................................16
Sound Menu ...............................................................................17
Settings Menu .............................................................................18
Options Menu .............................................................................20
Window Menu .............................................................................24
Layout Menu ...............................................................................25
Installation and Setup.....................................................27
Installation Considerations .........................................................27
Connecting Your HDTV Monitor .................................................28
Installing the Media Box Stand ...................................................30
Removing the Speakers .............................................................31
Restoring Your Remote Control’s
Factory Settings for Monitor Control ...........................................31
Page i

Contents
Troubleshooting .............................................................33
Appendix .........................................................................37
Limited Warranty......................................................................... 37
FCC Compliance ........................................................................ 39
Index ................................................................................41
Page ii

Safety Instructions
1. Read these instructions.
2. Keep these instructions.
3. Heed all warnings.
4. Follow all instructions.
5. Do not use this apparatus near water.
6. Clean only with a dry cloth.
7. Do not block any ventilation openings. Install in accordance with the
manufacturer’s instructions.
8. Do not install near any heat sources such as radiators, heat registers, stoves, or
other apparatus (including amplifiers) that produce heat.
9. Do not defeat the safety purpose of the polarized or grounding-type plug. A
polarized plug has two blades with one wider than the other. A grounding-type
plug has two blades and a third grounding prong. The wide blade or the third
prong are provided for your safety. If the provided plug does not fit into your
outlet, consult an electrician for replacement of the obsolete outlet.
10. Protect the power cord from being walked on or pinched, particularly at plugs,
convenience receptacles, and the point where they exit from the apparatus.
11. Use only attachments/accessories specified by the manufacturer.
12. Use only with the cart, stand, tripod, bracket, or table specified by
the manufacturer, or sold with the apparatus. When a cart is used,
use caution when moving the cart/apparatus combination to avoid
injury from tip-over.
13. Unplug this apparatus during lightning storms or when unused for
long periods of time.
14. Refer all servicing to qualified service personnel. Servicing is required when the
apparatus has been damaged in any way, such as the power supply cord or plug
is damaged, liquid has been spilled or objects have fallen into the apparatus, the
apparatus has been exposed to rain or moisture, does not operate normally, or
has been dropped.
Apparatus shall not be exposed to dripping or splashing and no
objects filled with liquids, such as vases, shall be placed on the
apparatus.
Page iii

Safety Instructions
Note to installer: This reminder is provided to call the satellite TV system
installer’s attention to Article 820-40 of the National Electrical Code (NEC) that
provides guidelines for proper grounding and, in particular, specifies that the
cable ground shall be connected to the grounding system of the building as close
to the point of cable entry as practical.
Safety Tips
• Unplug the monitor from the AC power outlet before cleaning.
• The use of accessories or attachments not recommended by the monitor
manufacturer will void the Limited Warranty.
•Do not place the monitor in an enclosure such as a cabinet without proper
ventilation.
•Do not stack the monitor on top of or below other electronic devices.
•Do not drop or impact the monitor. The LCD monitor is fragile and may break.
• Operate the monitor using only the type of power source indicated on the
marking label. Unplug the monitor power cord by gripping the power plug, not
the cord.
•Do not overload wall outlets or extension cords, as this can result in a risk of
fire or electrical shock.
• Never insert objects of any kind into the monitor through openings, as the
objects may touch dangerous voltage points or short out parts. This could cause
fire or electrical shock.
• Make sure that the outdoor parts of the antenna system are grounded in
accordance with local, state, federal, and National Electrical Code (NEC)
requirements.
•Do not locate the antenna near overhead light or power circuits, or where it can
fall into such power lines or circuits. When installing the antenna, take extreme
care to avoid touching such power lines or circuits, as contact with them can be
fatal.
•Do not attempt to service the monitor yourself, as opening or removing covers
may expose you to dangerous voltage, and will void the Limited Warranty.
Refer all servicing to authorized service personnel.
• Use an electrical outlet that contains surge suppression or ground fault
protection. During a lightning storm, or if the monitor is to be left unattended
and unused for a long period of time, unplug the power cord from the electrical
outlet and disconnect the cable between the monitor and an off-air antenna, if
applicable. This will provide some protection against damage caused by
lightning or power line surges.
Page iv

Chapter 1
Introduction
Welcome to DISH Network HDTV. This High Definition TV (HDTV) monitor will
bring you the sharpest picture format available. Along with HDTV programming
delivered by DISH Network, you will also be able to enhance your home
entertainment system with this versatile monitor.
Key Features
Your monitor is equipped with features that will add to your TV-viewing
experience. These features include the following:
DISH Digital Visual Interface (DISH DVI)
Use the DISH DVI input to connect a DISH DVI-equipped DISH Network
HDTV satellite receiver. This connection provides the highest quality digital
signal available for HD programming.
Unified Remote Control
The remote control provided with your DISH DVI-equipped DISH Network
receiver seamlessly controls both your DISH Network HDTV monitor and
satellite receiver. To program the remote to control other devices, see the
satellite TV receiver User’s Guide.
How to Use This Guide
Tips
In the margins of pages throughout this guide are tips and other information to
make using your HDTV monitor easier.
Conventions
To make it easy for you to use this guide, we use the following conventions.
• The names of remote control buttons and modes are in all capital letters.
Example: Press the SAT button.
• Menus and options that appear on the monitor’s screen are in bold type.
Example: Open the
• Connections on the back of the monitor and receiver are in small capital
letters.
Example: V
IDEO.
Main Menu.
Tip: Save your
purchase receipt for
the monitor. See the
Limited Warranty on
page 37 for details.
If You Run Into Problems
There are problems you might run into that are easy to solve. Before you call the
Customer Service Center, be sure to refer to Chapter 5, Troubleshooting. If
problems remain call the Customer Service Center at 1-800-333-DISH (3474).
Page 1

Chapter 1
Introduction
Notes
Page 2
Chapter 2
Monitor Description
Monitor Display and Media Box
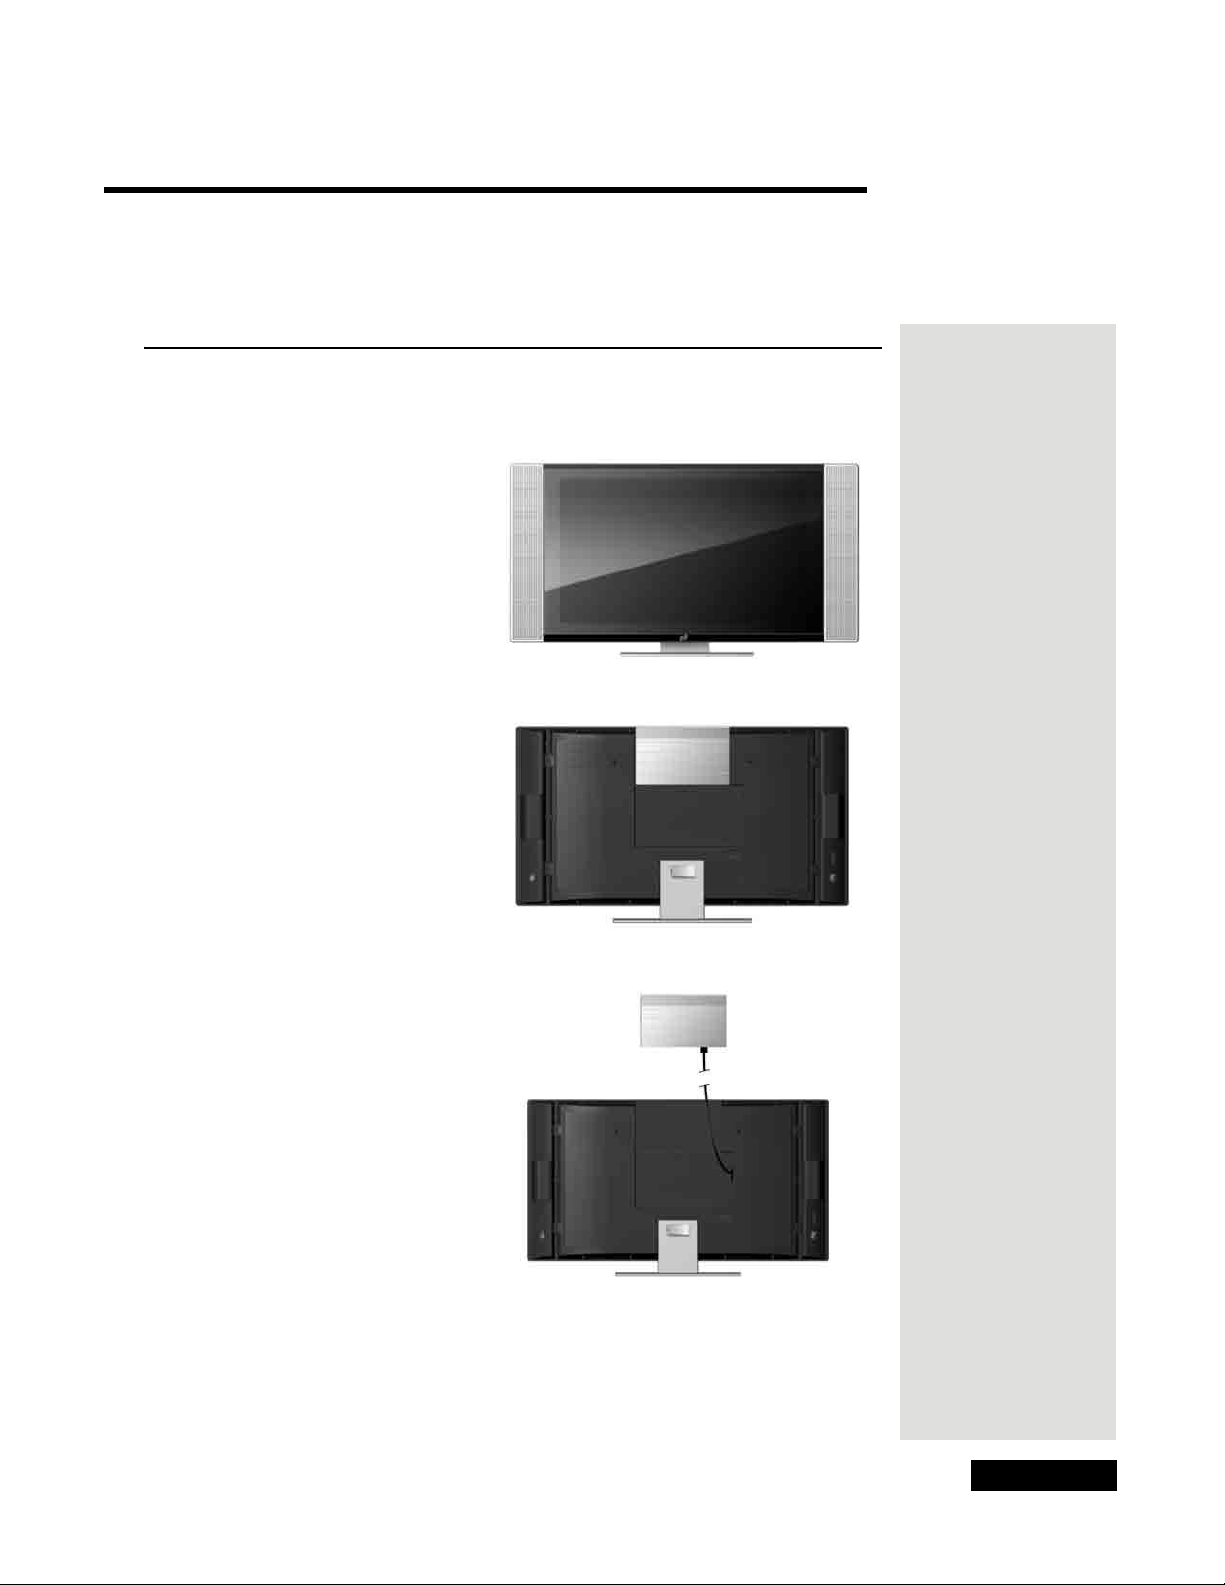
There are three main components of the LCD monitor - the monitor display, the
Media Box, and the power supply.
The monitor display is a flat, thin
screen that shows the video. The
display includes speakers attached
to both sides to play audio and
includes an integral stand for
table-top mounting.
Note: Remove the film
covering the monitor’s screen.
The Media Box includes the
monitor controls and provides the
audio/video input connections for
your DISH Network satellite
receiver and other devices. It
connects to the monitor display
using a system cable. The Media
Box can either be mounted on the
back of the monitor display or
mounted separately whichever
makes getting to the controls or
connections easier.
Note: To mount the Media
Box to the display, insert four
mounting posts on the Media
Box into the matching keyshaped holes on the display
back panel and push down to
lock in place. To remove the
Media Box, press down and
hold the locking clip at the
bottom of the Media Box
while gently pulling the Media
Box up and then away from
the monitor.
Monitor - Front View
Monitor - Back View
with Media Box Attached
The power supply provides power
from a wall outlet to the monitor
through a connection on the
display back panel.
See Chapter 4 for installation
instructions.
Monitor - Back View
with Media Box Mounted Separately
Page 3

Chapter 2
Monitor Description
Media Box Front Panel
The front panel buttons may be used to operate many of the monitor’s
features.
Menu
Displays the Main Menu. Use the MENU button to go back one level in the
menus.
Channel Controls
Changes channels on the monitor’s TV input. While in the menus, use the
CHANNEL +/- to move vertically through the menus.
Note: Normally, you would want to change programming channels using the
DISH Network satellite receiver and its Electronic Program Guide.
Volume Controls
Turns the volume up or down. While in the menus, use the VOL +/- to move
horizontally through the menus and adjust menu settings. In the
Select
menu, use the VOL +/- to move the highlight to a different input.
Source
Power
Turns the monitor on and off.
Source
Displays the Source menu. In the Source menu, once the desired input is
highlighted using the VOL +/- buttons, use the SOURCE button to switch
to the highlighted input.
Page 4
Media Box Back Panel
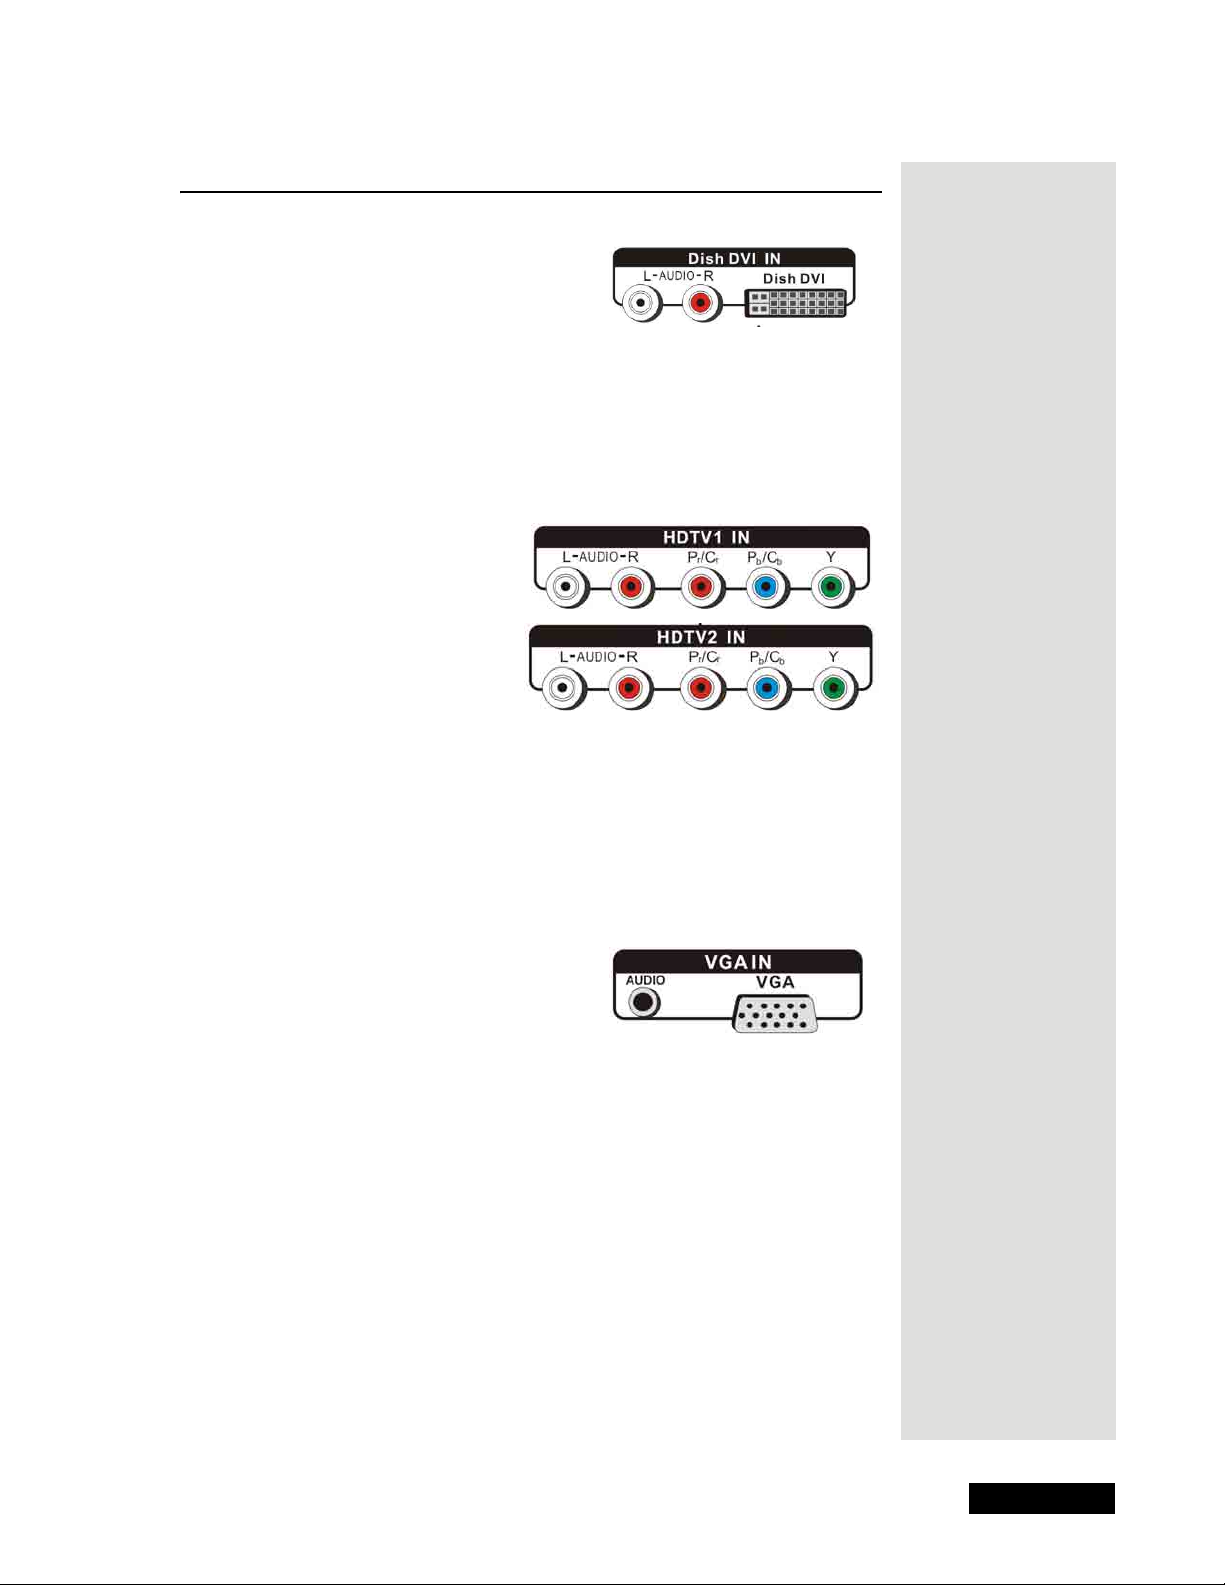
DISH DVI Input
Media Box Back Panel
Connect a DISH DVI-equipped DISH
Network HD receiver to watch high
definition programming.
DISH DVI - Provides a high-quality
•
digital video interface.
•
L-AUDIO-R (RCA-type audio) - Provides left (white) and right (red)
audio connections when using the
Component Inputs
Connect a component video
source, such as an HD device or a
DVD player, to
HDTV2 IN.
Y-PB-P
•
quality because the video is separated into three components:
P
B/CB
HDTV1 IN or
R
/ Y-C
(Component Video) - Provides optimum picture
B-CR
(blue), and PR/CR (red).
Tip: Remember to
connect the left
and right audio
cables because
the DISH DVI cable
carries the video
signal, not the
sound.
DISH DVI video input.
Y (green),
L-AUDIO-R (RCA-type audio) - Provides left (white) and right (red)
•
audio connections when using the
COMPONENT INPUTS.
VGA Input
Connect a VGA video source, such as a
computer, to
VGA - Provides optimum picture quality because the video is separated
•
into its individual pieces and travels along the connector’s pins.
•
AUDIO (3.5 mm mini-jack) - Provides stereo (left and right) audio when
using the
Note: There is also a VGA input on the monitor itself. This input can only
be used when the Media Box’ system cable is disconnected from the
monitor. Make sure that the monitor is powered off before disconnecting
the system cable.
VGA IN.
VGA IN video input.
Page 5
Chapter 2
Monitor Description
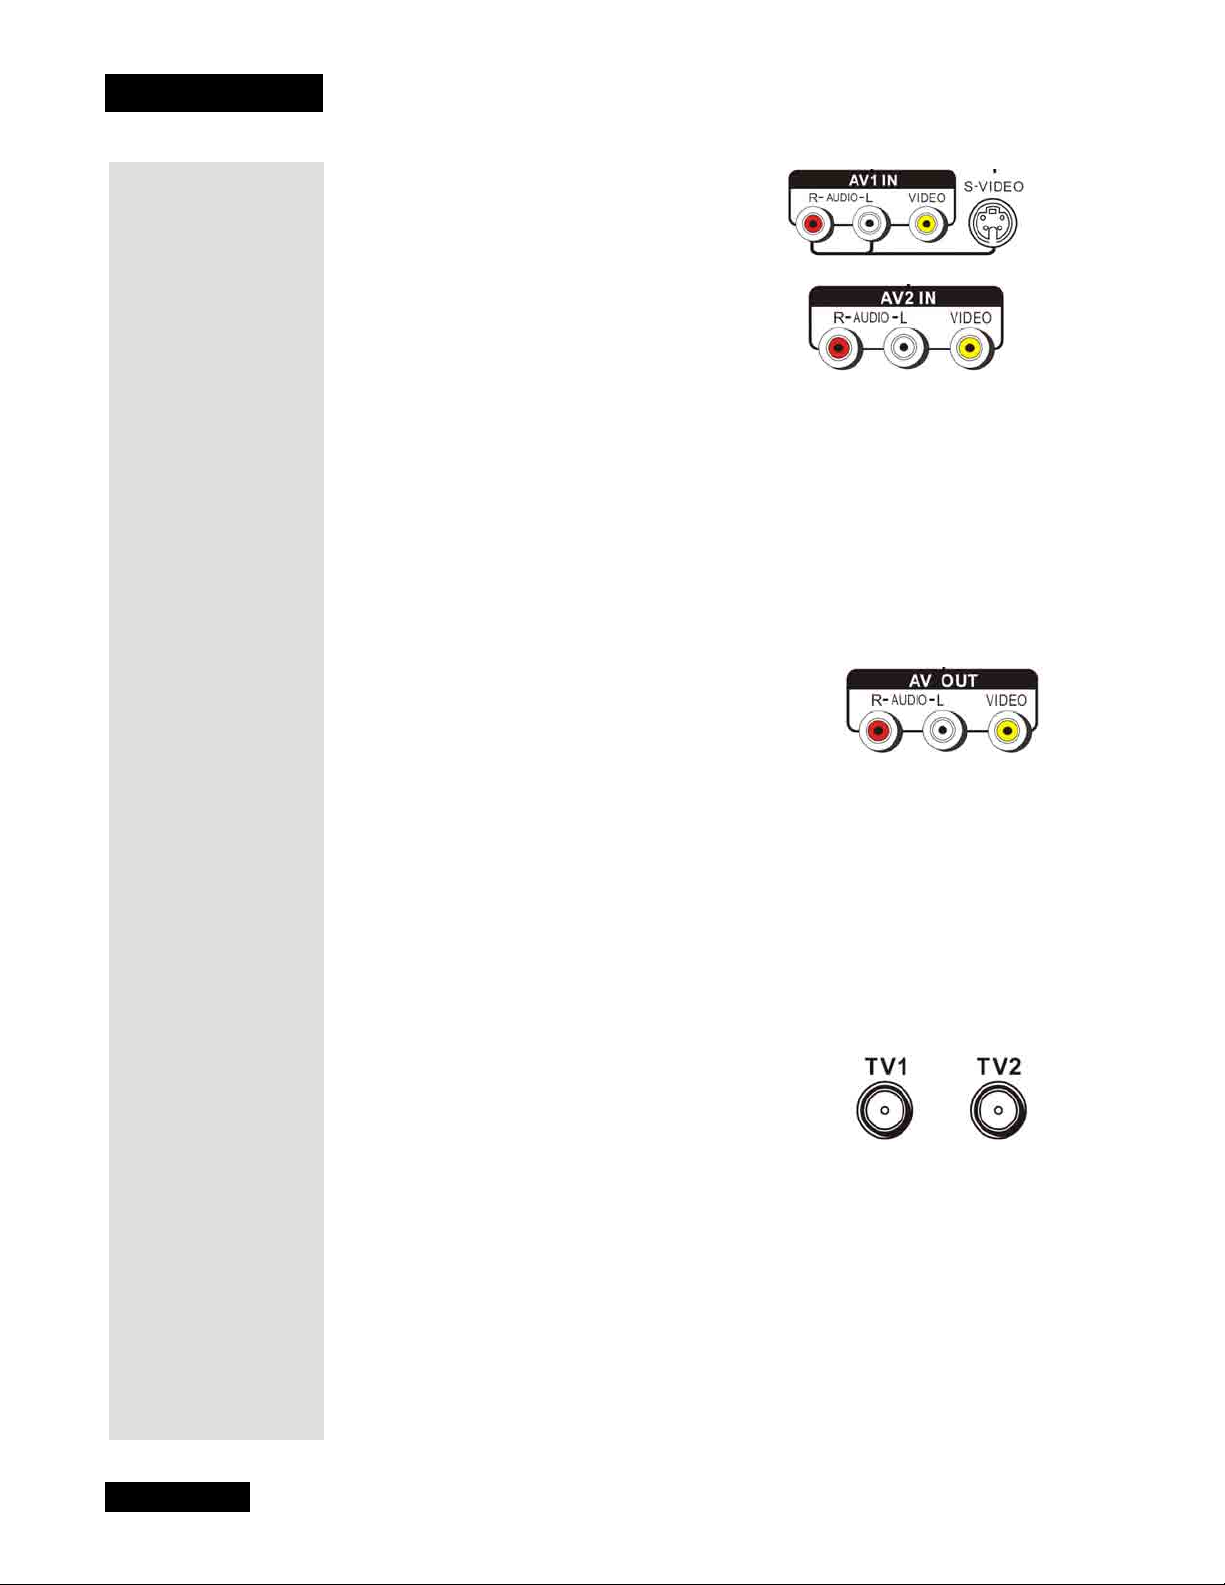
S-Video and Composite Inputs
Connect another device, such as a VCR or
DVD player, to
.
IN
VIDEO (RCA-type Video) - Provides
•
S-VIDEO, AV1 IN, or AV2
composite video connections (yellow)
for the
S-VIDEO - Provides better picture quality than the RCA-Type Video
•
AV1 IN and AV2 IN inputs.
(yellow) connections because the video is separated into two parts: color
and brightness.
Note: When connected, S-VIDEO replaces the AV1 IN VIDEO input and
uses the
•
R-AUDIO-L (RCA-type audio) - Provides right (red) and left (white)
AV1 I N audio inputs.
audio connections when using the
Audio/Video Outputs
AV1 I N or AV2 IN inputs.
Connect an amplifier, audio receiver, VCR, or
external video monitor to
VIDEO (RCA-type Video) - Provides a
•
AV OUT.
composite video output (yellow).
Note: This video output does not include menu overlays or messages.
R-AUDIO-L (RCA-type audio) - Provides right (red) and left (white)
•
variable audio outputs.
Note: The AV OU T only provides video from a standard-definition
input. If you are using a high-definition input, the
content from the
TV1 INPUT.
AV OUT displays
Antenna/Cable Inputs (Capped)
Connect an antenna to TV1 or TV2 to receive
analog broadcasts from an off-air antenna.
Note: For the best viewing experience, you should use the off-air tuner
provided in your DISH DVI-equipped DISH Network satellite receiver. The
satellite receiver’s off-air tuner can receive both analog and digital off-air
broadcasts, integrates off-air programming into its Electronic Program
Guide, and allows all of the satellite and off-air programming to be viewed
over a single high-quality digital connection.
Page 6
Note: The TV1 and TV2 inputs are for standard definition channels only.
Using the Monitor’s Inputs
Headphone Jack
HEADPHONE - Provides a stereo 3.5 mm mini-jack audio
output. To control the volume for this input, see page 17.
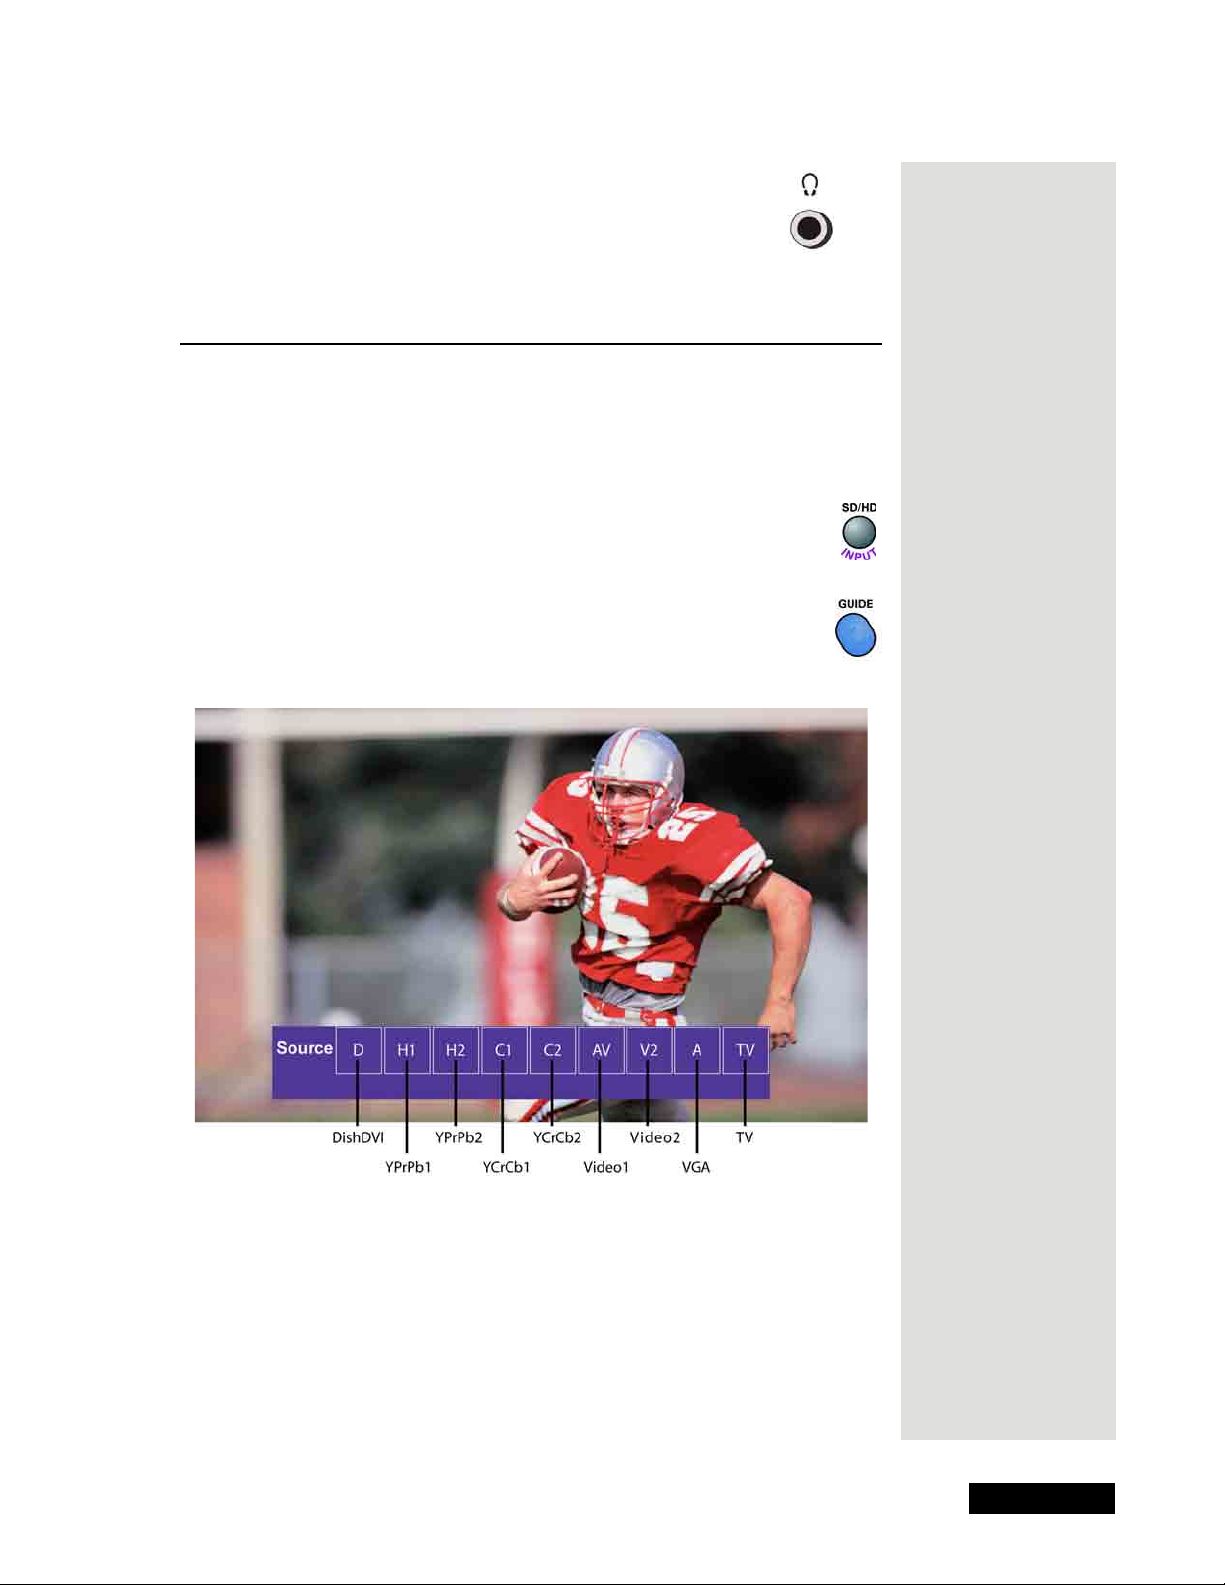
Using the Monitor’s Inputs
To view the programming provided through the audio/video connections on
the Media Box, the DISH LCD monitor must be switched to the correct
input. To switch to the desired input, find its source name on the example
screen below, and then either:
• Press the INPUT button on the remote control to switch inputs
until the input name is highlighted on the
Source Select bar,
or
• Press the GUIDE button on the remote control, then use the
LEFT and RIGHT ARROWS to highlight the input name on
the
Source bar, then press SELECT.
Tip: Remember to
keep the remote
control in TV mode
for these buttons to
work as described.
Note: The H1 and C1 inputs share the same physical connection on the
Media Box (
what device is connected. For example,
HDTV1 IN), but need to be selected separately depending on
H1 is for high definition sources
(720p or 1080i), which include DISH HD receivers and HD gaming
consoles, while
C1 is for enhanced definition sources (480p) which include
DVD Players and non-HD gaming consoles.
Note: In the Source bar, the AV input becomes the SV input when an S-
Video cable is connected from a device to the Media Box.
Page 7
Chapter 2
Monitor Description
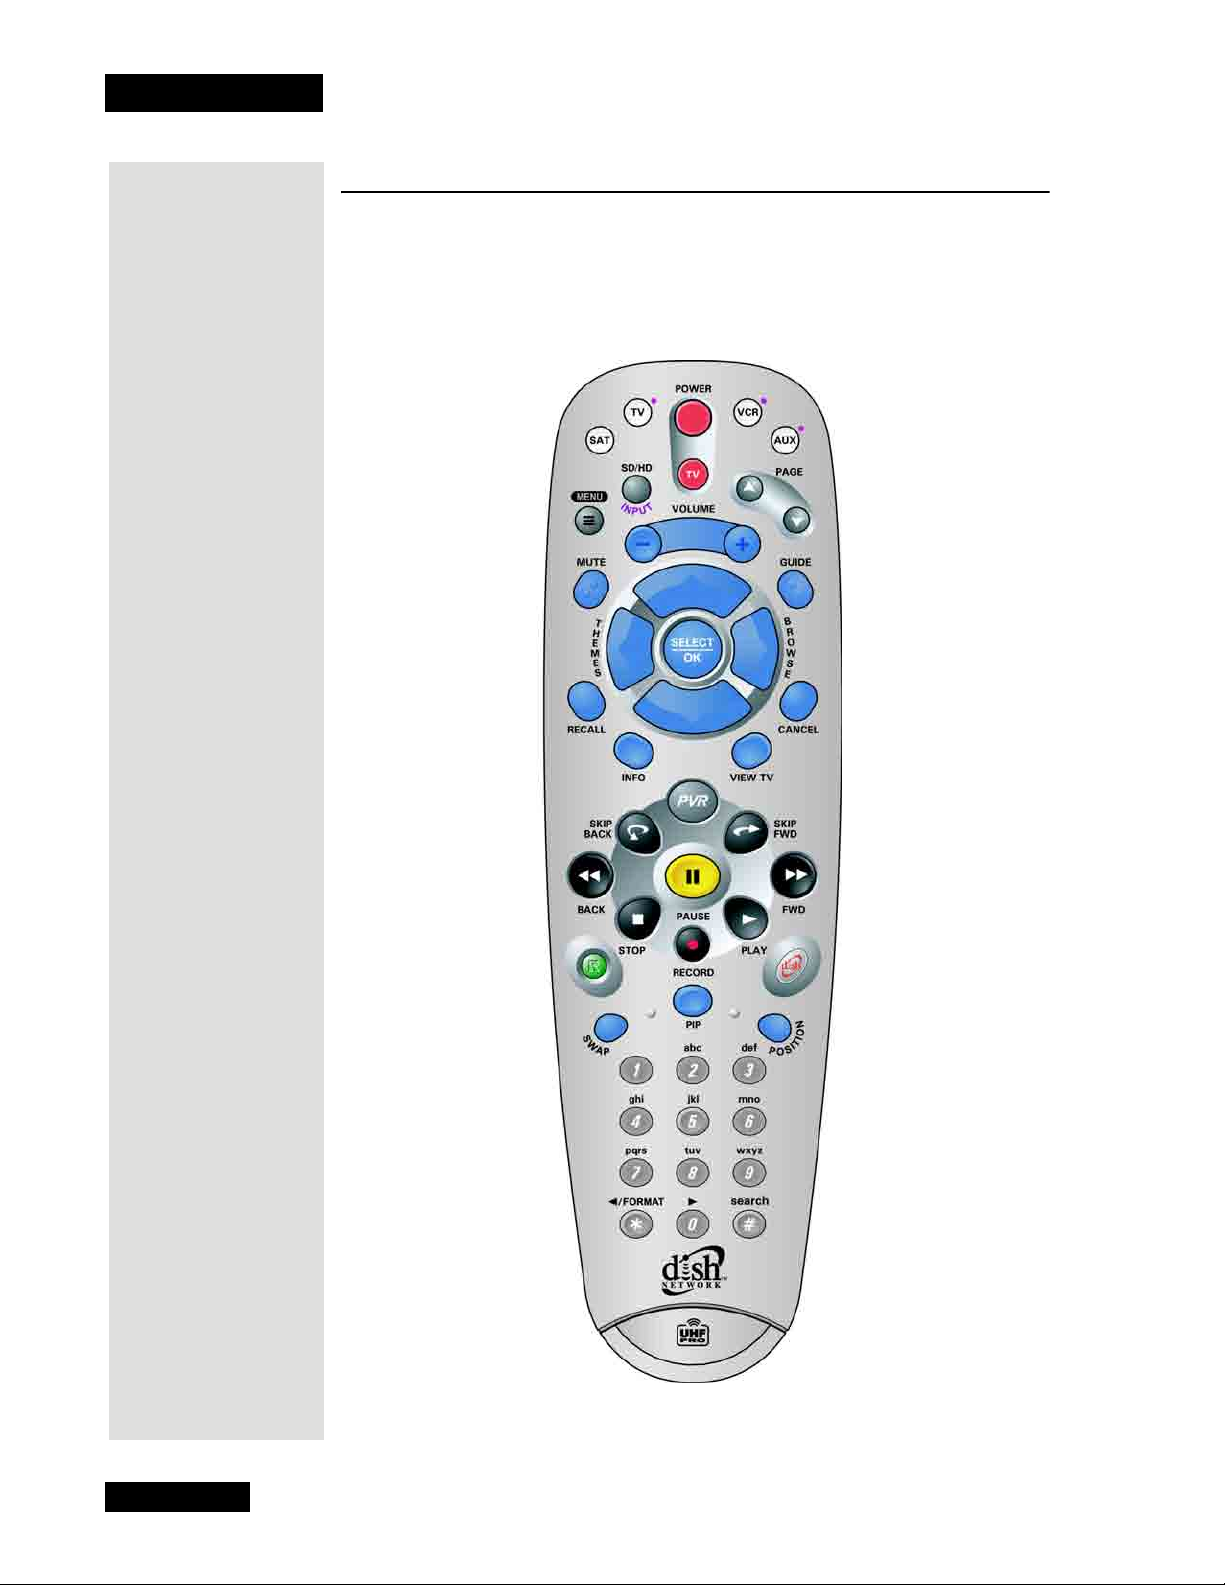
Using the Remote Control
The remote control gives you easy access to the features of your monitor.
This remote control is provided with your DISH DVI-equipped DISH
Network satellite receiver.
Note: Your remote control may look slightly different than that shown.
Page 8
Remote Control Buttons
The following section describes how to use the remote control with your
monitor.
Using the Remote Control
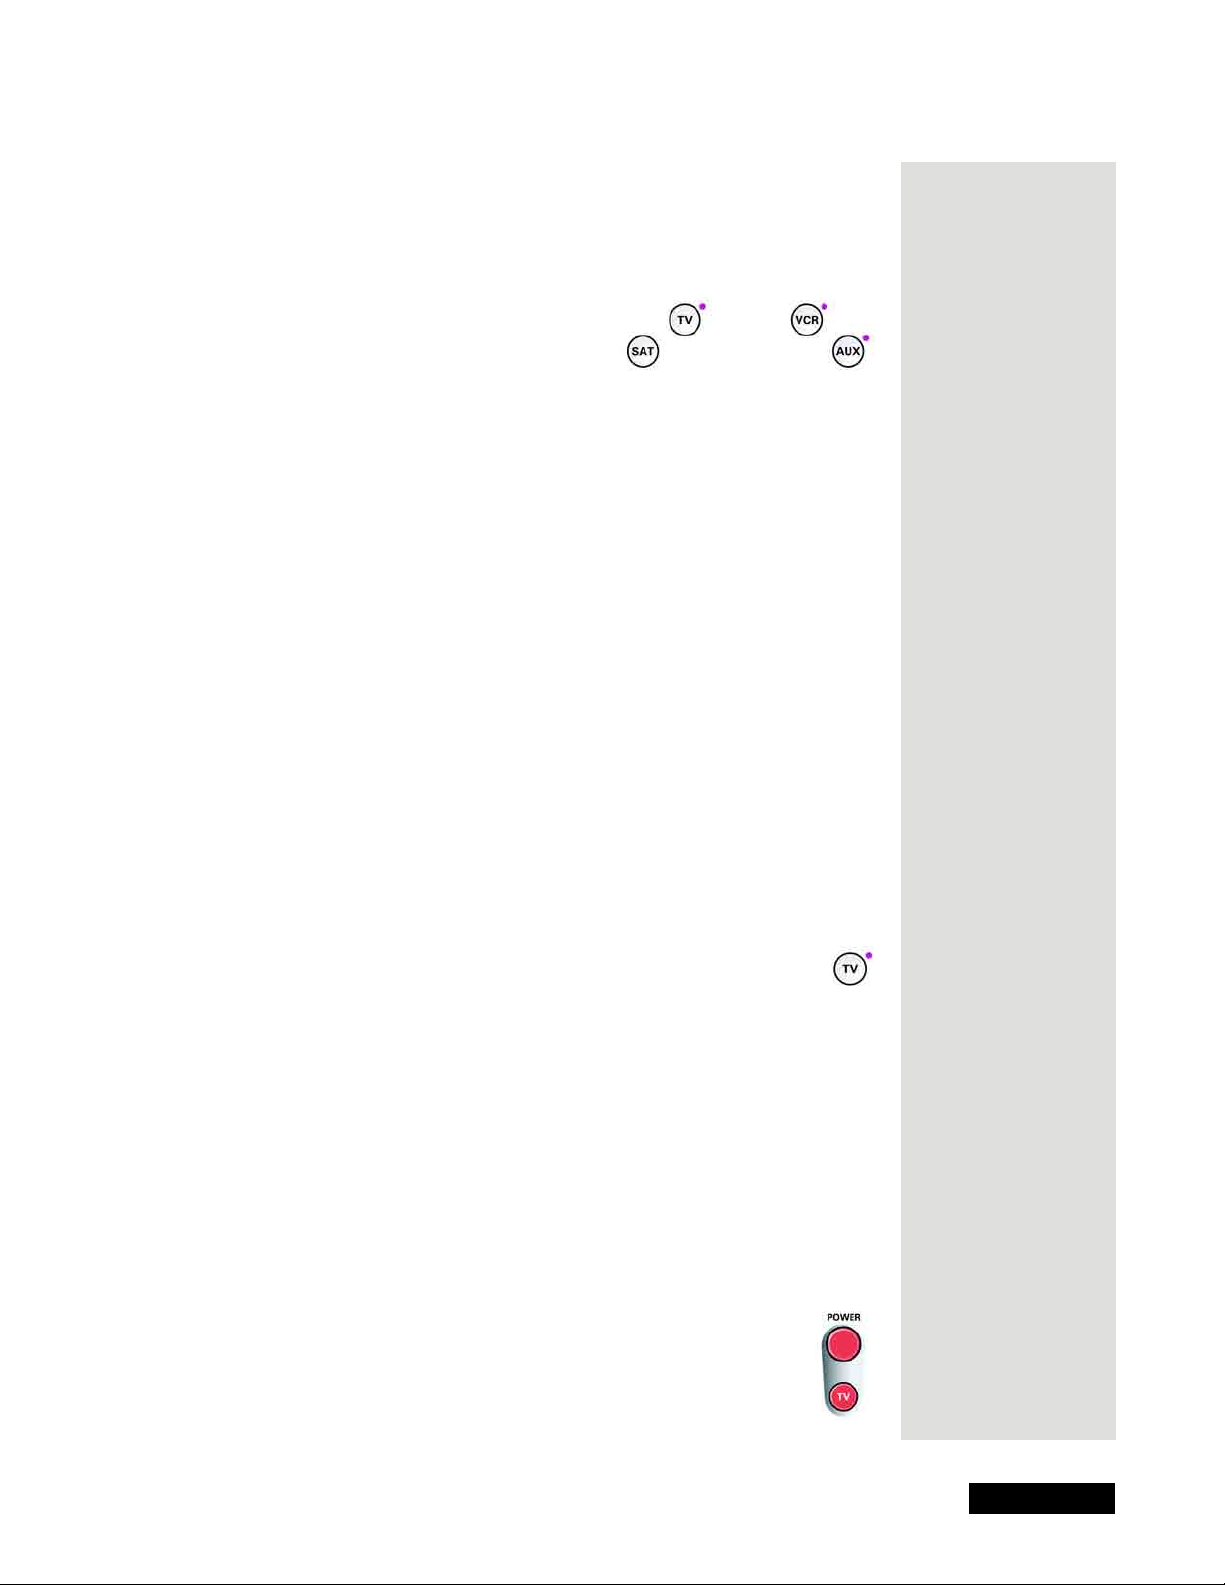
Mode Buttons
The mode buttons on your remote control allow you to control your
monitor, DISH Network satellite receiver, and other devices.
• Press the SAT mode button to turn on the monitor and DISH Network
satellite receiver, and change the monitor to the DISH DVI input so you
can watch satellite programming.
Note: You may need to press the SAT button a second time to switch
the input to
This action also puts the remote control into the SAT mode, enabling it
to control the satellite receiver. Refer to your satellite receiver User’s
Guide instructions to control your satellite receiver.
• Press the TV mode button to control the DISH Network LCD monitor.
See the section below for details on monitor controls.
• Press the VCR and AUX mode buttons to control other devices.
See the User’s Guide that came with your DISH Network satellite
receiver for instructions on using the VCR and AUX mode buttons to
program the remote to control other devices.
DISH DVI.
Tip: Normally, you
would want to use
the remote control
in SAT mode to
watch DISH Network
programming
and to use the
extensive features
of your DISH
Network satellite
receiver.
TV Mode Button
Pressing the TV mode button puts the remote control in the TV
mode. When in the TV mode, the other remote control buttons work
as described below to control monitor features.
Note: Your remote control provided with your DISH DVI-equipped DISH
Network satellite receiver comes from the factory ready to work with your
DISH Network LCD monitor. However, the TV mode button can be
programmed to operate other TVs. If the remote control has been
programmed to operate a different TV and you wish to restore the remote
control factory settings to control your DISH Network LCD monitor, see
Restoring Your Remote Control’s Factory Settings for Monitor Control on
page 31.
Power Buttons
Press the POWER or TV POWER button to turn the monitor on
or off. The TV POWER button will also turn the monitor on or
off in other remote control modes.
Page 9
Chapter 2
Monitor Description
Tip: Remember
to keep the
remote control in
TV mode for
these buttons to
function as
described.
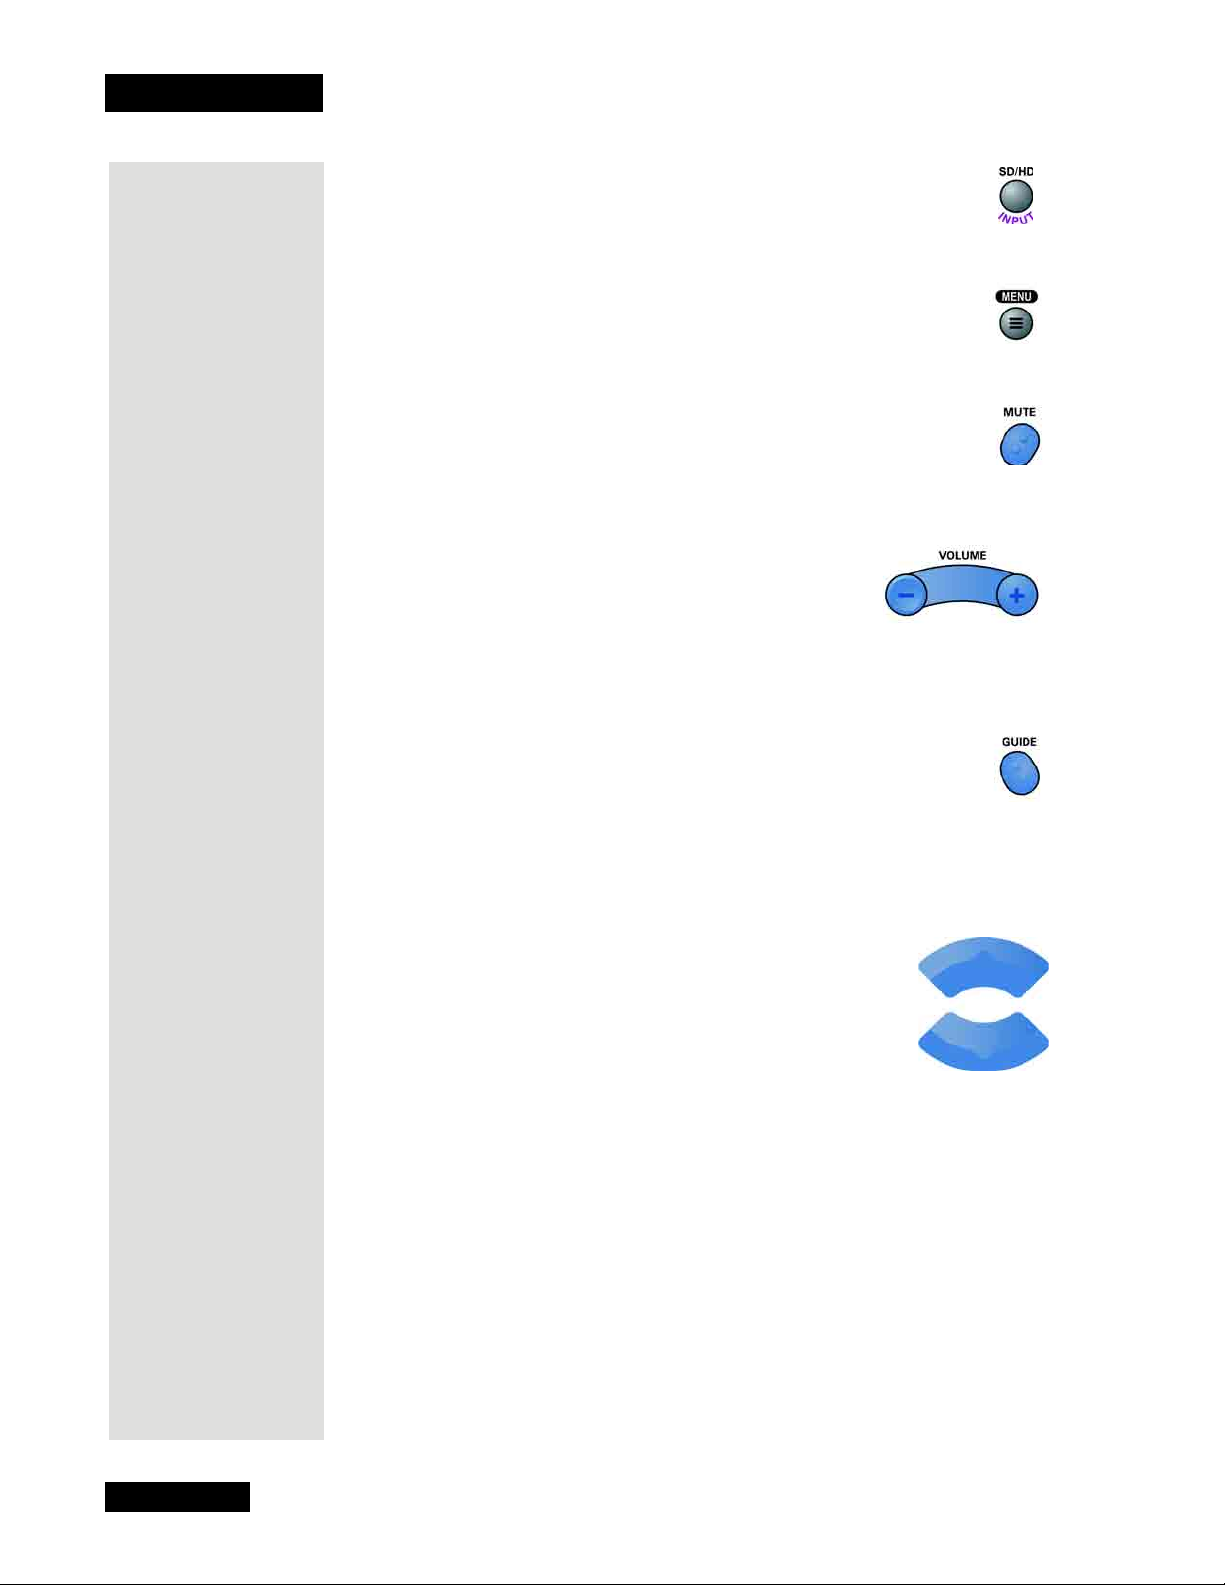
SD/HD Input Button
Press the SD/HD INPUT button to switch to the next input on the
monitor.
Menu Button
Press the MENU button to open the Main Menu. Use the MENU
button to step back out of the menus.
Mute Button
Press the MUTE button to turn off the monitor sound. Press it again
to restore the monitor sound. The MUTE button will mute and
restore the monitor volume in other remote control modes.
Volume Button
Press the minus (-) side of the VOLUME button to
lower the monitor volume. Press the plus (+) side of the
VOLUME button to raise the monitor volume. The
VOLUME button will change the monitor volume in other
remote control modes.
Guide Button
Press the GUIDE button to display the Source Select menu. When
displayed, use the LEFT and RIGHT ARROWS to highlight an
input, and then select the input. While in the TV menus, press the GUIDE
button to bring up the current input and channel information on the right side
of the screen.
Up and Down Arrow Buttons
Press the UP and DOWN ARROW buttons to:
• Move up and down in a menu.
• Move the picture up and down on the screen when in
Pan mode (described on page 25).
• Zoom the picture in and out when in
(described on page 25).
• In Picture-in-Picture (
PIP) mode, the UP ARROW will select a picture
window for channel changes and audio control, while the DOWN
ARROW will move the PIP window around the screen. See page 14 for
information about
PIP.
Zoom mode
Page 10
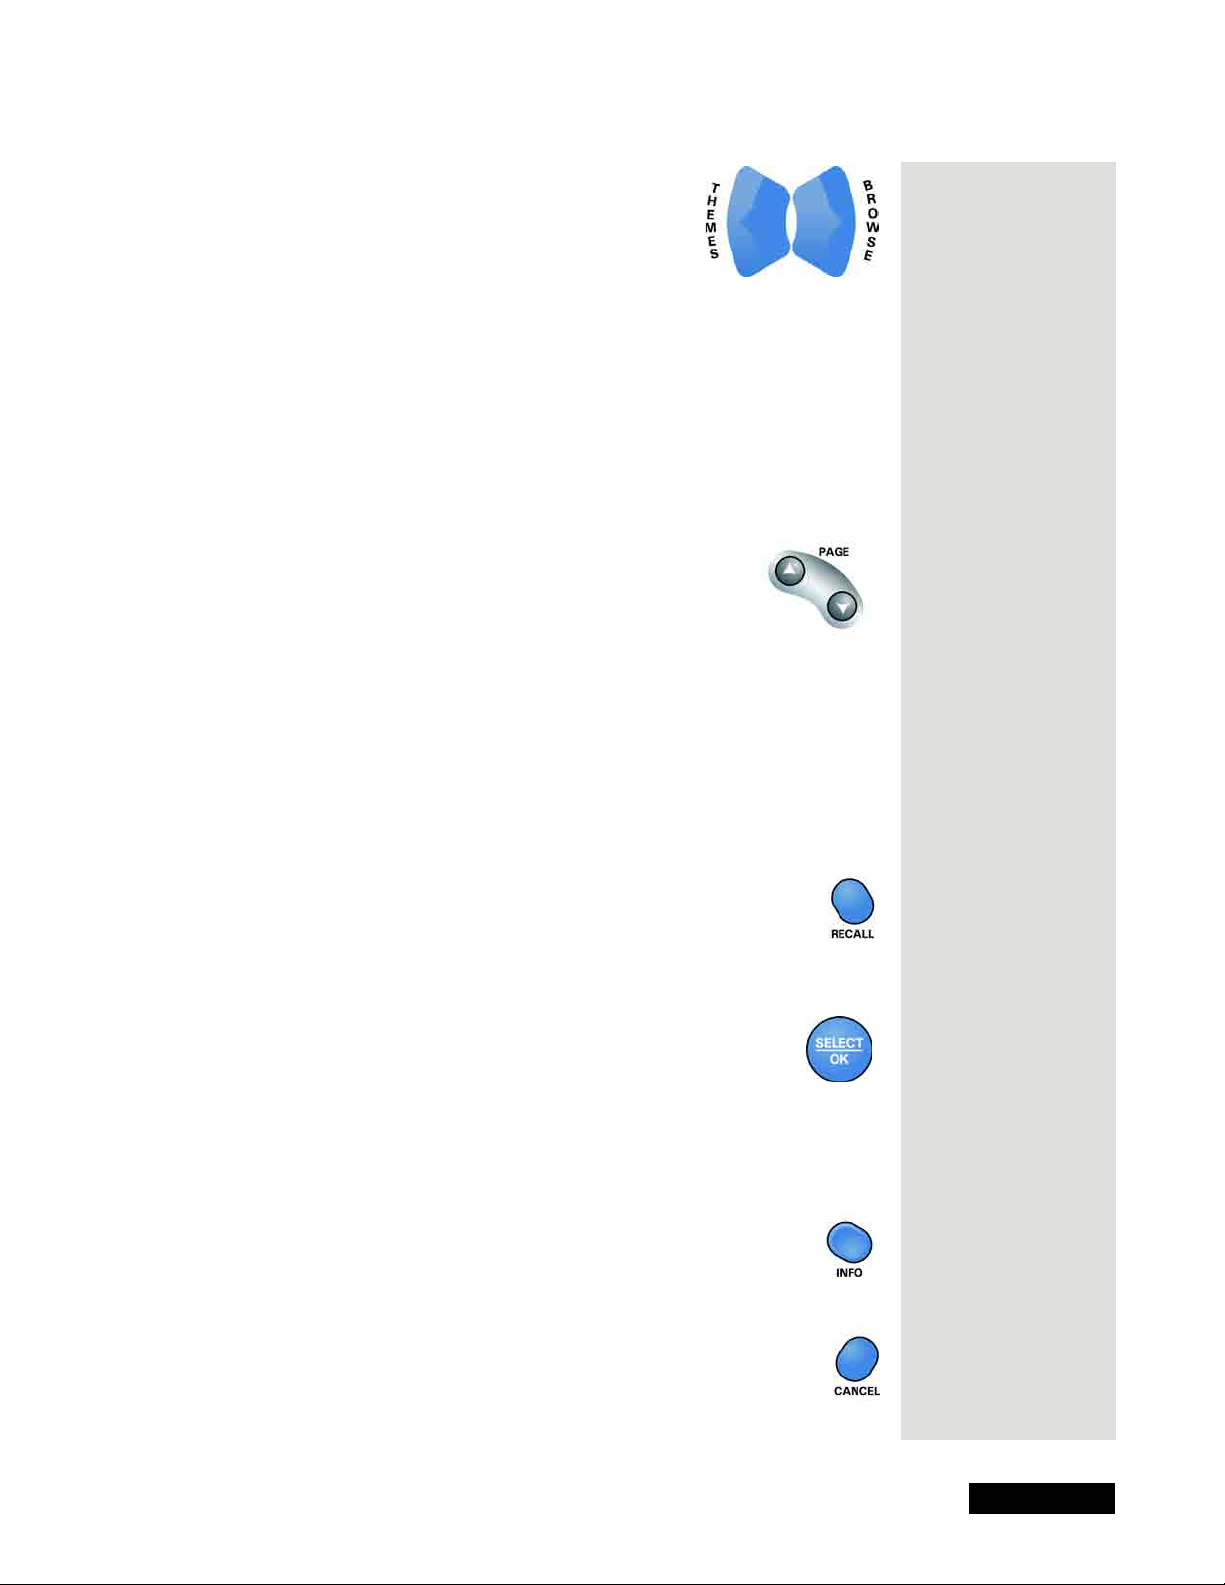
Left and Right Arrow Buttons
Press the LEFT and RIGHT ARROW buttons to:
• Move left and right in a menu
• Adjust menu settings.
• Move the picture left and right on the screen when in
(described on page 25).
Using the Remote Control
Pan mode
In Picture-in-Picture (
PIP) mode, after selecting a window using the UP
ARROW, the LEFT ARROW will allow the monitor to play the selected
picture window’s sound through the monitor’s speakers, while the RIGHT
ARROW will allow the monitor to play the selected picture window’s
sound through the headphone output. See page 14 for information about
PIP.
Page Up and Page Down Buttons
Press the PAGE UP and PAGE DOWN buttons to change
the channel up or down on the monitor’s internal off-air
TV input).
tuner (
Note: For the best viewing experience, you should use the off-air tuner
provided in your DISH DVI-equipped DISH Network satellite receiver. The
satellite receiver’s off-air tuner can receive both analog and digital off-air
broadcasts, integrates off-air programming into its Electronic Program
Guide, and allows all of the satellite and off-air programming to be viewed
over a single high-quality digital connection.
Note: The TV input is for standard definition channels only.
Recall Button
Press the RECALL button to go back to the last channel or input
you watched. Press it again to switch between the last two
channels or inputs you watched.
Select/OK Button
Press the SELECT/OK button to:
• Select menu items.
• Tune to a channel once entered in using the NUMBER PAD.
• Tune to an input once highlighted in the
Source Select menu.
Info Button
Press the INFO button to activate the Pan and Zoom feature.
Pan and Zoom feature is described on page 25.
The
Cancel Button
Press the CANCEL button to remove any menu or display from
the screen and return to normal viewing. While in PIP or POP,
press the CANCEL button to return to
Full Screen viewing.
Tip: Remember
to keep the
remote control in
TV mode for
these buttons to
function as
described.
Page 11
 Loading...