

Page 1

Direct-Viewing Digital Crane Scale
Model: DWP-C2X
User Manual
January 2012
Page 2

Preface
Thanks for choosing our products!
In order to properly utilize the product and fully realize its superior performance,
please read the manual carefully before use.
Copyright no. 2012-1
Page 3

Content
Chapter 1 Proper use and maintenance ............................................................................ 1
Chapter 2 General Introduction ......................................................................................... 1
Chapter 3 Scale characters .................................................................................................. 1
Chapter 4 Main Technical functions ..................................................................................... 2
Chapter 5 Operation ............................................................................................................. 2
Chapter 6 Password Input .................................................................................................. 4
Chapter 7 Parameter setting (Setup) ................................................................................. 5
Chapter 8 Weighing Demarcation & Compensation Demarcation .................................. 7
Appendix 1 Glitch and self- maintenance ............................................................................ 9
Page 4

Chapter 1 Proper use and maintenance
1.1 This charging circuit is uniquely designed requiring lower voltage than regular ones, make sure do NOT
use other chargers or it could be burned or become non-chargeable.
1.2 The Crain Scale should be charged regularly in case the damage of the battery as it is with
self-discharge, usually once for every two months and 12 hours for one time.
1.3 If you have to replace the battery by yourself, don’t forget applying water-proof glue to the welding
exposed area.
1.4 This product is a sophisticated electronic equipment. Keep away from violent collision and moisture.
1.5 Over lifting may cause permanent damage or incident.
1.6 To ensure the safe use, please check all screws& pins for loose or falling before use.
Chapter 2 General Introduction
This direct-viewing digital crane scale is combined by hanging part, high precision transfer, A/D converter
and display. The layout is as below. This display with 1.2" super bright digital screen (or LCD) with 5 digits
allows clear reading from far away. Advanced compassed circuit and unique data processor make this
crane scale a real accurate, convenient and reliable weighing equipment used in the warehouse, dock,
plant and lifting occasions etc.
Chapter 3 Scale characters
◆ Accuracy Class: National Scale Standard Grade 3
◆ Low power design with auto power saving, 100 hours continuous use after charging.
◆ Over-discharging protection circuit protects the battery from life shortening or damage caused by
over-discharging.
◆ Percentage of battery capacity display at startup and shutdown helps good knowledge of the battery and
in-time charge.
◆ High compassed, high reliability
1
Page 5

0
◆ Power-saving mode and auto turn off function (Optional)
◆ Tare, hold, and accumulation functions
◆ Stable weighing, which will not be effected by shaking
◆ Convenient wireless remote can be operated within 20 meters for zeroing, record checking and
shutdown
◆ High heat insulation and anti erosion versions are available
Chapter 4 Main Technical functions
1、 Applicable temperature range: - 10℃ ~ +40℃
2、 Relative Humidity: ≤90% RH
3、 Display: 5 digits super bright 1.2" LED digital tube (or LCD), letter highness 40mm
4、 New advanced high precision SCM with extremely strong magnetic resistant function and reliable
steady weighing.
5、 Gravity correction function makes it suitable for all over the world.
6、 Safe over-lifting: 150% F.S
7、 Damaging over-lifting: 200% F.S
8、 Steady reading: <5 seconds
9、 Precision: Grade III
10、 Zeroing range: ≤10%F.S
11、 Tare range: 10% ~ 100%
Chapter 5 Operation
5.1 Switch On/Off
5.1.1 Startup
Under "OFF" situation, press “Tare On/Off" on the front panel, switch on and release the button when
the display shows on. It first shows" UEr6.0" of the copyright and self-check (showing figures 9-0) in
one second. (With decimal point, tare/stability lights flashing on), then it shows the battery capacity
percentage as “pbt85", then it enters into zero reformat, showing"-----" (it will not show if the
reformatting has been completed after self-check).By the end of Zeroing it shows"0" or "0.0", entering
into weighing status
5.1.2 Shutdown
On switch-on regime, press button [Tare on/off] in the front panel or [
] on the remote for one
second, showing tAr-9, release the button and press again to display the battery capacity like [pbt85],
then release the button to automatically cut off power supply.
5.1.3 Energy saving mode and auto shutdown
2
Page 6

This function is optional (check details in 7th section parameter setting). When the weighing is
continually stable or at Zero status for 15 minutes, it enters into power saving mode, each digit on
display shows "_" one by one. When button or weighing changes it automatically returns to normal
weighing display
After 60 minutes continual steady weight, it will automatically cut off the power and shutdown.
5.2 Maintaining and lifting the weight display
Press button (H) to hold the display which won’t change when real weight changes. Press (H) again to
life the display, enters into normal weighing process.
5.3 Tare ( Zero)
5.3.1 Tare ( Zero)
In the "Tare" off state, life the goods and press the "Tare On/off" button or the 【→0←) on the remote,
the scale will remove the weight and display will only show"0" or "0.0"
①If the weight is ≤10%F.S, Zero it(whatever the weighing is stable or not), it shows "0" and the "Tare"
light off
②if the weight is >10%F.S and the weighing is stable then tare it, shows "Zero" and press "Tare". If the
weighing is not stable then nothing needs to be done.
5.3.2 9 seconds to automatically tare delay
Press" Tare On/Off" button for one second, showing"tAr-9", and release the button; reduce value by 1
per second speed display. If the weighing is not stable ,it will show"-----" for waiting; When it becomes
stable, it will tare automatically, and shows" Zero" with the "Tare" indicating light on (if the weight ≤10%
or 2%F.S, Zero it and it will show"0" with "Tare" indicating light off). If the display value reduces by 1 per
second showing” tar-x", press” Tare On’/off"" button, it will start measuring the voltage and showing the
value, and shutdown automatically by releasing the button
In the state of " Tare" (with the tare light on"), press the button" Tare On/Off" or the" button on the
remote, tare clearance and it will show the gross weight , and quit " tare"("Tare" indication light off)
5.4 Check (Look back) the past 5 weighing records
The green button at the front panel of the scale is for checking. Press once for the latest display,
(Showing LSt-1 for one second and the value for 4 seconds) twice for second latest display, and so on.
It will show max.5 records at one time by pressing the button. It returns to weighing status 5 seconds
after checking the record.
In the state of" checking”, press" Tare On/off" to quit “checking weight value" immediately and return to
the weighing status.
5.5 Net weight accumulation
When the auto accumulation function is off and the net weight (>20d) display becomes stable, press
(*)to manual accumulate the net weight and it will show "n xy" and return to weight status in 2 seconds.
N stands for net weight accumulation, xy stands for times of accumulation. Next net weight
accumulation will only be after the net weight showing value ≤20d (empty). Max.99 times
When the auto accumulation function is on, it will automatically accumulate when the display value
becomes stable. Next net weight accumulation will only be after the net weight showing value ≤20d
3
Page 7

0
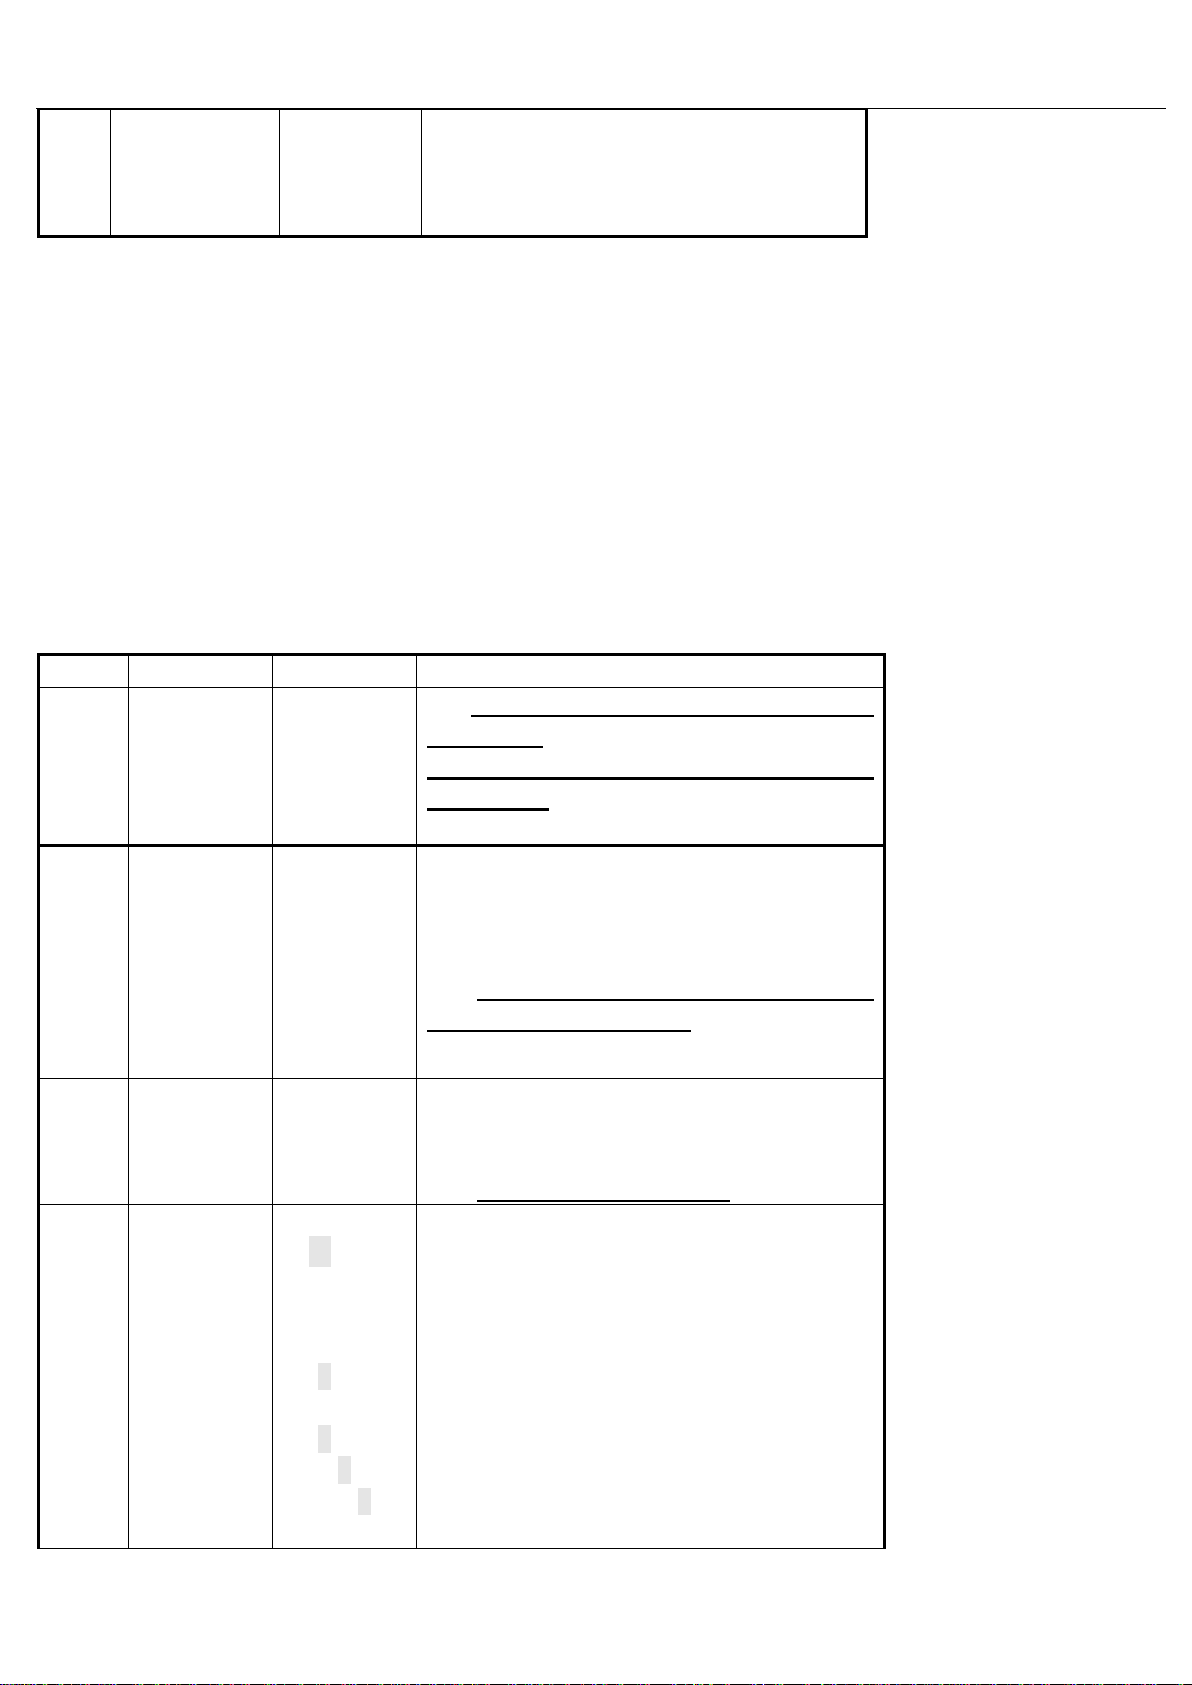
Step Operation
Display
Remark
1
Press(H)till
display
shows(00000
)
[
****
*
]
[ 0 0 0 0 0 ]
It shows the value under weighing
status
Enter into password inputting, the
highest digit will flash. The password is
33333.
2
PRESS(▲)
Press (*)
Press(▲)
After all done
press(*)
[ 3 0 0 0 0 ]
[ 3 0 0 0 0 ]
[ 3 3 0 0 0 ]
Press 3 times of (▲), it will show 3
Press one time of (*) the flashing
no. will move rightward one bit
Press 3 times of (▲), the number will
show 3
Press once it will stop flashing
If press(▲) Highest digit flash to start
resetting the password
(empty). Max.99 times
5.6 Display and clearance of net weight accumulation value
Press (▲) button in the state of weighing, it will show accumulated times of the net weight (n 20), press
again, it will show the highest 4 numbers [H 10], press once more, it will show the lowest 4 numbers
(L5000), press again to return back to weighting, then the net weight accumulation value is 105000kg.
When there are the above three figures, press [
] to clear the times and the value.
Press (Tare On/Off) to quit “net weight accumulation", and return to weight status
5.7 Charging Instruction
When the battery is less than 15%, the light will flash and remind user to charge in time
When the battery is less than 10%, it will automatically cut off the power (will not cut off during
self-inspection when scale starts)) to prevent from over-discharging of the battery
The plug hole is at the back of Crane scale. It takes about 12 hours to charge up every time.
5.8 Error Indication
1) Over-loading indication: when the weight of weighing is more than the full weighing range plus 9d it is
over-loaded and shows" -OF-"
2) Error Notice: The weighed value is negative and the highest no.is not "0" or "1" it will show"E rr--"
Chapter 6 Password Input
6.1 This operation should only be taken within one minuet after startup, and can only enter into
parameter set-up and calibration after inputting the password correctly.
6.2 Under this function, press (▲) button the number move up 1 by each pressing , every press
on button(—›0<—) the flashing no. will reduce by 1, press (*) button to confirm and the flashing
position will move rightward by one bit
For example:
4
Page 8
3
Press (*)
[
****
*
]
[CAL 1 ]
If input incorrect password, it will
return back to weighing state.
If input correct password, it will
enter into Calibration.
Step
Operation
Display
Remarks
1
Press(*)
after
password
confirmed
[ CAL 1 ]
Option: CAL 1 to setup the
parameter
CAL 2 to enter into
calibration
2
Press(▲)
Press(*)
[ dc *]
[ dc 0]
Set decimal digits
Press (▲) to choose the decimal
digits, option: 0/1/2/3
Enter into next parameter
setting( Division Value)
3
Press (▲)
Press
[ d
**
]
[ d 1 0 ]
Set Division Value
Press(▲) to select the required
Division value
Enter into next setting
4
Press(*)
Press(*)
Press(*)
[
****
*
]
[ 0 0 0 0 0 ]
[ 0 3 0 0 0 ]
[ 0 3 0 0 0 ]
[ 0 3 0 0 0 ]
Set the max. Weighing range
With the highest digit flashing, press
(▲) to choose the figures.
The fourth digit flashes, press (▲) to
choose the figures, for example press 3
times of (▲) it will show 3.
Press (*) the figures stop flashing
Press (▲), when the highest digit
flashes, enter into resetting the max.
Remarks:
1.Press(H)button to quit the password inputting at any time and return to weighing status.
2. Can enter into parameter setting and calibration only after input the password correctly.
3. After complete the password input it will automatically quit accumulation status.
4. Can not enter into “password input" under “Tare" status.
Chapter 7 Parameter setting (Setup)
1. Can not have parameter set under the "Tare" situation, should quit first.
2. In the state of “Parameter Setting “, press (▲) will plus, every press on (—›0<—) will minus,
press (*) as confirmation and enter into next operation, press (H) to quit setup status
5
Page 9

Weighing range
Otherwise, if press(*), it will
automatically show the overload warning
value of FS+9d
Enter into next setting( Zero
tracking range)
5
Press(▲)
Press (*)
[ 0 d *]
[ 0 d 2 ]
Set Zero trace range(Od=Zero tracking
range)
Press(▲) to choose the required zero
tracking range
Option: 0-9, each figure match
accordingly as below:
0--0.45d 1--0.6d 2--0.7d 3--0.8d
4--0.9d 2--1.0d 6--1.5d 7--2.0d
8--2.5d 9--3.0d
Enter into next setting(filter wave)
6
Press(▲)
Press(*)
[ L
**
]
[ L 12 ]
Set filter coeffition (L stand for
times of smooth views L=8-20
Press (▲) to set the parameter of
wave (each press the parameter adds by
1.
Enter into next setting(Power saving)
7
Press(▲)
Press(*)
[ J d *]
[ J d 1 ]
Option: 0-off, 1- on
Press((▲) for options
Enter into next setting(Auto
accumulation)
8
Press(▲)
Press (*)
[ LJ *]
[ LJ 1 ]
Option for auto accumulation: 0-Off;
1- On
Press (▲) for option
Enter into next setting(Weight unit)
9
Press(▲)
Press(*)
[ Lg *]
[ Lg 1 ]
Press ((▲) for weigh units option:
0-kg; 1-Lb
Only the LED display has this function
Enter into next setting(Gravity
Speed)
10
Press(*)
Press (*)
Press(*)
Press(*)
[ 9
***
*
]
[ 9 3 0 0 0 ]
[ 9 3 0 0 0 ]
[ 9 3 0 0 0 ]
[ 9 3 0 0 0 ]
[ 9 3 0 0 0 ]
Set gravity parameters(Remark 3)
The highest digit is 9, and the one
next to it flashes ,press (▲) for option
Move to the next digit for selection
After all digits set, it stops
flashing。
When press (▲), the next high digit
flashes, restart setting
Enter into next setting(Back
lightness of LCD)
6
Page 10

11
Press(▲)
Press [*]
[ brt *]
[ brt 6]
Set backlight brightness for LCD
Press(▲) to select the brightness:
Brt=1~64
Press [
0
] on remote, each press
minus the parameter by 1
Quit the setting and back to weighing
status
Ste
p
Operation
Display
Remarks
1
Press (*)
Press(▲)
Press(*)
[ CAL 1 ]
[ CAL 2 ]
Option: CAL 1 Parameter setting CAL 2 Calibration
Switch to calibration operation
Enter into calibration status
2
[
*****
]
[ 0 0 0 0 0 ]
check scale ZERO
Make sure the scale is empty and check if the display is
zero. If not, press [TARE ON/OFF] on the scale panel or
(
0
) on the remote to make it zero. If it is zero, enter to next
step.
3
Load
weight
Press (*)
[
#####
]
Load weight( load weight as close as to the max. capacity
Load weight on the scale, #### is the weight after
loading.
Enter into input of calibrating weight status
Remarks:
1.Can quit "Setup" at any time and return to weighing status, the data becomes effective only after all
processes completed.
2. The bigger setup data the more stable weighing,and with longer time for staying stable. And vice
versa.
3. The original setup gravity is 9.7936. The user can adjust it into local one; program will
automatically correct the gravity. If the user has calibrated at the local, the gravity doesn’t
need to be adjusted.
Chapter 8 Weighing Demarcation & Compensation Demarcation
1. Calibration (this operation must be after password setting. The initial password is 33333)
Press (▲) for plus, and (→0←) for minus, (*) for confirmation and enter into next step, press (H) to
quit setting mode.
7
Page 11

4
Press(*)
Press(*)
Press(*)
Press(*)
Press(*)
Press(*)
[ 0 0 0 0 0 ]
[ 0 0 0 0 0 ]
[ 0 3 0 0 0 ]
[ 0 3 0 0 0 ]
[ 0 3 0 0 0 ]
[ 0 3 0 0 0 ]
[ 0 3 0 0 0 ]
input calibration weight value
The highest digit flashes, press(▲) to choose figures.
Press (▲) the flashing move to the next digit, same way
for other digits. Press three time to input [3]
flashing stops after selection of all the figures
Then press(▲) to make the highest digit flash, re-input
the calibration weight value
Otherwise, press (*) to calculate “Zero Tracking"
parameter, "Calibration parameter”, and save the data
automatically, quit the calibration and return to weighing
status.
During this process when the figures are flashing the
flashing number will minus by 1 after each pressing on (→0←)
on the remote.
Step Operation
Display
Remarks
1
After
inputting
password,
Press(▲)
Press (*)
[ CAL 1 ]
[ CAL 2 ]
Option: CAL 1 Parameter setting; CAL 2
Calibration
Press (▲) and enter into calibration
Enter into (Compensation) status
2
Press (*)
[ 1 0 2 0 ]
shows current weight value
Press(*) into next operation
3
repeat step 4 of calibration
Remarks:
1) Preheat 8-10 minutes by turning the power on before operating, and set up the data first according
to Parameter setting.
2) This operation must be within one minute after startup and data setup.
3) 1.Press [H] to quit at any time and return to weighing status, the data could only be effective and
saved after all procedures completed.
4) Weight for weight calibration would be better as it be closer to the max.weight. If the loaded weight
is <10%F.S, the calibration is invalid, the original calibration parameter is still valid.
5)If the five digits input by the user are all 9, it will restore the factory parameter.
6) It can not enter into “Calibration" under the “Tare" status.
7) It will automatically quit “Accumulation" status after this process.
2. Compensation calibration (must be after password setting)
E.g.: When the actual weight on the scale is 1,000kgs, but it shows 1020kgs. it can be corrected by
compensation without taking off the weight from the scale.
Details show below:
8
Page 12

Error
Reason
Check method
Solution
Unable to startup
Battery pack
damaged
Use power meter to measure the
voltage of the two ends of battery,
lower than 5.0V means
breakdown,
Replace battery
Bad connecting of
battery wire
Shake gently the connecting wire
Reconnect or weld the
battery wire
On/Off button
damaged
Open the front panel and the two
ends behind the short-circuit
on/off button can be startup.
Replace the On/Off button
Charger indicator
does not light
Charger damaged
Connect through the power, the
charger light not on, voltage meter
shows less than 8V output
Replace charger
Charger not plug on
Less than 8V output, check the
plug connecting
Re-plug on the charger
No electricity on the
socket or not press
down the socket
button
Use Volt meter to check if the
socket light is on
Replace to socket with
electricity or press down the
button
Battery can not be
charged up
Battery damaged
8V output of the charger but no
voltage going up after connected
Replace the battery
Plug damaged
Sometimes it works when shake
the charger connector
Replace the charger
Short battery life
Not our charger,
Long-term damage
to the battery
over-voltage charge.
Check if the output power is more
than 8V
Replace the charger, our
company's charger output is
7.4-7.8
Battery Lifetime
expired
The voltage drops down fast after
charging up
Replace the battery
Self-discharge
caused by bad seal
Battery polarity welding is not
sealed or water in battery pack by
poor sealed.
Seal the battery welding area
and the battery case by glue.
Unstable display
Items shake
seriously while
weighing
Intensely shaking or over shaking
Wait till it is stable
The transfer is
damaged by over
loaded or the
insulation is
damaged
The output and input of the
transfer change too much or the
value is 1 when use Voltage meter
at 20MQ
Replace the transfer with the
manufacturer.
Appendix 1 Glitch and self- maintenance
9
Page 13

The wire of transfer
is broken or
damaged
Press at different area of the
transfer wire, the data changes
obviously
Reconnect the wires(protect
from short-circuit
Serious scale body
moisture
See vapor inside after open the
front cover
Dry wet parts
Insufficient welding
during maintenance
Welding points not smooth or with
small gaps
Redo the welding
Insert loose
check the loose by eyes, or shake
the insert, the value changes
Re plug or replace insert
Not show "0"
when the scale
empty
The preheat time is
not enough when
startup
Preheat time 3-5 minutes
Shows "0" after 3-5 minutes
Startup when the
scale is not hung up
Should startup with hung up
empty scale
Zero
Huge tolerance of
weighing value
Inaccurate reference
standard
Reference to "standard" is not a
standard weight, not test or test
for a long time
Calibrate with standard weights
or weight together with a new
scale from the distributor.
Inaccurate
placement of the
hanger
Check if any rope messed up,
over side load, protruding after
knotted during weighing
Avoid any slapping. No
centered, make sure no
stuck of the hanger
Remote not
working
Low battery
Check the battery capacity
Replace battery
Long distance
Move closer to the scale
Button failure
Other buttons work normally
Replace the remote
10
 Loading...