

Page 1
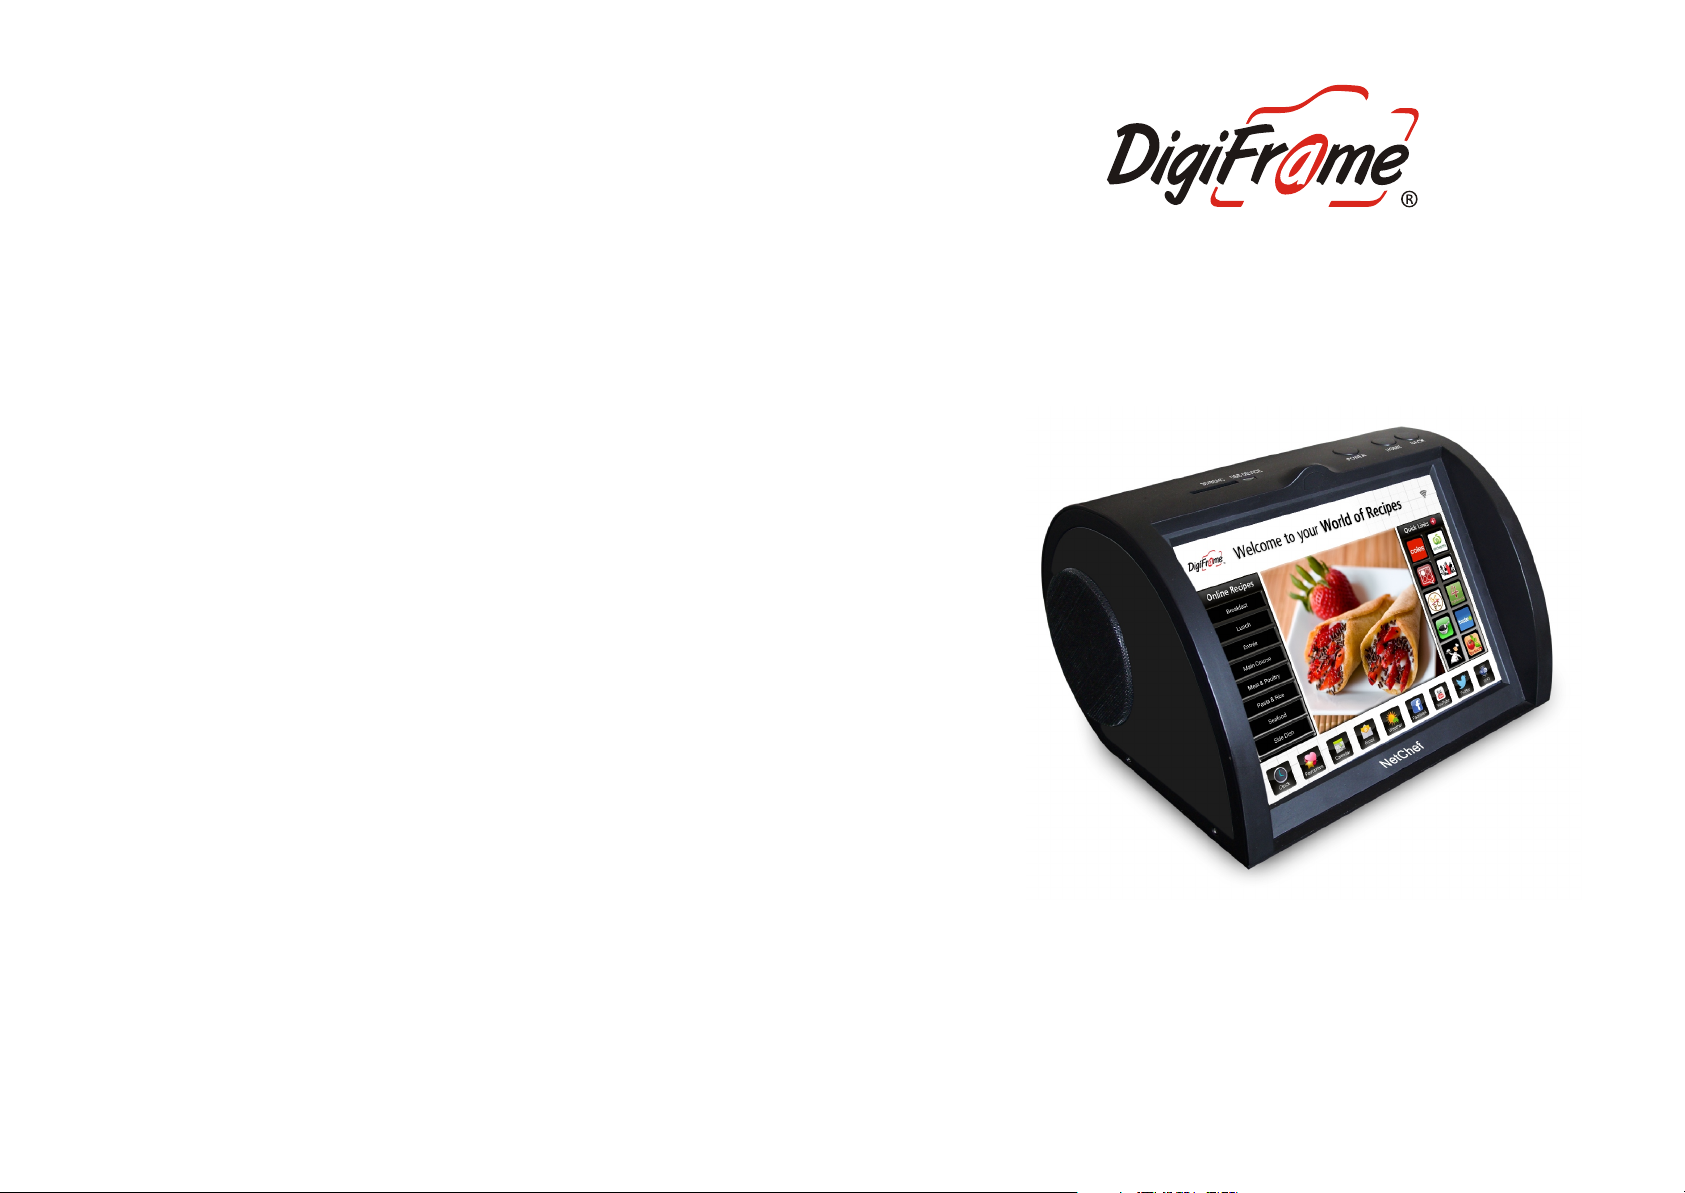
NetChef
Model No: DF-NC3804b and DF-NC3805r
User Manual
DigiFrame Australia Pty Ltd
72 Junction Road
KARALEE QLD 4306
Product Support: 1300 344 437
Email: contactus@digiframe.com.au
Website: www.digiframe.com.au
Page 2
CONTENTS
Safety Precautions
Information Notifications
Product Overview
Introduction
Connectivity
NetChef - User Manual
Description
NetChef Diagram of Functions of buttons and ports
Setup of your new DigiFrame NetChef
Connecting your NetChef to your Wi-Fi
Setting the Time and Date
Adjust the Volume
Home Screen Overview
Online Recipes
Quick Links
Bottom Menu
Keyboard Guide
Download Additional Applications
Language Settings
Turning OFF your NetChef
Inserting an SD Card
Connect to PC - Add “My Recipes”
Customise Screen Saver Photo Slideshow
2
2
3
4
5
5
6
6
7
8
8
9
10
11
11
12
13
13
15
Support
If you have any queries about your Netchef, please contact our Technical Support Dept:
DigiFrame Australia Pty Ltd
72 Junction Road
KARALEE QLD 4306
Ph: 1300 344 437 (1300DIGIFRAME)
Email: techsupport@digiframe.com.au
Website: www.digiframe.com.au
Feedback & Testimonials
We always appreciate your feedback and value the opportunity to discuss our products with
you. Please join us on Facebook to keep up to date with our new products, competitions
and much more:
http://www.facebook.com/NetChefAustralia
http://www.facebook.com/DigiFrame
If you would like to leave a personal Testimonial in relation to the NetChef or any of our
other products, simply click on Testimonials at the bottom of the home page on our website:
www.digiframe.com.au
Information
Tips & Tricks
Support
Feedback & Testimonials
Specifications
Features
Using your NetChef as a Digital Photo Frame
Deleting Favourites
Cooking Timer
Enlarge Viewing on Screen
Factory reset
Videos
Contact Details
16
16
17
17
17
17
17
17
18
18
Page 18
Page 3

Tips & Tricks
Safety Precautions
USING YOUR NETCHEF AS A DIGITAL PHOTO FRAME - The MENU Button ( ) can be
found at the top right corner of the screen beside the HOME button. Use this regularly to
access further options on the page you are working on. For example Select GALLERY Your albums (Once you have downloaded your photos to the NetChef or inserted an SD
card. If you have a lot of photos then we recommend an SD Card.) Then select the folder
you wish to view. If you press the menu button here you will notice more options appear at
the right of the screen. Select SLIDESHOW and your NetChef has just become your Digital
Photo Frame. When NetChef standby, the NetChef will play photo SLIDESHOW
automatically.
DELETING FAVOURITES - After you add a recipe from the ONLINE RECIPES section to
your favourites you can delete them by opening your Favourites Folder and holding on the
recipe you wish to delete. You will then see a screen appear that asks if you wish to delete
this recipe. Select YES to delete.
COOKING TIMER - At the bottom of the preloaded recipes we have included a timer so your
NetChef can keep track of how long your meal has been cooking. Simply select TIMER and
set the time required. When the timer has finished it will make a sound to notify you.
The NetChef screen will also appear with the time the timer was completed.
TO ENLARGE VIEWING ON SCREEN - To increase your view slightly when accessing
web pages you can double click on the screen or to enlarge fully use the (+) and (-) icons
that appear on the bottom right of the page.
FACTORY RESET - When you want to reset factory data you need to input the password,
please dial 1300 344437 for more information.
VIDEOS - When viewing a video on the NetChef you can touch to Pause and pull down
the screen to access the volume controls.
To Set a reminder in your Calendar:
- Double touch on the day you require.
- You will have to register a google account if you haven't already.
- New event will appear
- Touch on EVENT NAME and enter details e.g. Sally's Birthday
- Touch on Location and enter the event address.
- Touch on the date or time to change if need be.
- Touch on ALL DAY if applicable (Birthdays, Anniversaries etc)
- Touch on each individual Field to enter details e.g. WHERE & DESCRIPTION
- Touch and choose the Time zone.
REPETITION Select Yearly, One Time Event, Weekly etc.
REMINDERS You can Tell your NetChef to remind you of this
event up to 5 different times by Selecting the + Key (Add Reminder)
Once all details are entered, select DONE on the top right of the screen
Please read the safety precautions and user manual carefully before using your device to
ensure optimum use of your NetChef.
Please keep your NetChef device dry and away from steam.
Do not use expose your NetChef to excessive dust or dirt.
Please ensure your NetChef is placed on a level sturdy surface to
prevent any movement.
Do not subject your NetChef to extreme hot or cold conditions
Keep you NetChef clear from areas containing sharp instruments that
may scratch the surfaces. i.e. keys, jewellery, etc.
Do not place your NetChef near anything with a magnetic field.
Do not place your NetChef immediately near heaters, ovens, microwaves,
or any high pressure containers.
Do not drop, throw or sit on your NetChef for obvious reasons.
Do not use your NetChef close to other electronic devices e.g. Kettles, Microwaves etc
Please do not use your NetChef during storms.
Information Notifications
Please be advised of the following:
Netchef is an Android powered device, utilising Apps from third party sources and
gives you the option of downloading personally selected Apps from the Play Store.
DigiFrame can not be held responsible for any failures or assist with user training
for the content downloaded. If you require support for these third party Apps,
please contact the Application Developer directly.
Netchef uses a capacitive touch screen panel that will operate differently to mobile
phone screens you may be familiar with. please touch the screen with your finger
to ensure optimal performance.
Please note images and screenshots used within this user manual may differ
slightly in appearance from the actual screen on the product.
Due to ongoing improvements to our product the content included may differ from
this user manual and is subject to change without prior notice.
Page 17
Please note: Further Tips and Tricks will be shared on Facebook and
our Website.
Page 2
Page 4
Product Overview
Specifications
The NetChef is a touch screen Digital Cookbook suited to Wi-Fi connectivity. Not only
does it offer the ability to access recipes, but you can also listen to Music, play Videos,
browse the Internet, download Apps and log onto Social sites all within the privacy of your
kitchen.
The NetChef displays high quality images and can also be used as a Digital Photo Frame
to display your treasured memories. It comes with a built in memory for you to store your
favourite recipes and the external memory can be extended up to 32Gb. To get you
started.. we have included a BONUS 8GB SD card.
The NetChef can link to the internet via Wi-Fi. (see Wi-Fi Settings Page 5)
There is a fantastic selection of preloaded recipes for you to choose from. There are also
additional recipes available online as NetChef is constantly updated via cloud technology
each time you are connected to your Wi-Fi.
For your convenience we have also included a timer and unit converter at the bottom of
every recipe to help convert measurements if required.
We have been working with a number of Australian companies and have included a number
of inspiring and informative links under the Quick Links section of the Netchef. This allows
you to view popular Australian Recipes, Videos and information at the touch of the screen.
8” Display Screen: TFT LCD Capacitive touch screen
Screen Dimension: 8 inch
Resolution: 1024x768
Internal Memory: 4GB (approx 2GB available)
Supports: Photo format: JPG, PNG, BMP
Music format: WMA, MP3, WMV, AMR, AAC, FLAC, OGG
VIDEO format: AVI, WMV, VOB. RMVB, MKV, FLV, 3GP.
Memory Card: SD/MMC
USB connection: USB to PC
Power supply: AC 100 ~ 240V, DC 5V 2A
Features
8” Hi-Resolution LCD screen
Sleek and unique desktop design that blends with any kitchen environment
Preloaded with a huge selection of delicious recipes.. more available when online
Conveniently catalogued recipes to expedite your search
Link to your home wireless router with auto configuration
View your favourite recipes from the Internet
Save your favourite recipes into the built-in memory
Watch Recipe Videos from YouTube and other APPS and links
Touch screen with user-friendly interface for easy operation
Timer and Unit Converter to convert measurements if required
Additional functions: Browser, Calendar, Clock, Music etc
Photos slideshow, watch movies and listen to music
USB device which allows connection to PC for file management
Compatible with SD/MMC cards
2 x Stereo Speakers
Page 3
Page 16
Page 5
Connectivity
From the Home Screen select “My Recipes”. You will now find your personal files
stored in each of these three folders.
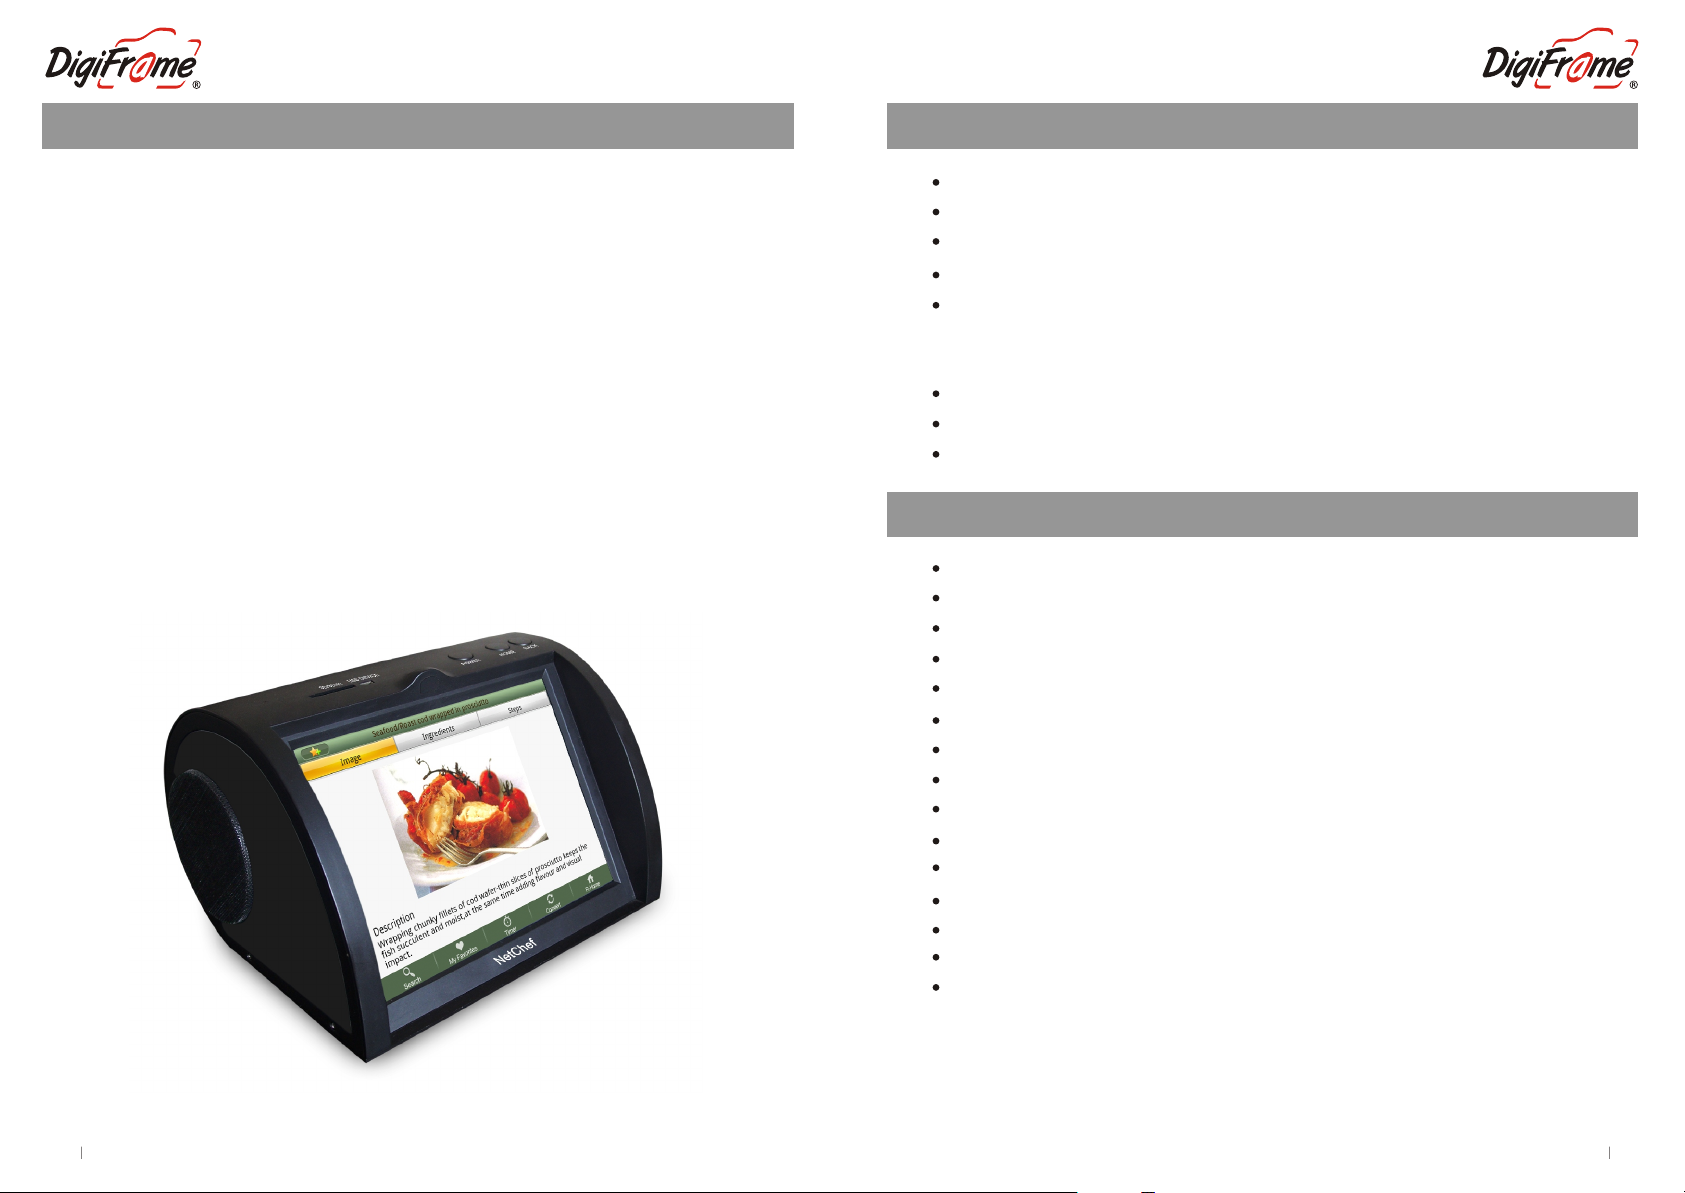
Customise your Screen Saver Photo Slideshow
A great feature of the Netchef is the photo slideshow. After 2 minutes of inactivity the
NetChef will start a photo slideshow as a screen Saver. To add your own family photos,
simply connect the NetChef to your PC and transfer the images into the “Slideshow
Photos” folder.
Product Overview
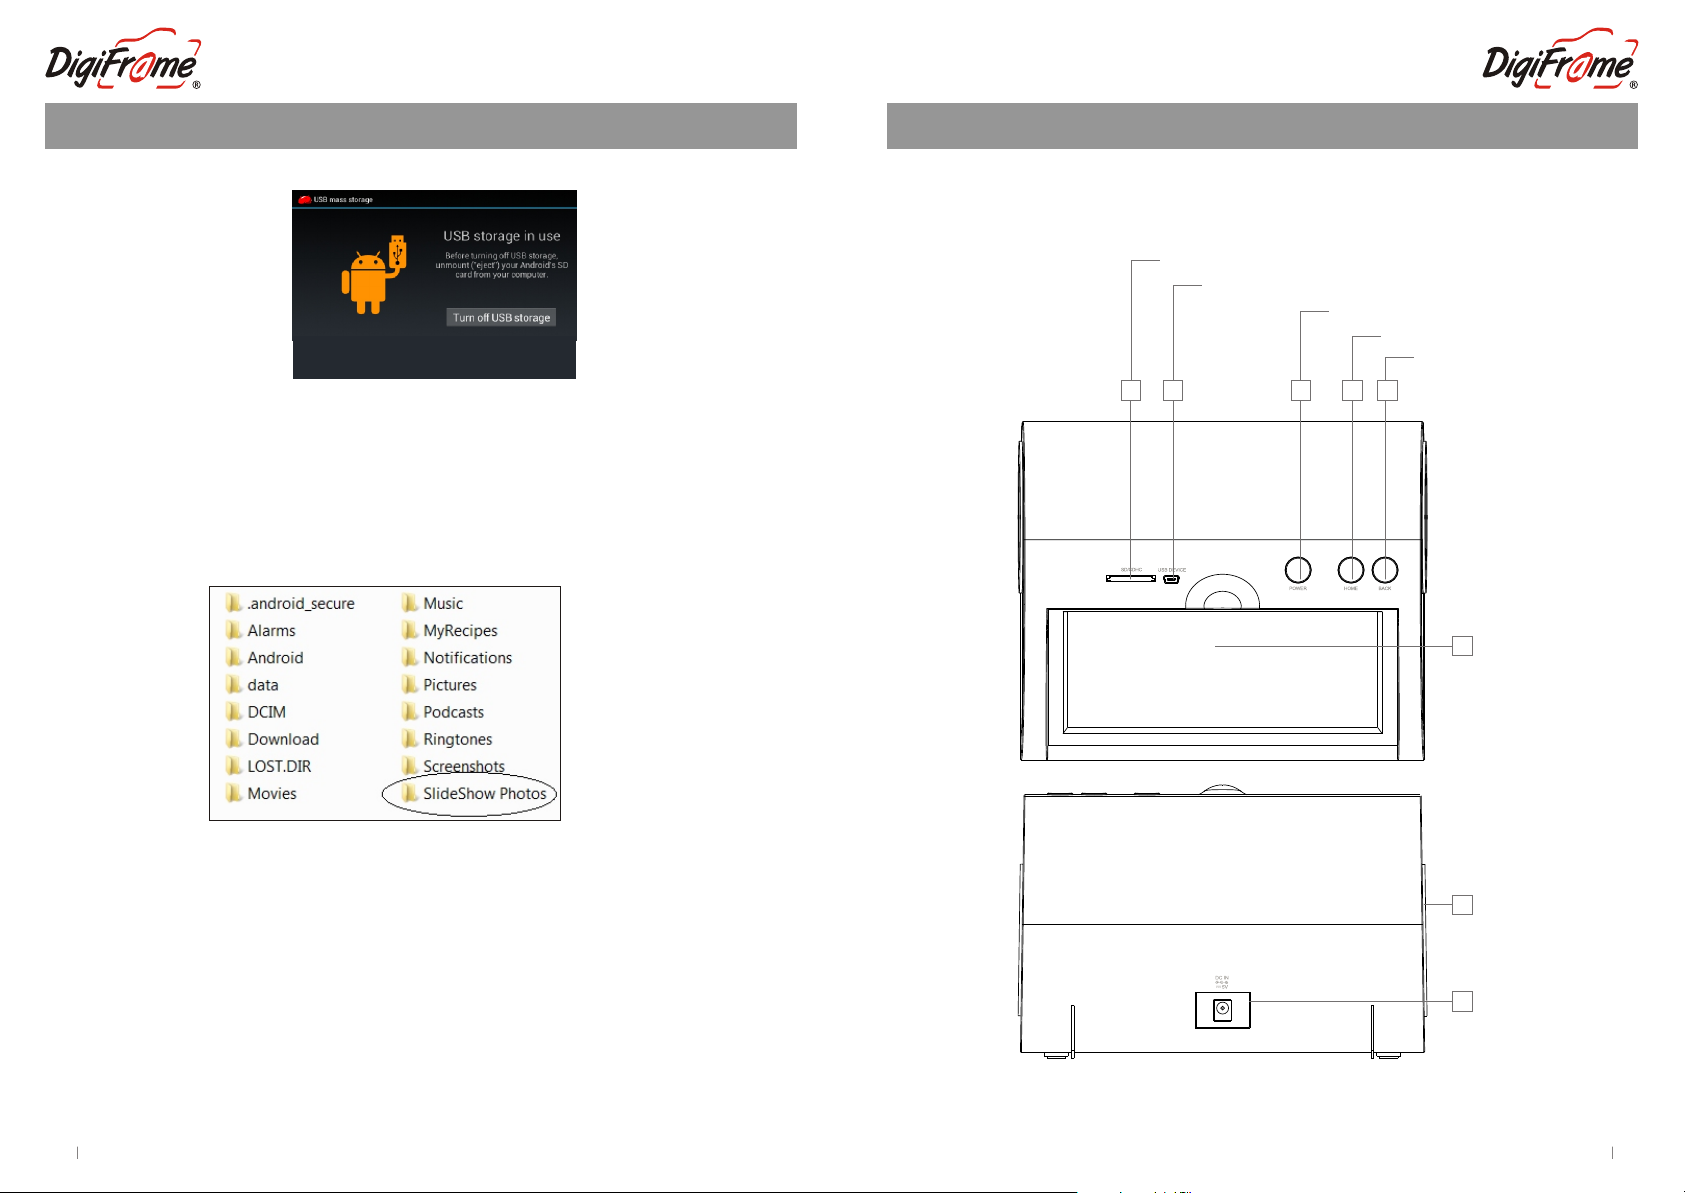
NetChef Diagram - Functions of Buttons & Ports
SD/SDHC Card Reader
USB Device(For connecting to PC)
Power ON/OFF
Home Screen
Back
2
1
4
3
5
6
Screen
At DigiFrame.. we're all about being able to enjoy your photos… in a digital way. When
your NetChef is not being used to create delicious meals, it can be used as a Digital
Photo Frame in your kitchen.
We've added some “Demo” images to show you how it works, but one of the first things
you might like to do is replace these images with your own.
To remove the demo Slideshow photos from your NetChef, please connect your NetChef
to your PC and navigate to the 'Slideshow Photos' folder, then simply delete the photos
that you don't want and “copy / paste” your personal photos into this folder.
IMPORTANT: These Slideshow images should be less than 1MB in size.
Tip: To change the 2 minutes of inactivity to another time period Click on All Apps then
Settings then Display then Sleep. Now select the time of inactivity that you choose.
Page 15
Speaker
7
8
DC IN
Page 4
Page 6

Introduction
Setup of your NEW DigiFrame NetChef
Connect your new NetChef to an available power source using the power adaptor
included in the box. (Connect to DC IN (No.9) on the diagram and plug into power
point)
Press and hold the Power button down for 4~5 seconds.
The initial NetChef Welcome screen will appear. Please do not touch your NetChef
whilst it is powering up. (This will take approx. 5~10 seconds)
Then a message “NetChef” will appear. Please wait for the NetChef to finish booting.
(This will appear for approximately 20 seconds)
Welcome to your new NetChef! - Your World of Recipes. It is now ready to use.
Recipes can be accessed using the category list on the Left hand side. To slide the
categories, simply use your finger and slide up and down to view other categories.
Within the right hand column, “QUICK LINKS”, we have listed a number of inspiring
and helpful links which may be of interest to you. Simply touch to access. (Please
note you will need to be connected to Wi-Fi to access these links) see below.
Connecting your NetChef to your Wi-Fi
Consult your Quick Start Guide for detailed images of these steps
Please ensure your home Wi-Fi router is turned on to enable the Netchef to find and
connect to this signal.
Select the “Wi-Fi” icon at the bottom of the screen on the NetChef. (You can slide
the bottom menu left and right to find this icon)
Turn on the wifi by sliding the OFF icon to the “ON” position (right).
Your NetChef will search wireless routers in your surroundings and the name of
your Wi-Fi connection will appear on the right of the screen. Select your Connection.
If you have not allocated a password to your Wi-Fi connection then the NetChef will
connect automatically. If you do have a password you will be prompted to enter it.
Touch on the password box and enter your password using the keyboard on screen.
Then select CONNECT. You will notice “Connected” will appear under the name of
the Wi-Fi router, and a Wi-Fi symbol on the right top of the home screen will appear
( ).
Your Wi-Fi has now been connected so you can start enjoying all the functions of
the NetChef.
Netchef will remember these settings, so when re-starting your Netchef, if your
home router is turned on, it will re-connect automatically.
Connectivity
You can view the NetChef as a Removable Drive via your PC. You will notice a folder
named “My Recipes”.
Inside this folder are three folders, one for each compatible file format.
Insert jpg files here… you can scan your
handwritten recipes and save as jpg files
In the Accessories folder on your PC, you will
have a program called Notepad. Type your
recipe and save as .txt files. Transfer .txt files
into this folder
Maybe you have saved video files? Transfer
these video files to this folder
Copy and paste the desired files from your PC to the internal storage of the Netchef.
Once you have transferred the files…Touch “Turn off USB storage” and then safely
remove your Netchef from your computer (this is important so you do not damage
any files) then unplug the USB connection.
Page 5
Page 14
Page 7
Connectivity
Introduction
This section explains how to connect external devices such as an SD Card or PC.
Download your favourite music, photos and videos onto your SD card prior to inserting into
your NetChef. The NetChef can recognise these files and you will be able to access these
files instantly.
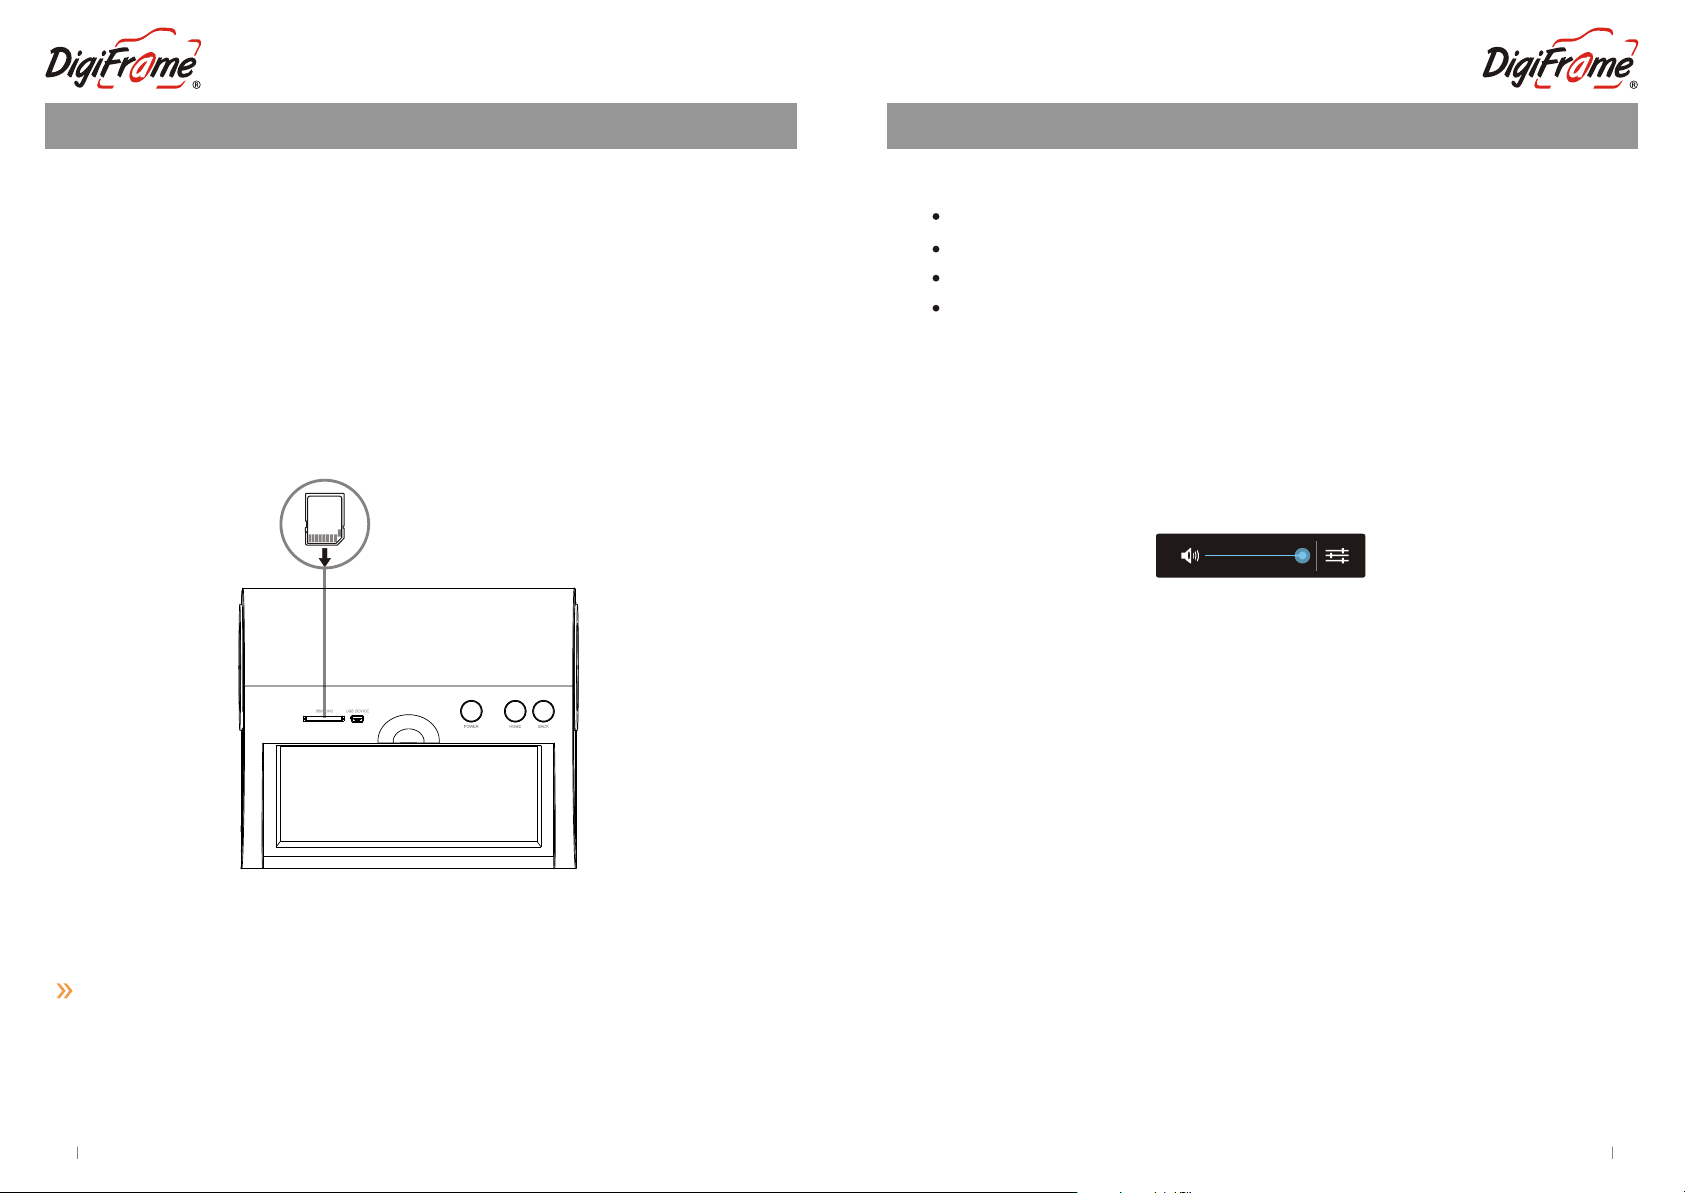
Inserting an SD Card
You can access Music files from your SD card by clicking on the Music tab in the Additional
functions section of the homepage OR by clicking on the Music App on the All Apps page.
You can access Photos from your SD card by clicking on 'All Apps' and then 'Gallery'. From
here you can view one at a time or select the slideshow function.
Videos can be accessed the same as Photos above In the Gallery section.
Insert an SD/SDHC Card into the card slot, push the card until it locks into place.
SD/SDHC Card
Setting the TIME & DATE
Select “ALL APPS” at the bottom left of the screen
Choose “SETTINGS”
Scroll down the page and choose “DATE & TIME”
Confirm AUTOMATIC is ticked at the right of the screen. This will ensure that the
NetChef will automatically detect the correct time and region for you.
Adjust the Volume
1. Long press “HOME” button on the device, the volume bar will display on the top of the
screen, then slide the volume bar to adjust the volume.
2. On the home screen, you can slide the middle of the home screen and the volume bar
will appear at the top, slide the volume bar to adjust the volume.
Connect to PC - Add “My Recipes”
Connect your Netchef to the computer with the USB cable to transfer files.
Using the USB cable:
1. Plug the small end of the cable into the USB slot of the Netchef.
2. Plug the large end of the cable into an available USB port on the computer.
In your Netchef you will see a connection screen. To correctly connect your Netchef with
the computer, press “Turn on USB storage”. then you can add files to your Netchef.
Page 13
Page 6
Page 8

Introduction
Home Screen Overview
Introduction
4
1
3
2
Turning OFF your NetChef
1
2
3
4
ONLINE
RECIPES
QUICK LINKS
ADDITIONAL
FUNCTIONS
Wi-Fi Indicator
Access Preloaded and Online recipes sorted in categories
for you to choose from.
View our Favourite Recipe pages and access literally
thousands of Recipes and Videos online.
Select various tools to play music, view your photos
(Stored on your SD Card) and Access social sites.
Scroll across to view ALL options.
This icon lets you know when you are connected to Wi-Fi.
If you are not connected, a red cross will be shown on this
icon. Wi-Fi connection is required to access the internet
and the online recipes
To SHUTDOWN your NetChef, hold the POWER button down for 2 seconds. A message
will appear with Device Options. Press the POWER OFF on the screen and your NetChef
will shut down.
WARNING: Please press POWER button to shut off your Netchef unit. File loss in
the system will be caused if directly unplugged from power source.
Page 7
Page 12
Page 9

Introduction
Introduction
Download Additional Applications
PLEASE NOTE:
Netchef is an Android powered device which utilises Apps from third party sources and gives
you the option of downloading personally selected Apps from the Play Store.
Please be aware that some Apps have been written for mobile use only, they may display in
a horizontal format.
DigiFrame can not be held responsible for any failures or assist with user training for the
content downloaded. If you require support for these third party Apps, please contact the
Application Developer directly.
From the Home Page select “All Apps” then select Android “Play Store”
Log in to your Google account. If you do not have an existing Google account, you
will need to complete this setup prior to downloading additional Apps
Search for and Install your desired App. You will see a notification in the top bar
during the download process. You can pull this bar down to view the progress of the
installation if you choose, after installation is complete you will see a message
“Successfully installed”
Press the HOME button, then press All Apps” from the bottom menu. All downloaded
and pre-installed apps will appear in this section
Language Setting
On the HOME screen touch “All Apps” select “Settings” then select “language & input”,
select “Language” scroll to select your required Language and touch. Press the return
button or the “Home” button on top of your NetChef to return to the home page.
Online Recipes
The list includes Categories by meal and food type e.g. Breakfast, Dinner, Lunch, Lamb,
Pork, Turkey and Vegetable.
Remember you can always add your Favourite Recipes from this section, to the "My
Favourites" folder by clicking on the "Add to Favourites" symbol in the top left area of each
Recipe ( ).
Additional Features: (shown at the bottom of each Recipe)
SEARCH
MY FAVOURITES
TIMER
CONVERT
R-HOME
- Allows you to search for recipes by Name or Ingredient.
- Direct Access to your Favourite Recipes on NetChef.
- Set the time required for cooking. The Alarm will sound at this time.
- Use the Convert button to convert Volumes or Weights.
- Returns you to the main Recipe Page.
Quick Links
We have worked with some prominent Australian companies to include a fantastic selection
of QUICK LINKS to some very inspiring websites. Simply select and watch Recipe Videos
and also search for other specialty recipes online.
You can also customise this area to include your own Quick Links to personally selected
Apps. First you will need to search and install these Apps from “Google PLAY”
(see “Downloading Additional Applications Page 11)
To add Quick Links Apps, please follow these steps below:
Touch the Red + Symbol next to the words “Quick Links”
To Add, Touch and Hold the appropriate App
A message will appear: “ADD Add to Cooking Apps”
Select “YES”
Press the HOME Button
You can see this App has now been added to the “Quick Links” section of
your NetChef
Repeat procedure to add further Applications.
Page 11
Removing Applications from the QUICK LINKS Section:
To remove an application from the Quick Links Section.
Simply press and hold the App which you would like to delete.
A message will appear “ DELETE Remove from cooking Apps?
Select “YES”
Page 8
Page 10

Introduction
Introduction
Bottom Menu
Included at the bottom of the screen is a number of applications which will be extremely
valuable to you when using your Netchef. This menu scrolls from left to right.
Please see Details below:
ALL APPS:
CHROME:
SLIDESHOW:
MUSIC:
MEMO:
MY RECIPES:
CLOCK:
WI-FI:
ALL APPS includes all possible applications included in your
NetChef for you to use.
Browse websites on the internet for more recipes or access
search engines.
Transfer photos from your PC into the Slideshow folder.
You can view all of these treasured Memories from here.
These images will be shown as screen saver.
Download your Music to the SD Card supplied and insert into the
SD card slot on your Netchef, you can listen to your favourite songs
whilst preparing your meals.
Create Shopping lists, reminders, things to do lists here for quick
access.
These must be transferred from your PC. View your personal
recipes, recipe pictures or recipe videos. (Saved or scanned) See
Connect to PC (Add Personal Recipes page 14)
Show the time, and set the alarm
Access to manage your Wi-Fi Settings
Keyboard Guide
The keyboard will appear whenever the user taps on the blank area that requires data to be
entered.
Tap to switch between lower case letters and Upper case letters.
?123
Tap to switch to numbers and symbols.
DEL
X
Tap to delete data.
Page 9
FAVOURITES:
CALENDAR:
FACEBOOK:
YOUTUBE:
TWITTER:
WEATHER:
You can select your favourite recipes from the ONLINE RECIPES
section by simply selecting the “Add to Favourites” button (top left
of the screen) once a recipe has been selected. All your selected
favourites will appear here.
View your personalised Calendar month to month. You can scroll
through the months by “scrolling up” utilising the touch screen.
You can also allocate REMINDERS for specific times and dates of
important events and appointments.
Log on to your Facebook Account to check in with friends and family.
Search YouTube for fantastic online Recipe Videos.
Log on to Twitter and post tweets about your NetChef.
Search local weather by location (No GPS installed)
Page 10
 Loading...