

Page 1
Digit al Photo Frame
User Manual
1. Product Introduction:
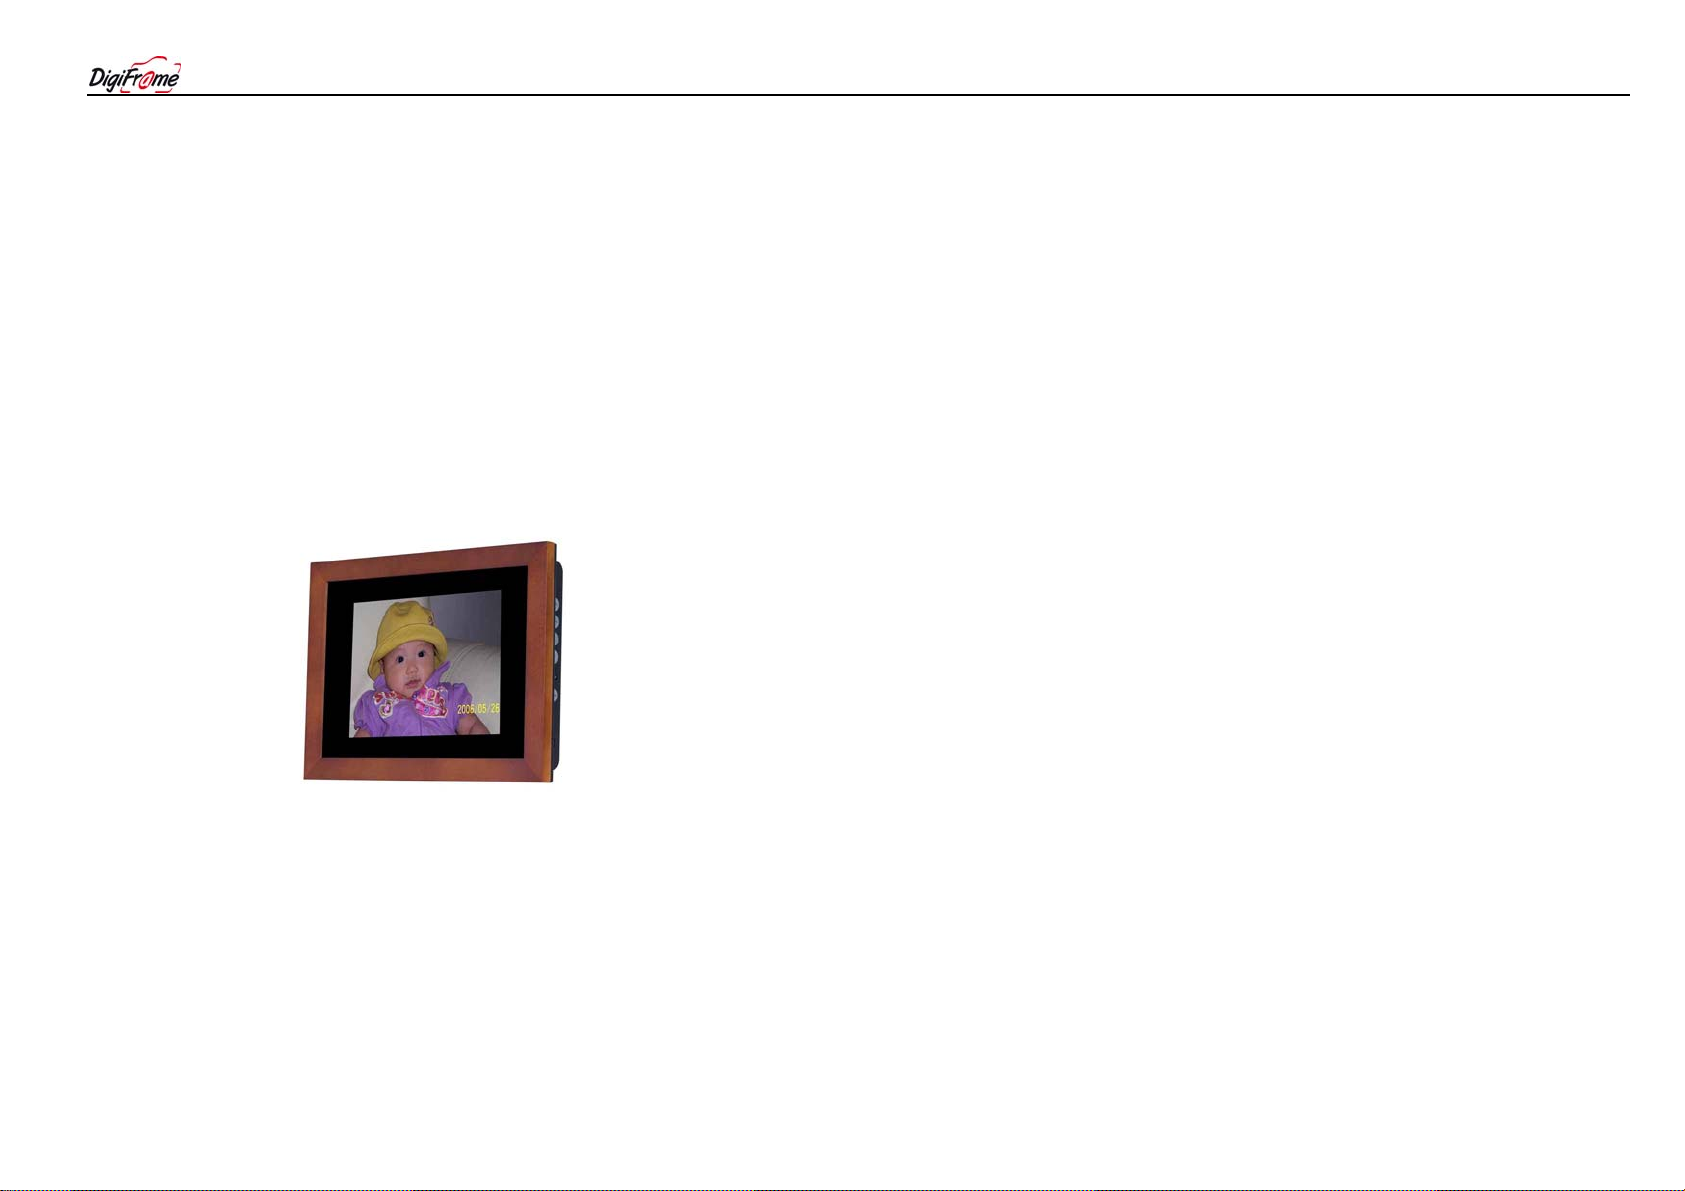
Congratulations! You are the proud owner of a new 10.4” DigiFrame. Boasting
high-quality image resolution the DigiFrame is the perfect way to display your
Digital Photos. Your DigiFrame can be configured to display Photos in a slide
show or as a still Photo. You can now display all your favorite Photos or video
files for everyone to see!
2. Package Contents:
Before using your DigiFrame, be sure to check all the a ccessor ies are in the
box.
Your DigiFrame comes with the following items:
· Digital Photo Frame
· St and x1
· AC adap ter x 1
· Remote Control x1
· User Manual x1
x 1
3. Features:
Display Photo and video files without a computer
Listen to MP3 files while displaying photos
Simple to operate: insert your memory card into the photo frame to view
Photo and video files or listen to MP3
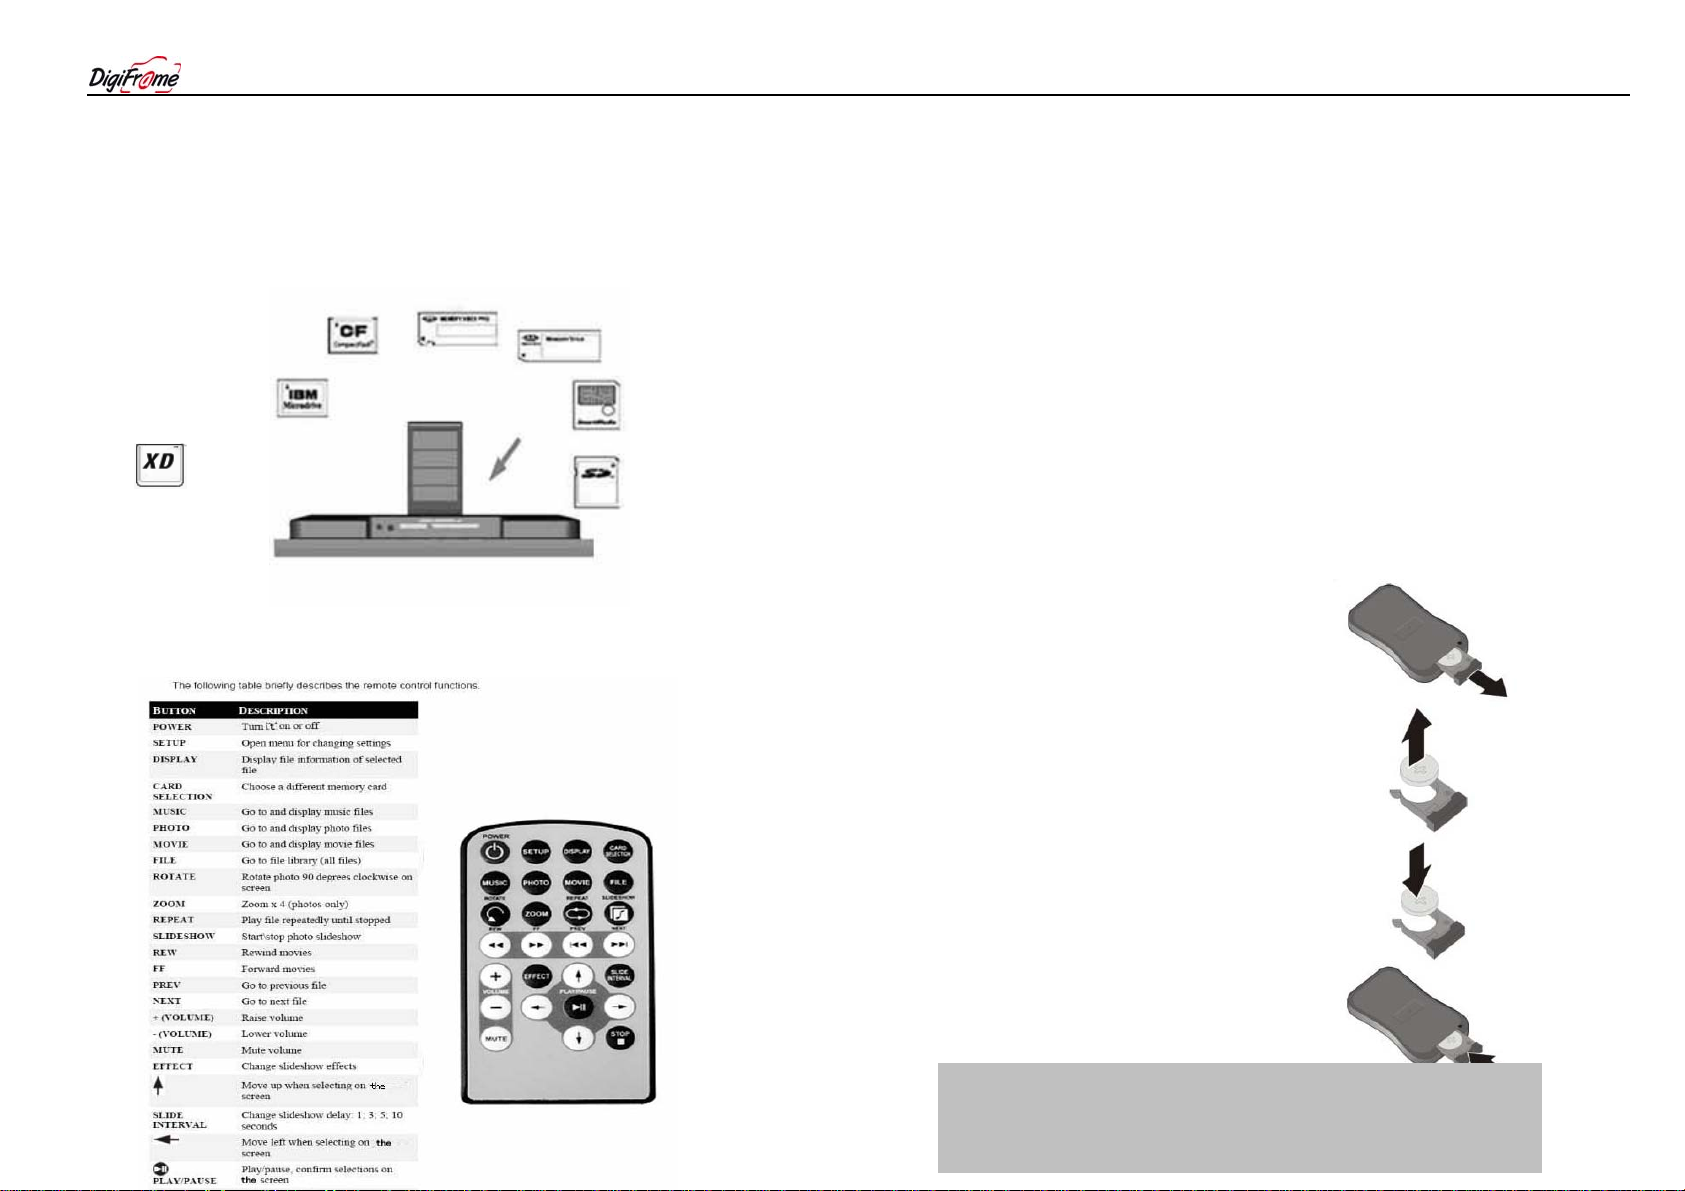
Supports: CF—MS/SD/MMC—SM /XD Multi Media cards
TFT-LCD screen with high resolution, wide view angle and rich color
Easy to use remote control for displaying and managing your files
Built-in stereo speakers
Page 2
)
)
)
4. Specifications
Accessories
1. Remote Control
2. AC Adapter
3. Operation Manual
Model
Unit Size
Display Area
Resolution
Colors
Brightness
Contrast angle
Viewing angle
Operation Temperature
Net Weight
Media Supported
Cards Supported
Auto Start Mode
Photo Playback Mode
Music Playback Mode
Video Playback Mode
DF-F1043b, DF-1044r & DF-1045s
314(h) x 257(v) x40(d
211.2(h) x 158.4(v
640x480
262,144
350cd/m2 max.
300:1
70/70 (l/r),70/40(u/d
AC100—240V(50HZ—60HZ)
0---50
1.5kg
MPEG1/2/4, MP3/JPEG
CF /MS/SD/MMC/SM/XD
Auto Slide Show JPEG
1. Loop, Zoom In
2. Auto Slide Show
3. Slide Show with background MP3 music
4. File name, File size, Resolution, Date Display
5. Interval Time Setup
6. Transition Setup
7. Play/Stop/Pause
1. Play/Stop/Pause
2. Volume Adjust
3. Repeat Model Setup
4. File Type, Total T ime, Date, Display
1. Play/Stop/Pause
2. Volume Adjust
3. Zoom in
4. File information, Time and Date Display
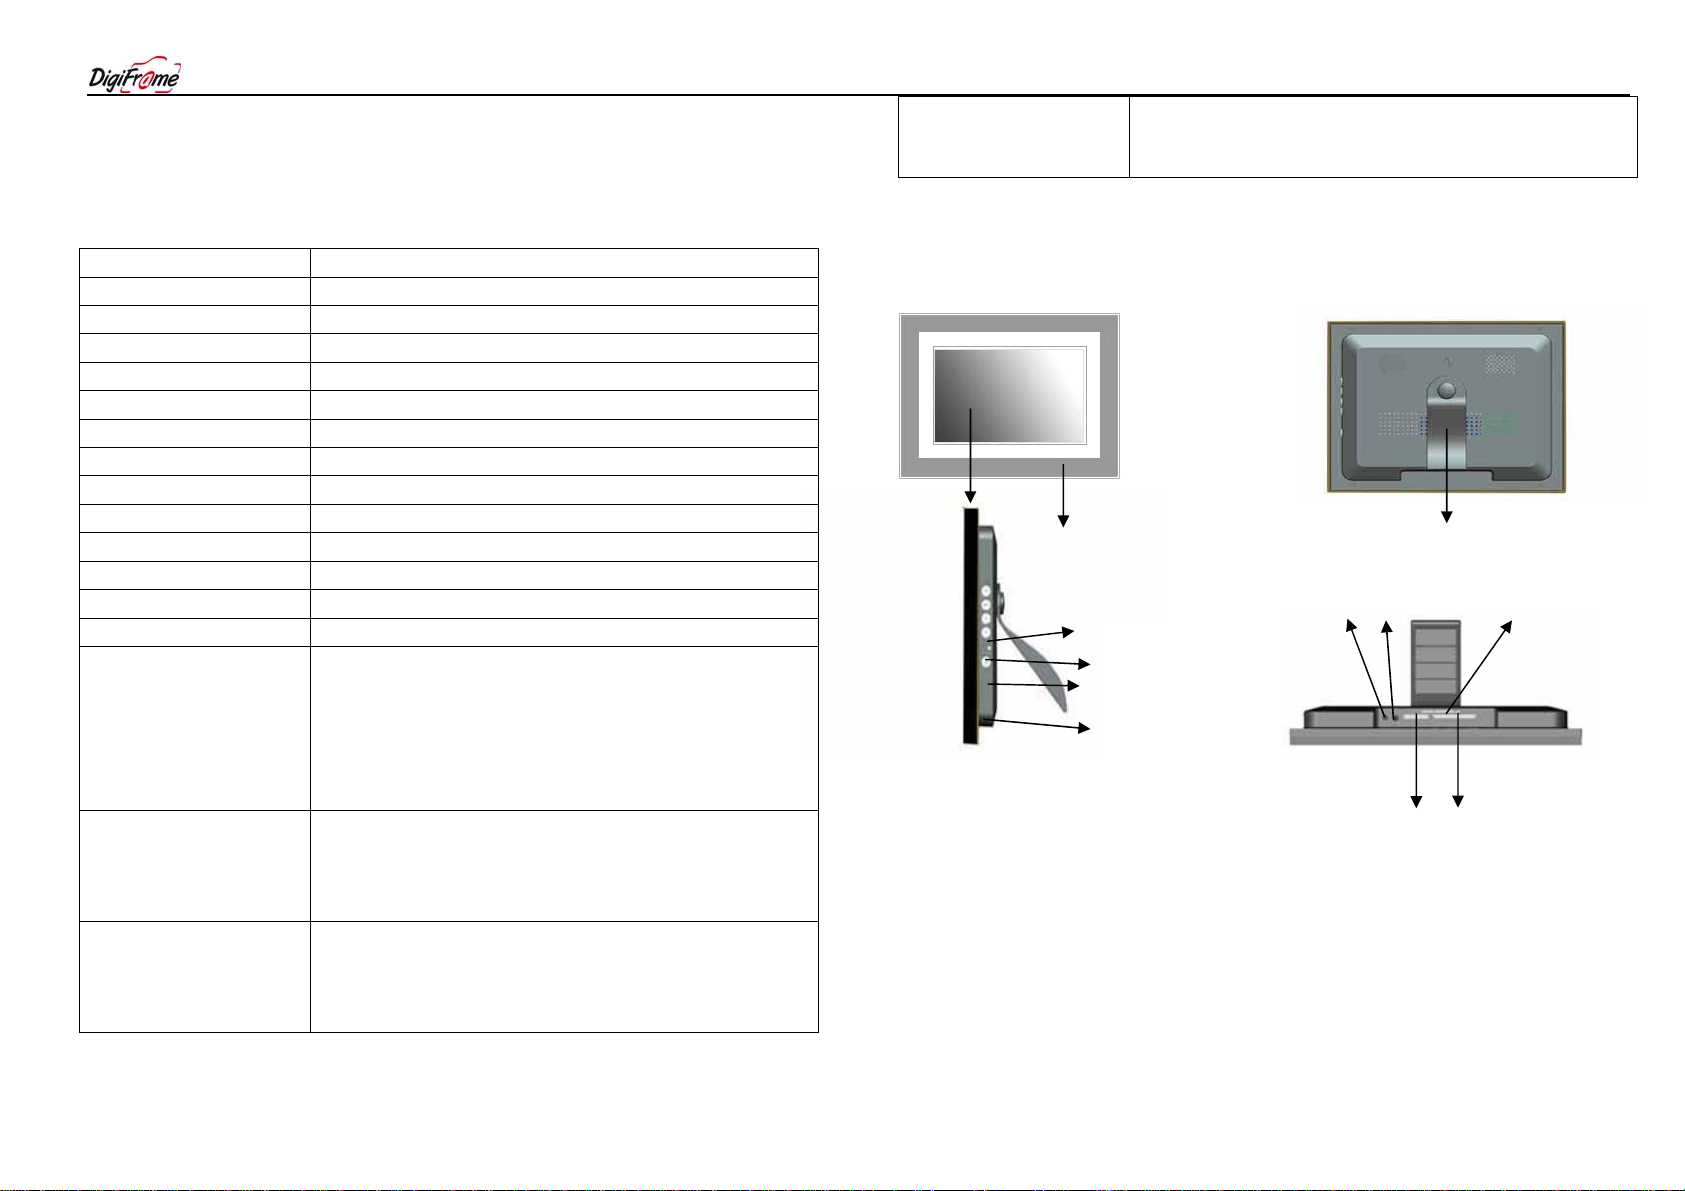
5. Control and Memory Card Slots
Display
Decorative Frame Desktop Stand
AV Power SM/XD
Arrow
Auto
Menu
Volume
Power
MS/SD/MMC/CF
6. Setting up your DigiFrame
·Open the package and remove your DigiFrame from the protective
packaging.
·Plug the AC adapter into a power outlet. Plug the other end into the unit.
·Insert your memory card into the designated slot.
·Turn power to On position via the On/Off Button. The power button is on the
right hand side of the frame
Page 3
·Your photo files will be displayed randomly for your viewing pleasure.
8. Playing a Slideshow with Music background
7. Remote Control:
A. Press the “Music” key on your remote to enter the Music database. Use
7
9. Replacing Remote Control Battery
the arrow keys to select the desired music file.
B. Press “Slideshow” key on your remote. Your DigiFrame will play the
selected MP3 while playing a slideshow of your photos.
1—Remove the battery
compartment cover by
pulling the cover in the
direction of the arrow.
2—Remove the battery.
3—Insert the replacement
battery taking note of the
correct polarity (+/-).
4— replace the cover.
Caution:
1. Only use a 3V CR2025 battery.
2. Dispose of used batteries according to local ordinance regulations.
3. Remove the battery when not using the Flash Player for prolonged periods.
Page 4
System Setup
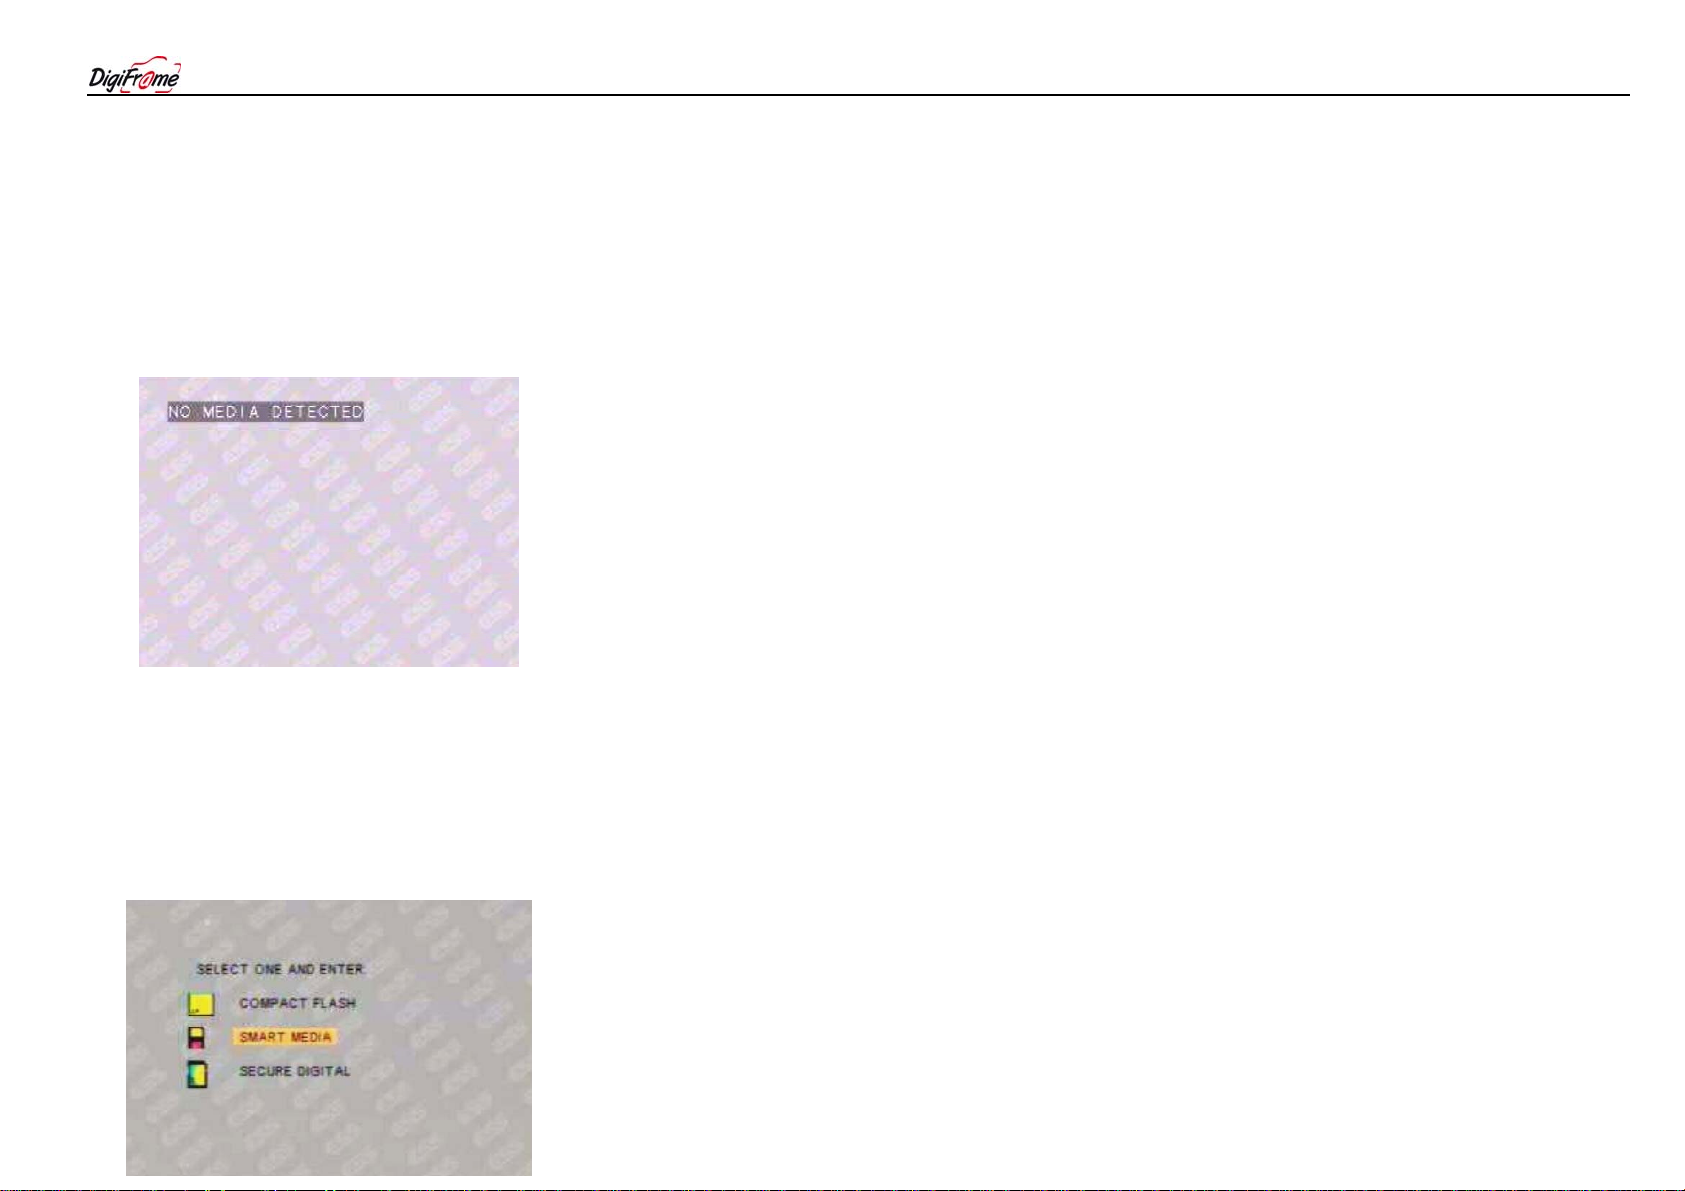
• Press the Power button on your remote control to power up the system.
If no media card is detected you will see:”NO MEDIA DETECTED”
Multiple Cards in System
If the Card Reader contains more than one device/card, the Multiple
Cards Screen will appear. Use the Up/Down navigation buttons to move
through the selections and press Enter to select. If only one device is present,
the Multiple Cards Screen will not appear.
Multiple Cards Screen
Page 5
Multiple Contents in Card
If there is more than one type of file in the device/card, the Multiple
Contents Screen will appear. Use the Left/Right navigation buttons to
move through the options and press Enter to select. If only one file type is
present in the card, the Multiple Content Screen will not appear.
Multiple Contents Screen
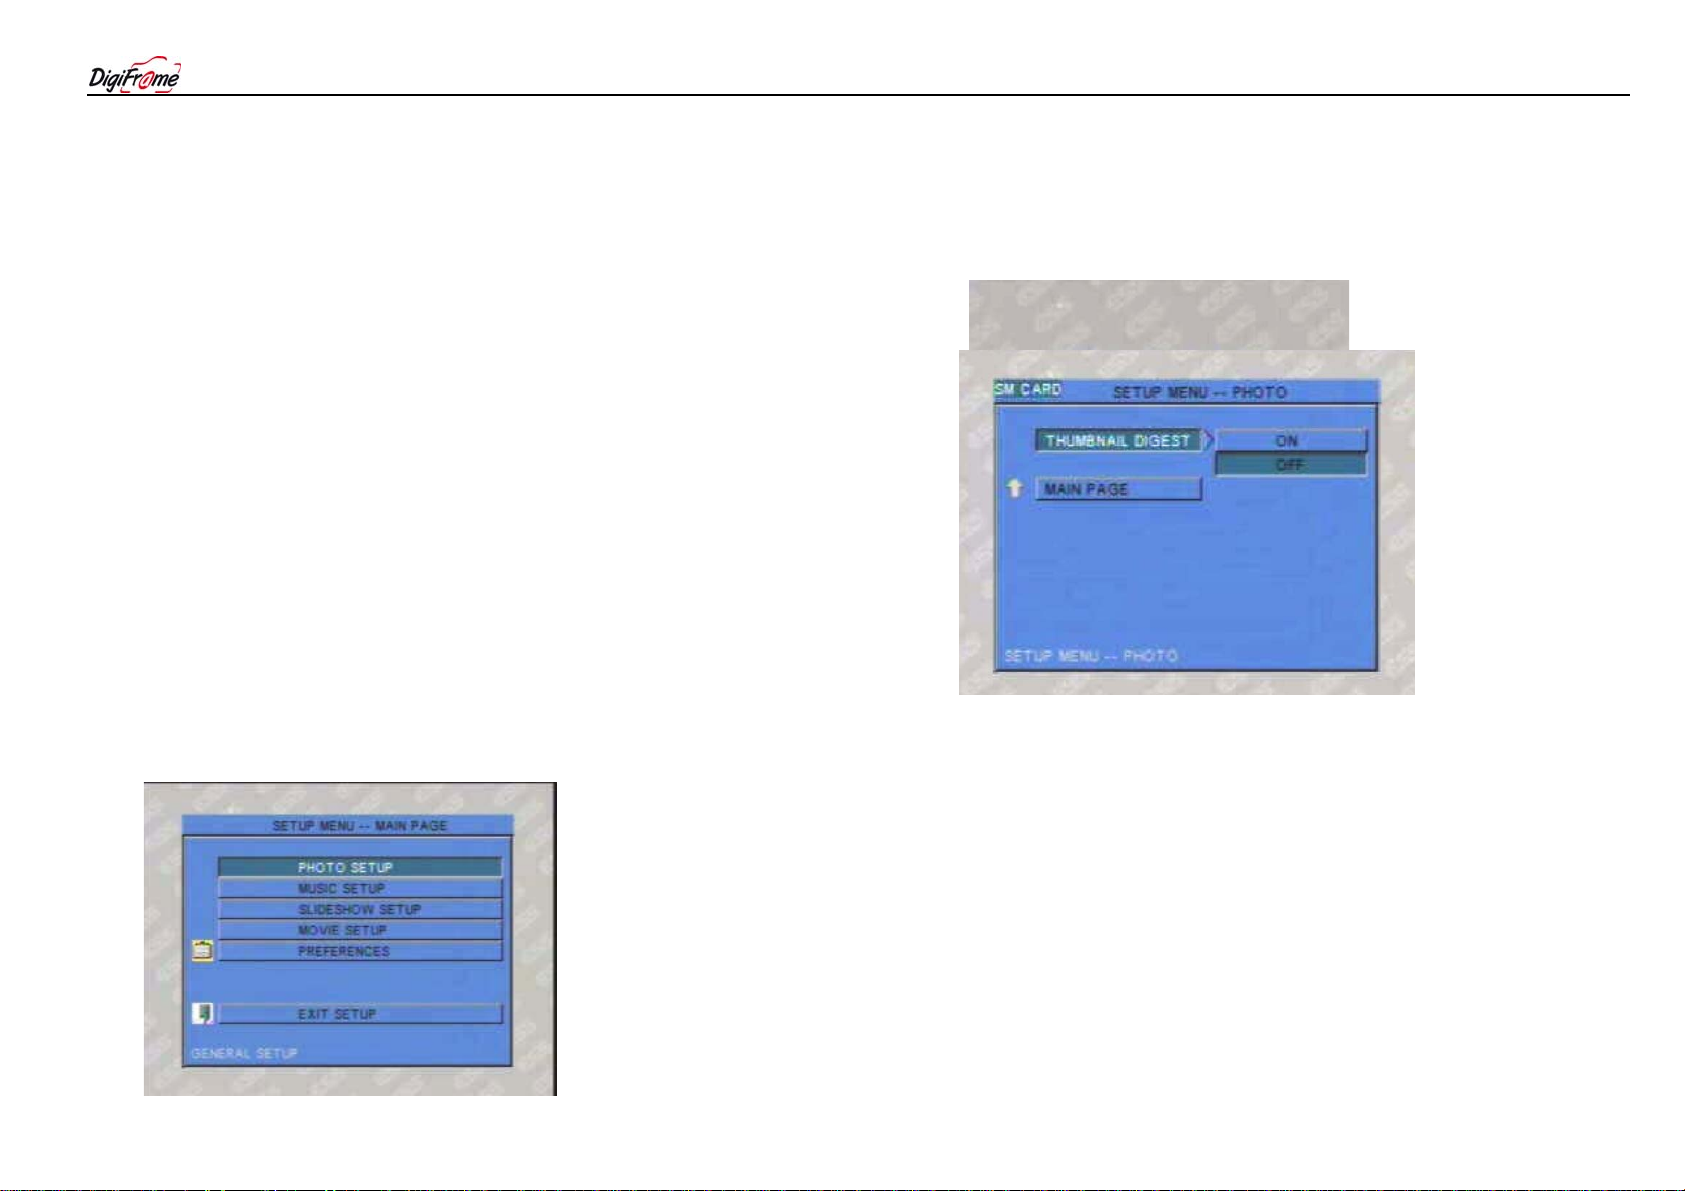
Setup Main Page
The Setup Main Page is shown below. Use the navigation buttons to
move up and down the options and press Enter to select. Please note “Preferences” is only available without a media card inserted.
Setup Main Screen
Photo Setup
The Photo Setup is illustrated in the following section.
Thumbnail Digest
The (photo) Thumbnail Digest Setup Screen is shown below. Use the
navigation buttons to move through the options and press Enter to select.
Thumbnail Digest Setup Screen
• Selecting ON will display the photo thumbnails using the original
thumbnail files created by the digital camera and stored within the memory
stick. This process will help to display thumbnails of large photos in a short
time. (Factory default mode)
• Selecting OFF will display the photo thumbnails by decoding the photo
and scaling down to fit into the display area allocated for the thumbnail. This
process may take a longer time if the photos are of high resolutions (big files).
Page 6

Music Setup
The Music Setup is illustrated in the following section.
Repeat Mode
The Repeat Mode Setup Screen is shown below. Use the navigation
buttons to move through the options and press Enter to select.
Repeat Mode Setup Screen
• Selecting ONE will repeat the highlighted music continuously, until the
Stop button is pressed.
• Selecting ALL will repeat all the music files in the music library
continuously, until the Stop button is pressed. (Factory default mode)
Slideshow Mode
The Slideshow Mode Setup Screen is shown below. Use the navigation
buttons to move through the options and press Enter to select.
Slideshow Setup Screen
• Selecting MANUAL will give full control of the photo slideshow timing to
the user. The user will need to use the navigation keys of the remote control to
scroll through the photos stored in the memory card. This will allow each photo
to be displayed as long as is desired.
• Selecting AUTO will make the photo slideshow start automatically after
displaying the photo thumbnails for about 10 seconds. (Factory default mode)
• Selecting OFF will disable the repeat feature. Music playback will start
from the highlighted music file through to the last music file found in the music
library and then stop.
(The Repeat button on the remote control can still provide the Repeat
feature if so desired)
Page 7

Folder Repeat
The Folder Repeat Setup Screen is shown below. Use the navigation
buttons to move through the options and press Enter to select.
Slideshow Setup Screen
• Selecting ON will turn on the repeat mode indefinitely, until the Stop
button is pressed. (Factory default mode)
• Selecting OFF will turn off the repeat mode. i.e. Your DigiFrame will
slideshow your photos only once and then stop.
Interval Time
The Interval Time Setup Screen is shown below. Use the navigation
buttons to move through the options and press Enter to select.
Interval Time Setup Screen
• You can set your DigiFrame to show each photo for 1, 3, 5, 10, 30 or 60
seconds by navigating to and pushing the enter key on the desired interval –
OR use the “Slide Transition” key on your remote during normal operation and
this will change the transition time “on screen”. Set to the desired transition
time and wait until the On Screen Display disappears. The selected Interval
time is now set.
7: Left to Right (roll)
Page 8
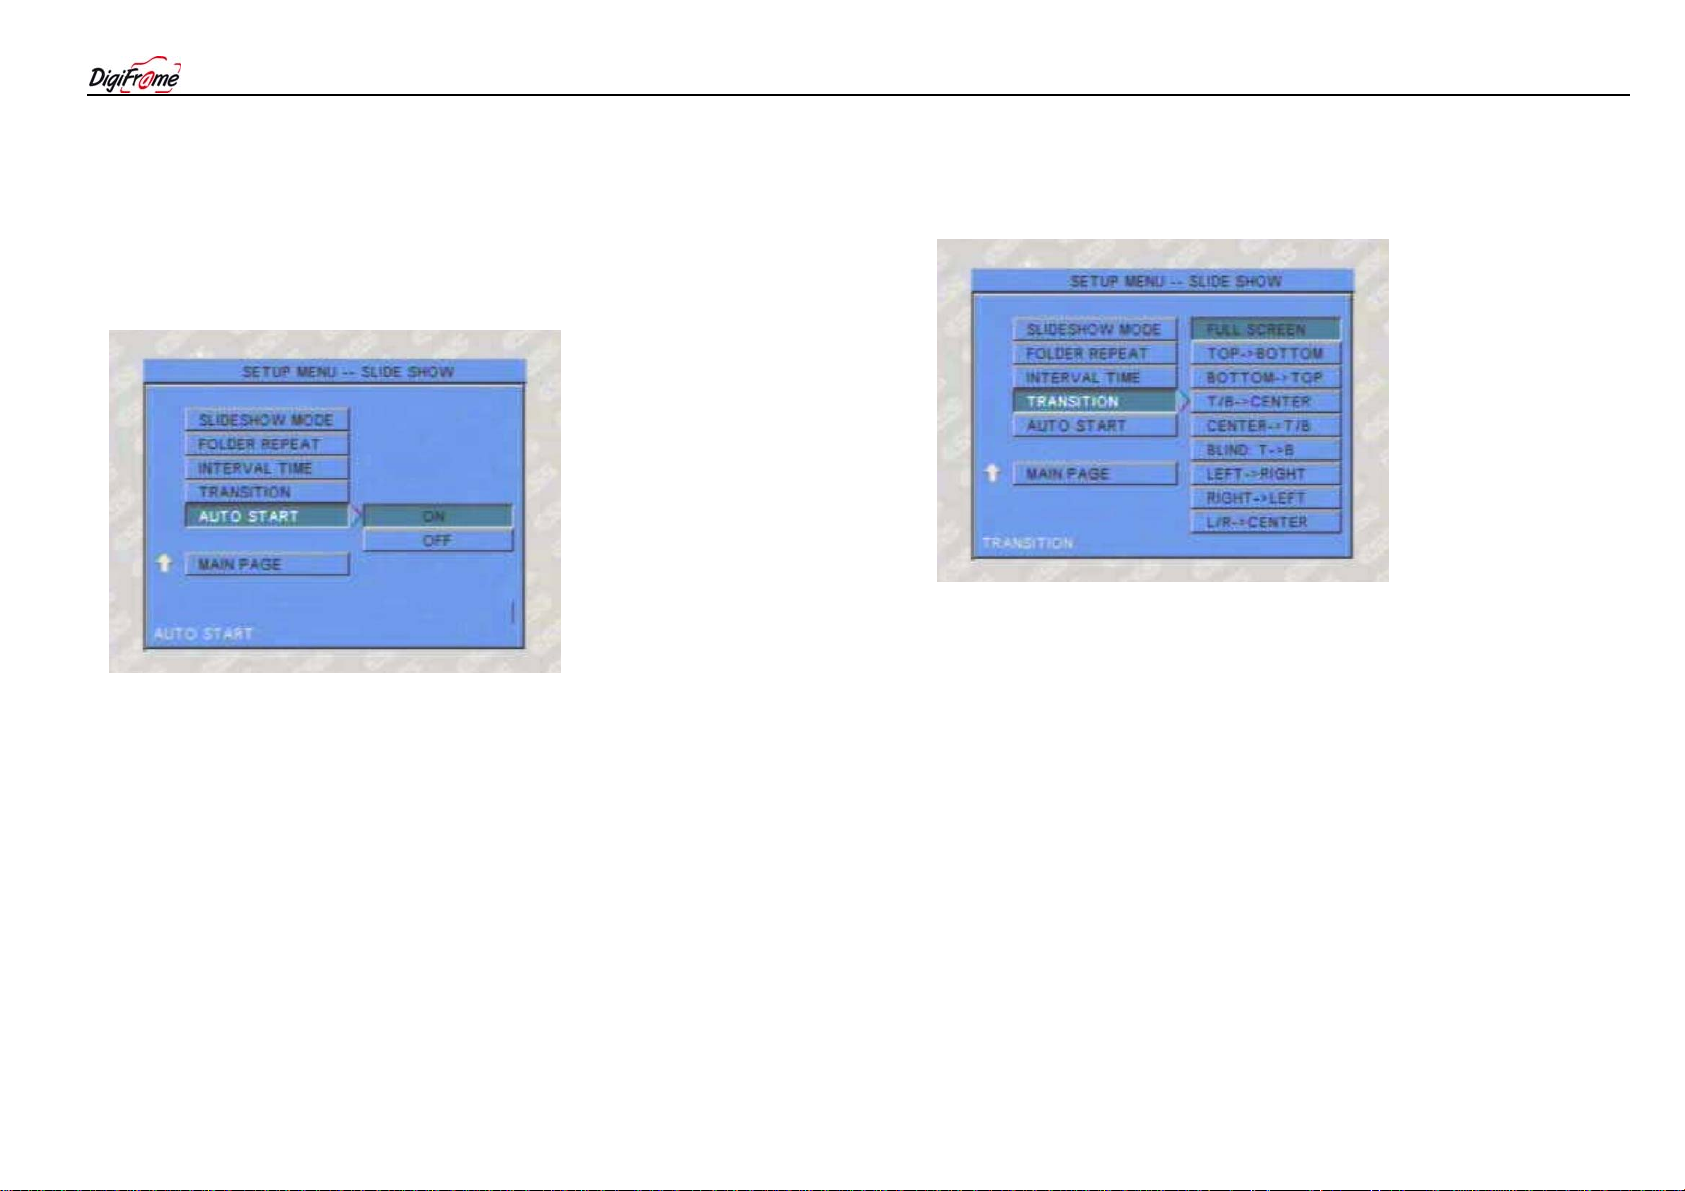
Transition Setup Page
The Transition Setup Screen is shown below. Use the navigation
buttons to move through the options and press Enter to select.
Transition Setup Screen
• Selecting FULL SCREEN will display the full photo in a full screen
(instant) transition. (Factory default mode)
• Selecting the other modes will display the photo using the transition
chosen.
The photo transition choices are:
1: Full Screen (instant) 7: Left to Right (roll)
2: Top to Bottom (roll) 8: Right to Left (roll)
3: Bottom to Top (roll) 9. Left/Right to Centre (Roll)
4: Top/Bottom to Center (roll) 10. Centre to Left/Right (Roll)
5: Center to Top/Bottom (roll) 11. Corners to Centre (Implode)
6: Top to Bottom (blind) 12. Left to Right (Blind)
13. Random (mixture of the above options)
Auto Start Setup Page
The Auto Start Setup Screen is shown below. Use the navigation
buttons to move through the options and press Enter to select.
Transition Setup Screen
• Selecting ON will start, after power on, the automatic playback of all the
photo, music, and video files found in the Memory card.
• Selecting OFF disables the automatic playback of all contents after
powering on the system. (Factory default mode)
Page 9

Movie Setup
The Movie Setup is illustrated in the following section.
Interval Time
The (Video Thumbnails) Interval Time Setup Screen is shown below. Use
the navigation buttons to move through the options and press Enter to select.
Interval Time Setup Screen
• Selecting FAST will display the video thumbnails at a faster rate, using the
first frame of each video as its thumbnails.
• Selecting NORMAL will display the video thumbnails with a three seconds
playback of the videos in QCIF mode. This takes a longer time to fill up the
thumbnail page.
Page 10

Video Output
The Video Output Setup Screen is shown below. Use the navigation
buttons to move through the options and press Enter to select.
Video Output Setup Screen
• Selecting S-VIDEO will output the video to Composite and S-Video.
(Factory default mode)
• Selecting YPBPR will output the video to Component video in
Progressive YUV mode. (ES6420FP only)
• Selecting RGB will output the video to VGA. (ES6420FP only)
OSD Language
The OSD Language Setup Screen is shown below. Use the navigation
buttons to move through the options and press Enter to select.
OSD Language Setup Screen
• Selecting ENGLISH will display the OSD in English. (Factory default
mode)
• Selecting CHINESE will display the OSD in Chinese.
• Selecting JAPANESE will display the OSD in Japanese.
Page 11

DEFAULTS
The Factory Default Setup Screen is shown below. Use the navigation
buttons to move through the menu options.
Use the RESET button to restore the factory default settings.
Default Setup Screen
Note: All setting changes are saved in the non-volatile EEPROM in the
system.
Digital Photo Display ——
The digital photo display is initiated in three ways: (1) only photos are
present in the device/card, (2) the Photo option was selected from the Multiple
Contents in Card screen, or (3) the Photo shortcut button on the remote control
was pressed.
In the digital photo display mode, the Photo Thumbnails Screen will
appear. All the photos found in the device/card will be displayed in continuous
pages of photo thumbnails.
If the device/card has more than one folder and you desire to view the
photos by folder, go to “File Library Management” for how to access individual
folders.
thumbnail page, and use the I<< and >>I buttons to jump to the previous or
next page of thumbnails.
Photo Show will start automatically after about ten (10) seconds.
all files at Power-Up would be in effect and the Photo Thumbnails Screen will
not be visible. To access the Photo Thumbnails Screen press “Photo” key on
your remote.
Use the navigation buttons to move through the thumbnails in the
If the Slideshow Mode option in the SETUP menu is set to AUTO, the
If the Auto Start option in the SETUP menu is set to ON, the playback of
Page 12

Photo Thumbnails Screen
• Press the ENTER button on the remote control to display the highlighted
thumbnail in full-screen. Once in full-screen, pressing the ENTER button again
will return to the Photo Thumbnails Screen.
• Press the PLAY/PAUSE button on the remote control to start the Photo
Show. Once in photo show, press PLAY/PAUSE button to pause or resume
the Photo Show; press the STOP button to return to the Photo Thumbnails
Screen.
• If so desired, press the DELAY button on the remote control to set a new
time delay of your choice for the display of the photos, different from the
settings in the SETUP menu.
• If so desired, press the REPEAT button on the remote control to set a new
repeat mode of your choice, different from the settings in the SETUP menu.
• Press the ROTATE button on the remote control to change the rotation of
a
photo. Not available when in Music Slideshow.
• Press the ZOOM button on the remote control to zoom-in the display by a
factor of 2X, 3X, and 4X. Pressing ZOOM once more will return the display to
its original state. While in the Zoom mode, use the navigation buttons to pan
the display Left, Right, Up, or Down. Not available when in Music Slideshow.
• Press the HOME button on the remote control to jump to the main level of
the DMP software application.
• Press the DISPLAY button on the remote control to view, by OSD, the
properties of the photo displayed on screen.
• Press the MUSIC button on the remote control to jump to the Music
Library Screen. If no music file is present, no action takes place.
• Press the VIDEO button on the remote control to jump to the Video
Thumbnails Screen. If no video file is present, no action takes place.
• Press the FILE button on the remote control to jump to the File
Management Screen.
• Press the PLAY/PAUSE button on the remote control to pause or resume
the music.
• Press the STOP button on the remote control to stop the music.
• If so desired, press the TRANSITION button on the remote control to set a
new photo display transition mode of your choice, different from the settings in
the SETUP menu.
• Press the M-SLIDE button on the remote control to initiate the Music
Slideshow. Music files must be present in order to have music; otherwise, it
will only be a Photo Show. Music Slideshow can be initiated either from the
Photo Thumbnails Screen or after the Photo Show has started.
Page 13

Digital Music Playback ——
The digital music playback is initiated in three ways: (1) only music files
are present in the device/card, (2) the Music option was selected from the
Multiple Contents in Card screen, or (3) the Music shortcut button on the
remote control was pressed.
In the digital music playback mode, the Music Library Screen will appear.
All the music files found in the device/card will be displayed in a continuous list
of music files. If the device/card has more than one folder and you desire to
playback the music files by folder, go to chapter six “File Library Management”
for how to access individual folders.
Use the navigation buttons to move through the music files. The
highlighted music starts to play automatically. Press STOP to stop the
playback.
If the Auto Start option in the SETUP menu is set to ON, the playback of
all files at power-up would be in effect and the Music Library Screen will not be
visible.
• If desired, press the REPEAT button on the remote control to set a new
repeat mode of your choice, different from the settings in the SETUP menu.
–REPEAT ALL: repeats all the files in the library sequentially
–REPEAT ONE: repeats the highlighted music only
–REPEAT OFF: music stops when the end of the library is reached.
• Press the M-SLIDE button on the remote control to initiate the Music
Slideshow. Photos must be present in order to have slideshow; otherwise,
it will only be music playback.
• Press the VOL button on the remote control to adjust the volume
• Press the MUTE button on the remote control to mute music.
• Press the HOME button on the remote control to jump to the main level of
the DMP application.
• Press the DISPLAY button on the remote control to display a Graphics
Equalizer to accompany the music playback. Pressing DISPLAY again will
hide it.
• Press the PHOTO button on the remote control to jump to the Photo
Thumbnails Screen. If no photo file is present, no action takes place.
• Press the VIDEO button on the remote control to jump to the Video
Thumbnails Screen. If no video file is present, no action takes place.
• Press the FILE button on the remote control to jump to the File
Music Library Screen
Management Screen.
Page 14

Digital Video Playback
The digital video playback is initiated in three ways: (1) only videos are
present in the device/card, (2) the Video option was selected from the Multiple
Contents in Card screen, or (3) the Video shortcut button on the remote control
was pressed.
In the digital video playback mode, the Video Thumbnails Screen will
appear. All the videos found in the device/card will be displayed in continuous
pages of video thumbnails.
If the device/card has more than one folder and you desire to view the
videos by folder, go to chapter six (6) “File Library Management” for how to
access individual folders.
Use the navigation buttons to move through the thumbnails in the
thumbnail page, and use the I<< and >>I buttons to jump to the previous or
next page of thumbnails.
If the Auto Start option in the SETUP menu is set to ON, the playback of
all files at Power-Up would be in effect and the Video Thumbnails Screen will
not be visible.
• Press the ENTER button on the remote control to playback the highlighted
thumbnail in full-screen. Once in full-screen, pressing the ENTER button again
will return to the Video Thumbnails Screen.
• Press the PLAY/PAUSE button on the remote control to start the Video
Show. Once in Video Show, press PLAY/PAUSE button to pause or resume
the Video Show.
. Press the STOP button to return to the Video Thumbnails Screen.
• Press the VOL button on the remote control to change the volume of the
video.
• Press the MUTE button on the remote control to mute video.
• Press the HOME button on the remote control to jump to the main level
of the DMP application.
• Press the DISPLAY button on the remote control to view, by OSD, the
properties of the video displayed on screen.
• Press the PHOTO button on the remote control to jump to the Photo
Thumbnails Screen. If no photo file is present, no action takes place.
• Press the MUSIC button on the remote control to jump to the Music
Library Screen. If no music file is present, no action takes place.
• Press the FILE button on the remote control to jump to the File
Management Screen.
Video Thumbnails Screen
Page 15

File Library Management
The File Library Management is initiated by either selecting File from
the “Multiple Contents in Card” screen or pressing the File shortcut
button on the remote control.
The File Library Management Screen will appear. Use the navigation
buttons to move through the thumbnails and press ENTER to select.
Devices
The Device Selection Screen is shown below. Use the navigation
buttons to move through the options and press ENTER to select.
File Library Management Screen
• Selecting DEVICES allows a user to switch to a different device/card.
• Selecting a photo folder (i.e. PHOTOS) allows a user to manage the
Photo Library.
• Selecting a music folder (i.e. MP3 MUSIC) allows a user to manage the
Music Library.
• Selecting a video folder (i.e. MOVIES) allows a user to manage the Video
Library.
Device Selection Screen
Page 16

Photos Library
The Photos Library Screen is shown below. Use the navigation buttons to
move through the photos. You will see a preview of each photo as well as its
file properties.
Music Library
The Music Library Screen is shown below. Use the navigation buttons to
move through the music files. The highlighted music starts to play
automatically with the file properties displayed.
Photos Library Screen
• Pressing ENTER on the remote control will start a Photo
Slideshow from the photo currently highlighted. While in the Photo
Slideshow, all features such as Delay, Repeat, Transition, Rotate,
Zoom, Pause, and Resume will work, and pressing ENTER or STOP
will return the display to the Photos Library Screen.
• Pressing ENTER on the remote control will start the playback of all the
music files beginning from the highlighted music file until the last music file in
the library, with a Graphics Equalizer display. While in music playback mode,
all the features such as Next, Previous, Pause, and Resume will work, and
pressing ENTER or STOP will return the display to the Music Library Screen.
Music Library Screen
Page 17

Videos Library
The Videos Library Screen is shown below. Use the navigation buttons to
move through the videos. You will see a preview of each video as well as its
file properties.
Video Library Screen
• Pressing ENTER on the remote control will start a Video file from the video
currently highlighted. While in the Video Show, all the features such as Next,
Previous, Pause, and Resume will work, and pressing ENTER or STOP will
return the display to the Video Library Screen.
 Loading...