

Page 1
Questions? See us on the World Wide Web at www_dewalt.corn
iNSTRUCTiON MANUAL
GUIDE D'UTILISATION
MANUAL DE INSTRUCCIONES
DW896
16-Gauge Nibbler
Grignoteuse de calibre 16
Cortadora de I_rnina calibre 16
INSTRUCTIVO DE OPERACION, CENTROS DE SERVICIO Y POLIZA
DE GARANTfA. ADVERTENCIA: LEASE ESTE INSTRUCTIVO ANTES
DE USAR EL PRODUCTO.
®
Page 2

IF YOU HAVE ANY QUESTIONS OR COMMENTS ABOUT THIS OR
ANY DEWALT TOOL, CALL US TOLL FREE AT:
I=800=4=DEWALT (1=800=433=9258)
PADDLE
SWITCH
I
PUNCH
Irnportaret Safety Instructiores
_ WARNING: When using electric tools, basic safety precautions
should always be followed to reduce risk of fire, electric shock,
and personal inju_ including the following:
READ A££ INSTRUCTIONS
Double Iresulation
Double insulated tools are constructed throughout with two separate
layers of electrical insulation or one double thickness of insulation
between you and the tool's electrical system. Tools built with this
insulation system are not intended to be grounded. As a result, your
tool is equipped with a two prong plug which permits you to use
extension cords without concern for maintaining a ground connection.
NOTE: Double insulation does not take the place of normal safety
precautions when operating this tool. The insulation system is for
added protection against injury resulting from a possible electrical
insulation failure within the tool.
.&CAUTION: WHEN SERVICING USE ONLY IDENTICAL
REPLACEMENT PARTS. Repair or replace damaged cords.
Polarized Plugs
Polarized plugs (one blade is wider than the other) are used on
equipment to reduce the risk of electric shock. When provided, this
plug will fit in the polarized outlet only one way. If the plug does not fit
fully into the outlet, reverse the plug. If it still does not fit, contact a
qualified electrician to install the proper outlet. Do not change the plug
in any way.
Safety Instructieres For All Tools
* KEEP WORKAREA CLEAN. Cluttered areas and benches invite
injuries.
* CONSIDER WORKAREA ENVIRONMENT. Don't expose power
tools to rain. Don't use power tools in damp or wet locations. Keep
work area weft fit. Do not use tool in presence of flammable liquids
or gases.
Page 3

* GUARD AGAINST ELECTRIC SHOCK. Prevent body contact
with grounded surfaces. For example; pipes, radiators, ranges, and
refrigerator enclosures.
* KEEP CHILDREN AWAY. Do not let visitors contact tool or
extension cord. Aft visitors should be kept away from work area.
* STORE IDLE TOOLS. When not in use, tools should be stored in
dry, and high or locked-up place -- out of reach of children.
* DON'T FORCE TOOL. It will do the job better and safer at the
rate for which # was intended.
* USE RIGHT TOOL. Don't force smafl tool or attachment to do the
job of a heavy-duty tool. Don't use tool for purpose not intended.
* DRESS PROPERLY. Do not wear loose clothing or jewelry. They
can be caught in moving parts. Rubber gloves and non-skid
footwear are recommended when working outdoors. Wear
protective hair covering to contain long hair.
* USE SAFETY GLASSES. Also use face or dust mask if operation
is dusty.
* DON'T ABUSE CORD. Never carry tool by cord or yank it to
disconnect from receptacle. Keep cord from heat, oil, and sharp
edges.
* SECURE WORK. Use clamps or a vise to hold work. It's safer than
using your hand and # frees both hands to operate tool.
* DON'T OVERREACH. Keep proper footing and balance at aft
times.
* MAiNTAiN TOOLS WITH CARE. Keep tools sharp and clean for
better and safer performance. Follow instructions for lubricating
and changing accessories. Inspect tool cords periodically and if
damaged, have repaired by authorized service facility. Inspect
extension cords periodically and replace if damaged. Keep
handles dry, clean, and free from oil and grease.
* DISCONNECT OR LOCK OFF TOOLS when not in use, before
servicing, and when changing accessories, such as blades, bits,
cutters.
REMOVE ADJUSTING KEYS AND WRENCHES. Form habit of
checking to see that keys and adjusting wrenches are removed
from tool before turning it on.
o
AVOID UNINTENTIONAL STARTING. Don't carry tool with finger
on switch. Be sure switch is off when plugging in.
o
EXTENSION CORDS. Use only 3-wire extension cords that have
3-prong grounding-type plugs and 3-pole receptacles that accept
the tool's plug. Replace or repair damaged cords. Make sure your
extension cord is in good condition. When using an extension cord,
be sure to use one heavy enough to carry the current your product
will draw. An undersized cord will cause a drop in line voltage
resulting in loss of power and overheating. The following table
shows the correct size to use depending on cord length and
nameplate ampere rating, ff in doubt, use the next heavier gage.
The smaller the gage number, the heavier the cord.
Volts
120V
240V
Ampere Rating
More Not more
Than Than
0 6
6 10
10 12
12 16
Minimum Gage for Cord Sets
Total Length of Cord in Feet
0-25 26-50 51-100 101-150
0-50 51-100 101-200 201-300
AWG
18 16 16 14
18 16 14 12
16 16 14 12
14 12 NotRecommended
OUTDOOR USE EXTENSION CORDS. When tool is used
outdoors, use only extension cords intended for use outdoors and
so marked.
o
STAY ALERT. Watch what you are doing. Use common sense.
Do not operate tool when you are tired.
o
CHECK DAMAGED PARTS. Before further use of the tool, a
guard or other part that is damaged should be carefully checked
to determine that it will operate properly and perform its intended
function. Check for alignment of moving parts, binding of moving
parts, breakage of parts, mounting, and any other conditions that
may affect its operation. A guard or other part that is damaged
should be properly repaired or replaced by an authorized service
center unless otherwise indicated elsewhere in this instruction
Page 4
manual.Havedefectiveswitchesreplacedbyauthorizedservice
center.Donotusetoolifswitchdoesnotturnitonandoff.
SAVE THESE INSTRUCTIONS
Motor
Your DEWALTtool is powered by a DEWALT built motor. Be sure your
power supply agrees with the nameplate marking. Voltage decrease of
more than 10% will cause loss of power and overheating. All DEWALT
tools are factory tested; if this tool does not operate, check the power
supply.
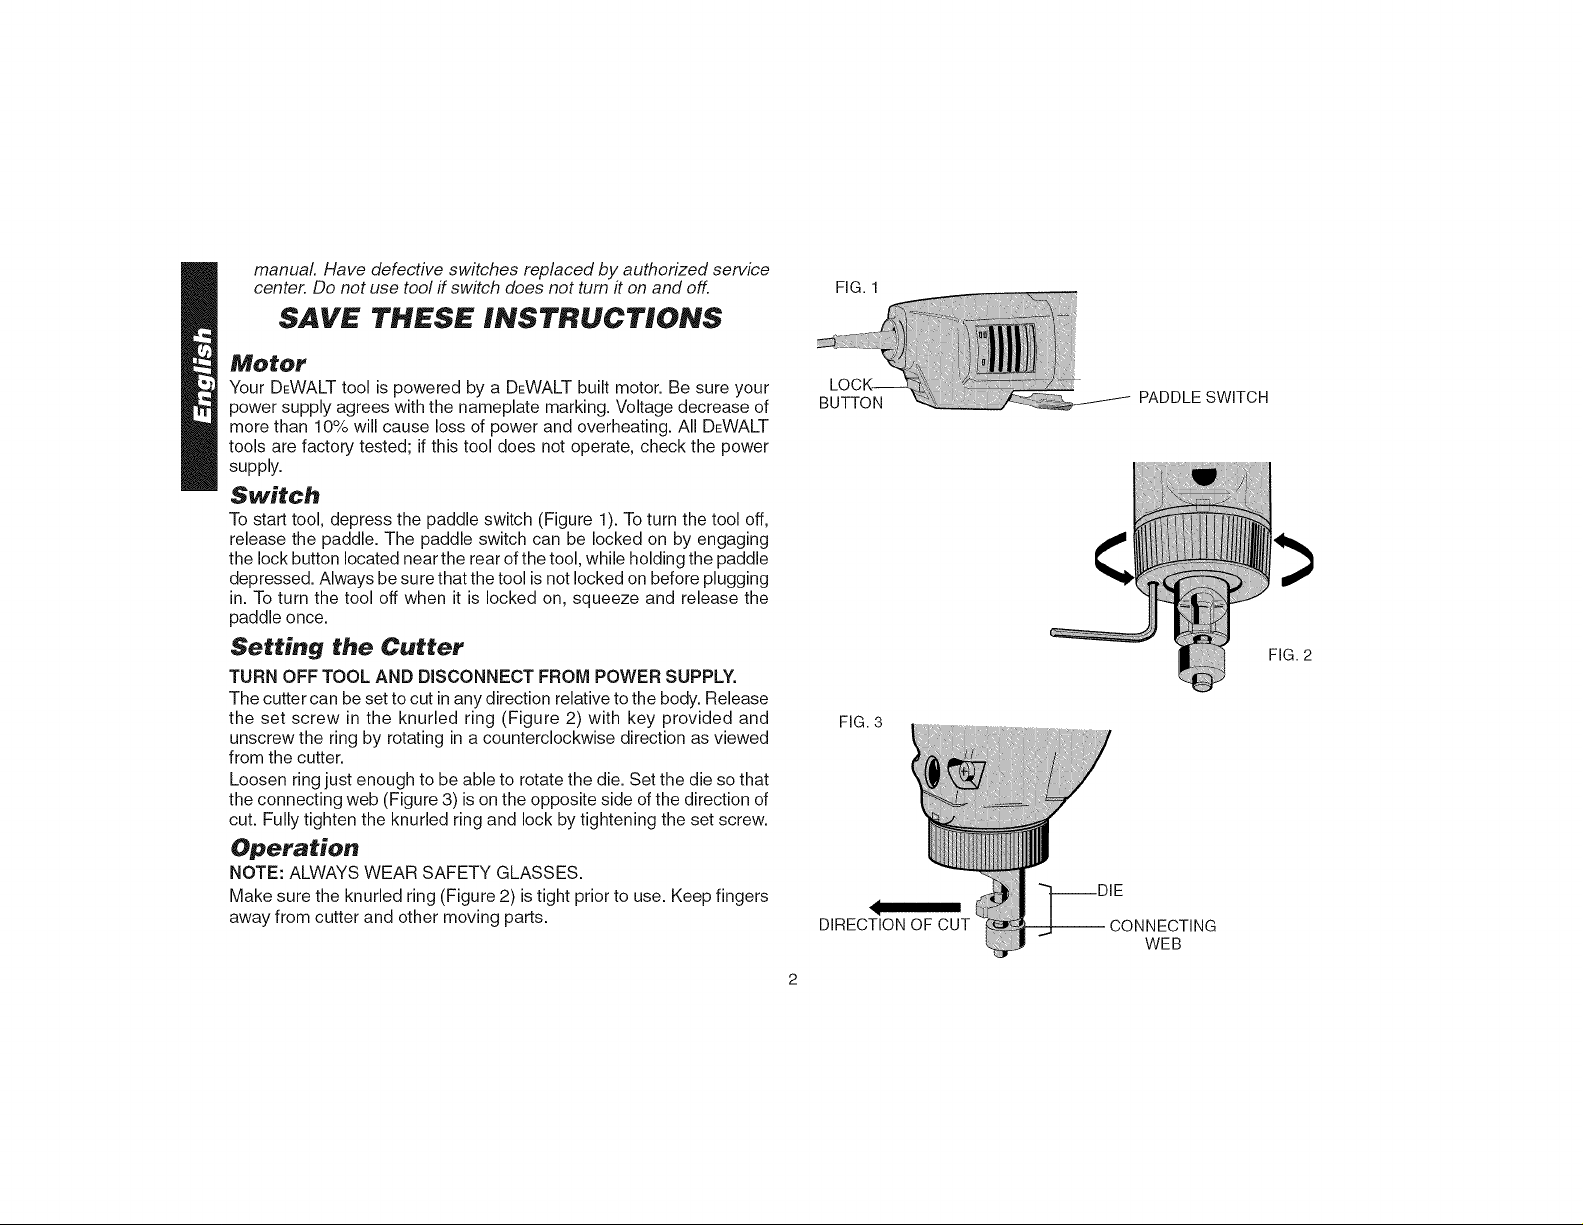
Switch
To start tool, depress the paddle switch (Figure 1). To turn the tool off,
release the paddle. The paddle switch can be locked on by engaging
the lock button located near the rear of the tool, while holding the paddle
depressed. Always be su rethat the tool is not locked on before plugging
in. To turn the tool off when it is locked on, squeeze and release the
paddle once.
Setting the Cutter
TURN OFF TOOL AND DISCONNECT FROM POWER SUPPLY.
The cutter can be set to cut in any direction relative to the body. Release
the set screw in the knurled ring (Figure 2) with key provided and
unscrew the ring by rotating in a counterclockwise direction as viewed
from the cutter.
Loosen ring just enough to be able to rotate the die. Set the die so that
the connecting web (Figure 3) is on the opposite side of the direction of
cut. Fully tighten the knurled ring and lock by tightening the set screw.
Operation
NOTE: ALWAYS WEAR SAFETY GLASSES.
Make sure the knurled ring (Figure 2) is tight prior to use. Keep fingers
away from cutter and other moving parts.
BUTTON
FIG. 3
DIRECTION OF CUT
---DIE
CONNECTING
PADDLE SWITCH
FIG. 2
WEB
Page 5

FIG.6
FIG.4
FIG.5
The nibbler cuts a slot in the work 6mm wide so remember to
compensate for this when marking out and calculating material
requirements.
When starting the cut from an edge, place the nibbler so the slot in the
die engages the work and the edge is against the punch, which is the
moving part when cutting (Figure 4).
Start the nibbler by depressing the paddle switch. Hold the body
parallel to the work surface.
Exert only enough forward pressure to start the nibbler cutting and
maintain this pressure. Extra pressure will not increase the rate of cut
as the amount of material removed at each cutting stroke is fixed and
the rate of cut is dependent only on the speed of the nibbler. The
cutting line of the work should be lightly coated with oil to lubricate the
punch and die while cutting.
NOTE: Punch and die should be lubricated by immersing in a good
quality cutting oil approximately every 30 feet of cutting.
When the cut is to be started or finished within the periphery of the
work, a 13mm (1/2") hole must first be drilled in the work at the start or
finish point. This enables the die to be entered or withdrawn as it is
larger in diameter than the slot being cut in the work (Figure 5).
Circular holes should be cut inthe manner shown in Figure 6, starting
at the 13mm (1/2") diameter hole within the circle.
Punch and Die Replacement
After a period of cutting, the punch will become blunted and require
replacement. At the same time, check the die for sharpness and replace
if necessary.
To remove the die, release the knurled ring (Figure 7). Having removed
the die, rotate the motor by turning the armature fan, accessible through
the side cooling slot, until the punch retaining nut is clear of the face of
the gearbox. With the spanner provided, release this nut
counterclockwise and remove the punch, Figure 8.Assemble in reverse
order.
Page 6

Keepyournibblerascleanaspossiblebywipingwithacleanclothand
occasionallyblowingairthroughit.
Cleaning
Blowing dust and grit out of the main housing by means of air hose is
recommended and may be done as often as dirt is seen collecting in
and around the ventilator vents. The motor should be running while air
is being blown into the air vents.
Lubrication
DEWALTtools are properly lubricated at the factory and are ready to
use. Tools should be relubricated regularly every 60 days to 6 months,
depending on usage. Tools used constantly on production or heavy-
duty jobs and tools exposed to heat may require more frequent
lubrication. This lubrication should only be attempted by trained power
tool repairmen such as those at DEWALTcertified service centers.
Motor Brushes
When the brushes on this tool become worn out, the tool will
automatically stop and prevent damage to the motor. Brush
replacement should be performed by DEWALT service centers.
Accessories
Recommended accessories for use with your tool are available at extra
cost from your distributor or local service center.
A CAUTION: The use of any non-recommended accessory may be
hazardous.
Repairs
To assure product SAFETY and RELIABILITY, repairs, maintenance
and adjustment (including brush inspection and replacement) should
be performed by authorized service centers or other qualified service
organizations, always using identical replacement parts.
Three Year Limited Warranty
DEWALTwill repair, without charge, any defects due to faulty materials
or workmanship for three years from the date of purchase. This
FiG. 7
DiE
KNURLED RiNG
I
FiG. 8
!
--PUNCH
Page 7

warranty does not cover part failure due to normal wear or tool abuse.
For further detail of warranty coverage and warranty repair information,
visit www.dewalt.com or call 1-800-4-DEWALT (1-800-433-9258). This
warranty does not apply to accessories or damage caused where
repairs have been made or attempted by others. This warranty gives
you specific legal rights and you may have other rights which vary in
certain states or provinces.
In addition to the warranty, DEWALT tools are covered by our:
1 YEAR FREE SERVICE
DEWALT will maintain the tool and replace worn parts caused by
normal use, for free, any time during the first year after purchase.
90 DAY MONEY BACK GUARANTEE
If you are not completely satisfied with the performance of your
DEWALT Power Tool, Laser, or Nailer for any reason, you can return it
within 90 days from the date of purchase with a receipt for a full refund
- no questions asked.
FREE WARNING LABEL REPLACEMENT: If your warning labels
become illegible or are missing, call 1-800-4-DEWALT for a free
replacement.
POUR TOUT RENSEIGNEMENT SUPPLE_MENTAIRE SUR CET
OUTIL OU TOUT AUTRE OUTIL DEWALT, COMPOSER SANS
FRAIS LE NUMI_RO:
1 800 4-DEWALT (1 800 433-9258)
IINTERRUPTEUR ,_
PALETTE
I
POINOON
Irnportantes rnesures de s_curit_
_ VERTISSEMENT : Afin de r6duire les risques d'incendie, de
secousses electriques oude blessures Iorsqu'on utilise des outils
61ectriques, il faut toujours respecter les mesures de securit6 suivantes.
LIRE TOUTES LES DIRECTIVES
Double isolation
Les outils & double isolation comportent deux couches distinctes
d'isolant 61ectrique ou une double _paisseur d'isolant qui prot_gent
I'utilisateur contre les risques de blessures provenant du syst_me
Page 8

61ectriquedeI'outil.Cesyst_mededoubleisolation_liminelebesoin
demettrelesoutils&laterre.Eneffet,I'outilestmunid'unefiche&
deuxbroches,cequipermetd'utiliserunerallongeordinairesansavoir
sesoucierd'assurerlamise&laterre.
NOTE:Ladoubleisolationnedispensepasdesmesuresdes6curit6
normalesIorsdeI'utilisationdeI'outil.Ellevise&procurerune
protectionsuppl_mentairecontrelesblessuresquepeutentrafner
uned_fectuosit_deI'isolant_lectriqueaI'int6rieurdeI'outil.
MISE EN GARDE : LORS DE L'ENTRETIEN, N'UTILISER QUE
DES PIE-CES DE RECHANGE IDENTIQUES. Reparer ou remplacer
les cordons endommages.
Fiche polaris_e
Afin de r_duire les risques de secousses _lectriques, I'outiiest muni
d'une fiche polaris6e (une lame plus large que I'autre). Ce genre de
fiche n'entre que d'une fa£on dans une prise polaris6e. Lorsqu'on ne
peut ins6rer la fiche a fond dans la prise, il faut tenter de le faire apr_s
avoir invers6 les lames de c6t& Si la fiche n'entre toujours pas dans
la prise, il faut communiquer avec un 61ectricien certifi& II ne faut en
aucun cas modifier la fiche.
Mesures de s_curif:_ pour tous les outiis
• BIEN DF:GAGER LA SURFACE DE TRAVAIL. Des surfaces et
des 6tab/is encombr6s peuvent _tre /a cause de b/essures.
• TENIR COMPTE DU MILIEU DE TRAVAIL. Prot6ger/es outi/s
6/ectriques de/a p/uie. Ne pas s'en servir clans des endroits humides
ou moui//6s. Bien 6c/alter/a surface de travail. Ne passe servir de
I'outi/ en pr6sence de/iquides ou de vapeurs inflammables.
• SE PROTEGER CONTRE LES SECOUSSES E:LECTRIQUES.
E-vitertout contact avec des objets mis a/a terre, comme des tuyaux,
radiateurs, cuisinibres, refrig6rateurs et autres objets du genre.
• E:LOIGNER LES ENFANTS. Tous/es visiteurs doivent _tre tenus
/'6cart de/'aire de travail et il faut /es emp_cher de toucher
I'outi/ ou au cordon de ra//onge.
• RANGER LES OUTILS INUTILISE:S. fl faut ranger/es outils clans
un endroit sec, situe en hauteur ou ferme a c/6, hors de/a portee
des enfants.
• NE JAMAIS FORCER L'OUTIL. Afin d'obtenir un rendement s_r
et efficace, uti/iser /'outi/ a son rendement nominal
• UTILISER L'OUTIL APPROPRIE:. Nejamais exiger d'un petit outi/
ou d'un accessoire /e rendement d'un outi/ de fabrication plus
robuste. Se servir de I'outil selon /'usage prevu;
• PORTER DES Vt:TEMENTS APPROPRIES. Eviter de porter des
v_tements amples et des bijoux qui peuvent _tre happes par les
pibces en mouvement. Porter des gants de caoutchouc et des
chaussures a semelle antid6rapante pour travailler a I'exterieur.
Prot6ger la chevelure si elle est Iongue.
• PORTER DES LUNETTES DE SECURITE:. Porter egalement un
masque respiratoire si le travail de coupe produit de la poussibre.
• NE PAS MANIPULER LE CORDON DE FA_ON ABUSIVE. hie
pas transporter I'outil par le cordon ni tirer sur ce demier pour le
d6brancher de la prise. Eloigner le cordon des sources de chaleur,
des flaques d'huile et des ar_tes tranchantes.
• ASSUJETTIR LA PIF=CE. Immobiliser la pibce a I'aide de brides
ou d'un _tau. On peut alors se servir des deux mains pour faire
fonctionner l'outil, ce qui est plus sot.
• NE PAS DEPASSER SA PORTEE. Toujours demeurer clans une
position stable et garder son _quilibre.
• PRENDRE SOIN DES OUTILS. Conserver les outils propres pour
qu'ils donnent un rendement superieur et sot. Suivre les directives
concernant la lubrification et le remplacement des accessoires.
Inspecter regulibrement le cordon de I'outil et le faire reparer au
besoin a un atelier d'entretien autorise. Inspecter regulibrement les
cordons de rallonge et les remplacer Iorsqu'ils sont endommages.
S'assurer que les poign_es sont toujours propres, seches et libres
de toute tache d'huile ou de graisse.
• DE:BRANCHER OU VERROUILLER EN POSITION HORS
TENSION LES OUTILS NON UTILISE:S. Respecter cette mesure
Iorsqu'on ne se sert pas de I'outil, ou qu'on doit le reparer ou en
changer un accessoire (comme une lame, un foret ou un couteau).
Page 9
ENLEVERLESCLE.SDERF=GLAGE.PrendreI'habitudede
v@rifiersi lescl@sder@glageont@t@retir@esavantdefaire
d@marrerI'outiL
E:VITERLESDF=MARRAGESACCIDENTELS.Nepaslaisserle
doigtsurI'interrupteurIorsqu'ontransporteI'outiLS'assurerque
I'interrupteurestalapositionhorscircuitIorsqu'onbrancheI'outiL
CORDONSDERALLONGE.S'assurerquelecordonderallonge
estenbon@tat.Lorsqu'onsesertd'uncordonderaflonge,
s'assurerqu'ilestdecalibreappropri@pourlatensionn@cessaire
aufonctionnementdeI'outiLL'utilisationd'uncordondecalibre
inf@rieuroccasionneunebaissedetensionentrMnantunepertede
puissanceetlasurchauffe.Letableausuivantindiquelecalibre
appropri@selonlaIongueurducordonetlesmentionsdelaplaque
signal@tiquedeI'outiLEncasdedoute,utiliseruncordondecalibre
sup@rieur.Le chiffreindiquantle cafibreest inversement
proportionnelaucalibreducordon.
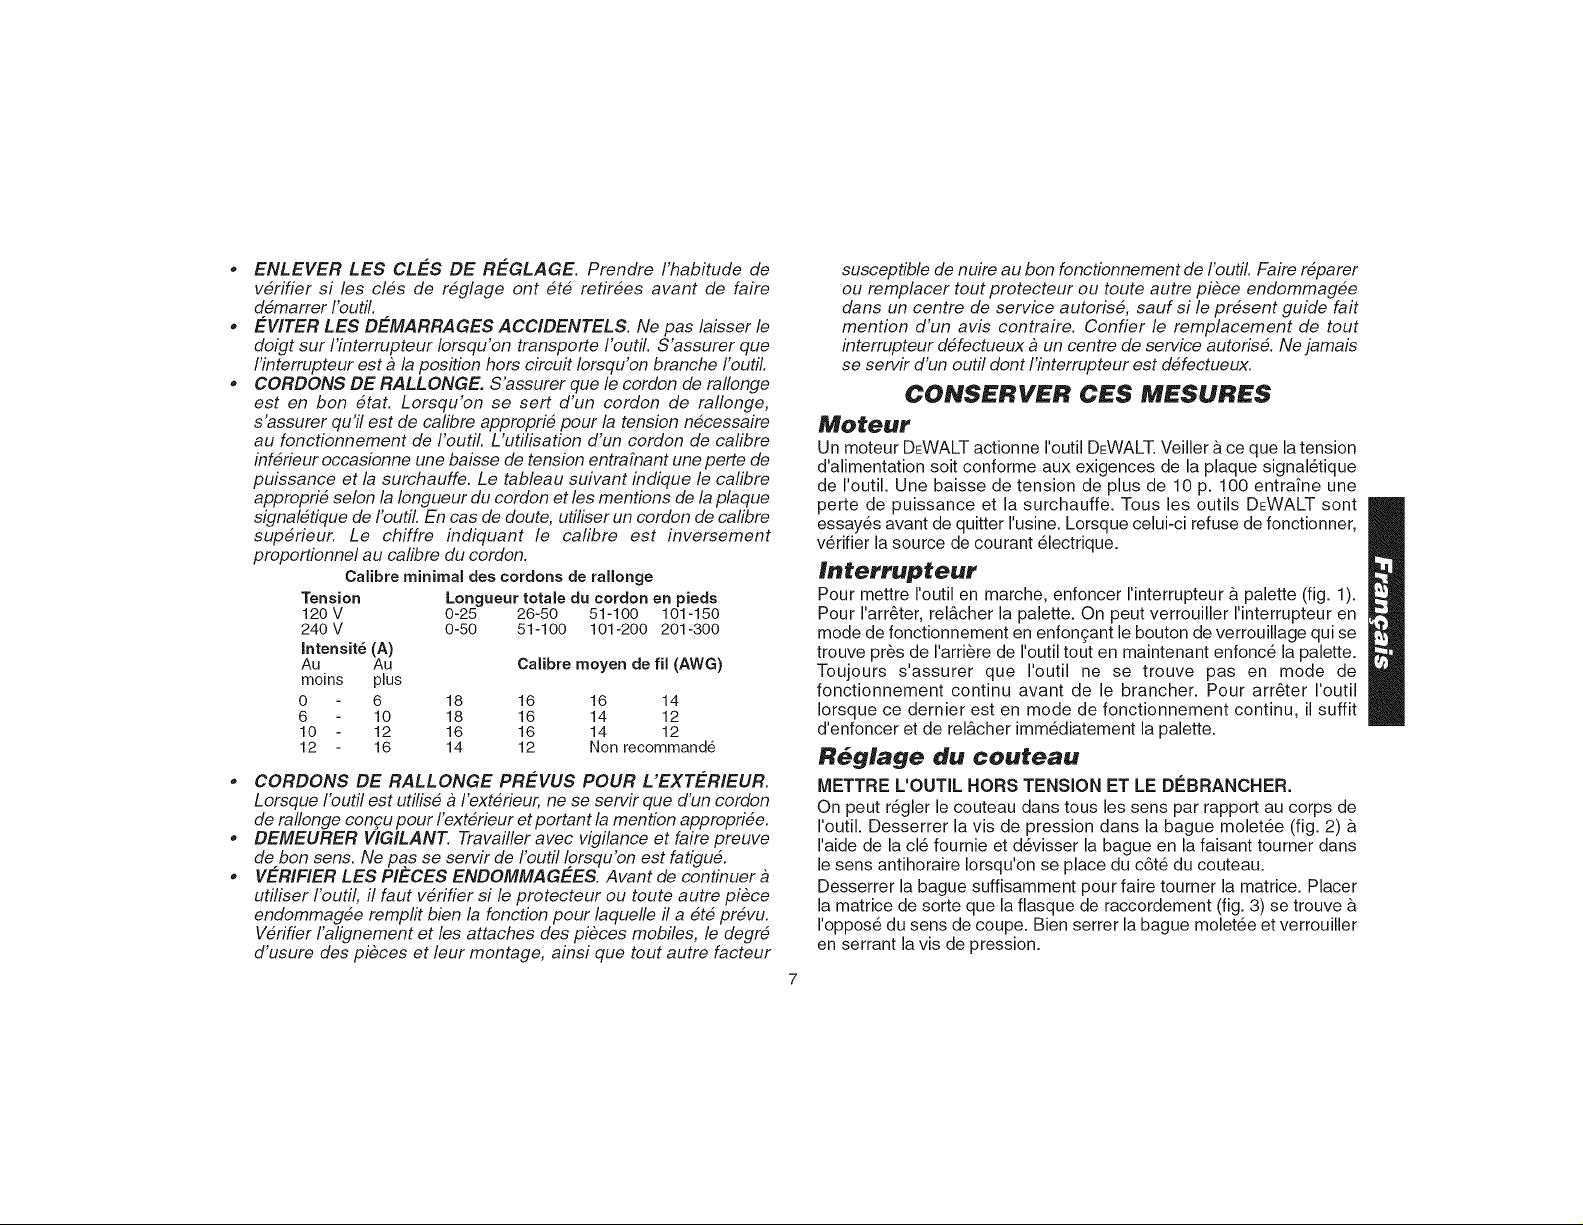
Calibre minimal des cordons derallonge
Tension
120 V
240 V
Intensit_ (A)
Au Au
moins plus
0 6
6 10
10 12
12 16
* CORDONS DE RALLONGE PRE:VUS POUR L'EXTt:RIEUR.
Lorsque Ibutil est utilis@a I'ext@rieur, ne se servir que d'un cordon
de rallonge congu pour I'ext@rieuret portant la mention appropri@e.
* DEMEURER VIGILANT. Travailler avec vigilance et faire preuve
de bon sens. Ne pa.s se servir de I'outil Iorsqu'on est fatigu6.
* VE.RIFIER LES PIECES ENDOMMAGEES. Avant de continuer
utiliser I'outil, fl faut v@rifier si le protecteur ou toute autre pi@ce
endommag@e rempfit bien la fonction pour laquelle il a @t@pr@vu.
V@rifierI'alignement et les attaches des pi@ces mobiles, le degr@
d'usure des pi@ces et leur montage, ainsi que tout autre facteur
Longueur totale du cordon en pieds
0-25 26-50 51-100 101-150
0-50 51-100 101-200 201-300
Calibre rnoyen de fil (AWG)
18 16 16 14
18 16 14 12
16 16 14 12
14 12 Non recommand@
susceptible de nuire au bon fonctionnement de IbutiL Faire r@parer
ou remplacer tout protecteur ou toute autre pi@ce endommag@e
clans un centre de service autoris@, sauf si le pr@sent guide fait
mention d'un avis contraire. Confier le remplacement de tout
interrupteur d@fectueux a un centre de service autoris@.Ne jamais
se servir d'un outil dont I'interrupteur est d@fectueux.
CONSERVER CES MESURES
Moteur
Un moteur DEWALT actionne I'outil DEWALT.Veiller & ce que latension
d'alimentation soit conforme aux exigences de la plaque signal@tique
de I'outil. Une baisse de tension de plus de 10 p. 100 entrafne une
perte de puissance et la surchauffe. Tousles outils DEWALT sont
essay@s avant de quitter I'usine. Lorsque celui-ci refuse de fonctionner,
v@rifierla source de courant @lectrique.
Interrupteur
Pour mettre I'outil en marche, enfoncer I'interrupteur & palette (fig. 1).
Pour I'arr@ter,rel&cher la palette. On peut verrouiller I'interrupteur en
mode de fonctionnement en enfongant le bouton de verrouillage qui se
trouve pr@sde I'arri_re de I'outil tout en maintenant enfonc@ la palette.
Toujours s'assurer que I'outil ne se trouve pas en mode de
fonctionnement continu avant de le brancher. Pour arr@ter I'outil
Iorsque ce dernier est en mode de fonctionnement continu, il suffit
d'enfoncer et de rel&cher imm@diatement la palette.
R_glage du couteau
METTRE L'OUTIL HORS TENSION ET LE DEBRANCHER.
On peut r@glerle couteau dans tousles sens par rapport au corps de
I'outil. Desserrer la vis de pression dans la bague molet@e (fig. 2)
I'aide de la cl@fournie et d@visser la bague en la faisant tourner dans
le sens antihoraire Iorsqu'on se place du c6t@du couteau.
Desserrer la bague suffisamment pour faire tourner la matrice. Placer
la matrice de sorte que la flasque de raccordement (fig. 3) se trouve
I'oppos@du sens de coupe. Bien serrer la bague molet@eet verrouiller
en serrant la vis de pression.
Page 10

Fonct ionnernent
NOTE : TOUJOURS PORTER DES LUNETTES DE SECURITt _.
S'assurer que la bague molet6e (fig. 2) est serr6e avant d'utiliser
I'outil. t_loigner les doigts du couteau et des autres pi_ces mobiles.
La grignoteuse coupe une fente de 6 mm de large dans le mat6riau.
IIfaut se rappeler de pr6voir cette fente lots du trac6 et des calculs.
Lorsque la coupe commence sur un rebord, placer la grignoteuse de
sorte que la fente de la matrice s'engage dans le mat6riau et que le
rebord repose contre le poin£on (la piece mobile Iors de lacoupe) (fig.
4).
Actionner la grignoteuse en enfon(2ant I'interrupteur & palette.
Maintenir le corps de I'outil parall_le &la surface de travail.
Exercer seulement la pression suffisante vers I'avant pour engager la
coupe, puis maintenir cette pression. Une pression excessive
n'augmente pas le taux de coupe puisque la quantit6 de mat6riau
enlev6e a chaque course est fixe et le taux de coupe d6pend
uniquement de la vitesse de la grignoteuse. II est conseill6 d'enduire
une mince pellicule d'huile sur la ligne de coupe afin de lubrifier le
poin£on et la matrice pendant la coupe.
NOTE : II faut lubrifier le poin£on et la matrice en les immergeant dans
de I'huile de bonne qualit6 apr_s environ chaque 9 m (30 pi) de coupe.
IIfaut d'abord percer un trou de 13 mm (1/2 po) au d6but ou a latin de
la coupe Iorsque celle-ci se fait en p6riph6rie de la piece a ouvrer. On
peut ainsi ins6rer ou retirer la matrice puisque celle-ci est plus large
que la fente coup6e autour de la piece (fig. 5).
Les trous circulaires doivent 6tre coup6s de la fa£on illustr6e a la
figure 6 en per£ant un trou d'un diam_tre de 13 mm (1/2 po) dans le
cercle.
Rernplacernent du poin_on et de la
rnatrice
Apr_s une ce_aine p6riode de coupe, le poin_on devient 6mouss6 et
ilfaut le remplacer. V6rifier en m6me temps I'aff_tage de la matrice et
la remplacer, le cas 6ch6ant.
FIG. 1
BOUTON DE
VERROUILLAGE
FIG. 3
SENS DE COUPE
J MATRICE
FLASQUE DE
RACCORDEMENT
INTERRUPTEUR
PALETTE
FIG. 2
Page 11

FIG.6
FIG.4
FIG.5
'UEDE
RACCORDEMENT
Pour retirer la matrice, d@gager la bague molet@e(fig. 7). Apr_s avoir
enlev@ la matrice, faire tourner le moteur en faisant tourner le
ventilateur de I'induit, accessible par la fente de ventilation lat@ale,
jusqu'& ce que I'@croude retenue du poin£on ne se trouve plus devant
le boftier des engrenages. ,g,I'aide de la cl@a fourche fournie, d@gager
I'@croudans le sens antihoraire et retirer le poin(2on(fig. 8). Remonter
dans I'ordre inverse.
S'assurer de la propret@ de la grignoteuse, dans la mesure du
possible, en I'essuyant avec un chiffon propre et y soufflant
occasionnellement de I'air par les orifices.
Nettoyage
II est conseill@ d'utiliser un boyau d'air comprim@ afin de chasser la
poussi@e et les salet@s du corps de I'outil. Effectuer cette tb,che d_s
I'apparition de salet@dans les @vents et autour de ceux-ci. Le moteur
de I'outil devrait fonctionner Iorsqu'on souffle de I'air dans les @ventsde
I'outil.
Lubrification
Les outils DEWALT sont bien lubrifi@sen usine et ils sont pr@s & servir.
IIfaut les lubrifier de nouveau r@guli@ement &tous les 60 jours & 6
mois, selon I'usage. Les outils utilis@sconstamment pour la production
ou des t&ches de service intensif ainsi que les outils expos@s & la
chaleur peuvent n@cessiter une lubrification plus fr@quente. Confier la
lubrification de I'outil seulement au personnel qualifi@ des centres de
service DEWALT.
Balais du rnoteur
Un syst_me arr@e automatiquement I'outil Iorsque les balais sont us@s
afin de ne pas endommager le moteur. II faut confier le remplacement
des balais au personnel
Accessoires
Les accessoires recommand@s pour I'outil sont vendus s@ar@ment
chez les d@aillants ou au centre de service autoris@de la r@gion.
i_,MISE EN GARDE : L'utilisation de tout accessoire non
recommand@ peut @tredangereuse.
Page 12

B_paraf:ions
Pour assurer la SECURIT¢: D'EMPLOI et la FIABILIT¢: de routil, n'en
confier la r6paration, I'entretien et les rajustements (y compris
I'inspection des balais) qu'a un centre de service ou a un atelier
d'entretien autoris6 n'utilisant que des pi_ces de rechange identiques.
Gararetie lirnit_ de trois ares
DEWALT r6parera, sans frais, tout produit d6fectueux caus6 par un
d6faut de mat6riel ou de fabrication pour une p6riode de trois ans
compter de la date d'achat. La pr6sente garantie ne couvre pas les
pi_ces dont la d6fectuosit6 a 6t6 caus6e par une usure normale ou
I'usage abusif de I'outil. Pour obtenir de plus amples renseignements
sur les pi_ces ou les r6parations couvertes par la pr6sente garantie,
visiter le site www.dewalt.com ou composer le 1 800 433-9258 (1 800
4-DEWALT). Cette garantie ne s'applique pas aux accessoires et ne
vise pas les dommages caus6s par des r6parations effectu6es par un
tiers. Cette garantie conf@e des droits 16gauxparticuliers a I'acheteur,
mais celui-ci pourrait aussi b6n6ficier d'autres droits variant d'un 6tat
ou d'une province a I'autre.
En plus de la pr6sente garantie, les outils DEWALT sont couverts par
notre :
CONTRAT D'ENTRETIEN GRATUIT D'UN AN
DEWALT entretiendra I'outil et remplacera les pi_ces us6es au cours
d'une utilisation normale et ce, gratuitement, pendant une p6riode d'un
an a compter de la date d'achat, et la
GARANTIE DE REMBOURSEMENT DE 90 JOURS
Si I'acheteur n'est pas enti@ement satisfait, pour quelque raison que
ce soit, du rendement de I'outil 61ectrique, du laser ou de la cloueuse
DEWALT,celui-ci peut le retoumer, accompagn6 d'un re,u, dans les 90
jours _,compter de la date d'achat, pour obtenir un remboursement
int6gral, sans aucun probl_me.
REMPLACEMENT GRATUIT DES I_TIQUETTES
D'AVERTISSEMENT : Si les 6tiquettes d'avertissement deviennent
illisibles ou sont perdues, composer le 1 800 4-DEWALT (1 800 433-
9258) pour obtenir un remplacement gratuit.
FIG. 7
-- BAGUE MOLETEE
MATRICE
I
I
lO
Page 13

INTERRUPTOR
DEPALETA
UEL
I
PUNZON
Instrucciorees irnportaretes de seguridad
_ ADVERTENClA: Es indispensable sujetarse alas precauciones
basicas de seguridad, con la finalidad de reducir el peligro de
incendio, choque el#ctrico y lesiones personales, en todas las
ocasiones en que se utilicen herramientas el#ctricas. Entre estas
precauciones se incluyen la siguientes:
LEA TODAS £AS INSTRUCCIONES
Doble aislamiento
Las herramientas doblemente aisladas se han elaborado de manera
integral con dos "capas" separadas, o una de DOBLE espesor, de
aislamiento el6ctrico entre usted y el sistema el_ctrico que contienen.
Las herramientas elaboradas con este sistema de aislamiento no
requieren conectarse a tierra. Como resultado, su unidad estb,
equipada con una clavija de dos patas que le permite emplear
cordones de extensi6n sin preocuparse por tener una conexi6n a
tierra.
NOTA: el doble aislamiento no substituye alas precauciones normales
de seguridad cuando se opera esta herramienta. La finalidad de este
sistema de aislamiento es ofrecer a usted proteccion a_adida contra la
lesi6n resultante de fallas en el aislamiento el6ctrico interno de la
unidad.
i¢ PRECAUCION: UTILICE SOLAMENTE REFACCIONES
IDENTICAS cuando se haga servicio a cualquier herramienta. Repare
o reemplace los cordones el6ctricos da#ados.
Clavija polarizada
Se emplean clavijas polarizadas (con una pata m_s ancha que la otra)
para reducir los riesgos de choque el6ctrico. Cuando el cord6n el_ctrico
cuente con este tipo de clavija, ajustarA en un contacto polarizado
solamente de una manera. Si la clavija no ajusta completamente en su
contacto, invi_rtala. Si a0n asi no ajusta, Ilame a un electricista
calificado para que le instale un contacto polarizado apropiado. No
modifique o haga cambios en la clavija por ning0n motivo.
Instrucciones de seguridad para todas
las herramieretas
* CONSERVE LIMPIA LA ZONA DE TRABAJO. Las superficies y
los bancos con objetos acumulados en desorden propician los
accidentes.
* OTORGUE PRIORIDAD AL AMBIENTE DE TRABAJO. No deje
las herramientas electricas expuestas a la Iluvia. No las utilice en
lugares inundados o mojados. Conserve bien iluminada lazona de
trabajo. No utilice la herramienta en presencia de liquidos o gases
inflamados.
* PROTEJASE CONTRA EL CHOQUE ELECTRICO. Evite el
contacto corporal con superficies aterrizadas, por ejemplo,
tuberfas, radiadores, antenas y gabinetes de refrigeracidn.
* CONSERVE APARTADOS A LOS NINOS. No permita que los
visitantes toquen las herramientas o los cables de extensidn. Los
visitantes deben estar alejados del area de trabajo.
11
Page 14
* GUARDE LAS HERRAMIENTAS QUE NO EMPLEE. Las
herramientas que no se est#n utilizando deben guardarse en un
lugar seco y elevado o bajo Ilave, fuera del alcance de los ni#os.
NO FUERCE LA NERRAMIENTA. Esta cumplir# su funci6n mejor y
con m#s seguridad a la velocidad y la presi6n para las que se dise#6.
EMPLEE LA HERRAMIENTA ADECUADA. No fuerce a una
herramienta peque#a o a sus dispositivos de montaje en un
trabajo de tipo pesado. No emplee la herramienta en una tarea
para la que no se dise#6.
* VISTASE DE LA MANERA ADECUADA. No tenga puestas ropas
o artfculos dejoyerfa flojos, pues podrfan quedar atrapados pot las
partes m6viles de las herramientas. Se recomienda el empleo de
guantes de caucho y calzado antiderrapante cuando se trabaja al
aire libre. C#brase bien la cabeza para sujetarse el pelo si Io tiene
largo.
* COLOQUESE ANTEOJOS DE SEGURIDAD. P6ngase tambi@n
una mascarilla contra el polvo si Io produce la operaci6n de corte
que va a efectuar.
* TENGA MUCHO CUIDADO CON EL CORDON ELECTRICO.
Nunca levante la herramienta pot el cord6n ni tire de @ste para
desconectarlo del enchufe. Apbrtelo del calor y los objetos
calientes, las sustancias grasosas y los hordes cortantes.
* SUJETE FIRMEMENTE LOS OBJETOS SOBRE LOS QUE
TRABAJE. Utilice prensas o tornillos de banco para sujetar bien
los objetos sobre los que va a trabajar. Esto ofrece mayor
seguridad que sujetar los objetos con la mano, y ademas deja
libres ambas manos para operar la herramienta.
* NO SALGA DE EQUILIBRIO. Conserve en todo momento bien
apoyados los pies, Io mismo que el equilibrio.
* CUIDE BIEN SUS HERRAMIENTAS. Conserve sus herramientas
bien afiladas y limpias para que funcionen mejor y con mayor
seguridad. Obedezca las instrucciones de lubricaci6n y cambio
de accesorios. Inspeccione los cordones el@ctricos con frecuencia
y, si los encuentra da#ados, hagalos cambiar o reparar en un
centro de servicio autorizado. Revise tambi@n con frecuencia las
extensiones el@ctricasy reemplacelas si estan da#adas. Conserve
los mangos secos, limpios y libres de aceites y grasas.
DESCONECTE LAS NERRAMIENTAS. Hagalo cuando no las
emplee, antes de darles servicio y cuando vaya a cambiarles
accesorios como seguetas, discos, brocas y otros dispositivos de
corte.
RETIRE LAS LLAVES DE AJUSTE Y DE TUERCAS. Adquiera
el habito de asegurarse de que se hart retirado /as flaves de ajuste
de la herramienta antes de accionarla.
EVITE QUE LA HERRAMIENTA SE ACCIONE
ACCIDENTALMENTE. Nunca sostenga una herramienta con el
dedo en el interruptor si se encuentra conectada a la corriente
el@ctrica. Aseg#rese que el interruptor esta en la posici6n de
"apagado" antes de conectarla.
CORDONES DE EXTENSION. Aseg#rese que su extensi6n est@
en buenas condiciones. Cuando utifice un cord6n de extensi6n,
aseg#rese de emplear uno con el calibre suficiente para soportar
la corriente necesaria para su producto. Una extensi6n con calibre
menor al necesario causara una cafda en el voltaje de la Ifnea,
resultando en p@rdida de potencia y sobrecalentamiento. El
cuadro siguiente muestra los calibres correctos para usarse de
acuerdo con la Iongitudde la extensi6n y el amperaje especificado.
Si tiene dudas, utilice el cafibre siguiente, m#s pesado. Cuanto
mas peque#o el n#mero de calibre del alambre, mayor la
capacidad del cable.
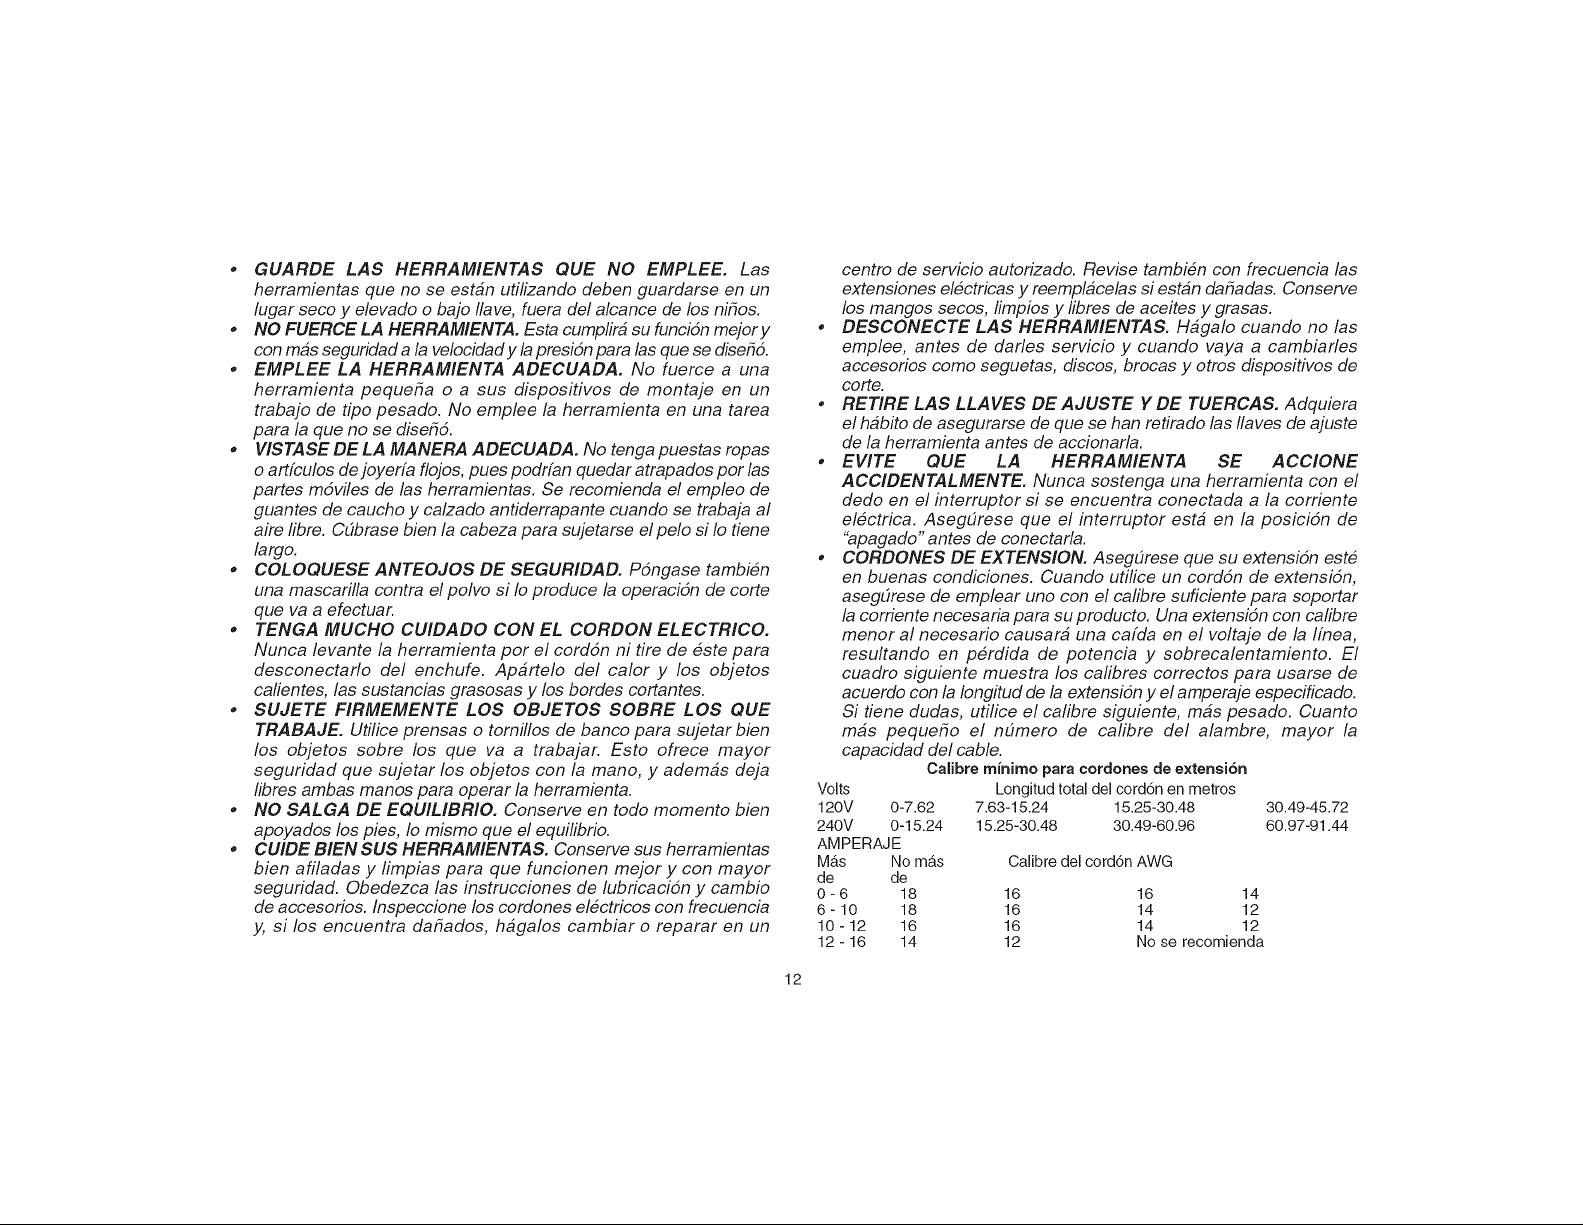
Calibre minimo paracordonesde extensi6n
Volts
120V 0-7.62
240V 0-15.24
AMPERAJE
Mb,s No mb,s
de de
0-6 18
6-10 18
10-12 16
12-16 14
Longitud total del cord6n en metros
7.63-15.24 15.25-30.48 30.49-45.72
15.25-30.48 30.49-60.96 60.97-91.44
Calibre del cord6n AWG
16 16 14
16 14 12
16 14 12
12 No se recomienda
12
Page 15

CORDONES DE EXTENSION PARA INTEMPERIE. Cuando
trabaje a la intemperie, utilice siempre cordones de extensidn
dise#ados exclusivamente para esta finalidad.
NO SE DISTRAIGA. Concentrese en Io que esta haciendo.
Recurra al sentido com#n. No opere ninguna herramienta si se
encuentra fatigado.
VERIFIQUE LAS PARTES DAI_IADAS. Antes de seguir
empleando cualquier herramienta, es indispensable verificar con
mucho cuidado que las guardas u otras partes da#adas puedan
operar de la manera adecuada para cumplir con su funci6n.
Verifique la afineaci6n de las partes m6viles, la firmeza con que
deben encontrarse sujetas en sus montaduras, las partes rotas,
las propias montaduras y cualesquiera otros detalles que pudieran
afectar a la operaci6n de la herramienta. Las guardas y las otras
partes que se encuentren da#adas deberan repararse bien o
cambiarse en un centro de servicio autorizado, a menos que se
diga otra cosa en el manual de/usuario. Haga que se cambien los
interruptores da#ados en un centro de servicio autorizado. No
emplee ninguna herramienta que tenga inutilizado o estropeado
el interruptor.
CONSERVE ESTAS INSTRUCCiONES
Motor
Su herramienta DEWALT.funciona con un motor DEWALT.integrado.
AsegOrese que la alimentaci6n de corriente concuerde con la
seSalada en la placa de identificaci6n. Disminuciones en el voltaje
mayores a 10% causara p6rdida de potencia y sobrecalentamiento.
Las herramientas DEWALT.se prueban en la f_,brica; siesta
herramienta no funciona, revise la alimentaci6n de corriente.
Interruptor
Oprima el interruptor de paleta para encender la herramienta (figura 1),
su61telo para apagarla. El interruptor de paleta se puede asegurar en
posici6n de encendido activando el bot6n de encendido permanente
que se encuentra cerca de la parte posterior de la herramienta, al
mismo tiempo que se conserva el interruptor de paleta oprimido.
AsegOrese siempre que la herramienta no tenga activado el
mecanismo de encendido permanente antes de conectarla. Para
apagar la unidad cuando este mecanismo est,. activado, oprima y
libere la paleta una vez.
Ajuste de la cortadora
APAGUE LA HERRAMIENTA Y DESCONECTELA DE LA TOMA
DE CORRIENTE.
La cuchilla se puede ajustar en cualquier direcci6n en relaci6n con el
cuerpo. Saque el pfisionero del anillo moleteado (figura 2) con la Ilave
provista y desenrosque el anillo girandolo en sentido contrario alas
manecillas del reloj, visto desde lacuchilla.
Afloje el anillo Io suficiente para que alcance a girar eltroquel. Coloque
el troquel de manera que la conexiSn (figura 3) quede del lado opuesto
a la direcci6n de corte. Apriete bien el anillo moleteado y asegSrelo
apretando el prisionero.
Operaci6n
NOTA: UTILICE SIEMPRE GAFAS DE SEGURIDAD.
AsegOrese que el anillo moleteado (figura 2) est6 apretado antes de
usar la unidad. Conserve los dedos alejados de la cuchilla y otras
piezas m6viles.
La unidad corta una ranura en la pieza de trabajo de 6 mm de ancho,
asi que recuerde compensar esto cuando marque y calcule sus
requerimientos de material.
Cuando inicie el corte desde un borde, coloque lacortadora de manera
que la ranura del troquel se enganche con lapieza de trabajo y el borde
quede contra elpunz6n, que el lapieza m6vil al cortar (figura 4).
Encienda la herramienta oprimiendo el interruptor de paleta. Sujete el
cuerpo en paralelo a lasuperficie de trabajo.
Ejerza Onicamente la presi6n hacia delante suficiente para que la
herramienta inicie el corte y cons6rvela asi. La presi6n adicional no
incrementar_, la velocidad de corte, ya que la cantidad de material
removido en cada corte es fija y depende Onicamente de la velocidad
13
Page 16

delacortadora.Lalineadecorteenlapiezadetrabajodeberecubrirse
ligeramenteconaceiteparalubricarelpunz6nyeltroquelduranteel
corte.
NOTA:Elpunz6nyeltroqueldebenlubricarsesumergi_ndolosen
aceiteparacortedebuenacalidadaproximadamentecada9metros
decorte.
Cuandosevayaainiciaroaterminarelcortecentrodelaperiferiadel
trabajo,dedebeperforarprimerounorificiode13mmenesepunto
Estopermitealtroquelentrarosaliryaqueesmayorendi_.metroque
laranuraqueproduceenlapiezadetrabajo(fig.5).
Losorificioscircularesdebencortarsecomosemuestraenlafigura6,
iniciandoenlaperforaci6nde13mmquesehizodentrodelcirculo.
Reernplazo del punz6n y el troquel
Despu6s de un periodo de corte, el punz6n quedar_, romo y deber_
cambiarse. AI mismo tiempo, verifique el filo del troquel y reempl_.celo
en caso necesario.
Para sacar el troquel, afloje el anillo moleteado (figura 7). Despu6s de
quitar el troquel, gire el motor ayudAndose el ventilador, accesible a
trav6s de la ranura de ventilaci6n, hasta que la tuerca de retenci6n del
punz6n est_ libre de la caja de engranes. Con la Ilave provista, afloje
esta tuerca en sentido opuesto a las manecillas del reloj y saque el
punz6n, figura 8. Ensamble inviertiendo el orden de estos pasos.
Conserve su cortadora tan limpia como sea posible frot_.ndola con un
trapo limpio y soplete_.ndola de vez en cuando.
Lirnpieza
Se recomienda sopletear el polvo y la mugre de la carcaza principal
con aire comprimido, este procedimiento se puede Ilevar a cabo tan
frecuente como se note que se acumula la mugre alrededor de la
rejillas de ventilaci6n. El motor debe funcionar mientras se sopletean
las ventilas.
LubHcaci6n
Las herramientas DEWALT.se lubrican apropiadamente en la f_brica y
estan listas para usarse. Las herramientas deben lubricarse
FIG. 1
BOTON
ENCENDIDO
FIG. 3
iUEL
DIRECCION DE
CORTE
14
INTERRUPTOR
DE PALETA
FIG. 2
Page 17

FIG.6
FIG.4
FIG.5
regularmente cada 60 dias a 6 meses, depende de su uso. Las
herramientas que se emplean constantemente en producci6n o en
trabajos pesados y las que se exponen al calor pueden requerir
lubricaci6n m_s frecuente. Esta lubricaci6n solamente debe realizarla
personal entrenado como el de los centros de servicio certificados
DEWALT.
Carbones del motor
Cuando los carbones del motor se hayan desgastado, la herramienta
se apagar_ automAticamente para evitar da_os al motor. El cambio de
carbones debe efectuarse [_nicamente en centros de servicio DEWALT.
Reparaciones
Para garantizar la SEGURIDAD y la CONFIABILIDAD, deber_.n
hacerse reparaciones, mantenimiento y ajustes de esta herramienta
en los centros autorizados de servicio DEWALT u otras organizaciones
autorizadas. Estas organizaciones prestan servicio a las herramientas
DEWALTy emplean siempre refacciones legitimas DEWALT.
P61iza de Gararetia
IDENTIFICACION DEL PRODUCTO:
Sello o firma del Distribuidor.
Nombre del producto: Mod./Cat.:
Marca: NOra.de serie:
(Datos para set Ilenados por el distribuidor)
Fecha de compra y/o entrega del producto:
Nombre y domicilio del distribuidor donde se adquiri6 el producto:
Este producto esta garantizado por un a_o a partir de la fecha de
entrega, contra cualquier defecto en su funcionamiento, asi como en
materiales y mano de obra empleados para su fabricaci6n. Nuestra
garantia incluye la reparaci6n o reposici6n del producto y/o
componentes sin cargo alguno para el cliente, incluyendo mano de
obra, asi como los gastos de transportaci6n razonablemente erogados
derivados del cumplimiento de este certificado.
15
Page 18

ParahacerefectivaestagaranfiadeberApresentarsuherramienta
y estap61izaselladaporel establecimientocomercialdondese
adquiri6elproducto,denocontarcon6sta,bastarAlafacturade
compra.
EXCEPClONES.
EstagarantianoserAv&lidaenlossiguientescasos:
• Cuandoel productosehubieseutilizadoencondiciones
distintasalasnormales;
• Cuandoelproductonohubiesesidooperadodeacuerdoconel
instructivodeusoqueseacompaSa;
• Cuandoelproductohubiesesidoalteradooreparadopor
personasdistintasalasenlistadasalfinaldeestecertificado.
AnexoencontrarAunarelaci6ndesucursalesdeserviciodefAbrica,
centrosdeservicioautorizadosy franquiciadosenlaRepOblica
Mexicana,dondepodrahacerefectivasugarantiayadquirirpartes,
refaccionesyaccesoriosoriginales.
Garantia lirnitada per tres a_os
DEWALT repararA, sin cargo, cualquier falla que surja de defectos en
el material o la fabricaci6n del producto, pot hasta tres aSos a contar
de la fecha de compra. Esta garantia no cubre fallas de las piezas
causadas por su desgaste normal o abuso a la herramienta. Para
mayores detalles sobre la cobertura de la garantia e informaci6n
acerca de reparaciones realizadas bajo garantia, visitenos en
www.dewalt.com o IIAmenos al 1 800 433-9258 (1-800-4-DEWALT).
Esta garantia no aplica a accesorios o a daSos causados por
reparaciones realizadas o intentadas pot terceros. Esta garantia le
otorga derechos legales especificos, ademAs de los cuales puede
tenet otros dependiendo del estado o provincia en que se encuentre.
AdemAs de la garantia, las herramientas DEWALT estAn cubiertas por:
1 ANO DE SERVlClO GRATUITO
DEWALTmantendrA la herramienta y reemplazarA las piezas gastadas
por su uso normal, sin cobro, en cualquier momento durante un ago a
contar de la fecha de compra.
FIG. 7
MOLETEADO
FIG. 8
TROQUELDIE_
!
!
GARANT|A DE REEMBOLSO DE SU DINERO POR 90 DiAS
Si no esta completamente satisfecho con el desempeSo de su
mAquina herramienta, laser o clavadora DEWALT, cualquiera sea el
motivo, podrA devolverlo hasta 90 dias de la fecha de compra con su
recibo y obtener el reembolso completo de su dinero - sin necesidad
de responder a ninguna pregunta.
SUSTITUClON GRATUITA DE LAS ETIQUETAS DE
ADVERTENClA: Si las etiquetas de advertencia se vuelven ilegibles
o se pierden, Ilame al 1-800-4-DEWALT para conseguir gratuitamente
otras de repuesto.
16
Page 19

PARA REPARACION Y SERVIClO DE SUS HERRAMIENTAS
ELECTRICAS, FAVOR DE DIRIGIRSE AL CENTRO DE
SERVICIO IVlAS CERCANO
CUUACAN, SIN
Av. Nicolb,s Bravo #1063 Sur - Col. industrial Bravo (667) 7 12 42 11
GUADALAJARA, JAL
Av. La Paz #1779 - Col. Americana Sector Juarez (33) 3825 6978
MEXICO, D.E
Eje Central Lb,zaro Cardenas No. 18 (55) 5588 9377
Local D, Col. Obrera
MERIDA, YUC
Calie 63 #459-A - Col. Centro (999) 928 5038
MONTERREY, N.L.
Av. Francisco J.Madero No.831 - Col. Centro (81) 8375 2313
PUEBLA, PUE
17 Notre #205 - Col. Centro (222) 246 3714
QUERETARO, QRO
Av. Madero 139 Pte.- Col. Centro (442) 214 1660
SAN LUIS POTOSI, SLP
Av. Universidad 1525 - Col. San Luis (444) 814 2383
TORREON, COAH
Blvd. Jndependencia, 96 Pte. - Col. Centro (871) 716 5265
VERACRUZ, VER
Prolongaci6n Diaz Mir6n #4280 - Col. Remes (229) 921 7016
VlLLAHERMOSA, TAB
Constituci6n 516-A - Col. Centro (993) 312 5111
PARA OTRAS LOCAUDADES LLAME AL: (55) 5326 7100
Tensi6n de alimentaci6n 120 V CA/CD
Epecificaciones (DW896)
Potencia nominal: 380 W
Frecuencia de operaci6n: 60 Hz
Consumo de corriente: 3,0 A
IMPORTADOR: DEWALT S.A. DE C.V.
BOSQUES DE CIDROS ACCESO RADIATAS NO. 42
COL. BOSQUES DE LAS LOMAS, 3A. SECCION, CP 05120
DELEGACION CUAJIMALPA, MEXICO, D.F
Para servicioy ventasconsulte /..... ',,,
"HERRAMIENTAS ELECTRICAS" SECCJ_'
TEL. 5 326 7100
R.F.C.: BDE810626-1W7
en la secci6n arnarilla. AMARILLA
17
Page 20

DEWALTIndustrialToolCo., 701 EastJoppa Road,Baltimore,MD 21286 (APR04) Form No. 384263-00 DW896
Copyright © 1997, 2004
The following are trademarks for one or more DEWALT power tools: the yellow and black color scheme; the "D" shaped air intake grill; the array of
pyramids on the handgrip; the kit box configuration; and the array of lozenge-shaped humps on the surface of the tool.
 Loading...