

Page 1

D27904, D27905
Heavy-Duty Dust Extractor Vacuums
Extracteurs industriels de poussière
Aspiradoras para trabajos pesados de extracción de polvo
INSTRUCTION MANUAL
GUIDE D'UTILISATION
MANUAL DE INSTRUCCIONES
INSTRUCTIVO DE OPERACIÓN, CENTROS DE SERVICIO Y PÓLIZA
DE GARANTÍA. ADVERTENCIA: LÉASE ESTE INSTRUCTIVO ANTES
DE USAR EL PRODUCTO.
If you have questions or comments, contact us.
Pour toute question ou tout commentaire, nous contacter.
Si tiene dudas o comentarios, contáctenos.
1-800-4-DEWALT • www.dewalt.com
Page 2

Page 3

1
English
IF YOU HAVE ANY QUESTIONS OR COMMENTS ABOUT
THIS OR ANY D
EWALT TOOL, CALL US TOLL FREE AT:
1-800-4-D
EWALT (1-800-433-9258).
Important Safety Instructions
Important Safety Instructions
NOTE: This vacuum is intended for commercial use.
WARNING: When using electric appliances, always follow
basic safety precautions to reduce the risk of fire, electric shock
and personal injury, including the following:
BEFORE USING THIS APPLIANCE, READ AND FOLLOW
ALL INSTRUCTIONS.
• Connect to a properly grounded outlet only (See Grounding
Instructions).
• Do not leave the appliance when it is connected to a power
source. Unplug it from outlet when not in use and before
servicing.
• Do not expose the appliance to rain. Store it indoors. This
action will reduce the risk of electric shock.
• Do not allow the appliance to be used as a toy. Pay close
attention when the appliance is used by or near children.
• Use this appliance ONLY as described in the manual. Use only
D
EWALT recommended attachments.
• Do not use this appliance with a damaged cord or plug. If the
appliance is not working correctly, or if it has been dropped,
damaged, left outdoors, or dropped in water, return it to a
service center.
• Do not pull or carry this appliance by the cord, use the cord
as a handle, close a door on the cord, or pull the cord around
sharp edges or corners. Do not run the appliance over the cord.
Keep cord away from heated surfaces.
• Do not unplug this appliance by pulling on the cord. To unplug,
grasp the plug, not the cord.
• Do not handle the plug or appliance with wet hands.
• Do not put any objects into the openings of the appliance. Do
not use the appliance with any opening blocked; keep free of
dust, lint, hair and anything else that may reduce air flow.
• Keep hair, loose clothing, fingers, and all body parts away from
the openings and moving parts.
• Turn off all controls before unplugging appliance.
• Use extra care when cleaning on stairs.
• Do not use the appliance to pick up flammable or combustible
liquids, such as gasoline, or use in areas where flammable or
combustible liquids are present.
Defi nitions: Safety Guidelines
The definitions below describe the level of severity for each
signal word. Please read the manual and pay attention to
these symbols.
DANGER: Indicates an imminently hazardous situation
which, if not avoided, will result in death or serious
injury.
WARNING: Indicates a potentially hazardous situation
which, if not avoided, could result in death or serious
injury.
CAUTION: Indicates a potentially hazardous situation
which, if not avoided, may result in minor or moderate
injury.
NOTICE: Indicates a practice not related to personal injury
which, if not avoided, may result in property damage.
Page 4

2
English
SAVE THESE INSTRUCTIONS
ADDITIONAL SAFETY RULES
• This vacuum can be converted to meet the EPA lead-related
Renovations, Repair and Painting (RRP) Rule for HEPA
vacuum only when used with the D279041H HEPA filter.
(included with D27905H).
The D279042F disposable fleece bag is recommended to
lengthen the life of the HEPA filter.
Contact the United States Environmental Protection Agency
(EPA) for more information on their Renovations, Repair and
Painting (RRP) Rule.
• Do not pick up anything that is burning or smoking, such as
cigarettes, matches, or hot ashes.
• Do not use to vacuum combustible explosive materials, such as
coal, grain, or other finely divided combustible material.
• Do not use to vacuum hazardous, toxic or carcinogenic
materials, such as asbestos or pesticide.
• Never pick up explosive liquids (e.g. gasoline, diesel fuel,
heating oil, paint thinner, etc.), acids or solvents.
• Do not use vacuum without filter and/or filter bags in place.
• Some wood contains preservatives which can be toxic. Take
extra care to prevent inhalation and skin contact when working
with these materials. Request and follow any safety information
available from your material supplier.
• Do not use vacuum as a step stool.
• An extension cord must have adequate wire size (AWG
or American Wire Gauge) for safety. The smaller the gauge
number of the wire, the greater the capacity of the cable, that
is 16 gauge has more capacity than 18 gauge. An undersized
cord will cause a drop in line voltage resulting in loss of power
and overheating. When using more than one extension to make
up the total length, be sure each individual extension contains
at least the minimum wire size. The following table shows the
correct size to use. If in doubt, use the next heavier gauge. The
smaller the gauge number, the heavier the cord.
• If an extension cord is to be used outdoors it must be marked
with the suffix W-A or W following the cord type designation.
For example – SJTW-A to indicate it is acceptable for outdoor
use.
Minimum Gauge for Cord Sets
Volts Total Length of Cord in Feet (meters)
120V
25 (7.6) 50 (15.2) 100 (30.5) 150 (45.7)
240V
50 (15.2) 100 (30.5) 200 (61.0) 300 (91.4)
AWG
14 12 Not Recommended
WARNING: Always use eye protection. All users and
bystanders must wear eye protection that conforms to ANSI
Z87.1.
WARNING: Always wear proper personal hearing protection
that conforms to ANSI S12.6 (S3.19) during use. Under some
conditions and duration of use, noise from this product may
contribute to hearing loss.
WARNING: ALWAYS use safety glasses. Everyday eyeglasses
are NOT safety glasses. Also use face or dust mask if area
operation is dusty. ALWAYS WEAR CERTIFIED SAFETY
EQUIPMENT:
• ANSI Z87.1 eye protection (CAN/CSA Z94.3),
• ANSI S12.6 (S3.19) hearing protection,
• NIOSH/OSHA/MSHA respiratory protection.
WARNING: This product contains chemicals, including lead,
known to the State of California to cause cancer, and birth
defects or other reproductive harm. Wash hands after handling.
WARNING: Some dust contains chemicals known to the State
of California to cause cancer, birth defects or other reproductive
harm. Some examples of these chemicals are:
• compounds in fertilizers,
Page 5
3
English
• compounds in insecticides, herbicides and pesticides,
• arsenic and chromium from chemically-treated lumber.
To reduce your exposure to these chemicals, wear approved
safety equipment such as dust masks that are specially designed
to filter out microscopic particles.
SAVE THESE INSTRUCTIONS
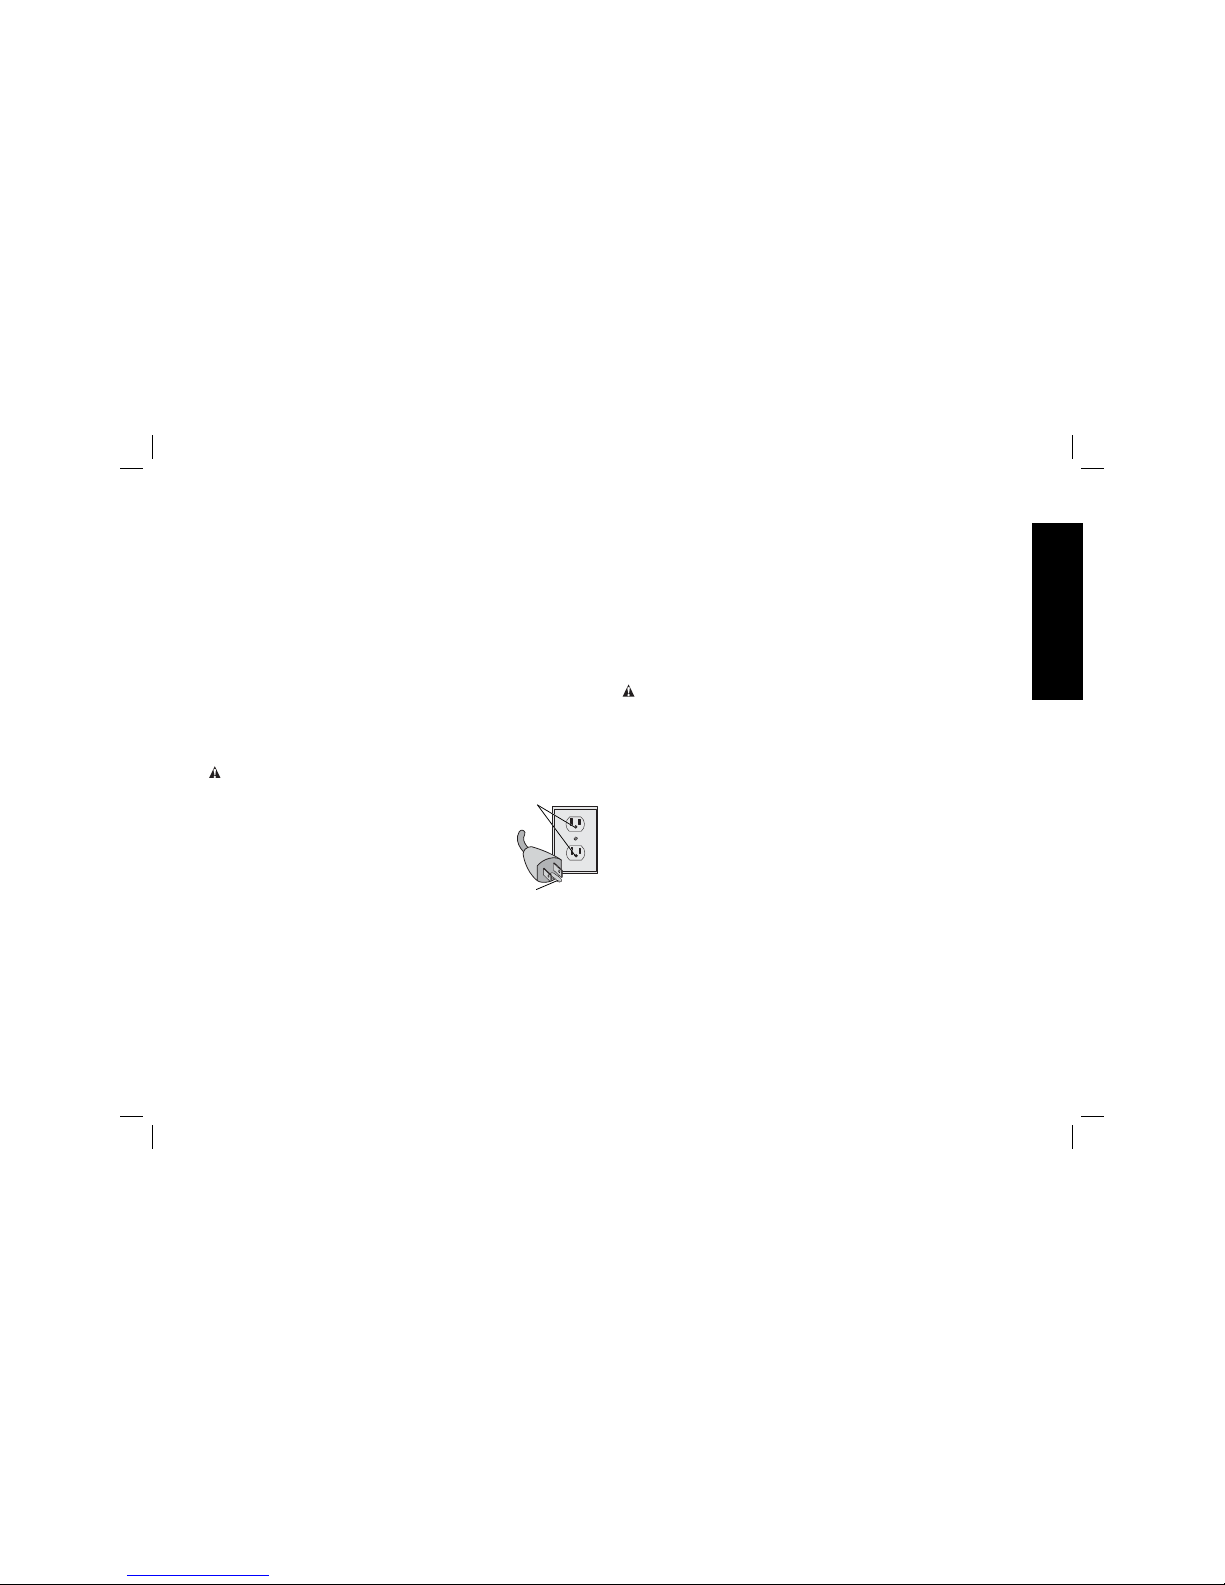
Grounding Instructions
This appliance must be grounded. If it should malfunction or
breakdown, grounding provides a path of least resistance for
electric current to reduce the risk of electric shock. This appliance
is equipped with a cord having an equipment-grounding conductor
and grounding plug. The plug must be inserted into an appropriate
outlet that is properly installed and grounded in accordance with
all local codes and ordinances.
WARNING: Improper connection of
GROUNDED
OUTLET
FIG. A
GROUNDING
PIN
the equipment-grounding conductor
can result in a risk of electric shock.
Check with a qualified electrician or
service person if you are in doubt as to
whether the outlet is properly
grounded. Do not modify the plug
provided with the appliance – if it will
not fit the outlet, have a proper outlet
installed by a qualified electrician.
This appliance is for use on a nominal 120-volt circuit and has a
grounding attachment plug that looks like the plug illustrated in
Figure A. Make sure that the appliance is connected to an outlet
having the same configuration as the plug. No adapter should be
used with this appliance.
Motor
Many DEWALT tools will operate on either D.C. or single phase
25 to 60 cycle A.C. current and voltage within plus or minus
5 percent of that shown on the specification plate on the tool.
Several models, however, are designed for A.C. current only.
Refer to the specification plate on your tool for proper voltage and
current rating.
Do not operate your tool on a current on which the voltage is not
within correct limits. Do not operate tools rated A.C. only on D.C.
current. To do so may seriously damage the tool.
SAVE THESE INSTRUCTIONS
COMPONENTS (FIG. 1)
WARNING: Never modify the power tool or any part of it.
Damage or personal injury could result.
A. Hose wrap I. Carry handle
B. Outlet for power tools J. Filter compartment
C. Canister latch K. Filter door handle
D. On/Off switch L. Cord wrap
E. Variable suction dial M. Power cord
F. Outlet activation switch N. Canister
G. Twist-lock hose inlet O. Vacuum lid
H. Suction hose
INTENDED USE
These vacuums are used for fine particulate pick-up, like drywall,
concrete, wood or surface dust. These units come equipped with a
built in outlet for use with power tools providing automatic vacuum
start-up when tool is turned on and a 15-second vacuum overrun
to clear suction hose when tool is turned off, dual filtration system,
corrosion resistant tank, large wheels for easy maneuvering and
a convenient flat top surface tray for holding tools while working.
DO NOT use under humid conditions or in presence of flammable
liquids or gases.
These heavy-duty vacuums are for professional use. DO NOT let
children come into contact with the tool. Supervision is required
when inexperienced operators use this tool.
Page 6

4
English
FIG. 1
A
B
C
D
F
G
H
ASSEMBLY (FIG. 1–4)
WARNING: To reduce the risk of serious personal injury,
turn tool off and disconnect tool from power source before
making any adjustments or removing/installing attachments
or accessories.
WARNING: When using electric appliances, always follow
basic safety precautions to reduce the risk of fire, electric shock
and personal injury.
WARNING: The flat pleated filter
FIG. 2
P
(P) must always be in place while
vacuuming. When vacuuming fine
dust, you may also use an additional
paper filter or fleece bag.
1. Release the two canister locks
(C), (one on each side of vacuum
cleaner).
2. Lift the vacuum lid from the canister and carefully set aside.
3. Remove wheels and accessories from canister.
4. Turn canister over and place on a solid flat surface.
FIG. 3
D27905D27904
R
Q
R
Q
S
S
5. Slide wand bracket (S) onto tank as shown BEFORE
assembling wheels assembly (R).
6. Insert the casters (Q) into holes provided and press firmly to
seat in place.
Model D27904 is shown
E
I
K
L
J
O
N
M
Page 7

5
English
7. Place the wheels assembly (R) into slots and press firmly to
seat in place. Fasten wheel assembly to the tank with two steel
clips and two Phillips head screws. Turn canister over and
place wheels/casters onto solid flat surface.
8. If paper filter or fleece bag is to be used, install as shown (T).
NOTE: Be careful to not tear the bag. Ensure bag is placed
securely on inlet to provide a tight seal for maximum dust
collection performance.
9. Place the vacuum lid onto the container and secure it by
closing the canister locks.
10. Insert the twist-lock connection on the hose (H) into inlet and
rotate clockwise to lock in place.
T
FIG. 4
H
OPERATION
WARNING: To reduce the risk of serious personal injury,
turn tool off and disconnect tool from power source before
making any adjustments or removing/installing attachments
or accessories.
WARNING: Risk of fire. Do not pick up anything that is
burning, smoldering or smoking such as matches, cigarettes, or
hot ashes.
• Do not use to vacuum combustible explosive materials,
such as coal, grain, or other finely divided combustible
material.
• Do not use to vacuum hazardous, toxic or carcinogenic
materials, such as asbestos or pesticide.
• This vacuum can be converted to meet the EPA lead-related
Renovations, Repair and Painting (RRP) Rule for HEPA
vacuum only when used with the D279041H HEPA filter
(included with D27905H).
The D279042F disposable fleece bag is recommended to
lengthen the life of the HEPA filter.
Contact the United States Environmental Protection Agency
(EPA) for more information on their Renovations, Repair
and Painting (RRP) Rule.
WARNING: When using electric appliances, always follow
basic safety precautions to reduce the risk of fire, electric shock
and personal injury.
1. Plug the power cord into an
FIG. 5
D
E
appropriate outlet.
2. Depress on/off switch (D) to
turn the unit on.
3. Set the variable suction dial
(E) in the desired position.
See To Set Variable
Suction.
TO SET VARIABLE SUCTION (FIG. 6)
This feature allows the user to control the vacuum's power and
suction. The power level dedicated to the vacuum and the amount
of power going to the tool are controlled.
To determine the correct setting for the vacuum:
1. Determine the amperage of the power tool being used with the
vacuum.
2. Refer to the following chart for the correct variable suction dial
setting.
Maximum Tool
Amperage Rating
Variable Speed
Setting
3.0 Amps MAX
3.5 Amps 1/2
5.0 Amps MIN
Page 8
6
English
3. Rotate the variable suction dial to
FIG. 6
E
the correct setting MIN, 1/2 or
MAX.
4. Follow the direction under
Connecting to Power Tools to
connect to the power tool to be
used.
NOTE: This setting also controls the level of suction. This is very
useful in applications where the vacuum creates unacceptable
levels of drag to the work piece.
CONNECTING TO POWER TOOLS (FIG. 7, 8)
1. Plug the vacuum power cord
B
V
FIG. 7
D
F
into an appropriate outlet.
2. Plug the power tool into the
outlet (B).
3. Depress on/off switch (D) to
turn the unit on.
4. Depress outlet activation
switch (F) to activate
automatic mode.
5. The light (V) will come on, indicating the vacuum cleaner is in
the stand by mode.
6. To switch back to manual mode, depress outlet activation
switch (F). The light (V) will go off, indicating vacuum is in
manual mode.
NOTE:
• The vacuum cleaner is turned on and off automatically with
the electric power tool.
• The vacuum cleaner starts automatically within 0.5 seconds
and continues to run for 15 seconds after the power tool has
been turned off.
• Please refer to Specifications
U
FIG. 8
H
for the power connection
specifications of the power tools.
7. Choose the correct power
tooladaptor (U) to fit the power tool
connection on the tool to be used.
Attach power tool adaptor (U) to
power tool.
8. Attach the suction hose (H) to the power tool adaptor.
AUTOMATIC FILTER CLEANING SYSTEM
D27904
This vacuum has an innovative filter cleaning system that is
particularly effective with fine dust. The flat pleated filter is
automatically cleaned every 15 seconds through an air jet
(pulsating sound).
The automatic filter cleaning system senses when the filter
becomes blocked and will adjust the pressure of the pulsing.
To achieve the full effect of the filter cleaning system, block the
end of the hose on a hard surface until the filter cleaning system
activates. This will produce the maximum pulse and the best
cleaning of the filter.
PARKING BRAKE (FIG. 9)
D27904
The parking brake will lock one wheel in
FIG. 9
place to prevent vacuum from rolling.
1. To engage parking brake, depress the
brake button to snap the brake into the
locked position.
2. To disengage parking brake, depress
the brake button and brake will snap
into the unlocked position.
Page 9
7
English
AUTOMATIC SHUT OFF (FIG. 1, 10)
Vacuum will shut off when canister fills with water. W hen this
happens:
1. Depress the on/off switch (D) to turn the unit off. Unplug the
unit.
2. Release vacuum lid from the canister and carefully set aside.
3. Empty canister.
Electrodes must be clean to ensure proper operation of automatic
shut off.
To Clean Electrodes
1. Depress the on/off switch (D)
FIG. 10
W
W
to turn the unit off. Unplug the
unit.
2. Release vacuum lid from the
canister and carefully set
aside.
3. Clean electrodes (W).
4. Replace vacuum lid onto
canister and lock in place.
To Shut Down (Fig. 1)
1. Depress the on/off switch (D) to turn the unit off.
2. Unplug the unit.
MAINTENANCE
WARNING: To reduce the risk of serious personal injury, turn
tool off and disconnect tool from power source before making
any adjustments or removing/installing attachments or
accessories.
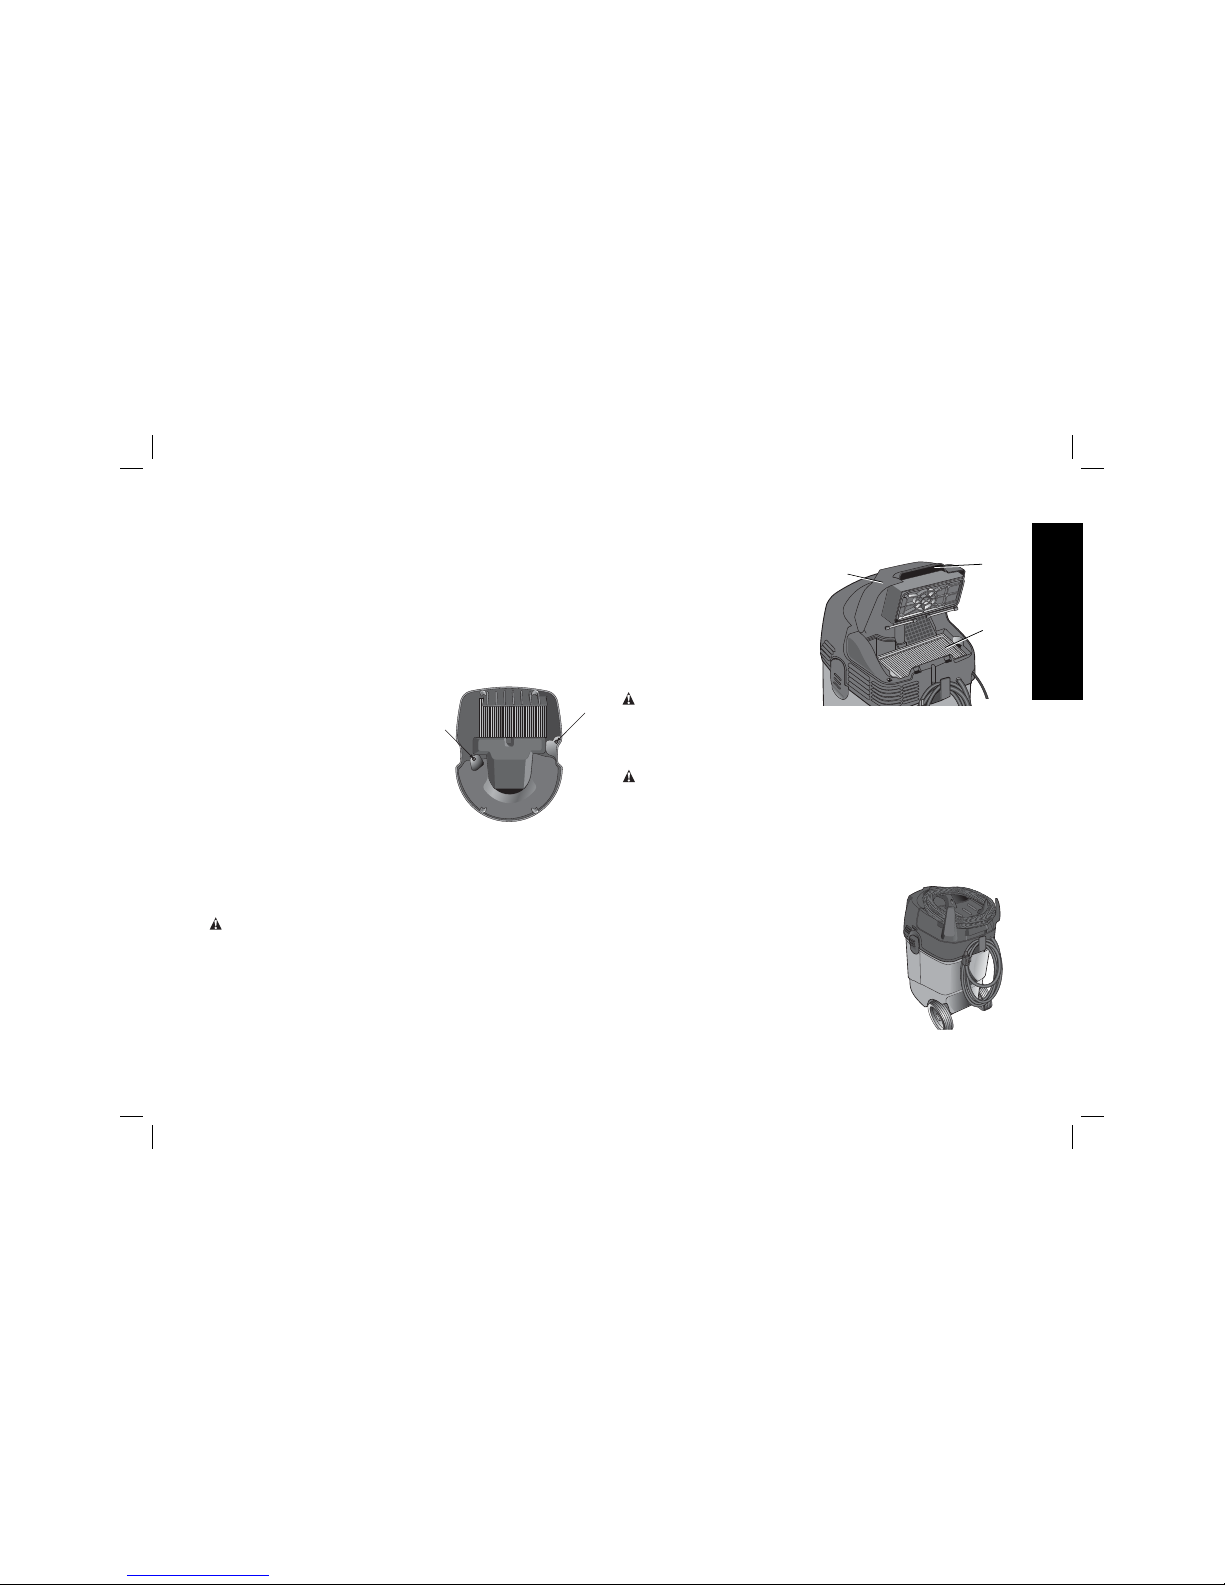
TO REPLACE THE PLEATED FILTER (FIG. 11)
1. Lift the filter door handle
P
J
FIG. 11
K
(K) to open filter
compartment (J).
2. Replace the flat pleated
filter (P).
3. Close the filter door.
Ensure door locks into
place.
Cleaning
WARNING: Blow dirt and
dust out of all air vents with
dry air at least once a week. Wear proper ANSI Z87.1 (CAN/CSA
Z94.3) eye protection and proper NIOSH/OSHA/MSHA
respiratory protection when performing this.
WARNING: Never use solvents or other harsh chemicals for
cleaning the non-metallic parts of the tool. These chemicals may
weaken the plastic materials used in these parts. Use a cloth
dampened only with water and mild soap. Never let any liquid get
inside the tool; never immerse any part of the tool into a liquid.
Storage (Fig. 12)
1. Empty the canister.
2. Wipe the vacuum inside and outside.
See Cleaning.
3. Gently shake filter to clean.
NOTE: Do not use compressed air,
water or cleaning solutions to clean
filter. See To Replace the Pleated
Filter.
4. Store the suction hose and the power
cord as shown in the illustration.
FIG. 12
Page 10
8
English
Place the unit in a dry room and secure it from unauthorized
use.
Accessories
WARNING: Since accessories, other than those offered by
D
EWALT, have not been tested with this product, use of such
accessories with this tool could be hazardous. To reduce the risk
of injury, only D
EWALT, recommended accessories should be
used with this product.
Recommended accessories for use with your tool are available at
extra cost from your local dealer or authorized service center. If
you need assistance in locating any accessory, please contact
D
EWALT Industrial Tool Co., 701 East Joppa Road, Baltimore,
MD 21286, call 1-800-4-D
EWALT (1-800-433-9258) or visit our
website www.dewalt.com.
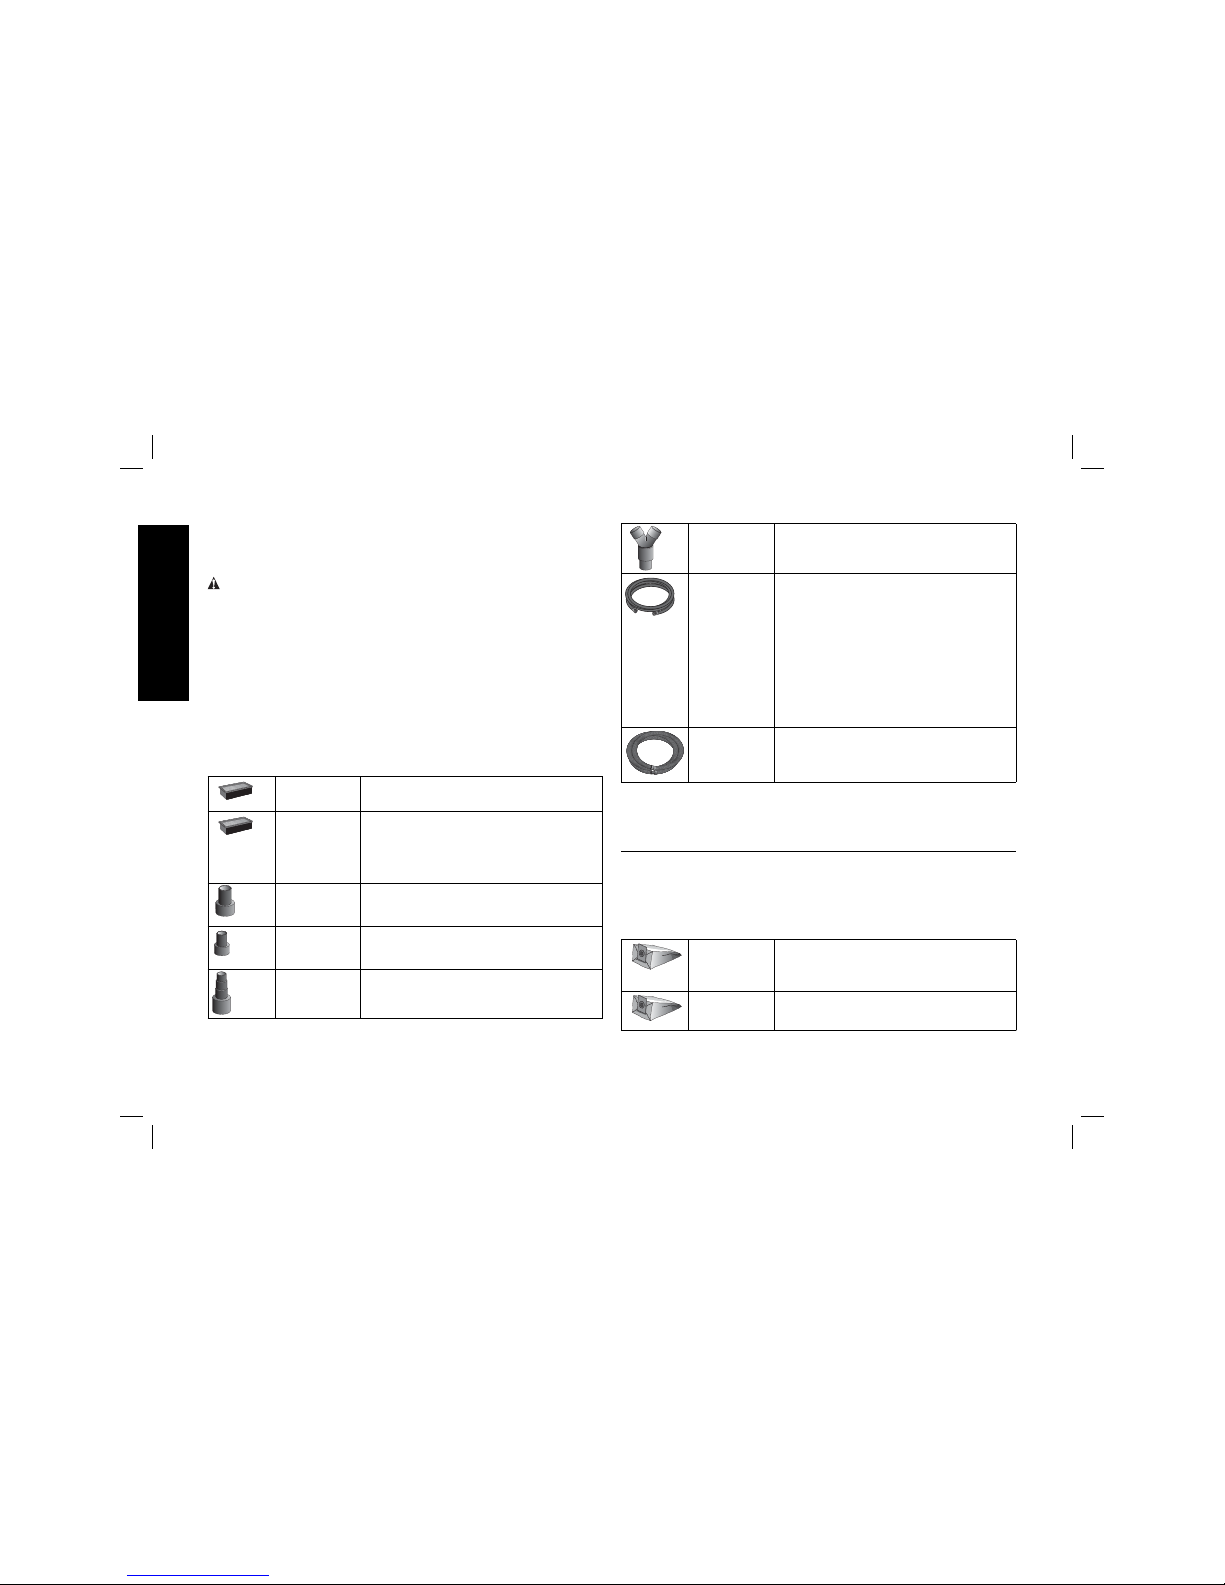
OPTIONAL ACCESSORIES
D279041 Nano coated general purpose filter
D279041H HEPA filter: Captures 99.97% of all
particles greater than or equal to
0.3 microns. Required when picking up
lead paint debris.
D279053 1-1/4" OD–2-1/4" OD
(31.6 mm–57.2 mm) tool adapter
D279054 1" ID–1-1/4" (25.4 mm–31.6 mm) tool
adapter
D279055 Step adapter
D279056 Y splitter
D279058AS Anti-static 14' (4.3 m) hose
ANTI-STATIC HOSE OPTION
The D27904 and D27905 are both
equipped with an anti-static grounding
system. To take advantage of this
option, an anti-static hose must be
purchased. This hose (D279058AS)
fits into the dust extractor system the
same way as the standard hose.
D279058 Crush proof 14' (4.3 m) hose
The filter efficiency of the D
EWALT dust extractor vacuums can
be significantly increased with the use of filter bags. The filter
bags also provide a clean, easy, and quick way to dispose of the
dust collected.
Paper filter bags: The D279042/D279052 filter bags are
designed to capture many types of dust including drywall,
concrete, and wood. They provide filtration performance of
99.9% at 2 microns. These bags should be disposed of once the
airflow becomes restricted. DO NOT reuse bags.
D279042 Disposable paper filter bag (for use
with D27904)
12 gallon (45.4 L)
D279052 Disposable paper filter bag (for use
with D27905) 10 gallon (37.9 L)
Page 11
9
English
Repairs
To assure product SAFETY and RELIABILITY, repairs, maintenance
and adjustments (including brush inspection and replacement)
should be performed by a D
EWALT factory service center, a
D
EWALT authorized service center or other qualified service
personnel. Always use identical replacement parts.
Three Year Limited Warranty
DEWALT will repair, without charge, any defects due to faulty
materials or workmanship for three years from the date of
purchase. This warranty does not cover part failure due to normal
wear or tool abuse. For further detail of warranty coverage
and warranty repair information, visit www.dewalt.com or call
1-800-4-D
EWALT (1-800-433-9258). This warranty does not apply
to accessories or damage caused where repairs have been made
or attempted by others. This warranty gives you specific legal
rights and you may have other rights which vary in certain states
or provinces.
In addition to the warranty, D
EWALT tools are covered by our:
1 YEAR FREE SERVICE
D
EWALT will maintain the tool and replace worn parts caused by
normal use, for free, any time during the first year after purchase.
90 DAY MONEY BACK GUARANTEE
If you are not completely satisfied with the performance of your
D
EWALT Power Tool, Laser, or Nailer for any reason, you can
return it within 90 days from the date of purchase with a receipt for
a full refund – no questions asked.
LATIN AMERICA: This warranty does not apply to products sold
in Latin America. For products sold in Latin America, see country
specific warranty information contained either in the packaging,
call the local company or see website for warranty information.
Fleece filter bag: The D279052F fleece bag is designed to
capture many types of dust including drywall, concrete, and
wood. It provides filtration performance of 95% at 0.3 microns.
This bag should be disposed of once the airflow becomes
restricted. DO NOT reuse this bag. The fleece bag is ideal for
heavier materials such as concrete and drywall dust where
a paper filter bag may tear. It also provides 2.5 times more
capacity than a paper filter bag, increasing productivity and
value.
D279052F Disposable fleece filter bag
10 gallon (37.9 L)
The D279042D disposable plastic bag is designed to work in
conjunction with the D27904 heavy-duty dust extractor vacuum
with automatic filter cleaning. The design seals the liner to the
tank inlet without being pulled into the filter during use. The
plastic disposable bag allows for easy cleanup and disposal of
dust and keeps dust from escaping back into the atmosphere
during emptying. Because this bag is specially designed not
to be pulled into the filter, there will be a small amount of dust
remaining in the tank.
D279042D Disposable plastic collection bag
(for use with D27904)
12 gallon (45.4 L)
D279059 Accessory Kit includes: (2) Extension,
(1) Curved wand, (1) Crevice tool, (1)
Squeegee/floor sweeper
Page 12

10
English
FREE WARNING LABEL REPLACEMENT: If your warning labels
become illegible or are missing, call 1-800-4-D
EWALT for a free
replacement.
Troubleshooting
PROBLEM SOLUTION
Suction turbine does
not run
Check power cord, plugs and outlet.
Ensure the on/off switch is in the ON
position.
Suction capacity
decreases
Remove blockages in the suction
nozzle, suction tube, suction hose or
flat pleated filter.
Replace the paper filter bag.
Ensure the filter cover properly locks
into place.
Replace the flat pleated filter.
Dust comes out while
vacuuming
Check for proper installation of the flat
pleated filter.
Replace the flat pleated filter.
Automatic filter
cleaning is not working
(D27904 only)
Suction hose is not connected.
Ensure flat pleated filter is clean and
dry.
Power tool does not
turn on.
Ensure the outlet activation switch is
set to automatic mode.
SPECIFICATIONS
MODEL D27904 D27905
Volts 120 V ~ 120 V ~
Hertz 60 60
Amps 9 A 9 A
12 A (with tool) 12 A (with tool)
Capacity 12 gallon (45.5 liter) 10 gallon (37.9 liter)
Page 13

11
English
Compliance Certifi cate
DEWALT Dust Extractor Vacuums (D27904, D27905) are manufactured in compliance with
Underwriters Laboratories (UL) 1017 and Canadian Standards Association (CSA) C22.2
No. 243-01 Standards.
These vacuums also meet the requirements of a HEPA vacuum as defined in the United States
Environmental Protection Agency's (EPA) Renovation, Repair and Painting (RRP) Rule
(40 CFR Part 745) when used with the D279041H HEPA filter.
The D279041H HEPA filter has been evaluated per EN1822 by an independent third party to
confirm that the filter is capable of capturing particles of 0.3 microns with 99.97% efficiency.
Page 14

Français
12
Défi nitions : lignes directrices en
matière de sécurité
Les définitions ci-dessous décrivent le niveau de gravité pour
chaque symbole. Veuillez lire le mode d’emploi et porter une
attention particulière à ces symboles.
DANGER : Indique une situation dangereuse imminente qui,
si elle n’est pas évitée, causera la mort ou des blessures
graves.
AVERTISSEMENT :
Indique une situation potentiellement
dangereuse qui, si elle n’est pas évitée, pourrait se solder par un
décès ou des blessures graves.
ATTENTION : Indique une situation potentiellement dangereuse
qui, si elle n’est pas évitée pourrait se solder par des blessures
mineures ou modérées.
AVIS : Indique une pratique ne posant aucun risque de
dommages corporels mais qui par contre, si rien n’est fait
pour l’éviter, pourrait poser des risques de dommages
matériels.
POUR TOUT COMMENTAIRE OU QUESTION RELATIF À
CET OUTIL OU TOUT AUTRE OUTIL D
EWALT, COMPOSEZ
GRATUITEMENT LE : 1-800-4-D
EWALT (1-800-433-9258).
Consignes importantes de sécurité
REMARQUE : Cet aspirateur a été conçu pour un usage
commercial.
AVERTISSEMENT : Lors de l’utilisation de tout appareil
électrique, des précautions de base doivent être suivies pour
réduire tout risque d’incendie, de chocs électriques ou de
dommages corporels, y compris les suivantes :
AVANT D’UTILISER CET APPAREIL, LIRE ET SUIVRE
TOUTES LES CONSIGNES
• Brancher l’appareil sur une prise correctement mise à la terre
(Se reporter aux Directives de mise à la terre).
• Ne pas laisser l’appareil sans surveillance lorsqu’il est branché
sur le secteur. Le débrancher de la prise en fin d’utilisation, et
avant tout entretien.
• Protéger l’appareil de la pluie. L’entreposer à l’intérieur. Cela
réduira tout risque de chocs électriques.
• Ne pas laisser l’appareil être utilisé comme un jouet. Être
extrêmement vigilant lorsque l’appareil est utilisé par des
enfants ou à leur proximité.
• Utiliser l’appareil SEULEMENT comme décrit dans ce manuel.
Utiliser exclusivement des accessoires recommandés par
D
EWALT.
• Ne pas utiliser cet appareil avec un cordon ou une fiche
endommagé. Si l’appareil ne fonctionne pas correctement, ou
s’il est tombé, a été endommagé, laissé dehors, ou est tombé
dans l’eau, le rapporter dans un centre de réparation.
• Ne pas tirer sur cet appareil ou le transporter par son cordon,
ne pas utiliser son cordon comme poignée, le coincer dans une
porte, ou le tirer sur des bords tranchants ou des coins. Ne pas
passer sur le cordon avec l’appareil. Protéger le cordon de la
chaleur.
• Ne pas le débrancher en tirant sur son cordon. Pour le
débrancher, tirer sur la fiche et non pas sur le cordon.
• Ne pas manipuler la fiche ou l’appareil avec les mains
humides.
• Ne disposer aucun objet dans les ouvertures de l’appareil.
Ne pas utiliser l’appareil si ses ouvertures sont bloquées. Les
maintenir propres et nettes de tout cheveu, poussière, peluche,
ou toute autre chose pouvant en réduire la circulation d’air.
Page 15

Français
13
• Maintenir les cheveux, les vêtements amples, les doigts, et
toute autre partie du corps éloignés des ouvertures et des
pièces mobiles.
• Arrêter tout bouton de commande avant de débrancher
l’appareil.
• Rester extrêmement vigilant lors du nettoyage d’escaliers.
• Ne pas utiliser l’appareil pour aspirer des liquides inflammables
ou combustibles, tel l’essence, ou l’utiliser dans des lieux
abritant des liquides inflammables ou combustibles.
CONSERVER CES CONSIGNES
RÈGLES DE SÉCURITÉ
ADDITIONNELLES
• Cet aspirateur peut être transformé pour répondre à la norme
EPA en matière de Rénovations, Réparations et Peintures
(RRP) relative au plomb pour les aspirateurs H.E.P.A.
seulement lorsqu’ils sont utilisés avec les filtres H.E.P.A.
D279041H (inclus avec le D27905H).
Un sac molletonné jetable D279042F est recommandé pour
prolonger la durée de vie du filtre H.E.P.A.
Contacter l’Agence de protection de l'environnement américaine
(EPA) pour plus d’informations sur la norme Rénovations,
Réparations et Peintures (RRP).
• Ne pas aspirer des objets incandescents, ou se consumant,
comme les cigarettes, les allumettes ou les cendres chaudes.
• Ne pas utiliser l’appareil pour aspirer des matériaux explosifs,
comme le charbon, le grain, ou tout autre matériau combustible
à fine texture.
• Ne pas l’utiliser pour aspirer des produits dangereux, toxiques
ou carcinogènes, comme l’amiante ou les pesticides.
• Ne jamais aspirer des liquides explosifs (ex. : essence, diesel,
mazout domestique, diluant, etc.), des acides ou des solvants.
• Ne pas utiliser l’aspirateur sans son filtre et/ou ses sacs-filtres
en place.
• Certains bois contiennent des conservateurs pouvant être
toxiques. Lorsqu’on travaille avec ces matériaux, protéger la
peau de tout contact et les poumons de toute inhalation. Se
renseigner auprès du fournisseur du matériau pour obtenir
toutes les directives de sécurité disponibles, et les suivre.
• Ne pas utiliser l’aspirateur comme un tabouret-escabeau.
• Pour la sécurité de l’utilisateur, utiliser une rallonge de
calibre adéquat (AWG, American Wire Gauge [calibrage
américain normalisé des fils électriques]). Plus le calibre
est petit, et plus sa capacité est grande. Un calibre 16, par
exemple, a plus de capacité qu’un calibre 18. L’usage d’une
rallonge de calibre insuffisant causera une chute de tension
qui entraînera perte de puissance et surchauffe. Si plus
d’une rallonge est utilisée pour obtenir une certaine longueur,
s’assurer que chaque rallonge présente au moins le calibre de
fil minimum. Le tableau ci-dessous illustre le calibre à utiliser.
En cas de doute, utiliser le calibre suivant. Plus le calibre est
petit, plus la rallonge peut supporter de courant.
• Si l’utilisation d’une rallonge à l’extérieur est inévitable, elle doit
comporter, suivant le type de cordon, les suffixes W-A ou W.
Par exemple, SJTW-A indique que celle-ci peut être utilisée
dehors.
Calibres minimaux des rallonges
Volts Longueur totale de cordon en mètres (pieds)
120V
7,6 (25) 15,2 (50) 30,5 (100) 45,7 (150)
240V
15,2 (50 ) 30,5 (100) 61,0 (200) 91,4 (300)
AWG
14 12 Non recommandé
AVERTISSEMENT : Porter systématiquement une protection
oculaire. Tout utilisateur ou individu présent doit porter une
protection oculaire homologuée ANSI Z87.1.
Page 16

Français
14
AVERTISSEMENT : Pendant l’utilisation, porter
systématiquement une protection auditive individuelle
adéquate homologuée ANSI S12.6 (S3.19). Sous certaines
conditions et suivant la longueur d’utilisation, le bruit émanant de
ce produit pourrait contribuer à une perte de l’acuité auditive.
AVERTISSEMENT : PORTER systématiquement des lunettes
de protection. Les lunettes courantes NE sont PAS des lunettes
de protection. Utiliser aussi un écran facial ou un masque
antipoussières si la découpe doit en produire beaucoup. PORTER
SYSTÉMATIQUEMENT UN ÉQUIPEMENT DE SÉCURITÉ
HOMOLOGUÉ :
• Protection oculaire ANSI Z87.1 (CAN/CSA Z94.3) ;
• Protection auditive ANSI S12.6 (S3.19) ;
• Protection des voies respiratoires NIOSH/OSHA/MSHA.
AVERTISSEMENT : Cet outil contient des produits chimiques,
y compris du plomb, reconnus par l’état californien pour causer
cancers, malformations congénitales ou être nocifs au système
reproducteur. Bien se laver les mains après toute utilisation.
AVERTISSEMENT : Certaines poussières contiennent des
produits chimiques reconnus par l’état californien pour causer
cancers, malformations congénitales ou être nocifs au système
reproducteur. Parmi ces produits chimiques, on retrouve :
• Les engrais et leurs composés ;
• les insecticides, herbicides et pesticides et leurs
composés ;
• l’arsenic et le chrome dans le bois ayant subi un traitement
chimique.
Pour réduire toute exposition à ces produits : utiliser le matériel de
sécurité approprié, tel un masque anti-poussières spécialement
conçu pour filtrer les particules microscopiques.
CONSERVER CES CONSIGNES
Directives de mise à la terre
Cet appareil doit être mis à la terre. S’il venait à mal fonctionner
ou à tomber en panne, la mise à la terre offre un chemin de
moindre résistance au courant électrique pour réduire tout risque
de décharge électrique. Cet appareil est pourvu d’un cordon muni
d’un conducteur de protection et d’une fiche de mise à la terre.
Cette fiche doit être branchée dans une prise adéquate installée
correctement et mise à la terre conformément aux codes et
régulations locales.
AVERTISSEMENT : Tout branche-
PRISE MISE
À LA TERRE
FIG. A
BROCHE DE
MISE À LA
TERRE
ment non conforme du matériel mis à la
terre augmente les risques de chocs
électriques. Faire vérifier par un
électricien qualifié ou du personnel
d’entretien que la prise est correctement
mise à la terre. Ne pas modifier la fiche
fournie avec l’appareil. - Si elle ne
rentre pas dans la prise, faire installer
une prise adéquate par un électricien
qualifié.
Cet appareil est conçu pour une tension nominale de 120-volt,
et est équipé d’une fiche mise à la terre qui ressemble à la fiche
illustrée en figure A. S’assurer que l’appareil est bien branché
sur une prise ayant la même configuration que la fiche. Aucun
adaptateur ne doit être utilisé avec cet appareil.
Moteur
De nombreux outils DEWALT fonctionnent soit sur CC, soit sur
courant monophasé de 25 à 60 cycles, et sur une tension entre
plus ou moins 5 pourcent des indications portées sur la plaque
signalétique de l’outil. Cependant certains modèles sont conçus
exclusivement pour CA. Se reporter à la plaque signalétique de
votre outil pour connaître la tension et le courant adéquats.
Page 17

Français
15
Ne pas utiliser l’outil sur un secteur dont la tension est hors
tolérance. Ne pas utiliser d’outils conçus pour du CA sur du CC
pour éviter tout dommage matériel sérieux.
CONSERVER CES CONSIGNES
DESCRIPTION (FIG. 1)
AVERTISSEMENT : Ne jamais modifier l’outil électrique ni
aucun de ses composants, car il y a risques de dommages
corporels ou matériels.
A. Support de tuyau H. Tuyau d’aspiration
B. Prise pour outils électriques I. Poignée de transport
C. Verrouillage de la cuve J. Compartiment du filtre
D. Interrupteur marche/arrêt K. Poignée du volet du filtre
E. Sélecteur d’aspiration L. Rembobineur de cordon
F. Interrupteur de dépoussiérage M. Cordon électrique
automatique N. Cuve
G. Buse à verrou rotatif O. Couvercle ventouse
USAGE PRÉVU
Ces aspirateurs ont été conçus pour aspirer de fines particules
comme celles du placoplâtre, béton, bois, ou des poussières
de surfaces. Ces appareils sont équipés d’une prise intégrée
destinée aux outils électriques et permettant de démarrer
automatiquement l’aspiration lorsque l’outil est mis en marche,
d’un temps d’aspiration supplémentaire de 15 secondes pour
vider l’intérieur du tuyau d’aspiration une fois l’outil arrêté, d’un
système à double filtration, d’une cuve anticorrosion, de larges
roues pour faciliter les manœuvres ainsi que d’un dessus-plateau
pour recevoir les outils pendant le travail.
NE PAS utiliser l’outil en milieu ambiant humide ou en présence
de liquides ou gaz inflammables.
Ces aspirateurs industriels sont des outils de professionnels.
NE PAS les laisser à la portée des enfants. Une supervision est
nécessaire auprès de tout utilisateur non expérimenté.
FIG. 1
A
B
C
D
F
G
H
I
K
L
J
O
N
M
Le modèle D27904 est illustré
E
Page 18

Français
16
MONTAGE (FIG. 1–4)
AVERTISSEMENT : Pour réduire tout risque de dommages
corporels graves, arrêter et débrancher l’outil avant tout
réglage ou avant de retirer ou installer toute pièce ou tout
accessoire.
AVERTISSEMENT : Lors de l’utilisation de tout appareil
électrique, des précautions de base doivent être suivies pour
réduire tout risque d’incendie, de chocs électriques ou de
blessure.
AVERTISSEMENT : Il est impératif
FIG. 2
P
que le filtre plissé plat (P) soit en
place avant toute utilisation de
l’aspirateur. Pour aspirer des
poussières fines, il est possible
d’utiliser un filtre-papier
supplémentaire ou un sac molletonné.
1. Libérez les deux verrouillages de
la cuve (C). (De chaque côté de l’aspirateur).
2. Enlevez le couvercle ventouse de la cuve et mettez-le
soigneusement de côté.
3. Retirez les roues et les accessoires de la cuve.
4. Inversez la cuve et disposez-la sur une surface solide et
plane.
5. Glissez le dispositif de fixation de rallonge (S) sur la cuve
comme illustré, AVANT d’assembler le dispositif des
roues (R).
6. Insérez les roulettes (Q) dans les trous prévus à cet effet, puis
appuyez dessus fermement pour les enclencher à fond.
7. Insérez le dispositif des roues (R) dans les encoches et
appuyez fermement dessus pour l’enclencher à fond. Arrimez
le dispositif de roue à la cuve à l’aide de deux fixations en
acier et de deux vis Phillips. Inversez la cuve sur ses roues/
roulettes sur une surface solide et plane.
FIG. 3
D27905D27904
R
Q
R
Q
S
S
8. Si un filtre papier ou un sac molletonné est utilisé, installez-les
comme illustré (T).
REMARQUE : Attention à ne pas déchirer le sac. S’assurer
que le sac est bien arrimé sur la buse pour offrir une étanchéité
et un rendement d’aspiration maximums.
9. Installez le couvercle ventouse sur la cuve et arrimez-le en
refermant les verrouillages de la cuve.
10. Insérez le raccord du verrou rotatif sur le tuyau (H) dans la
buse puis tournez vers la droite pour le verrouiller en place.
T
FIG. 4
H
FONCTIONNEMENT
AVERTISSEMENT : Pour réduire tout risque de dommages
corporels graves, arrêter et débrancher l’outil avant tout
réglage ou avant de retirer ou installer toute pièce ou tout
accessoire.
AVERTISSEMENT : Risques de brûlures. Ne pas aspirer des
objets incandescents, ou se consumant, comme les cigarettes,
les allumettes ou les cendres chaudes.
Page 19

Français
17
• Ne pas utiliser l’appareil pour aspirer des matériaux
explosifs, comme le charbon, le grain, ou tout autre
matériau combustible à fine texture.
• Ne pas l’utiliser pour aspirer des produits dangereux,
toxiques ou carcinogènes, comme l’amiante ou les
pesticides.
• Cet aspirateur peut être transformé pour répondre à la
norme EPA en matière de Rénovations, Réparations et
Peintures (RRP) relative au plomb pour les aspirateurs
H.E.P.A. seulement lorsqu’ils sont utilisés avec les filtres
H.E.P.A. D279041H (inclus avec le D27905H).
Un sac molletonné jetable D279042F est recommandé pour
prolonger la durée de vie du filtre H.E.P.A.
Contacter l’Agence de protection de l'environnement
américaine (EPA) pour plus d’informations sur la norme
Rénovations, Réparations et Peintures (RRP).
AVERTISSEMENT : Lors de l’utilisation de tout appareil
électrique, des précautions de base doivent être suivies pour
réduire tout risque d’incendie, de chocs électriques ou de
blessure.
1. Branchez le cordon dans la
FIG. 5
D
E
prise appropriée.
2. Appuyez sur le bouton
marche/arrêt (D) pour
mettre l’appareil en marche.
3. Ajustez le sélecteur
d’aspiration (E) sur la
position désirée. Reportezvous à la section Réglage
de l’aspiration.
RÉGLAGE DE L’ASPIRATION (FIG. 6)
Cette fonction permet à l’utilisateur de régler la puissance et
le degré d’aspiration de l’aspirateur. Le niveau de puissance
de l’aspirateur et de degré de puissance allouée à l’outil sont
contrôlables.
Pour déterminer le réglage correct de l’aspirateur :
1. Déterminez l’intensité de l’outil électrique utilisé avec
l’aspirateur.
2. Reportez-vous au tableau suivant pour obtenir le réglage
approprié du sélecteur d’aspiration.
Intensité maximale de l’outil Réglage de la vitesse
3,0 Amp MAX
3,5 Amp 1/2
5,0 Amp MIN
3. Tournez le sélecteur d'aspiration sur
FIG. 6
E
le paramètre approprié : MIN, 1/2 ou
MAX.
4. Suivez les directives de la section
Connexion à un outil électrique
pour le connecter à l’outil électrique
à utiliser.
REMARQUE : Ce réglage contrôle aussi le degré d’aspiration.
Ceci est très pratique pour les applications où l’aspirateur crée
des niveaux inacceptables d’aspiration sur la pièce à travailler.
CONNEXION À UN OUTIL ÉLECTRIQUE (FIG. 7, 8)
1. Branchez le cordon de l’aspirateur dans la prise appropriée.
2. Branchez le cordon de l’outil dans la prise (B).
3. Appuyez sur le bouton marche/arrêt (D) pour mettre l’appareil
en marche.
Page 20

Français
18
4. Appuyez sur l’interrupteur
B
V
FIG. 7
D
F
de dépoussiérage
automatique (F) pour activer
le mode automatique.
5. Le voyant (V) s’allumera,
indiquant que l’aspirateur
est en mode de veille.
6. Pour repasser en mode
manuel, réappuyez
sur l’interrupteur de
dépoussiérage automatique (F). Le voyant (V) s’éteindra,
indiquant que l’aspirateur est en mode manuel.
REMARQUE :
• L’aspirateur se mettra en marche ou s’arrêtera
automatiquement en même temps que l’outil électrique.
• L’aspirateur démarrera automatiquement dans les
0,5 secondes et continuera à fonctionner 15 secondes
après l’arrêt de l’outil électrique.
• Se reporter aux Caractéristiques techniques pour
les spécifications de puissance de connexion de l’outil
électrique.
7. Choisissez le raccord d’outil (U)
U
FIG. 8
H
adapté à la connexion de l’outil qui
sera utilisé. Rattachez le raccord
d’outil (U) à l’outil électrique.
8. Rattachez le tuyau d’aspiration (H)
au raccord d’outil.
SYSTÈME DE FILTRE
AUTONETTOYANT
D27904
L’aspirateur est équipé d’un système innovant d’auto nettoyage du
filtre particulièrement efficace contre les poussières fines. Le filtre
plissé plat est automatiquement nettoyé toutes les 15 secondes
grâce à un jet d’air (son d’air pulsé).
Ce système de filtre autonettoyant détecte si le filtre est bouché
et ajuste automatiquement la pression du jet. Pour bénéficier
pleinement de l’action du système de filtre autonettoyant, bloquez
l’embout du tuyau contre une surface dure jusqu’à ce que le
système se mette en marche. Cela produira une puissance de jet
maximum et optimisera le nettoyage du filtre.
FREIN D’ARRÊT (FIG. 9)
D27904
Le frein d’arrêt verrouillera une roue pour empêcher l’aspirateur
de rouler.
1. Pour actionner le frein d’arrêt, appuyez
FIG. 9
sur le bouton de frein pour l’enclencher
en position de verrouillage.
2. Pour désactionner le frein d’arrêt,
appuyez sur le bouton de frein et celuici sera désactivé.
ARRÊT AUTOMATIQUE (FIG. 1, 10)
L’aspirateur s’arrêtera automatiquement
lorsque la cuve se remplira d’eau. Si c’est le
cas :
FIG. 10
W
W
1. Appuyez sur le bouton
marche/arrêt (D) pour arrêter
l’appareil. Débranchez
l’appareil.
2. Enlevez le couvercle
ventouse de la cuve et
mettez-le soigneusement de
côté.
3. Videz la cuve.
Les électrodes doivent être
propres pour assurer le bon
fonctionnement de l’arrêt
automatique.
Page 21

Français
19
Pour Nettoyer les Électrodes :
1. Appuyez sur le bouton marche/arrêt (D) pour arrêter l’appareil.
Débranchez l’appareil.
2. Enlevez le couvercle ventouse de la cuve et mettez-le
soigneusement de côté.
3. Nettoyez les électrodes (W).
4. Réinstallez le couvercle ventouse sur la cuve et verrouillez-le.
Pour arrêter l’appareil (fi g. 1)
1. Appuyez sur le bouton marche/arrêt (D) pour arrêter l’appareil.
2. Débranchez l’appareil.
MAINTENANCE
AVERTISSEMENT : Pour réduire tout risque de dommages
corporels graves, arrêter et débrancher l’outil avant tout
réglage ou avant de retirer ou installer toute pièce ou tout
accessoire.
CHANGEMENT DU FILTRE PLISSÉ (FIG. 11)
1. Soulevez la poignée du
P
J
FIG. 11
K
volet du filtre (K) pour
ouvrir le compartiment
du filtre (J).
2. Changez le filtre plissé
plat (P).
3. Refermez le volet du
filtre. Assurez-vous
que le volet est bien
verrouillé.
Entretien
AVERTISSEMENT : Expulser tout débris ou poussière des
évents à l’aide d’un jet d’air sec au moins une fois par semaine.
Porter une protection oculaire ANSI Z87.1 (CAN/CSA Z94.3) et
respiratoire NIOSH/OSHA/MSHA adéquates pour effectuer cette
opération.
AVERTISSEMENT : Ne jamais utiliser de solvants ou tout
autre produit chimique décapant pour nettoyer les parties non
métalliques de l’outil. Ces produits chimiques pourraient attaquer
les matériaux plastiques utilisés. Utilisez un chiffon humidifié
avec de l’eau et un savon doux. S’assurer qu’aucun liquide ne
pénètre dans l’outil ; ne jamais immerger aucune partie de l’outil
dans un liquide.
Stockage (fi g. 12)
1. Videz la cuve.
2. Essuyez l’intérieur et l’extérieur de
FIG. 12
l’aspirateur. Se reporter à la section
Entretien.
3. Secouez doucement le filtre pour le
nettoyer.
REMARQUE : Ne pas utiliser d’air
comprimé, d’eau ou des produits de
nettoyage pour nettoyer le filtre. Se
reporter à la section Changement
du filtre plissé.
4. Rangez le tuyau d’aspiration et le cordon comme illustré.
Entreposez l’appareil dans une pièce sèche et protégez-le de
toute utilisation non autorisée.
Accessoires
AVERTISSEMENT : Comme les accessoires autres que
ceux offerts par D
EWALT n’ont pas été testés avec ce produit,
leur utilisation avec cet appareil pourrait comporter un danger.
Pour réduire tout risque de dommages corporels, seuls des
accessoires D
EWALT recommandés doivent être utilisés avec
cet appareil.
Les accessoires recommandés pour cet outil sont vendus
séparément chez les distributeurs locaux ou dans les centres
de réparation agréés. Si vous avez besoin d’aide pour localiser
Page 22

Français
20
ces accessoires, veuillez contacter DEWALT Industrial Tool
Co., 701 East Joppa Road, Baltimore, MD 21286 ou appeler
1-800-4-D
EWALT (1-800-433-9258) ou vous rendre sur notre site
www.dewalt.com.
ACCESSOIRES EN OPTION
D279041 Filtre à usage général à nanocouche
D279041H Filtre H.E.P.A. : Capture 99,97 % de
toutes les particules supérieures ou
égales à 0,3 micron. Requis pour
aspirer les débris des peintures au
plomb.
D279053 Raccord d’outil de 31,6 mm D.E. –
57,2 mm D.E. (1-1/4 po –2-1/4 po)
D279054 Raccord d’outil de 25,4 mm D.I. –
31,6 mm D.I. (1 po –1-1/4 po)
D279055 Adaptateur escalier
D279056 Adaptateur en Y
D279058AS Tuyau antistatique 4,3 m (14 pi)
OPTION : TUYAU ANTISTATIQUE
Les modèles D27904 et D27905 sont
équipés d’un dispositif de mise à la
terre antistatique. Pour bénéficier de
cette option, il faut se procurer un tuyau
antistatique. Ce tuyau (D279058AS)
s’adapte sur le dispositif de l’extracteur
de poussière tout comme un tuyau
standard.
D279058 Tuyau indéformable 4,3 m (14 pi)
L’efficacité des extracteurs de poussière D
EWALT peut être
sensiblement améliorée avec l’usage des sacs-filtres. Les sacsfiltres permettent aussi d’éliminer facilement, rapidement et
proprement la poussière collectée.
Sacs-filtres papier : Les sacs-filtres D279042/D279052 ont
été conçus pour retenir de nombreux types de poussières y
compris celles du placoplâtre, du béton, et du bois. Ils permettent
d’atteindre des niveaux de performance de filtration de 99,9 % à
2 microns. Ces sacs doivent être changés lorsque la circulation
d’air est trop limitée. NE PAS réutiliser ces sacs.
D279042 Sac-filtre papier jetable de 45,4 l
(12 gallons) (à utiliser avec le D27904)
D279052 Sac-filtre papier jetable de 37,9 l
(10 gallons) (à utiliser avec le D27905)
Page 23

Français
21
Sac-filtre molletonné : Le sac molletonné D279052F a été
conçu pour retenir de nombreux types de poussières y compris
celles du placoplâtre, du béton, et du bois. Il permet d’obtenir
des niveaux de performance de filtrage de 95 % à 0,3 micron.
Ce sac doit être remplacé lorsque la circulation d’air est trop
limitée. NE PAS réutiliser ce sac. Ce sac molletonné est idéal
pour des matériaux plus lourds comme la poussière du béton ou
du placoplâtre, là où les sacs-filtres papier pourraient se déchirer.
Leur contenance est deux fois et demie plus grande que les sacsfiltres papier, un plus en termes de rapport qualité/prix.
D279052F Sac-filtre molletonné jetable de 37,9 l
(10 gallons)
Les sacs plastiques jetables D279042D ont été conçus pour être
utilisés avec les extracteurs de poussière industriels D27904
avec filtre autonettoyant. Ce concept fait adhérer le sac à la buse
de la cuve sans qu’il ne soit aspiré sur le filtre pendant l’utilisation.
Le sac plastique jetable permet l’aspiration et l’élimination facile
des poussières, tout en empêchant celles-ci de s’échapper dans
l’atmosphère au moment du vidage. Parce que ces sacs ont
été spécialement conçus pour ne pas être aspirés sur le filtre, il
restera une petite quantité de poussières dans la cuve.
D279042D Sac plastique de récupération jetable
de 45,4 l (12 gallons) (à utiliser avec le
D27904)
D279059 Ce kit-accessoire comprend :
Rallonges (2), rallonge courbe (1),
suceur (1), raclette/balayeuse (1)
Réparations
Pour assurer votre SÉCURITÉ et la FIABILITÉ du produit, toute
réparation, maintenance et tout réglage (y compris l’inspection et
le remplacement des balais) doivent être effectués par un centre
de réparation en usine D
EWALT, un centre de réparation DEWALT
agréé ou par tout autre personnel de réparation qualifié. Utilisez
systématiquement des pièces de rechange d’origine.
Garantie limitée trois ans
DEWALT réparera gratuitement tous les problèmes dus à des
défauts de matériau ou de fabrication pendant trois ans à compter
de la date d'achat. Cette garantie ne couvre pas des défaillances
de pièce dues à une usure normale ou à une mauvaise utilisation
de l'outil. Pour plus de détails relatifs à la couverture de la
garantie et aux réparations sous garantie, visiter le site Web
www.dewalt.com ou composer le 1-800-4-D
EWALT
(1-800-433-9258). Cette garantie ne s'applique pas aux accessoires
ni aux dommages causés par des réparations réalisées ou
tentées par des tiers. Cette garantie vous accorde des droits
légaux spécifiques et il est possible que vous ayez d'autres droits
qui varient d'un État ou d'une province à l'autre.
En plus de la garantie, les outils D
EWALT sont couverts par
notre :
SERVICE D'ENTRETIEN GRATUIT DE 1 AN
D
EWALT entretiendra l'outil et remplacera les pièces usées par
une utilisation normale et ce, gratuitement, à tout instant pendant
la première année à compter de la date d'achat.
GARANTIE DE REMBOURSEMENT DE 90 JOURS
Si vous n'êtes pas entièrement satisfait des performances de votre
outil électrique, laser ou de votre marteau-cloueur DEWALT pour
quelque raison que ce soit, vous pouvez le retourner accompagné
d'un reçu dans les 90 jours suivant la date d'achat et nous vous
rembourserons entièrement–sans poser de questions.
Page 24

Français
22
AMÉRIQUE LATINE : cette garantie ne s'applique pas aux produits
vendus en Amérique latine. Pour ceux-ci, veuillez consulter les
informations relatives à la garantie spécifique présente dans
l'emballage, appeler l'entreprise locale ou consulter le site Web
pour les informations relatives à cette garantie.
REMPLACEMENT GRATUIT DES ÉTIQUETTES
D'AVERTISSEMENT : si les étiquettes d'avertissement deviennent
illisibles ou sont manquantes, composer le 1-800-4-D
EWALT pour
en obtenir le remplacement gratuit.
Guide de Dépannage
PROBLÈME SOLUTION
La turbine s’aspiration
ne fonctionne pas
Vérifier le cordon, la fiche et la prise.
S’assurer que l’interrupteur est bien en
position de MARCHE.
Capacité d’aspiration
réduite
Retirer tout blocage au niveau du nez
d’aspiration, du tube, du tuyau ou du
filtre plissé plat.
Changer le sac-filtre papier.
S’assurer que le filtre est bien arrimé
en place.
Changer le filtre plissé plat.
La poussière est
rejetée pendant
l’aspiration
Vérifier que le filtre plissé plat a bien
été installé.
Changer le filtre plissé plat.
Le filtre autonettoyant
ne fonctionne pas
Le tuyau d'aspiration n’est pas
connecté.
(D27904 seulement)
S’assurer que le filtre plissé plat est
propre et sec.
L’outil électrique
refuse de se mettre en
marche
S’assurer que l’interrupteur de
dépoussiérage automatique est réglé
sur le mode automatique.
CARACTÉRISTIQUES TECHNIQUES
MODÈLE D27904 D27905
Volts 120 V ~ 120 V ~
Hertz 60 60
Amp 9 A 9 A
12 A (avec l’outil) 12 A (avec l’outil)
Contenance 45,5 litres (12 gallons) 37,9 litres (10 gallons)
Page 25

Français
23
Certifi cat de conformité
Les aspirateurs extracteurs de poussière DEWALT (D27904, D27905) sont fabriqués
conformément aux normes 1017 des Stations d’essais-Laboratoire du feu (Underwriters
Laboratories, UL) et C22.2 Nº 243-01 de l’Association canadienne de normalisation (CSA).
Ces aspirateurs sont aussi conformes aux spécifications des aspirateurs H.E.P.A. comme
défini par la norme Rénovation, Réparations et Peintures (40 CFR Part 745) de l’Agence
de protection de l'environnement américaine (EPA) lorsqu’utilisés avec les filtres H.E.P.A.
D279041H.
Les filtres H.E.P.A. D279041H ont été évalués en conformité avec la norme EN1822 par un
tiers pour confirmer qu’ils peuvent aspirer des particules de 0,3 micron avec une efficacité de
99,97 %.
Page 26

Español
24
Defi niciones: Normas de seguridad
Las siguientes definiciones describen el nivel de gravedad de
cada advertencia. Lea el manual y preste atención a estos
símbolos.
PELIGRO:
indica una situación de peligro inminente que, si no
se evita,
provocará
la
muerte o lesiones graves.
ADVERTENCIA:
Indica una situación de peligro potencial que,
si no se evita,
podría
provocar la
muerte o lesiones graves
ATENCIÓN:
Indica una situación de peligro potencial que, si no
se evita,
puede
provocar
lesiones leves o moderadas.
AVISO: Se refiere a una práctica no relacionada a lesiones
corporales que de no evitarse puede resultar en daños a la
propiedad.
SI USTED TIENE ALGUNA PREGUNTA O COMENTARIO
ACERCA DE ESTA O CUALQUIER OTRA HERRAMIENTA
D
EWALT, LLÁMENOS SIN COSTO AL: 1-800-4-DEWALT
(1-800-433-9258).
Instrucciones de seguridad
importantes
NOTA: Esta aspiradora ha sido diseñada sólo para usos
comerciales.
ADVERTENCIA: Cuando utilice aparatos eléctricos, siempre
siga instrucciones básicas de seguridad para reducir el riesgo
de incendio, descarga eléctrica y lesiones corporales, incluyendo
las siguientes:
ANTES DE UTILIZAR ESTE APARATO, LEA Y SIGA TODAS
LAS INSTRUCCIONES.
• Enchúfelo sólo en una toma de corriente debidamente
conectada a tierra (ver Instrucciones de conexión a tierra).
• No deje el aparato sin supervisión cuando esté enchufada
a una fuente de alimentación. Desenchúfelo de la toma
de corriente cuando no esté en uso y antes de realizar
mantención.
• No exponga el aparato a la lluvia. Almacénelo en el interior.
Esto reducirá el riesgo de descargas eléctricas.
• No permita que se juegue con él. Preste especial atención si el
aparato es utilizado por o cerca de niños.
• SÓLO use este aparato como lo describe el manual. Use sólo
los accesorios D
EWALT recomendados.
• No use este aparato si su cable o enchufe están dañados. Si
el aparato no funciona debidamente, o si se ha caído, dañado,
dejado a la intemperie, o si se ha caído en agua, devuélvalo a
un centro de servicio.
• No tire del cable, levante el aparato por el cable, use el cable
como un mango, cierre la puerta si el cable está en el umbral,
o tire del cable entorno a bordes o esquinas afilados. No
atropelle el cable con el aparato. Mantenga el cable alejado de
superficies calientes.
• No tire del cable para desenchufar el aparato. Para
desenchufarlos, tome el enchufe con firmeza, no el cable.
• No toque el enchufe o el aparato si tiene las manos mojadas.
• No inserte ningún objeto por las aperturas del aparato. No
utilice este aparato si tiene alguna apertura bloqueada;
manténgalo sin polvo, pelusa, pelo o cualquier otra cosa que
podría reducir el flujo de aire.
• Mantenga su cabello, vestimenta suelta, dedos y toda parte
de su cuerpo alejados de las aperturas y piezas móviles del
aparato.
• Apague todos los controles antes de desenchufar el aparato.
• Tenga especial cuidado cuando lo use para limpiar en
escaleras.
Page 27

Español
25
• No use el aparato para recoger líquidos inflamables o
combustibles, como gasolina, ni lo use en lugares donde exista
la presencia de líquidos inflamables o combustibles.
GUARDE ESTAS INSTRUCCIONES
REGLAS DE SEGURIDAD ADICIONALES
• Esta aspiradora puede ser convertida para cumplir con
las regulaciones de la EPA en cuanto a Renovaciones,
Reparación y Pintura (RRP), relacionadas con plomo, para
aspiradoras HEPA solamente cuando se utiliza con el filtro
HEPA D279041H (incluido con la D27905H).
Se recomienda la bolsa desechable de lanilla D279042F para
alargar la vida útil del filtro HEPA.
Póngase en contacto con la Agencia de Protección Ambiental
(EPA) de los Estados Unidos para obtener más información
sobre sus regulaciones en cuanto a Renovaciones, Reparación
y Pintura (RRP).
• No recoja nada que se esté quemando o que esté humeando,
como cigarrillos, fósforos o cenizas calientes.
• No use para aspirar materiales combustibles explosivos, como
carbón, grano u otro material combustible finamente dividido.
• No utilice para aspirar materiales peligrosos, tóxicos o
cancerígenos, tales como asbesto o pesticida.
• Nunca recoja líquidos explosivos (como gasolina, combustible
diesel, gasóleo, diluyente de pintura, etc.), ácidos o solventes.
• No utilice la aspiradora sin filtro y/o sin bolsas de filtro
instaladas.
• Alguna madera contiene preservantes que pueden ser tóxicos.
Tenga especial cuidado para prevenir la inhalación y el
contacto con la piel cuando trabaje con estos materiales.
Solicite y siga cualquier información de seguridad que su
proveedor de materiales ponga a su disposición.
• No se pare sobre la aspiradora.
• Los hilos del alargador deben ser de un calibre apropiado
(AWG o American Wire Gauge) para su seguridad. Mientras
menor sea el calibre del hilo, mayor la capacidad del cable.
Es decir, un hilo calibre 16 tiene mayor capacidad que uno
de 18. Un cable de un calibre insuficiente causará una caída
en la tensión de la línea dando por resultado una pérdida de
energía y sobrecalentamiento. Cuando se utilice más de un
alargador para completar el largo total, asegúrese que los hilos
de cada alargador tengan el calibre mínimo. La tabla siguiente
muestra el tamaño correcto a utilizar. Si tiene dudas sobre cuál
calibre usar, use un calibre mayor. Cuanto más pequeño sea
el número del calibre, más resistente será el cable.
• Si utilizará un alargador en el exterior, deberá tener marcado
el sufijo W-A ó W luego de la designación del tipo de cable. Por
ejemplo – SJTW-A para indicar que es aceptable para usar
afuera.
Calibre mínimo para cables de alimentación
Voltios Largo total del cable en
metros (pies)
120V
7,6 (25) 15,2 (50) 30,5 (100) 45,7 (150)
240V
15,2 (50) 30,5 (100) 61,0 (200) 91,4 (300)
AWG
14 12 No recomendado
ADVERTENCIA: Siempre use protección ocular. Tod o
usuario o persona circunstante deberá utilizar protección ocular
en conformidad con ANSI Z87.1.
ADVERTENCIA: Siempre use protección auditiva personal
en conformidad con ANSI S12.6 (S3.19) durante el uso de
este aparato. Bajo algunas condiciones y duraciones de uso, el
ruido producido por este producto puede contribuir a la pérdida
auditiva.
Page 28

Español
26
ADVERTENCIA: SIEMPRE utilice lentes de seguridad. Los
anteojos de diario NO SON lentes de seguridad. Utilice también
careta o mascarilla si se produce polvo al operar en el área.
PORTE SIEMPRE EQUIPO DE SEGURIDAD CERTIFICADO:
• Protección ocular ANSI Z87.1 (CAN/CSA Z94.3),
• Protección auditiva ANSI S12.6 (S3.19),
• Protección respiratoria NIOSH/OSHA/MSHA.
ADVERTENCIA: Este producto contiene químicos, incluyendo
el plomo, que el estado de California sabe producen cáncer,
defectos de nacimiento y otros tipos de daño reproductivo.
Lávese las manos después de utilizar este producto.
ADVERTENCIA: Algunos tipos de polvo contienen químicos
que el estado de California sabe producen cáncer, defectos de
nacimiento y otros tipos de daño reproductivo. Algunos ejemplos
de estos químicos son:
• Compuestos de fertilizantes,
• Compuestos de insecticidas, herbicidas y pesticidas ,
• Arsénico y cromo proveniente de madera tratada
químicamente.
Para reducir su exposición a estos químicos, use equipo de
seguridad aprobado tal como máscaras antipolvo diseñadas
especialmente para filtrar partículas microscópicas.
GUARDE ESTAS INSTRUCCIONES
Instrucciones de Conexión a Tierra
Este aparato debe tener conexión a tierra. En el caso de una
falla o avería, la conexión a tierra proporciona una vía de menor
resistencia para la corriente eléctrica, reduciendo el riesgo de
choque eléctrico. Este aparato viene con un cable equipado
con un conductor a tierra y un enchufe con conexión a tierra. El
enchufe deberá conectarse a una toma que haga juego y que esté
instalada apropiadamente y conectada a tierra en conformidad
con todos los códigos y regulaciones locales.
ADVERTENCIA: La conexión
TOMA CON
CONEXIÓN
A TIERRA
FIG. A
CLAVIJA DE
CONEXIÓN A
TIERRA
indebida del conductor a tierra del
equipo puede tener como resultado
una descarga eléctrica. Si tiene alguna
duda acerca de si el enchufe está
correctamente conectado a tierra,
consulte con un electricista calificado.
No altere el enchufe que viene con el
aparato – si no entra en la toma de
corriente, pida a un electricista
calificado que le instale una toma
apropiada.
Este aparato es compatible con circuitos nominales de 120 voltios
y tiene un enchufe de conexión a tierra como el que aparece
ilustrado en la Figura A. Verifique que el aparato esté conectado
en una toma que tenga la misma configuración que el enchufe. No
debería usar un adaptador con este aparato.
Motor
Muchas herramientas DEWALT funcionan con corriente continua,
o alterna monofásica de 25 a 60 ciclos, y con un voltaje 5 por
ciento por encima o por debajo del que aparece en la placa de
especificaciones de la herramienta. Sin embargo, varios modelos
han sido diseñados sólo para corriente alterna. Remítase a la
placa de especificaciones de su herramienta para ver el voltaje
correcto y la calificación apropiada de la corriente.
No opere su herramienta en una corriente en que el voltaje no se
encuentra entre los límites apropiados. No opere herramientas
marcadas para sólo corriente alterna en corriente continua. Esto
podría dañar seriamente la herramienta.
GUARDE ESTAS INSTRUCCIONES
Page 29

Español
27
COMPONENTES (FIG. 1)
ADVERTENCIA: Nunca modifique la herramienta eléctrica,
ni tampoco ninguna de sus piezas. Podría producir lesiones
corporales o daños.
A. Soporte para la manguera H. Manguera de succión
B. Toma para herramientas I. Asa
eléctricas J. Compartimiento del filtro
C. Seguro del recipiente K. Mango para la puerta del
D. Conmutador de encendido filtro
y apagado L. Soporte para el cable
E. Dial de succión variable M. Cable eléctrico
F. Interruptor de activación N. Recipiente
de la toma de corriente O. Tapa de la aspiradora
G. Entrada de manguera con
cierre de torsión
USO DEBIDO
Estas aspiradoras son utilizadas para la extracción de partículas
finas como polvo de muro seco, concreto, madera o superficies.
Estas unidades cuentan con una toma de corriente integrada
para utilizar con herramientas eléctricas, además de un arranque
automático de la aspiradora cuando se enciende la herramienta y
un intervalo adicional de 15 segundos para despejar la manguera
de succión cuando se apague la herramienta, sistema de filtraje
doble, tanque anticorrosivo, ruedas grandes para facilitar el
maniobrado, y una práctica bandeja de superficie plana para
poner sus herramientas mientras trabaja.
NO utilice la herramienta en condiciones húmedas o en la
presencia de líquidos o gases inflamables.
Estas aspiradoras para trabajos pesados son para uso profesional.
NO permita que un niño juegue con ella. Si el operador no tiene
Aparece ilustrado el
modelo D27904
FIG. 1
A
B
C
D
F
G
H
E
I
K
L
J
O
N
M
Page 30

Español
28
experiencia operando esta herramienta, su uso deberá ser
supervisado.
MONTAJE (FIG. 1–4)
ADVERTENCIA: Para reducir el riesgo de lesiones
corporales graves, apague la herramienta y desconéctela de
la fuente de alimentación antes de realizar ajustes o de quitar
o poner accesorios.
ADVERTENCIA: Cuando utilice aparatos eléctricos, siempre
siga instrucciones básicas de seguridad para reducir el riesgo de
incendio, descarga eléctrica y lesiones corporales.
ADVERTENCIA: El filtro plano
FIG. 2
P
plegado (P) debe siempre estar en su
sitio cuando aspire. Cuando aspire
polvo fino, puede también usar un
filtro de papel adicional o saco de
lanilla.
1. Abra los dos cierres del recipiente
(C), (uno a cada lado de la
aspiradora).
2. Levante la tapa de la aspiradora del recipiente y póngala
cuidadosamente a un lado.
3. Retire las ruedas y los accesorios del recipiente.
4. Voltee el recipiente y colóquelo sobre una superficie firme y
plana.
5. Deslice el soporte para el tubo (S) para instalarlo en el tanque
como aparece ilustrado ANTES de ensamblar las ruedas (R).
6. Inserte las ruedecillas (Q) en los orificios y presione firmemente
para fijarlas en su lugar.
7. Coloque la unidad con las ruedas (R) en las ranuras y
presione firmemente para fijarla en su lugar. Fije la unidad de
ruedas al tanque con dos broches de acero y dos tornillos de
estrella. Voltee el recipiente y ponga las ruedas/ruedecillas
sobre una superficie firme y plana.
FIG. 3
D27905D27904
R
Q
R
Q
S
S
8. Si utilizará un filtro de papel o saco de lanilla, instálelo como
aparece ilustrado (T).
NOTA: Tenga cuidado de no rajar la bolsa. Verifique que la
bolsa esté puesta debidamente en la entrada para que se
forme un sello ajustado y obtenga el máximo rendimiento de
colección de polvo.
9. Coloque la tapa de la aspiradora en el recipiente y asegúrelo
cerrando los cierres del recipiente.
10. Inserte la conexión de cierre por torsión de la manguera (H)
en la entrada y gírela en la dirección de las manillas del reloj
para asegurarla en su lugar.
T
FIG. 4
H
FUNCIONAMIENTO
ADVERTENCIA: Para reducir el riesgo de lesiones
corporales graves, apague la herramienta y desconéctela de
Page 31

Español
29
la fuente de alimentación antes de realizar ajustes o de quitar
o poner accesorios.
ADVERTENCIA: Riesgo de incendio. No aspire nada que se
esté quemando, ardiendo o humeando, como fósforos, cigarrillos
o cenizas calientes.
• No use para aspirar materiales combustibles explosivos,
como carbón, grano u otro material combustible finamente
dividido.
• No utilice para aspirar materiales peligrosos, tóxicos o
cancerígenos, tales como asbesto o pesticida.
• Esta aspiradora puede ser convertida para cumplir con
las regulaciones de la EPA en cuanto a Renovaciones,
Reparación y Pintura (RRP), relacionadas con plomo, para
aspiradoras HEPA solamente cuando se utiliza con el filtro
HEPA D279041H (incluido con la D27905H).
Se recomienda la bolsa desechable de lanilla D279042F
para alargar la vida útil del filtro HEPA.
Póngase en contacto con la Agencia de Protección
Ambiental (EPA) de los Estados Unidos para obtener
más información sobre sus regulaciones en cuanto a
Renovaciones, Reparación y Pintura (RRP).
ADVERTENCIA: Cuando utilice aparatos eléctricos, siempre
siga instrucciones básicas de seguridad para reducir el riesgo de
incendio, descarga eléctrica y lesiones corporales.
1. Enchufe el cable en una
FIG. 5
D
E
toma de corriente apropiada.
2. Oprima el conmutador de
encendido y apagado (D)
para encender la unidad.
3. Coloque el dial de succión
variable (E) en la posición
deseada. Remítase a Cómo
configurar la succión o
velocidad variable.
COMO CONFIGURAR LA SUCCIÓN O VELOCIDAD
VARIABLE (FIG. 6)
Esta característica permite que el usuario controle la potencia
y succión de la aspiradora. El nivel de potencia dedicado a la
aspiradora y la potencia que va a la herramienta son controlados.
Para determinar la configuración correcta para la aspiradora:
1. Determine el amperaje de la herramienta eléctrica que
utilizará con la aspiradora.
2. Remítase a la tabla siguiente para ver cuál es la configuración
correcta para el dial de succión variable de la aspiradora.
Calificación de amperaje
máximo de la herramienta
Velocidad variable
a fijar
3,0 amps MÁX
3,5 amps 1/2
5,0 amps MÍN
3. Gire el dial de succión variable a la
FIG. 6
E
configuración correcta: MÍN, 1/2 ó
MÁX.
4. Siga las instrucciones en Cómo
conectar herramientas eléctricas
para conectar la herramienta
eléctrica a utilizar.
NOTA: Esta configuración además controla el nivel de succión.
Esto es muy útil en aplicaciones en las que la aspiradora ejerce
niveles inaceptables de tiraje a la pieza de trabajo.
CÓMO CONECTAR HERRAMIENTAS ELÉCTRICAS (FIG. 7, 8)
1. Enchufe el cable de la aspiradora en una toma de corriente
apropiada.
2. Enchufe la herramienta eléctrica en la toma de corriente (B).
3. Oprima el conmutador de encendido y apagado (D) para
encender la unidad.
Page 32

Español
30
4. Presione el interruptor de
B
V
FIG. 7
D
F
activación de la toma de
corriente (F) para activar la
modalidad automática.
5. La luz (V) se encenderá,
indicando que la aspiradora
está en modalidad stand
by.
6. Para cambiarla de vuelta a
la modalidad manual, presione el interruptor de activación de
la toma de corriente (F). La luz (V) se apagará, indicando
que la aspiradora está en modalidad manual.
NOTA:
• La aspiradora se enciende y apaga automáticamente con
la herramienta eléctrica.
• La aspiradora se enciende automáticamente dentro de
0,5 segundos y opera por 15 segundos adicionales luego
de apagarse la herramienta eléctrica.
• Por favor remítase a Especificaciones para ver las
especificaciones de conexión de herramientas eléctricas.
7. Elija el adaptador de herramienta
U
FIG. 8
H
eléctrica adecuado (U) a la
conexión eléctrica de la
herramienta a utilizar. Conecte el
adaptador de la herramienta
eléctrica (U) en la herramienta
eléctrica.
8. Conecte la manguera de
succión (H) en el adaptador de
la herramienta.
SISTEMA DE LIMPIEZA AUTOMÁTICA DEL FILTRO
D27904
Esta aspiradora cuenta con un sistema innovador para la
limpieza del filtro, el cual es en particular eficaz cuando se trata
de polvo fino. El filtro plano plegado se limpia automáticamente
cada 15 segundos a través de un chorro de aire (sonido
palpitante).
El sistema de limpieza automática del filtro tiene un sensor que
le avisa cuando el filtro está bloqueado y ajustará la presión
de la palpitación. Para lograr el efecto completo del sistema
de limpieza del filtro, bloquee el extremo de la manguera
colocándolo contra una superficie dura hasta que el sistema de
limpieza del filtro se active. Esto producirá la palpitación máxima
y la mejor limpieza del filtro.
FRENO (FIG. 9)
D27904
El freno bloquea el movimiento de una de
FIG. 9
las ruedas para evitar que la aspiradora
ruede.
1. Para activar el freno, oprima el botón
del freno para que entre en la posición
de bloqueo.
2. Para desactivar el freno, oprima el botón del freno para que el
freno deje de bloquear la rueda.
APAGADO AUTOMÁTICO (FIG. 1, 10)
La aspiradora se apagará cuando el recipiente se llene de agua;
cuando esto suceda:
1. Oprima el conmutador de encendido y apagado (D) para
apagar la unidad. Desenchufe la unidad.
2. Levante la tapa de la aspiradora del recipiente y póngala
cuidadosamente a un lado.
3. Vacíe el recipiente.
Page 33

Español
31
Los electrodos deben estar limpios para garantizar la operación
correcta del apagado automático.
Para limpiar los electrodos:
1. Oprima el conmutador de
FIG. 10
W
W
encendido y apagado (D) para
apagar la unidad. Desenchufe
la unidad.
2. Levante la tapa de la
aspiradora del recipiente y
póngala cuidadosamente a un
lado.
3. Limpie los electrodos (W).
4. Reponga la tapa de la
aspiradora en el recipiente y asegúrela en su lugar.
Para apagar (Fig. 1)
1. Oprima el conmutador de encendido y apagado (D) para
apagar la unidad.
2. Desenchufe la unidad.
MANTENIMIENTO
ADVERTENCIA: Para reducir el riesgo de lesiones
corporales graves, apague la herramienta y desconéctela de
la fuente de alimentación antes de realizar ajustes o de quitar
o poner accesorios.
P
J
FIG. 11
K
PARA CAMBIAR EL
FILTRO PLEGADO (FIG.
11)
1. Levante el mango del
compartimiento del
filtro (K) para abrir el
compartimiento del
filtro (J).
2. Cambie el filtro plano plegado (P).
3. Cierre la puerta del filtro. Verifique que la puerta quede bien
cerrada.
Limpieza
ADVERTENCIA: Limpie la suciedad y el polvo de las rejillas
de ventilación con aire seco al menos una vez por semana.
Lleve protección ocular ANSI Z87.1 (CAN/CSA Z94.3) debida
y protección respiratoria NIOSH/OSHA/MSHA debida cuando
haga esto.
ADVERTENCIA: Nunca utilice solventes u otros químicos
fuertes cuando limpie las piezas no metálicas de la herramienta.
Estos químicos pueden debilitar los materiales de plástico
utilizados en estas piezas. Use un paño humedecido con agua
y jabón suave. No permita que ningún líquido se introduzca en
la herramienta; no sumerja ninguna parte de la herramienta en
un líquido.
Almacenamiento
FIG. 12
(Fig. 12)
1. Vacíe el recipiente.
2. Limpie la aspiradora con un trapo
por dentro y por fuera. Remítase a
Limpieza.
3. Sacuda levemente el filtro para limpiar.
NOTA: No use aire comprimido, agua
o soluciones de limpieza para limpiar el
filtro. Remítase a Para cambiar el filtro
plegado.
4. Guarde la manguera de succión y el cable como aparece
ilustrado. Coloque el aparato en un lugar seco y protéjalo de
usos no autorizado.
Page 34

Español
32
Accesorios
ADVERTENCIA: Como otros accesorios fuera de los ofrecidos
por D
EWALT no han sido probados con este producto, el uso
de tales accesorios con esta herramienta puede ser peligroso.
Para reducir el riesgo de lesiones, sólo se deberían usar los
accesorios recomendados por D
EWALT con este producto.
Los accesorios recomendados para su herramienta están
disponibles con un cargo adicional en su distribuidor local o en el
centro de servicio autorizado. Si necesita ayuda para ubicar algún
accesorio, por favor póngase en contacto con D
EWALT Industrial
Tool Co., 701 East Joppa Road, Baltimore, MD 21286, llame
al 1-800-4-D
EWALT (1-800-433-9258) o visite nuestro sitio Web
www.dewalt.com.
ACCESORIOS OPCIONALES
D279041 Filtro para uso general con
nano-revestimiento
D279041H Filtro HEPA: Captura el 99,97 % de
todas las partículas mayores o iguales
a 0,3 micrones. Obligatorias al recoger
desechos de pintura a base de plomo.
D279053 Adaptador para herramientas de
31,6 mm DE – 57,2 mm DE
(1-1/4 pulg.–2-1/4 pulg.)
D279054 Adaptador para herramientas de
25,4 mm – 31,6 mm DI
(1 pulg.–1-1/4 pulg.)
D279055 Adaptador para escalones
D279056 Conector en Y
D279058AS Manguera anti-estática de
4,3 m (14 pies)
OPCIÓN DE MANGUERA
ANTI-ESTÁTICA
Tanto la D27904 como la D27905
vienen equipadas con un sistema de
conexión a tierra anti-estática. Para
poder aprovechar esta opción, deberá
comprar una manguera anti-estática.
Esta manguera (D279058AS) se
conecta al sistema de extracción de
polvo en la misma forma en que se
conecta la manguera estándar.
D279058 Manguera inaplastable de
4,3 m (14 pies)
La eficiencia del filtro de los extractores de polvo D
EWALT
puede aumentar significativamente si utiliza bolsas para el filtro.
Además, las bolsas para el filtro son una forma limpia, fácil y
rápida de deshacerse del polvo colectado.
Bolsas de filtro de papel: Las bolsas para el filtro D279042/
D279052 están diseñadas para captar muchos tipos diferentes
de polvo, incluyendo el de muro seco, concreto y madera.
Brindan una filtración de 99,9% en 2 micrones. Estas bolsas
deben ser desechadas una vez que el flujo de aire empiece a
disminuir. NO reutilice las bolsas.
Page 35

Español
33
D279042 Bolsa desechable de filtro de papel
(para usar con D27904) 45,4 litros
(12 galones)
D279052 Bolsa desechable de filtro de papel
(para usar con D27905) 37,9 litros
(10 galones)
Bolsa de filtro de lanilla: La bolsa de lanilla D279052F está
diseñada para capturar muchos tipos de polvo incluyendo
de yesería, hormigón y madera. Proporciona un rendimiento
de filtración de 95% a 0,3 micrones. Esta bolsa debe ser
desechada una vez que el flujo de aire empiece a disminuir. NO
reutilice esta bolsa. La bolsa de lanilla es ideal para materiales
más pesados como el polvo de concreto y muro seco, los que
podrían hacer que la bolsa de papel se raje. Además tiene una
capacidad 2,5 veces mayor que la de la bolsa de filtro de papel,
lo que aumenta la productividad y la hace de gran valor.
D279052F Bolsa desechable de filtro de lanilla
37,9 litros (10 galones)
La bolsa de plástico desechable D279042D está diseñada para
usarse con el Extractor de polvo para trabajos pesados D27904
con limpieza automática del filtro. El diseño sella el forro de
la entrada del tanque sin chuparse en el filtro durante su uso.
La bolsa de plástico desechable permite limpiar y desechar
fácilmente el polvo recogido y previene que el polvo se escape
de vuelta a la atmósfera al vaciarse. Como esta bolsa está
especialmente diseñada para no chuparse en el filtro, quedará
una pequeña cantidad de polvo en el tanque.
D279042D Bolsa desechable de fi ltro de plástico
(para usar con D27904) 45,4 litros
(12 galones)
D279059 El juego de accesorios incluye:
(2) Alargador, (1) tubo curvo, (1)
herramienta para bordes, (1) barredor/
trapeador
Reparaciones
Las reparaciones, el mantenimiento y los ajustes de este producto
deberían ser realizados por un centro de servicio de fábrica
D
EWALT, un centro de servicio autorizado por DEWALT u otro
personal de servicio calificado para garantizar la SEGURIDAD
y FIABILIDAD del producto. Siempre utilice repuestos idénticos.
Póliza de Garantía
IDENTIFICACIÓN DEL PRODUCTO:
Sello o firma del Distribuidor.
Nombre del producto: _____________ Mod./Cat.: _____________
Marca: ________________Núm. de serie:__________________
(Datos para ser llenados por el distribuidor)
Fecha de compra y/o entrega del producto: _________________
Nombre y domicilio del distribuidor donde se adquirió el
producto:
____________________________________________________
Este producto está garantizado por un año a partir de la fecha
de entrega, contra cualquier defecto en su funcionamiento,
así como en materiales y mano de obra empleados para su
fabricación. Nuestra garantía incluye la reparación o reposición
del producto y/o componentes sin cargo alguno para el cliente,
incluyendo mano de obra, así como los gastos de transportación
razonablemente erogados derivados del cumplimiento de este
certificado.
Page 36

Español
34
Para hacer efectiva esta garantía deberá presentar su herramienta
y esta póliza sellada por el establecimiento comercial donde se
adquirió el producto, de no contar con ésta, bastará la factura de
compra.
EXCEPCIONES
Esta garantía no será válida en los siguientes casos:
• Cuando el producto se hubiese utilizado en condiciones
distintas a las normales;
• Cuando el producto no hubiese sido operado de acuerdo
con el instructivo de uso que se acompaña;
• Cuando el producto hubiese sido alterado o reparado
por personas distintas a las enlistadas al final de este
certificado.
Anexo encontrará una relación de sucursales de servicio de
fábrica, centros de servicio autorizados y franquiciados en la
República Mexicana, donde podrá hacer efectiva su garantía y
adquirir partes, refacciones y accesorios originales.
Garantía limitada de tres años
DEWALT reparará sin cargo cualquier defecto ocasionado por
materiales defectuosos o mano de obra, durante tres años a partir
de la fecha de compra. Esta garantía no cubre fallas en las piezas
que resulten del desgaste normal de la herramienta o de su
utilización inadecuada. Para obtener información detallada sobre
la cobertura de la garantía y sobre reparaciones, visite nuestra
página Web www.dewalt.com o llame al 1-800-4-D
EWALT (1-800-
433-9258). Esta garantía no se extiende a los accesorios o a los
daños causados por terceros al intentar realizar reparaciones.
Esta garantía le concede derechos legales específicos; usted
goza también de otros derechos que varían según el estado o
provincia.
Además de la garantía, las herramientas D
EWALT están cubiertas
por nuestro:
SERVICIO GRATUITO DE 1 AÑO
D
EWALT realizará el mantenimiento de la herramienta y
reemplazará las piezas gastadas tras el uso normal, sin costo
alguno, en cualquier momento durante el primer año después de
la compra.
GARANTÍA DE REEMBOLSO DE DINERO DE 90 DÍAS
Si por alguna razón no estuviera plenamente satisfecho con el
rendimiento de la herramienta eléctrica, el láser o la clavadora
D
EWALT, puede devolver el producto dentro de los 90 días
siguientes a la fecha de compra acompañado del recibo de
compra. De esta manera, se le reintegrará el importe total del
producto sin formularle pregunta alguna.
AMÉRICA LATINA: Esta garantía no se aplica a los productos
que se venden en América Latina. Para los productos que se
venden en América Latina, debe consultar la información de la
garantía específica del país que viene en el empaque, llamar
a la compañía local o visitar el sitio Web a fin de obtener esa
información.
Page 37

Español
35
REEMPLAZO GRATUITO DE LAS ETIQUETAS DE
ADVERTENCIA: si sus etiquetas de advertencia se tornan
ilegibles o faltan, llame al 1-800-4-D
EWALT para que se las
reemplacen gratuitamente.
Resolución de problemas
PROBLEMA SOLUCIÓN
La turbina de succión
no funciona
Revise el cable, los enchufes y la toma.
Verifique que el interruptor de
encendido y apagado este en ON.
La capacidad de
succión disminuye
Revise que no haya nada bloqueando
la boquilla de succión, el tubo de
succión, la manguera de succión o el
filtro plano plegado.
Cambie la bolsa de papel del filtro.
Verifique que la tapa del filtro esté
asegurada.
Cambie el filtro plano plegado.
Cuando aspiro sale
polvo
Revise que el filtro plano plegado esté
debidamente instalado.
Cambie el filtro plano plegado.
La limpieza automática
del filtro no funciona
(D27904 únicamente)
La manguera de succión no está
conectada.
Verifique que el filtro plano plegado
esté limpio y seco.
La herramienta
eléctrica no enciende
Verifique que el interruptor de
activación de la toma de corriente
esté en modalidad automática.
Page 38

Español
36
PARA REPARACIÓN Y SERVICIO DE SUS
HERRAMIENTAS ELÉCTRICAS, FAVOR DE DIRIGIRSE
AL CENTRO DE SERVICIO MÁS CERCANO
CULIACAN, SIN
Blvd.Emiliano Zapata 5400-1 Poniente
Col. San Rafael (667) 717 89 99
GUADALAJARA, JAL
Av. La Paz #1779 - Col. Americana Sector Juárez (33) 3825 6978
MEXICO, D.F.
Eje Central Lázaro Cárdenas No. 18
Local D, Col. Obrera (55) 5588 9377
MERIDA, YUC
Calle 63 #459-A - Col. Centro (999) 928 5038
MONTERREY, N.L.
Av. Francisco I. Madero 831 Poniente - Col. Centro (818) 375 23 13
PUEBLA, PUE
17 Norte #205 - Col. Centro (222) 246 3714
QUERETARO, QRO
Av. San Roque 274 - Col. San Gregorio (442) 2 17 63 14
SAN LUIS POTOSI, SLP
Av. Universidad 1525 - Col. San Luis (444) 814 2383
TORREON, COAH
Blvd. Independencia, 96 Pte. - Col. Centro (871) 716 5265
VERACRUZ, VER
Prolongación Díaz Mirón #4280 - Col. Remes (229) 921 7016
VILLAHERMOSA, TAB
Constitución 516-A - Col. Centro (993) 312 5111
PARA OTRAS LOCALIDADES:
Si se encuentra en México, por favor llame al (55) 5326 7100
Si se encuentra en U.S., por favor llame al
1-800-433-9258 (1-800 4-D
EWALT)
SOLAMENTE PARA PROPÓSITO DE MÉXICO:
IMPORTADO POR: D
EWALT S.A. DE C.V.
BOSQUES DE CIDROS, ACCESO RADIATAS NO.42
3A. SECCIÓN DE BOSQUES DE LAS LOMAS
DELEGACIÓN CUAJIMALPA,
05120, MÉXICO, D.F.
TEL. (52) 555-326-7100
R.F.C.: BDE810626-1W7
Para servicio y ventas consulte
“HERRAMIENTAS ELECTRICAS”
en la sección amarilla.
ESPECIFICACIONES
MODELO D27904 D27905
Voltios 120 V ~ 120 V ~
Hercios 60 60
Amperios 9 A 9 A
12 A (con herramienta) 12 A (con herramienta)
Capacidad 45,4 litros 37,9 litros
(12 galones) (10 galones)
Page 39

Español
37
Certifi cación de cumplimiento
Las aspiradoras para extracción de polvo DEWALT (D27904, D27905) se fabrican en
cumplimiento de las normas 1017 de Underwriters Laboratories (UL) y C22.2 No. 243-01 de
Canadian Standards Association (CSA).
Estas aspiradoras también cumplen con los requerimientos de una aspiradora HEPA, tal como
está definido en las regulaciones de la Agencia de Protección Ambiental (EPA) de los Estados
Unidos en cuanto a Renovaciones, Reparación y Pintura (RRP) (40 CFR Parte 745) cuando es
utilizada en conjunto con el filtro HEPA D279041H.
El filtro HEPA D279041H ha sido evaluado por un tercero independiente según EN1822, a fin
de confirmar que el filtro es capaz de capturar partículas de 0,3 micrones con 99,97% de eficiencia.
Page 40

DEWALT Industrial Tool Co., 701 Joppa Road, Baltimore, MD 21286
(JUL10) Part No. N086385 D27904, D27905 Copyright © 2010 D
EWALT
The following are trademarks for one or more D
EWALT power tools: the yellow and black color scheme; the “D” shaped air intake grill; the array
of pyramids on the handgrip; the kit box configuration; and the array of lozenge-shaped humps on the surface of the tool.
 Loading...