

Page 1
101285 May 29, 2007
Detex Corporation, 302 Detex Drive, New Braunfels, Texas 78130-3045
(830)629-2900 / 1-800-729-3839 / Fax (830)620-6711
E-MAIL: [email protected] INTERNET: www.detex.com
INSTALLATION INSTRUCTIONS FOR 03C(N), 02C(N), 01C(N) PULLPLATE TRIM
03C(N) 02C(N)
FUNCTIONFUNCTION
DETEX INS-101285
01C(N)
FUNCTION
Page 2
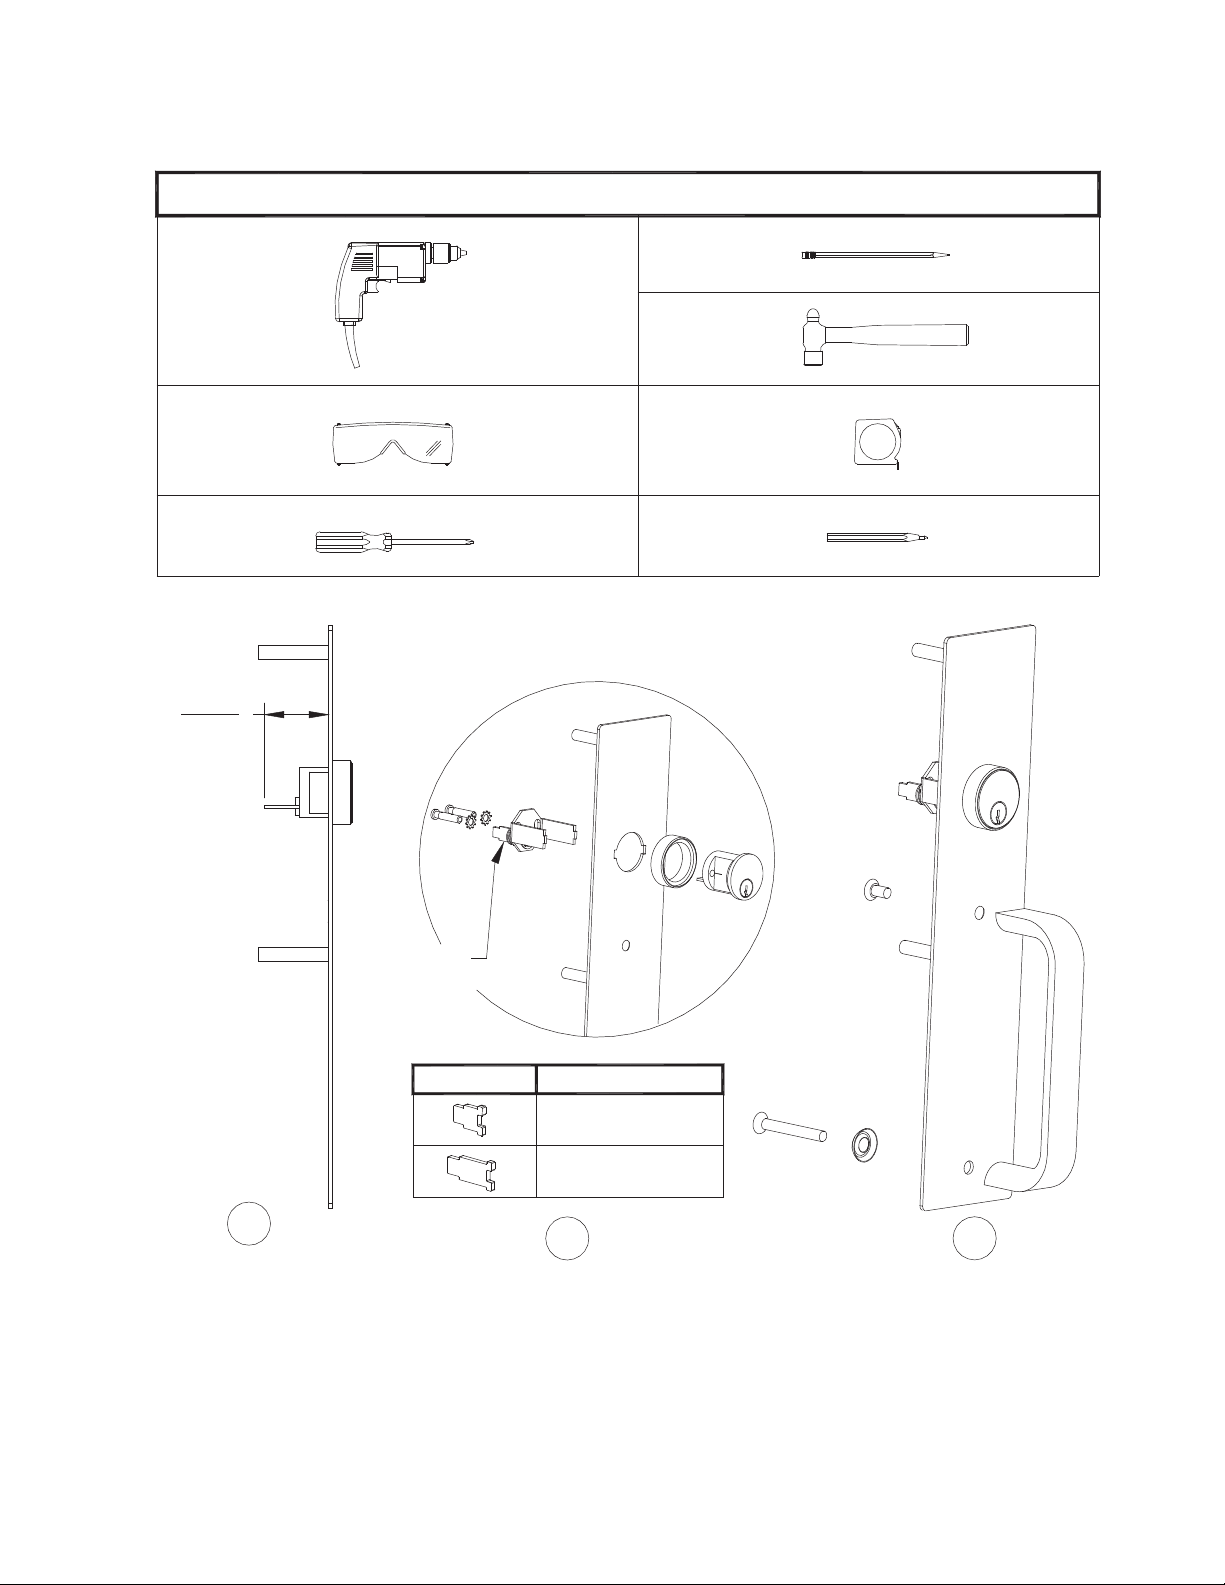
03, 02, 01 PULLPLATE Trim
Tools Required
Power Drill
Safety Glasses
Screw Driver
Cut
Cylinder
Tailpiece
1-1/16" (Min)
1-1/8" (Max)
Pencil
Hammer
Tape Measure
Center Punch
03 Trim Preparation
(No prep necessary for 02 & 01 Trims)
1
Rim Cylinder
Preparation
Tailpiece
(see table)
Tailpiece Used
Door Thickness
1-3/4" and 2" Thick Doors
2-1/4" Thick Doors
2
Install
Tailpiece Assembly
Page 2
3
Install
Trim Unit on Door
(see next page)
Page 3
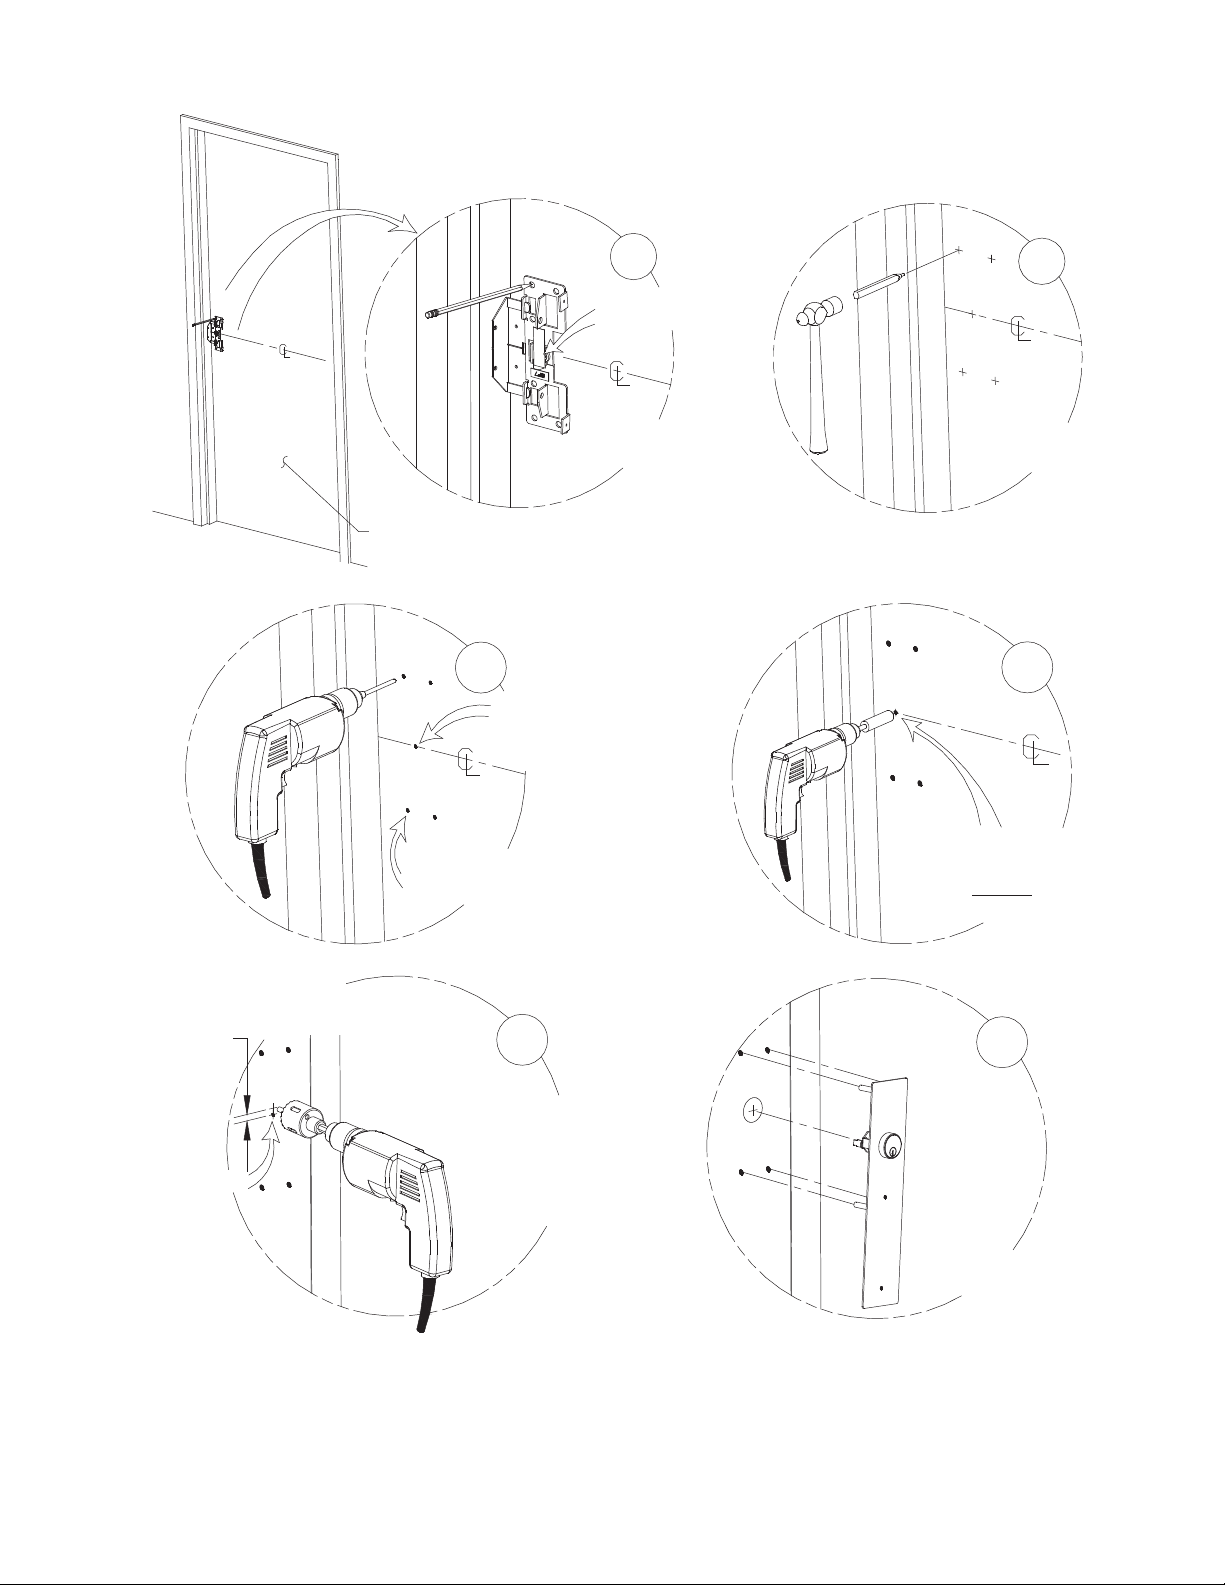
Wide Trim Door Preparation
For Narrow Trim Refer to Pages 5 & 6.
FLOOR
Interior Door Face
Note: All Holes Must Be
Drilled Straight and Level
3
Mark Centerhole
for 03 Function
Mark Backplate Holes
(wide stile shown)
For 03 And 01
Functions, Drill
Pilot Hole Thru
Door.
1
2
Punch Marked
Holes
4
1/4"
Pilot Hole
Mark 1/4" Up
from Center Mark
Drill 3/8" Thru Holes
(4 for Wide Stile)
5
For 03 function ONLY
Drill 1-1/2" Hole Through
Exterior Door Face ONLY
(1/4" up from center mark)
For 03 function ONLY
Next, Drill 3/4" Hole
Through Interior Door
Face ONLY
6
PlaceTrim Unit to
Exterior Door Face.
Page 3
Page 4
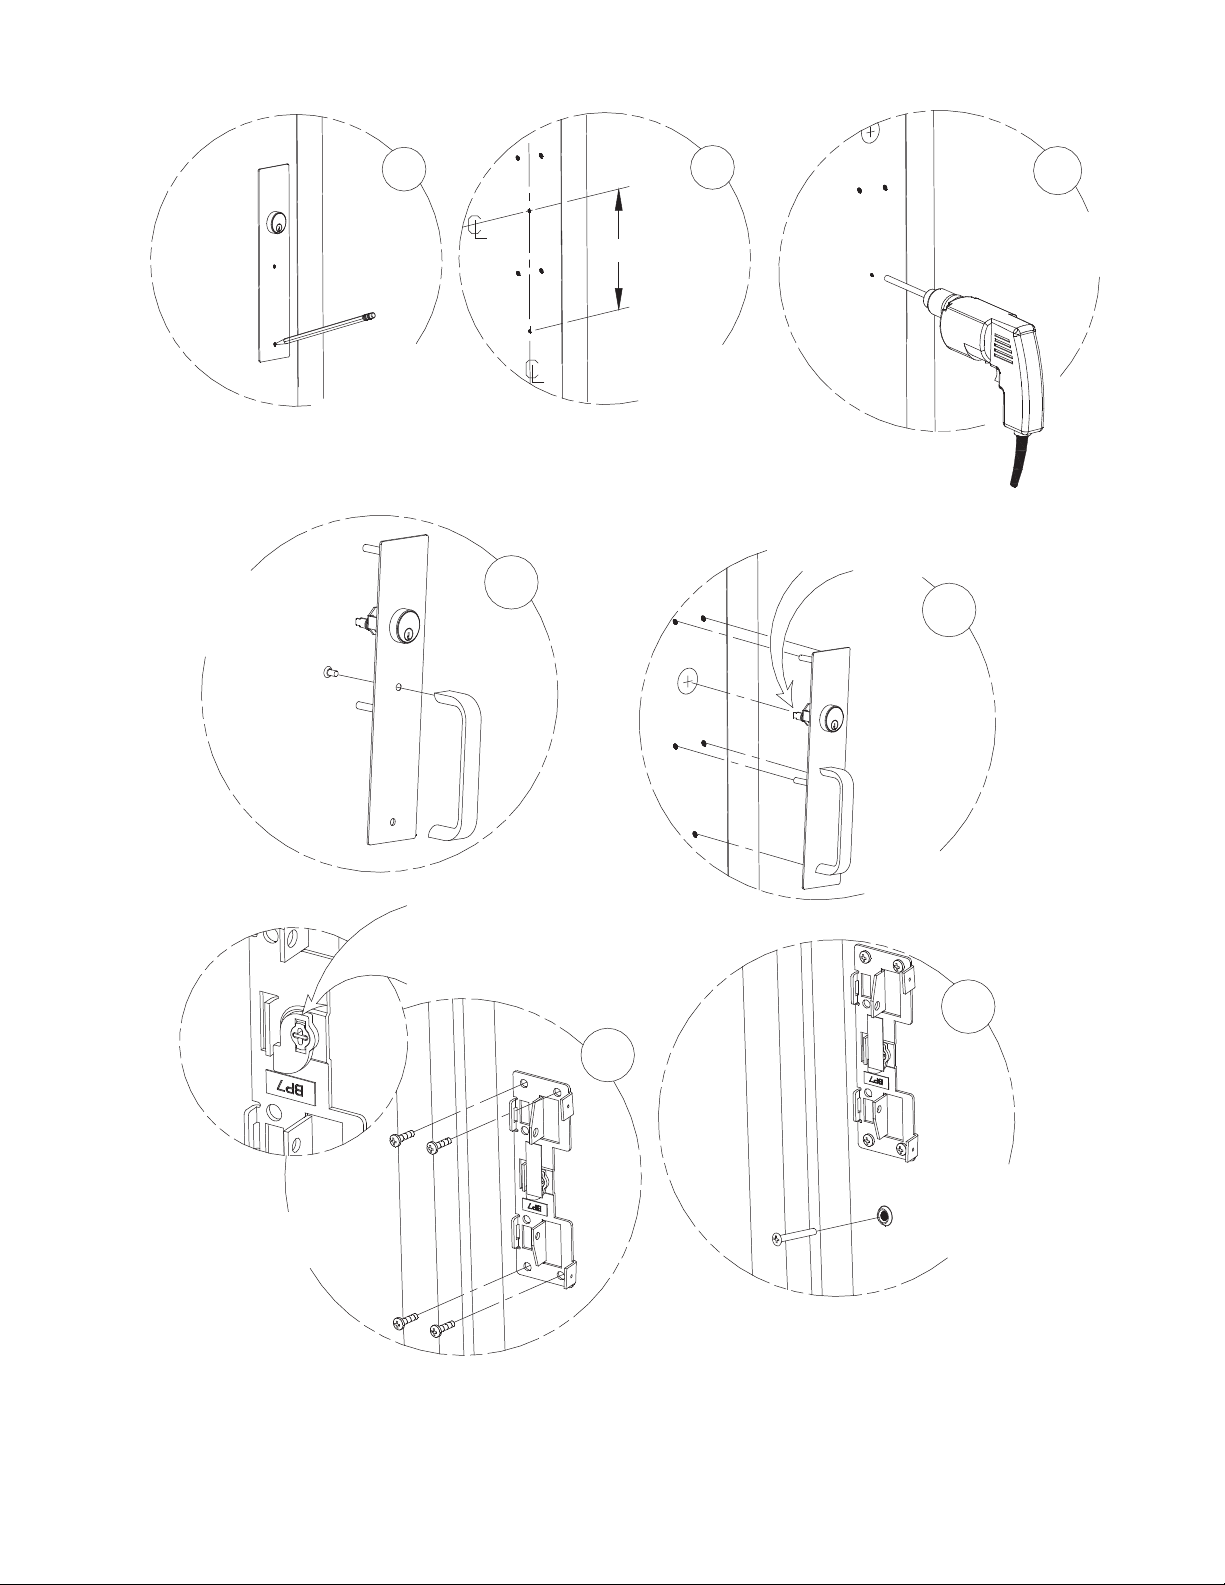
7
8-1/2"
8
Once Hole is
Marked Drill 3/8"
(1/2" max) Thru Hole.
9
Fasten The Top
of Pull To The
Trim Plate Using
Screw Provided
Mark Bottom Hole
For Thru Bolt
(for 01 trims see
step number 8)
Be sure to Engage Cam
to Tailpiece on Backplate
Cam Orientation Label
Not Shown for Clarity
For 01 Trims
Measure from the
Device Centerlines
Installing the Trim
Position Tailpiece Vertically
when Installing Trim Plate
10
11
PlaceTrim Unit onto
Exterior Door Face.
13
Fasten Backplate
to Pullplate
12
Fasten Bottom of
Pull with PFH Screw
(Be Sure To Use
Finished Washer)
Continue with Exit
Hardware Instructions
Page 4
Page 5
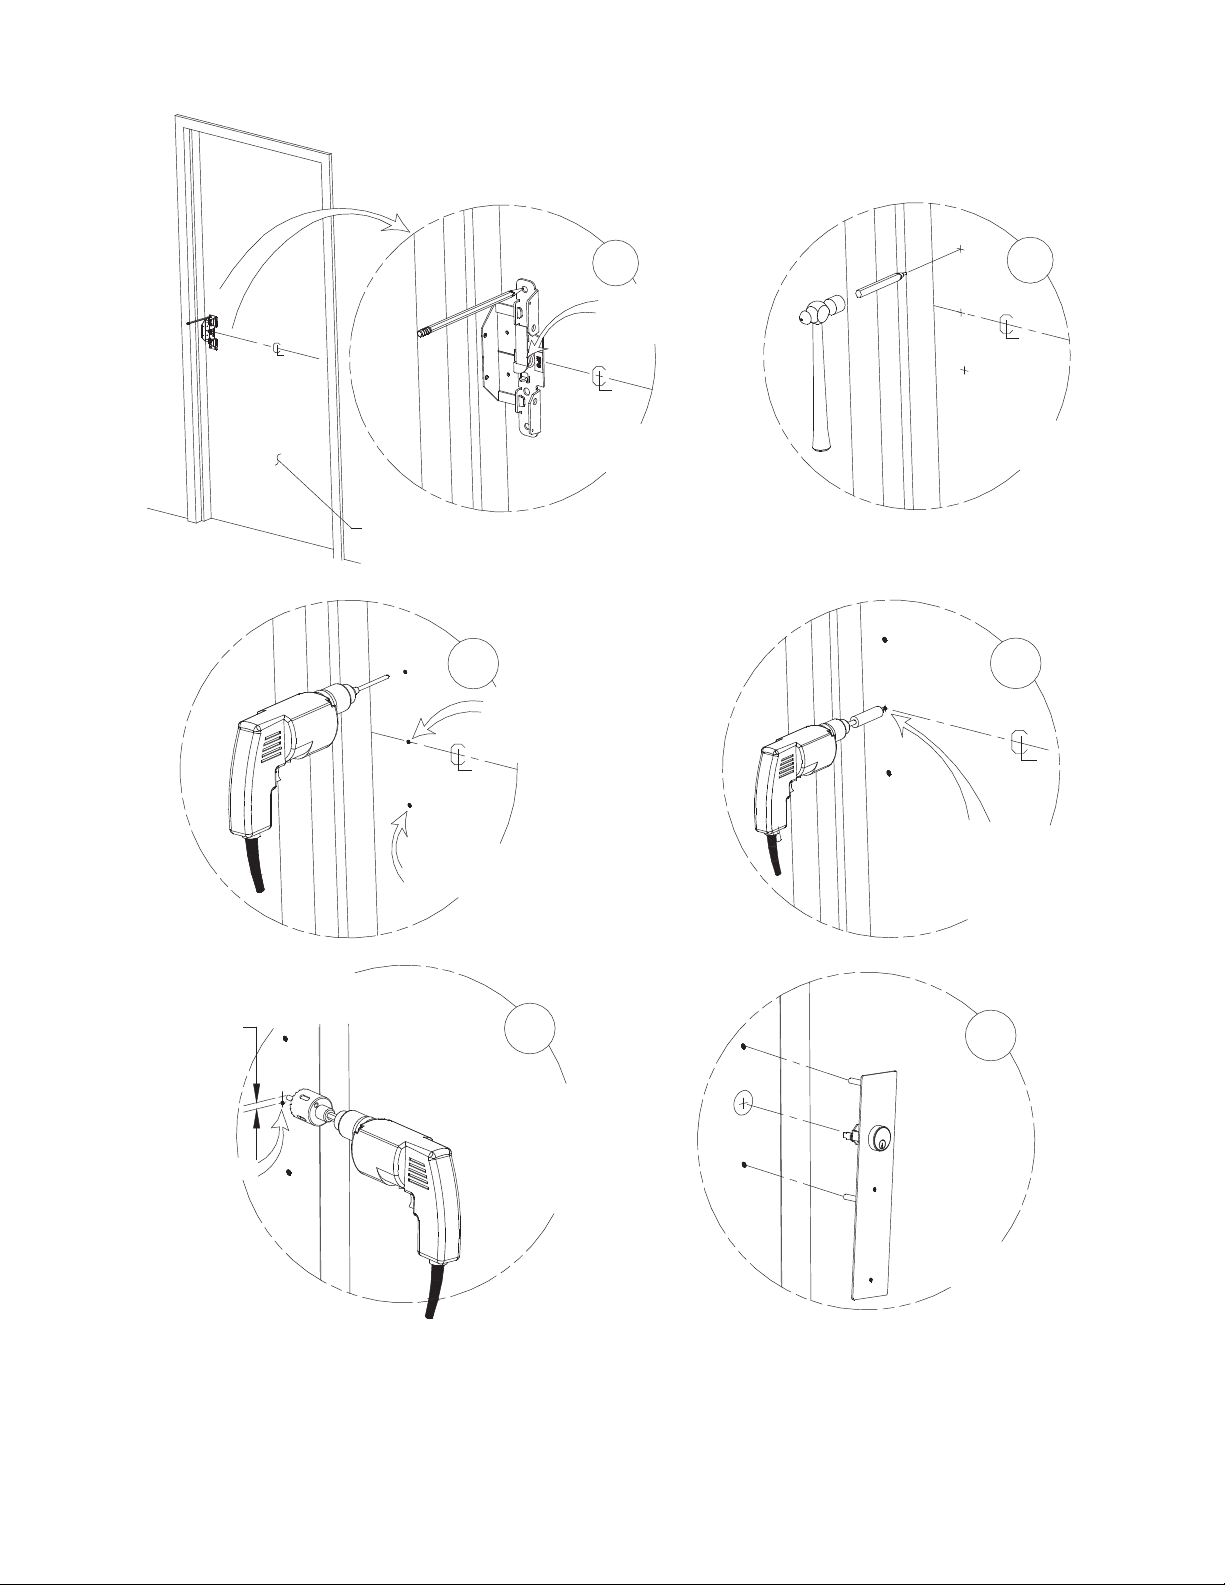
Narrow Trim Door Preparation
For Wide Trim Refer to Pages 3 & 4.
FLOOR
Interior Door Face
Note: All Holes Must Be
Drilled Straight and Level
3
Drill 3/8" Thru Holes
(2 for Narrow Stile)
For 03 and 01
Functions
Mark Centerhole
Mark Backplate Holes
(narrow stile shown)
For 03 And 01
Functions, Drill
Pilot Hole Thru
Door.
1
2
Punch Marked
Holes
4
For 03 function ONLY
Next, Drill 3/4" Hole
Through Interior Door
Face ONLY
1/4"
Pilot Hole
Mark 1/4" Up
from Center Mark
5
For 03 function ONLY
Drill 1-1/2" Hole Through
Exterior Door Face ONLY
(1/4" up from center mark)
Page 5
6
PlaceTrim Unit to
Exterior Door Face.
Page 6
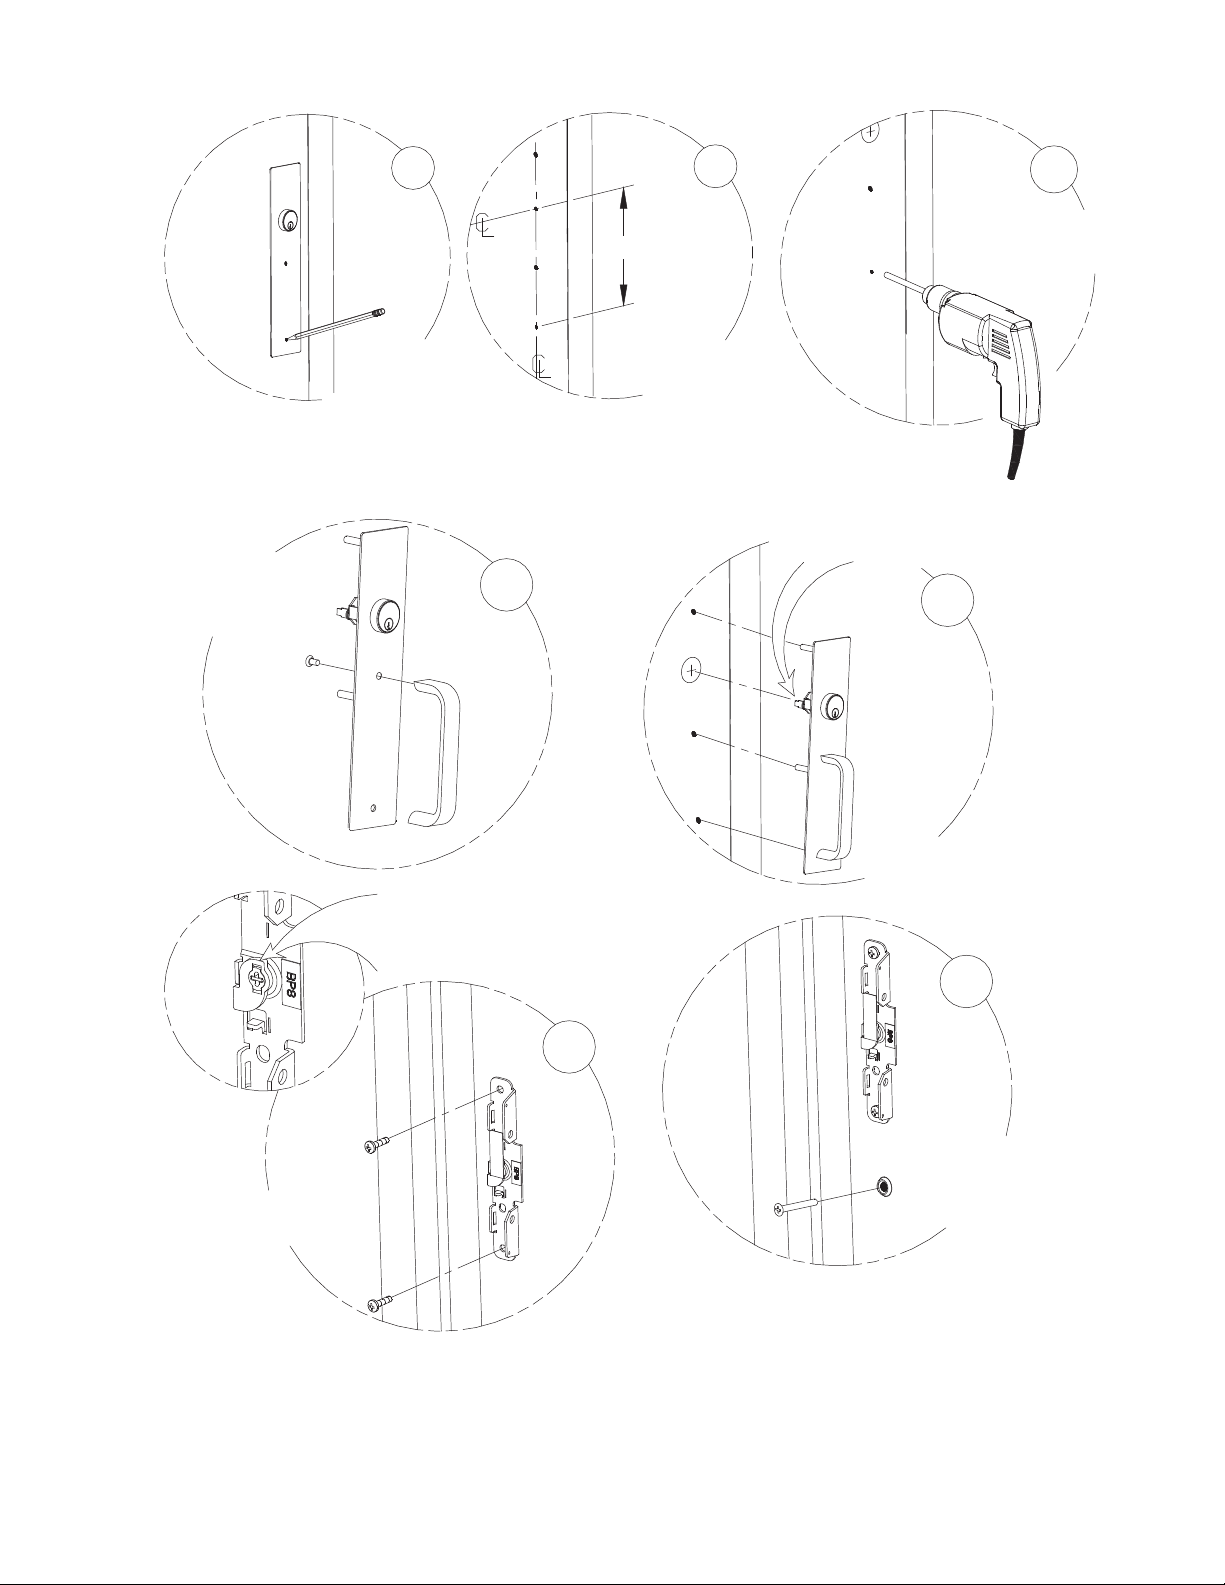
7
8-1/2"
8
Once Hole is
Marked Drill 3/8"
Thru Hole.
9
Fasten The Top
of Pull To The
Trim Plate Using
Screw Provided
Mark Bottom Hole
For Thru Bolt
(for 01 trims see
step number 8)
Installing the Trim
10
Be sure to Engage Cam
to Tailpiece on Backplate
Cam Orientation Label
Not Shown for Clarity
For 01 Trims
Measure from the
Device Centerlines
Position Tailpiece Vertically
when Installing Trim Plate
11
PlaceTrim Unit onto
Exterior Door Face.
13
Fasten Backplate
to Pullplate
12
Fasten Bottom of
Pull with PFH Screw
(Be Sure To Use
Finished Washer)
Continue with Exit
Hardware Instructions
Page 6
 Loading...