


MAXX
Denver MAXX
Electronic Precision Scales/Balances
Elektronische Präzisionswaagen
Balances électroniques d’analyse et de précision
Balanzas electrónicas de precisión
Operating Instructions/Betriebsanleitung/
Mode d’emploi/Manual de instrucciones

English page 3
In cases involving questions of
interpretation, the German-language
version shall prevail.
Deutsch Seite 20
Im Auslegungsfall ist die
deutsche Sprache maßgeblich.
Français page 37
En cas de questions concernant
l’interprétation, la version
en langue allemande fera autorité.
Español página 54
En caso de interpretación,
la versión en lengua alemana
será determinante.
2

3
Contents
Page
Warnings and Safety Precautions . . . . . . . . . . . . . . . . . . . . . . . . . . . . . . . . . . . . . 4
Getting Started. . . . . . . . . . . . . . . . . . . . . . . . . . . . . . . . . . . . . . . . . . . . . . . . . . . . . 5
Operation . . . . . . . . . . . . . . . . . . . . . . . . . . . . . . . . . . . . . . . . . . . . . . . . . . . . . . . . . 8
Basic Weighing Function . . . . . . . . . . . . . . . . . . . . . . . . . . . . . . . . . . . . . . . . . . . 8
Description of the Keys. . . . . . . . . . . . . . . . . . . . . . . . . . . . . . . . . . . . . . . . . . . . . 8
Application Programs . . . . . . . . . . . . . . . . . . . . . . . . . . . . . . . . . . . . . . . . . . . . . . . 9
Toggling between Weigh Units . . . . . . . . . . . . . . . . . . . . . . . . . . . . . . . . . . . . . . 9
Counting . . . . . . . . . . . . . . . . . . . . . . . . . . . . . . . . . . . . . . . . . . . . . . . . . . . . . . . . . 10
Weighing in Percent . . . . . . . . . . . . . . . . . . . . . . . . . . . . . . . . . . . . . . . . . . . . . . . 11
Display Lock Mode . . . . . . . . . . . . . . . . . . . . . . . . . . . . . . . . . . . . . . . . . . . . . . . . 12
Total/Formulation . . . . . . . . . . . . . . . . . . . . . . . . . . . . . . . . . . . . . . . . . . . . . . . . . 13
Specific Gravity . . . . . . . . . . . . . . . . . . . . . . . . . . . . . . . . . . . . . . . . . . . . . . . . . . . 14
Calibration/Span Adjustment . . . . . . . . . . . . . . . . . . . . . . . . . . . . . . . . . . . . . . . . . 15
Advanced Features (Setup Menu) . . . . . . . . . . . . . . . . . . . . . . . . . . . . . . . . . . . . . 16
Error Codes. . . . . . . . . . . . . . . . . . . . . . . . . . . . . . . . . . . . . . . . . . . . . . . . . . . . . . . . 17
Overview. . . . . . . . . . . . . . . . . . . . . . . . . . . . . . . . . . . . . . . . . . . . . . . . . . . . . . . . . . 18
Specifications. . . . . . . . . . . . . . . . . . . . . . . . . . . . . . . . . . . . . . . . . . . . . . . . . . . . . 18
Accessories . . . . . . . . . . . . . . . . . . . . . . . . . . . . . . . . . . . . . . . . . . . . . . . . . . . . . . 19
C Marking . . . . . . . . . . . . . . . . . . . . . . . . . . . . . . . . . . . . . . . . . . . . . . . . . . . . . . . 19

4
Installation
– It is recommended to connect
only Denver accessories and
options, as these are optimally
designed for use with your
balance/scale.
– Do not open the balance/scale
housing as this will void the
manufacturer’s warranty.
Symbols
The following symbols are used
in these instructions:
● indicates steps you must
perform
$ indicates steps you must
perform only under certain
conditions
> describes what happens after
you have performed a certain
step
– indicates an item in a list
! indicates a hazard
Warnings and Safety Precautions
Safety Information
● To prevent damage to the equip-
ment, please read these operating instructions carefully before
using your balance/scale.
! Do not use this equipment in
hazardous areas.
! Make sure the voltage rating
printed on the power supply is
identical to your local line voltage.
! Use only commercially available
9V batteries (not included).
If desired, you can use a
rechargeable battery.
– The balance/scale is energized at
all times unless you disconnect
the AC adapter and, if connected, the battery.
– Protect the AC adapter from
contact with liquid
! Exposure to excessive electro-
magnetic interference can cause
the readout value to change.
Once the disturbance has
ceased, the instrument can be
used again in accordance with
its intended purpose.
5
Getting Started
Equipment Supplied
– Balance/scale
– Weighing pan
– AC adapter
Additional equipment with models
MXX-612, MXX-412, MXX-212:
– Calibration weight
Additional equipment with model
MXX-123:
– Calibration weight
– Round glass draft ring
– Level indicator and adjustable feet
Installation
Choose a location that is not subject
to the following negative influences:
– Heat (heater or direct sunlight)
– Drafts from open windows and
doors
– Extreme vibrations during
weighing
– Excessive moisture
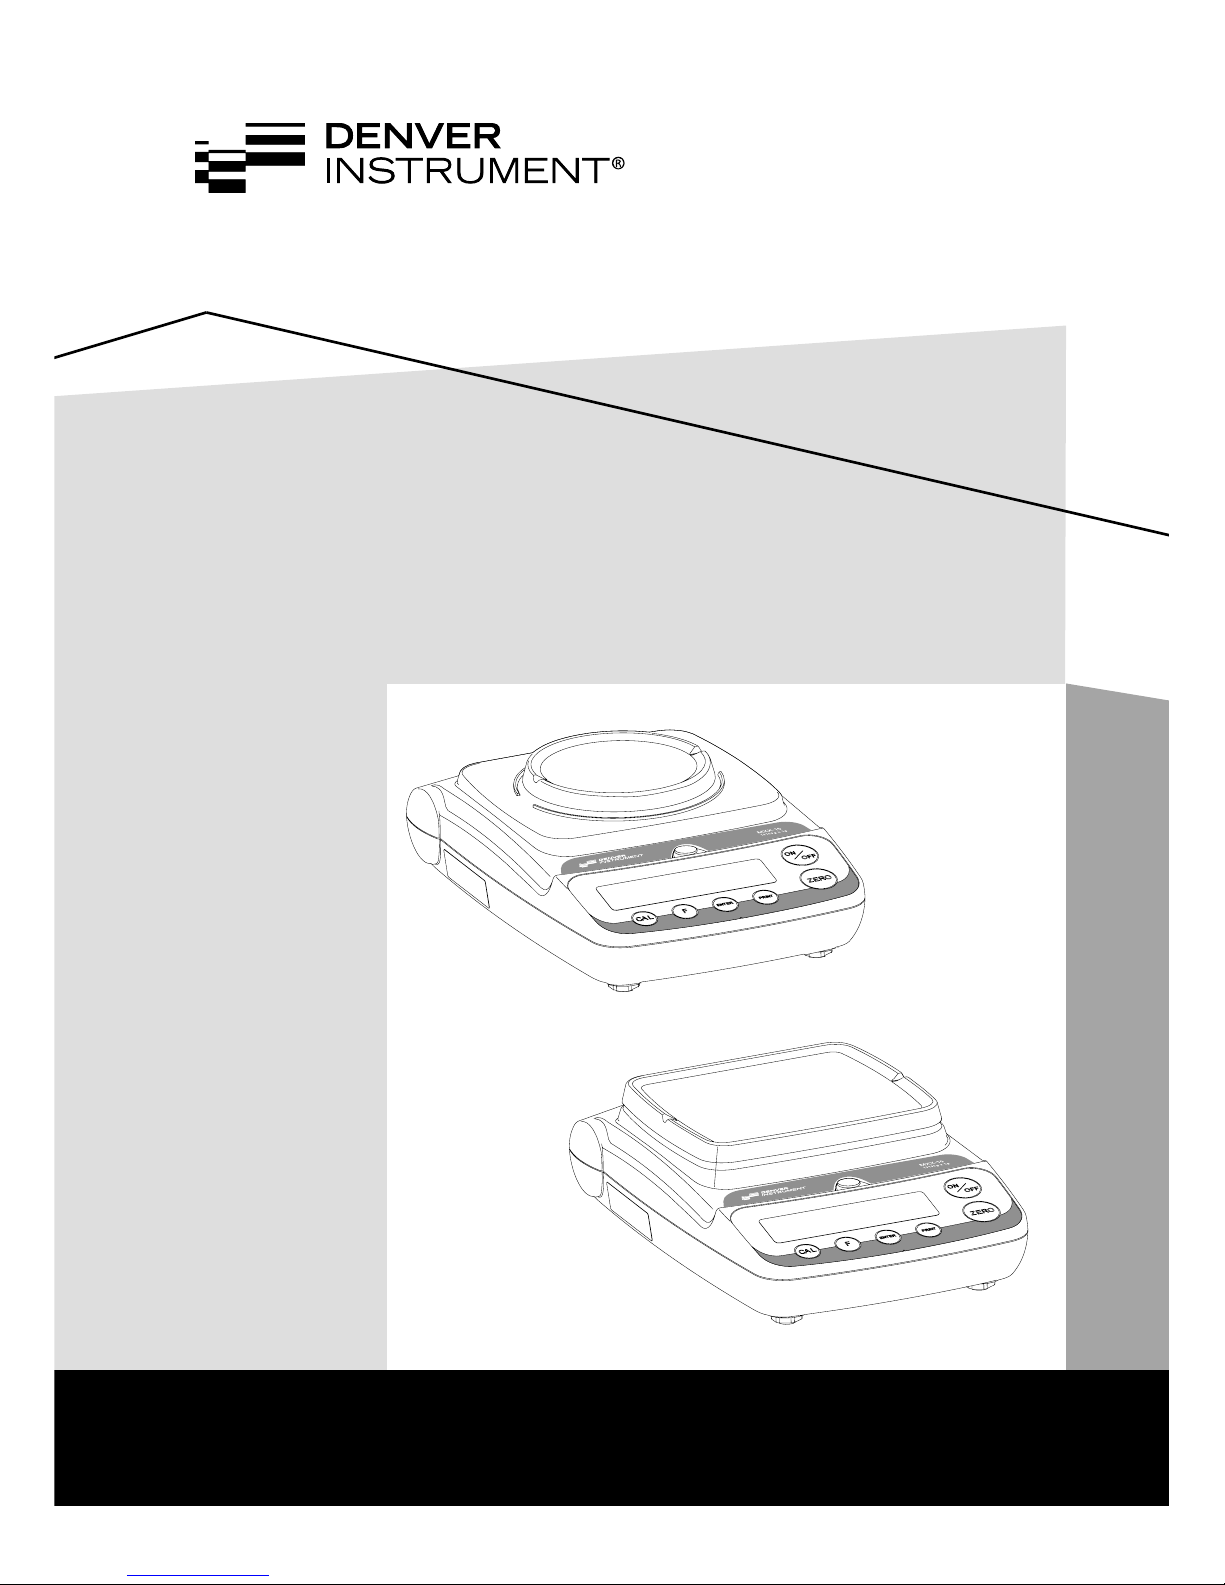
Setting Up the Balance/Scale
● Place the components on the
balance/scale in the following
order:
– Reversible weighing pan
– Round glass draft ring on model
MXX-123
6
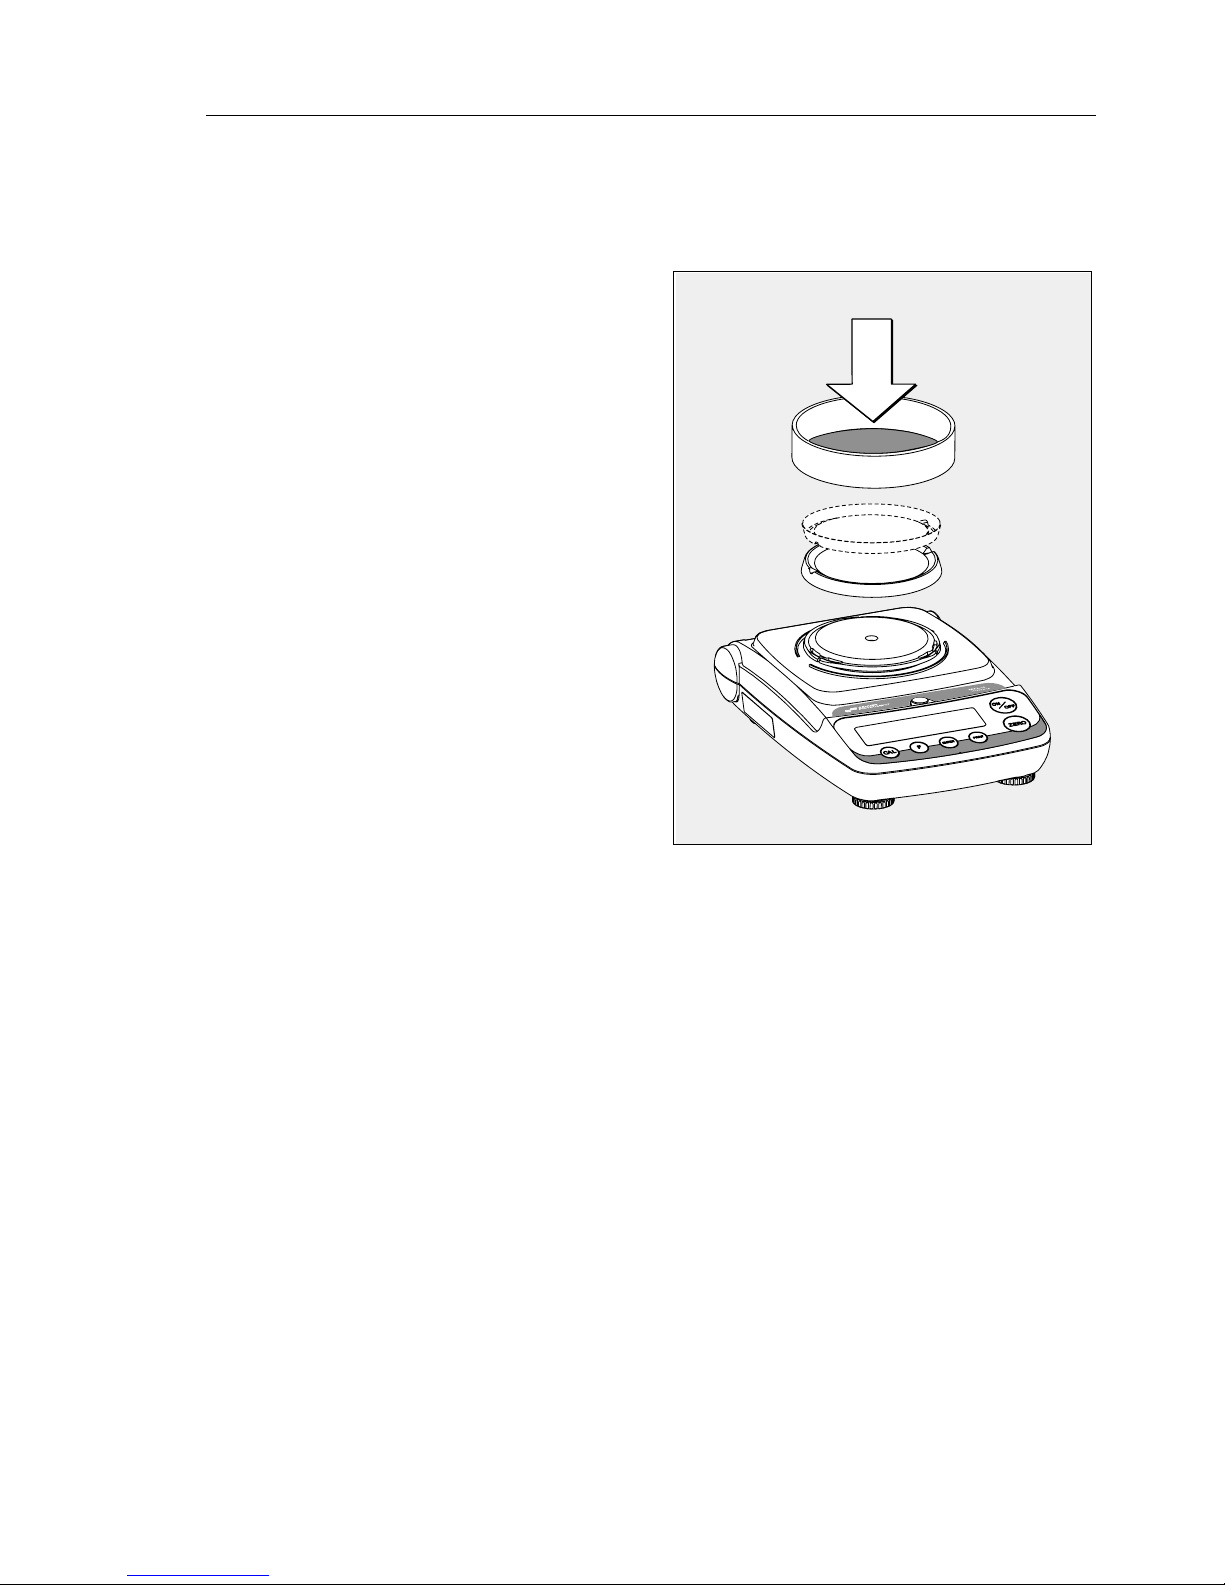
Connecting the Balance/Scale
to AC Power
! Use only the AC adapter for
optimal performance and safety.
§ Insert plug into the jack (located
on back of balance/scale)
§ Plug the AC adapter into an
electrical outlet
! LISTED power supply 11 V–21 V
compliant with NEC Class 2 output.
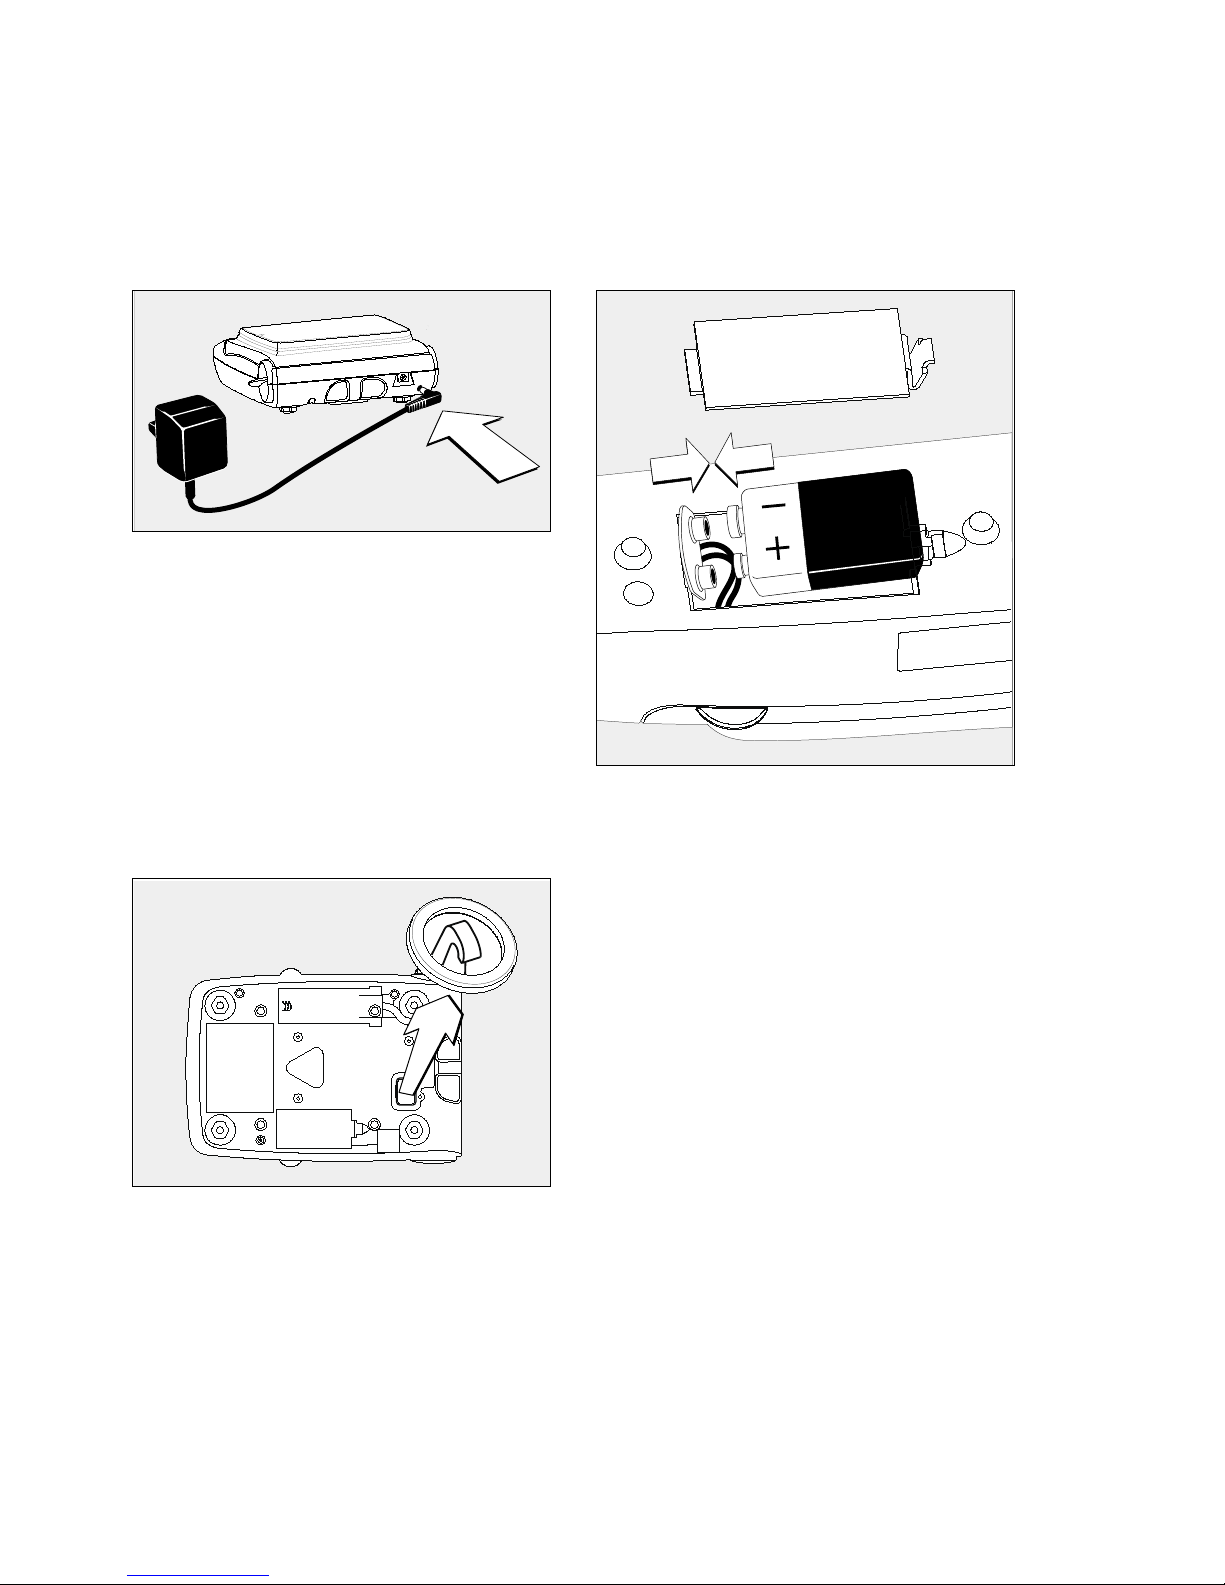
Below-Balance/Under-Scale Weighing
A port for a below-balance weighing
hanger is located on the bottom of
the balance/scale.
§ Open the cover plate on the
bottom of the balance/scale.
§ Attach the sample (e.g., using
a suspension wire) to the hanger.
$ Install a shield for protection
against drafts if necessary.
Installing the Battery
(not for model MXX-123)
$ Batteries are not included with
the equipment supplied
! Use only commercially available
9V batteries.
! If you use a rechargeable bat-
tery, recharge it with an external
battery charger.
§ Lay the balance/scale on its side
§ Open the battery compartment:
remove the compartment cover
§ Install the battery in the compartment
$ Make sure the polarity is correct.
§ Close the battery compartment:
slide the cover into position until
it snaps into place
! Do not throw away used batter-
ies with normal household
waste. Rechargeable batteries
contain toxic materials and must
be disposed of in accordance
with local waste disposal regulations.
 Loading...