

INSTRUCTION MANUAL
BEDIENUNGSANLEITUNG
PRIRUČNIK S UPUTAMA ZA RAD
2
DVBT-42
2

Important safety instructions to be kept with the product
WARNING!
Presence of dangerous tension inside apparatus! Do not open. Risk of
electric shock! No part should be repaired by users. The maintenance of the
receiver should be carried out exclusively by qualified persons.
If the power cord is damaged, it must be replaced or repaired by the manufacturer,
its after-sales service, qualified electrician or persons of similar qualification in
order to avoid possible danger.
The product must be installed in accordance with national regulations.
The used batteries must be disposed of safely. Throw them in collection bins
provided is prohibited (inquire after your retailer for more details) in order to
protect the environment.
Proper Installation
- Place the receiver on a flat, firm and stable surface. Do not put it on a carpet or
rug.
- Do not place the receiver on top of another device, such as an amplifier. This
may lead to overheating.
- Do not put anything above the unit (for example, CDs or magazines).
Sufficient Ventilation
- Place the receiver in a well-ventilated location to prevent accumulation of
internal heat. Allow a gap of at least 10cm to the rear and the top of the unit, as
well as a space of 5cm to both sides to avoid overheating.
- Do not obstruct any ventilation openings with items such as newspapers,
tablecloths, curtains, etc.
Protecting the Receiver from High Temperatures, Humidity, Water and Dust
- The receiver should not be exposed to dripping water or splashing.
- No objects filled with liquids, such as vases, shall be placed on the unit.
- Do not place any objects that might damage your unit near it (e.g. liquid filled
objects or candles).
Please read attentively
To prevent fire and electric shock, do not expose this
receiver to rain or moisture. In order to avoid any possible
risk of electric shock, never attempt to open the unit. In case
of breakdown, reparation should be made by qualified
technicians. No part of this unit should be repaired by users.
1

- Do not place any source of flames such as lit candles on the receiver.
- This receiver is to be used in a temperate climate and should not be used in a
tropical climate.
Electricity Supply
- Please unplug the receiver in case of prolonged non-use.
- If the power cord is damaged, it must be replaced or repaired by the
manufacturer, its after-sales service, qualified electrician or similar qualifications
to those to avoid possible danger.
- This device must be connected to a 240V ~ 50Hz electrical network.
- The plug must remain readily accessible after the installation of the product.
Welcome Section Main Features:
Congratulations on choosing to buy a DENVER product. By doing so you now
have the assurance and peace of mind that comes with purchasing a product
made by one of the leading manufactory. All products brought to you by DENVER
are manufactured to the highest standards of performance and safety, and, as
part of our philosophy of customer service and satisfaction, are backed by our
comprehensive 1 Years Warranty.
Main Features:
Slim size (130mm)
MPEG-2 decoding
USB2.0 for software update , music ,image and recording
LCN(Logical Channel Number) supported;
Parental control
Favorite lists
Timer
EPG/TEXT/SUBTITLE supported
Digital sound through COAXIAL output (S/PDIF)
PVR ready supported
2

CONTENTS
1 Installation of STB…………………………………………………...........................4
1.1 Front Panel…………………………...............................................................4
1.2 Rear Panel………………………………………………………………………...4
1.3 Connection………………………………………………………………………..5
1.4 Remote…………………………………………………………………………….6
2 Welcome Page………………………………………………………………………...7
3 Main Menu……………………………………………………………………………..8
4 Channel…………………………………………………………………………….......8
4.1 TV Channel List………………………………………………………………......9
4.2 Radio Channel List……………………………………………………………. 10
4.3 Delete All Favorites………………….. ………………….. …………………. ..10
4.4 Delete All………………….. ………………….. …………………. …….. .. . .10
5. Installation …………………………………………………………………………...11
5.1 Auto Scan………………………………………………………………………..11
5.2 Channel Scan………………………………………………………….. ………12
5.3 Tuner Setting…………………………………………………….. …………….12
6 System Setup…………………………………………………….. ………………....12
6.1 OSD Language…………………………………………………….. …………..13
6.2 TV System…………………………………………………….. ………………..13
6.3 Region and Time…………………………………………………….. ………...14
6.4 Timer Setting…………………………………………………….. ……………..14
6.5 OSD Setting…………………………………………………….. ……………...16
6.6 Parental Lock…………………………………………………….. …………….16
7 Tools…………………………………………………….. ……………….................17
7.1 Information…………………………………………………….. ……………….17
7.2 Game…………………………………………………….. ……………….........17
7.3 Load Factory Default ………………………………….. ………………...........18
7.4 Software Upgrade……………………………….. ………………...................18
8 Media+……………………………….. ………………..........................................20
8.1 Media player……………………………….. ………………...........................20
8.2 Record Manage……………………………….. ………………......................25
8.3 Removalbe Disk Information……………………………….. ………………...26
8.4 DVR Configuration……………………………….. ………………..................27
8.5 Safely Remove Storage Device..................................................................28
9 DVR ……………………………….. ………………...............................................28
9.1 EC(Record) ……………………………….. ………………............................28
9.2 imeshift……………………………….. ………………....................................29
10 Technical Specification………………………………………………………….....30
11Troubleshooting…………………………………………………………………......31
3
1.Installation of STB
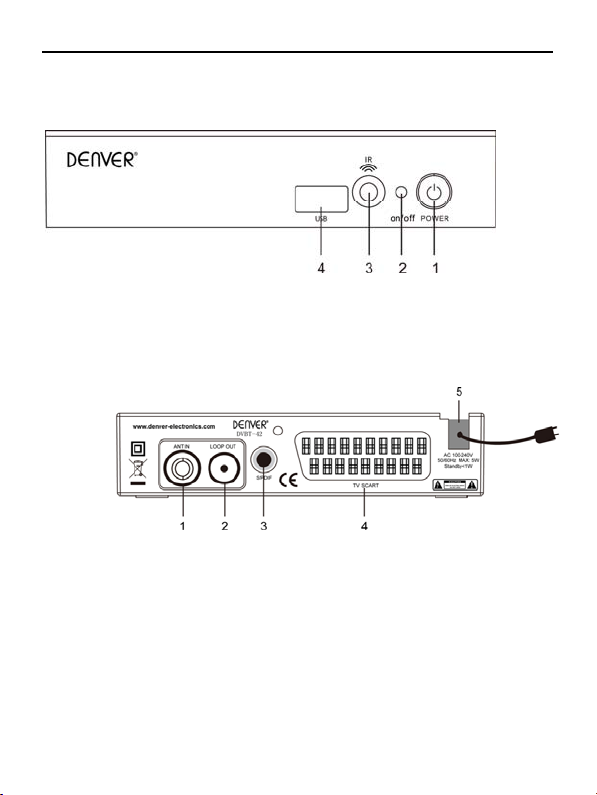
1.1 Front Panel
(1) Power: Switch between Standby mode and active mode.
(2) on/off: Power lamp, red color in Standby mode, green color in active mode
(3) IR sensor: Receives the remote control signal.
(4) USB
1.2 Rear Panel
1. ANT IN:Connect antenna here.
2. LOOP OUT:To connect to TV.
3. S/PDIF:Digital audio signal output
4.TV SCART Connector:
Use this connector to connect your receiver to your video recorder using a
SCART cable. Your video signal will now be looped through your receiver to
your TV set.
5.Power Cord
4
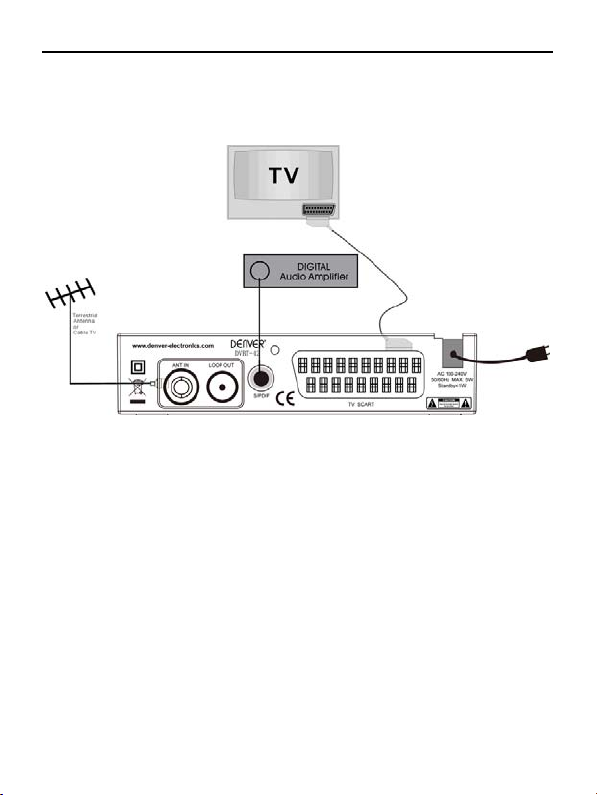
1.3 Connection
Note: Before connect this STB to other devices, please close all devices’
power.
1.3.1 Connecting to Terrestrial Antenna
To receive the broadcast signal, the terrestrial antenna cable should be
connected to the ANT IN connector at the back of the receiver.
1.3.2 Connecting to TV
Connect the Audio Left ,Right and VIDEO RCA connectors at the back of the
receiver to the Audio Left, Right IN and VIDEO connectors on your TV set.
Connect the HDMI connector at the back of the receiver to the HDMI connector on
your TV set.
1.3.3 Connecting to Digital Audio Amplifier
Connect OPTICAL connector at the back of your receiver to appropriated input of
your Digital Audio
5

1.4 Remote
: Switch between peration and standby
modes.
: Press to temporarily cut off the sound.
0-9: nter number or elect a channel number to watch.
FAV: Press to display the TV favorite list.
RECALL: Go back to the previously viewed channel.
AUDIO: isplay the Audio Select window.
SUBTITLE: Show the list of subtitled languages the
current. channel supports.
INFO: Shows information of the current channel.
MENU: Displays the main menu.
EPG: Shows the PG(Electronic Program Guide) only
when menu is off.
EXIT: Return to the previous menu or escape from
the item
: Move cursor left/right or Volume +/-.
: Move up/down or CH+/CH-
OK: Confirm.
TEXT: Shows current service’s Teletext on OSD.
REC LIST: Show the menu of media that have been
recorded.
PAUSE‖: Freeze/Resume picture.
TV/RADIO: Switch between TV and Radio mode.
STOP: Stop playing Media.or stop recording.
REV
FED :Slow/Fast playing media or To
navigate in the menu environment.
RECORD●:Records a live program.
RED/GREEN/YELLOW /BLUE: Use to navigate between pages in teletext mode.
6

2 Welcome Page
1 When first time power on, it will show welcome page
2 Press [Up/Down] key to move highlight.
3 Press [Left/Right] key to select region and OSD language.
4 Move highlight to [OK] button and press [ENTER] Key to begin to auto scan.
5 Press [Exit] key to exit menu.
7
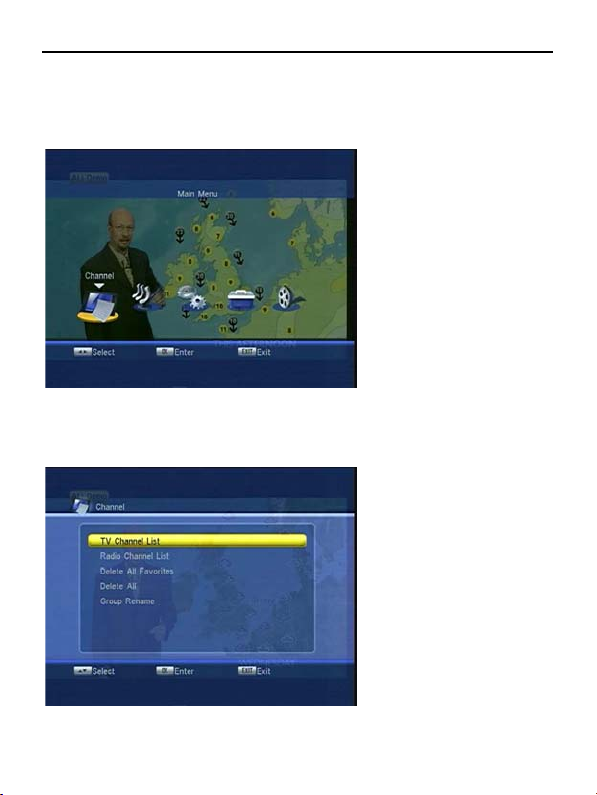
3 Main Menu
press [Menu] key, you can enter main menu.
1 Press [left/right] key to select menu pages
2 Press [OK] key to enter the selected item
4 Channel
1 Press [Up/Down] key to select items
2 Press [OK] to enter the selected item.
8
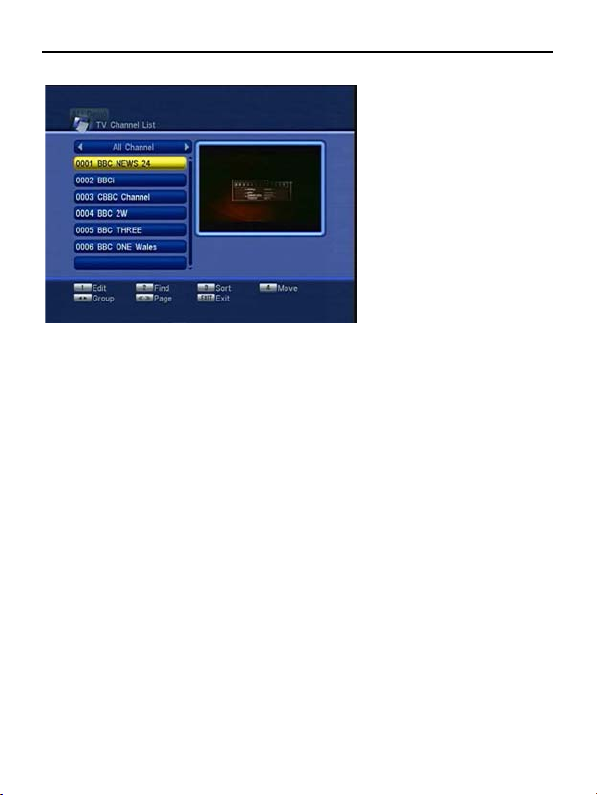
4.1 TV Channel List
1 press [Up/Down] key to preview the current highlighted program in the right side
preview window.
2 press [REV/FWD] key to implement the Page Up/Page Down function.
3 press [OK] keys to enter full screen playing mode.
4 press [Menu] or [Exit] keys to go back to menu.
5 Press the number key [1] ~ [4] can implement the corresponding function in
“Channel List”.
4.1.1 Edit
1 press number [1] Edi to enter edit channel list.
2 Press [OK] and number key [1] ~ [5] to implement the corresponding function.
3 Press [Left] or [Right] key to change group
4Press [REV]or [FWD] to page
5 Press [Menu] or [Exit] to exit.
Select
1 Press [OK] key to select the highlighted channel.
Press [OK] again to cancel the selection.
Select All
1 Press number [0] key to select all channel.
Press number [0] again to cancel all selection.
Favorite
1 Press number [1] key to set the favorite channel.
2 press [Left] or [Right] key to switch to favorite group and
press number key [4] to delete the channel in favorite group.
Lock
1 Press number [2] key to lock the channel
9

2 When highlight on the lock channel, press number [2] key again can cancel the
lock mark.
Skip
1 Pressing number [3] key to make a skip mark.
2 press number [3] key again can cancel the skip mark.
Delete
1 Pressing number [4] key to delete the highlighted channel.
Rename
1 Pressing number [5] key to rename the highlighted channel.
2 Press [Up][Down][Left][Right] key to move the highlight in “Rename” window.
Press [OK] to input char.
3 Move the highlight to “OK” and press [OK] key to save the modification.
4 Move the highlight to “ESC” and press [OK] key to cancel the operation.
4.1.2 Find
1 Pressing number [2] key to show a “Find” window
2 Press [Up][Down][Left][Right] key to move the highlight in “Find” window.
Press [OK] to input char.
3 Move the highlight to “OK” and press [OK] key to save the modification.
4 Press [Exit] key to cancel the operation.
4.1.3 Sort
1 Press number [3] key to sort channel.
2 Press [Up] or [Right] key to move the highlight and press [OK] to select sort type
such as Default/Name(A-Z)/ Name(Z-A)/ FTA/ Lock.
4.1.4 Move
1 Press number key [4] to show a “moving mark” in the right side of the selected
channel.
2 move the selected channel to the position that you want to place by press
[Up/Down] key. And press [OK] key to confirm your decision.
4.2 Radio Channel List
In “Radio Channel List” mode, there is no video information, so it will always
display Radio’s logo in the right side preview window.
4.3 Delete All Favorites
This operation will remove all favorite channels from favorite list.
4.4 Delete All
1 Pressing [OK] key on the “Delete All”, it will display “Input Password” dialogue.
Default password is “0000”.
10
5. Installation
1 Press [Up/Down] key to select menu items among each item.
2 Press [OK] key to enter the selected item.
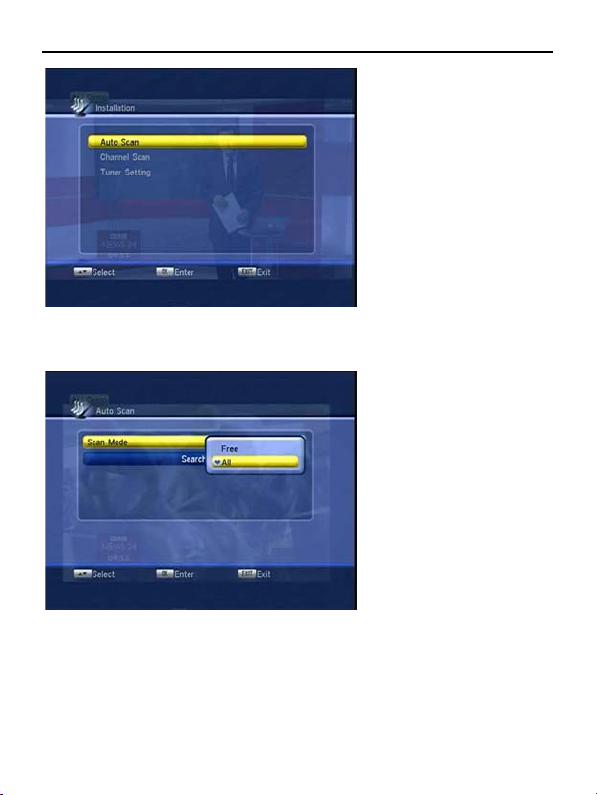
5.1 Auto Scan
1 In “Scan Mode” item, press [Left/Right] key to select scans all channels or just
scans free channels.
2 Moving the highlight to “Search” item and press [OK] key to start scanning.
3 In the “Auto Scan” menu, press [Exit] key to draw back from the scanning.
11
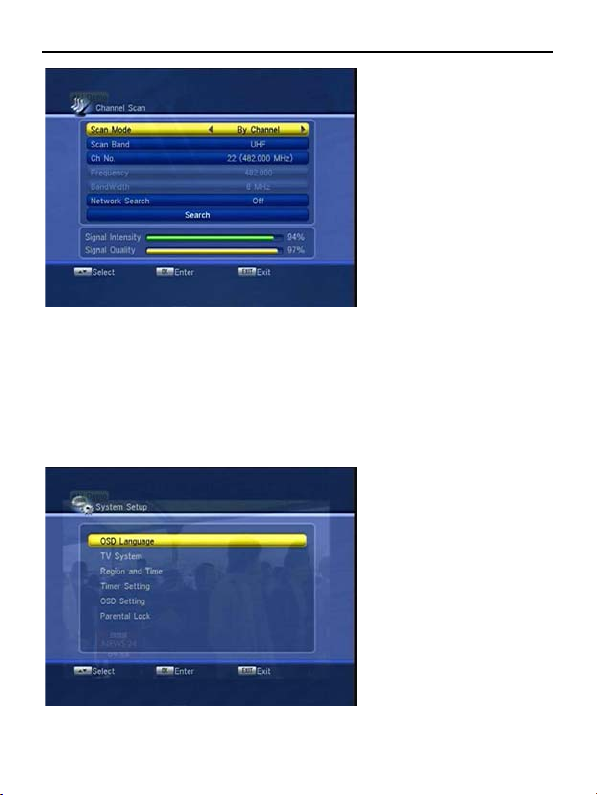
5.2 Channel Scan
1 There are two modes. You can scan channel by channel or by frequency”.
2 scan band above UHF and VHF.
3 Network Search: Select ”ON”, into network search more when channel scan.
4 Press [Exit] key to exit the scanning.
5.3 Tuner Setting
1 Tuner Power: On / Off
2 Tuner Loop:On/Off
6 System Setup
1Press [Up/Down] key to select menu items among each item.
2 Press [OK] key to enter the selected item.
12
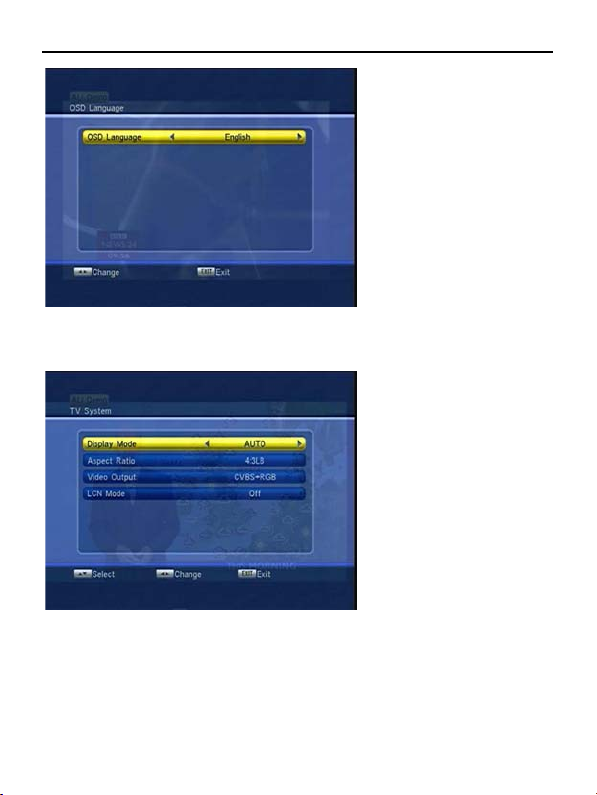
6.1 OSD Language
1 Press [Left], [Right] key to change the osd language.
2 Press [Exit] key to draw back from “OSD Language” menu.
6.2 TV System
1 Display Mode: Auto / PAL / NTSC.
2 Aspect Mode:4:3LB/4:3PS/16:9.
3 Video Output: CVBS+RGB, CVBS,.
4 LCN Mode: On / Off.
5 Auto standby can control the STB to standby automatically after any
comportment for 3 hours.
6 Press [Exit] key to draw back from “TV System” menu.
13
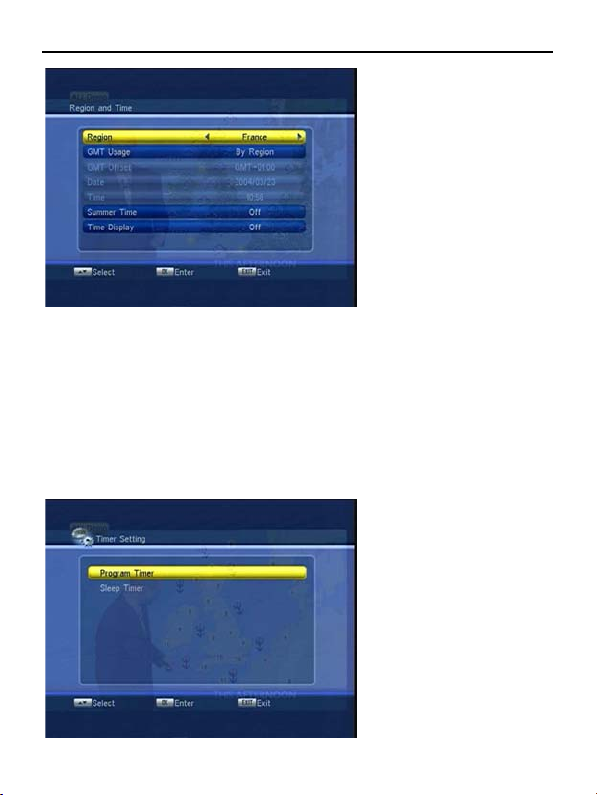
6.3 Region and Time
Region is used for selecting the country which you are in.
GMT Usage: This item is use for open the usage of GMT.
The “GMT Offset” item is valid only when the setting of “GMT Usage” is “User
Define”.
“Date ” and “Time” items are valid only when the setting of “GMT Usage” is “Off”.
“Summer Time” items are valid only when the setting of “GMT Usage” is “By
Region”.
Time display function can control whether the time will be displayed on screen
or not.
Pr ess [Exit] key to draw back from “Time” menu.
6.4 Timer Setting
14
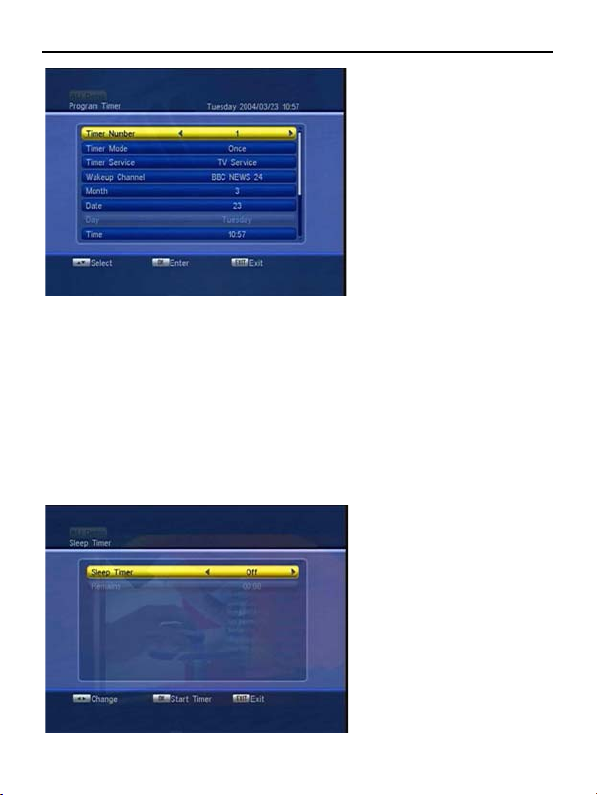
6.4.1 Program Timer
1 Timer Mode: There are several modes for Timer to setting, include Off, Once,
Daily, Weekly, Monthly
2 Wakeup Channel: press [OK] key to enter channel list and select channel that
you want to setting.
3 Month / Date: press [Left/Right] keys to select your wakeup date.
4 Day: If “Timer Mode” is “Weekly”, this item is valid. You can select day such as
Monday.
5 Time: press [OK] key and number keys to input your wakeup time.
7 Auto Record: If Auto Record is ON, Scheduled program recording will be
enabled.
8 Record Duration: setting the recording duration of auto record mode. The max
time is 99.59 hours.
6.4.2 Sleep Timer
15
Sleep Timer can set the system enter standby mode automatically after the
user setting time.
The option is like below: Off / 10min/30min /60min /90min /120min. then press
key
[OK] to start sleep time countdown.
Press [Exit] can exit the current menu.
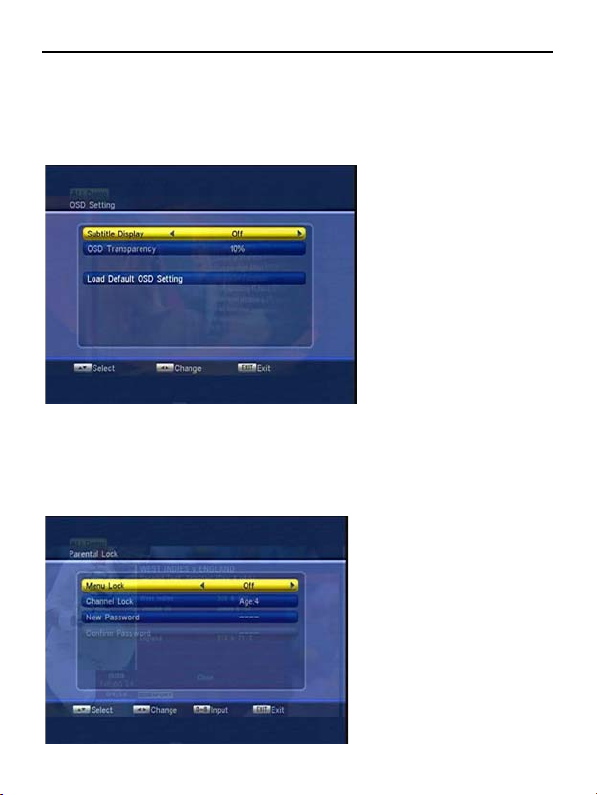
6.5 OSD Setting
1 Subtitle Display: On / Off
2 OSD Transparency: press [Left/Right] key to select the values. 10%, 20%, 30%,
40%, 50%, and “Off”
3 Load Default OSD Setting: Press OK to load default OSD setting.
4 Press [Exit] key to draw back from the “OSD Setting” menu.
6.6 Parental Lock
1 press [OK] key, there will pop a dialogue for you to input the password “0000”.
16
2 If the setting of “Menu Lock” is “ON” which means user have to key in password
3 Channel Lock can set the channel which user wants to lock it.
4 you can press [OK] key firstly then input the new password
5 Press [Exit] key to draw back from the “Parental Lock” menu.
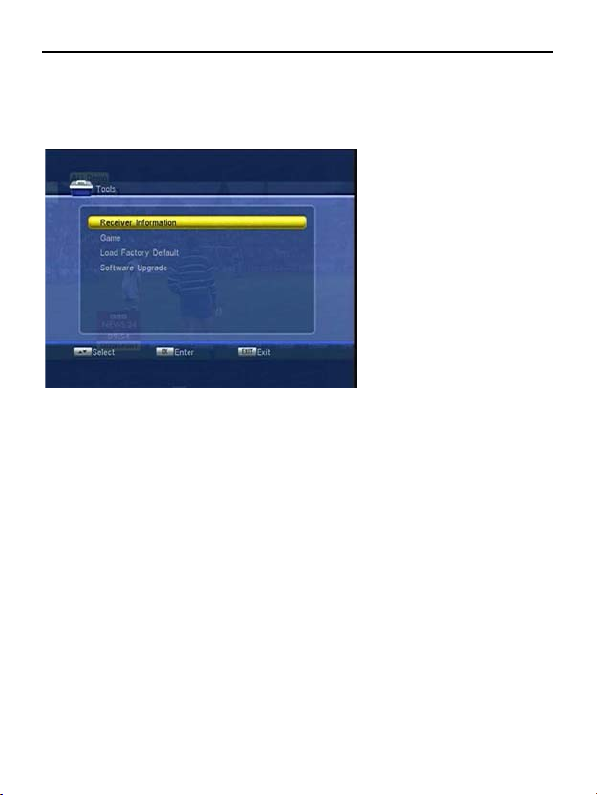
7 Tools
1 Press [Up/Down] key to select menu items among each item.
2 Press [OK] key to enter the selected item.
7.1 Information
1 enter to “Information” menu, you will see some receiver Information.
2 Press [Exit] key to draw back from “Tools” menu.
7.2 Game
1 Snake
Moving highlight to “Setup” and press [Left/Right] key to select the game
level(speed).
Moving highlight to “Start” and press [OK] key to start the game.
Moving highlight to [Cancel] keys and press [OK] key to draw back from the
game.
Start on the game:
[Volume Up/Volume Down/Channel UP/Channel Down] — use these arrow
keys to guide the snake.
[OK] — Pause/Play game
[Exit] — Quit game and draw back to “Game” menu. 2 Othello
Moving highlight to “Setup” and press [Left/Right] keys to select the game level
Moving highlight to “Start” and press [OK] key to start the game.
Moving highlight to [Cancel] keys and press [OK] key to draw back from the
game.
Start on the game:
17
[Volume Up/Volume Down/Channel UP/Channel Down] — use these arrow
keys to guide chessman.
[OK] — set chessman.
[Exit] — Quit game and draw back to “Game” menu.
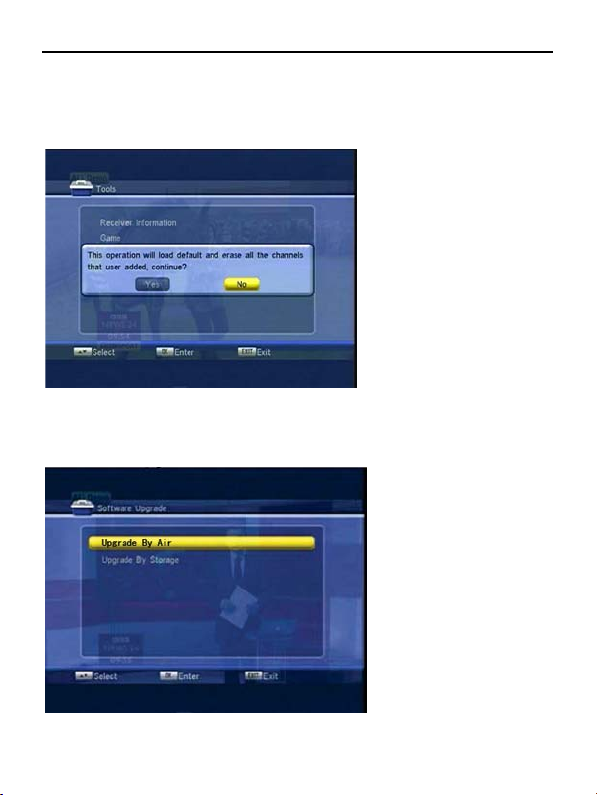
7.3 Load Factory Default
1 There will pop a dialogue for you to enter the password “0000”.
2 press [Exit] key can draw back from this item
7.4 Software Upgrade
18
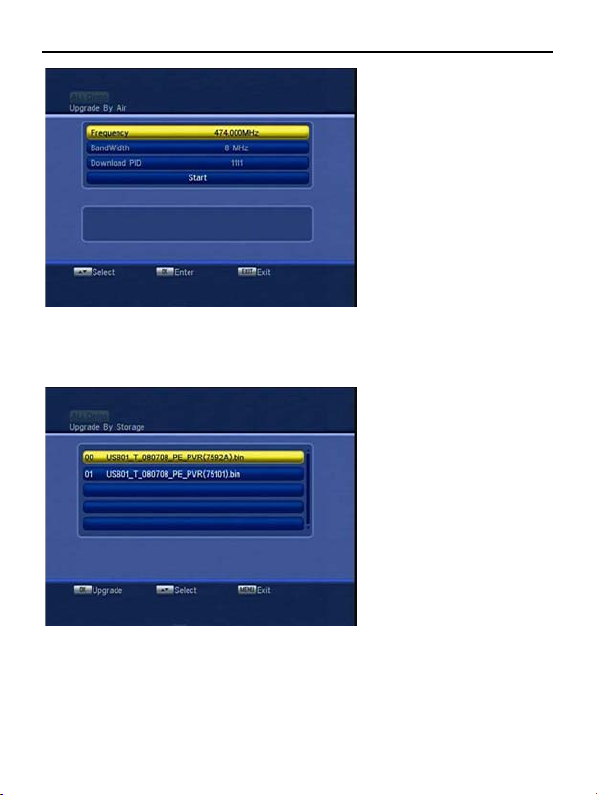
7.4.1 Upgrade By Air
1 Input the frequency value and download PID, and select bandwidth.
2 Then move the highlight to the start button and
press [Enter] key to begin to upgrade.
7.4.2 Upgrade BY Storage
1. Press [up/down] key to moving highlight.
2. Press [OK] key to start upgrade
3. Press [exit] key to exit.
19

8 Media+
1 Press [Up/Down] key to select menu items among each item.
2 Press [OK] key to enter the selected item.
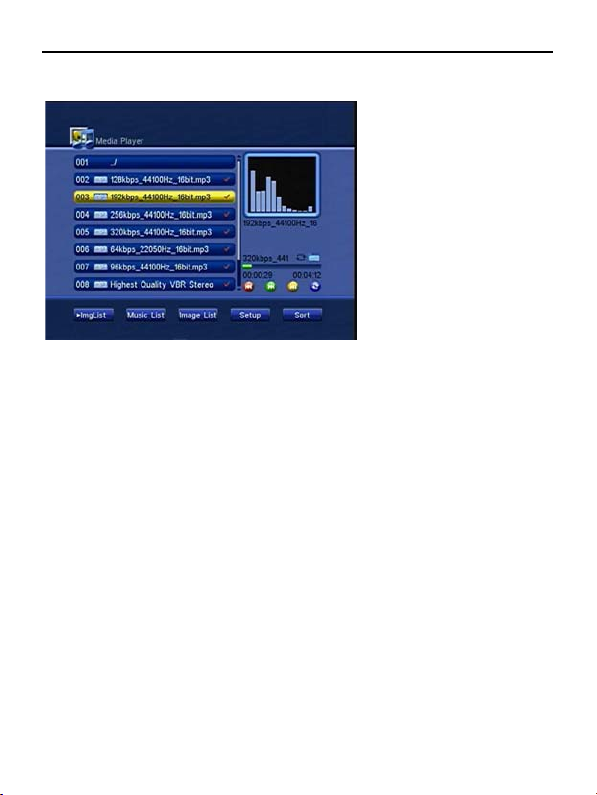
8.1 Media player
1. Press [up/down] key to moving highlight in file list;
2. Press [left/right] key to moving highlight to switch file list and bottom button.
3. Press [OK] key to play current file.
4. Press [FWD/REV] key to thumb page in file list.
5. Press [Audio] key to show a volume box, you can press [up/down] key to adjust
volume.
Press [left/right] key to change balance be closed to left or close to right.
6. Press [FAV] or number key [2] to add favor file to Music list or Image list. Except
“.mpg” file.
20
7. Press [Exit] key to back to “Media+” menu.
8.1.1 Music
1. Press color key [red] one time to go to last music file.
2. Press color key [red] 3s to fast backward mode.
3. Press color key [green] one time to go to next music file.
4. Press color key [green] 3s to fast forward mode.
5. When playing music file, Press color key [yellow] to pause music, press [yellow]
key again, playing music.
6. Press [yellow] key to start playing the music list 1st file. If no file in list, It will
show” Image play list is empty”
7. Press color key [blue] to switching repeat mode: Repeat all/ Repeat one/ repeat
folder/repeat 123/repeat random.
21
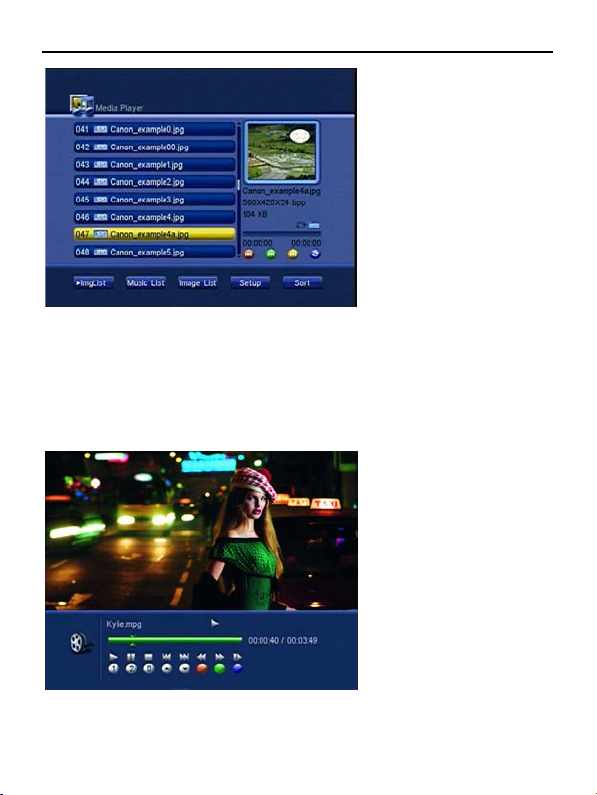
8.1.2 Image
press [OK] key to play current image in full screen:
1. And then system default slide show pictures by repeating current folder’s all
image files.
2. Press [up/down] key to go back previous picture or go to next picture.
3. Press [left/right] key to rotating picture, and rotate icon will be display
4. Press [OK] key to into zoom in mode, and zoom in icon will be display.
5. Press [pause] key to pause picture,Press [pause] key again to default slide
show pictures by repeating current folder’s all image files.
8.1.3 Mpeg
1. Press [info] key to show/hide navigator bar.
2. Press [Play] key or number key [1] to start playing current file from pause mode
or stop mode.
22
3. Press [Pause] key or number key [2] to pause the video playing, and
continuously press [Pause] key or number key [2]will into play mode.
4. Press number key [0] to stop playing.
5. Press color key [red] will into fast rewind mode. Press color key [red] many
times to switching fast rewind speed.
6. Press color key [green] will into fast forward mode. Press color key [red] many
times to switching fast forward speed.
7. Press color key [blue] will into slow forward mode.
8. When the navigator bar is hide, Press [Left/Right] key will be for Volume
adjustment like TV program playing.
9. Press [up/down] key to play previous or next mpeg file in current folder.
8.1.4 Bottom buttons
press [left/right] key to moving highlight to 5 bottom buttons, about:
Imglist:
Press [FAV] or number key [2] in file list to add favor image files to Image list.
Press [OK] key then system default slide show pictures by repeating image list
files
Music list:
Press [up/down] key to moving highlight.
Press color key [red] to start play files in mus ic list.
Press color key [yellow] to delete file one by one from music list.
Press color key [blue] to delete all music files in list.
Press [exit] key to exit music list menu.
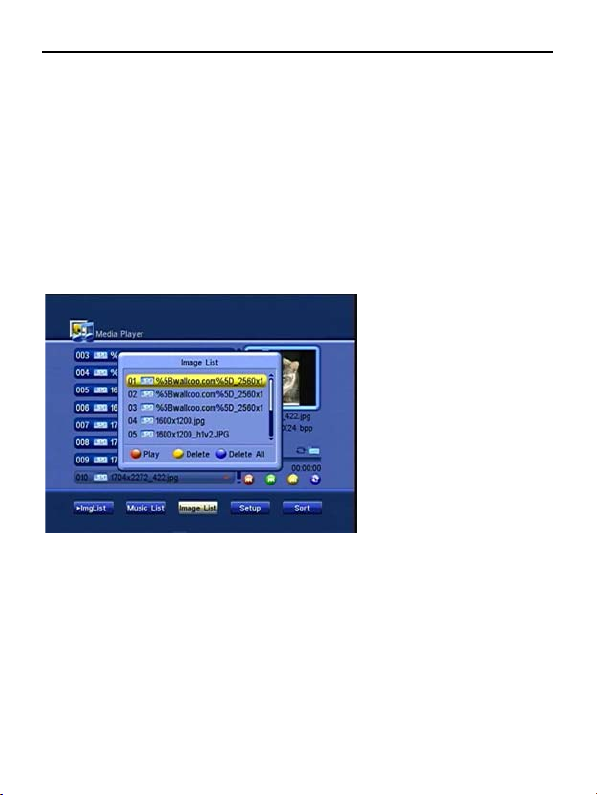
Image list:
Press [up/down] key to moving highlight.
Press color key [red] to start play files in image list.
Press color key [yellow] to delete file one by one from image list.
Press color key [blue] to delete all image files in list.
23

If image list is empty, it will show “Image play list is empty”
Press [exit] key to exit image list menu.
Setup
Press [up/down] key to moving highlight to each item.
Press [left/right] key to select
Picture size: setting to display picture in full screen.
Slide Interval (sec.): For setting every picture’s stay time when slide show. It
have 0~10s to select.
Slide Repeat: For select the picture slide show playing mode. It has “OFF/ON”
to select.
Fate effect: For setting the slide show’s picture fade in fade out effect. It has
“Shutter”, “Chessboard”, “left/up insert”, “Left-UP stretch”, “Random”, “Cross
Fade”.
Sort
24
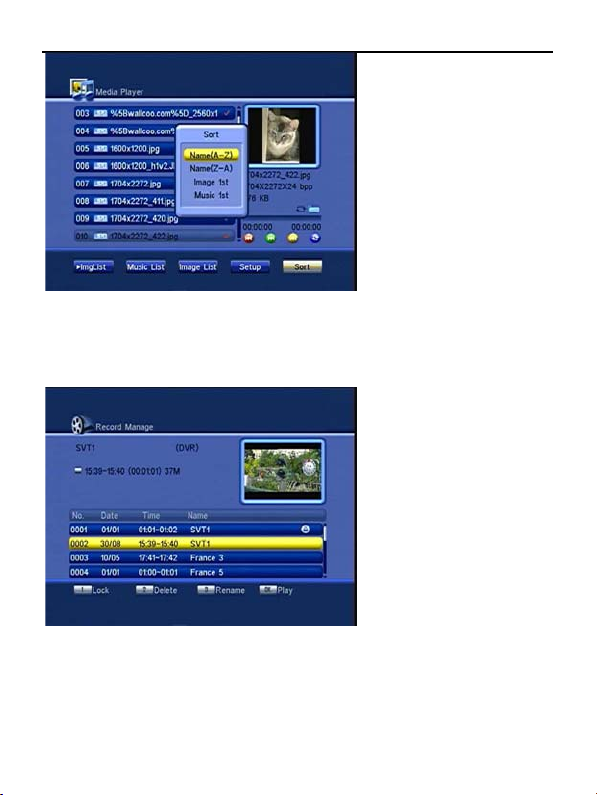
Name(A ~ Z): sort files by files name’s 1st letter from A to Z;
Name(Z ~ A): sort files by files name’s 1st letter from Z to A;
Image 1st: sort files sequence should be JPG > BMP > MP3 > WMA
Music 1st: sort files sequence should be MP3 > WMA > JPG > BMP
8.2 Record Manage
Press [OK] key to enter ”Record Manage” menu
1. Press [up/down] key to move highlight.
2. Press [FWD/REV] key to thumb page.
3. Press [OK] key to playing current file.
Pre ss [exit] key to cancel recall bar, and press [OK] key to show recall bar
again.
Press [left/right] key to moving position cursor, press [OK] key to play the video
on the position now cursor pointed.
25

Press [stop] key to stop playing and back to Record manager menu.
8.2.1 Lock
Press number key [1] to mark lock and unlock file;
If “Channel Lock” is “On”, it will show a password box when highlight on a lock
file, you must input current password.
8.2.2 Delete
Press number key [2] to mark delete and cancel delete icon;
8.2.3 Rename
Press number key [3] to show a “Rename” window and rename the highlighted
file.
Press [Up][Down][Left][Right] key to move the highlight in “Rename” window.
Press [OK] key to input char.
Move the highlight to “OK” and press [OK] key to save the modification.
Move the highlight to “ESC” and press [OK] key to cancel the operation.
Press [Menu/Exit] key to exit “Record Manage” window.
8.3 Removalbe Disk Information
26
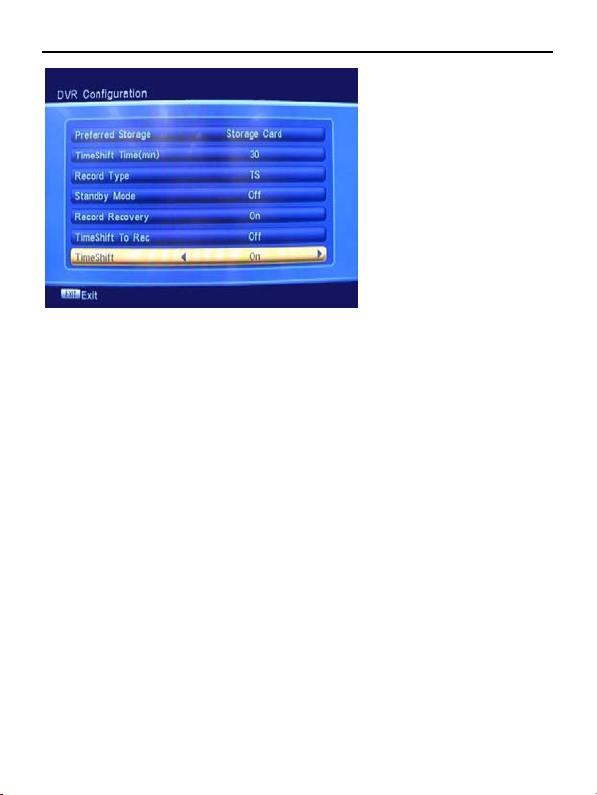
8.4 DVR Configuration
8.4.1 Timeshift
To user switching timeshift mode, press [left/right] key to select “ON/OFF”
8.4.2 Timeshift Time(min):
Manual to change how many space system allocated for timeshift buffer. It
have:10/20/30/40/50/60 (min) to select .
8.4.3 Record type
Press [left/right] key to select “TS” and “PS”.
TS: DVR recording will storage the TV program as transport stream format.
PS: DVR recording will storage the TV program as MPEG format.
8.4.4 Standby Mode
Press [left/right] key to select “ON/OFF”. When select on, the machine will
standby after recording.
8.4.5 Record Recovery
Press [left/right] key to select “ON/OFF”. When select on, when it is recoding
programe from televison. Then It is cut off electricity. It can work continually when
it is connected its power again.
8.4.6 Timeshift to Rec
Press [left/right] key to select “ON/OFF”. when select on, you can not only
record but also can timeshift.
27
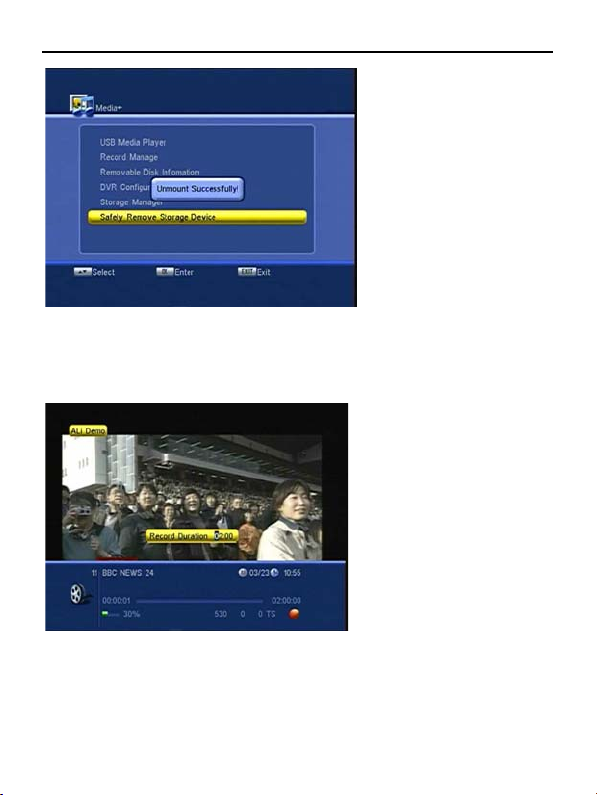
8.5 Safely Remove Storage Device
It’s to safely remove your inserted USB device like on computer.
9 DVR
9.1 REC(Record)
1. Press [record] key to record a file in TV full screen, and show a REC bar on
screen
2. When recording, Press [exit] key to cancel record bar.
3. Press [record] key again, show a record Duration box, the max time is 99.99
hours.
4. When recording, press [REV/FWD] key into fast rewind mode and fast
forward mode.
5. Press [stop] key to stop recording.
28
 Loading...