

Page 1
1
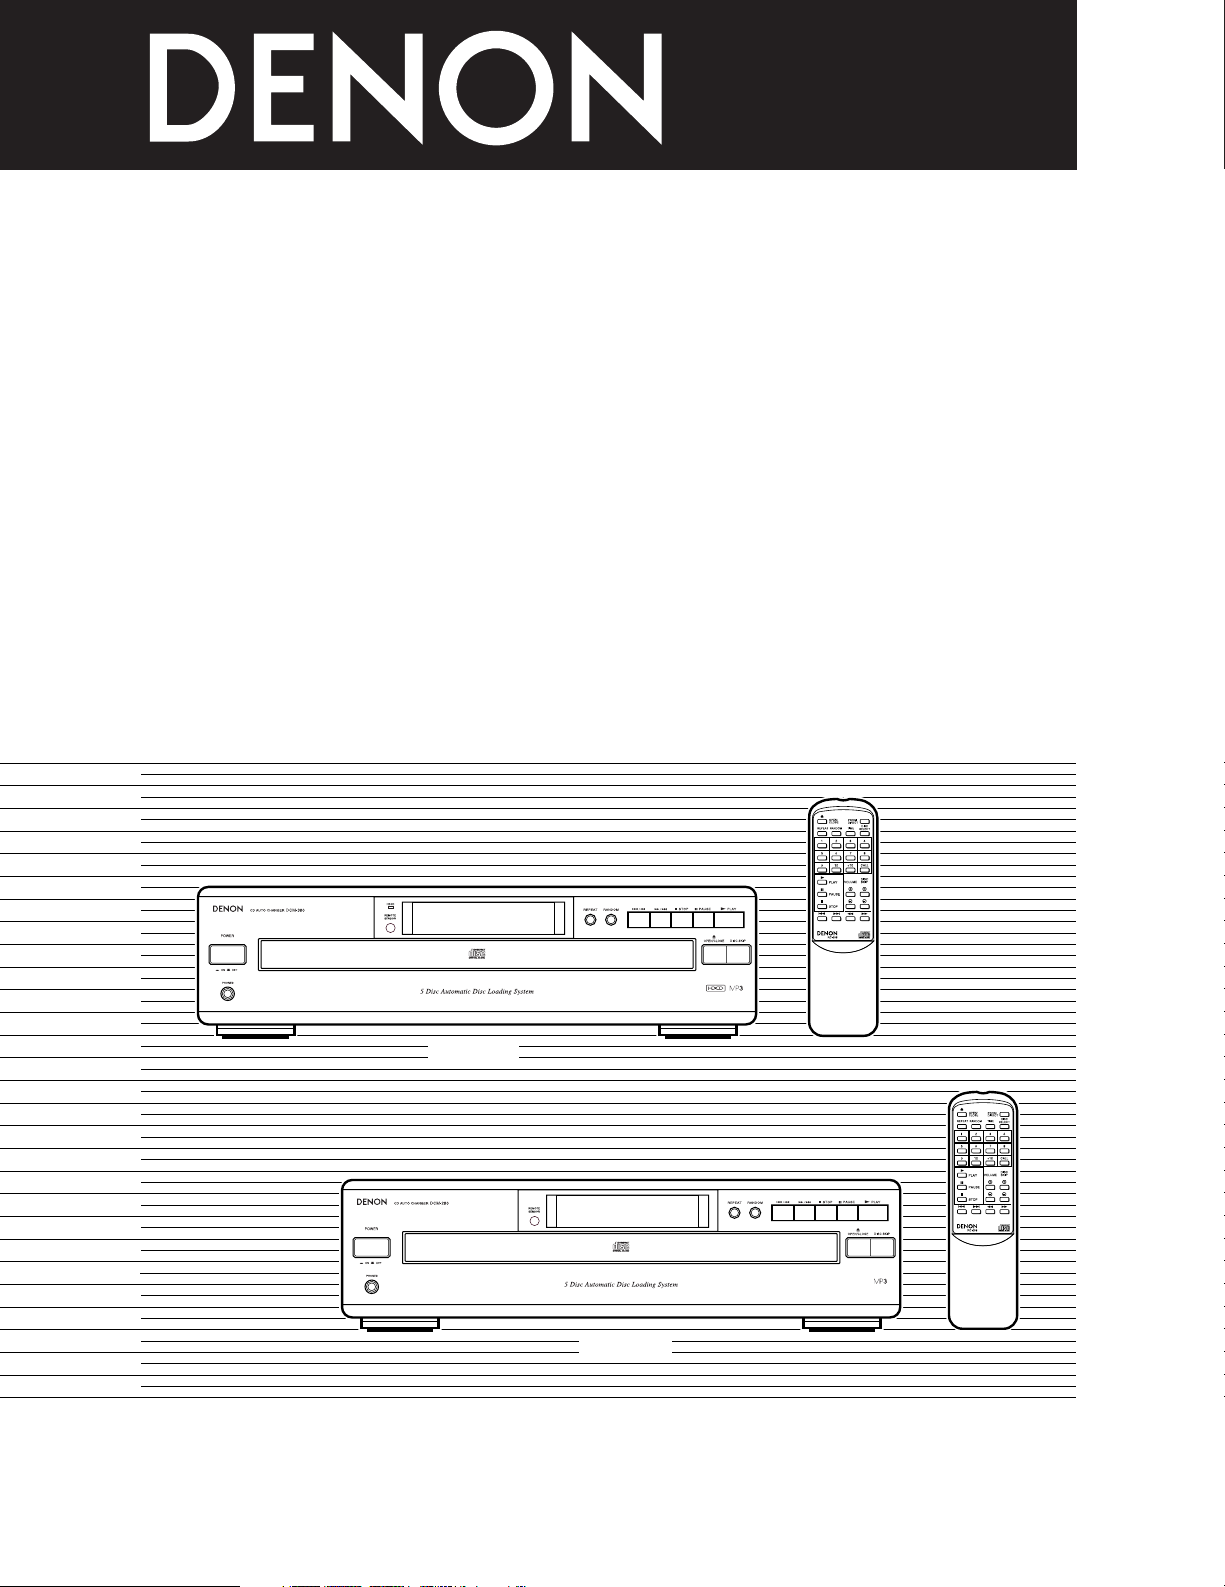
STEREO CD PLAYER
DCM-380/280
OPERATING INSTRUCTIONS
MODE D’EMPLOI
DCM-380
DCM-280
FOR ENGLISH READERS PAGE 005 ~ PAGE 022
POUR LES LECTEURS FRANCAIS PAGE 023 ~ PAGE 040
Page 2

IMPORTANT TO SAFETY
WARNING:
TO PREVENT FIRE OR SHOCK HAZARD, DO NOT
EXPOSE THIS APPLIANCE TO RAIN OR MOISTURE.
CAUTION:
1. Handle the power supply cord carefully
Do not damage or deform the power supply cord. If it is damaged or
deformed, it may cause electric shock or malfunction when used.
When removing from wall outlet, be sure to remove by holding the plug
attachment and not by pulling the cord.
2. Do not open the top cover
In order to prevent electric shock, do not open the top cover.
If problems occur, contact your DENON DEALER.
3. Do not place anything inside
Do not place metal objects or spill liquid inside the CD player.
Electric shock or malfunction may result.
Please, record and retain the Model name and serial number of your set
shown on the rating label.
Model No. DCM-380/280 Serial No.
CAUTION:
TO REDUCE THE RISK OF ELECTRIC SHOCK,
DO NOT REMOVE COVER (OR BACK). NO
USER SERVICEABLE PARTS INSIDE. REFER
SERVICING TO QUALIFIED SERVICE
PERSONNEL.
The lightning flash with arrowhead symbol, within
an equilateral triangle, is intended to alert the user to
the presence of uninsulated “dangerous voltage”
within the product’s enclosure that may be of
sufficient magnitude to constitute a risk of electric
shock to persons.
The exclamation point within an equilateral triangle
is intended to alert the user to the presence of
important operating and maintenance (servicing)
instructions in the literature accompanying the
appliance.
NOTE:
This CD player uses the semiconductor laser. To allow you to enjoy music
at a stable operation, it is recommended to use this in a room of 10 °C (50
°F) ~ 35 °C (95 °F).
CAUTION:
USE OF CONTROLS OR ADJUSTMENTS OR REFORMANCE OF
PROCEDURES OTHER THAN THOSE SPECIFIED HEREIN MAY RESULT
IN HAZARDOUS RADIATION EXPOSURE.
THE COMPACT DISC PLAYER SHOULD NOT BE ADJUSTED OR
REPAIRED BY ANYONE EXCEPT PROPERLY QUALIFIED SERVICE
PERSONNEL.
This device complies with Part 15 of the FCC Rules. Operation is
subject to the following two conditions: (1) This device may not
cause harmful interference, and (2) this device must accept any
interference received, including interference that may cause
undesired operation.
This Class B digital apparatus meets all requirements of the
Canadian Interference-Causing Equipment Regulations.
Cet appareil numérique de la classe B respecte toutes les
exigences du Règlement sur le matériel brouilleur du Canada.
• FOR CANADA MODEL ONLY
CAUTION
TO PREVENT ELECTRIC SHOCK DO NOT USE THIS (POLARIZED)
PLUG WITH AN EXTENSION CORD, RECEPTACLE OR OTHER
OUTLET UNLESS THE BLADES CAN BE FULLY INSERTED TO
PREVENT BLADE EXPOSURE.
• POUR LES MODELES CANADIENS UNIQUEMENT
ATTENTION
POUR PREVENIR LES CHOCS ELECTRIQUES NE PAS UTILISER
CETTE FICHE POLARISEE AVEC UN PROLONGATEUR UNE PRISE
DE COURANT OU UNE AUTRE SORTIE DE COURANT, SAUF SI
LES LAMES PEUVENT ETRE INSEREES A FOND SANS EN
LAISSER AUCUNE PARTIE A DECOUVERT.
LABELS (for U.S.A. model only)
CERTIFICATION
THIS PRODUCT COMPLIES WITH DHHS RULES 21CFR
SUBCHAPTER J APPLICABLE AT DATE OF MANUFACTURE.
CLASS 1 LASER PRODUCT
LUOKAN 1 LASERLAITE
KLASS 1 LASERAPPARAT
,
CLASS 1
LASER
PRODUCT
,
,,
ADVARSEL:
USYNLIG LASERSTRÅLING VED ÅBNING, NÅR
SIKKERHEDSAFBRYDERE
ER UDE AF FUNKTION. UNDGÅ UDSAETTELSE FOR STRÅLING.
VAROITUS!
LAITTEEN KÄYTTÄMINEN MUULLA KUIN TÄSSÄ
KÄYTTÖOHJEESSA MAINITULLA TAVALLA SAATTAA ALTISTAA
KÄYTTÄJÄN TURVALLISUUSLUOKAN 1 YLITTÄVÄLLE
NÄKYMÄTTÖMÄLLE LASERSÄTEILYLLE.
VARNING-
OM APPARATEN ANVÄNDS PÅ ANNAT SÄTT ÄN I DENNA
BRUKSANVISNING SPECIFICERATS, KAN ANVÄNDAREN
UTSÄTTAS FÖR OSYNLIG LASERSTRÅLNING SOM ÖVERSKRIDER
GRÄNSEN FÖR LASERKLASS 1.
Copyrights / Droits d’auteur / Derechos de Autor
2
It is prohibited by law to reproduce, broadcast, rent or play discs in
public without the consent of the copyright holder.
2
La reproduction, la diffusion, la location, le prêt ou la lecture publique
de ces disques sont interdits sans le consentement du détenteur des
droits d’auteur.
2
De acuerdo con las leyes está prohibido reproducir, emitir, alquilar o
interpretar discos en público sin la autorización del propietario de los
derechos de autor.
2
CAUTION
RISK OF ELECTRIC SHOCK
DO NOT OPEN
Page 3
SAFETY INSTRUCTIONS
1. Read Instructions – All the safety and operating instructions
should be read before the product is operated.
2. Retain Instructions – The safety and operating instructions
should be retained for future reference.
3. Heed Warnings – All warnings on the product and in the
operating instructions should be adhered to.
4. Follow Instructions – All operating and use instructions should
be followed.
5. Cleaning – Unplug this product from the wall outlet before
cleaning. Do not use liquid cleaners or aerosol cleaners.
6. Attachments – Do not use attachments not recommended by
the product manufacturer as they may cause hazards.
7. Water and Moisture – Do not use this product near water – for
example, near a bath tub, wash bowl, kitchen sink, or laundry
tub; in a wet basement; or near a swimming pool; and the like.
8. Accessories – Do not place this product on an unstable cart,
stand, tripod, bracket, or table. The product may fall, causing
serious injury to a child or adult, and serious damage to the
product. Use only with a cart, stand, tripod, bracket, or table
recommended by the manufacturer, or sold with the product.
Any mounting of the product should follow the manufacturer’s
instructions, and should use a
mounting accessory
recommended by the
manufacturer.
9. A product and cart
combination should be
moved with care. Quick
stops, excessive force,
and uneven surfaces may
cause the product and cart
combination to overturn.
10. Ventilation – Slots and openings in the cabinet are provided for
ventilation and to ensure reliable operation of the product and to
protect it from overheating, and these openings must not be
blocked or covered. The openings should never be blocked by
placing the product on a bed, sofa, rug, or other similar surface.
This product should not be placed in a built-in installation such
as a bookcase or rack unless proper ventilation is provided or
the manufacturer’s instructions have been adhered to.
11. Power Sources – This product should be operated only from the
type of power source indicated on the marking label. If you are
not sure of the type of power supply to your home, consult your
product dealer or local power company. For products intended
to operate from battery power, or other sources, refer to the
operating instructions.
12. Grounding or Polarization – This product may be equipped with
a polarized alternating-current line plug (a plug having one blade
wider than the other). This plug will fit into the power outlet
only one way. This is a safety feature. If you are unable to
insert the plug fully into the outlet, try reversing the plug. If the
plug should still fail to fit, contact your electrician to replace your
obsolete outlet. Do not defeat the safety purpose of the
polarized plug.
13. Power-Cord Protection – Power-supply cords should be routed
so that they are not likely to be walked on or pinched by items
placed upon or against them, paying particular attention to
cords at plugs, convenience receptacles, and the point where
they exit from the product.
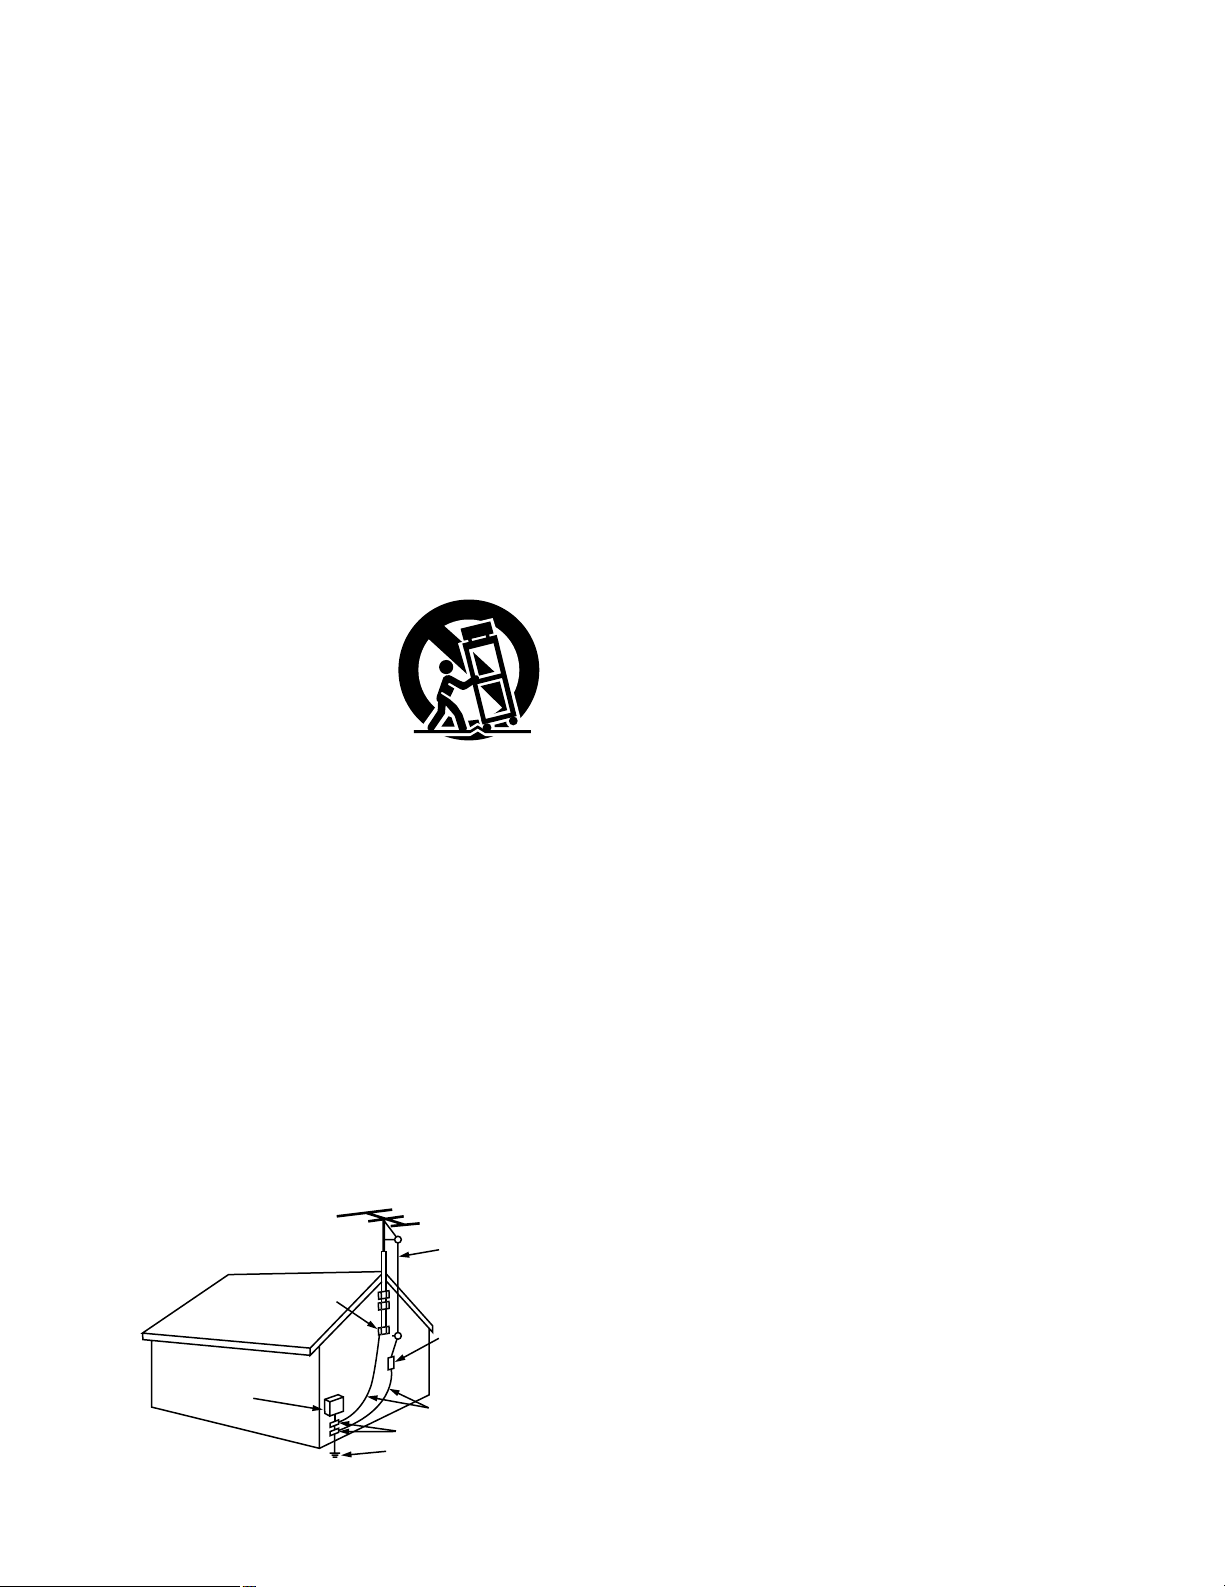
15. Outdoor Antenna Grounding – If an outside antenna or cable
system is connected to the product, be sure the antenna or
cable system is grounded so as to provide some protection
against voltage surges and built-up static charges. Article 810
of the National Electrical Code, ANSI/NFPA 70, provides
information with regard to proper grounding of the mast and
supporting structure, grounding of the lead-in wire to an
antenna discharge unit, size of grounding conductors, location
of antenna-discharge unit, connection to grounding electrodes,
and requirements for the grounding electrode. See Figure A.
16. Lightning – For added protection for this product during a
lightning storm, or when it is left unattended and unused for
long periods of time, unplug it from the wall outlet and
disconnect the antenna or cable system. This will prevent
damage to the product due to lightning and power-line surges.
17. Power Lines – An outside antenna system should not be
located in the vicinity of overhead power lines or other electric
light or power circuits, or where it can fall into such power lines
or circuits. When installing an outside antenna system,
extreme care should be taken to keep from touching such
power lines or circuits as contact with them might be fatal.
18. Overloading – Do not overload wall outlets, extension cords, or
integral convenience receptacles as this can result in a risk of
fire or electric shock.
19. Object and Liquid Entry – Never push objects of any kind into
this product through openings as they may touch dangerous
voltage points or short-out parts that could result in a fire or
electric shock. Never spill liquid of any kind on the product.
20.
Servicing – Do not attempt to service this product yourself as
opening or removing covers may expose you to dangerous
voltage or other hazards. Refer all servicing to qualified
service personnel.
21.
Damage Requiring Service – Unplug this product from the
wall outlet and refer servicing to qualified service
personnel
under the following conditions:
a) When the power-supply cord or plug is damaged,
b) If liquid has been spilled, or objects have fallen into the
product,
c) If the product has been exposed to rain or water,
d) If the product does not operate normally by following the
operating instructions. Adjust only those controls that are
covered by the operating instructions as an improper
adjustment of other controls may result in damage and will
often require extensive work by a qualified technician to
restore the product to its normal operation,
e) If the product has been dropped or damaged in any way, and
f) When the product exhibits a distinct change in performance
– this indicates a need for service.
22. Replacement Parts – When replacement parts are required, be
sure the service technician has used replacement parts
specified by the manufacturer or have the same characteristics
as the original part. Unauthorized substitutions may result in
fire, electric shock, or other hazards.
23. Safety Check – Upon completion of any service or repairs to this
product, ask the service technician to perform safety checks to
determine that the product is in proper operating condition.
24. Wall or Ceiling Mounting – The product should be mounted to a
wall or ceiling only as recommended by the manufacturer.
25. Heat – The product should be situated away from heat sources
such as radiators, heat registers, stoves, or other products
(including amplifiers) that produce heat.
FIGURE A
EXAMPLE OF ANTENNA GROUNDING
AS PER NATIONAL
ELECTRICAL CODE
ANTENNA
LEAD IN
WIRE
GROUND
CLAMP
ELECTRIC
SERVICE
EQUIPMENT
ANTENNA
DISCHARGE UNIT
(NEC SECTION 810-20)
GROUNDING CONDUCTORS
(NEC SECTION 810-21)
GROUND CLAMPS
POWER SERVICE GROUNDING
ELECTRODE SYSTEM
(NEC ART 250, PART H)
NEC - NATIONAL ELECTRICAL CODE
3
Page 4
4
ENGLISH FRANCAIS
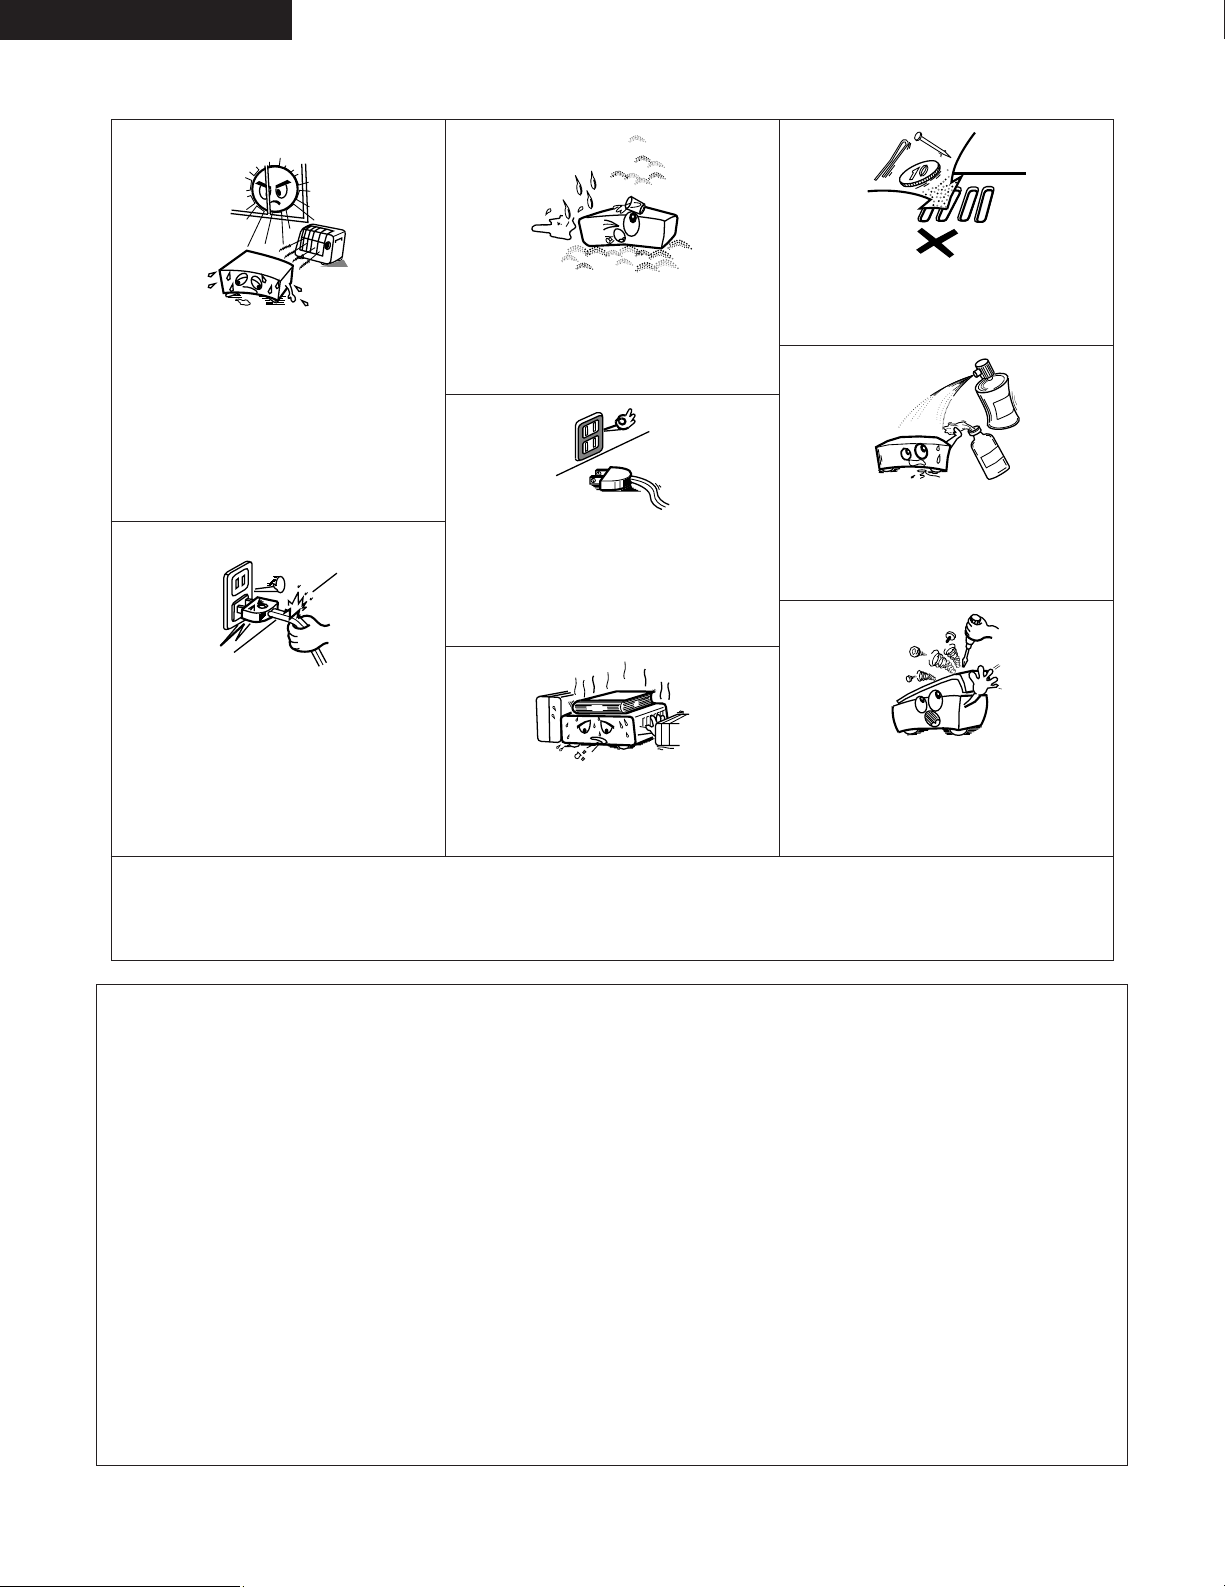
NOTE ON USE / OBSERVATIONS RELATIVES A L’UTILISATION
• Avoid high temperatures.
Allow for sufficient heat dispersion when
installed on a rack.
• Eviter des températures élevées.
Tenir compte d’une dispersion de chaleur
suffisante lors de l’installation sur une
étagère.
• Evite altas temperaturas.
Permite la suficiente dispersión del calor
cuando está instalado en la consola.
• Keep the set free from moisture, water, and
dust.
• Protéger l’appareil contre l’humidité, l’eau
et lapoussière.
• Mantenga el equipo libre de humedad, agua
y polvo.
• Do not let foreign objects in the set.
• Ne pas laisser des objets étrangers dans
l’appareil.
• No deje objetos extraños dentro del equipo.
• Do not let insecticides, benzene, and
thinner come in contact with the set.
• Ne pas mettre en contact des insecticides,
du benzène et un diluant avec l’appareil.
• No permita el contacto de insecticidas,
gasolina y diluyentes con el equipo.
• Unplug the power cord when not using the
set for long periods of time.
• Débrancher le cordon d’alimentation lorsque
l’appareil n’est pas utilisé pendant de
longues périodes.
• Desconecte el cordón de energía cuando no
utilice el equipo por mucho tiempo.
• Do not obstruct the ventilation holes.
• Ne pas obstruer les trous d’aération.
• No obstruya los orificios de ventilación.
• Handle the power cord carefully.
Hold the plug when unplugging the cord.
• Manipuler le cordon d’alimentation avec
précaution.
Tenir la prise lors du débranchement du
cordon.
• Maneje el cordón de energía con cuidado.
Sostenga el enchufe cuando desconecte el
cordón de energía.
• Never disassemble or modify the set in any
way.
• Ne jamais démonter ou modifier l’appareil
d’une manière ou d’une autre.
• Nunca desarme o modifique el equipo de
ninguna manera.
✽ (For sets with ventilation holes)
• The ventilation should not be impeded by covering the ventilation openings with items, such as newspapers, table-cloths, curtains, etc.
• No naked flame sources, such as lighted candles, should be placed on the apparatus.
• Please be care the environmental aspects of battery disposal.
• Apparatus shall not be exposed to dripping or splashing and no objects filled with liquids, such as vases, shall be placed on the apparatus.
• No objects filled with liquids, such as vases, shall be placed on the apparatus.
• DECLARATION OF CONFORMITY
We declare under our sole responsibility that this product, to which this
declaration relates, is in conformity with the following standards:
EN60065, EN55013, EN55020, EN61000-3-2 and EN61000-3-3.
Following the provisions of 73/23/EEC, 89/336/EEC and 93/68/EEC
Directive.
• ÜBEREINSTIMMUNGSERKLÄRUNG
Wir erklären unter unserer Verantwortung, daß dieses Produkt, auf das
sich diese Erklärung bezieht, den folgenden Standards entspricht:
EN60065, EN55013, EN55020, EN61000-3-2 und EN61000-3-3.
Entspricht den Verordnungen der Direktive 73/23/EEC, 89/336/EEC und
93/68/EEC.
• DECLARATION DE CONFORMITE
Nous déclarons sous notre seule responsabilité que l’appareil, auquel se
réfère cette déclaration, est conforme aux standards suivants:
EN60065, EN55013, EN55020, EN61000-3-2 et EN61000-3-3.
D’après les dispositions de la Directive 73/23/EEC, 89/336/EEC et
93/68/EEC.
• DICHIARAZIONE DI CONFORMITÀ
Dichiariamo con piena responsabilità che questo prodotto, al quale la
nostra dichiarazione si riferisce, è conforme alle seguenti normative:
EN60065, EN55013, EN55020, EN61000-3-2 e EN61000-3-3.
In conformità con le condizioni delle direttive 73/23/EEC, 89/336/EEC e
93/68/EEC.
QUESTO PRODOTTO E’ CONFORME
AL D.M. 28/08/95 N. 548.
• DECLARACIÓN DE CONFORMIDAD
Declaramos bajo nuestra exclusiva responsabilidad que este producto al
que hace referencia esta declaración, está conforme con los siguientes
estándares:
EN60065, EN55013, EN55020, EN61000-3-2 y EN61000-3-3.
Siguiendo las provisiones de las Directivas 73/23/EEC, 89/336/EEC y
93/68/EEC.
• EENVORMIGHEIDSVERKLARING
Wij verklaren uitsluitend op onze verantwoordelijkheid dat dit produkt,
waarop deze verklaring betrekking heeft, in overeenstemming is met de
volgende normen:
EN60065, EN55013, EN55020, EN61000-3-2 en EN61000-3-3.
Volgens de bepalingen van de Richtlijnen 73/23/EEC, 89/336/EEC en
93/68/EEC.
• ÖVERENSSTÄMMELSESINTYG
Härmed intygas helt på eget ansvar att denna produkt, vilken detta intyg
avser, uppfyller följande standarder:
EN60065, EN55013, EN55020, EN61000-3-2 och EN61000-3-3.
Enligt stadgarna i direktiv 73/23/EEC, 89/336/EEC och 93/68/EEC.
• DECLARAÇÃO DE CONFORMIDADE
Declaramos sob nossa exclusiva responsabilidade que este produto, ao
qual esta declaração corresponde, está em conformidade com as
seguintes normas:
EN60065, EN55013, EN55020, EN61000-3-2 e EN61000-3-3.
De acordo com o estabelecido nas Directivas 73/23/EEC, 89/336/EEC e
93/68/EEC.
Page 5
5
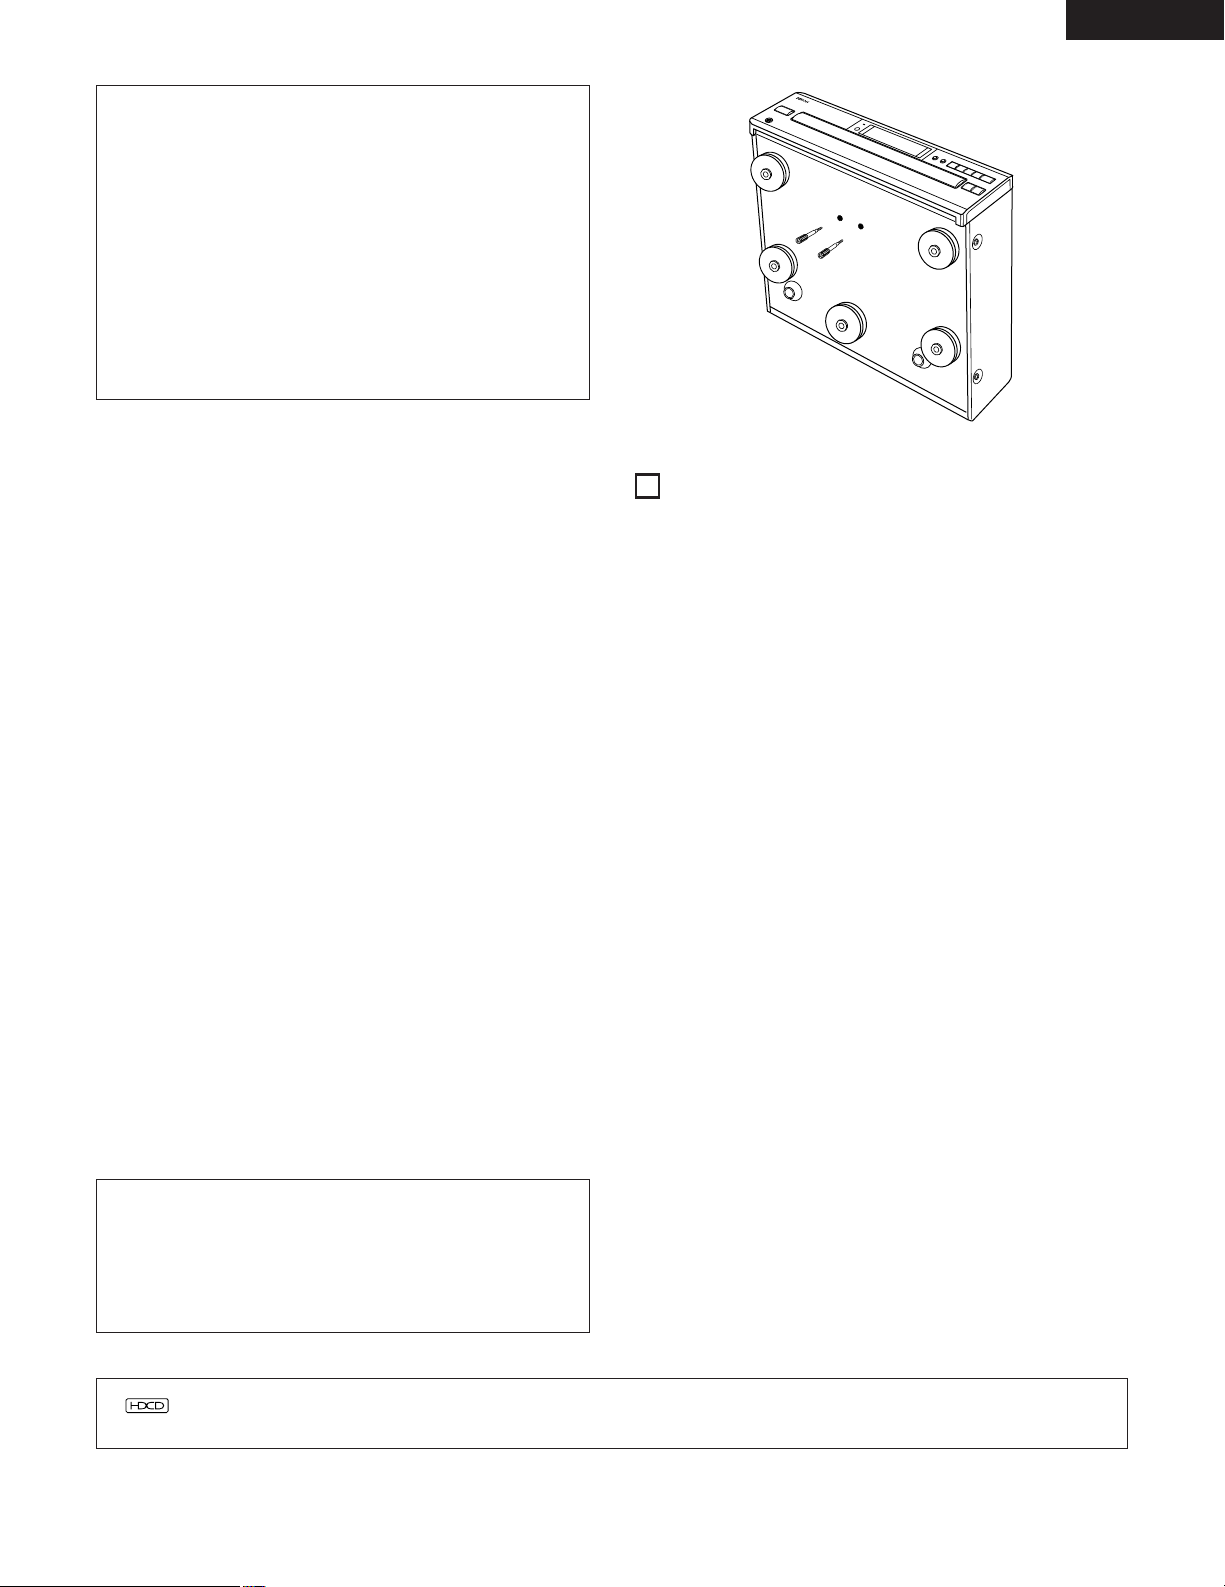
CAUTION:
At the bottom of the player there are two red shipping screws for
use when the player is transported. Before using the player, turn
these screws counterclockwise and remove them.
If the shipping screws are still in place and the power is turned on,
the disc tray will not open. If this happens, turn off the power,
unplug the power cord from the power outlet and remove the
shipping screws.
Retain these screws as they will be needed when the player is
transported.
Before transporting the player, take out the discs, close the disc
tray, turn off the power after “0 00 00:00” is displayed and unplug
the power cord from the power outlet. Then install the shipping
screws by turning them clockwise. Be sure to fasten them
securely.
Thank you for purchasing the DENON compact disc player. Read the
Operating Instructions thoroughly, and operate this player properly.
— TABLE OF CONTENTS —
z
FEATURES ……………………………………………………………5
x
BEFORE USING………………………………………………………6
c
CLEANING ……………………………………………………………7
v
CDs ……………………………………………………………………7
b
NAMES OF PARTS AND THEIR FUNCTIONS …………………8, 9
n
OPENING AND CLOSING THE DRAWER AND
LOADING A DISC …………………………………………………10
m
CONNECTIONS ……………………………………………………11
,
NORMAL PLAY ……………………………………………………12
.
OTHER PLAY METHODS ……………………………………13~17
⁄0
PLAYING MP3 FILES …………………………………………18, 19
⁄1
PLAY USING THE REMOTE CONTROL UNIT………………20, 21
⁄2
COMPACT DISCS …………………………………………………22
⁄3
TROUBLE? CHECK THE PLAYER TO FIND
WHAT’S WRONG …………………………………………………22
⁄4
SPECIFICATIONS……………………………………………………22
In addition to the CD Player unit, please check to make sure the
following items are included in the packing box:
(1) Operating Instructions………………………………………………1
(2) Connection Cords……………………………………………………1
(3) Remote Control Unit RC-258………………………………………1
(4) R6P (AA size) Dry batteries ………………………………………2
IMPORTANT
(CANADIAN MODEL ONLY)
This digital apparatus does not exceed the Class B limits for
radio noise emissions from digital apparatus setout in the Radio
Interference Regulations of the Canadian Department of
Communication.
FEATURES
(1) HDCD®(High Definition Compatible Digital) decoder
(DCM-380 only)
HDCD is an encoding/decoding technology that greatly reduces
the distortion occurring at the time of digital recording while
maintaining compatibility with the conventional CD format. HDCD
allows 20-bit data to be converted into the 16-bit data of current
CDs with no loss in sound quality.
The use of this HDCD decoder makes it possible to achieve the
high resolution and low distortion characteristic of HDCD when
playing HDCD-compatible discs, and DENON’s digital technology
optimizes the high sound quality possibilities of HDCD
technology. Furthermore, normal CDs and HDCD-compatible CDs
are automatically identified, and the optimum digital signal
processing for that type of disc used.
(2) High performance digital filter
The DCM-380/280 uses high precision 8-times oversampling
digital filters.
(3) Simple Playback of 8cm CD Singles
8cm CD singles can be played without using an adaptor.
(4) Programming of up to 32 tracks
All of the tracks on a CD can be programmed to play in any order.
Programming in units of discs (all tracks on a disc) is also possible.
(5) Newly developed carousel-type changer mechanism
included
This mechanism can house five discs, and while one disc is
playing the remaining four discs can be changed. In addition, the
carousel can be rotated either clockwise or counterclockwise, so
searching between discs is fast.
(6) Wireless Remote Control Accessory
In addition to general operations such as Play, Stop and Pause,
this remote control unit enables direct selection, direct
programming, and other functions. Use of the remote control unit
adds greatly to the operating ease of the DCM-380/280,
enhancing its outstanding features.
(7) CD-RW Playback Capability
The DCM-380/280 can play finalized CD-R and CD-RW discs.
(8) MP3 Playback
ENGLISH
®
,HDCD®and High Definition Compatible Digital®are either registered trademarks or trademarks of Microsoft Corporation in the
United States and/or other countries.
1
Page 6
6
ENGLISH
Condensation
2 Condensation
Condensation can be seen as water droplets that have formed on
the windows of a heated room in winter.
2 Conditions for the Formation of Condensation
In winter, when the unit is brought from outdoors to a warm indoor
location, or when the room temperature is suddenly raised by a
heater, condensation will form on the operating parts within the
unit and normal operation will no longer be possible.
Condensation can also form in summer when the breeze from an
air conditioner strikes the unit directly. Should this occur, change
the setup location of the unit.
2 Measures to Take After Condensation Forms
• If condensation has formed, switch on the power and leave the
unit for a while. Although the time will differ according to the
surrounding conditions, the unit should be usable in 1 to 2 hours.
• Should condensation form on the disc, wipe the disc clean.
2
Illustrations used for descriptive purposes may differ from the
actual items.
2
Please keep the instruction manual.
After reading this instruction manual, please keep it in a safe place
together with the warranty.
2 Please provide a spacing of more than 10 cm between the top,
rear, and side surfaces of subwoofer and walls or other audio/video
equipment, etc.
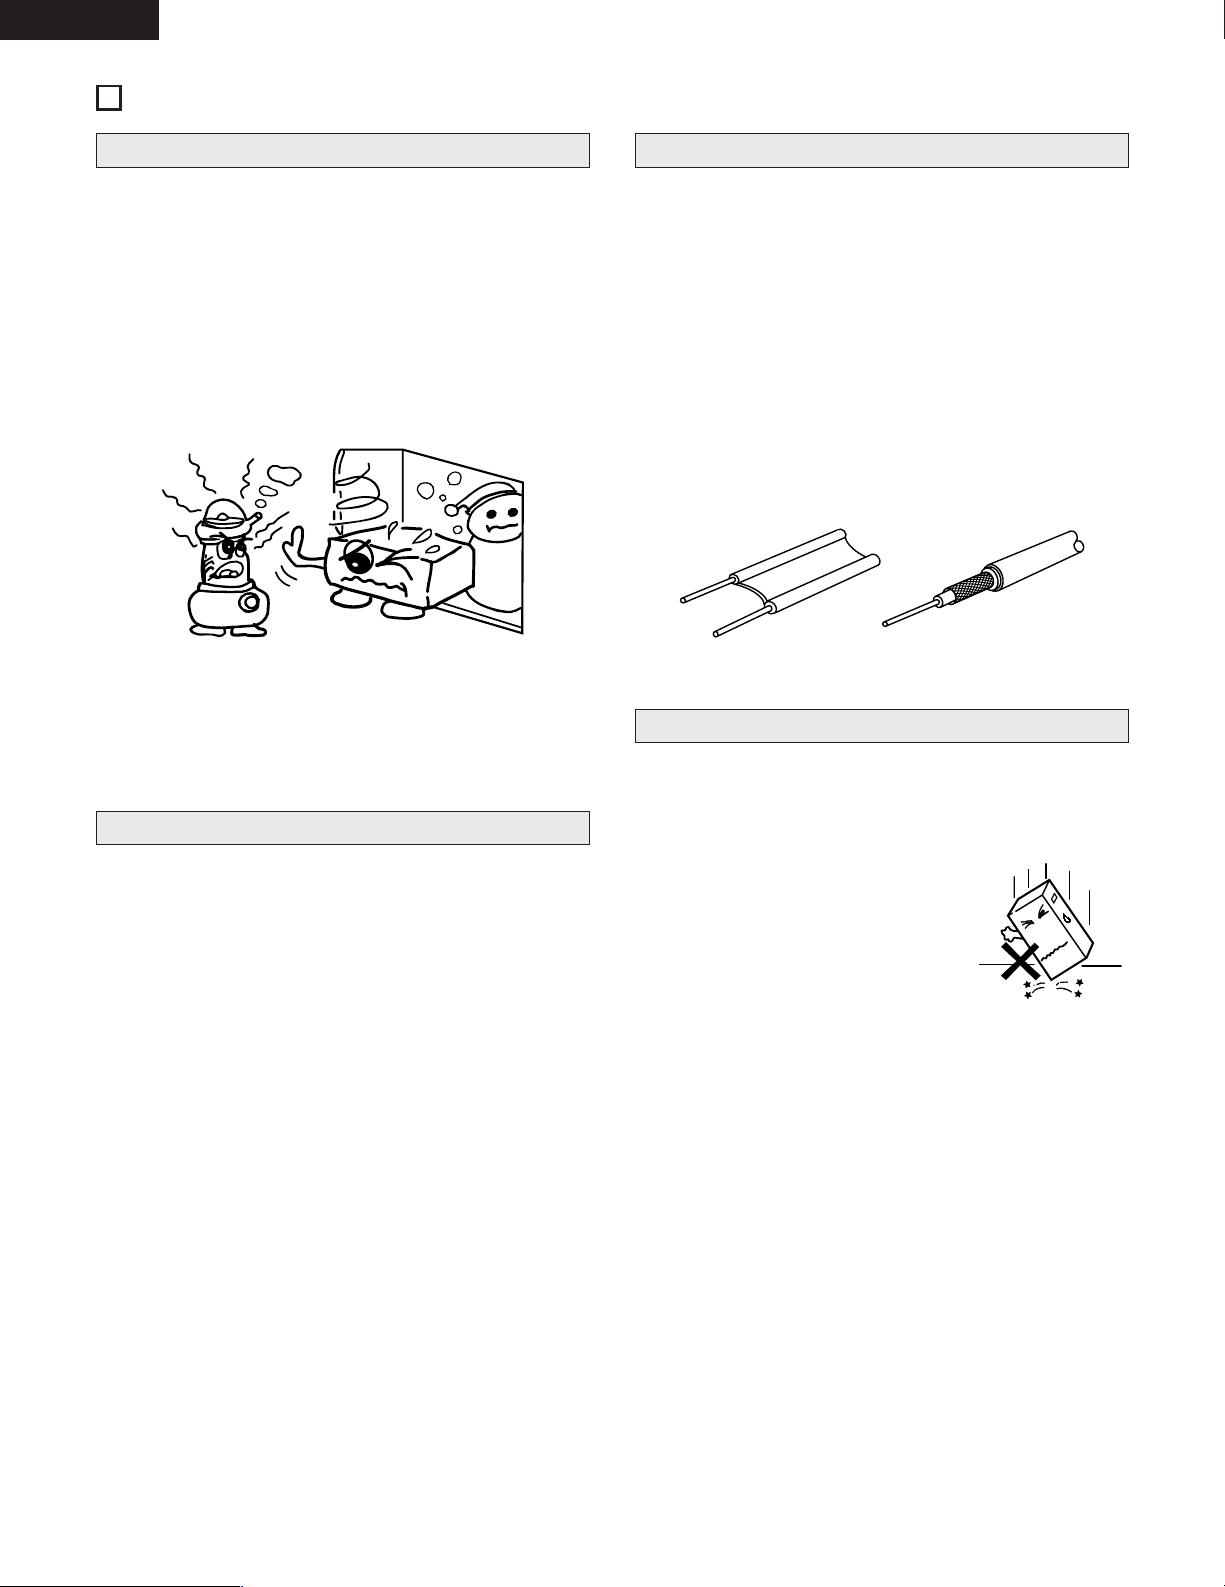
2 When using this unit or other electronic equipment that contains
microprocessors at the same time as using a tuner or TV, noise or
screen interference can occur on the audio and video of the tuner
or TV. Should this occur, pay careful attention to the following
points.
• Separate this unit as much as possible from the tuner or TV.
• Separate the antenna line of the tuner or TV from the power
cable and input/output connection cables of this unit as much as
possible.
• Use of indoor antennas and 300 Ω/ohms feedline are especially
susceptible to such interference. We recommend the use of
outdoor antennas and 75 Ω/ohms coaxial cable.
300 Ω/ohms feedline 75 Ω/ohms coaxial cable
2 Under normal circumstances
• Always remove the disc and turn the power off.
• When leaving home for long periods of times such as for trips,
be sure to unplug the power supply cord.
2 When moving the DCM-380/280
• Do not subject the DCM-380/280 to
shocks.
• Always check that the disc has been
removed and the connection cords
disconnected before moving the DCM380/280.
Other Precautions
Setup Precautions
When not using the DCM-380/280
BEFORE USING
2
Page 7

ENGLISH
7
Cleaning the main unit
2 Use a soft cloth and wipe lightly to remove dirt from the cabinet
and operation panel.
• When using chemically treated cloths, follow the precautions
that have been written for them.
2 Do not use benzene, thinners, or other organic solvents or
insecticides on the main unit since they may cause a change in
quality or color.
NOTE:
Do not use record spray or antistatic. Also do not use volatile
chemicals such as benzene or thinner.
Record
spray
Thinner
Benzene
Cleaning discs
2 Fingerprints or dirt on the disc may lower sound and picture quality
or cause breaks in playback. Wipe off fingerprints or dirt.
2 Use a commercially available disc cleaning set or a soft cloth to
wipe off fingerprints or dirt.
Wipe gently from the middle
outwards.
Do not wipe with a circular
motion.
Discs
This unit uses CDs (optical digital audio discs)
which bear the mark located at the right.
Note that specially shapes CDs, for example, heart
shaped or hexagonal cannot be played. Do not
attempt to use such CDs since doing so may
cause breakdown of this unit.
C
Holding discs
Avoid touching the surface of discs when loading and unloading them.
Be careful not to get fingerprints on
the signal surface (the side which
shines in rainbow colors).
Cautions on Handling Discs
• Do not get fingerprints, grease or dirt on discs.
• Be especially careful not to scratch discs when removing them
from their cases.
• Do not bend discs.
• Do not heat discs.
• Do not enlarge the center hole.
• Do not write on the labeled (printed) side with a ball-point pen or a
pencil.
• Water droplets may form on the surface if the disc is moved
suddenly from a cold place to a warm one. Do not use a hairdryer,
etc., to dry the disc.
Cautions on Storing Discs
•
Always eject discs after playing them.
•
Keep discs in their cases to protect them from dust, scratches and
warping.
•
Do not put discs in the following places:
1. Exposed to direct sunlight for long periods of time
2. Humid or dusty places
3. Places exposed to heat from heaters, etc
CLEANING
3
CDs
4
Page 8
ENGLISH
8
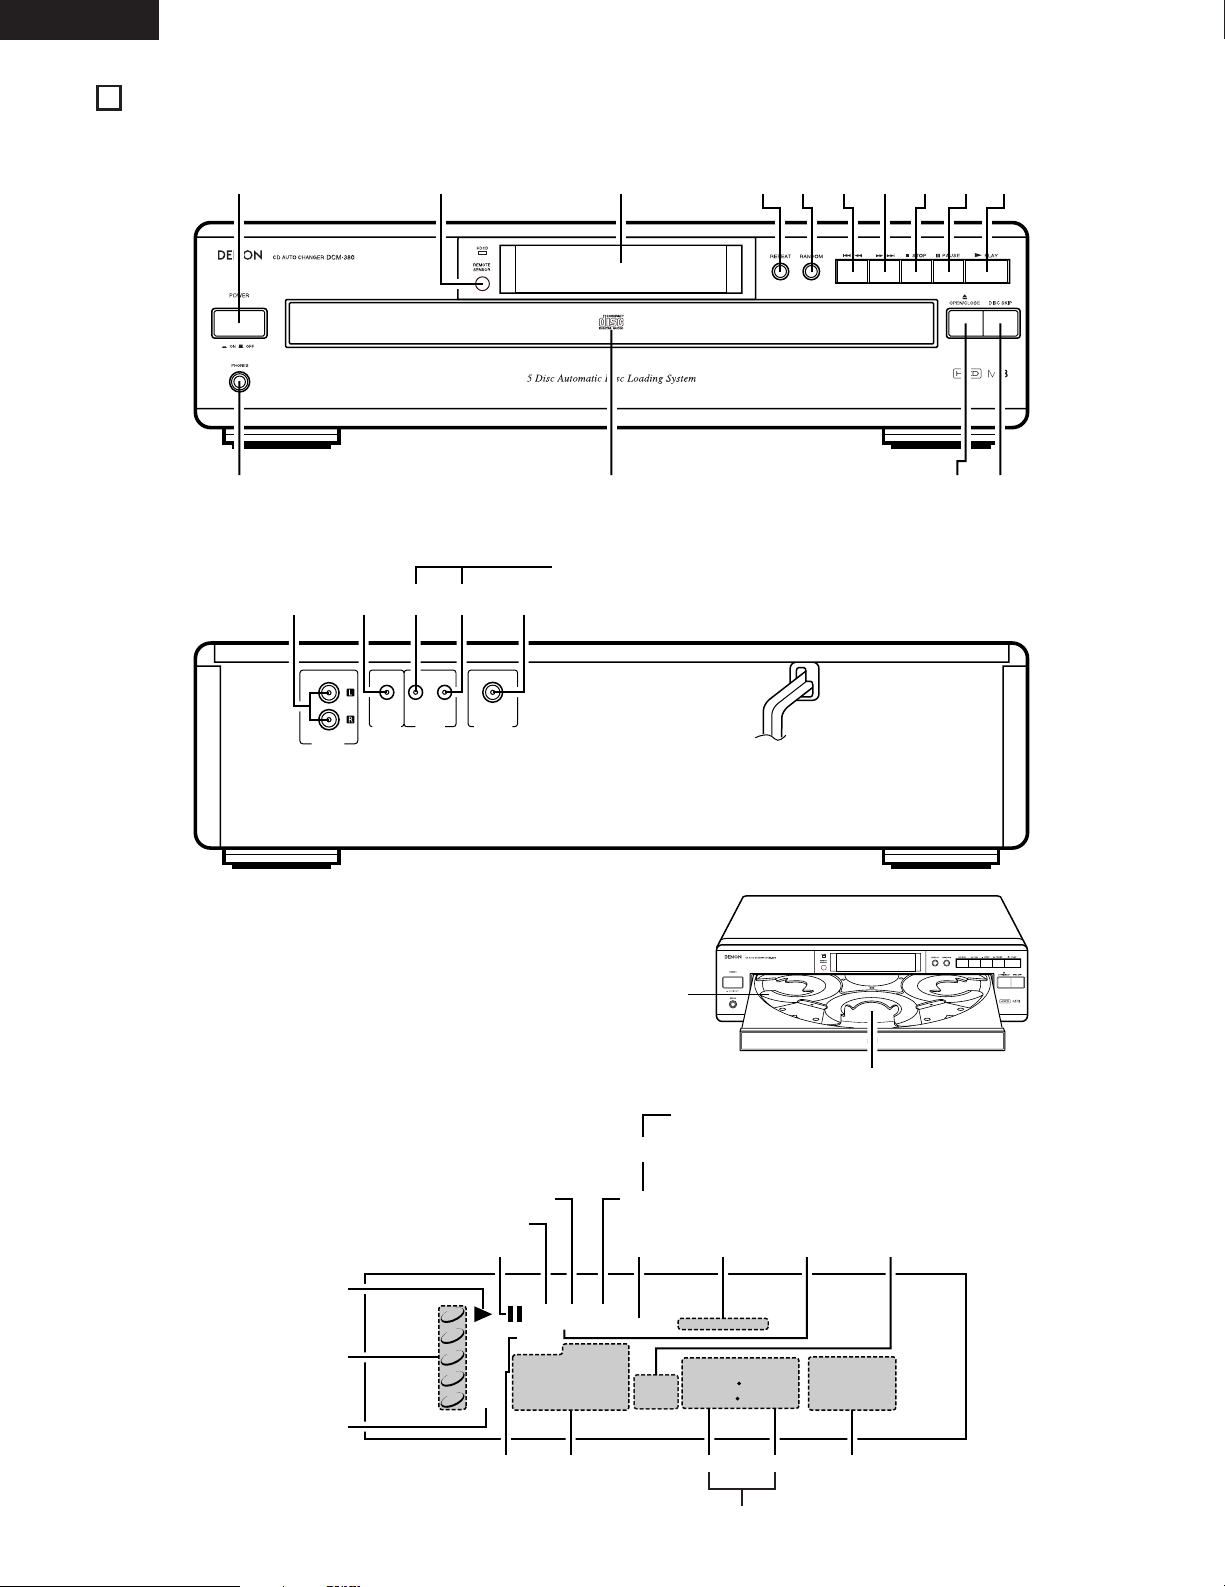
FRONT PANEL
q
wrtyuio!0 !1
!5
!4
!3 !2
REAR PANEL
COAXIAL
DIGITAL OUT
LINE OUT
VARIABLE
CONTROL
OUT
IN
SYNCHRO
!7
!8 @0 @1
!9
!6
1
2
3
4
5
TRACK
DISC
°°
°
°°°°°
MIN
SEC
PROGRAM
RANDOM REPEAT
REMAIN
EACH
TOTAL
R
MP3 CD HDCD
1 DISC
1617 1918 20
1112 1413 15
67 9810
12 435
minuteTrack
Number
20-track
music calendar
Remote control signal
Receive Indicator
second
Time
Disc Indicator
Disc Number
Play Indicator
Repeat
Indicator
Program
Indicator
Random
Indicator
Pause Indicator
MP3 Indicator
CD Indicator HDCD Indicator
Disc
Remaining
time Indicator
e
DISPLAY
DCM-380 only
DCM-380 only
CAROUSEL
NAMES OF PARTS AND THEIR FUNCTIONS
5
Page 9

ENGLISH
9
q
Power Switch (POWER)
• Press this button to switch on the power.
w
Remote Control Receptor (REMOTE SENSOR)
• This receptor receives infrared signals from the wireless
remote control unit.
• Aim the wireless remote control unit at this receptor window
when operating it.
e
HDCD Indicator (DCM-380 only)
• This lights when an HDCD-compatible disc is playing.
r
Display Window
• The Disc No., Track No., playing time and other information are
displayed in the display window.
t
Repeat Button (REPEAT)
• Press this button for repeated playback. The “REPEAT”
indicator appears on the display. The following three types of
repeat modes are available.
• When pressed once, the “REPEAT” and “1” indicators light
and the track currently playing is repeated.
• When pressed again, the “REPEAT” and “1 DISC” indicators
light and all the tracks on the disc currently playing are
repeated.
• When pressed again, the “REPEAT” and “DISC” indicators
light and all the discs currently set on the tray are repeated.
• When pressed again, the “REPEAT” and “DISC” indicators
turn off and the repeat mode is cancelled.
The repeat function can also be used during programmed and
random playback, but in this case only the all repeat
(“REPEAT” and “DISC” indicator) mode is available.
(Refer to page 15 for details.)
y
Random button (RANDOM)
• Press this button to begin random play.
• Pressing this button during stop, and press the 1 PLAY button
play to full automatic random play.
• Pressing this button during playing of a program starts random
play of the tracks in the program.
(See page 15, item u.)
u
Automatic/Manual Search Reverse Button
(8/6)
• Press this button to return the pickup to the beginning of the
present track. Press again to return to other tracks.
• By pressing the button a number of times, the pickup will
move back the corresponding number of tracks.
• Keep on pressing this button for more than 0.5 seconds during
playback for fast reverse search. As long as the button is kept
pressed, music signals are played back faster than normal.
• Keep on pressing this button for more than 5 seconds, reverse
search becomes approximately 4 times faster.
i
Automatic/Manual Search Forward Button
(7/9)
• Press this button to move the pickup forward to the beginning
of the next track. Press again to move ahead to other tracks.
• By pressing the button a number of times, the pickup will
advance the corresponding number of tracks.
• Keep on pressing this button for more than 0.5 seconds during
playback for fast forward search. As long as the button is kept
pressed, music signals are played back faster than normal.
• Keep on pressing this button for more than 5 seconds, forward
search becomes approximately 4 times faster.
o
Stop Button (2 STOP)
• Press this button to stop play.
!0
Pause Button (3 PAUSE)
• Press this button to stop play temporarily.
• Pressing the 3 PAUSE button during play stops play
temporarily. The “1” indicator goes off and the “3” indicator
lights up.
• To cancel the Pause state, press either the 1 PLAY button !1
or the 3 PAUSE button !0 a second time.
!1
Play Button (1 PLAY)
• Press this button to play a disc.
The “1” indicator lights up when the button is pressed, the
number of the disc and the track being played is displayed by
the Disc Number and Track No. indicator, and the amount of
elapsed time for the current track is displayed by the Time
indicator.
• The “1” indicator goes off after playing of the final track of
the final disc is finished and the player stops.
!2
Disc Skip Button (DISC SKIP)
• Each time this button is pressed, the carousel will rotate in a
clockwise direction to the next tray position. This allows for
loading or unloading of discs.
This button is also used to select the next disc, in the normal
play continuously.
!3
Open/Close Button (5 OPEN/CLOSE)
• Press this button when opening.
• The drawer is opened toward the front.
• Press the button again to close the drawer.
!4
Loading Drawer
• Discs can be loaded and unloaded when this drawer is open.
Do not force the drawer closed by hand.
!5
Headphone Jack (PHONES)
• Insert the jack of the headphones when desiring to listen to a
disc privately. (Headphones are sold separately.)
!6
Disc Trays (1 ~ 5)
• One disc per tray can be loaded.
!7
Output Terminal (LINE OUT)
• Connect the connection cords from these terminals to the
amplifier’s input terminals. (Refer to page 11 for connections.)
!8
SYNCHRO Jack (SYNCHRO)
• To make a synchronized recording, this jack must be
connected to the SYNCHRO jack of the deck with a
connection cord. (Refer to page 11 for connections.)
!9
Control Input Connector (CONTROL IN)
(DCM-380 only)
• This is the input connector for wired remote control.
Consult your DENON dealer if you wish to use this connector.
@0
Control Output Connector (CONTROL OUT)
(DCM-380 only)
• This is the output connector for wired remote control.
Consult your DENON dealer if you wish to use this connector.
@1
Digital Audio Output Connector (COAXIAL)
• Connect a commercially available 75 Ω/ohms pin-plug cord.
• Digital data is output from this connector.
Continuous Button Operation
If the Automatic/Manual Search Reverse button u or the
Automatic/Manual Search Forward button i are held in, the
function of that button will be repeated.
Page 10
ENGLISH
10
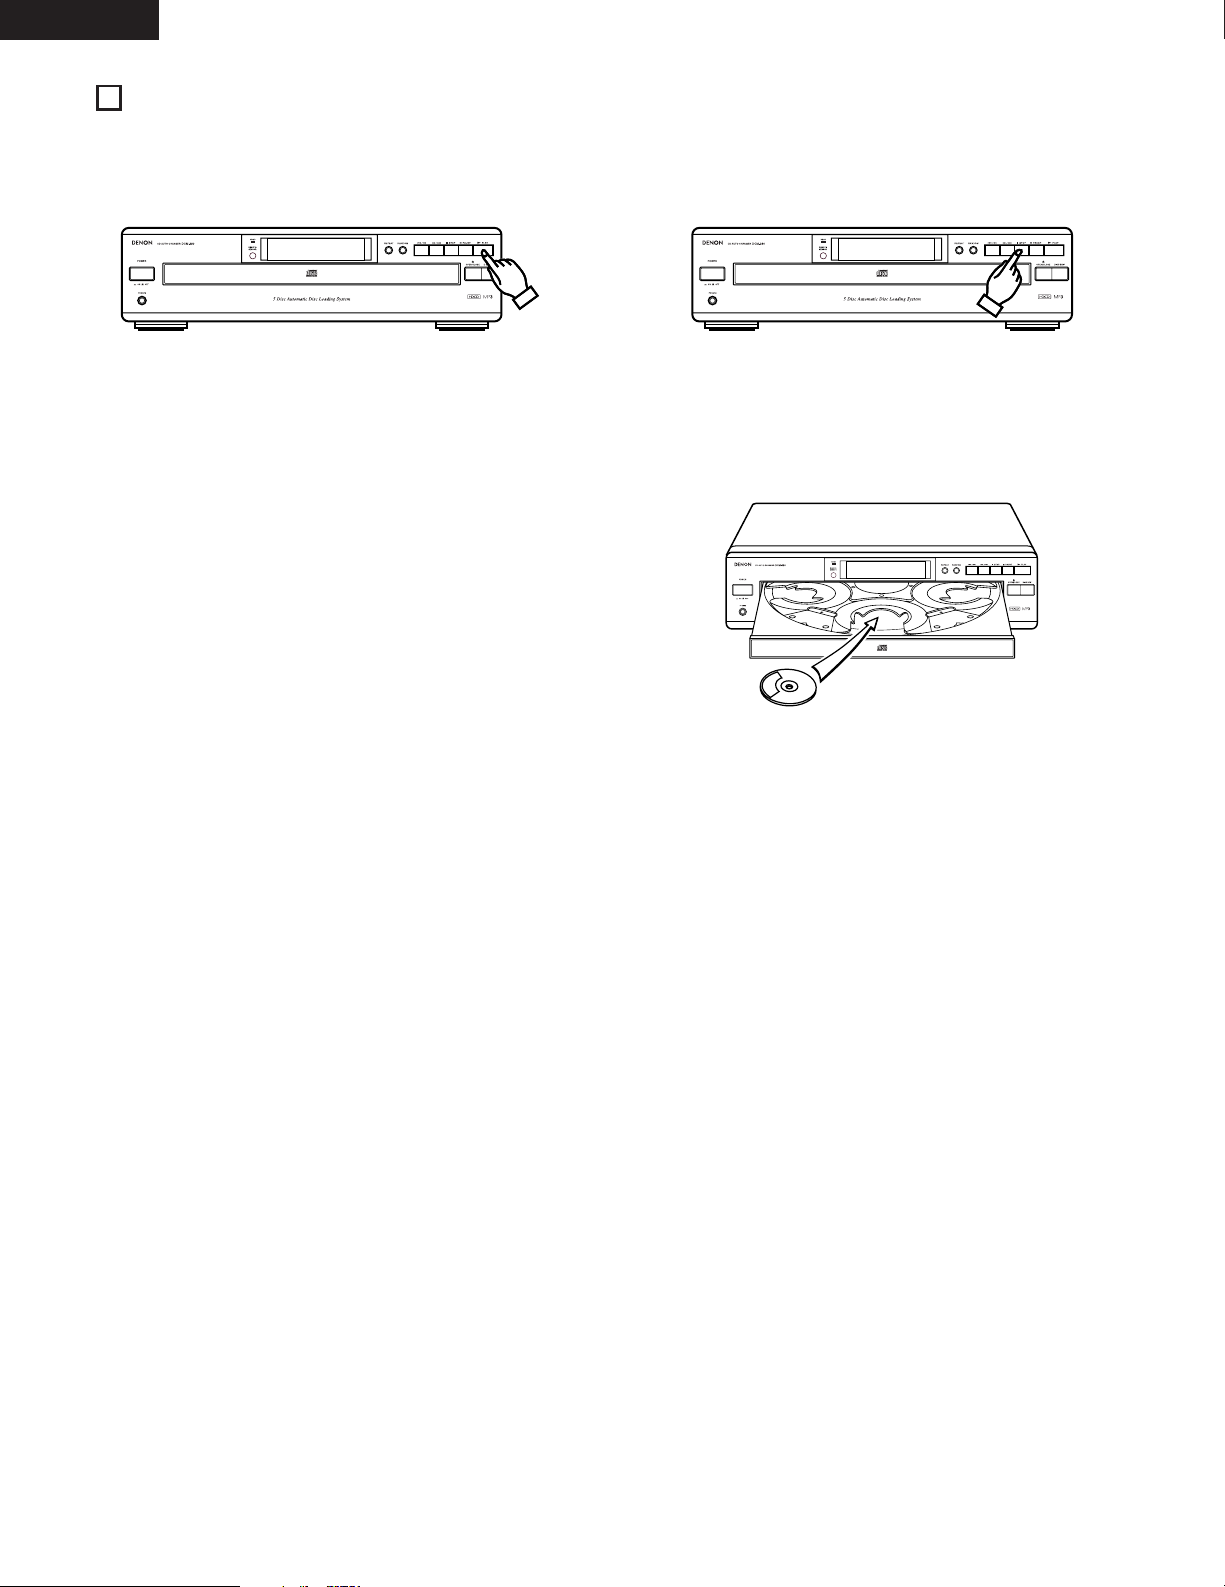
Opening and closing the drawer (This operation only works while
the power is on.)
1. Press the POWER switch to turn on the power.
2. Press the 5 OPEN/CLOSE button.
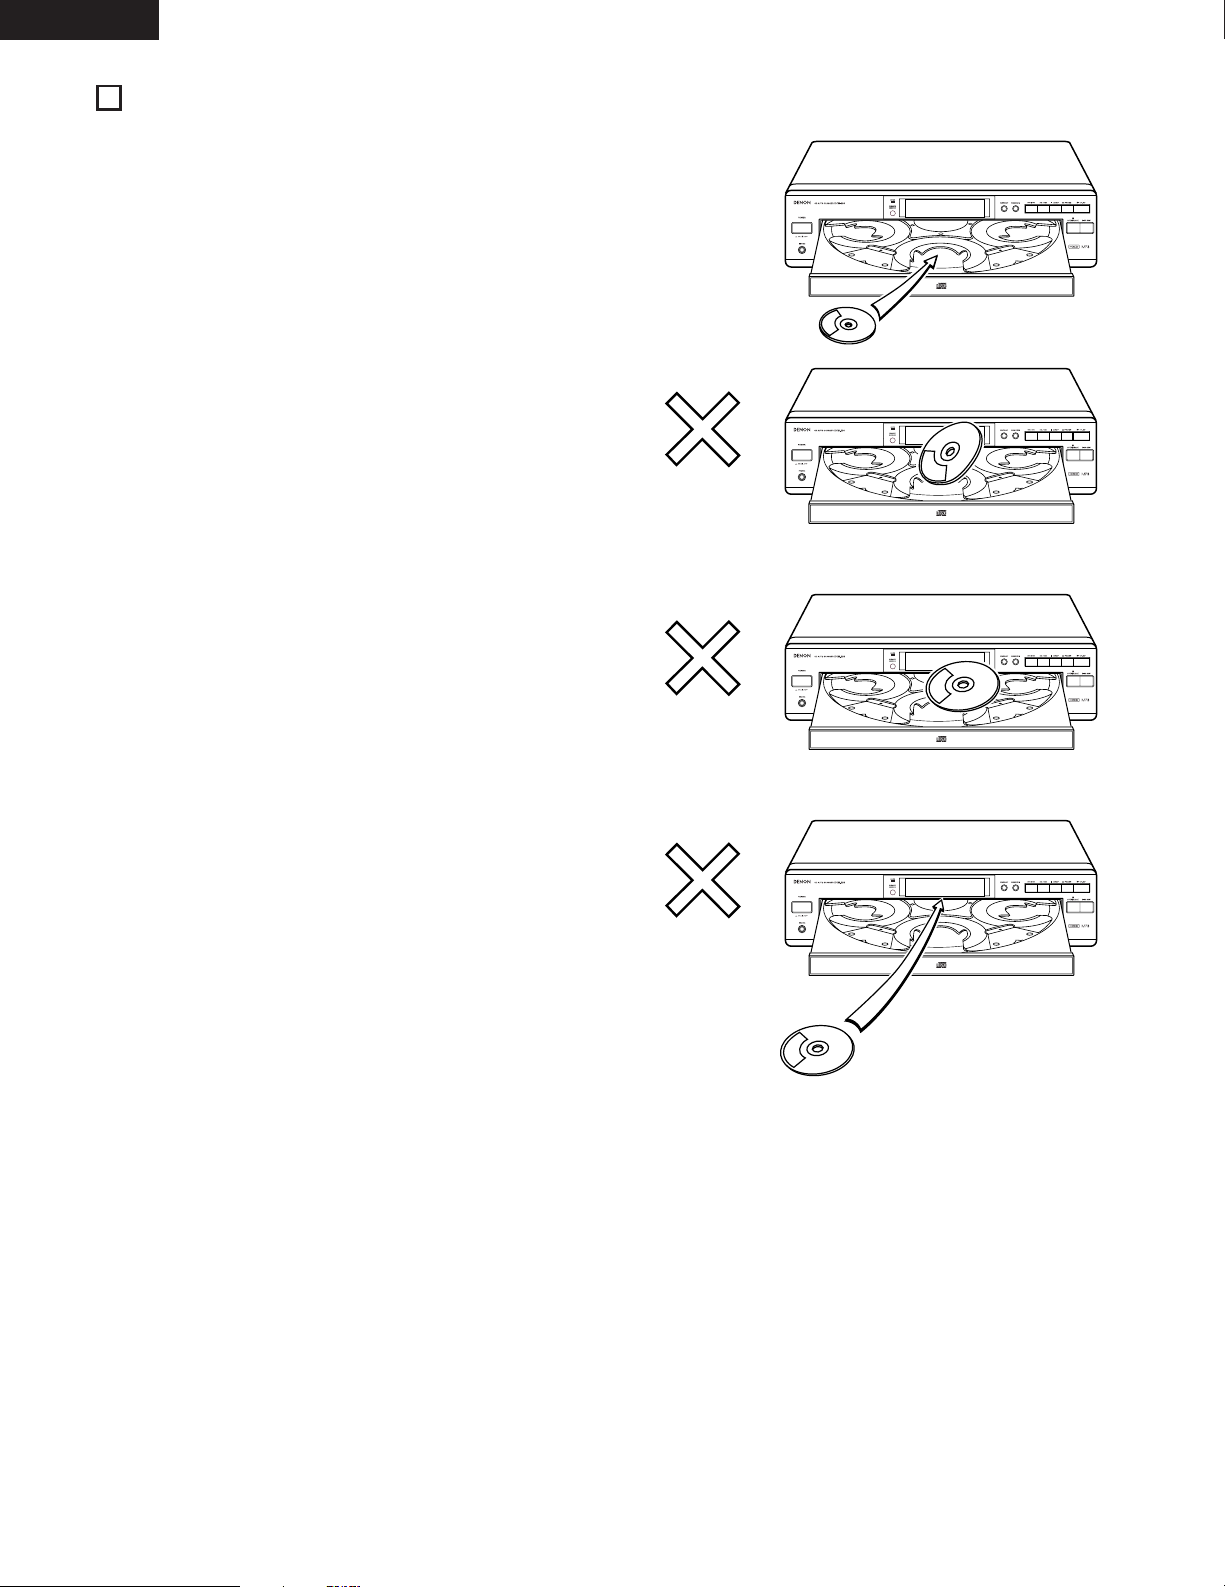
How to load a disc
• Make sure the drawer is completely open.
• Hold the disc by the edges and place it on the disc tray. (Do not
touch the signal surface, i.e., the glossy side.)
• Set the disc properly in the tray according to its size.
Set 8 cm discs in the center hole.
Set 12 cm discs in the outer hole.
• When the drawer is opened during the stop mode, discs can be
loaded in the 3 disc trays. If the DISC SKIP button is pressed, the
carousel turns and a disc can be loaded in the another disc tray.
When the drawer is opened during the play mode, it is possible to
load and unload discs in all of the disc trays other than the one
whose disc is currently playing. 3 discs can be replaced and press
the DISC SKIP button to switch the other disc tray that can be
replaced.
• Press the 5 OPEN/CLOSE button to close the drawer.
Caution:
• The player will not operate properly and the disc may even be
damaged if it is not set correctly.
• If your finger should get caught in the drawer when it closes, press
the 5 OPEN/CLOSE button.
• Do not place any foreign objects on the disc tray, and do not place
more than one disc on the tray at a time. Otherwise malfunction
may occur.
• Do not push in the disc tray manually when the power is off as this
may cause malfunction and damage the CD player.
• Do not touch the carousel while it is turning. Also, do not turn the
carousel by hand when it is stopped. Doing so could damage it.
• Do not insert disc where indicated by arrow.
This could damage the internal mechanism in the unit.
LABEL SIDE
UP WARD
OPENING AND CLOSING THE DRAWER AND LOADING A DISC
6
Page 11
ENGLISH
11
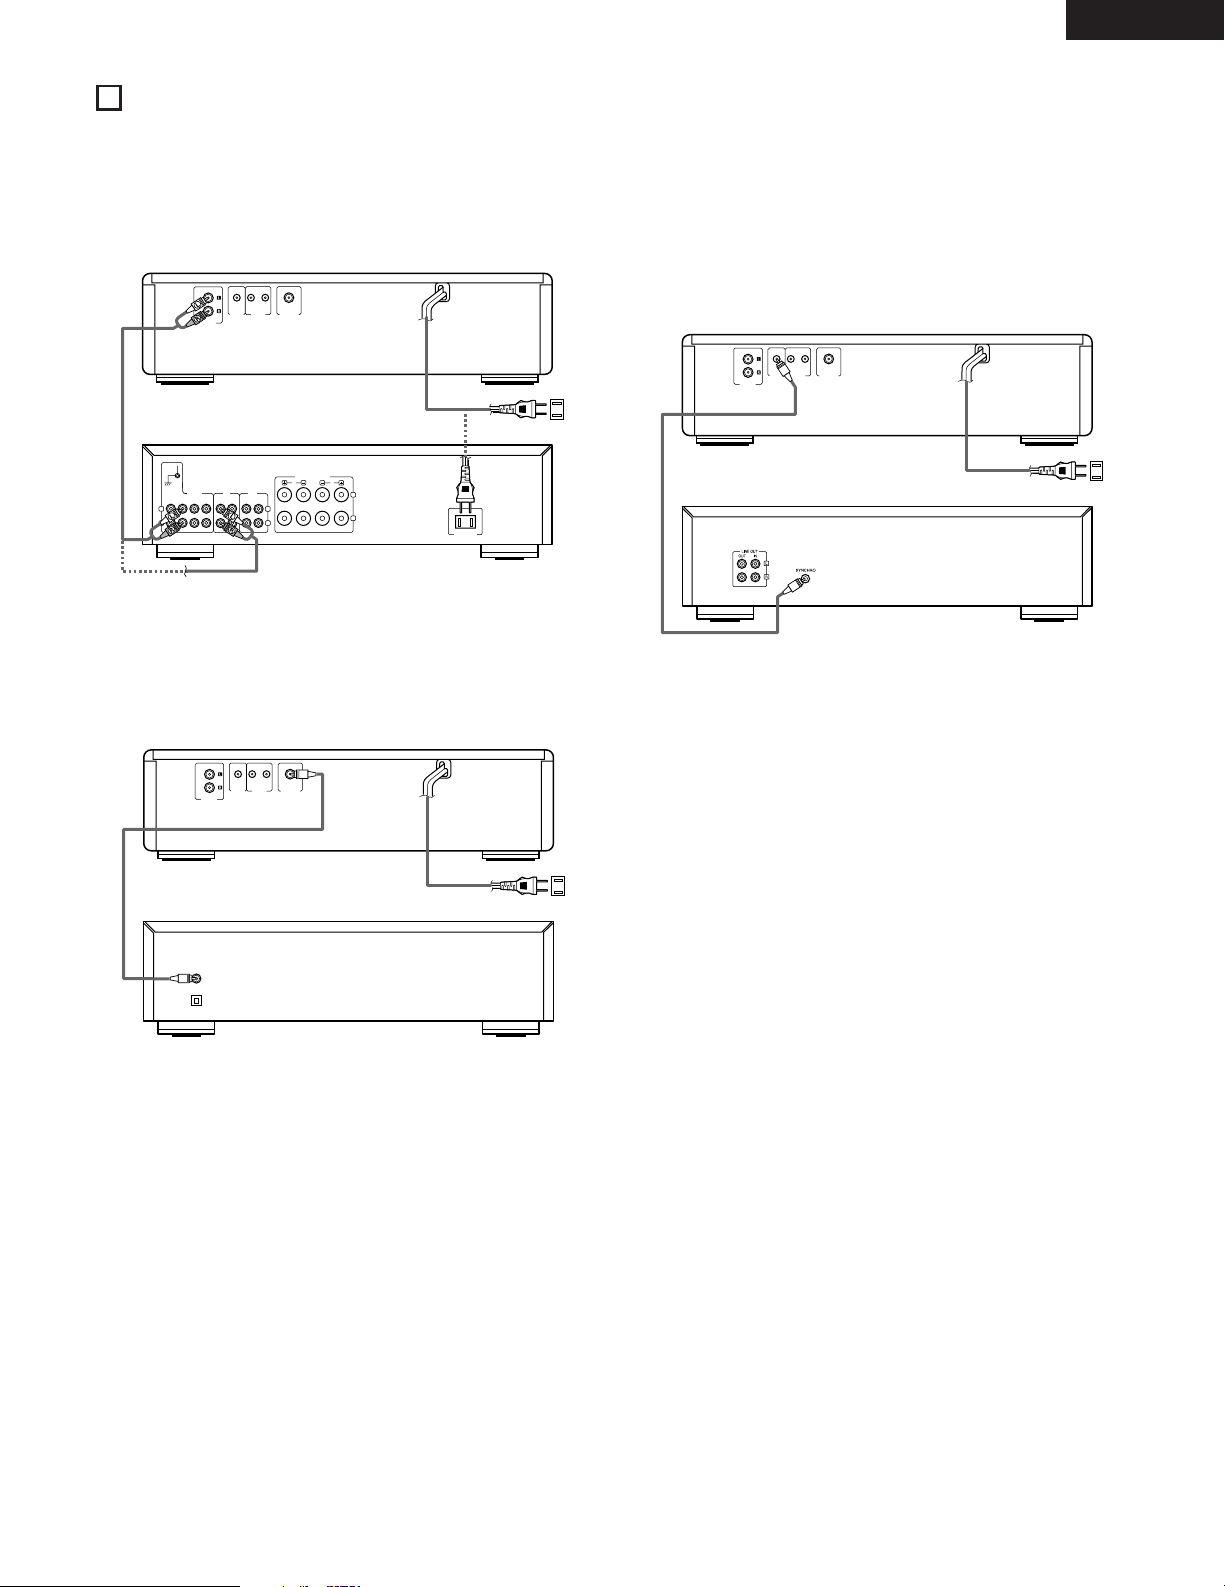
(1) Connecting the Output Terminal
• Connect one end of the connection cord supplied with the CD
Player to the output terminals, left (L) and right (R) of the CD
Player, and the other end to the CD, AUX or TAPE PLAY input
terminals, left (L) and right (R), of the amplifier.
COAXIAL
DIGITAL OUT
LINE OUT
VARIABLE
CONTROL
OUT
IN
SYNCHRO
(2) Connecting the Digital Output Jack (COAXIAL)
• Use a 75 Ω/ohm pin cord to connect the digital output jack
(COAXIAL) of the CD Player to the digital input jack (COAXIAL) on
a digital processor or MD recorder, available in stores.
COAXIAL
DIGITAL OUT
LINE OUT
VARIABLE
CONTROL
OUT
IN
SYNCHRO
AC OUTLET
PHONO CD TUNER AUX
TAPE-1
/DAT
TAPE-2
/MD
TAPE-1
/DAT
TAPE-2
/MD
L
R
PB REC
SIGNAL
GND
INPUTS
L
R
RL
SPEAKER SYSTEMS
A
B
(3) SYNCHRO Jack Connections
• Connect the SYNCHRO jack with a DENON cassette deck which
is equipped with a SYNCHRO jack, then make a synchronized
recording. Use the connection cord supplied with the cassette
deck.
• To make use of this function, also connect the output jacks and
make the settings so that a recording can be made from the CD
player to the cassette deck.
COAXIAL
DIGITAL OUT
LINE OUT
VARIABLE
CONTROL
OUT
IN
SYNCHRO
DIGITAL INPUT
COAXIAL
OPTICAL
DCM-380/280
(Cassette Deck)
Power supply outlet
DCM-380/280
(Amplifier)
Power supply outlet
DCM-380/280
(Digital processor or MD recorder)
Power supply outlet
CONNECTIONS
7
Page 12
ENGLISH
12
Follow the steps below to get an understanding of the disc play procedure.
(1) Starting Playback
1. Turn the POWER switch on and press the 5 OPEN/CLOSE button
to open the drawer.
2. Set the disc to be played in the front side tray.
3. Press the 1 PLAY button.
4. The drawer closes and the disc just loaded is played.
5. The disc number, track number and elapsed time, etc., for the disc
currently playing appear on the display window.
6. If the 5 OPEN/CLOSE button is pressed while a disc is playing,
playback continues, but the drawer opens and four discs can be
replaced. The disc that can be replaced switches when the DISC
SKIP button is pressed.
Press the 5 OPEN/CLOSE button again to close the drawer.
(2) Stopping Playback
1. Press the 2 STOP button to stop playback.
2. To replace discs, press the 5 OPEN/CLOSE button.
The disc which was playing switches over to the front side and the
drawer opens.
• Set the disc you want to played in the front side.
(1 PLAY)
(2 STOP)
NORMAL PLAY
8
Page 13
ENGLISH
13
e To Move to the Next Track
during Play ……………………………………………………………
• During Random or Program operation, player moves to the
beginning of the next random or program track selection.
Automatic Search
Press the 7/9 button for less than 0.5 seconds during
playback.
• The pickup will advance to the beginning of the next track and
playback will continue. Pressing the button several times will
forward the pickup the corresponding number tracks.
r To return to the beginning of the
track now being played ……………………………………………
Press the 8/6 button for less than 0.5 seconds during
playback.
• The pickup will return to the beginning of the current track and
playback will continue. Pressing the button several times will return
the pickup the corresponding number tracks.
Automatic Search
In addition to normal play, the following methods can be used when playing a disc.
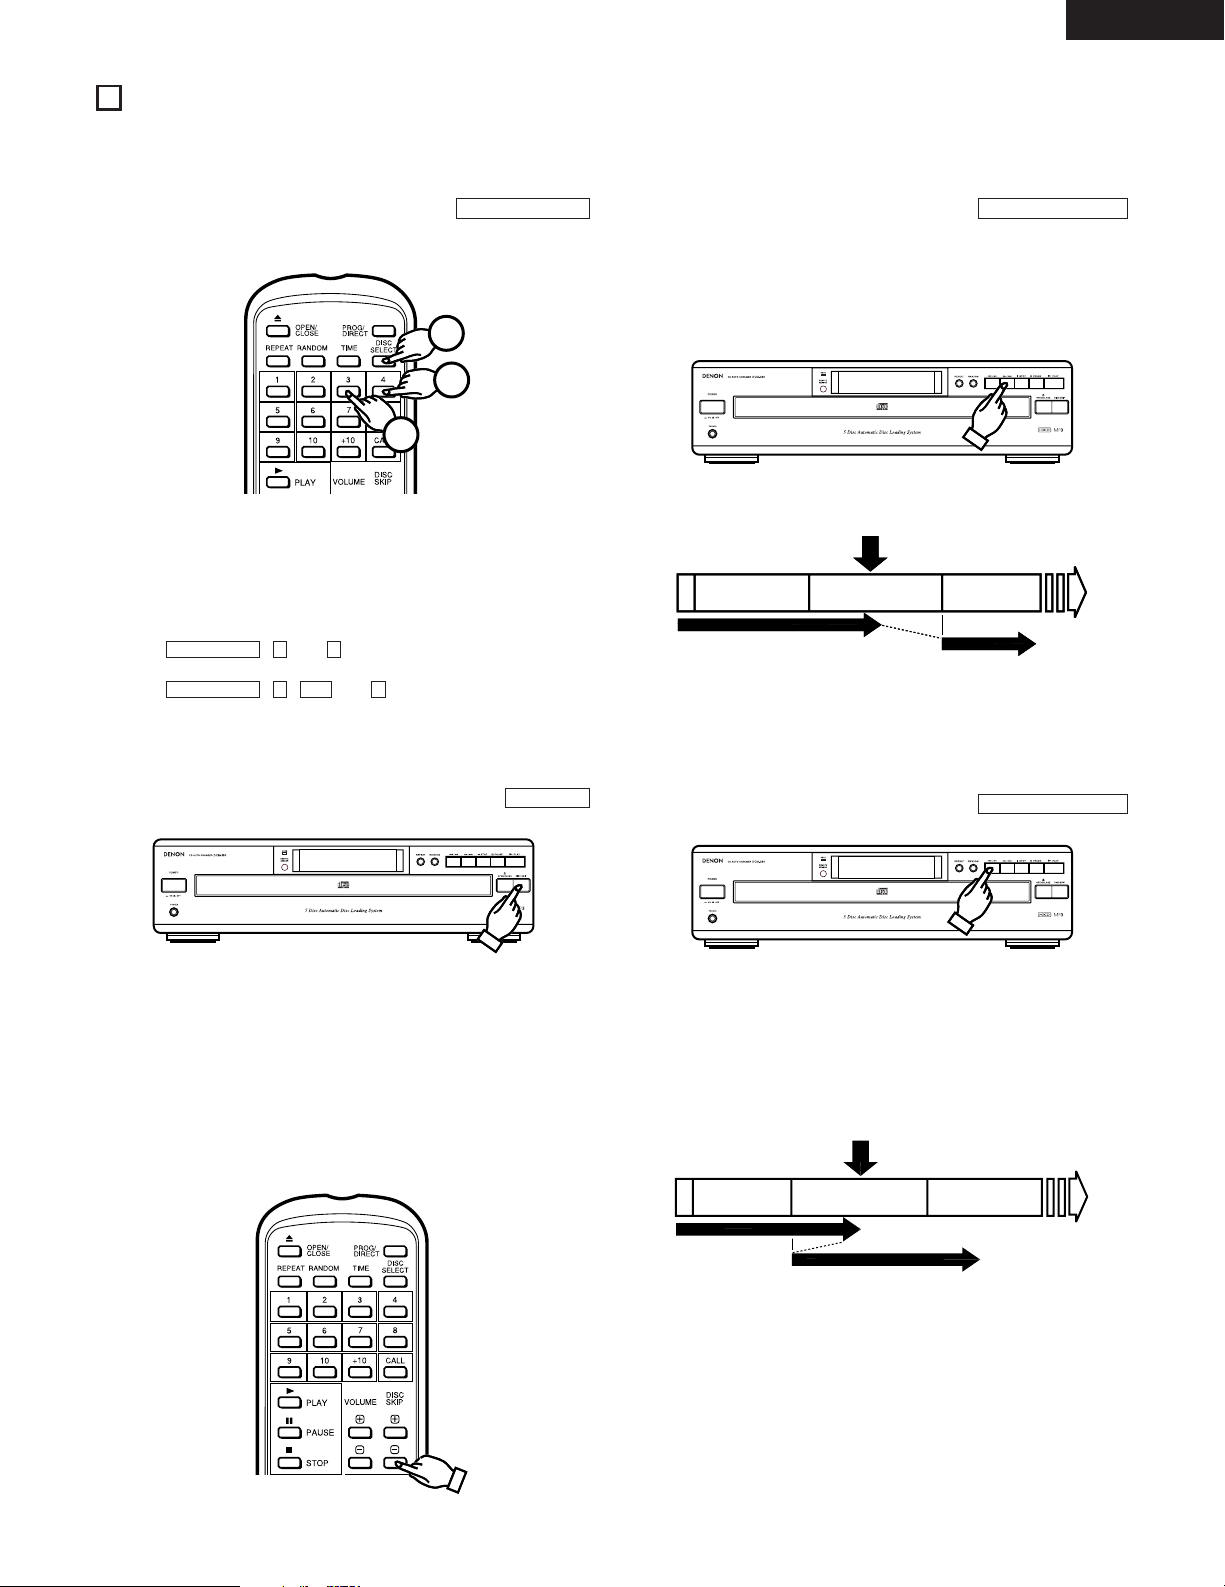
q To Play the Desired Disc and
Desired Track …………………………………………………………
1
3
2
1. Press the DISC SELECT button.
2. Use the number buttons (1 to 5) to select the number of the disc
to be played.
3. Next, use the number buttons (1 to 10 and +10) to select the
number of the track to be played.
• For example, to play the 4th track on the 3rd disc:
Press , and .
To play the 12th track on the 5th disc:
Press , , and .
Playback begins from the number of the disc and track selected.
2+105DISC SELECT
43DISC SELECT
Direct Selection
(Remote control only)
w To Move to the Next Disc
During Playback………………………………………………………
1. Press the DISC SKIP button. The carousel in the drawer turns and
the disc on the next tray is played.
For example, if disc number 3 was playing, the disc switches to
disc number 4, and if disc number 5 was playing, the disc switches
to disc number 1.
2. In addition, when the DISC SKIP – button on the remote control
unit is pressed, the carousel turns in the opposite direction and the
previous disc is played.
Disc Skip
(DISC SELECT)
(1 ~ 10)
(1 ~ 5)
(DISC SKIP)
(DISC SKIP –)
(7/9)
Press the 7/9 button.
2nd Track 3rd Track 4th Track
(8/6)
Press the 8/6 button.
3rd Track 4th Track 5th Track
OTHER PLAY METHODS
9
Page 14

ENGLISH
14
(4) To clear the entire program
• Pressing the PROG/DIRECT button once more erases the entire
program. Pressing the 5 OPEN/CLOSE button also erases the
contents of a program.
• Pressing the PROG/DIRECT button while a program is being played
cancels the program. Play will then be continuous to the end of the
disc currently being played, after which the player will stop
automatically.
Cautions:
• Programmed playback is not possible with MP3 discs.
If an MP3 disc is specified, that step in the program is ignored.
• If a program is run during playing of a track or from the Pause state,
the track which is currently being played becomes the 1st track in
the program.
• Direct selection cannot be done while a program is being played.
Inputting the track number of a desired track with the Track Number
buttons adds the input track to the end of the program.
• When programming, do not program a track number which is not
recorded on the disc. If such a number is programmed by mistake,
the player ignore the program.
t To Play the Desired Discs and
the Desired Tracks in the
Desired Order …………………………………………………………
• You can play certain tracks on the loaded discs in any order.
• Tracks on a disc not loaded can also be programmed, but if you try
to play that disc, the microprocessor detects that it is not loaded
and the following disc is played automatically.
• Up to 32 tracks can be set in a program.
Program Selection
(1) Programming (Remote control only)
1
2
4
3
• Press the PROG/DIRECT button. The “PROGRAM” indicator lights.
Use the DISC SELECT button, number and +10 buttons to select
the disc to be programmed.
For example, to program the 3rd track on the 2nd disc and the 12
track on the 5th disc, press , , , ,
, , and .
2+105DISC SELECT
32DISC SELECTPROG/DIRECT
(2) To Check the Programmed Tracks (Remote control only)
• Press the CALL button on the wireless remote control unit.
The contents of the program are displayed in order one item at a
time each time the CALL button is pressed.
(3) To Play a Program
• Press the 1 PLAY button to play the programmed selections in the
order in which they were programmed.
(PROG / DIRECT)
(DISC SELECT)
(1 ~ 10)
(1 ~ 5)
(CALL)
(1 PLAY)
(1 PLAY)
Page 15

ENGLISH
15
y To Repeat Play of All Tracks ………………………………………
Repeat Play
• Press the REPEAT button. The “REPEAT” indicator will light up.
✽
Steps qand wcan be done in any order, with the same results.
1
2
• When the REPEAT button is pressed once, the “REPEAT” and “1”
indicators light. In this mode, the track currently playing is repeated.
• If the REPEAT button is pressed again, the “REPEAT” and “1
DISC” indicators light, and the disc currently playing is repeated.
• If the REPEAT button is pressed again, the “REPEAT” and “DISC”
indicators light, and all the discs currently loaded are repeated.
• Pressing the REPEAT button during play will also cause the player
to repeat play (of all tracks).
• To cancel repeat play, press the REPEAT button once more.
• Pressing the REPEAT button while a program is being played will
cause the tracks in the program to be played again in order.
• Pressing the REPEAT button during Random play will cause the
tracks to be played again at random.
u Letting the Player Select the
Order of Play …………………………………………………………
1
2
• Press the RANDOM button, then press the 1 PLAY button. The
microcomputer will then start play of the tracks on the 5 discs at
random.
Random Play
(When using the remote control unit)
(1) Full Random Play
1
2
5
3
4
6
• After pressing the PROG/DIRECT button and inputting a program
(See item t on page 14), press the RANDOM button, then the 1
PLAY button. The microcomputer will then select tracks from the
program at random and play them.
(2) Program Random Play (Remote control only)
(1 PLAY)
(REPEAT)
REPEAT
REPEAT 1
Track Track Track
REPEAT 1 DISC
1st disc
(ALL TRACKS)
2nd disc
(ALL TRACKS)
5th disc
(ALL TRACKS)
REPEAT
REPEAT
DISC
1st disc
(ALL TRACKS)
2nd disc
(ALL TRACKS)
5th disc
(ALL TRACKS)
REPEAT
(RANDOM)
(1 PLAY)
(RANDOM)
(1 ~ 5)
(1 ~ 10)
(1 PLAY)
(PROG / DIRECT)
(DISC SELECT)
Page 16

ENGLISH
16
1
2
3
4
• Press the RANDOM button and specify the disc numbers (1 to 5)
with the DISC SELECT button and the number buttons. A press of
the 1 PLAY button will result in the player randomly selecting and
playing tracks on the disc in the order of specified discs.
Up to 5 discs can be selected, and the same disc can be selected,
two or more times. Disc sequential random play is cancelled when
play ends.
(3) Disc Sequential Random Play
(4) To Cancel Random Play
• Pressing the RANDOM button once more cancels the Random
function. Play will then proceed from the track currently being
played to the end of the last track on the disc, then stop.
Pressing the 5 OPEN/CLOSE button also cancels the Random
function.
Cautions:
• Pressing the RANDOM button during normal play starts full random
play.
• Pressing the RANDOM button during Program play starts random
play of the tracks in the program, including the tracks which have
already been played.
• During random play, the player may display the number of disc
which is not loaded in the tray. In such a case, the player will read
the disc information, then reset automatically to correct. This is not
a malfunction.
• MP3 discs are ignored during program random play.
i To Stop Play Temporarily……………………………………………
• Pressing the 3 PAUSE button during play stops play at that point.
Pressing the 3 PAUSE button once more starts play again from the
same point.
Pause
1. Press the 3 PAUSE button.
2. Press the 1 PLAY button or 3 PAUSE button to start play.
o Audible quick search…………………………………………………
• Using this function, you can cue to a desired point within a track,
either in the forward or reverse direction.
• Release the 8/6 or 7/9 button when the desired
point has been reached. Normal playback then continues.
Manual Search
Keep on pressing the 7/9 button for more than 0.5 seconds
during playback. Playback of the track is sped up.
• As a reference, the current track number and elapsed playback time
within the track are displayed.
• Manual search forward is approximately 4 times faster when the
7/9 button is kept on pressing more than 5 seconds.
• If the 7/9 button is kept pressed after the end of the final
track on the disc is reached, “ ” is displayed and manual search
stops. To return to another point, press the 8/6 button until
“ ” disappears.
• If the 7/9 button is kept on pressing and the end of the
current track is reached during random play or programmed play,
the next track is searched and playback starts.
(1) Manual Search Forward
(RANDOM)
(1 ~ 5)
(1 PLAY)
(DISC SELECT)
(3 PAUSE)
4th Track 5th Track 6th Track
Pause
(7/9)
Page 17

ENGLISH
17
Keep on pressing the 8/6 button for more than 0.5 seconds
during playback. Reverse playback of the track is sped up.
• As a reference, the current track number and elapsed playback time
within the track are displayed.
• Manual search in reverse is approximately 4 times faster when the
8/6 button is kept on pressing more than 5 seconds.
• If the 8/6 button is kept pressed after the beginning of the
first track on the disc is reached, “ ” is displayed and manual
search stops. To return to another point, press the 7/9
button until “ ” disappears.
• If the 8/6 button is kept on pressing and the beginning of
the current track is reached during random play or programmed
play, the manual search in reverse is canceled and playback starts.
(2) Manual Search in Reverse
!0 To Cue and Stop Play ………………………………………………
1
2
• Cuing by direct selection, then entering the Pause state, is
convenient for practicing vocals with background music.
Pause
(Remote control only)
(1) Cuing by Direct Selection
1. Press the number buttons to set the number of the desired track.
2. Press the 3 PAUSE button.
• To start play, press the 1 PLAY button or 3 PAUSE button.
• After setting the desired track selections in a program, press the 3
PAUSE button. The player will advance to the beginning of the 1st
track in program memory and wait in the pause state.
(2) Cuing by Program Selection
!1 Synchronized Recording
Function ………………………………………………………………
Connecting the SYNCHRO jack with a DENON cassette deck which is
equipped with a SYNCHRO jack will allow synchronized recordings to
be made.
• To use this function, be sure to connect the SYNCHRO jacks as well
as the LINE OUT terminal. (Refer to page 11 for connections.) Then,
load a disc.
• With the CD player in the stop or pause condition, starting a
synchronized recording at the cassette deck side will automatically
cause the CD player to start playing. (This is synchronized play.)
• The remote control indicator of the display will blink during
synchronized play.
Synchronized Recording Function
NOTES:
• Synchronized play is also possible in the program mode.
• The repeat mode are cancelled when synchronized play is started.
• Except for the 2 STOP, 1 PLAY and TIME buttons, the buttons will
not operate during synchronized play.
• In the play condition, even if you start a synchronized recording at
the cassette deck side, CD player will not synchronize with the
cassette deck and the cassette deck becomes synchronized pause
condition. In this case push the 2 STOP button of the cassette
deck, set the CD player in the stop or pause condition and start a
synchronized recording at the cassette deck side again.
• For further details, see the owner’s manual for the cassette deck
that has been connected.
(8/6)
(1 ~ 10)
(3 PAUSE)
Page 18

ENGLISH
18
2 There are many sites on the Internet from which you can download music files in MP3 format. These files can be downloaded following the
instructions on the site and stored on CD-R/RW discs which can then be played on the DCM-380/280.
The music on commercially available music CDs can be converted into MP3 files on a computer using MP3 encoding programs. When this is
done, the data is reduced to approximately 1/10 the original size. This MP3 data can then be stored on a CD-R/RW disc, allowing you to create
a single 12 cm CD-R/RW disc containing about 10 times more music than a normal music CD, that is some 100 tracks or more (*).
* This is an approximately value for MP3 files of tracks about 5 minutes long converted at a standard bit rate (128 kbps) and stored on a CD-
R/RW disc with a capacity of 650 MB.
✽
Recordings you make are for your personal use and should not be used in ways infringing upon the copyright holder as per copyright laws.
NOTES:
• The DCM-380/280 is compatible with “MPEG-1 Audio Layer-3”,
“MPEG-2 Audio Layer-3” and “MPEG-2.5 Audio Layer-3”
standards (sampling frequencies - 32 kHz, 44.1 kHz and 48 kHz).
It is not compatible with MP1 or MP2 standards.
• When writing MP3 files on a CD-R/RW disc, set the writing
program’s format to “ISO9660 level 1” or “ISO9660 level 2”.
MP3 files written in other formats may not play properly. With
some writing programs it is not possible to record in “ISO9660”
format. Use an “ISO9660” format writing program.
• Generally speaking, the higher the MP3 file’s bit rate, the better
the sound quality. With the DCM-380/280 it is recommended to
use MP3 files written with a bit rate of 128 kbps or greater.
• The writing program may change the positions of the folders
and files when writing the MP3 files on the CD-R/RW disc, so
the files may not be played in the expected order.
• Make sure to give MP3 files the extension “.MP3”. Files with
extensions other than “.MP3” or without extensions cannot be
played. (On Macintosh computers, MP3 files can be played by
adding the extension “.MP3” after the file name consisting of a
maximum of 8 Roman capital letters and/or numerals when
recording them on CD-R/RW discs.)
• To protect copyrights, no digital signals are output when playing
MP3 files.
• A maximum of 99 folders can be played on the DCM-380/280.
Folders over 8 layers down, however, cannot be played. The
maximum number of files is also 512. If there are 513 files, only
the first 512 are played. (Files other than those with the
extension “.MP3” are not counted.)
• It may not be possible to play some CD-R/RW discs due to dirt,
scratches or the disc’s properties.
• Do not apply seals or tape to the label or signal side of CDs or
CD-R/RW discs. The glue could get on the disc surface, making
the disc get stuck inside the set.
• The DCM-380/280 is multi-session compatible.
Only first music CDs can be played if the first session is a music
CD, and only MP3 files can be played if the first session consists
of MP3 files.
• The DCM-380/280 is mixed-audio compatible. Only music files
can be played.
• The DCM-380/280 is not compatible with packet write programs.
• The DCM-380/280 is not compatible with play lists.
• The DCM-380/280 is not compatible with ID3-Tag.
• Program selection and program randam play are not possible
with MP3 discs.
Follow the steps below to get an understanding of the disc play
procedure.
(1) Starting Playback
1. Turn the POWER switch on and press the 5 OPEN/CLOSE button
to open the drawer.
2. Set the MP3 disc to be played in the front side tray.
3. Press the 1 PLAY button.
4. The drawer closes and the disc just loaded is played.
5. The disc number, track number and elapsed time, etc., for the disc
currently playing appear on the display window.
6. If the 5 OPEN/CLOSE button is pressed while a disc is playing,
playback continues, but the drawer opens and four discs can be
replaced. The disc that can be replaced switches when the DISC
SKIP button is pressed.
Press the 5 OPEN/CLOSE button again to close the drawer.
q Normal Play
(2) Stopping Playback
1. Press the 2 STOP button to stop playback.
2. To replace discs, press the 5 OPEN/CLOSE button.
The disc which was playing switches over to the front side and the
drawer opens.
• Set the MP3 disc you want to played in the front side.
(1 PLAY)
(2 STOP)
PLAYING MP3 FILES
10
Page 19

ENGLISH
19
The DCM-380/280 is compatible with discs containing up to 256
tracks.
w Other Play Methods
• Press the RANDOM button and the disc number of MP3 (1 to 5)
with the DISC SELECT button and the number buttons. A press of
the 1 PLAY button will result in the player randomly selecting and
playing tracks on the disc in the order of specified discs.
Up to 5 discs can be selected, and the same disc can be selected,
two or more times. Disc sequential random play is cancelled when
play ends.
(2) Disc Sequential Random Play
(3) To Cancel Random Play
• Pressing the RANDOM button once more cancels the Random
function. Play will then proceed from the track currently being
played to the end of the last track on the disc, then stop.
Pressing the 5 OPEN/CLOSE button also cancels the Random
function.
(4) To Repeat Play of All Tracks
• Press the REPEAT button. The “REPEAT 1” indicator will light up.
✽
Steps qand wcan be done in any order, with the same results.
• When the REPEAT button is pressed once, the “REPEAT” and “1”
indicators light. In this mode, the track currently playing is repeated.
• If the REPEAT button is pressed again, the “REPEAT” and “1
DISC” indicators light, and the disc currently playing is repeated.
• If the REPEAT button is pressed again, the “REPEAT” and “DISC”
indicators light, and all the discs currently loaded are repeated.
• Pressing the REPEAT button during play will also cause the player
to repeat play (of all tracks).
• To cancel repeat play, press the REPEAT button once more.
NOTE:
• The single track and 1 disc repeat mode cannot be set during disc
sequential random play.
1
2
3
4
(RANDOM)
(1 ~ 5)
(1 PLAY)
(DISC SELECT)
1
2
(1 PLAY)
(REPEAT)
REPEAT
REPEAT 1
Track Track Track
REPEAT
1 DISC
1st disc
(ALL TRACKS)
2nd disc
(ALL TRACKS)
5th disc
(ALL TRACKS)
REPEAT
REPEAT
DISC
1st disc
(ALL TRACKS)
2nd disc
(ALL TRACKS)
5th disc
(ALL TRACKS)
REPEAT
1
2
• Press the RANDOM button, then press the 1 PLAY button. The
microcomputer will then start play of the tracks on the 5 discs at
random.
(1) Full Random Play
(RANDOM)
(1 PLAY)
Page 20

ENGLISH
20
The DCM-380/280 CD Player can be controlled from across the room using the accessory Remote Control Unit.
(1) Inserting the Dry Battery
1. Remove the cover on the back of the remote control unit.
2. Insert two R6P (AA size) batteries in the RC-258, following the
indications on the battery compartment.
3. Replace the cover on the back of the remote control unit.
Cautions Concerning Dry Batteries
• Use R6P batteries in the RC-258 remote control unit.
• Depending on the frequency of use, the dry batteries should be
replaced approximately once per year.
• If the remote control unit fails to control the CD Player, even before
a year has passed, replace the dry batteries with new ones.
• Be sure to follow polarity indications inside the case of the remote
control unit, inserting the + end and – end of each battery in the
directions indicated.
• Batteries may become damaged or leak under the following
conditions.
✽ Using new batteries together with old ones.
✽ Using different types of batteries together.
✽ Do not short batteries, take them apart, subject them to heat or
throw them into a fire.
• When the remote control unit is not used for a long period of time,
remove the dry batteries.
• If fluid leaks from the batteries, be sure to wipe up all battery fluid
inside the battery case and replace the batteries with new ones.
(2) Using the Remote Control Unit
• Aim the remote control unit toward the light receptor in the front of
the CD Player, as shown in the drawing below.
• The remote control unit can be used up to a distance of 8 meters
in a straight line from the CD Player. However, this distance will be
shortened if there is some obstruction between the remote control
unit and the light receptor, or if the beam of light is slanted.
• The remote control unit has the same functions as the main unit,
but the following operations cannot be done.
✽ Switching the power on and off.
Cautions During Use
• Do not press the operating buttons on the main unit and the remote
control unit at the same time. This could cause a malfunction.
• Operation of the remote control unit will be hindered if a strong
light from the sun or a light fixture is shining on the REMOTE
SENSOR, or if there is an obstruction between the remote control
unit and the CD player unit.
RC-258
REMOTE SENSOR
Left 30°
Right 30°
PLAY USING THE REMOTE CONTROL UNIT
11
Page 21

ENGLISH
21
REMOTE CONTROL UNIT RC-258
Setting to the Program Mode
• For program search, press the PROG/DIRECT button then the
number buttons (1 through 10 and +10).
• The remote control unit is normally set to the direct mode.
Use this to adjust the output level output of the
VARIABLE.
The volume increases when the “+” button is
pressed, decreases when the “–” button is
pressed.
• Disc Selection
Use the DISC SELECT and number buttons to select the number of
the disc to be played.
“–” appears on the disc number section of the display for 2
seconds when the DISC SELECT button is pressed. Press the
number button corresponding to the number of the disc to be
played while “–” is displayed to select the disc number.
Track numbers are selected if the number buttons are pressed
while “–” is not displayed on the disc number section of the
display.
• Direct Selection
Normally, direct search is possible simply by pressing the desired
number buttons.
• Program Selection (During playback, the track which is
currently playing is programmed as the 1st track.)
Press the PROG/DIRECT button, then press the number buttons.
For example, to program tracks number 3, 11, and 5, press
PROG/DIRECT
/ 3 / +10 and 1 / 5.
To cancel the program, press the PROG/DIRECT button.
• Inputting the Track Numbers
For track numbers below 10, simply press the corresponding
button. For track numbers of 11 and greater, press the +10 then the
number buttons.
For example, for track number 22 press +10 twice then 2.
• Volume
The volume control on the unit will operate when the VOLUME
buttons are pressed. The volume can be checked by looking at the
position of the control.
• Skipping Discs
The DISC SKIP +, – button will not function in the random and
program modes.
During disc sequential random playback, when the DISC SKIP +
button is pressed, the following disc is played in random order.
• Volume
The output level of the VARIABLE output terminal can be changed.
When the VOLUME button is pressed, “–” appears in the TIME M
(minutes) section of the display window and the level appears in
the S (seconds) section. The volume can be changed between a
maximum of “00” and a minimum of “–12” in 12 steps, by
approximately 1.5 dB per step.
• The Time indicator indicates the amount of elapsed time for the
track currently being played, the amount of time remaining for
the current track and the amount of time remaining for all tracks
yet to be played.
Normally, the amount of elapsed time for the current track is
displayed. Pressing this button once causes the “EACH”
“REMAIN” indicator to light up, displaying the amount of time
remaining for the current track. Pressing the button once more,
causes the “TOTAL” “REMAIN” and “–” indicator to light up,
displaying the number and the time remaining for all tracks yet
to be played on the disc. Pressing the button once again turns
the “TOTAL” “REMAIN” indicator off and causes the indicator
to display the elapsed time for the current track.
• During playback, the total remaining time is the remaining time
for the disc. For programmed playback, the remaining time for
the program is only displayed when the programmed tracks are
all on the same disc.
“– – – –” is displayed when tracks on more than one disc are
programmed.
• In the case that the total playing time of programmed tracks
becomes more than 99:59, “– –: – –” is displayed.
Open / Close Button (5 OPEN / CLOSE)
Random Button (RANDOM)
Repeat Button (REPEAT)
Number Buttons (1 ~ 10)
Play Button (1 PLAY)
Pause Button (3 PAUSE)
Stop Button (2 STOP)
Automatic Search Reverse Button (8)
Automatic Search Forward Button (9)
Time Button (TIME)
Program/Direct Button (PROG/DIRECT)
Disc Select Button (DISC SELECT)
Call Button (CALL)
+10 Button (+10)
Disc Skip + Button (DISC SKIP +)
Volume + Button (VOLUME +)
Disc Skip – Button (DISC SKIP –)
Volume – Button (VOLUME –)
Manual Search Forward Button (7)
Manual Search Reverse Button (6)
Page 22

ENGLISH
22
1. Cautions in Handling Compact Discs
• Do not get fingerprints, oil, dirt or other substances on the
compact disc. If the disc becomes dirty, wipe it off with a dry,
soft cloth.
• Do not clean compact discs with benzene, paint thinner, water,
record spray, anti-static agent, silicon cloth or similar
substances.
• Take particular care to prevent scratches to the back side of the
compact disc when removing it from the case and when
inserting it in its case.
• Do not bend compact discs.
• Do not apply to compact discs.
• Do not attempt to enlarge the center hole of the disc.
• Do not write on the label (printed) side of the disc with a ball
point pen or pencil.
• Bringing a CD into a warm room from a cold place could cause
moisture to condense on the disc surface. Do not attempt to dry
the disc with a hair dryer, etc.
2. Storage of Compact Discs
• After play, be sure to remove the disc from the player.
• To prevent dust, scratches, deformation, etc., be sure to store
compact discs in their case.
• Do not store compact discs in the following locations.
1) Places where direct sunlight strikes for long periods of time.
2) Places with a high humidity or a lot of dust.
3) Places reached by heat from a heater or similar appliance.
The drawer won’t open/close when the 5 OPEN/CLOSE button
is pressed.
• Is the Power switch on?
After a disc is loaded “0 00 00M 00S” is displayed in the display
window.
• Is the disc loaded correctly? ………………See page 10, 12, 22.
Play does not begin when the 1 PLAY button is pressed.
• Is the disc dirty or scratched?………………………See page 22.
There is no sound, or the sound is distorted.
• Is the output cord connected correctly
to the amplifier?………………………………………See page 11.
• Does the sound return to normal when the
amplifier’s knobs are adjusted or the proper
input device is selected?
The player won’t go to the place specified in the search.
• Is the disc dirty or scratched?………………………See page 22.
A program cannot be played.
• Is the method used to make a program
and run it correct?……………………………………See page 14.
The player won’t operate correctly when the remote control
unit is used.
• Are the dry batteries in the
remote control unit dead? …………………………See page 20.
• Is the remote control unit located too far
from the CD Player unit? ……………………………See page 20.
AUDIO
Number of Channels: 2 Channels
Frequency Characteristics: 2 ~ 20,000 Hz
Dynamic Range: 100 dB 98 dB
S N Ratio: 112 dB 108 dB
High Frequency Distortion: 0.0025% (1kHz) 0.003%
Separation: 98 dB 96 dB
Wow and Flutter: Less than the measuring
(±0.001% W. peak)
Output Voltage: Variable 0.2 ~ 2.0 V
DISC USED Audio compact discs are used
12 cm (5 in) and 8 cm (3 in)
OVERALL
Power Supply: 60 Hz
Voltage is shown on rating label
Power Consumption: 14 W
External Dimensions: 434 (W) x 115 (H) x 392 (D) mm
(17-3/32” x 4-17/32” x 15-7/16”)
Mass: 6.3 kg (13.1 lbs.) 6.3 kg (13.1 lbs)
DCM-280
DCM-380
FUNCTIONS AND DISPLAY
Functions: Five discs can be used,
Direct Track Selection,
Program Selection,
Random Play, etc.
Displays: Disc No., Track No.,
Time (min., sec.),
Play, Pause, Repeat, Random, etc.
Other: Headphone Jack (Level Variable)
REMOTE CONTROL UNIT RC-258
Remote Control Method: Infrared Pulse system
Power Supply: 3 V DC Two R6P (standard SIZE AA)
External Dimensions: 50 (W) x 175 (H) x 18 (D) mm
(1-31/32” x 6-57/64” x 45/64”)
Mass: 100g (approx. 3 oz)
(Includes batteries)
✽ Design and specifications are subject to change without notice in the course of product improvement.
Even when it appears that there is trouble, check the following points carefully.
COMPACT DISCS
12
TROUBLE? CHECK THE PLAYER TO FIND WHAT’S WRONG
13
SPECIFICATIONS
14
Page 23

23
FRANCAIS
Nous vous remercoins d’avoir acheté de lecteur de disque compact
DENON.
Nous vous prions de lire attentivement le Mode d’emploi afin d’utiliser
correctement cet appareil.
— TABLE DES MATIERES —
z
CARACTERISTIQUES ………………………………………………23
x
AVANT D’UTILISER VOTRE APPAREIL …………………………24
c
NATTOYAGE…………………………………………………………25
v
CD ……………………………………………………………………25
b
DESIGNATION DES PIECES ET LEURS FONCTIONS ……26, 27
n
OUVERTURE ET FERMETURE DU TIROIR DE
DISQUE COMPACT ET CHARGEMENT D’UN DISQUE ………28
m
CONNEXIONS ………………………………………………………29
,
LECTURE NORMALE………………………………………………30
.
AUTRES METHODES DE LECTURE…………………………31~35
⁄0
LIRE DES FICHIERS MP3 ……………………………………36, 37
⁄1
LECTURE EN UTILISANT L’UNITE DE
TELECOMMANDE ……………………………………………38, 39
⁄2
COMPACT DISCS …………………………………………………40
⁄3
DES PROBLEMES? VERIFIER LE LECTEUR POUR
EN DETERMINER LA CAUSE ……………………………………40
⁄4
CARACTERISTIQUES TECHNIQUES ……………………………40
En plus du lecteur de CD, vérifier que les éléments suivants se
trouvent bien dans le carton d’emballage:
(1) Mode d’emploi ………………………………………………………1
(2) Cordon de connexion ………………………………………………1
(3) Unité de télécommande RC-258 …………………………………1
(4) Piles sèches (format R6P/AA) ……………………………………2
(1) Décodeur HDCD®(Compatible Digital Haute Définition)
(DCM-380 seulement)
Le HDCD est une technologie de codage/décodage qui réduit
considérablement la distorsion survenant lors des
enregistrements digitaux, tout en restant compatible avec le
format CD conventionnel. Le HDCD permet aux données 20-bit
d’être converties en données 16-bit des CD courants sans perte
de qualité de son.
L’utilisation de ce HDCD permet d’atteindre la haute résolution et
la basse distorsion caractéristiques du HDCD lors de la lecture de
disques compatibles HDCD, et la technologie digitale de DENON
optimise les possibilités de haute qualité de son de la technologie
du HDCD. De plus, les CD normaux et les CD compatibles HDCD
sont identifiés automatiquement, et le traitement de signal digital
optimum pour ce type de disque est utilisé.
(2) Filtre numérique de haute performance
Le DCM-380/280 utilise des filtres numériques de haute précision
de suréchantillonnage octuple.
(3) Lecture simnple des CD simples 8 cm
Les CD simples 8 cm peuvent être utilisés sans adaptateur.
(4) Programmation jusqu’à 32 plages
Toutes les plages d’un disque compact peuvent être
programmées pour la lecture dans n’importe quel ordre. La
programmation en unités de disque (de toutes les plages sur le
disque) est également possible.
(5) Mécanisme de changeur de type carrousel nouvellement
développé fourni
Ce mécanisme peut contenir cinq disques et pendant qu’un
disque est en cours de lecture, les quatre disques restants
peuvent être changés. De plus, le carrousel peut tourner soit dans
le sens des aiguilles d’une montre, soit dans le sens contraire des
aiguilles d’une montre, ainsi la recherche entre disques est rapide.
(6) Télécommande sans fil accessoire
Outre les fonctions générales comme la lecture, l’arrêt et la
pause, cette unité de télécommande permet une sélection
directe, une programmation directe, une lecture aléatoire et
d’autres fonctions. L’unité de télécommande facilite énormément
l’utilisation du DCM-380/280, améliorant sa souplesse d’emploi.
(7) Possibilité de lecture de CD-RW
Le DCM-380/280 peut lire des disques CD-R et CD-RW finalisés.
(8) Lecture MP3
ATTENTION:
Au fond du lecteur, se trouvent deux vis de transport rouges, à
utiliser lors du tranport du lecteur. Avant d’utiliser le lecteur,
tourner ces vis dans le sens inverse des aiguilles d’une montre, et
les retirer.
Si les vis de transport sont encore en place et l’alimentation
allumée, le plateau de disque ne s’ouvrira pas. Si cela se produit,
couper l’alimentation, débrancher le cordon d’alimentation de la
prise de sortie d’alimentation, et retirer les vis de transport.
Conserver ces vis, car elle seront nécessaires lors d’un transport
du lecteur.
Avant de transporter le lecteur, retirer les disques, fermer le
plateau de disque, couper l’alimentation après que “0 00 00:00” ait
été affiché, et débrancher le cordon d’alimentation de la prise de
sortie d’alimentation. Puis installer les vis de transport en les
tournant dans le sens des aiguilles d’une montre. Assurez-vous de
les avoir serrées solidement.
®
,HDCD®et High Definition Compatible Digital®sont des marques déposées ou des marques de fabrique de Microsoft
Corporation aux Etats-Unis et/ou dans d’autres pays.
CARACTERISTIQUES
1
Page 24

24
FRANCAIS
Condensation
2 Condensation
La condensation se présente sous forme de gouttelettes d’eau qui
se forment sur les fenêtres d’une pièce chauffée en hiver.
2 Conditions pour la formation de condensation
En hiver, lorsque l’appareil est transporté de l’extérieur vers une
pièce chauffée, ou lorsque la température de la pièce augmente
soudainement grâce au chauffage, de la condensation va se
former sur les pièces de fonctionnement à l’intérieur de l’appareil
et le fonctionnement normal ne sera plus possible.
De la condensation peut également se former en été lorsque
l’appareil est directement frappé par l’air froid d’une climatisation.
Le cas échéant, déplacer l’appareil.
2
Mesures à prendre après la formation de condensation
• Si de la condensation s’est formée, activer l’appareil et le laisser
un moment. Bien que la durée varie en fonctions des conditions
ambiantes, l’appareil devrait être en état de marche en 1 à 2
heures.
• Si de la condensation s’est formée sur le disque, l’essuyer.
2 Les illustrations utilisées dans un but descriptif peuvent différer de
l’article.
2 Veuillez conserver le manuel d’utilisation.
Après avoir lu le manuel d’utilisation, le conserver dans un endroit
sûr avec la garantie.
2 Veuillez laisser un espace de plus de 10 cm entre le mur ou
d’autres appareils audio/vidéo, etc. et le dessus, l’arrière et les
côtés de l’subwoofer.
2 Lors de l’utilisation simultanée de cet appareil ou d’autres
équipements électroniques contenant des microprocesseurs et
d’une radio ou d’une TV, des parasites ou des interférences
peuvent survenir sur l’écran de TV ou sur le son de la radio. Le cas
échéant, lire attentivement les points suivants.
• Séparer cet appareil autant que possible de la radio ou de la TV.
• Séparer autant que possible la ligne d’antenne de la radio ou de
la TV et le câble d’alimentation et les câbles de connexion
entrée/sortie de cet appareil.
• L’utilisation d’antennes intérieures et de ligne d’alimentation de
300 Ω/ohms est particulièrement propice à ce genre
d’interférences. Nous vous recommandons l’utilisation
d’antennes extérieures et d’un câble coaxial de 75 Ω/ohms.
Ligne d’alimentation de 300 Ω/ohms Câble coaxial de 75 Ω/ohms
2 Dans des circonstances normales
• Toujours retirer le disque et inactiver l’appareil.
• Lorsque vous quittez la maison pendant de longues périodes,
comme lorsque vous partez en vacances, s’assurer de bien
débrancher le cordon d’alimentation.
2 Lorsque le DCM-380/280 est déplacé
• Ne pas faire subir de chocs au DCM380/280.
• Toujours vérifier que le disque a été
retiré et que les cordons de connexion
ont été débranchés avant de déplacer
le DCM-380/280.
Autres précautions
Précautions d’installation
Lorsque le DCM-380/280 n’est pas utilisé
AVANT D’UTILISER VOTRE APPAREIL
2
Page 25

25
FRANCAIS
Nettoyage de l’unité principale
2 Utiliser un chiffon doux et essuyer légèrement pour retirer la saleté
du boîtier et du panneau de commande.
• Lors de l’utilisation de chiffons imprégnés de produits
chimiques, suivre les précautions qui leur sont associées.
2 Ne pas utiliser de benzène, de dissolvant ni d’autres solvants
organiques ou insecticides sur l’unité principale car il risquerait
d’altérer la qualité ou la couleur.
REMARQUE:
Ne pas utiliser des aérosols ou des produits anti-statiques. Ne pas
utiliser du benzène, un diluant ou d’autres produits chimiques
volatils.
Spray pour
disques
Dissolvant
Benzène
Nettoyage du disque
2 Lorsque le disque est marqué de traces de doigt ou de la saleté,
l’essuyer avant son utilisation. La saleté n’affectera pas le signal du
disque, mais la qualité sonore risque de diminuer et le son peut
sautiller. Remarquer que lorsque la surface d’un disque CD-R/RW
est sale, l’enregistrement ne peut pas être fait correctement.
2 Pour essuyer le disque, utiliser un kit de nettoyage de disque
disponible dans le commerce ou un chiffon doux.
Essayer légèrement la surface
du disque en partant du
centre vers les bords.
Ne pas essuyer en faisant un
cercle.
Disques
Cet appareil utilise des CD (disques optiques
numériques audio) portant la marque située à
droite.
Notez que les CD de forme spéciale, comme
ceux en forme de cœur ou hexagonaux ne
peuvent être utilisés. Ne pas tenter d’utiliser de tels CD car ils
risquent d’endommager cet appareil.
C
Manipulation des disques
Eviter de toucher la surface du disque lors de son insertion et de son
retrait.
Faire attention aux traces de doigt
sur la surface d’enregistrement du
signal.
Précautions de manipulation
• Ne pas laisser des traces de doigt, de graisse ou de la saleté sur la
surface du disque.
• Veiller à ne pas rayer la surface, en particulier lors du retrait ou en
rangeant le disque dans son boîtier
• Ne pas plier le disque.
• Ne pas chauffer le disque.
• Ne pas agrandir le trou au centre.
• Ne pas écrire sur la surface de l’étiquette (exple la face imprimée)
avec un stylo à bille ou un crayon.
• Des gouttelettes d’eau peuvent se former à la surface du disque
lorsqu’il est amené brusquement d’un endroit froid à un endroit
chaud. Si cela se produit, ne pas sécher le disque avec un sèchecheveux.
Précautions de stockage
•
S’assurer d’éjecter le disque après la lecture.
•
Toujours retourner le disque dans son boîtier pour éviter la
poussière, des rayures, et une déformation.
•
Ne pas laisser le disque dans des endroits suivants:
1. Endroits où il est exposé aux rayons directs du soleil pendant de
longues périodes.
2. Endroits très humides ou poussiéreux.
3. Endroits où il est exposé à la chaleur provenant d’un radiateur.
NATTOYAGE
3
CD
4
Page 26

26
FRANCAIS
PANNEAU AVANT
q
wrtyuio!0 !1
!5
!4
!3 !2
PANNEAU ARRIERE
COAXIAL
DIGITAL OUT
LINE OUT
VARIABLE
CONTROL
OUT
IN
SYNCHRO
!7
!8 @0 @1
!9
!6
1
2
3
4
5
TRACK
DISC
°°
°
°°°°°
MIN
SEC
PROGRAM
RANDOM REPEAT
REMAIN
EACH
TOTAL
R
MP3 CD HDCD
1 DISC
1617 1918 20
1112 1413 15
67 9810
12 435
minuteNuméro
de plage
Calendrier musical
à 20 pistes.
Signal de télécommande
Indicateur de réception
seconde
Temps
Indicateur de disc
Numéro de disque
Indicateur de lecture
Indicateur
de répétition
Indicateur
de
programme
Indicateur
de lecture
aléatoire
Indicateur de pause
Indicateur de MP3
Indicateur de CD
Indicateur de HDCD
Indicateur
d’accentuation
e
AFFICHAGE
DCM-380 seulement
DCM-380 seulement
CARROUSEL
DESIGNATION DES PIECES ET LEURS FONCTIONS
5
Page 27

27
FRANCAIS
q
Interrupteur d’alimentation (POWER)
• Appuyer sur cet interrupteur pour mettre l’appareil sous
tension.
w
Récepteur de télécommande
(REMOTE SENSOR)
• Ce récepteur reçoit les signaux infrarouges de l’unité de
télécommande sans fil.
• Pointer l’unité de télécommande vers cette fenêtre de
réception
e
Indicateur HDCD (DCM-380 seulement)
• Ceci s’allume quand un disque compatible avec les HDCD est
joué.
r
Fenêtre d’affichage
• Le No. de disc, le No. de piste, la durée de lecture et autres
informations sont affichés dans la fenêtre d’affichage.
t
Touche de répétition (REPEAT)
• Appuyer sur cette touche pour une lecture répétée.
L’indicateur “REPEAT” apparaît sur l’affichage. Les trois types
suivants de modes de répétition sont disponibles.
• Lorsqu’il est pressé une fois, les indicateurs “REPEAT” et “1”
s’allument, et toutes les plages sur le disque en cours de
lecture sont lues répetées.
• Lorsqu’il est de nouveau pressé, les indicateurs “REPEAT” et
“1 DISC” indicators light and all the tracks on the disc currently
playing are repeated.
• Lorsqu’il est de nouveau pressé, les indicateurs “REPEAT” et
“DISC” s’allument, et les disques actuellement sur le plateau
sont répetés.
• Lorsqu’il est de nouveau pressé, les indicateurs “REPEAT” et
“DISC” s’éteignent, et le mode de répetition est annulé.
La fonction de répétition peut aussi être utilisée pendant une
lecture d’un programme et une lecture aléatoire, mais dans ce
cas seul le mode répétition du disque (l’indicateur “REPEAT”
et “DISC”) est disponible.
(Se réferer à la page 33 pour les détails.)
y
Touche de aléatoire (RANDOM)
• Appuyer sur cette touche pour commencer la lecture aléatoire.
• Appuyer sur cette touche pendant l’arrêt et appuyer sur la
touche 1 PLAY pour la lecture aléatoire entièrement
automatique.
• Lorsque cette touche est enfoncée pendant la lecture d’un
programme, la lecture aléatoire des plages dans le programme
commence. (Voir la page 33, point u.)
u
Touche de recherche en arrière
automatique/manuelle (8/6)
• Appuyez sur cette touche pour faire revenir l’endroit de
reproduction jusqu’au commencement de la plage en cours de
reproduction. Appuyez encore une fois pour retourner jusqu’à
d’autres plages.
• En appuyant sur cette touche un certain nombre de fois,
l’endroit de reproduction sera déplacé en arrière du même
nombre de plages.
• Maintenir cette touche enfoncée pendant plus de 0,5 seconde
pendant la lecture pour effectuer une recherche rapide en
arrière. Aussi longtemps que la touche est maintenue
enfoncée, les signaux musicaux sont lus plus rapidement
qu’en cas normal.
• Maintenez votre doigt sur cette touche pendant plus de 5
secondes, la recherche arrière devient approximativement 4
fois plus rapide.
i
Touche de recherche en avant
automatique/manuelle (7/9)
• Appuyer sur cette touche pour déplacer le capteur vers le
début de la plage suivante. Appuyer de nouveau sur cette
touche pour avancer vers d’autres plages.
• En appuyant plusieurs fois sur cette touche, le capteur avance
le nombre correspondant de plages.
• Maintenir enfoncée cette touche pendant plus de 0,5
secondes pendant la lecture pour effectuer une recherche
rapide en avant. Aussi longtemps que la touche est maintenue
enfoncée, les signaux musicaux sont lus plus rapidement
qu’en cas normal.
• Maintenez votre doigt sur cette touche pendant plus de 5
secondes, la recherche avant devient approximativement 4
fois plus rapide.
o
Touche d’arrêt (2 STOP)
• Appuyer sur cette touche pour arrêter la lecture.
!0
Touche de pause (3 PAUSE)
• Appuyer sur cette touche pour arrêter provisoirement la
lecture.
• Une pression sur la touche 3 PAUSE pendant la lecture
l’arrête provisoirement. L’indicateur “1” s’éteint et
l’indicateur “3” s’allume.
• Pour arrêter le temps de pause, appuyez soit sur la touche 1
PLAY !1 ou 3 PAUSE !0 une seconde fois.
!1
Touche de lecture (1 PLAY)
• Appuyer sur cette touche pour lire un disque.
L’indicateur “1” s’allume lorsque la touche est enfoncée, le
numéro du disque et la plage en cours de lecture sont affichés
par l’indicateur de numéro de disque et de No. de plage et le
temps écoulé de a plage actuelle est affiché par l’indicateur de
temps.
• L’indicateur “1” s’éteint après la fin de la lecture de la
dernière plage du dernier disque et le lecteur s’arrête.
!2
Touche de saut de disque (DISC SKIP)
• Chaque fois que cette touche est enfoncée, le carrousel
tourne dans la direction des aiguilles d’une montre vers la
position du tiroir suivant. Ceci permet le chargement et
déchargement de disques.
Cette touche est également utilisée pour sélectionner le
disque suivant en lecture normale en continu.
!3
Touche d’ouverture/fermeture (5 OPEN/CLOSE)
• Appuyer sur cette touche pour ouvrir.
• Le tiroir est ouvert vers l’avant.
• Appuyer de nouveau sur la touche pour refermer le tiroir.
!4
Tiroir de chargement
• Les disques peuvent être chargés et déchargés quand ce tiroir
est ouvert. Ne pas forcer le tiroir à la main pour le fermer.
!5
Jack de casque (PHONES)
• Insérer la fiche du casque dans ce jack pour une écoute privée
de compact disc. (Le casque est vendu séparément).
!6
Tiroirs de disque (1 ~ 5)
• Un disque par tiroir peut être chargé.
!7
Borne de sortie (LINE OUT)
• Raccorder les cordons de connexion de ces bornes aux bornes
d’entrée de l’amplificateur. (Se réferer à la page 29 pour les
connections.)
!8
Prise de synchronisation (SYNCHRO)
• Pour effectuer un enregistrement synchronisé, cette prise doit
être connectée à la prise SYNCHRO de la platine avec un
cordon de connexion. (Se réferer à la page 29 pour les
connections.)
!9
Connecteur d’entrée de commande
(CONTROL IN) (DCM-380 seulement)
• Il s’agit du connecteur d’entrée pour télécommande par fil.
Consultez votre revendeur DENON si vous souhaitez utiliser
ce connecteur.
@0
Connecteur de sortie de commande
(CONTROL OUT) (DCM-380 seulement)
• Il s’agit du connecteur de sortie pour télécommande par fil.
Consultez votre revendeur DENON si vous souhaitez utiliser
ce connecteur.
@1
Connecteur de sortie digital audio (COAXIAL)
• Connecter un cordon 75 Ω/ohms à prise brochée disponible
dans le commerce.
• Les données digitales sont sorties par ce connecteur.
Opération en continu des touches
Si la touche de recherche en arrière automatique/manuelle u ou la
touche de recherche en avant automatique/manuelle i, sont
enfoncées, la fonction de cette touche se répétera.
Page 28

28
FRANCAIS
Ouverture et fermeture du tiroir de disque compact (Cette
fonction ne fonctionne que lorsque l’alimentation est branchée)
1. Appuyez sur la interrupteur POWER pour mettre l’appareil sous
tension.
2. Appuyez sur la touche 5 OPEN/CLOSE.
Comment charger un disque
• Assurez-vous que le tiroir soit complètement ouvert.
• Tenez le disque par les bords et placez-le sur le plateau de disque
(ne touchez pas la surface à signaux, c. à. d. le côté luisant).
• Placer le disque correctement dans le tiroir selon sa dimension.
Placer des disques de 8 cm sur le trou central.
Placer des disques de 12 cm dans le trou extérieur.
• Quand le tiroir est ouvert pendant le mode d’arrêt, les disque
peuvent chargés dans les 3 plateaux. Si on appuie sur la touche
DISC SKIP, le carrousel tourne et on peut charger un disque sur un
autre plateau.
Lorsque le tiroir est ouvert pendant le mode de lecture, il est
possible de charger et retirer des disques de tous les tiroirs de
disque sauf de celui du disque en cours de lecture. 3 disques
peuvent être remplacés et appuyer sur la touche DISC SKIP pour
commuter vers l’autre plateau du disque à changer.
• Appuyez sur la touche 5 OPEN/CLOSE pour fermer le tiroir de
disque.
Attention:
• Le lecteur ne fonctionne pas correctement et le disque peut même
être endommagé s’il n’est pas placé correctement.
• Si votre doigt reste coinçé dans le tiroir de disque celui-ci se ferme,
appuyez sur la touche 5 OPEN/CLOSE.
• Ne placez pas des objets sur le plateau de disque ni n’y placez plus
d’un disque à la fois sans quoi vous risquez d’obtenir un
fonctionnement défectueux.
• Ne poussez pas sur le disque à la main pour l’introduire lorsque
l’alimentation n’est pas branchée étant donné que ceci pourrait
entraîner un fonctionnement défectueux et endommager votre
lecteur de disque compact.
• Ne pas toucher le carrousel pendant sa rotation. Aussi, ne pas
tourner le carrousel à la main lorsqu’il est arrêté, car il pourrait être
endommagé.
• N’insérez pas de disque à l’endroit indiqué par la flèche.
Ceci pourrait endommager le mécanisme interne de l’appareil.
FACE IMPRIMEE
VERS LE HAUT
OUVERTURE ET FERMETURE DU TIROIR DE DISQUE COMPACT ET CHARGEMENT D’UN DISQUE
6
Page 29

29
FRANCAIS
(1) Connexion des sortie
• Brancher une extrémité du cordon de connexion fourni avec le
lecteur de CD aux bornes de sortie, gauche (L) et droite (R), du
lecteur de CD et l’autre extrémité aux bornes d’entrée CD, AUX
ou TAPE PLAY, gauche (L) et droite (R), de l’amplificateur.
COAXIAL
DIGITAL OUT
LINE OUT
VARIABLE
CONTROL
OUT
IN
SYNCHRO
(2) Connexions à la prise de sortie numérique (COAXIAL)
• Utiliser un cordon à broche de 75 Ω/ohms pour connecter la prise
de sortie numérique (COAXIAL) du lecteur CD à la prise d'entrée
numérique (COAXIAL) d'un processeur numérique ou d'un
enregistreur MD, disponible dans le commerce.
COAXIAL
DIGITAL OUT
LINE OUT
VARIABLE
CONTROL
OUT
IN
SYNCHRO
AC OUTLET
PHONO CD TUNER AUX
TAPE-1
/DAT
TAPE-2
/MD
TAPE-1
/DAT
TAPE-2
/MD
L
R
PB REC
SIGNAL
GND
INPUTS
L
R
RL
SPEAKER SYSTEMS
A
B
(3) Connexions de prise de synchronisation (SYNCHRO)
• Connecter la prise SYNCHRO à une platine cassette DENON
équipée d’une prise SYNCHRO, effectuer ensuite un
enregistrement synchronisé. Utiliser le cordon de connexion
fourni avec la platine cassette.
• Pour utiliser cette fonction, connecter aussi les prises de sortie et
faire les réglages de telle sorte qu’un enregistrement puisse être
effectué depuis lecteur de CD à la platine cassette.
COAXIAL
DIGITAL OUT
LINE OUT
VARIABLE
CONTROL
OUT
IN
SYNCHRO
DIGITAL INPUT
COAXIAL
OPTICAL
DCM-380/280
(Magnétocassette)
Prise secteur
DCM-380/280
(Amplificateur)
Prise secteur
DCM-380/280
(Processeur numérique ou enregistreur MD)
Prise secteur
CONNEXIONS
7
Page 30

30
FRANCAIS
Suivre les étapes ci-dessous pour comprendre la procédure de lecture d’un disc.
(1) Pour démarrer la lecture
1. Mettre l'interrupteur POWER sous tension et appuyer sur la
touche 5 OPEN/CLOSE pour ouvrir le tiroir de disque.
2. Mettez le disque qui va être joué dans le plateau avant.
3. Appuyer sur la touche 1 PLAY.
4. Le tiroir se ferme et le disque qui vient d’être chargé est lu.
5. Le numéro de disque, numéro de plage et le temps écoulé, etc.
pour le disque actuellement en cours de lecture apparaissent sur
la fenêtre de l’affichage.
6. Si la touche 5 OPEN/CLOSE est enfoncée, pendant qu’un disque
est lu, la lecture continue, mais le tiroir s’ouvre et quatre disques
peuvent être remplacés. Le disque pouvant être remplacé change
lorque le touche DISC SKIP est pressé.
Appuyer de nouveau sur la touche 5 OPEN/CLOSE pour refermer
le tiroir.
(2) Pour arrêter la lecture
1. Appuyer sur la touche 2 STOP pour arrêter la lecture.
2. Pour remplacer des disques, appuyer sur la touche 5 OPEN/CLOSE.
Le disque qui était en train d’être joué passe à l’avant et le tiroir
s’ouvre.drawer opens.
• Mettez le disque que vous voulez entendre à l’avant.
(1 PLAY)
(2 STOP)
LECTURE NORMALE
8
Page 31

31
FRANCAIS
e Pour passer à la piste suivante
pendant la lecture ……………………………………………………
• Pendant l’opération aléatoire ou de programmation, le lecteur va au
début de la sélection aléatoire suivante ou de la plage programmée
suivante.
Recherche automatique
Appuyer sur la touche 7/9 pendant moins de 0,5 seconde
pendant la lecture.
• L’endroit de reproduction sera avancé jusqu’au commencement de
la plage suivante et la reproduction continuera. Si vous appuyez sur
la touche plusieurs fois, l’endroit de reproduction sera avancé
d’autant de plages.
r Pour retourner au début de la
piste en cours de lecture……………………………………………
Appuyer sur la touche 8/6 pendant moins de 0,5 seconde
pendant la lecture.
• L’endroit de reproduction sera reculé jusqu’au commencement de
la plage en cours de reproduction et la reproduction continuera. Si
vous appuyez sur la touche plusieurs fois, l’endroit de reproduction
sera reculé d’autant de plages.
Recherche automatique
Outre la lecture normale, les méthodes suivantes peuvent être utilisées pour reproduire un disc.
q Pour lire le disque désiré et
la plage désirée ………………………………………………………
1
3
2
1. Appuyer sur la touche DISC SELECT.
2. Utiliser les touches numériques (1 à 5) pour sélectionner le
numéro de disque à lire.
3. Ensuite, utiliser les touches numériques (1 à 10 et +10) pour
sélectionner le numéro de plage à lire.
• Par exemple, pour lire la 4ème plage sur le 3ème disque:
Appuyer sur la touche , et .
Pour lire la 12ème plage sur le 5ème disque:
Appuyer sur la touche , , et .
La lecture commence à partir du numéro du disque et de la plage
sélectionnés.
2+105DISC SELECT
43DISC SELECT
Sélection directe
(Seulement la télécommande)
w Pour aller vers le disque suivant
Pendant la lecture ……………………………………………………
1. Appuyer sur la touche DISC SKIP. Le carrousel dans le tiroir tourne
et le disque dans le tiroir suivant est lu.
Par exemple, si le disque numéro 3 a été lu, le disque passe au
disque numéro 4 et si le numéro de disque 5 a été lu, le disque
passe au disque numéro 1.
2. De plus, lorsque la touche DISC SKIP – sur l’unité de
télécommande est enfoncée, le carrousel tourne dans la direction
opposée et le disque précédent est lu.
Saut de disque
(DISC SELECT)
(1 ~ 10)
(1 ~ 5)
(DISC SKIP)
(DISC SKIP –)
(7/9)
Appuyer sur la touche 7/9.
2ème piste 3ème piste 4ème piste
(8/6)
Appuyer sur la touche 8/6.
3ème piste 4ème piste 5ème piste
AUTRES METHODES DE LECTURE
9
Page 32

32
FRANCAIS
(4) Pour effacer un programme entier
• Lorsque la touche PROG/DIRECT est de nouveau enfoncée, le
programme entier est effacé. Lorsque la touche 5 OPEN/CLOSE
est enfoncée, le contenu d’un programme est également effacé.
• Une pression sur la touche PROG/DIRECT pendant qu’un
programme est en cours de lecture annule le programme. La
lecture continue alors jusqu’à la fin du disc en cours de lecture,
après quoi le lecteur s’arrête automatiquement.
Attention:
• Il n'est pas possible d'effectuer une lecture programmée de
disques MP3.
Si un disque MP3 est spécifié, cette étape dans le programme est
ignorée.
• Si la programmation est effectuée pendant la lecture d’une piste ou
à partir du mode de pause, la piste en cours de lecture devient la
1ère piste programmée.
• Une sélection directe ne peut pas être faite pendant qu’un
programme est reproduit. L’introduction du numéro de la piste
désirée avec les touches de numéro de plage ajoute cette piste à la
fin du programme.
• Lors de la programmation, ne pas programmer un numéro de plage
qui n’est pas enregistré sur le disque. Si un tel numéro est
programmé par erreur, le lecteur ignore le programme.
t Pour lire les disques désirés
et les plages désirés dans
l’ordre désiré …………………………………………………………
• Certaines plages sur les disques chargés peuvent être lues dans
n’importe quel ordre.
• Les plages sur un disque non chargé peuvent également être
programmées, mais si on essaie de lire ce disque, le
microprocesseur détecte qu’il n’est pas chargé et le disque suivant
est lu automatiquement.
• Jusqu’à 32 pistes peuvent être programmées.
Sélection de programme
(1) Programmation
(Seulement la télécommande)
1
2
4
3
• Appuyer sur la touche PROG/DIRECT. L’indicateur “PROGRAM”
s’allume. Utiliser la touche DISC SELECT, les touches numériques
et +10 pour sélectionner le disque à programmer.
Par exemple, pour programmer la 3ème plage sur le 2ème disque
et la 12ème plage sur le 5ème disque, appuyer sur la touche
, , , , , , et .
2+105DISC SELECT32DISC SELECTPROG/DIRECT
(2) Pour vérifier les pistes programmées
(Seulement la télécommande)
• Appuyer sur la touche CALL de la télécommande sans fil.
Le contenu du programme est affiché, dans l’ordre, un élément à la
fois, chaque fois que la touche CALL est enfoncée.
(3) Pour effectuer une lecture programmée
• Appuyer sur la touche 1 PLAY pour reproduire les sélections
programmées dans l’ordre où elles ont été programmées.
(PROG / DIRECT)
(DISC SELECT)
(1 ~ 10)
(1 ~ 5)
(CALL)
(1 PLAY)
(1 PLAY)
Page 33

33
FRANCAIS
y Pour répéter la lecture de
toutes les pistes………………………………………………………
Lecture répétée
• Appuyer sur la touche REPEAT. L’indicateur “REPEAT” s’allume.
✽
Les opérations qet wpeuvent être effectuées dans n’importe
quel ordre, avec le même résultat.
1
2
• Lorsque la touche REPEAT est enfoncée une fois, les indicateurs
“REPEAT” et “1” s’allument. Dans ce mode, la plage en cours de
lecture est répétée.
• Si la touche REPEAT est de nouveau pressé, les indicateurs “REPEAT”
et “1 DISC” s’allument, et tous les disques actuellement chargés
sont répetés.
• Si le touche REPEAT est de nouveau pressé, les indicateurs
“REPEAT” et “DISC” s’allument, et tous les disques actuellement
chargés sont répetés.
• Une pression sur la touche REPEAT pendant la lecture active la
lecture répétée (de toutes les pistes).
• Pour annuler la lecture répétée, appuyer une seconde fois sur la
touche REPEAT.
• Une pression sur la touche REPEAT pendant une lecture
programmée active la lecture répétée des pistes programmées,
dans l’ordre.
• Une pression sur la touche REPEAT pendant une lecture aléatoire
active la lecture répétée aléatoire des pistes.
u Pour laisser le lecteur sélectionner
l’ordre de lecture ……………………………………………………
1
2
• Appuyez sur la touche RANDOM, puis appuyez sur la touche 1
PLAY, le micro ordinateur commencera alors la lecture aléatoire des
5 disques.
Lecture aléatoire
(Lors de l’utilisation des touches de la télécommande)
(1) Lecture aléatoire totale
1
2
5
3
4
6
• Après avoir enfoncé la touche PROG/DIRECT et introduit un
programme (Voir le point t à la page 32), appuyer sur la touche
RANDOM, puis sur la touche 1 PLAY. Le micro-ordinateur
sélectionne alors les plages du programme en ordre aléatoire et les
lit.
(2) Lecture aléatoire programmée (Seulement la télécommande)
(1 PLAY)
(REPEAT)
REPEAT
REPEAT 1
Plage Plage Plage
REPEAT 1 DISC
1er disque
(TOUTES LES PLAGES)
2ème disque
(TOUTES LES PLAGES)
5ème disque
(TOUTES LES PLAGES)
REPEAT
REPEAT
DISC
1er disque
(TOUTES LES PLAGES)
2ème disque
(TOUTES LES PLAGES)
5ème disque
(TOUTES LES PLAGES)
REPEAT
(RANDOM)
(1 PLAY)
(RANDOM)
(1 ~ 5)
(1 ~ 10)
(1 PLAY)
(PROG / DIRECT)
(DISC SELECT)
Page 34

34
FRANCAIS
1
2
3
4
• Appuyer sur la touche RANDOM et spécifier le nombre de disques
(1 à 5) avec la touche DISC SELECT et les touches de numéro. En
appuyant ensuite sur la touche 1 PLAY, l’appareil sélectionne et
procède casuellement à la lecture des pistes du disque et ce dans
l’ordre des disques spécifiés.
Jusqu’à 5 disques peuvent être sélectionnés et le même disque
peut être sélectionné, deux fois ou plus. La lecture aléatoire
séquentielle de disque est annulée lorsque la lecture est terminée.
(3) Lecture aléatoire séquentielle de disc
(4) Pour annuler la lecture aléatoire
• Lorsque la touche RANDOM est de nouveau enfoncée, la fonction
aléatoire est annulée. La lecture procède alors à partir de la plage
en cours de lecture jusqu’à la fin de a dernière plage, puis s’arrête.
Lorsque la touche 5 OPEN/CLOSE est enfoncée, la fonction
aléatoire est annulée.
Attention:
• Lorsque la touche RANDOM est enfoncée pendant la lecture
normale, la lecture complètement aléatoire commence.
• Lorsque la touche RANDOM est enfoncée pendant la lecture de
programme, la lecture aléatoire des plages dans le programme y
comprises les plages qui ont déjà été lues commence.
• Pendant la lecture aléatoire, le lecteur peut afficher le numéro de
disque qui n’est pas chargé dans le tiroir. Dans un tel cas, le lecteur
lit l’information sur le disque, puis se réinitialise pour corriger
automatiquement. Ceci n’est pas un mauvais fonctionnement.
• Les disques MP3 sont ignorés pendant la lecture aléatoire
programmée.
i Pour arrêter provisoirement la lecture …………………………
• Une pression sur la touche 3 PAUSE pendant la lecture l’arrête à
ce point.
Une seconde pression sur la touche 3 PAUSE redémarre la lecture
à partir du même point.
Pause
1. Appuyer sur la touche 3 PAUSE.
2. Une pression sur la touche 1 PLAY ou 3 PAUSE redémarre la
lecture.
o Recherche rapide audible …………………………………………
• A l’aide de cette fonction, vous pouvez repérer un endroit désiré
dans une plage, en avant ou en arrière.
• Relâcher la touche 8/6 ou 7/9 lorsque le point désiré
est atteint. La lecture normale continue.
Recherche manuelle
Maintenir enfoncée la touche 7/9 pendant plus de 0,5
seconde pendant la lecture. La lecture de la bande est accélérée.
• Comme référence, le numéro de la plage en cours de reproduction
et le temps écoulé de la plage sont affichés.
• La recherche manuelle avant est approximativement 4 fois plus
rapide quand on appuie sur la touche 7/9 pendant plus de 5
secondes.
• Si la touche 7/9 est maintenue enfoncée lorsque la fin de
la dernière plage sur le disque est atteint, “ ” est affiché et la
recherche manuelle s’arrête. Pour revenir vers un autre point,
appuyer sur la touche 8/6 jusqu’à ce que “ ” disparaisse.
• Si on appuie sur la touche 7/9 et que l’on arrive à la fin de
la piste parcourue pendant la lecture aléatoire ou la lecture d’un
programme, on passe à la piste suivante et la lecture commence.
(1) Recherche manuelle en sens avant
(RANDOM)
(1 ~ 5)
(1 PLAY)
(DISC SELECT)
(3 PAUSE)
4ème piste 5ème piste 6ème piste
Pause
(7/9)
Page 35

35
FRANCAIS
Maintenir enfoncée la touche 8/6 pendant plus de 0,5
seconde pendant la lecture. La lecture en arrière de la plage est
accélérée.
• Comme référence, le numéro de la plage en cours de reproduction
et le temps écoulé de la plage sont affichés.
• La recherche manuelle arrière est approximativement 4 fois plus
rapide quand on appuie sur la touche 8/6 pendant plus de 5
secondes.
• Si la touche 8/6 est maintenue enfoncée lorsque le début
de la première plage sur le disque est atteint, “ ” est affiché et
la recherche manuelle s’arrête. Pour revenir vers un autre point,
appuyer sur la touche 7/9 jusqu’à ce que “ ” disparaisse.
• Si on appuie sur la touche 8/6 et que l’on arrive au début de
la piste parcourue pendant la lecture aléatoire ou la lecture d’un
programme, la recherche manuelle arrière est arrêtée et la lecture
commence.
(2) Recherche manuelle en arrière
!0 Repérage et arrêt de la lecture ……………………………………
1
2
• Le repérage par sélection directe, puis le passage en mode de
pause, est pratique pour faire des exercices de chant avec une
musique de fond.
Pause
(Seulement la télécommande)
(1) Repérage par sélection directe
1. Appuyer sur les touches de numéro de plage pour régler le numéro
de la piste désirée.
2. Appuyer sur la touche 3 PAUSE.
• Pour démarrer la lecture, appuyer sur la touche 1 PLAY ou sur la
touche 3 PAUSE.
• Après avoir programmé les pistes désirées, appuyer sur la touche
3 PAUSE. Le capteur avance jusqu’au début de la 1ère piste
programmée et le lecteur passe dans le mode de pause.
(2) Repérage par sélection programmée
!1 Fonction d’enregistrement
synchronisé ……………………………………………………………
Le fait de connecter une prise SYNCHRO à une platine cassette
DENON équipée d’une prise SYNCHRO, permet d’effectuer des
enregistrements synchronisés.
• Pour utiliser cette fonction, s’assurer de connecter les prises
SYNCHRO ainsi que les prises LINE OUT. (Se réferer à la page 29
pour les connections.) Ensuite, charger un disque.
• Avec le lecteur de CD en mode d’arrêt ou de pause, le fait de
commencer un enregistrement synchronisé sur une platine
cassette fait démarrer automatiquement le lecteur de CD. (Ceci est
appelé la lecture synchronisée.)
• L’indicateur de réception de signal de télécommande de l’affichage
clignote pendant la lecture synchronisée.
Fonction d’enregistrement synchronisé
REMARQUES:
• La lecture synchronisée est aussi possible en mode de
programmation.
• Le mode répétion sont annulées lorsque la lecture synchronisée a
démarrée.
• Excepté pour la touche 2 STOP, 1 PLAY et TIME, les touches ne
fonctionnent pas pendant la lecture synchronisée.
• En mode de lecture, même si un enregistrement synchronisé
démarre sur la platine cassette, le lecteur de CD n’est pas
synchronisé avec la platine cassette et la platine cassette entre em
mode de pause de synchronisation. Dans ce cas, enfoncer la
touche 2 STOP de la platine cassette, régler le lecteur de CD en
mode d’arrêt ou de pause et recommencer un enregistrement
synchronisé sur la platine cassette.
• Pour des détails complémentaires, voir le mode d’emploi de la
platine cassette qui a été connectée.
(8/6)
(1 ~ 10)
(3 PAUSE)
Page 36

36
FRANCAIS
2 Il existe de nombreux site sur Internet à partir desquels vous pouvez télécharger des fichiers musique au format MP3. Ces fichiers peuvent
être téléchargés en suivant les instructions indiquées sur le site et sauvegardées sur des disques CD-R/RW qui peuvent ensuite être lus sur
le DCM-380/280.
La musique qu’il y a sur les CD que l’on peut trouver dans le commerce peut être convertie en fichiers MP3 en utilisant des programmes
d’encodage MP3. Une fois que c’est fait, la taille des données est réduite au 1/10 environ. Ces données MP3 peuvent être stockées sur un
disque CD-R/RW, ce qui vous permet de créer un seul disque CD-R/RW de 12 cm qui contient environ 10 fois plus de musique qu’un CD
musical normal, soit environ 100 plages ou plus (*).
* Il s’agit d’une valeur approximative pour des fichiers MP3 de plages d’environ 5 minutes converties à un débit standard (128 kbps) et
stockées sur un disque CD-R/RW d’une capacité de 650 MB.
✽
Les enregistrements que vous faites sont destinés à votre utilisation personnelle et ne doivent pas être utilisés d’une manière qui ne
respecterait pas les lois de droits d’auteur.
REMARQUES:
• Le DCM-380/280 est compatible avec les normes “MPEG-1
Audio Layer-3”, “MPEG-2 Audio Layer-3” et “MPEG-2,5 Audio
Layer-3” (fréquences d’échantillonnage −32 kHz, 44,1 kHz et 48
kHz). Il n’est pas compatible avec les normes MP1 ou MP2.
• Lors de l’écriture de fichiers MP3 sur un disque CD-R/RW,
réglez le format du programme d’écriture sur “ISO9660 level 1”
ou “ISO9660 level 2”. Les fichiers MP3 écrits sous un autre
format risquent de ne pas être lus correctement. Avec certains
programmes d’écriture, il est impossible d’enregistrer au format
“ISO9660”. Utilisez un programme ayant le format d’écriture
“ISO9660”.
• En général, plus grand est le débit du fichier MP3, meilleure est
la qualité du son. Avec le DCM-380/280, il est recommandé
d’utiliser des fichiers MP3 écris à un débit de 128 kbps ou plus.
• Le programme d’écriture risque de changer la position des
répertoires et des fichiers lorsque l’on écrit des fichiers MP3 sur
un disque CD-R/RW, et les fichiers risquent donc de ne pas être
lus dans l’ordre attendu.
• Assurez-vous de bien donner aux fichiers MP3 l’extension
“.MP3”. Les fichiers ayant une extension autre que “.MP3” ou
n’ayant aucune extension ne peuvent pas être lus. (Sur les
ordinateurs Macintosh, les fichiers MP3 peuvent être lus en
ajoutant l’extension “.MP3” après le nom de fichier constitué
d’un maximum de 8 lettres Romaines majuscules et/ou chiffres
lorsqu’on les enregistre sur des disques CD-R/RW.)
• Pour protéger les droits d’auteurs, aucun signal numérique n’est
généré pendant la lecture de fichiers MP3.
• Maximum 99 dossiers et 16 sous-dossiers peuvent être lus sur
le DCM-380/280. Cependant, les répertoires contenant plus de
8 couches ne peuvent pas être lus. Le nombre maximum de
fichiers est également de 512. S’il y a 513 fichiers, seuls les 512
premiers seront lus. (Les fichiers ayant une extension autre que
“.MP3” ne sont pas comptés.)
• Il se peut qu’il soit impossible de lire certains disques CD-R/RW
à cause de saletés, de rayures ou des propriétés du disque.
• N’appliquez pas de cachets ou d’adhésif sur la face imprimée ou
la face signal des CD ou disques CD-R/RW. La colle pourrait
s’accrocher à la surface du disque et le disque pourrait rester
bloqué à l’intérieur du lecteur.
• Le DCM-380/280 est compatible avec les disques multi-session.
Seuls les premiers CD musicaux peuvent être lus si la première
session est un CD musical, et seulement des fichiers MP3
peuvent être lus si la première session contient des fichiers
MP3.
• Le DCM-380/280 est compatible mixte-audio. Seuls des fichiers
de musique peuvent être lus.
• Le DCM-380/280 n’est pas compatible avec les programmes
d’écriture par paquets.
• Le DCM-380/280 n’est pas compatible avec les listes de lecture.
• Le DCM-380/280 n'est pas compatible avec l'étiquette ID3-Tag.
• La sélection de programme et la lecture aléatoire programmée
ne sont pas possibles avec les disques MP3.
Suivre les étapes ci-dessous pour comprendre la procédure de lecture
d’un disc.
(1) Pour démarrer la lecture
1. Mettre l'interrupteur POWER sous tension et appuyer sur la
touche 5 OPEN/CLOSE pour ouvrir le tiroir de disque.
2. Placer le disque MP3 à lire dans le tiroir frontal.
3. Appuyer sur la touche 1 PLAY.
4. Le tiroir se ferme et le disque qui vient d’être chargé est lu.
5. Le numéro de disque, numéro de plage et le temps écoulé, etc.
pour le disque actuellement en cours de lecture apparaissent sur
la fenêtre de l’affichage.
6. Si la touche 5 OPEN/CLOSE est enfoncée, pendant qu’un disque
est lu, la lecture continue, mais le tiroir s’ouvre et quatre disques
peuvent être remplacés. Le disque pouvant être remplacé change
lorque le touche DISC SKIP est pressé.
Appuyer de nouveau sur la touche 5 OPEN/CLOSE pour refermer
le tiroir.
q Lecture Normale
(2) Pour arrêter la lecture
1. Appuyer sur la touche 2 STOP pour arrêter la lecture.
2. Pour remplacer des disques, appuyer sur la touche 5 OPEN/CLOSE.
Le disque qui était en train d’être joué passe à l’avant et le tiroir
s’ouvre.
• Placer le disque MP3 qu'on veut lire sur le côté frontal.
(1 PLAY)
(2 STOP)
LIRE DES FICHIERS MP3
10
Page 37

37
FRANCAIS
Le DCM-380/280 est compatible avec les disques qui contiennent
jusqu’à 256 plages.
w Autres Methodes de Lecture
• Appuyer sur la touche RANDOM et le numéro de disque MP3 (1 à
5) à l'aide de la touche DISC SELECT et des touches numériques.
En appuyant ensuite sur la touche 1 PLAY, l’appareil sélectionne et
procède casuellement à la lecture des pistes du disque et ce dans
l’ordre des disques spécifiés.
Jusqu’à 5 disques peuvent être sélectionnés et le même disque
peut être sélectionné, deux fois ou plus. La lecture aléatoire
séquentielle de disque est annulée lorsque la lecture est terminée.
(2) Lecture aléatoire séquentielle de disc
(3) Pour annuler la lecture aléatoire
• Lorsque la touche RANDOM est de nouveau enfoncée, la fonction
aléatoire est annulée. La lecture procède alors à partir de la plage
en cours de lecture jusqu’à la fin de a dernière plage, puis s’arrête.
Lorsque la touche 5 OPEN/CLOSE est enfoncée, la fonction
aléatoire est annulée.
(4) Pour répéter la lecture de toutes les pistes
• Appuyer sur la touche REPEAT. L’indicateur “REPEAT 1” s’allume.
✽
Les opérations qet wpeuvent être effectuées dans n’importe
quel ordre, avec le même résultat.
REMARQUE:
• Le mode de piste et de répétition de 1 disque ne peut pas être règlé
pendant la lecture aléatoire séquentielle d'un disque.
1
2
3
4
(RANDOM)
(1 ~ 5)
(1 PLAY)
(DISC SELECT)
1
2
(1 PLAY)
(REPEAT)
• Lorsque la touche REPEAT est enfoncée une fois, les indicateurs
“REPEAT” et “1” s’allument. Dans ce mode, la plage en cours de
lecture est répétée.
• Si la touche REPEAT est de nouveau pressé, les indicateurs
“REPEAT” et “1 DISC” s’allument, et tous les disques
actuellement chargés sont répetés.
• Une pression sur la touche REPEAT pendant la lecture active la
lecture répétée (de toutes les pistes).
• Pour annuler la lecture répétée, appuyer une seconde fois sur la
touche REPEAT.
REPEAT
REPEAT 1
Plage Plage Plage
REPEAT 1 DISC
1er disque
(TOUTES LES PLAGES)
2ème disque
(TOUTES LES PLAGES)
5ème disque
(TOUTES LES PLAGES)
REPEAT
• Si le touche REPEAT est de nouveau pressé, les indicateurs
“REPEAT” et “DISC” s’allument, et tous les disques actuellement
chargés sont répetés.
REPEAT DISC
1er disque
(TOUTES LES PLAGES)
2ème disque
(TOUTES LES PLAGES)
5ème disque
(TOUTES LES PLAGES)
REPEAT
1
2
• Appuyez sur la touche RANDOM, puis appuyez sur la touche 1
PLAY, le micro ordinateur commencera alors la lecture aléatoire des
5 disques.
(1) Lecture aléatoire totale
(RANDOM)
(1 PLAY)
Page 38

38
FRANCAIS
Le lecteur de CD DCM-380/280 peut être commandé depuis l’autre bout de la pièce en utilisant l’unité de télécommande accessoire.
(1) Insertion de la pile
1. Retirer le couvercle se trouvant au dos de l’unité de télécommande.
2. Insérer deux piles R6P (AA) dans la télécommande RC-258, en
suivant les instructions gravées dans le compartiment à piles.
3. Remettre le couvercle au dos de la télécommande.
Précautions relatives aux piles sèches
• Utiliser des piles R6P (AA) pour la télécommande RC-258.
• Les piles soivent être remplacées environ une fois par an, en
fonction de la fréquence d’utilisation.
• Si l’unité de télécommande ne peut pas commander le lecteur de
CD, même avant l’écoulement d’une année, remplacer les piles
sèches par des neuves.
• Prendre soin d’observer les indications de polarité inscrites à
l’intérieur de l’unité de télécommande, en dirigeant l’extrémité (+)
et (–) de chaque pile dans le sens indiqué.
• Les piles risquent d’être endommagées et de fuire dans les cas
suivants.
✽ Utilisation mélangée de piles neuves avec d’anciennes.
✽ Utilisation mélangée de différents types de piles.
✽ Mise en court-circuit, démontage, échauffement ou mise des
piles dans le feu.
• Lorsque l’unité de télécommande n’est pas utilisée pendant une
période prolongée, en retirer les piles.
• Si le liquide des piles fuit, prendre soin de bien essuyer tout le
liquide présent à l’intérieur du compartiment des piles, et de
remplacer ces dernières par des neuves.
(2) Utilisation de l’unité de télécommande
• Pointer l’unité de télécommande vers le récepteur sur le panneau
avant du lecteur de CD, comme indiqué sur le schéma ci-dessous.
• L’unité de télécommande peut être utilisée depuis une distance de
jusqu’à 8 mètres, en ligne droite, du lecteur de CD. Cette distance
est cependant raccourcie s’il y a une obstruction entre l’unité de
télécommande et le récepteur, ou si le faisceau de lumière est
incliné.
• L’unité de télécommande a les mêmes fonctions que l’appareil
principal, mais les opérations suivantes ne peuvent pas être faites.
✽ La mise sous tension et hors circuit.
Précautions à prendre pendant l’utilisation
• Ne pas appuyer en même temps sur les touches de l’appareil
principal et de l’unité de télécommande. Cela pourrait provoquer un
fonctionnement défectueux.
• Vous ne pourrez pas agir avec la télécommande si le capteur de la
télécommande (REMOTE SENSOR) est exposé au soleil ou à une
lumière trop forte ou s’il y a un obstacle entre la télécommnade et
la lecteur de CD.
RC-258
Capteur de télécommande
(REMOTE SENSOR)
Gauche 30°
Droite 30°
LECTURE EN UTILISANT L’UNITE DE TELECOMMANDE
11
Page 39

39
FRANCAIS
TELECOMMANDE RC-258
Réglage du mode programme
• Pour rechercher un programme, enfoncer la touche PROG/DIRECT,
puis les touches de numéro de plage (1 à 10 et +10).
• La télécommande est normalement réglée en mode direct.
Utiliser cette commande pour régler le niveau
de sortie de la borne de sortie VARIABLE.
Le volume augmente quand la touche “+” est
enfoncée et diminue quand la touche “–” est
enfoncée.
• Sélection de disque
Utiliser la touche DISC SELECT et les touches numériques pour
sélectionner le numéro du disque à lire.
“–” apparaît sur la section de numéro de disque de l’affichage
pendant 2 secondes lorsque la touche DISC SELECT est enfoncée.
Appuyer sur la touche numérique correspondant au numéro de
disque à lire pendant que “–” est affiché pour sélectionner le
numéro de disque.
Les numéros de plage sont sélectionnés si les touches numériques
sont enfoncées pendant que “–” n’est pas affiché sur la section de
numéro de disque de l’affichage.
• Sélection directe
Normalement, la recherche directe est possible en enfonçant
simplement les touches des numéros désirés.
• Sélection de programme (pendant la lecture, la plage en cours
de lecture est programmée comme première plage.)
Enfoncer la touche PROG/DIRECT puis enfoncer les touches
numérotées.
Par exemple, pour programmer les plages numéros 3, 11 et 5,
enfoncer PROG/DIRECT / 3 / +10 et 1 / 5.
Pour annuler le programme, enfoncer la touche PROG/DIRECT.
• Sélection des numéros de plage
Pour les numéros de plage inférieurs à 10, enfoncer simplement la
touche correspondante. Pour des numéros de plage supérieurs et
égale à 11, enfoncer +10, puis enfoncer les touches numérotées.
Par exemple, pour le numéro de plage 22, enfoncer deux fois +10,
puis 2.
• Volume
La commande de volume de l’appareil fonctionne quand les
touches de volume sont enfoncées. Le volume peut être contrôlé
en regardant la position de la commande.
• Saut de disques
La touche DISC SKIP +, – ne fonctionne pas dans le mode aléatoire
et le mode de programme.
Pendant la lecture aléatoire séquentielle de disque, lorsque la
touche DISC SKIP + est enfoncée, le disque suivant est lu en ordre
aléatoire.
• Volume
Le niveau de sortie de la borne de sortie VARIABLE peut être
changé.
Quand la touche de volume est enfoncée, “–” apparaît dans la
section de temps (TIME M) (minutes) de la fenêtre d’affichage et le
niveau apparaît dans la section des secondes (S). Le volume peut
être changé entre un maximum de “00” et un minimum de “–12”
par pas de 12, d’environ 1,5 dB par pas.
• L’indicateur TIME indique la durée écoulée de la piste en cours
de lecture, la durée restante pour la piste actuelle et la durée
restante pour toutes les pistes qui doivent encore être
reproduites.
Normalement, le total du temps écoulé de la piste en cours est
affiché. Appuyer sur la touche une fois provoque l’apparition de
l’indicateur “EACH” “REMAIN”, qui montre le temps restant à
parcourir sur cette piste. Lorsque la touche est enfoncée de
nouveau, les indicateurs de temps “TOTAL”, “REMAIN” et “–”
s'allument, et le numéro et le temps restant de toutes les pistes
encore à lire sur le disque s'affichent. Appuyer sur cette touche
encore une fois éteint l’indicateur “TOTAL”“REMAIN” et
provoque l’apparition du temps écoulé sur la piste en cours.
• Pendant la lecture, le temps restant total est le temps restant
pour le disque. Pour la lecture programmée, le temps restant
pour le programme est seulement affiché quand les plages
programmées sont toutes sur le même disque.
“– – – –” est affiché lorsque des plages sur plus d’un disque
sont programmées.
• Au cas où la durée totale de lecture des pistes programmées
dépasse 99:59, “– –: – –” s’affiche.
Touche de apertura/cierre (5 OPEN / CLOSE)
Touche de aléatoire (RANDOM)
Touche de répétition (REPEAT)
Touches de numéro de plage (1 à 10)
Touche de lecture (1 PLAY)
Touche de pause (3 PAUSE)
Touche d’arrêt (2 STOP)
Touche de recherche automatique en arrière (8)
Touche de recherche automatique en avant (9)
Touche de mode durée (TIME)
Touche de programmation/sélection directe (PROG/DIRECT)
Touche de sélection de disque (DISC SELECT)
Touche d’appel (CALL)
Touche de +10 (+10)
Touche de saut de disque + (DISC SKIP +)
Commandes de volume + (VOLUME +)
Touche de saut de disque – (DISC SKIP –)
Commandes de volume – (VOLUME –)
Touche de recherche manuelle en avant (7)
Touche de recherche manuelle en arrière (6)
Page 40

40
FRANCAIS
1. Manipulation des compact discs
• Ne pas salir les compact discs avec des traces de doigts, de
l’huile, de la poussière ou d’autres substances. Si un disc est
sale, l’essuyer avec un chiffon sec et doux.
• Ne pas nettoyer des compact discs avec de la benzine, un
diluant, de l’eau, des produits pour disques en aérosol, des
agents anti-statiques, un chiffon au silicium ou substances
similaires.
• Faire particulièrement attention de ne pas rayer la face arrière
d’un compact disc en le retirant de son boîtier ou en l’insérant
dans son boîtier.
• Ne pas courber les compact discs.
• Ne pas appliquer de force aux compact discs.
• Ne pas essayer d’agrandir le trou centreal d’un disc.
• Ne pas écrire sur la face (imprimée) portant l’étiquette du disc
avec un stylo ou un crayon.
• Si un CD est apporté dans une pièce chaude depuis un endroit
froid, de la condensation peut se former sur la surface du disc.
Ne pas essayer de sécher le disc avec un séchoir, etc.
2. Rangement des compact discs
• Après la lecture, toujours retirer le disc du lecteur.
• Pour éviter qu’un compact disc se salisse, se raye, se déforme,
etc., toujours le ranger dans son boîtier.
• Ne pas ranger les compact discs dans les endroits suivants.
1) Endroits pendant longtemps sous les rayons directs du soleil.
2) Endroits où l’humidité est élevée ou très poussiéreux.
3) Endroits exposés à la chaleur provenant d’un chauffage ou
appareil similaire.
Le tiroir n’ouvre/ferme pas quand la touche 5 OPEN/CLOSE est
enfoncée.
• L’interrupteur d’alimentation est-il activé?
Après qu’un disc est chargé, l’affichage “0 00 00M 00S” est activé.
• Le disc est-il correctement chargé? ………Voir page 28, 30, 40.
La lecture ne commence pas lorsque la touche 1 PLAY est
enfoncée.
• Le disc est-il sale ou rayé? …………………………Voir page 40.
Il n’y a pas de son ou le son est déformé.
• Le cordon de sortie est-il correctement
raccordé à l’amplificateur? …………………………Voir page 29.
• Le son redevient-il normal lorsque les touches de
l’amplificateur sont réglés ou si le dispositif d’entrée
correct est sélectionné?
Le capteur ne passe pas au point spécifié pendant la recherche.
• Le disc est-il sale ou rayé? …………………………Voir page 40.
La lecture programmée est impossible.
• La méthode utilisée pour la programmation
et l’exécution est-elle correcte? …………………Voir pages 32.
Le lecteur ne fonctionne pas correctement lorsque l’unité de
télécommande est utilisée.
• Les piles dans l’unité de télécommande
sont-elles épuisées? …………………………………Voir page 38.
• L’unité de télécommande est-elle située
trop loin du lecteur de CD? …………………………Voir page 38.
AUDIO
Nombre de canaux: 2 canaux
Caractéristiques de fréquence
: 2 ~ 20.000 Hz
Gamme dynamique: 100 dB 98 dB
Rapport S/B: 112 dB 108 dB
Distorsion de haute fréquence
: 0,0025% (1kHz) 0,003%
Séparation: 98 dB 96 dB
Pleurage et scintillement: Inférieur aux limites mesurables
(±0,001% crête pondérée)
Tension de sortie: Variable 0,2 ~ 2,0 V
DISCS UTILISES Des disques compacts audio
12 cm et 8 cm sont utilisés.
GENERALITES
Alimentation:
60 Hz, la tension est indiquée sur
l’étiquette des caractéristiques techniques
Consommation en courant: 14 W
Dimensions extérieures: 434 (W) x 115 (H) x 392 (D) mm
(17-3/32” x 4-17/32” x 15-7/16”)
Poids: 6.3 kg (13.1 lbs.) 6.3 kg (13.1 lbs)
DCM-280
DCM-380
FONCTIONS ET AFFICHAGES
Fonctions: Cinq disques peuvent être utilisés,
Sélection directe de plage,
Sélection de programme,
Lecture aléatoire, etc.
Affichages: No. de disc, No. de piste,
durée (mn., s.),
lecture, pause, répétition,
lecture aléatoire, etc.
Autre: Jack de casque (niveau variable)
UNITE DE TELECOMMANDE RC-258
Méthode de télécommande
: Système à impulsions infrarouges
Alimentation: 3 V CC, deux piles R6P
(tamaño standard AA)
Dimensions extérieures: 50 (W) x 175 (H) x 18 (D) mm
(1-31/32” x 6-57/64” x 45/64”)
Poids: 100 g (3 oz)
(y compris les piles)
✽ Aux fins d’amélioration du produit, la conception et les caractéristiques techniques sont susceptibles de modification sans préavis.
Même s’il semble qu’il y a un problème, vérifier soigneusement les points suivants.
COMPACT DISCS
12
DES PROBLEMES? VERIFIER LE LECTEUR POUR EN DETERMINER LA CAUSE
13
CARACTERISTIQUES TECHNIQUES
14
Page 41

Printed in China 511 3959 001
16-11, YUSHIMA 3-CHOME, BUNKYOU-KU, TOKYO 113-0034, JAPAN
Telephone: (03) 3837-5321
Page 42

WARNING
• TO PREVENT FIRE OR SHOCK HAZARD, DO NOT USE THIS PLUG WITH AN EXTENSION CORD, RECEPTACLE OR OTHER OUTLET
UNLESS THE BLADES CAN BE FULLY INSERTED TO PREVENT BLADE EXPOSURE.
• TO PREVENT FIRE OR SHOCK HAZARD, DO NOT EXPOSE THIS APPLIANCE TO RAIN OR MOISTURE.
The lightning flash with arrowhead symbol,
within an equilateral triangle, is intended to
alert the user to the presence of uninsulated
“dangerous voltage” within the product’s
enclosure that may be of sufficient
magnitude to constitute a risk of electric
shock to persons.
CAUTION:
TO REDUCE THE RISK OF ELECTRIC
SHOCK, DO NOT REMOVE COVER (OR
BACK). NO USER-SERVICEABLEPARTS
INSIDE. REFER SERVICING TO QUALIFIED
SERVICE PERSONNEL.
The exclamation point within an equilateral
triangle is intended to alert the user to the
presence of important operating and
maintenance (servicing) instructions in the
literature accompanying the appliance.
CAUTION
RISK OF ELECTRIC SHOCK
DO NOT OPEN
IMPORTANT SAFETY INSTRUCTIONS
01) Read these instructions.
02) Keep these instructions.
03) Heed all warnings.
04) Follow all instructions.
05) Do not use this apparatus near water.
06) Clean only with dry cloth.
07) Do not block any ventilation openings. Install in accordance with the manufacturer’s instructions.
08) Do not install near any heat sources such as radiators, heat registers, stoves, or other apparatus (including amplifiers) that produce heat.
09) Do not defeat the safety purpose of the polarized or grounding-type plug. A polarized plug has two blades with one wider than the other.
A grounding type plug has two blades and a third grounding prong. The wide blade or the third prong are provided for your safety. If the
provided plug does not fit into your outlet, consult an electrician for replacement of the obsolete outlet.
10) Protect the power cord from being walked on or pinched particularly at plugs, convenience receptacles, and the point where they exit
from the apparatus.
11) Only use attachments/accessories specified by the manufacturer.
12) Unplug this apparatus during lightning storms or when unused for long periods of time.
13) Refer all servicing to qualified service personnel. Servicing is required when the apparatus has been damaged in any way, such as
power-supply cord or plug is damaged, liquid has been spilled or objects have fallen into the apparatus, the apparatus has been exposed
to rain or moisture, does not operate normally, or has been dropped.
This appliance shall not be exposed to dripping or splashing water and that no object filled with liquid such as vases ahall be placed on the
apparatus.
511 4006 005
 Loading...