

Page 1

P
HOENIX
TM
P
Pouch / Roll Laminator
Operators
TM
HOENIX
44 Laminator
Manual
Model ML44
REV C
Page 2

TABLE OF CONTENTS
S
•
OVERVIEW 3
•
SAFETY INFORMATION 4
•
SET-UP AND ELECTRICAL REQUIREMENTS 5
•
STAND ASSEMBLY (OPTIONAL) 6
•
ROLLER KIT INSTALLATION (OPTIONAL) 7
•
ROLLER GAP CONTROL KNOB, REAR PANEL 8
•
OPERATIONAL CONTROL PANEL 9
•
MOUNTING USING A HEAT ACTIVATED MOUNTING BOARD 10
•
MOUNTING AND LAMINATING USING A POUCH BOARD 11
•
ENCAPSULATING USING A FLEXIBLE POUCH 12
•
USING ROLL FILMS IN A PHOENIX 13
•
CLEANING YOUR PHOENIX LAMINATOR 14
•
TROUBLESHOOTING GUIDE 15
•
TECHNICAL SERVICE / REPAIR CENTERS 16
•
MOUNTING AND LAMINATING TERMS 17
•
TECHNICAL SPECIFICATIONS 18
•
WIRING DIAGRAM 19
•
PARTS LIST 20
•
LIMITED WARRANTY 23
•
PHOENIX SUPPLIES 24tor
PHOENIX 44 LAMINATOR
Page 3
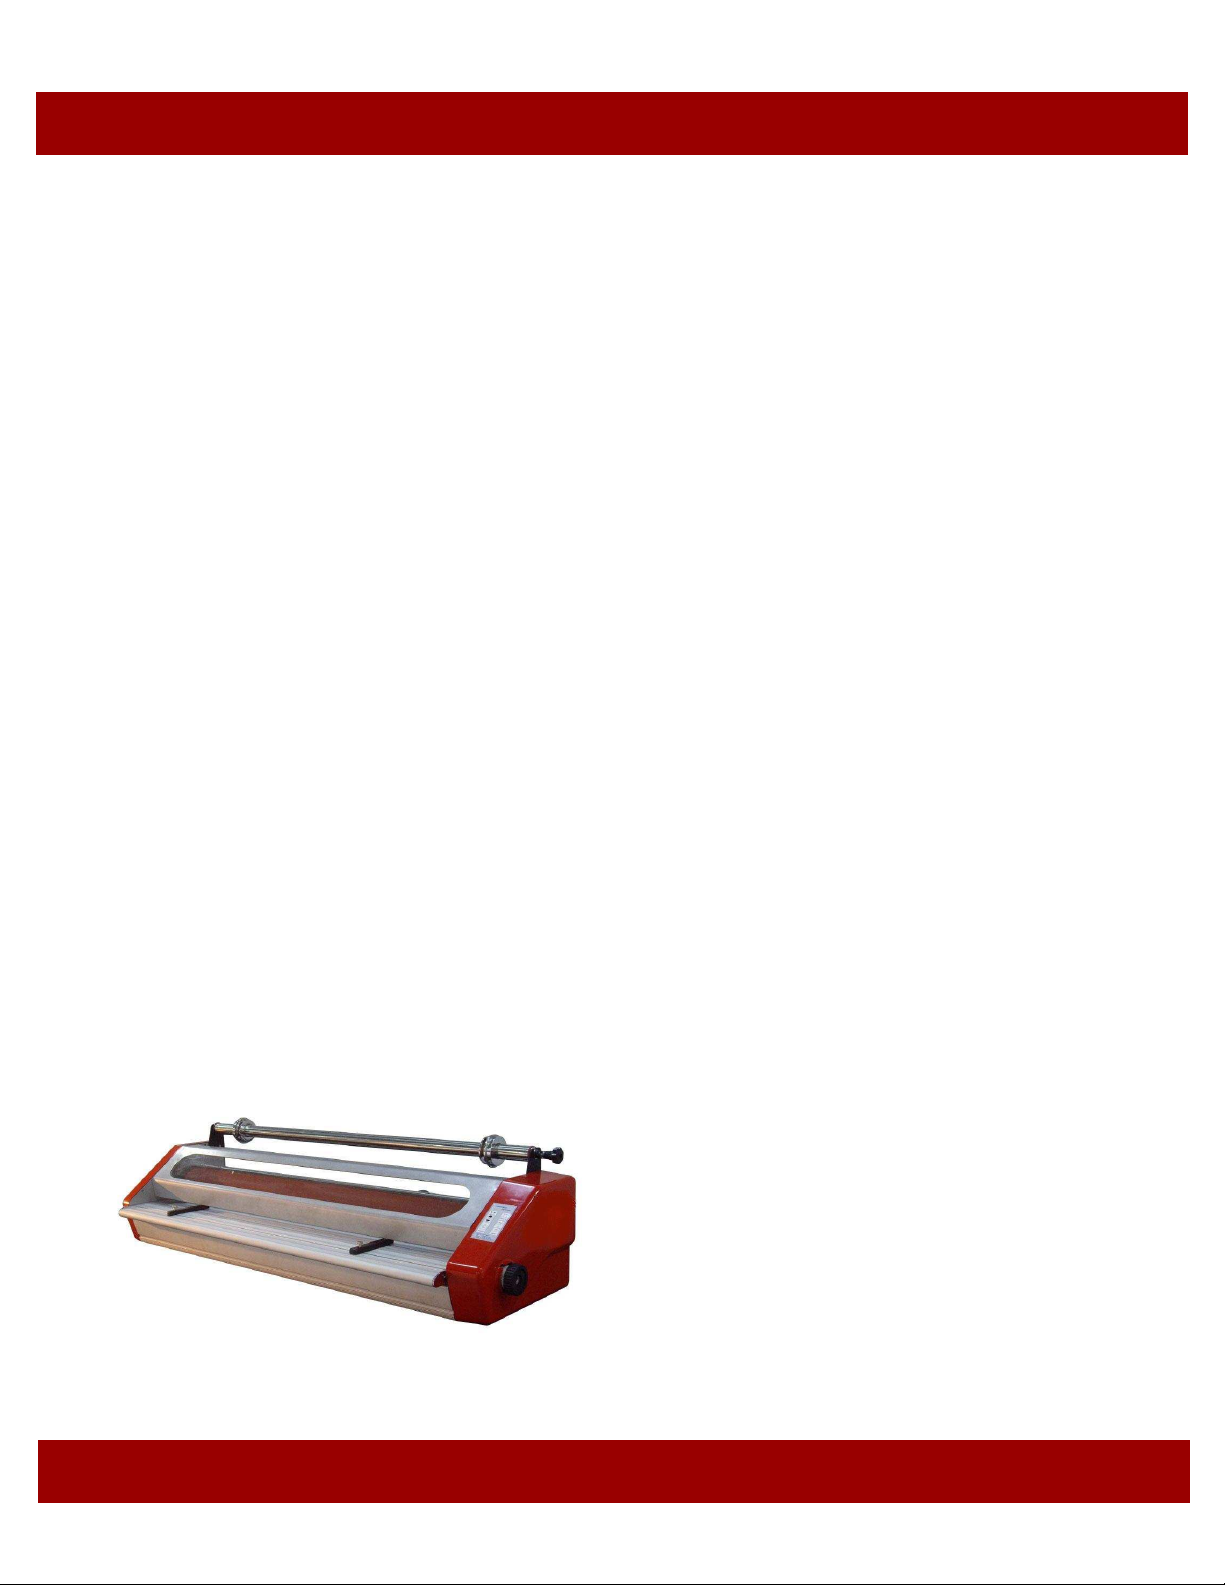
Owner’s Manual Overview
Thank you for purchasing a PHOENIX
laminator. We have designed the PHOENIX
Laminator to give you years of reliable
service. As you become familiar with the
PHOENIX laminator, you will appreciate the
high quality of its production and the
excellence in its engineering design.
By following the guidelines for proper care
and use of the PHOENIX laminator, you
can depend on many years of trouble-free
profitability from your investment.
The purpose of this manual is to outline
materials and processes. This manual will
show you how to use PHOENIX supplies
with your laminator to create signs,
displays, and flexible graphics with
professional results.
The manual includes instructions of
various laminating procedures, which are
meant to give you comprehensive
information needed for the efficient use of
your laminator.
Please read and fully understand the
entire manual before proceeding to
use your laminator.
MOUNTING AND LAMINATING USE
Your Phoenix Laminator has been designed to
be used with pouch boards, thermal laminating films and flexible pouches. When using
pouch boards and film pouches, you are able
to laminate and encapsulate prints in one
step. You may also use roll film products and
the PHOENIX has been tested and laminates
well with polyester based films with low temperature adhesives (I.e. adhesive which work
below 200 degrees). For other materials, you
will have to test those films to determine the
best settings and applicability of those products.
WARNING! This laminator is designed
for mounting and laminating. Any use
other than the intended may cause
damage to the laminator or physical
harm to the user.
WARNING! Any unauthorized changes or
modifications to this unit without our prior
written approval will void the user’s warranty
and will transfer health and safety obligations
to the user.
LIABILITY STATEMENT
The details given in this manual are based on
the most recent information available to us.
They may be subject to change in the future.
We retain the right to make changes to the
construction or the design of our products
without accepting any responsibility for
modifying earlier versions.
CAUTION! Please pay attention to all passages marked this way. This information is
vital to preventing user injury and/or damage
to the unit. Failure to follow this information
could void the user's warranties and transfer
all safety obligations to the user.
PHOENIX 44 LAMINATOR
3
Page 4

S
AFETY
I
NFORMATION
When using electrical appliances, basic
precautions should always be taken to reduce the risk of electrical shock and injury
to persons, including the following:
1. Read all instructions before connecting
or operating this unit.
2. Retain this Owners Manual for future
reference. For technical assistance
beyond what is covered in this manual
contact Technical Service.
3. Save your carton! PHOENIX laminators
are shipped in special cartons and should
be used in case your PHOENIX laminator
should ever require service or need to be
transported.
NOTICE! Failure to return machines
properly packed in original packaging
will impose a fifteen percent
restocking fee plus costs to repair
shipping damage. Contact Technical
Service for a return authorization
(see WARRANTY AND AUTHORIZED
REPAIR CENTERS).
4. Do not use the laminator for other
than its intended use.
5. The Laminator case may be cleaned
with a lint-free cloth, lightly
dampened with a mild soap and
water solution. Do not use spray-on
cleaners.
NOTE: Disconnect the laminator from
the main power supply before
cleaning!
6. Do not immerse any part of the
laminator in water or other liquids..
7. The laminator's location or position should
not interfere with its proper ventilation. Do
not install or place in a built-in enclosure
such as a bookcase.
8. Do not operate the laminator with a
damaged cord or plug, or after the laminator
has been dropped or damaged in any
manner. If purchased in U.S./Canada,
return the laminator to your ADEMCO reseller for
examination, repair or adjustment.
8. Do not let the cord hang over the edge of a
counter/bench or touch hot surfaces.
9. Always unplug the laminator when it is not
in use for a long period.
10. This unit should only be connected to a
power supply outlet of the voltage,
amperage, and frequency marked on the
rear panel. The laminator has a grounded
plug (three prongs). To reduce the risk of
electrical shock, this plug is intended to fit
only a grounded outlet of the proper
amperage, and in only one way.
If the plug does not fit in the outlet, contact
a qualified electrician.
WARNING! Do not modify the plug in
any way.
4
PHOENIX 44 LAMINATOR
Page 5

S
ET-UP AND
E
LECTRICAL
R
EQUIREMENTS
The PHOENIX 44 is a professional laminator
designed for ease of use. The process speed
and temperature have been preset to eliminate
operator guesswork. The factory setting will
facilitate good quality results using the
Flexible Pouches and Pouch Boards using low
temperature adhesives.
The PHOENIX 44 can handle Flexible Pouches
and Pouch Boards up to 44 inches (1120mm) wide.
Please familiarize yourself with machine
operation before installation, operating the
Control Panel and the Nip Control Knob.
Installation of your PHOENIX Laminator
Please read and fully understand the entire manual
before proceeding to use your laminator.
Without the PHOENIX Stand, your PHOENIX
laminator must be lifted and carried to the place
where it will be used. This should be done by at least
two people, one on each side. Grasp the machine
8-10 inches (20cm-25cm) from the side. It should
only be placed on a sturdy, clean, flat, level surface
able to support 150 lbs. (70kg). See Stand
instructions.
Keep the area around your laminator clear with
adequate space around it so you can feed, receive
and trim mounted and/or laminated images.
Unpacking your Laminator
1. Open the box, and lift the machine out (at least
two persons necessary!). Grasp the machine
8"-10" (200mm-250mm) from either side, at
the bottom metal parts. Be careful! The
polyethylene bag is slippery!
2. Place the machine on the work area described
above.
3. Remove the protective molded foam.
4. Remove the polyethylene bag.
5. Inspect the machine for any physical damage
(if damage does exist, report this to the Freight
Company on the BILL OF LADING. Contact
Your Dealer to determine if a replacement machine
should be shipped to you.
NOTICE! Retain original packaging.
Failure to return machines properly packed in
original packaging will impose a fifteen
percent restocking fee plus costs to repair
shipping damage. Contact Technical Service
for Return Authorization (see rear cover).
Setting up your Laminator
The PHOENIX laminator should be installed
next to a power/main outlet. We do not
recommend using an extension cord, but if
needed, make sure the cord rating meets or
exceeds the machine rating.
The plug and the outlet must be easily
accessible. Please ensure that you plug your
laminator into a grounded, three-prong
outlet. Please ensure that the total load of the
other items using the same circuit breaker do
not exceed its breaking value.
The US versions of the PHOENIX machines
are provided with a fixed power cable and
NEMA 5-20 plug.
Use 120Vac 20A grounded outlet
only.
110V 20 amp outlet
Using your PHOENIX 44
Plug the power cable into the grounded outlet
with appropriate service as described above.
Turn on power with main power switch. Roller
will turn continuously while power is on.
Depress the Heat switch and wait approximately 20 minutes for the unit to reach its
operating temperature. Also turn the Speed
on and set the Control Knob to zero so that
the roll heats uniformly. When Ready LED indicator is constantly lit, the PHOENIX laminator is ready for use.
CAUTION! Set the Control Knob to the
“Open” position when not in use.
NOTE: The laminator may emit vapors the
first few times it is used. This is normal and
will cease after several minutes of use.
PHOENIX 44 LAMINATOR
5
Page 6

S
TAND
Tools Required
Philips head screwdriver
4mm Allen wrench
14mm wrench or adjustable wrench
Stand Kit Contents (Figure 1)
(2) Side frames
(2) Cross straight supports
(8) 14mm Phillips screws & nuts
(4) 4mm Allen screws
A
SSEMBY AND
S
ET-UP
(O
PTIONAL
)
Assemble cross supports (Figure 2)
Attach the cross supports to the
side frames. Position the nuts on
the inside of the stand. Leave
the bolts finger tight until all
of the stand has been assembled
in Figure 3. Then tighten all of the
screws securely.
Insure all of the bolts are
tightened before attaching the
stand to your Phoenix laminator.
Attach stand to Phoenix laminator
Place your Phoenix Laminator
on a flat secure surface. Rotate
the laminator gently onto the back
panel (do not pinch the power cord).
Having one person holding
Figure 1
Figure 2
Figure 3
6
6
the laminator, remove the feet from
the bottom of the laminator and
attach the stand with
the 4mm screws supplied. The
angled side is the back. Tighten
securely. Then with 2 people lift
the Phoenix into position (Figure 4).
PHOENIX 44 LAMINATOR
Figure 4
Page 7
R
OLL
Tools Required
Philips head screwdriver
4mm Allen wrench
14mm wrench or adjustable wrench
Roll Kit Contents
K
IT
A
SSEMBLY
(O
PTIONAL
)
(1) Dispensing Bar with tensioner
(2) Dispensing bar Support brackets
(1) Idler bar with 4mm allen screws
IMPORTANT! - Unplug you laminator
before installing the Phoenix Roll Kit
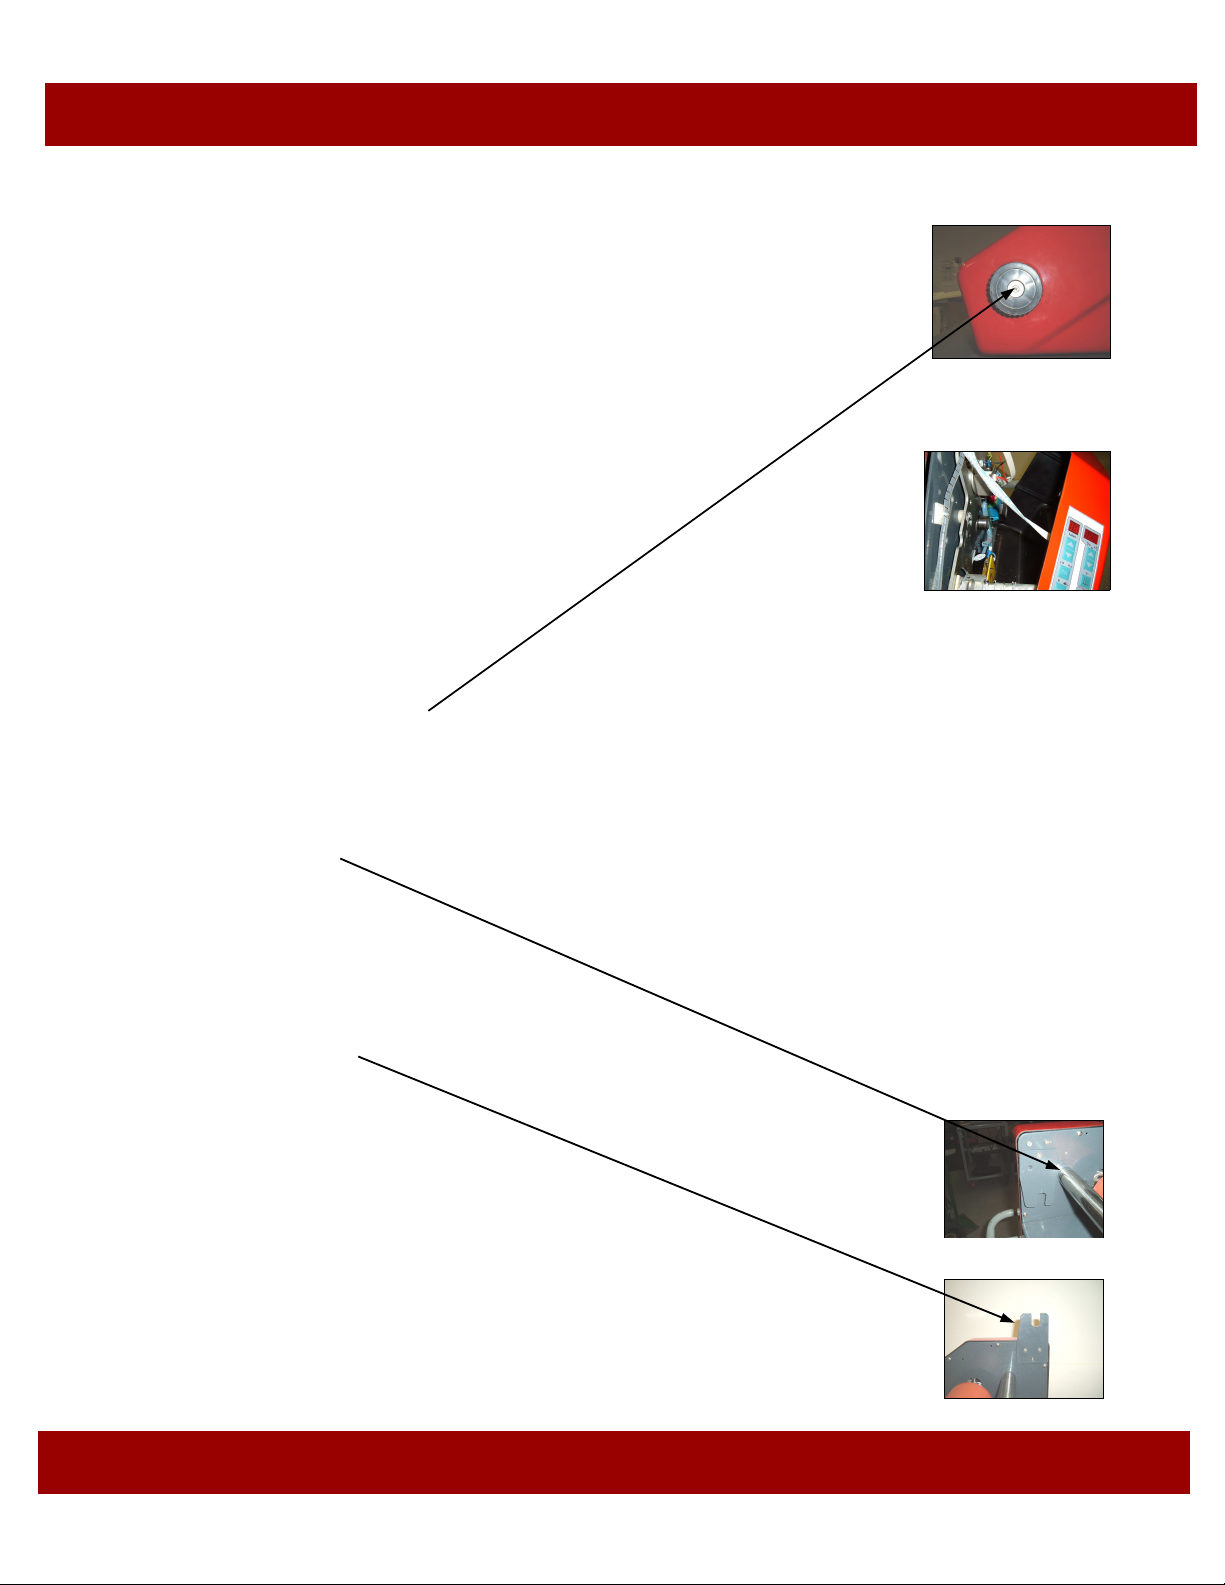
Remove the side panels
Lower the rollers to the closed or zero position.
Remove the roller gap control knob by taking off the
center cover of the Control Knob and unsrewing the
philips screw in the middle of the Control Knob (Figure 1)
and side panels gently and angle from the back
as the control panel will be attached to the circuit board
on the side frame (Figure 2).
Install Idler Bar (Figure 3)
Locate the pre-drilled holes in the sideframe in back of
Figure 1
Figure 2
the rollers. Attach the idler roll threading the 4mm
bolt through the hole in the side frame and tighten
with the corresponding nut. Repeat on the other side.
Install Roll holder (Figure 4)
Remove the upper back panel. Install roll
holder brackets with the 3 phillips screws.
Mount the roll holder in the bracket.
Replace the side panels and Control Knob.
Instructions for running cold films on Page 13
Figure 3
Figure 4
PHOENIX 44 LAMINATOR
7
Page 8

R
OLLER GAP CONTROL KNOB
The Control Knob (see figure 1A) is located on
the right hand side of the laminator and should
be operated from this side. The control knob is
used to adjust the height of the rollers.
The Nip Settings are 1/4"(6mm), 3/16" (5mm),
1/8" (3mm) and 1/16" (1.5mm) correspond to
Pouch Board thickness. There is also a closed
position - 0" (0mm) for film and paperboard
applications. Select the setting that indicates
the thickness of the material you are using.
To Operate the Nip Control Knob
1. Grasp it with your right hand and push
in approximately 1/4" (6mm).
2. Once the knob has disengaged from the
stop, it may be rotated forward or
backward (clockwise or counterclockwise, as
viewed from the right hand side of the unit).
3. Once the indicator has reached the desired
nip setting, release the knob or gently
pull the knob out to lock it in place. See
Figure 1A.
Figure 1A
Caution! Set the Nip Control Knob to
the “Open” position when not in use.
Note: When the machine is warming
up, set the control to the zero or
closed position.
REAR PAN
R
EAR
To turn the machine on and off, use the
main breaker switch below in figure 1B.
“O” is off and “1” is on.
Figure 1B
P
ANEL
Note: Always switch the power off when the
machine is not in use. The Control Panel is
always powered when the main power is
on.
In case of Emergency: Turn off the main
power breaker or unplug the machine
from the power outlet.
Caution! Turn off the main power
breaker and unplug the machine when
removing the side panels and performaing maintenance on your Phoenix.
8
PHOENIX 44 LAMINATOR
Page 9

O
PERATIONAL CONTROL
The Control Panel (see Figure 3) is located on the top right of the machine. A
diagram of the Control Panel is shown
in Figure 2.
Figure 2
Speed Control
The speed of the rollers is controlled in
the SPEED section of the Control Panel.
1. To turn the rollers on, press the
‘On/Off’ pad once. The Green LED
light will turn on indicating the bottom roller is turning. Note: the top
roller is free spinning as with all high
quality laminators. The PHOENIX will
automatically be set to the faster
‘Rabbit’ speed.
2. To adjust the speed of the rollers,
press the ‘Rabbit’ for the faster speed
(approximately 1 foot per minute) or
the ‘Turtle’ (approximately 6 inches
per minute) for the slower speed. All
standard pouches and pouch boards
with inkjet paper up to 11 mils thick
should work on the faster speed. For
thicker materials.use the slow ‘Turtle’
speed. The LED light which is on is
the current speed of the PHOENIX.
P
ANEL
Figure 3
Location of Control Panel
Heat Control
The Heat of the rollers is controlled in the
HEAT section of the Control Panel. When you
turn the PHOENIX on, the heat will be off and
the rollers cold. The LED Light above the
‘On/Off’ switch will be the color red.
1. To turn the heat on, press the ‘On/Off’
pad once. The LED above the ‘On/Off’
the PHOENIX will automatically be set to
the ‘Pouch’ heat setting and the ‘Pouch’
LED will be lit. The LED above the ‘On/
Off’ switch will be Green indicating the
roller is heating. When that light becomes yellow, the PHOENIX is ready to
process your pouch boards.
2. To adjust the heat of the rollers,
press the ‘Pouch’ button when using
pouch boards, mounting boards or flexible pouches. The ‘Pouch’ heat setting is
the higher setting and has a roll face
temperature of 150° Celsius. The Roll
temperature is a lower 90° Celsius (195°
Fahrenheit) for use with standard inkjet
laminating films.
In case of Emergency: Turn off the main
power switch or unplug the machine
from the power outlet. Open the Roller
Gap Control to its fully open position
and remove your work.
PHOENIX 44 LAMINATOR
9
Page 10

M
OUNTING WITH
H
EAT
A
CTIVATED
B
OARDS
Using a Heat Activated Mounting Board
Refer to the instruction sheet packed with
each box of Mounting Boards for specific
information on mounting with a heat activated Boards. All boards can not be thicker
than 1/4” inch and must use low temperature adhesive.
Also, refer to the instruction sheet for
information on Compatible Media, Process
Conditions and technical information.
Place the image to be mounted on the adhesive-coated side of the mounting board
(dull side of the board).
Cover your print with the "cover sheet" as
marked (included with each box of
Mounting Boards or use a sheet of non-stick
silicon paper). If the release paper is
longer, fold over the narrow end to make a
’pocket’ for the board to be inserted into.
Place your board with your print on it into
the fold of the cover sheet.
If you are overlaminating with roll film
while using Phoenix mount boards, do
not use any cover sheets but insure the
laminating film is equal to or wider
than your mount boards.
Set the Roller Gap Control knob to the correct setting that matches the Mounting
Board thickness.
Insert the board into the inlet opening. Ensure the board will enter centered and
straight. A gentle push may be required to
start the board into the laminator.
Hold the edges of the board until it is engaged in the unit and the laminator begins
pulling it on its own.
The board will feed through the laminator and automatically exit at the rear of
the unit.
CAUTION! The board will be hot! Allow it to lie flat while cooling.
CAUTION! USE ONLY WITH HEAT ACTIVATED MOUNTING BOARDS 1/4" (6mm)
THICK OR LESS.
DO NOT USE PLYWOOD, METAL,
CARDBOARD, SHARP OR HARD BOARD
WITH RAGGED EDGES OR ANY TYPE OF
PLASTIC.
MAKE SURE THAT ALL MEDIA FED INTO
THE LAMINATOR IS FREE OF STAPLES,
PAPER CLIPS, OR OTHER HARD
OBJECTS.
Foam board may be cut or trimmed using
a sharp hobby knife such as an X-ACTO
Knife. Lightly score the paper first. Several passes of the knife may be required.
We recommend a professional grade
trimmer with a standard utility knife
blade be used for professional and fast
results.
NOTE:
Ragged cuts or pulling of the foam
board indicates a dull blade.
10
PHOENIX 44 LAMINATOR
Page 11

L
AMINATING WITH
P
OUCH
B
OARDS
Refer to the instruction sheet packed with
each box of Pouch Boards for specific
information on mounting/laminating with a
Pouch Boards.
In addition, refer to the instruction sheet for
information on Compatible Media, Process
Conditions and technical information.
Carefully examine the board to determine
which edge is sealed. There is a 1/8" (3mm)
sealed edge where the laminate film is attached to the board.
Starting at one of the corners, opposite the
sealed edge, gently lift and peel back the film.
Care should be taken not to break the sealed
hinge.
Center the image to be laminated on the
board and lay the film back over it.
Set the Control Knob to the correct setting
that matches the Pouch Board thickness.
Ensure that the PHOENIX rollers are turned on
and set either at the ‘Rabbit’ or ‘Turtle’ speed.
With the Heat is on, set at the ‘Pouch’ setting
and the LED light is Yellow indicating the roll
temperature is ready to use.
Note: If your laminate appears cloudy or
your print is not fully adhered to the
board, adjust the speed to the ’Turtle’
setting and reprocess your pouch board.
Slowly insert the Pouch Board into the inlet
opening. Ensure that the Pouch Board will
enter centered and straight. A gentle push
may be required to start the board into the
laminator.
Hold the edges of the Pouch Board until it is
engaged and the laminator begins pulling it
on its own.
The Pouch Board will feed through the
laminator and automatically exit at the rear
of the unit.
CAUTION! The board will be hot! Allow
it to lie flat while cooling.
If there is any dirt or adhesive on the surface of the board, it can be removed by
dampening a lint free cloth with Isopropyl
Alcohol (IPA) and wiping the surface.
CAUTION! Always use care when using
Isopropyl Alcohol (IPA)! IPA is very
flammable. The flash point of IPA is 11ºC
(51.8ºF). The self-ignition temperature is
400ºF (752ºF).
PHOENIX 44 LAMINATOR
11
Page 12

E
NCAPSULATING WITH
F
LEXIBLE
F
ILM
P
OUCHES
Refer to the instruction sheet packed with
each box for specific information on encapsulating Flexible Film Pouches.
In addition, refer to the instruction sheet for
information on Compatible Media, Process
Conditions and technical information.
The Flexible Pouch consists of two
pieces of film that are hinged at one end,
along a short side. Separate the two pieces
starting at the end opposite the hinge. Take
care not to break the hinged seal.
1. Insert the article to be laminated in the
pouch so there is at least a 1/8" (3.5mm)
board around each of the sides. This
ensures that moisture never reaches the
image.
2. Place the pouch with the image on the
sled included with the Flexible Pouches or
Purchase Sleds separately.
Note: The Sled is a non-stick board used
to assist in the handling of large Flexible
Pouches. It is made of materials that
will not damage or cause excessive
wear to your PHOENIX Laminator.
3. Smooth out any wrinkles with the side of
your hand or a soft flexible squeegee.
4. Tape the leading edge of the pouch to the
sled using masking tape.
5. Adjust the Control Knob to the
3/16" (5mm) setting for the Sled included
with your Dealers Flexible Pouches. (Or set
the thickness to the thickness of the nonstick sled material you are using.)
6. Ensure that the PHOENIX rollers are
turned on and set either at the ‘Rabbit’ or
‘Turtle’ speed. Turn the Heat is on, set at
the ‘Pouch’ setting and wait for the LED light
is Yellow indicating the roll temperature is
ready to use.
Note: If your laminate appears cloudy
or your print is not fully adhered to the
board, adjust the speed to the ’Turtle’
setting and reprocess your pouch
board.
7. Slowly insert the sled with the Flexible
Pouch on top into the inlet opening.
8. Ensure that the sled is centered and
straight. A gentle push may be required to
start the sled into the laminator.
9. Hold the edge of the sled until it is engaged, and the laminator begins pulling it
on its own.
10. The sled should feed through the laminator and automatically exit at the rear of
the laminator.
CAUTION! The Sled will be hot! Allow it
to lie flat and cool before removing the
tape.
If there is any dirt or adhesive on the surface of the board, it can be removed by
dampening a lint free cloth with Isopropyl
Alcohol (IPA) and wiping the surface.
CAUTION! Always use care when using
Isopropyl Alcohol (IPA)! IPA is very flammable. The flash point of IPA is 11(51.8).The
self-ignition temperature is 400(752).
12
PHOENIX 44 LAMINATOR
Page 13

L
AMINATING WITH
R
OLL
F
ILM
Refer to the instruction sheet packed with
each box for specific information on the roll
film you are using. We recommend
using low temperature adhesives on
either a 3 or 5 mil construction.
The Phoenix is designed for roll films to
laminate one side of a print, over-laminate
a mounted print, or simultaneously mount
and laminate using heat activated board.
If you are laminating one-side of a print,
place your print on a sled or non-stick
board. Phoenix sleds are all 3/16” thick.
We recommend starting with the temperature to the ‘Roll’ setting and the Speed to
the ‘Rabbit’ setting.
If you are simultaneously mounting
and laminating using a heat activated
board, we recommend using boards
which use a low temperature
adhesive (i.e. below 160ºF). Set the
temperature to ‘Pouch’ and the speed
to the ‘Rabbit’ setting.
1. Set the Control Knob to the 3/16”
thickness setting.
2. Mount you laminate roll on the top roll
dispensing bar/supply mandrel. Note:
The Roll should be mounted on the
Phoenix such that the film is being
pulled from the bottom of the roll so
that you are looking at the adhesive or
dull sized of the film.
3. Pull the film from the roll, place it behind the idler bar and drape the film over
the top roller and roller nip opening (the
adhesive on the film should begin to ’wetout’ or activate.
4. Using a Threading board (3/16” thick is
supplied with the Phoenix Roll Kit), push
the threading board into the nip of the rollers. Turn the Motor control on and select
either the ‘Rabbit’ or ‘Turtle’ speeds. The
threading board will be automatically
pulled through the Phoenix with your roll
film.
5. Inspect the film on the top roll of the
Phoenix. It should be smooth and taught
against the roll. If it is not, pull the threading board on the back of the Phoenix until
the film smooths out. Once smooth, you
are ready to laminate.
6. Ensure that the PHOENIX rollers are
turned on and set either at the ‘Rabbit’
speed. With the Heat is on, set at the ‘Roll’
setting and the LED light is Yellow indicating
the roll temperature is ready to use.
7. Set the Control Knob to match the thickness of the board you will be using.
8. Insert your board (either the sled with
your print/mounted print/or heat activated
board. with your print into the nip of the
rollers. It will automatically be pulled
through the laminator and over-laminated.
9. If laminating more than one print, insert
it after the first print is done. Check the
film on the roll face first. If it has some
wrinkles, pull you first print unit they disappear and adjust the tension on the dispensing bar to maintain the film being smooth
on the roll face.
10. Trim your print after it exits the Phoenix.
Note: If your laminate appears cloudy
or your print is not fully adhered to the
board, adjust the speed to the ’Turtle’
setting and reprocess your pouch
board.
Caution: Do not trim near the rollers.
Cuts and nicks in the roller can effect
the quality of your laminating and require maintenance. Cuts and nicks in
the roll face are not covered by the
Warranty.
PHOENIX 44 LAMINATOR
13
Page 14

C
LEANING YOUR
PHOENIX L
AMINATOR
Cleaning the Outside of the Laminator:
CAUTION! Disconnect the laminator
from the power supply before cleaning.
The laminator may be cleaned with a lintfree cloth, lightly dampened with a mild
soap and water solution. Do not use a
spray-on cleaner.
Do not immerse any part of the laminator in
water or other liquid.
Do not use an abrasive cleaner, which can
damage the painted surfaces.
Do not allow water or liquids to enter the
electrical circuits, which may cause personal
injury and/or damage the equipment when
power is applied.
Cleaning the Rollers
The laminating rollers of your PHOENIX should
be periodically cleaned of adhesive build up that
might occur during normal operation.
IMPORTANT! Clean the laminating rollers to
prevent adhesive build-up and to ensure quality
output. Adhesive build-up may eventually damage the rollers.
When laminating, a small amount of adhesive
will squeeze out between the laminate films and
onto the top and bottom rollers. This residue
accumulates through normal use and can be
easily cleaned off the rollers.
Use a Cleaning Board for regular cleaning:
A new sheet of 3/16” foam board may be
used to clean the rollers. Simply run the new
board through the machine to remove any
built up adhesive.
1. Turn on the unit. Once the machine has
reached process temperature set the
Control Knob to 3/16" (5mm).
2. Slowly insert the Cleaning Board into the
inlet opening. Ensure that the board enters
centered and straight. A gentle push may
be required to start the board into the
machine. Hold the edges of the board until
it is engaged in the unit and the laminator
begins pulling it on its own.
3. The board will feed through the laminator
and automatically exit at the rear of the
unit.
CAUTION! THE BOARD WILL BE HOT!
Allow the board to lie flat while cooling.
For heavier deposits of adhesive on the
rollers, turn your unit off and let it cool. Rub
the rollers with Isopropyl alcohol and a
Scotchbrite pad to remove the adhesive buildup.
14
PHOENIX 44 LAMINATOR
Page 15

T
ROUBLE-SHOOTING
PROBLEM POSSIBLE CAUSE SOLUTION
The Red LED Light above the
rollers does not come on indicating the Main power
switch is turned on.
The Power cord is not
plugged in fully.
The main breaker is tripped.
The circuit breaker is tripped.
/ T
ECHNICAL
Check the Power cord.
Turn the breaker to the on.
Reset the circuit breaker.
S
ERVICE
Pouch Board is not being
pulled into the PHOENIX or
the motor is making a louder
humming noise or is stalling.
Only after pushing very hard
is the board pulled into the
PHOENIX.
The Quality of the lamination
is poor. There are silvery areas on dark surfaces which
are visable or the edges of
the image are not sealed
well.
The quality of the lamination
shows bubbles or ripples.
The Pouch Board is too thick
for the setting on the Roller
gap control Knob.
The set screw on the roller
gear may be loose
The roller temperature is too
low.
The Speed is too fast.
The Roller pressure is too
low.
The Roller temperature is too
high.
The Speed is too slow.
There is too much pressure.
Change the setting on the
Roller gap control to the next
thicker setting.
Contact Technical Service for
instructions how to tighten
set screw.
Contact Technical Service for
instructions on how to adjust
temperature.
If using the ‘Rabbit’ speed,
try the ‘Turtle’ speed. Otherwise contact Technical Service for instructions on how
to adjust speed.
Adjust the setting on the
Roller Gap Control to the
next narrower setting.
Contact Technical Service for
instructions on how to adjust
temperature.
If using the ‘Turtle’ speed,
try the ‘rabbit’ speed. Otherwise contact Technical Service for instructions on how
to adjust speed.
Adjust the setting on the
Roller Gap Control to the
next thicker setting.
There are wrinkles in either
the flexible pouch or pouch
board.
PHOENIX 44 LAMINATOR
There is too much pressure.
The seal of the leading edge
is not smooth.
Adjust the setting on the
Roller Gap Control to the
next thicker setting.
Re-tape the entire leading
edge smoothly
15
Page 16

S
PARE
P
ARTS
/ T
ECHNICAL
S
ERVICE
Technical Service
If the machine does not reach temperature
or you do not get the results you desire,
please contact your Technical Service
Representative. When calling for Technical
Service, please have the Laminator Serial
Number available.
Please contact your distributor or sales
person for replacement parts.
Your laminator is covered by a one-year
Warranty as described in this manual.
P
HOENIX
North East
Stover Graphics
7A Railroad Avenue Ext.
Beacon Falls, CT 06403
203-729-2846
A
UTHORIZED
Servicing and replacement parts
Service and maintenance must be performed
fully in accordance with the instructions.
Servicing by any unauthorized technician
voids the warranty. A service technician
must use replacement parts specified by
Technical Service.
NOTE! Service Technicians must perform
safety checks after completing any service or
repairs to the laminator.
R
EPAIR
Mid West
Film Source International
13878 Parks Steed drive
Earth City, MO 63045
314-739-4400
C
ENTERS
16
Mid Atlantic
Film Source International
6601 S Laburum Avenue
Richmond, VA 23231
804.226.0400
South
Smooth Finish
2385 Black Rock Drive
Duluth, GA
770.235.9374
PHOENIX 44 LAMINATOR
West Coast
Film Source International
1487 North Main Street
Orange, CA 92867
800.831.8947
Page 17

M
OUNTING
& L
AMINATING
T
ERMS
Cleaning Board:
Board used to capture any adhesive that may be
clinging to the rollers.
Cold Mode:
Heat is off.
Cover Sheet:
Release paper to be placed on the surface of
mounting boards.
Roller Gap Control Knob:
Adjusts the space between the rollers on the
PHOENIX 44.
Flashing Temperature Light:
The machine has not reached temperature.
Film:
A synonym used for laminate. The material used
in the laminating and encapsulating process.
Flexible Pouch:
Plastic Film Pouch for laminating paper.
Heat-Activated Films:
Films with an adhesive activated when heat is
applied. Once applied to an image, the adhesive
forms a strong bond between the laminate and
the image.
Hot Mode:
Heat is on.
Laminator:
A machine used to mount and laminate images.
LED:
Light Emitting Diode (light).
Mounting Board:
An adhesive coated board used for mounting
images.
Nip:
The spot where the top and bottom rollers
meet.
Out-Feed:
The back of the laminator where completed
images emerge.
Pouch Board:
An adhesive coated board with an overlaminate attached.
Pre-Coating:
The process of coating a substrate with an
adhesive mounting film onto which an image
can be mounted.
Pressure-Sensitive Films:
Films with an adhesive that is activated when
pressure is applied, forming a bond between
the protective laminate and the surface of the
image. Used primarily for fast mounting
applications and recommended for heatsensitive thermal and photographic prints.
Release Liner:
The backing on a pressure-sensitive film or
mounting adhesive used to keep the film from
sticking to itself. After peeling the release liner
off, the adhesive layer becomes exposed.
Roller Height:
The space between the rollers.
Sled:
A 3/16” (5mm) non-stick board used to place
flexible pouches to aide the laminating
process.
PHOENIX 44 LAMINATOR
17
Page 18

P
HOENIX
S
PECIFICATIONS
Dimensions
Width 17”
Length 56”
Roll Dimension 4”
Net Weight 145 pounds
Shipping weight 200 pounds
Height 15.25”
Operating Standards
Minimum Speed 6”/minute
Maximum Speed 12”/minute
Minimum temperature 195° Fahrenheit
Maximum temperature 300° Fahrenheit
Roll Core size 3” Inside Dimension (ID)
Maximum Roll size 6” Diameter
Roller Gap/Nip Settings
0 Closed (Rolls touch)
1/16”
1/8”
3/16”
1/4”
Stand Height 30”
Electrics
U.S. Version 110V/60Hz 17A
U.S. Plug Configuration AC Plug 3-Wire NEMA 5-20 Male
International 220V/50Hz 11A
Item Number
ML44
18
PHOENIX 44 LAMINATOR
Page 19

2 3 4
4
3 2 1
Phoenix
wiring diagram
Ademco
N
AC110V
L
N
9
Temp.switch 150 degree, closed normally
8
speed setting plate
control panel
7
heating tube
6
M
motor
5
4
RT heat-sensitized resistance PT1000
3
SR
solid state relay
2
XB junction
1
Q A switch
115V/2000W
YN80-25/110V speed rate 1:500
280V/50A
2P
20A
DZ47-32 25A
1
QA
1
L
2
N
XB
Text
Text
solid state relay
7
heating tube
Kr
5
N
SR
11
control panel
13
t
RT
3
4
8 2
speed setting plate
1 7 5 6
20 18 16 14
C
Title
Number Revision Size
A4
Date: 21-Mar-2008 Sheet of
C:\Documents and Settings\yg\ \
File:
20071212
.DDB Drawn By:
Page 20

P
Laminator
Parts Identification
18
26
22
21
5
HOENIX
19
20
24
23
6
15
10
16
15
14
13
12
Page 21

4
11
8
9
3
17
1
2
7
Page 22

P
HOENIX LAMINATOR PARTS IDENTIFICATION
Part No. Description
25
1
2
3
4
5
6
7
8
9
10
11
12
13
14
15
16
17
18
19
20
21
22
23
24
25
26
Roller
Silicon Roller
Drive Motor
Mother Board
Front Table
Roller up-down Clamp
Speed Controller
Chain
SSR
Left Arm
Right Arm
Heating Tube
Stand for Heating Tube
Cover
Press Spring
Terminal Block
Overheating Protection
Supporting Roll for Film
End-Caps(Big)
Knob
Localizer
Left Frame
Right Frame
Heat-Shield
Contactor(Breaker)
Plank
Page 23

L
IMITED
W
ARRANTY
The Manufacturer warrants to the original
consumer purchaser that each new PHOENIX
Laminator which proves defective in materials
or workmanship within the applicable warranty
period will be repaired at our option or
replaced without charge.
The Applicable Warranty period for the New
PHOENIX Laminators shall be one year on
parts and three months on labor and rollers
from date of purchase.
After three months and for up to one year
after the date of purchase, the manufacturer
will complete Warranty repair labor at no
charge provided the labor is completed at one
of our Authorized Locations. It is the
responsibility of the original consumer
purchaser to return the PHOENIX laminator to
our Authorized Locations. For a list of
Authorized Repair Locations, please contact
your Dealer.
All Warranty Repairs must be approved in
advance by Technical Service. If returning the
PHOENIX for approved Warranty repairs, it is
the consumer’s responsibility to insure the
machine is packaged in its original packing to
minimize the chances of any shipping damage.
Shipping damage is not covered under this
Warranty and is a matter between the
consumer and the freight company used to
transport this back to the authorized repair
center. If you need proper packaging, your
Dealer can supply such packaging at a
nominal cost.
This Warranty extends to and is enforceable
by only the original consumer purchaser, and
only for the period (during the applicable
term), which the product remains in the
possession of the original consumer purchaser.
"Original consumer purchaser" means the
person who first purchased the product
covered by this warranty. It does not apply if
it is found that at any time the equipment has
not been used for its intended purpose.
Any unauthorized changes or modifications to
this unit without our prior written approval will
void the user's Warranty.
The applicable warranty period for Demo
Equipment shall vary, not exceeding the
maximum warranty period stated herein. All
Demo Equipment comes with a specific
warranty, which will be stated at the time of
purchase. If warranty period is not detailed in
writing, there is no remaining warranty.
Please ask your dealer or sales
representative for details.
Used Equipment or non-Demo equipment is
sold on an "AS IS" basis with No Warranty.
For more information regarding this warranty,
please contact your distributor.
The information contained in this document is
subject to change without notice.
The Manufacturer assumes no responsibility
for any errors that may appear in the Owner’s
Manual. Nor does it make expressed or
implied warranty of any kind with regard to
this material including, but not limited to, the
implied warranties of merchantability and
fitness for a particular purpose.
The Manufacturer shall not be liable for incidental or consequential damages in connection with, or arising out of the furnishing, performance, or use of this document and the
program material, which it describes.
PHOENIX 44 LAMINATOR
23
Page 24

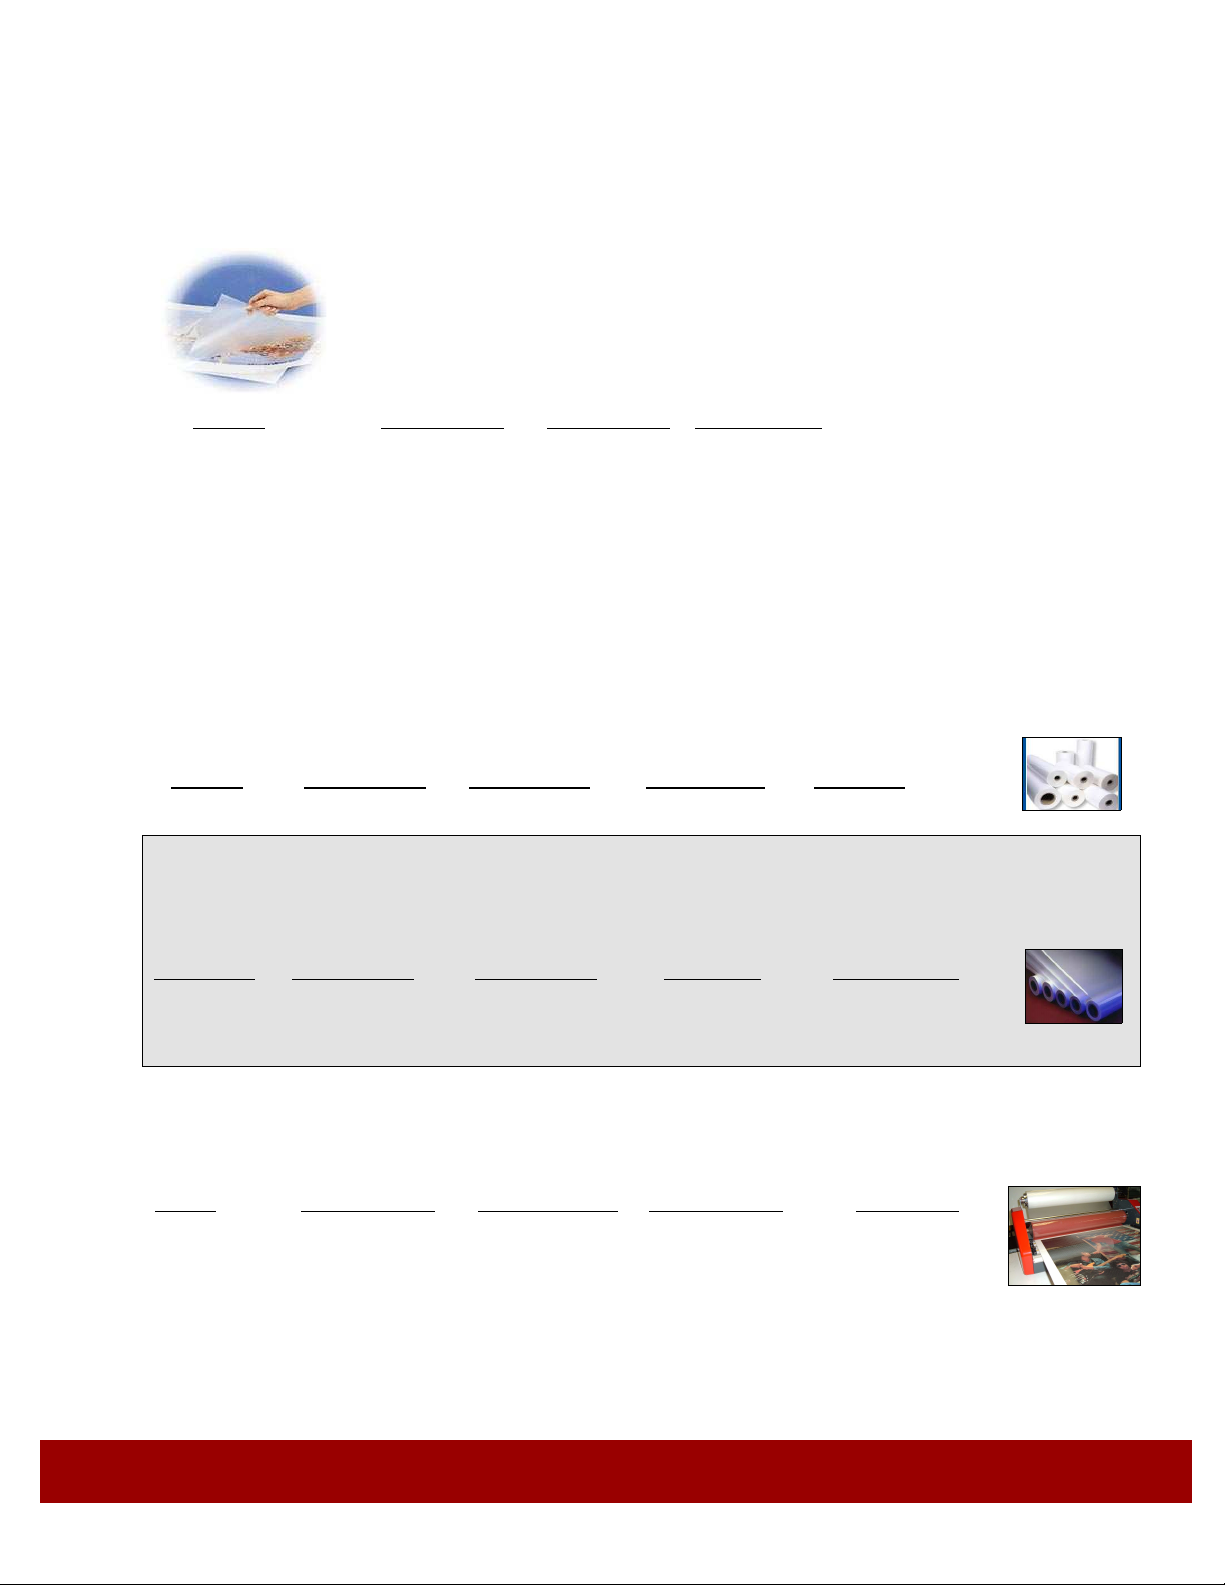
Phoenix Pouch Mounting Supplies
We have the widest range of pouch boards to use on any pouch mounter-laminator.
The pouch boards listed on this page are our standard pouch boards. We can also make
pouch boards from a variety of boards. We can also customize the adhesive to be compatible with the most medias. Whatever your customer’s need, the chances are great
that you can meet their needs with your pouch mounter-laminator.
special request, give us a call and we’ll make those jobs fast and easy!
When you have that
P
HOENIX
black foam board. Choose from our low temperature adhesive boards or with one
of our over-laminate films attached including: Gloss; Matte non-reflective finish with a
slight texture which is scuff resistant; or Canvas. Mounting board cover sheets have
exclusive insert folded edge. No tape needed! 10/box.
White Foam Pouch Boards
Size Mounting Gloss Matte
9” x 11.5” (MB911WHT) (C911WHT) (M911WHT)
11.5”x17.5” (MB1117WHT) (C1117WHT) (M1117WHT)
18.5” x 25” (MB18WHT) (C18WHT) (M18WHT)
25” x 37” (MB25WHT) (C25WHT) (M25WHT)
37” x 49” (MB37WHT) (C37WHT) (M37WHT)
41” x 61” (MB41WHT)
Black Foam Pouch Boards
25” x 37” (MB25BLK) (C25BLK) (M25BLK)
37” x 49” (MB36BLK) (C36BLK) (M36BLK)
41” x 61” (MB41BLK) (C41BLK) (M41BLK)
™
Pouch Boards
Mount-a-Sign Thin Pouch Boards
low temperature heat activated adhesive available with or without gloss overlaminate film. Rigid enough to stand-up with an easel and can be used with all
pouch laminators. Great for presentations for easy transport. 25/box.
Size Mounting Gloss
9” x 11.5” (601182) (601181)
11.5”x 17.5” (601185) (601184)
18.5”x 25” (601187) (601186)
25” x 37” (601189) (601188)
Available in 3/16” thick white or all
(C41WHT) (M41WHT)
25 mil thick white paper board with
24
P
HOENIX
from 4mm thick white corrugated plastic coated with a heat activated adhesive and a gloss laminate for shortterm signage. Flutes run vertically and the first dimension is the width of the board. (10/box)
12”x18”(CWPB1218) 18”x24”(CWPB1824) 24”x36”(CWPB2436)
18”x12”(CWPB1812) 24”x18”(CWPB2418) 36”x24”(CWPB3624)
Corrugated Plastic Pouch Boards
Pouch Boards made
PHOENIX 44 LAMINATOR
Page 25
Mounting Supplies
Wide Format Pouch Film Supplies
P
HOENIX
Film pouches for roll-up and flexible graphics including items such as blueprints,
menus, maps, banners and other flexible graphics. Low temperature adhesive safe
for use with inkjet media. A Sled is included with each box of 18”x24”, 25”x37” and
36”x48” film pouches. Smooth Matte finish has a write-able surface and the matte
laminate has a textured surface. 25 pouches/box.
Film Pouches
Size Gloss Gloss/Matte Gloss/White
9”x11.5”(50) (601248)
12”x 18” (50) (601247)
18.5”x24.5” (606590)
25” x 37” (606660)
36” x 48” (606780)
P
HOENIX
Roll Films
——— ———–
——— ———–
(608513) (606860)
(608517) (606970)
(608519) (607080)
Cold Mounting Adhesives (double-sided adhesive)
Choose from indoor lo-tack adhesive - good for most inkjet prints—or outdoor adhesives designed for
heavier papers and hard to stick boards such as Gator or Sintra pvc. Both self-wound with a single silicon release liner. Rolls on 3” cores. Lo tack 25” and 51” rolls are 150’ long.
Type 25”x200’ 38”x200’ 41”x200’ 51”x200’
Lo Tack
$
119 (MES25150) $199 (MES38200) $229 (MES41200) $299 (MES51150)
Gloss Thermal Over-Laminate Roll Films
High quality over-laminate films with low temperature adhesive (i.e. 185 - 200 degrees F, operating
temperatures depend on running speed). Films are high grade optically clear polyester with UV absorbers
for maximum protection against fading.
Thickness 25”x200’ 38”x200’ 51”x200’ 61”x200’_
3 mil
5 mil
10 mil
$
45 (IG25203)
$
69 (IG25205)
$
189 (IG25254) $248 (IG38254) $349 (IG51254)
$
62 (IG38203)
$
98 (IG38205) $120 (IG51205)
$
87 (IG51203)
$
95 (IG61203)
$
157 (IG61205)
—————–
InkJet Thermal Over-Laminate Roll Films
Laminating film featuring Inkjet Adhesive Technology. Approved by Xerox and Canon for use on color prints
with Fuser oils and glossy papers.
Finish 25”x200’ 38”x200’ 41”x200’ __51”x 200’
Satin
Matte $165 (FGM25205) $228 (FGM38205) $248 (FGM41205)
Velvet
$
165 (FGL25205) $228 (FGL38205) $248 (FGL41205)
$
185 (FGV25207) $254 (FGV38207) $274 (FGV41207)
Gloss $179 (FGG25201) $218 (FGG38201) $230 (FGG41201)
$
299 (FGL51205)
$
299 (FGM51205)
$
340 (FGV51207)
$
290 (FGG51201)
PHOENIX 44 LAMINATOR
25
 Loading...